One core feature of Tableau is that it empowers users to create shareable dashboards. With Tableau, you can publish and share dashboards easily and quickly.
To publish a Tableau dashboard, you must have Tableau Desktop and access to one of the server platforms (Tableau Online, Server of Cloud). Once you have access to any of the platforms, you can:
- Open the workbook to be published
- Select the server and Publish Workbook option
After signing in to the desired server, you must ensure certain settings, details, and permissions for a successful publication of packaged workbook.

In this article, we will have a detailed discussion on how to publish a Tableau dashboard. After going through this article, you’ll be able to publish Tableau dashboards with confidence.
The best part?
It will help you better collaborate and communicate across teams, departments, or even entire organizations.

What Elements Can You Publish?
When using Tableau, elements that you can publish depend on the Tableau version you are using.
In this section, we will look at the elements that you can publish with Tableau. Specifically, we will go over the following:
- Publishable Tableau Public Elements
- Publishable Tableau Online and Tableau Server Elements

1) What Elements Can You Publish with Tableau Public
Tableau Public is a free cloud-based platform that allows users to share their Tableau visualizations publicly with the world.

However, due to the public nature of Tableau Public, there are limitations on what elements can be published compared to Tableau Online or Tableau Server.
You can publish the following elements when using Tableau Public:
- Tableau Workbooks
- Dashboards
- Tableau Stories
- Tableau Extracts
It is important to note that you cannot publish a Tableau sheet as an independent element on Tableau Public. When publishing to Tableau Public, you must include the sheet within a workbook, dashboard, or story.
When publishing to Tableau Public, access to the data and visualizations becomes publicly accessible to anyone on the internet.
You should be mindful of data privacy and security concerns and avoid publishing sensitive or confidential information to Tableau Public.
2) What Elements Can You Publish With Tableau Online And Tableau Server
With Tableau Online and Server, apart from the elements discussed above, you can publish the following additional elements:
- Data Sources
- Data Connections
Once you know what elements can be published, let’s move to preparing your reports for publishing.
2 Essential Pre-Publishing Actions for Tableau Dashboards
Before publishing a Tableau dashboard to the Public, there are two crucial actions that you need to take.

First Action
You should create an extract of the data source used in the dashboard.
Extract in Tableau can be seen as a self-contained data source embedded within the workbook.
It serves as a snapshot of the original data source, capturing a subset or aggregation of the data used in the visualization.
Second Action
If you plan to publish a story, you need to be mindful of the first page’s content.
When the published file is opened, the default view should mirror the same view that was visible during the publishing process.
This rule is essential for maintaining the intended starting point of the data-driven narrative.
By adhering to these actions, you can enhance the accessibility and user experience of Tableau dashboards when sharing them with the public.

Now you are ready to start your first publishing operation.
6 Steps To Publishing Tableau Dashboard
In this section, we will walk you through the step-by-step process of publishing your Tableau dashboard.
This will empower you to effectively communicate your data-driven narratives and analyses to your target audience.
To publish a Tableau dashboard, you must follow the following steps:
- Prepare Your Dashboard
- Save the Workbook
- Sign In to Server Instance: Tableau Public, Server, or Online
- Publish the Dashboard
- Name the Published Dashboard
- Confirm the completed process
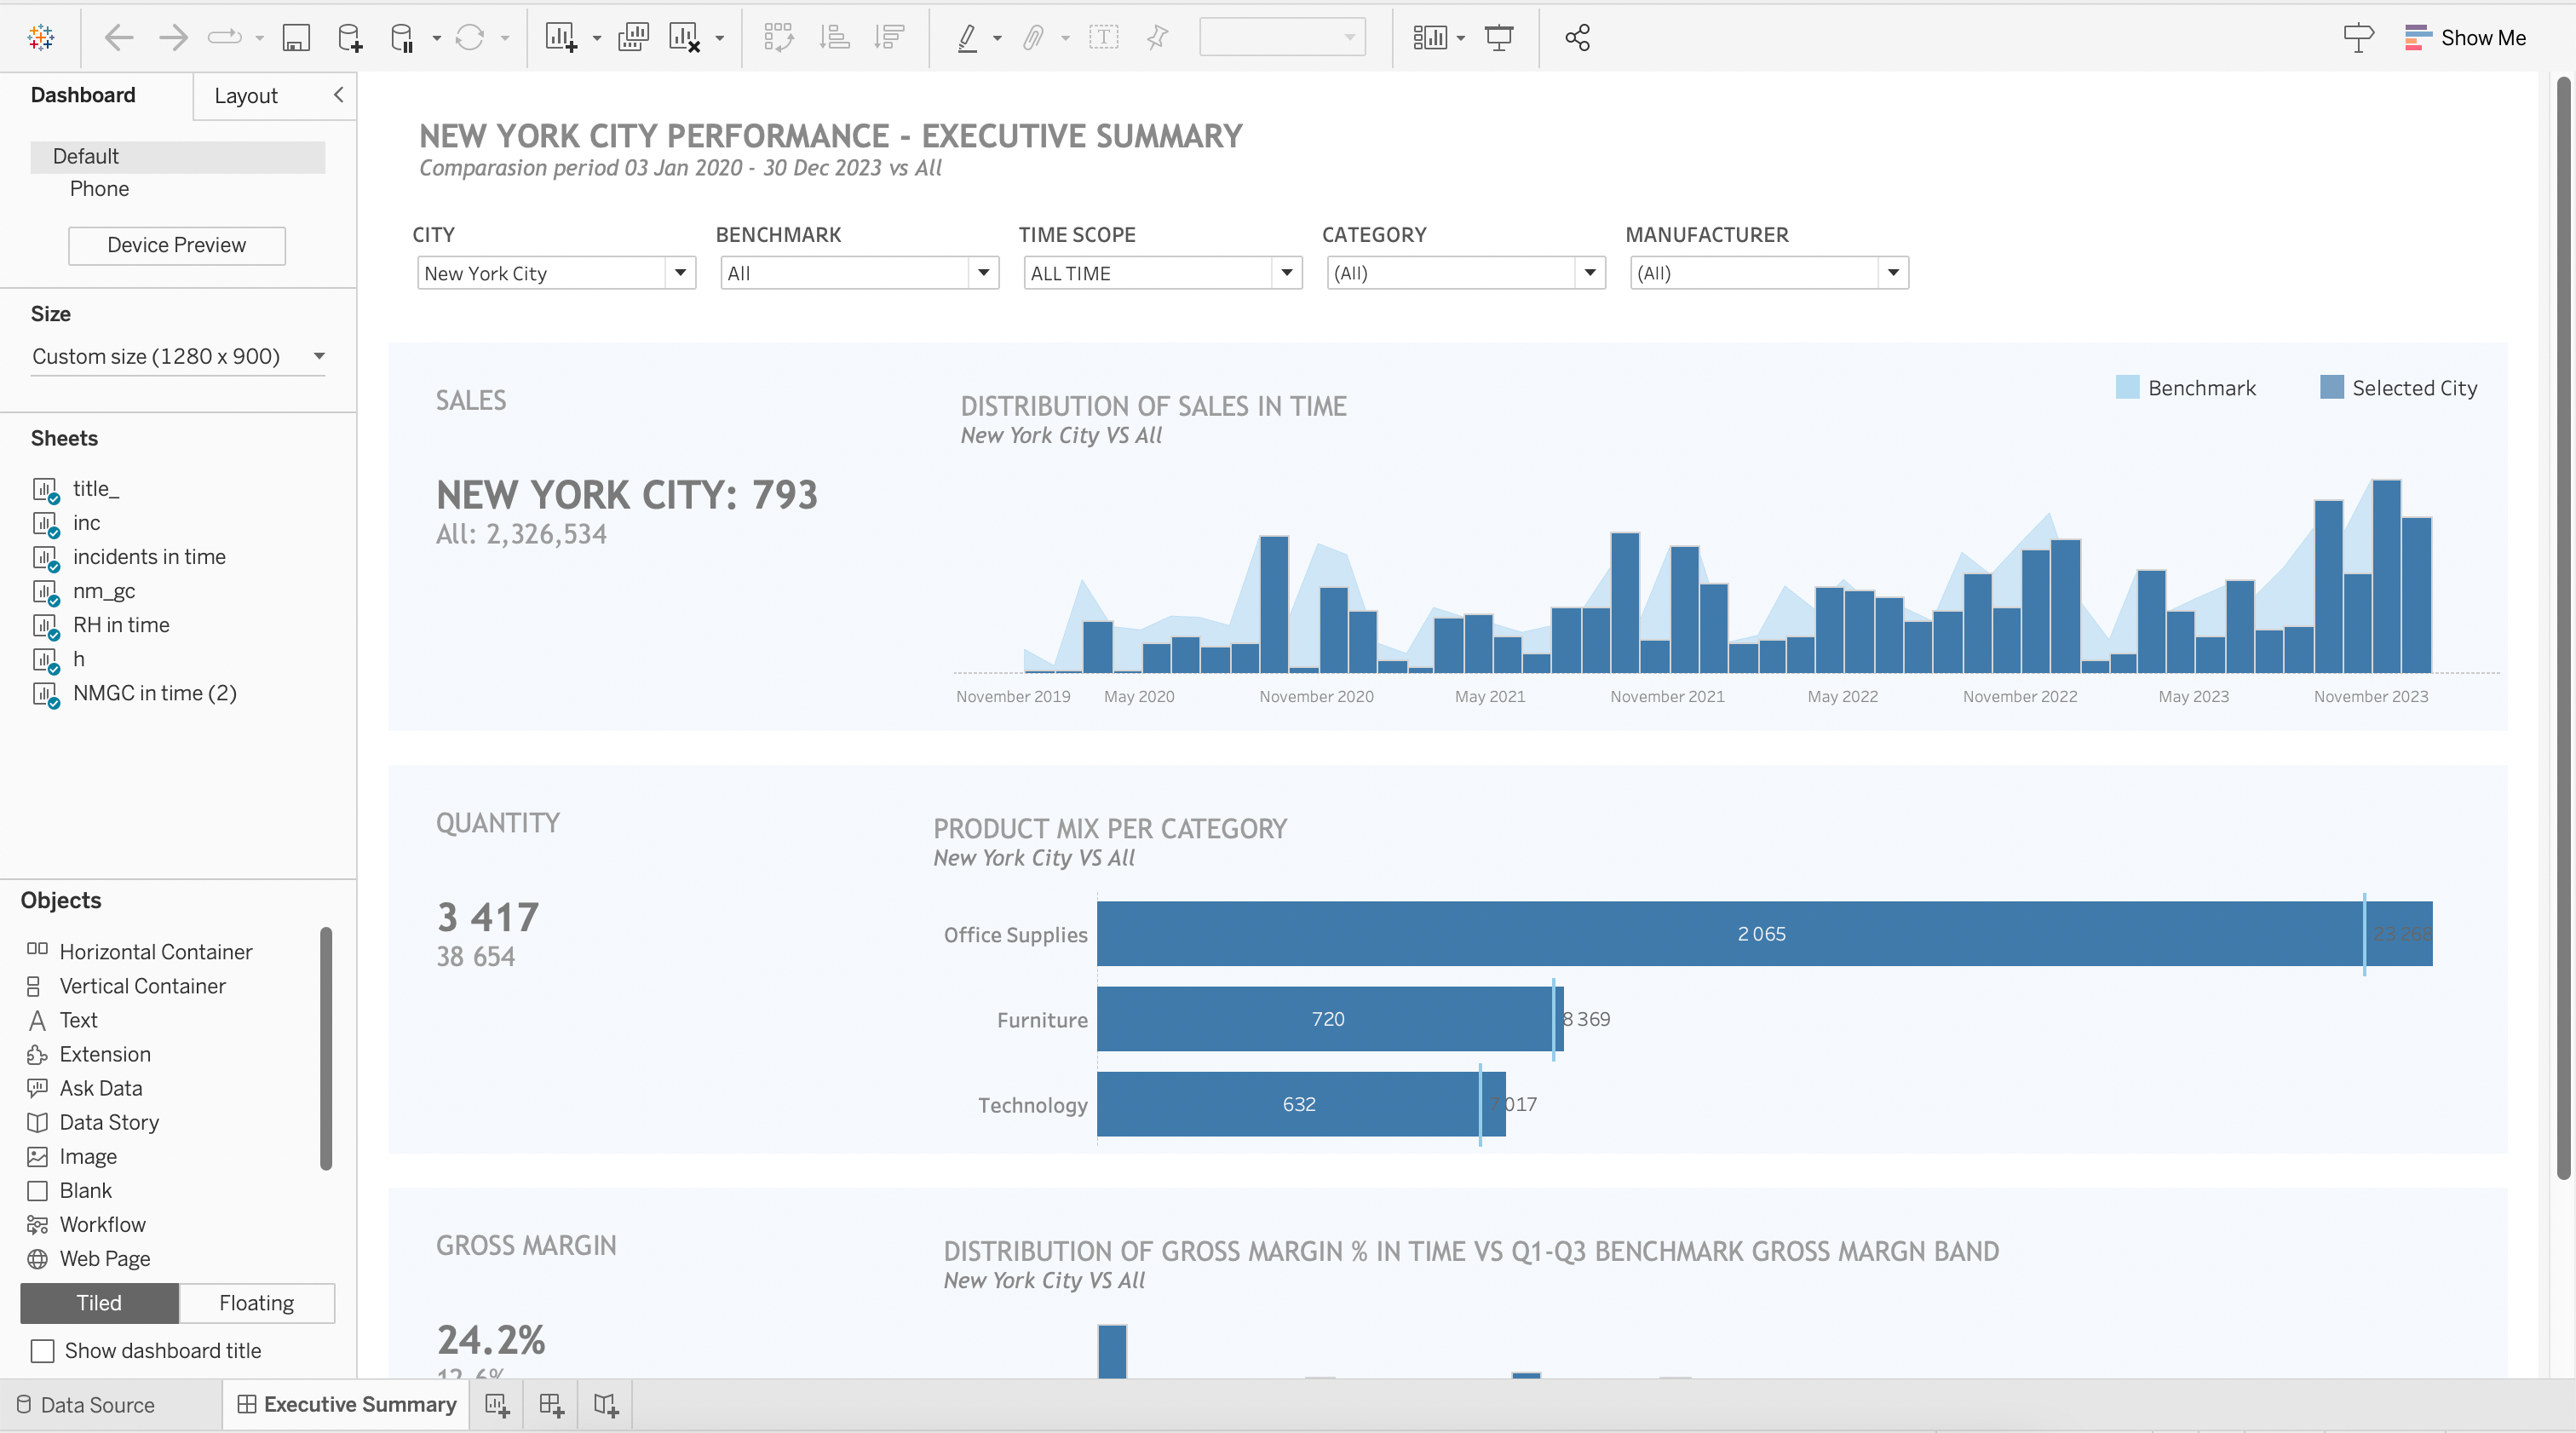
1) Prepare Your Dashboard
Before publishing, ensure your dashboard is complete and includes all the necessary visualizations, filters, and interactions to convey your data story effectively.
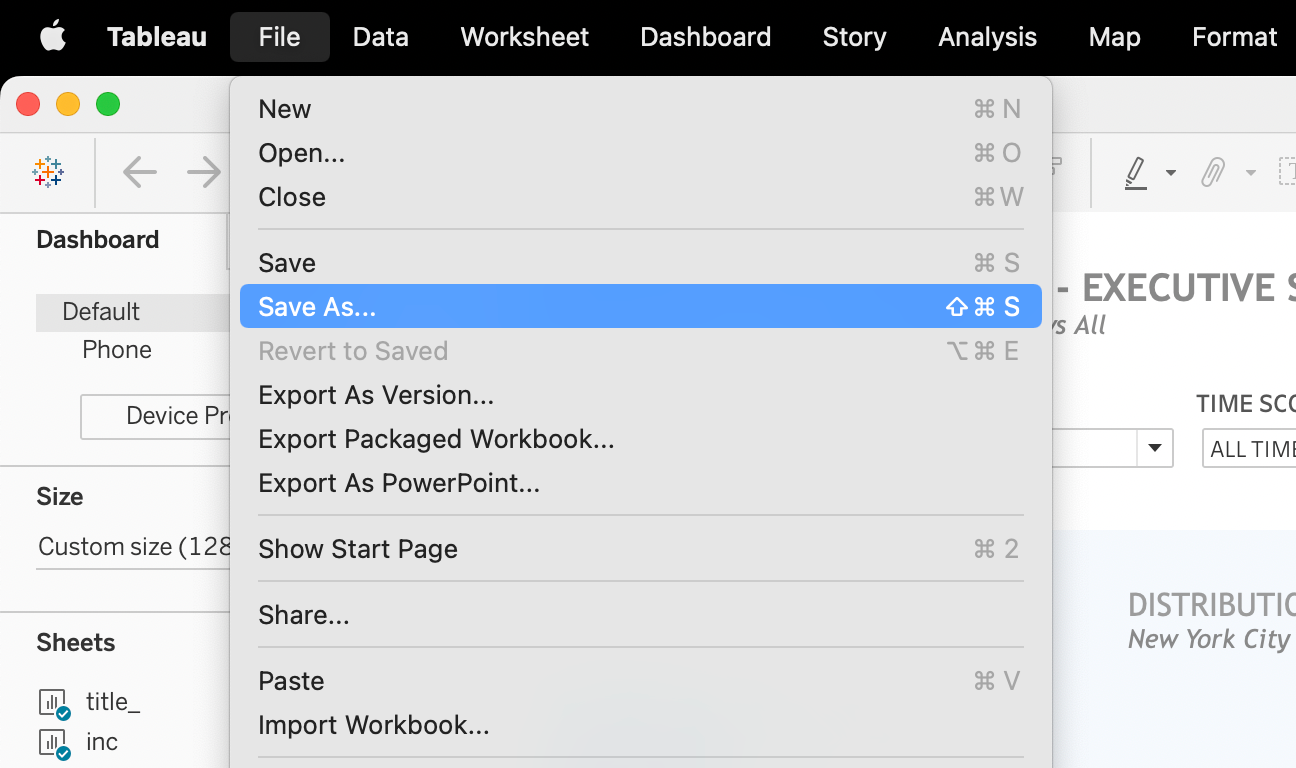
2) Save the Workbook
Save your Tableau workbook (.twb or .twbx file) containing the dashboard and its data connections locally on your computer by clicking on File in the menu and Save As.
Saving the workbook ensures that any changes or updates made to the dashboard are not lost and can be accessed for future use or further modifications.
3) Sign In to Server Instance: Tableau Public, Server or Online
To publish, you must have a Tableau account in one of the server platforms: either Public, Server, or Cloud.
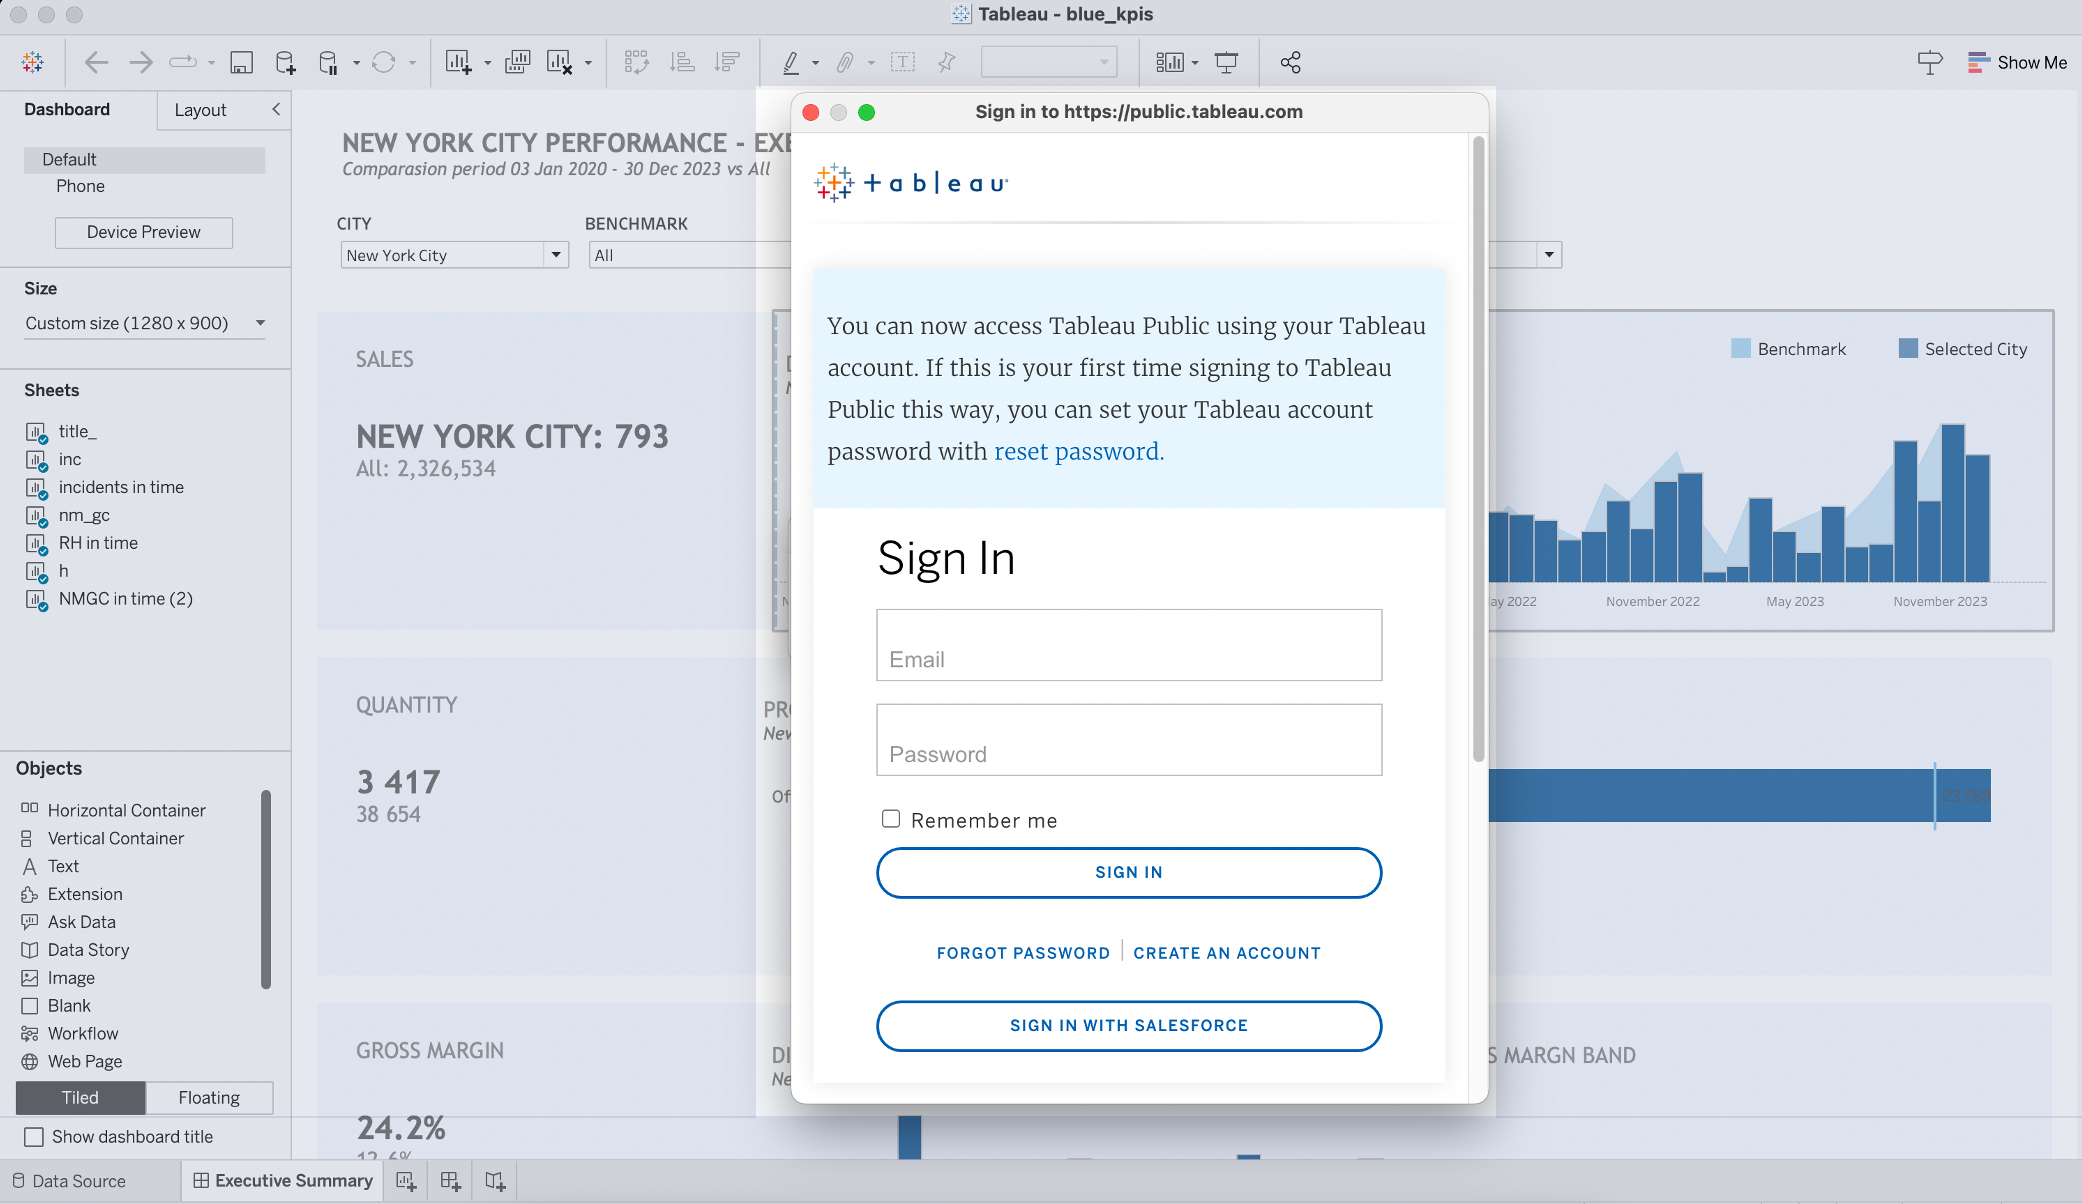
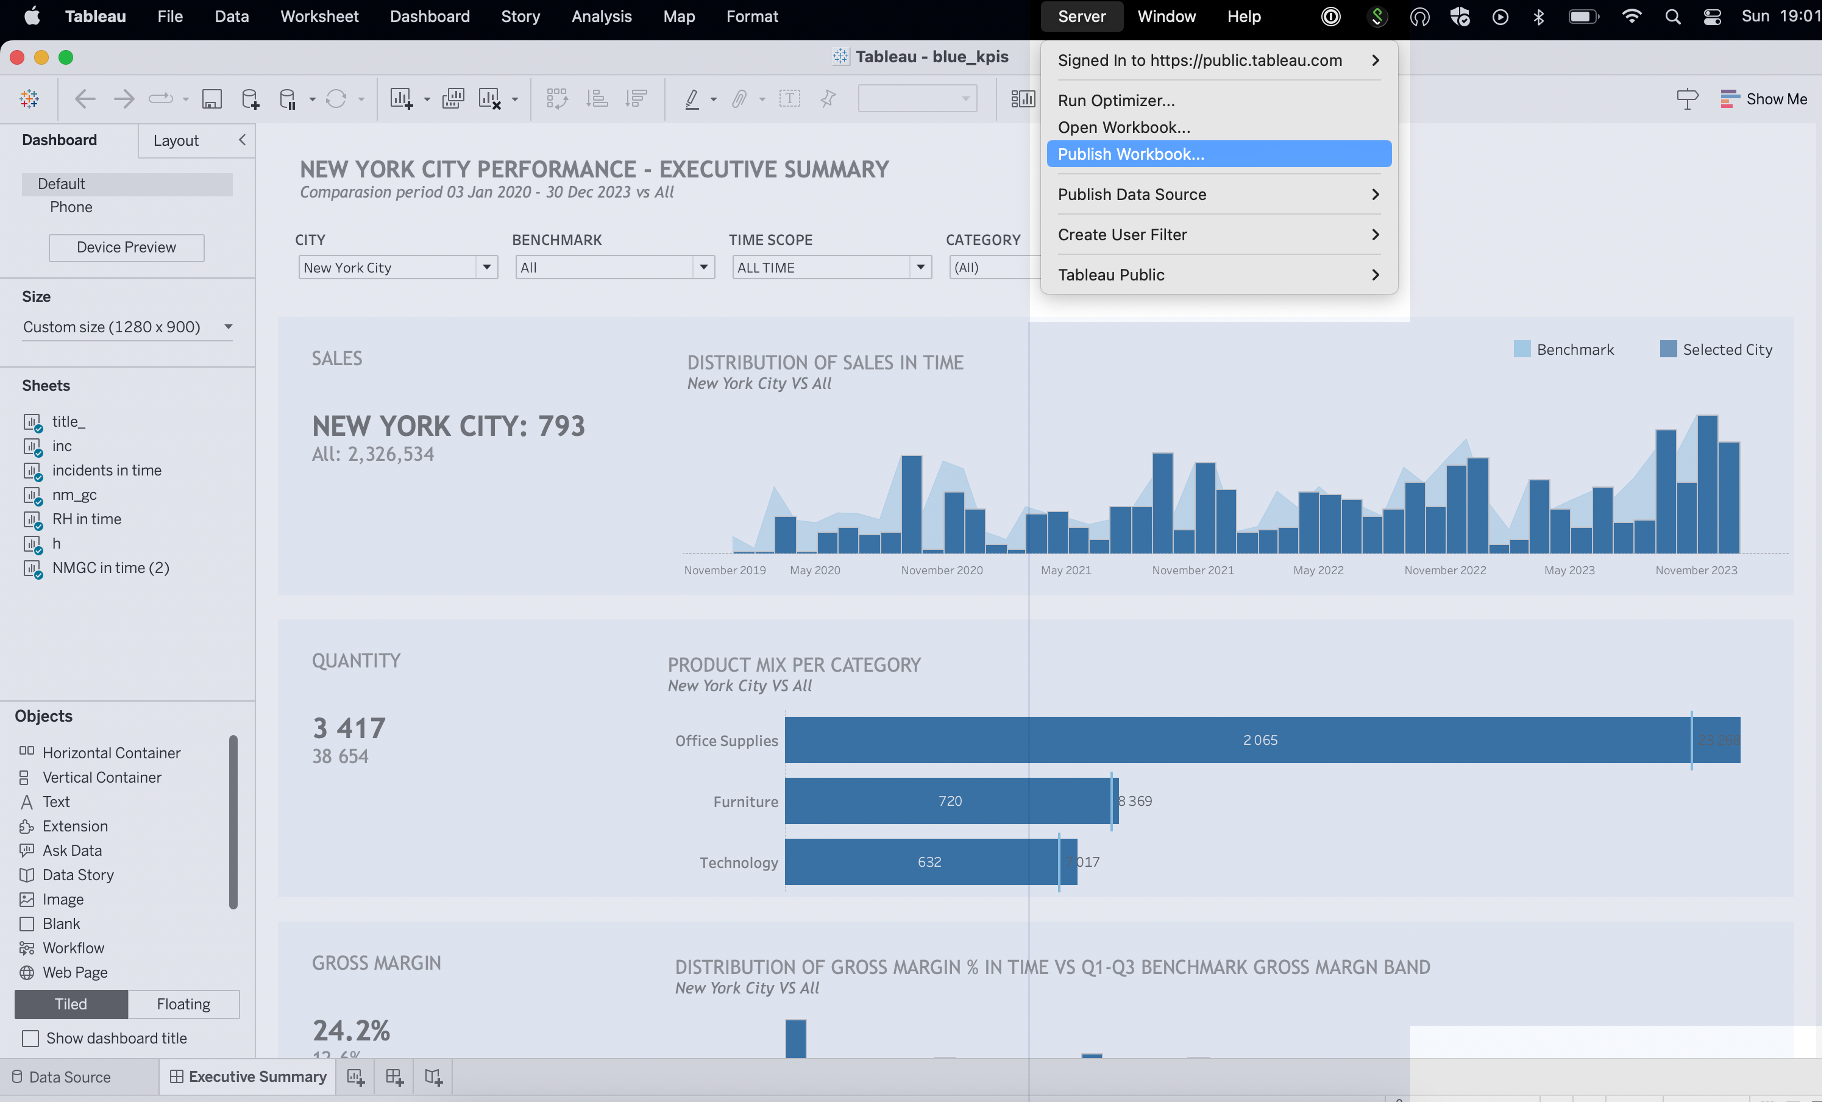
Sign in to the appropriate platform using your credentials by picking Server from the toolbar and clicking on Sign In.
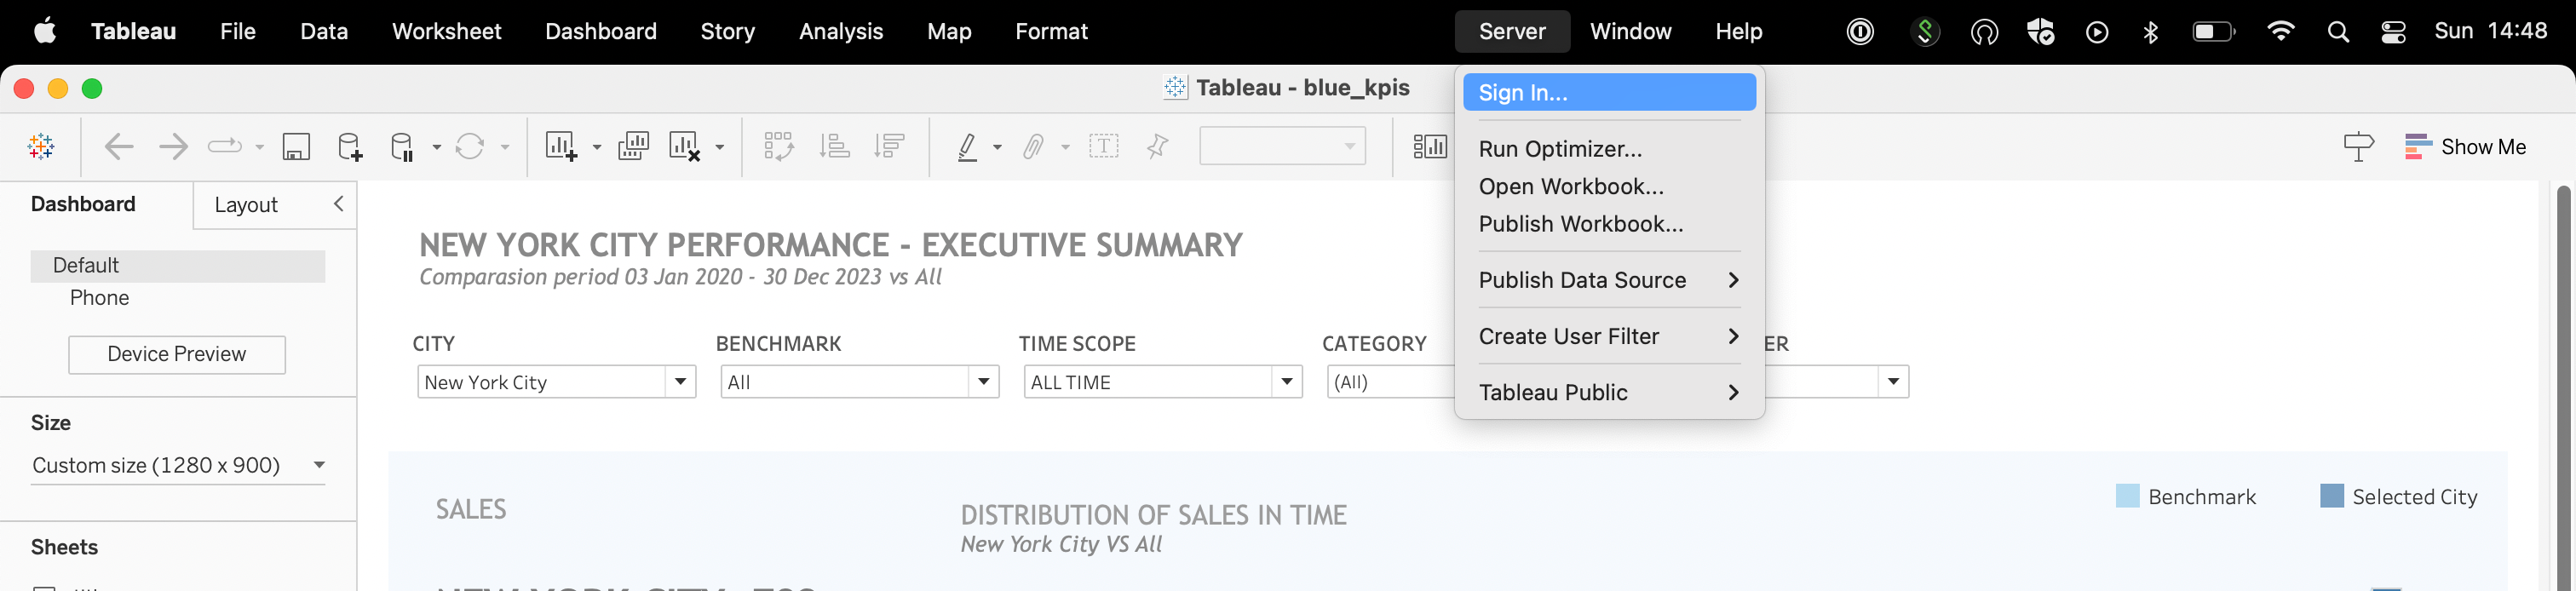
Next, the dialog box will appear. Here you need to pass the address of the server you want to connect to.
If you want to sign in to Tableau Public, you can type the address of the website.
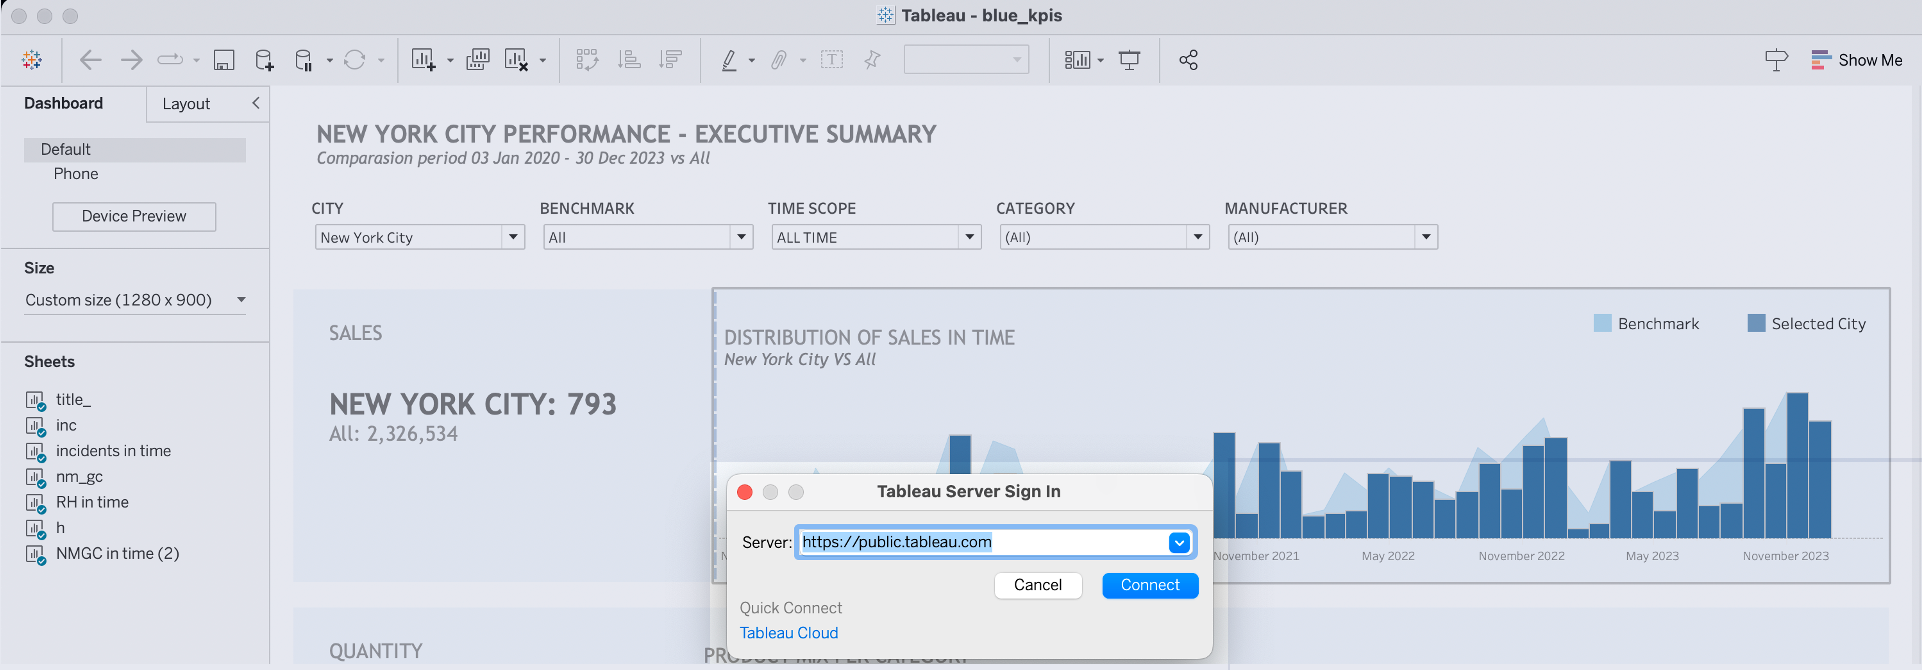
Finally, finish the authentication by providing your email and password.
If you use Tableau Public, you need to have an active account.
For Sever and Cloud instances, you need moreover Creator license and proper permissions to finalize the publishing process.
4) Publish the Dashboard
Click the “Publish” button to begin the publishing process.
Tableau will upload the workbook and its associated data to the platform.
5) Name the Published Dashboard
The final step is to give the name of the file before the process of publishing Tableau Dashboards starts using the popping-up dialog box.
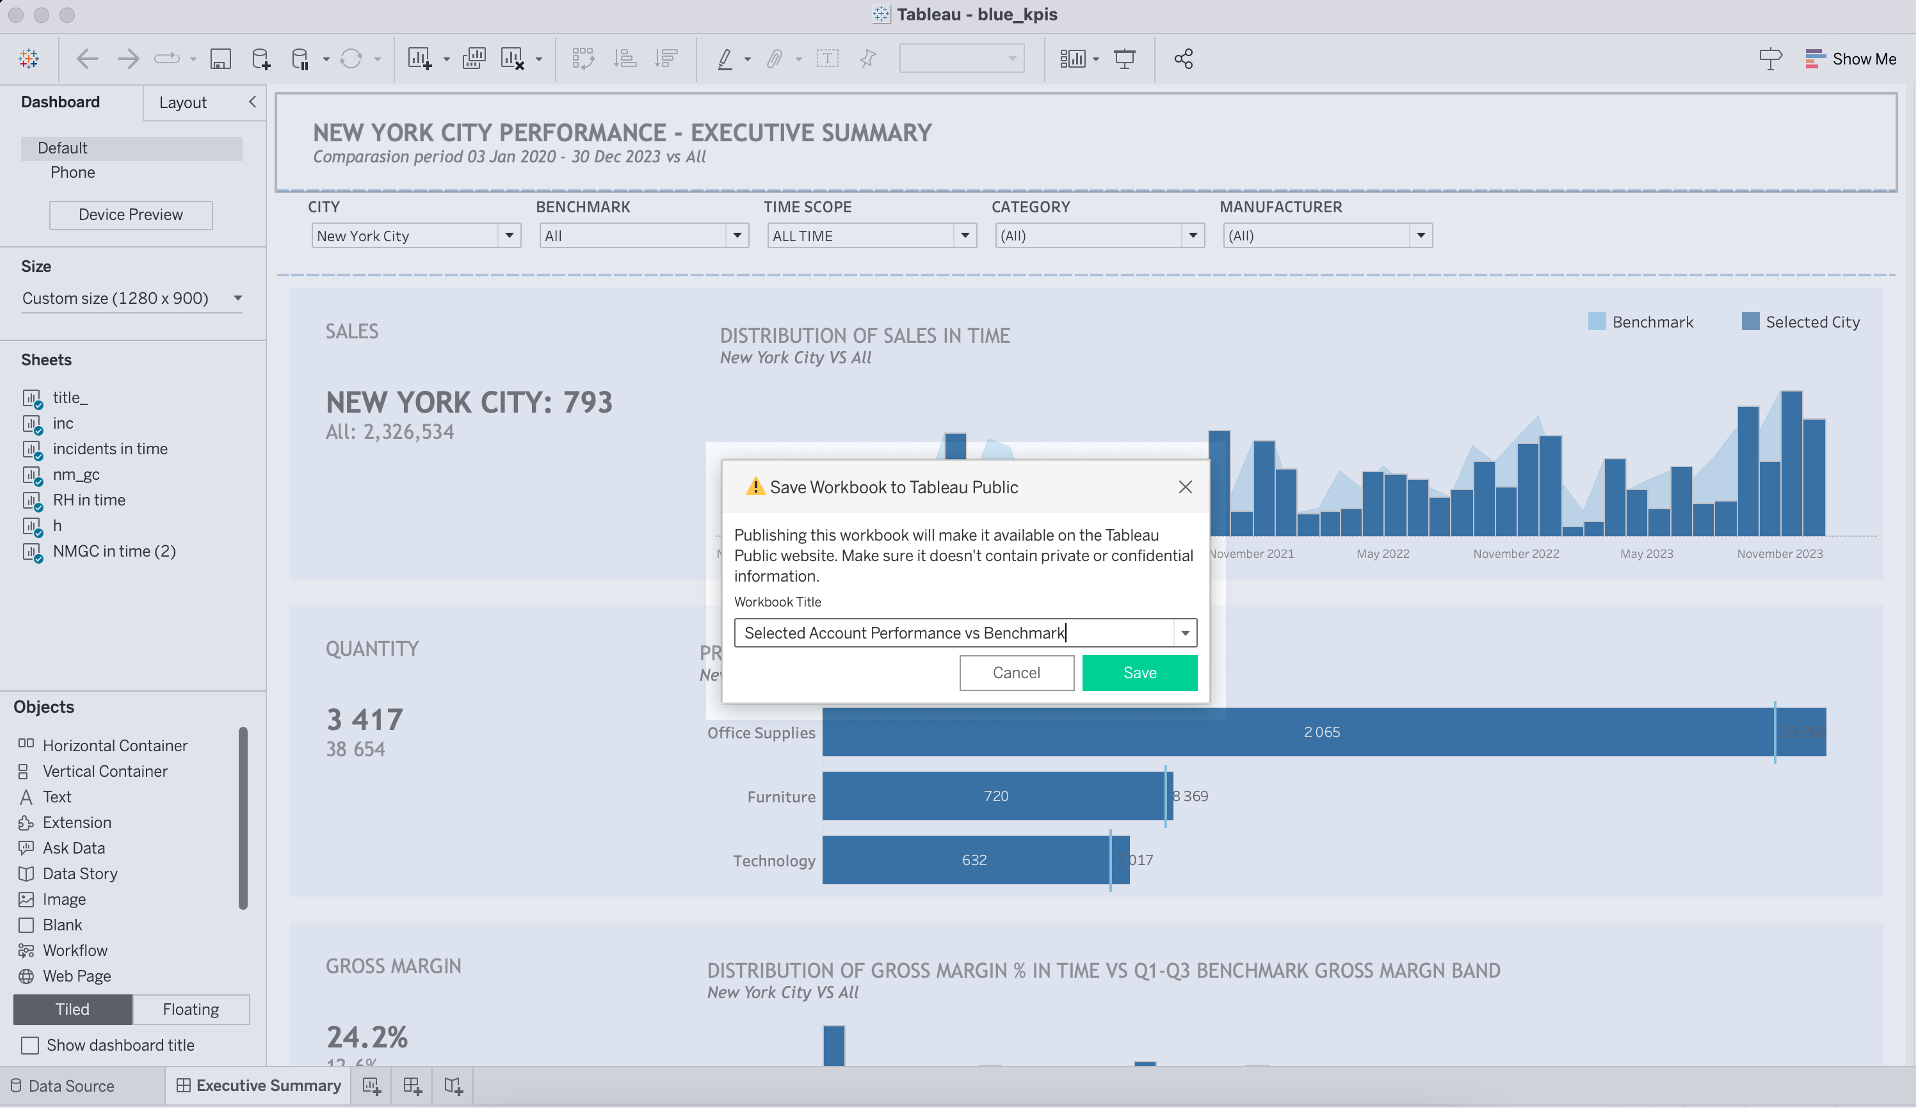
In case you publish Tableau Dashboards to a Server of Cloud instance, this window would look slightly different.
It will have several options like project location, data source, and connection preferences or authentication methods.
6) Confirm the completed process
Once the publishing process is complete, a new browser window automatically opens, revealing the dashboard on the Tableau platform.

The dashboard becomes readily available to anyone with the link, empowering users to share their data stories, analyses, and findings with colleagues, clients, or the general public.
What Are The Best Practices For Publishing Tableau Dashboards
When publishing a Tableau dashboard, it’s important to follow best practices.
This will ensure a smooth and efficient experience for both the publisher and the users accessing the published data.

Below you can find a list of elements you can adjust to increase performance and user experience:
Optimize Performance
Remove all the elements that are unnecessary and can slow down the report’s performance. If you work on a large dataset, you might consider creating an extract of the data you want to publish.
Clean The View
Hide the worksheets used in your dashboards and only display the final dashboards to be published. This keeps your data organized and easier to manage.
Set Proper Size And Resolution
Use automatic sizing and flexible layouts in your design. Adjust parameters separately for web browser and mobile viewing.
Embed Your Dashboard
It’s possible to embed your dashboard in your website’s HTML. One technique is to use an iframe along with the Tableau share link.
It involves generating an embed code from your Tableau dashboard and inserting it within an iframe code in your website’s HTML.
Learn more about transformations in AI by watching the following video:
Final Thoughts
Tableau allows you to share your dashboard with others by publishing it on Tableau Public, Server, or Cloud. Publishing your dashboard makes it accessible to your desired audience, facilitating collaboration and data-driven decision-making.
Before publishing, ensure that your dashboard is complete and includes all necessary visualizations and interactions. Save the workbook containing the dashboard and its data connections to preserve your work.
To publish, sign in to the appropriate Tableau platform, such as Tableau Public, Server, or Cloud. Then, click the “Publish” button to begin the process. Name the published dashboard and confirm the completion.
By following these steps and best practices, you can confidently export and publish your Tableau dashboard, allowing you to effectively share your data insights and analyses with your target audience.
Frequently Asked Questions
In this section, you will find some frequently asked questions you may have when publishing Tableau dashboards.

How can multiple dashboards be published in Tableau Public?
To publish multiple dashboards in Tableau Public:
- Open the workbook containing the dashboards in Tableau Desktop.
- Go to File > Save to Tableau Public As….
- Sign in to your Tableau Public account.
- Provide a title and confirm the sharing settings.
- After publishing, you can find all the dashboards as separate views under the “Views” section of the published workbook.
How can data source be published to Tableau Public?
it’s not possible to publish or edit a data source as a separate element in Tableau Public.
Instead, the data source must be embedded inside a dashboard or a workbook and then published as a whole.
How can a Tableau workbook be shared via email?
Unfortunately, you cannot directly share a Tableau workbook via email.
However, you can share the link to the published workbook on Tableau Server/Tableau Cloud or Tableau Public with your recipients.
Alternatively, you can export the workbook as a packaged workbook (.twbx) and attach it to the email for others to download and open in Tableau.