When designing dashboards in Tableau, one of the essential decisions you need to make is choosing between tiled and floating layouts for your items, such as bar charts, images, and text.
Tiled layouts ensure that each worksheet or object is fully visible. It automatically resizes and aligns as you add or move items within the dashboard.
On the other hand, floating layouts offer more flexibility and control. It allows you to position items freely on the dashboard, often overlapping one another.

In this article, we will review tiled and floating items in Tableau. We will explore the applications of both types and discuss how one differs from the other.
Let’s get into it!

Basics of Tiled and Floating Items in Tableau
Before we move towards demonstrating tiled and floating items in Tableau, it is crucial that you gain familiarity with its basics.
In this section, we will cover the following:
- Basics and Advantages of Tiled Items
- Basics and Advantages of Floating Items

1. What Are Tiled Items in Tableau
Tiled items in Tableau are objects, such as charts or visualizations, that are arranged on simple dashboards in a grid-like structure.
The position and size of these items are determined by the dashboard size and the neighboring objects.

Unlike floating items, tiled items cannot be layered on top of other elements. This ensures a clean, organized, and structured layout.
What Are The Advantages of Tiled Items
Using tiled items offers several benefits when building a Tableau dashboard.
Some of the benefits are listed below:
1) Structure
The grid-based layout provides a clear and organized presentation of your visualizations. It makes sure that there is no blank space left on the dashboard.
2) Responsiveness
As tiled items resize automatically with the dashboard size, they maintain a consistent appearance across different devices and screen resolutions. It ensures that a single-layer grid is completely occupied by items.
3) Ease of use
Positioning and sizing of items are handled automatically by Tableau, allowing you to easily create and maintain clean, organized dashboards without the need for manual adjustments.

2. What Are Floating Items in Tableau
Floating items in Tableau provide more flexibility in terms of their position and size.
They can be placed exactly where you want them on the dashboard by simply dragging and dropping the object to the desired location.
This allows you to overlap objects or float them within the dashboard, layering them as needed.
The size of floating items can be easily customized. By clicking and dragging the edges of the object, you can adjust its width and height to fit your preference.
This flexibility means you can create a dashboard that is visually appealing and optimally utilizes the available space.
What Are The Advantages of Floating Items
Using floating items in your Tableau dashboard comes with a number of advantages.
We have listed the most important ones below:
1) Precision Placement
Floating items allow you to position objects exactly where you want them.
This enables you to create a highly customized and visually compelling dashboard.

2) Layering And Overlapping
Floating objects can be layered on top of one another, offering more flexibility in your dashboard design.
This is especially useful when you want to cover consistent blank spaces or display multiple elements within a limited space.
3) Ease of Resizing
The size of floating items can be easily adjusted by clicking and dragging the edges of the object.
This allows for a more customized visual presentation that adapts to different screen sizes and dashboard needs.

How to Work With Tiled And Floating Items
We will go through a series of steps to demonstrate how to work with tiled and floating items in Tableau.
Take a look at the following empty dashboard:
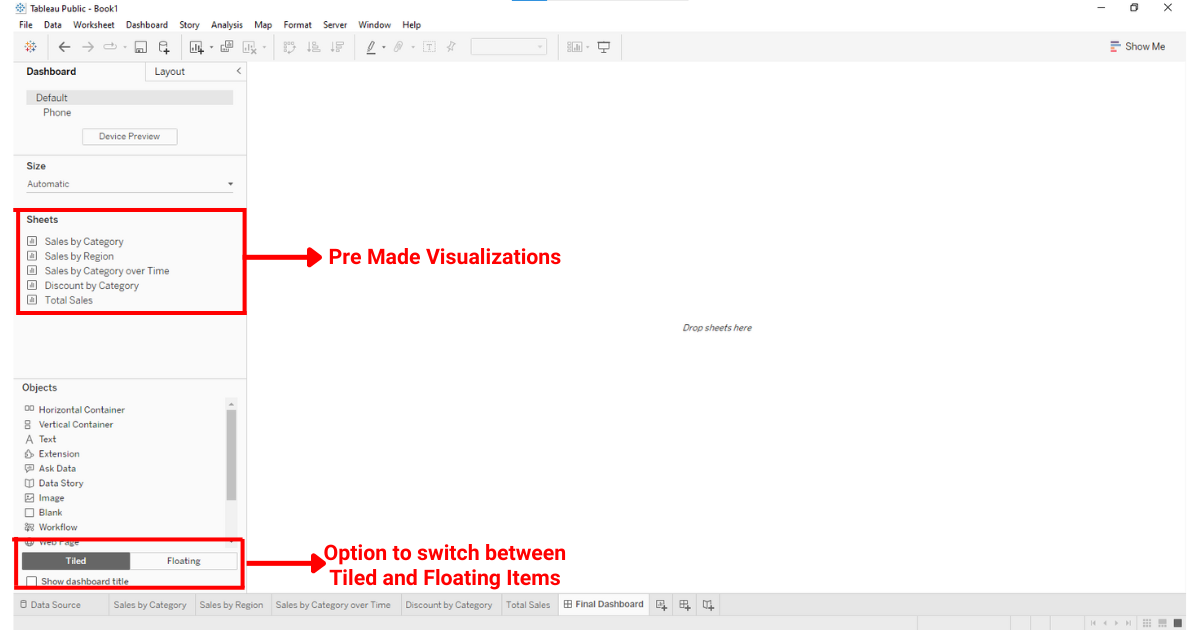
In this dashboard, we have created some visualizations that are highlighted in the upper red box. The lower red box highlights options for switching between tiled and floating items in Tableau.
In this section, we will cover the following:
- How to Work With Tiled Items
- How to Work With Floating Items
1. How to Work With Tiled Items
To work with tiled items, simply drag objects onto the dashboard canvas. Tableau will position and size the objects automatically, filling the available space.
As you add more items, Tableau will adjust the layout to make room for new objects, maintaining a consistent gap between items.
You can rearrange and resize tiled items within the dashboard by dragging them to different positions or adjusting their edges.
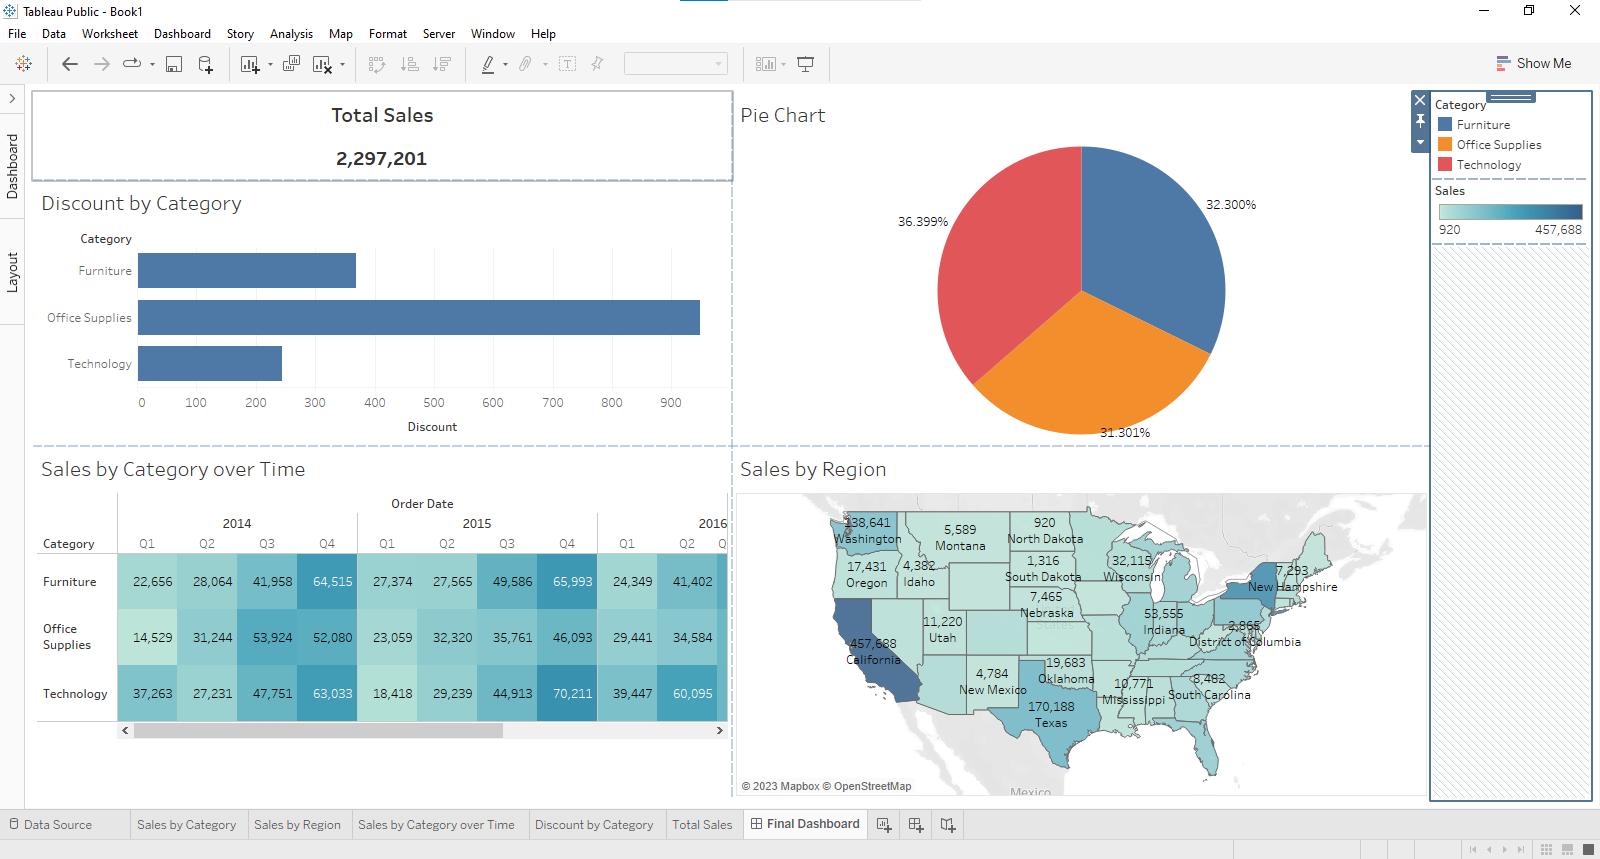
The above dashboard is an example of tiled items. After dragging and dropping sheets on the dashboard, Tableau automatically puts the charts and tables into tiles.
2. How to Work With Floating Items
Working with floating items in Tableau desktop requires a good understanding of the different objects you can use and how they can be best positioned.
You can add floating objects such as text boxes, images, charts, and other contents by clicking on the ‘Floating’ button in the dashboard layout options.

After switching to floating items, you can drag and drop sheets to the dashboard like you did with tiled items.
The only difference will be that you have to take care of the arrangement of the items when working with floating items.
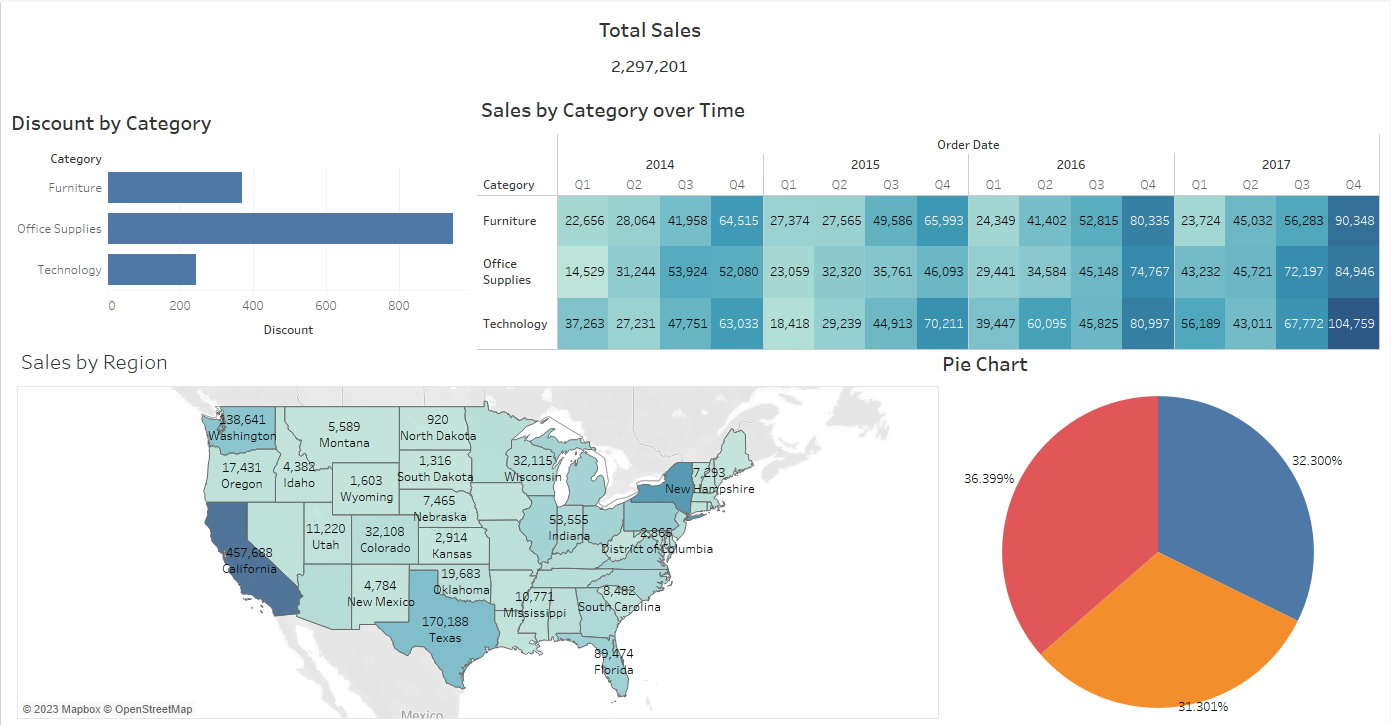
The dashboard above is an example of a floating item dashboard. You can adjust each item’s size manually without having to care about fixed horizontal containers.
Final Thoughts
Understanding tiled and floating items in Tableau can significantly increase your understanding of dashboard item arrangement which is a game-changer for your data visualization journey.
By mastering this distinction, you empower yourself to design dashboards that are both visually appealing and functionally effective. Why settle for rigid layouts when you can have the flexibility to position elements exactly where you want?
Embracing both tiled and floating items allows you to harness the full potential of Tableau. It ensures your data tells the most compelling story.

If you would like to learn more about comparing two tables in Power Query check out the below:
Frequently Asked Questions
In this section, you will find some frequently asked questions you may have when working with tiled and floating items in Tableau.

What are the main advantages of using floating containers?
Floating containers allow you to overlap different elements on a dashboard, granting more control over the exact placement of each object.
This flexibility enables you to create visually pleasing and sophisticated layouts.
However, it’s essential to be cautious when placing elements on top of each other, as it may lead to obscured information.
How is resizing affected by tiled and floating layouts?
Tiled layout automatically reorder and resize objects to fit the dashboard in a grid-like arrangement, which helps maintain the visibility and accessibility of each element.
On the other hand, floating items require manual resizing, which allows for precise control over an object’s dimensions.
This added control benefits the designer when creating highly customized and intricate Tableau dashboards.
How can I combine both layouts in a single dashboard?
It is possible to combine tiled and floating layouts on the same Tableau dashboard.
To do this, you can place floating objects on top of tiled containers, or designate specific areas of the dashboard for each layout type.
Integrating both layouts provides the benefits of using both tiled and floating objects to enhance your dashboard’s design and functionality.
What is the impact on dashboard performance due to layout choice?
Although performance differences can be minimal, floating layouts were found to perform faster in some situations according to a 2014 post by Nelson Davis.
However, Tableau has improved significantly since then, so the impact on dashboard performance may vary depending on the complexity of your dashboard and system resources.
How does the object hierarchy differ in the two layouts?
In a tiled layout, objects are organized in a grid-like hierarchy, ensuring visibility and accessibility.
Rearranging other objects can cause other elements to shift and resize based on the grid layout.
Meanwhile, a floating layout provides freedom to create custom hierarchies with overlapping elements, granting full control over the Z-order (layer depth) of each object.
Which layout is more suitable for design flexibility in Tableau?
If design flexibility is your goal, floating layouts are more suitable as they allow you to position and resize objects with greater precision.
Alternatively, tiled layouts are ideal for creating clean and organized dashboards that automatically adjust elements for maximum visibility.
Choosing the right layout depends on your specific design requirements and the complexity of your dashboard.