
Ever found yourself drowning in a sea of files, struggling to share them with your team? Welcome to the lifeboat that is SharePoint — a powerful collaboration tool that makes file sharing a breeze. It’s time to sail smoothly through your workday!
To upload a file to SharePoint:
- Go to your SharePoint site
- Find the Document Library
- Click on the “Upload” button to select your file from your computer
In this article, we’ll dive deeper into the world of SharePoint file management. We’ll explore three different methods to upload files: using the SharePoint web interface, by dragging and dropping files, and via OneDrive.

Let’s dive in!
3 Ways to Upload a File to SharePoint
In the dynamic environment of SharePoint, uploading files is a fundamental skill to master. Whether you are a seasoned professional or just getting started, knowing various methods to upload files can improve your efficiency.
In this section, we’ll walk you through three simple yet effective methods to upload individual files to SharePoint on any web browser (Mozilla Firefox, Google Chrome, Internet Explorer, etc.).
1. Drag and Drop a File from the Desktop
Sometimes, the simplest methods are the most effective. Dragging and dropping a file directly from your desktop into SharePoint is one of the quickest ways to get your files where they need to be.
Let’s break down the process for adding files to SharePoint via Windows Explorer.
Steps to Drag and Drop a File to SharePoint
1. Open two windows: Have one window open for your desktop where the file is located and another for your SharePoint site.

2. Navigate to the SharePoint site: In the SharePoint window, go to the Document Library where you want to upload files and folders.
3. Resize the windows: Make sure both windows are visible on your screen. You can resize them or use the split-screen feature on your computer.
4. Locate the file on your desktop: Find the file you want to upload in the desktop window.
5. Drag and drop: Click on the file, hold down the mouse button, and drag it over to the SharePoint window. Release the mouse button to drop the file into the Document Library.
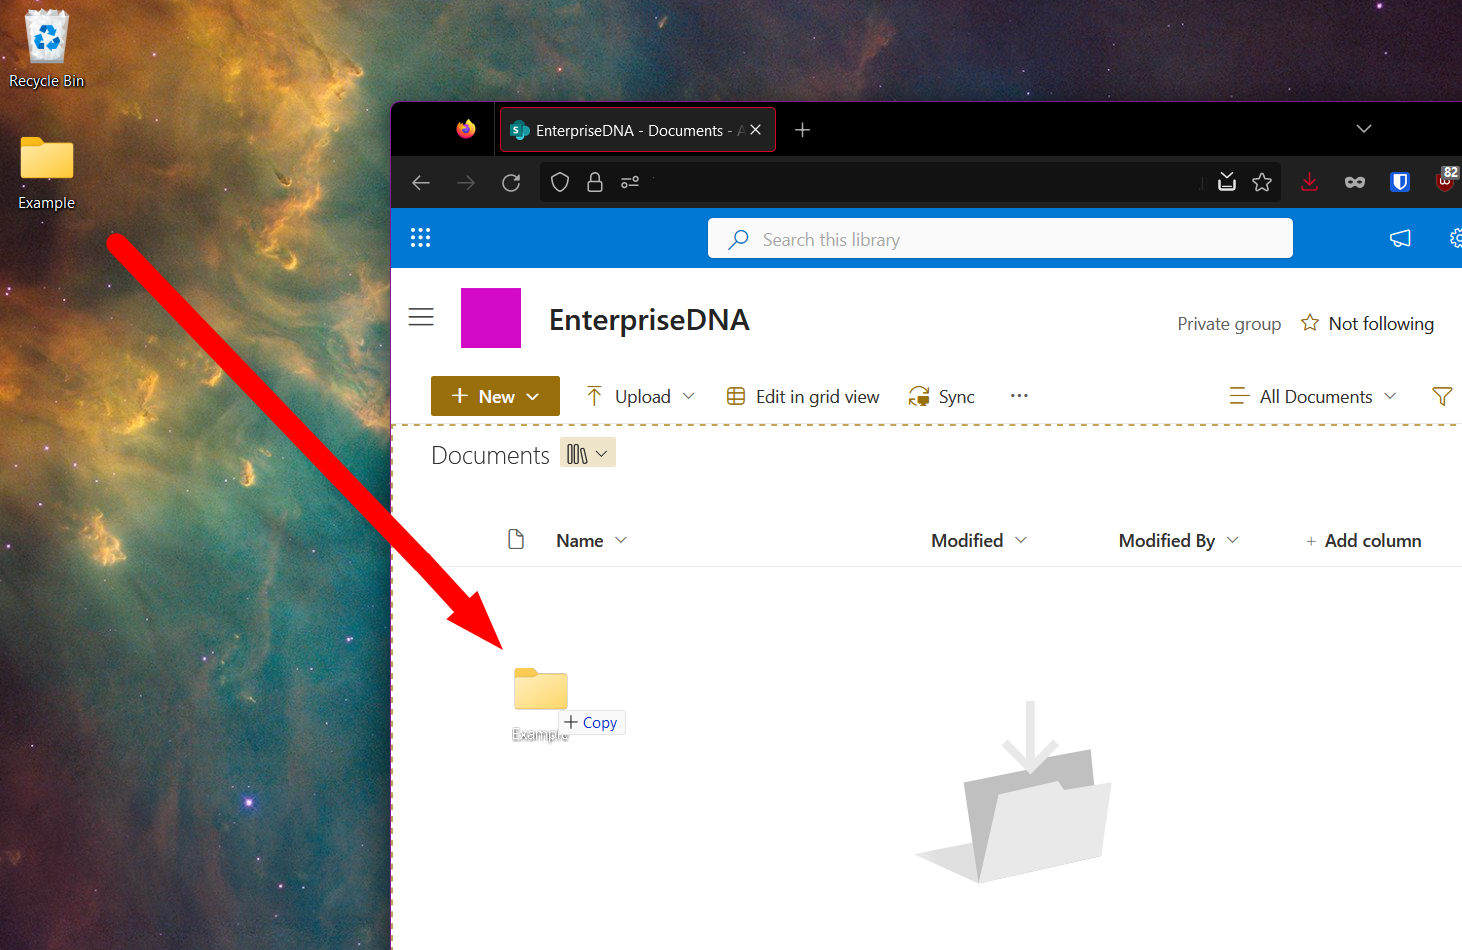
6. Confirm upload: You’ll see a notification confirming that the file has been uploaded successfully.
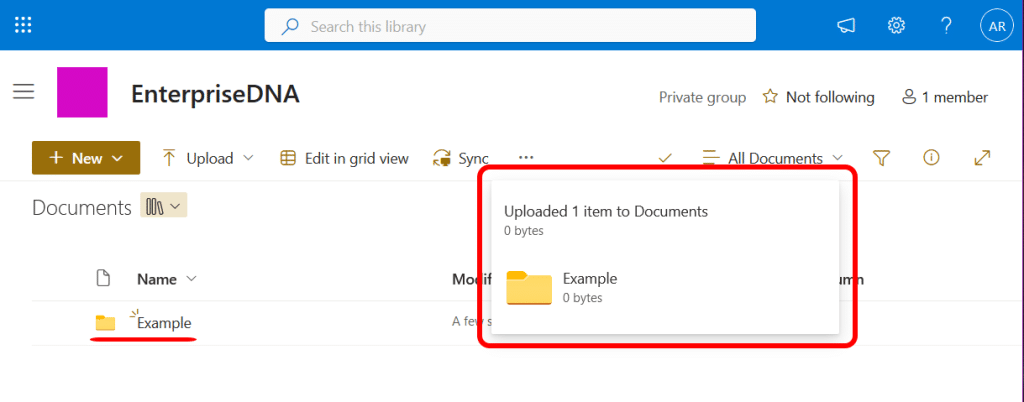
And there you have it! You’ve successfully uploaded a file to SharePoint by simply dragging and dropping it from your desktop.
If you thought that was easy, wait until you read our next section.
We’ll cover another straightforward method — using the “Upload” button in SharePoint. Stay tuned!
2. Using the “Upload” Button in SharePoint
If you’re looking for a method that’s just as user-friendly but offers a bit more control, the “Upload” button in SharePoint is your go-to option. This method is particularly useful when you’re already working within the SharePoint interface.
Let’s dive into the steps.
Steps to Upload a File Using the “Upload” Button
1. Navigate to the SharePoint site: Open your web browser and go to the SharePoint site where you want to upload the file.
2. Locate the document library: Find the Document Library where you want to place the file.
3. Click “Upload”: Locate and click the “Upload” button, usually found at the top of the Document Library.
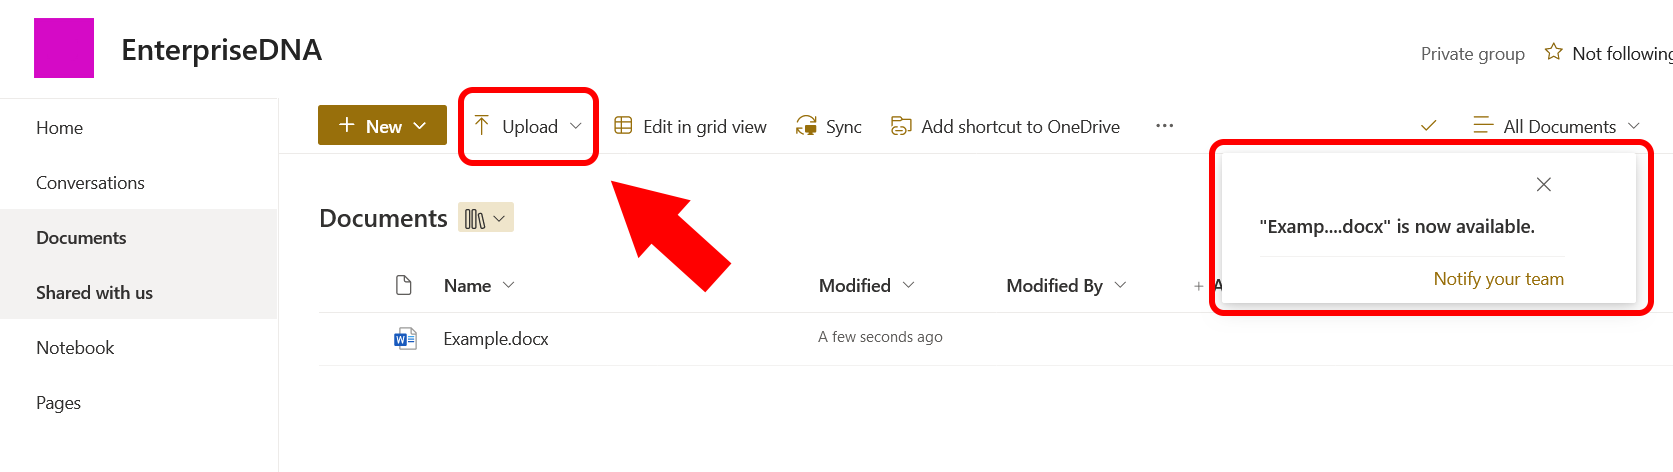
4. Select the file: A file dialog box will appear. Navigate to the location of the file on your computer and select it.
5. Confirm selection: Click “Open” in the file dialog box to confirm your selection.

6. Verify upload: You’ll see a notification or a progress bar confirming that the file has been uploaded successfully.
And that’s it! You’ve successfully uploaded a file to SharePoint using the “Upload” button, giving you a quick and controlled way to share files with your team.
If you’re intrigued by these methods, you’ll definitely want to stick around for our final method. Up next, we’ll discuss how to upload files to SharePoint via OneDrive.
3. Syncing SharePoint with OneDrive
For those who are already using OneDrive for file storage and sharing, syncing it with SharePoint can streamline your workflow even further.
This method allows you to upload files to a shared OneDrive folder that is synced with your SharePoint Document Library.
Here’s how to set it up and use it.
Steps to Sync SharePoint with OneDrive
1. Sign in to OneDrive: Open the OneDrive app and sign in with your Microsoft account that has access to the SharePoint site.
2. Locate the SharePoint document library: Go to your SharePoint site and find the Document Library you want to sync.
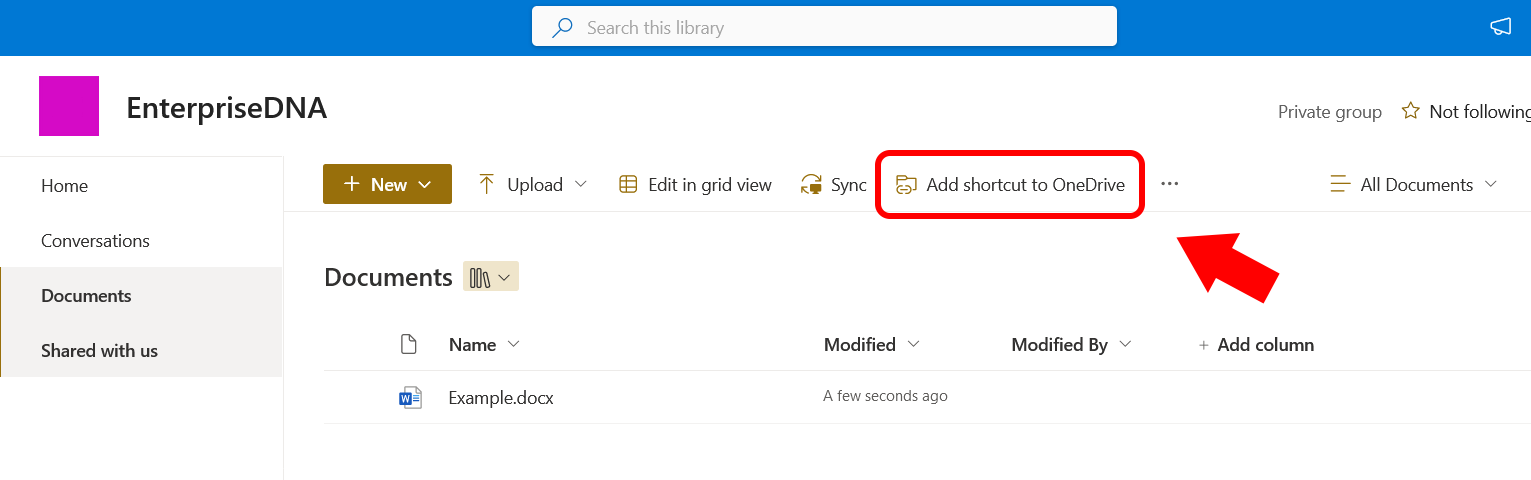
3. Initiate sync: Click on the “Add shortcut to OneDrive” button located at the top of the Document Library. This will create a shortcut to the Document Library in your OneDrive app.
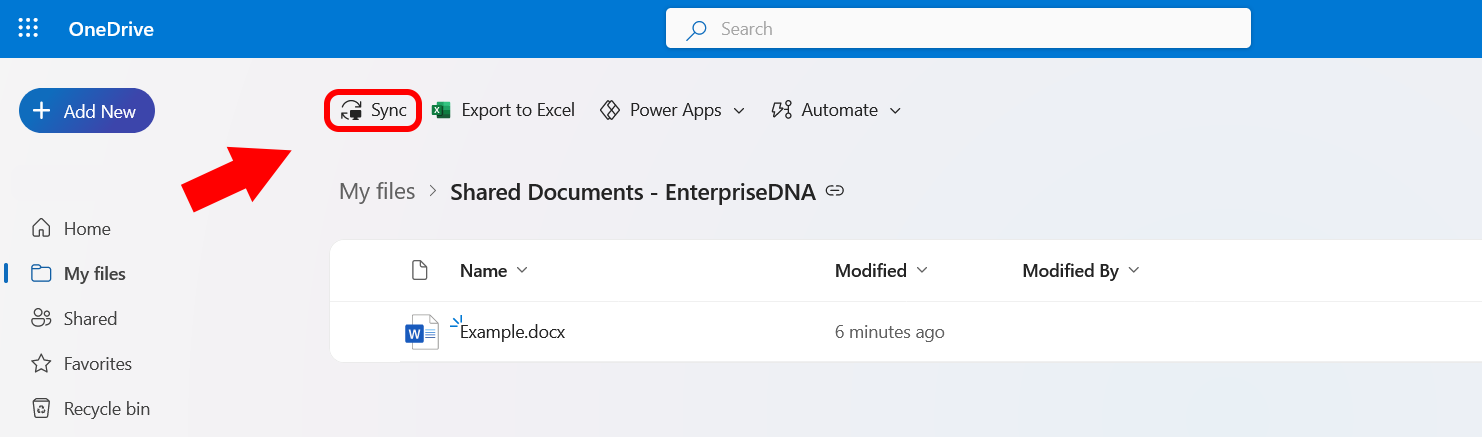
4. Confirm sync: Go to your OneDrive app and sync it with SharePoint. You’ll notice the example file in the Document Library will now be accessible in OneDrive, as you can see below.
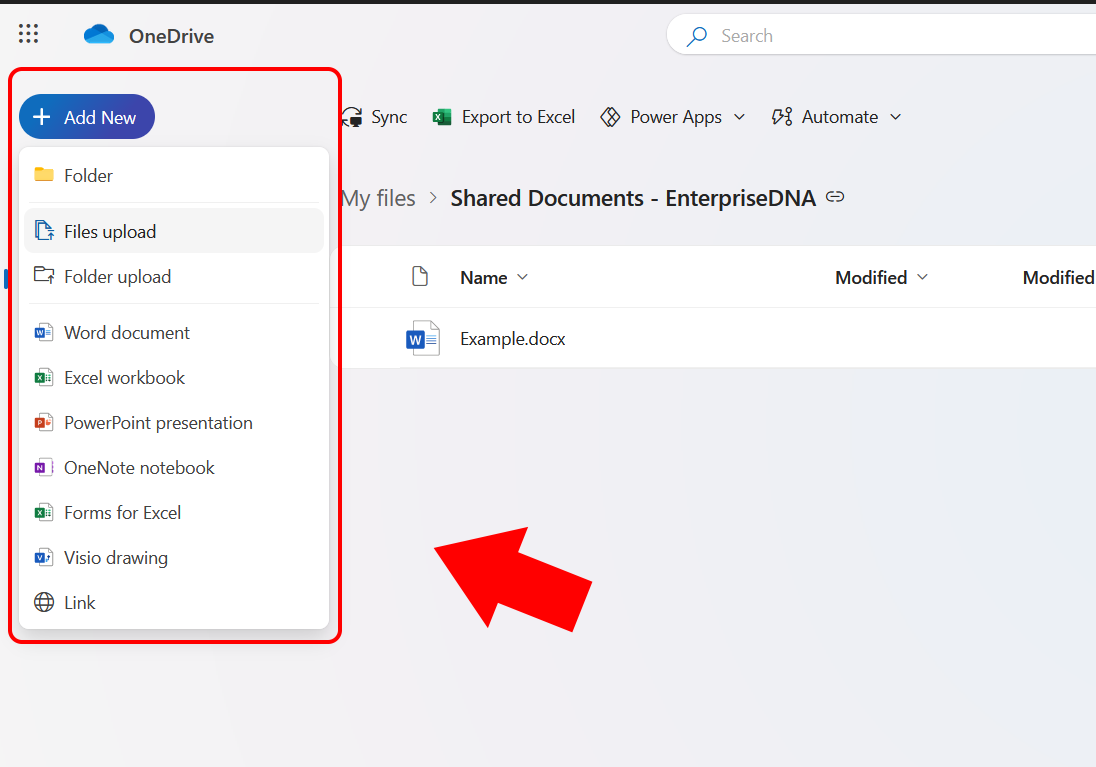
5. Upload a file to OneDrive: In the synced OneDrive folder, click on the “+ Add New” button to add a file or folder, or simply drag and drop or copy-paste the file into this folder.
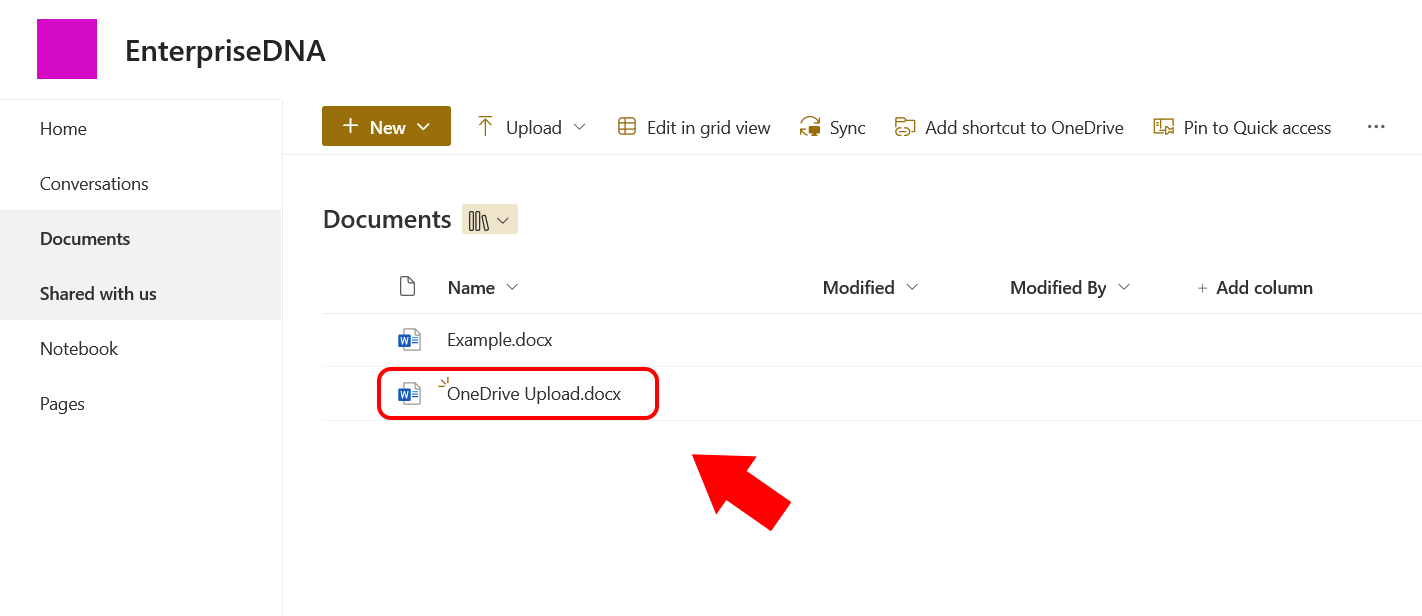
6. Verify sync: Go back to your SharePoint site and refresh the Document Library. The file you uploaded in OneDrive will now be accessible from your SharePoint site.
And there you have it! You’ve successfully uploaded a file to SharePoint by syncing it with a OneDrive folder.
This method is especially useful for those who want to manage files without having to switch between different platforms.
Final Thoughts

Uploading files to SharePoint doesn’t have to be a complicated affair. As we’ve seen, there are multiple methods to suit different needs and preferences — from the drag-and-drop simplicity to the more integrated approach of syncing with OneDrive.
Each method has its own advantages, so the best one for you will depend on your specific workflow and how you like to manage your files.
Remember, the key to effective file management in SharePoint is not just how you upload files but also how you organize them once they’re uploaded. So, take a moment to think about your Document Library structure and how it can best serve your team’s collaboration needs.
Happy sharing!
For more SharePoint tips and tricks, check out our video on how to parse emails and populate SharePoint lists below!
Frequently Asked Questions
What is the most efficient method for uploading multiple files to SharePoint?
To move files to SharePoint, you have several options. You can drag and drop files directly from your desktop into a SharePoint Document Library if you have both windows open.

Alternatively, you can use the “Upload” button within SharePoint to select files from your computer.
If you prefer, you can also sync a OneDrive folder with a SharePoint Document Library, allowing any files added to that OneDrive folder to appear in SharePoint automatically.
Choose the method that best suits your needs.
How do I upload to SharePoint and share?
To upload and share files on SharePoint, follow these steps:
- Upload file: Use the “Upload” button in SharePoint’s Document Library or drag and drop the file from your desktop. Once uploaded, find the file within the Document Library.
- Share: Right-click on the file and select “Share,” or use the “Share” button usually located at the top.
- Enter details and send: Input the email addresses of the people you want to share with and set permissions. Click “Send” or “Share” to finalize the sharing process.
These steps will upload your file to SharePoint and share it with specified team members.
What is the fastest way to upload files to SharePoint?
The fastest way to upload files to SharePoint is by using the drag-and-drop method. Simply open your SharePoint Document Library in one window and locate the file on your desktop in another.
Drag the file from your desktop and drop it into the SharePoint window. This method is quick and doesn’t require navigating through additional dialog boxes.
How do I attach a file in SharePoint online?
To attach a file in SharePoint Online, you typically don’t “attach” it like you would in an email. Instead, you upload it to a Document Library where team members can access it. Here’s how:
- Navigate: Go to the SharePoint Online site and locate the Document Library where you want to upload the file.
- Upload: Click the “Upload” button, usually at the top of the Document Library.
- Select File: A dialog box will appear; navigate to the file on your computer and select it.
- Confirm: Click “Open” to complete the upload.
Once uploaded, the file is accessible to anyone with the appropriate permissions to that Document Library.


