
In today’s fast-paced digital world, data protection is invaluable. With SharePoint Online becoming a go-to choice for organizations to store and manage files, knowing how to create a backup of your content is indispensable.
SharePoint Online provides you with both native and third-party options to create a backup of your data. Using these methods effectively can make it simple to protect and restore your valuable documents whenever needed.
Native backup options within SharePoint include:

- Retention Policies
- OneDrive Sync
- Versioning
- Export
Third-party backup options include:
- PowerShell
- APIs
- Nakivo
- AvePoint
This article will give you insights on the most reliable and secure practices to back up data on SharePoint Online.
By understanding the various options and tools available to you, you can create an effective backup plan that caters to yourspecific needs and requirements.
Let’s get started!
How Does SharePoint Online Work?
SharePoint Online is a cloud-based service provided by Microsoft as part of the Office 365 suite. It allows your organization to store, share, and collaborate on documents and data seamlessly without the need for on-premises infrastructure and maintenance.
With SharePoint, you can access your data from anywhere and at any time using an internet connection and a web browser. Microsoft takes care of all the updates and security patches, ensuring that your data is always protected with the latest technology.

Now let’s talk about how to back up this important data.
Why You Should Backup SharePoint Online

SharePoint backups are performed every 12 hours and retained for 14 days, while deleted items are retained for 93 days.
While Microsoft provides a range of robust security measures and built-in data protection features, it’s essential to recognize the importance of implementing a comprehensive backup strategy tailored to your organization’s needs.
Here’s why you should prioritize backing up your data in SharePoint:
- Protection against data loss: By regularly backing up your SharePoint data, you create a safety net that allows you to restore lost or compromised content.
- Enhanced data recovery: A dedicated backup solution offers granular recovery options, enabling you to retrieve specific files, folders, or even entire SharePoint sites at different points in time.
- Compliance and legal requirements: A robust backup strategy ensures that your SharePoint data is retained according to industry and regional compliance and data retention regulations.
- Protection against cyber threats: A well-designed backup solution can protect you from falling victim to ransomware by allowing you to restore data to a clean state without giving in to attackers’ demands.
- Simplified migration and upgrades: A reliable backup solution eases the process of migrating data by allowing you to move your data with confidence.
Implementing a dedicated backup strategy for your SharePoint data is a proactive step toward ensuring data availability, business continuity, compliance, and peace of mind in an ever-evolving digital landscape.
In the next section, we’ll go over native backup options for SharePoint Online.
Native SharePoint Online Backup Options

SharePoint Online, as part of Microsoft 365’s suite of services, offers several built-in backup and recovery options to help safeguard your data and ensure its availability.
Some of these options include:
1. Retention Policies
Use retention policies to help secure your data and maintain compliance in your organization.
In Microsoft 365, retention policies can be configured at the site level or for specific libraries and lists. These policies ensure that your data stays in place while preventing accidental deletion or other unwanted changes.
To initiate retention policies:
- Log into your Microsoft 365 Admin Center.
- Under Admin centers in the menu, Click on Compliance to access the Microsoft Compliance Center.
- Click on the Data lifecycle management drop-down menu and select Microsoft 365.
- Go to the Retention policies tab and click New retention policy.
- Choose the appropriate retention policies for your organization.
Make sure you have the right permissions to add retention policies and remember that once a policy is applied, it can’t be removed, only overwritten.

2. OneDrive Sync
OneDrive for Business, which comes with your Microsoft 365 account, offers a sync feature that can help with backing up SharePoint Online data.
This tool allows you to sync SharePoint Online files and OneDrive folders, allowing local access to important SharePoint files.
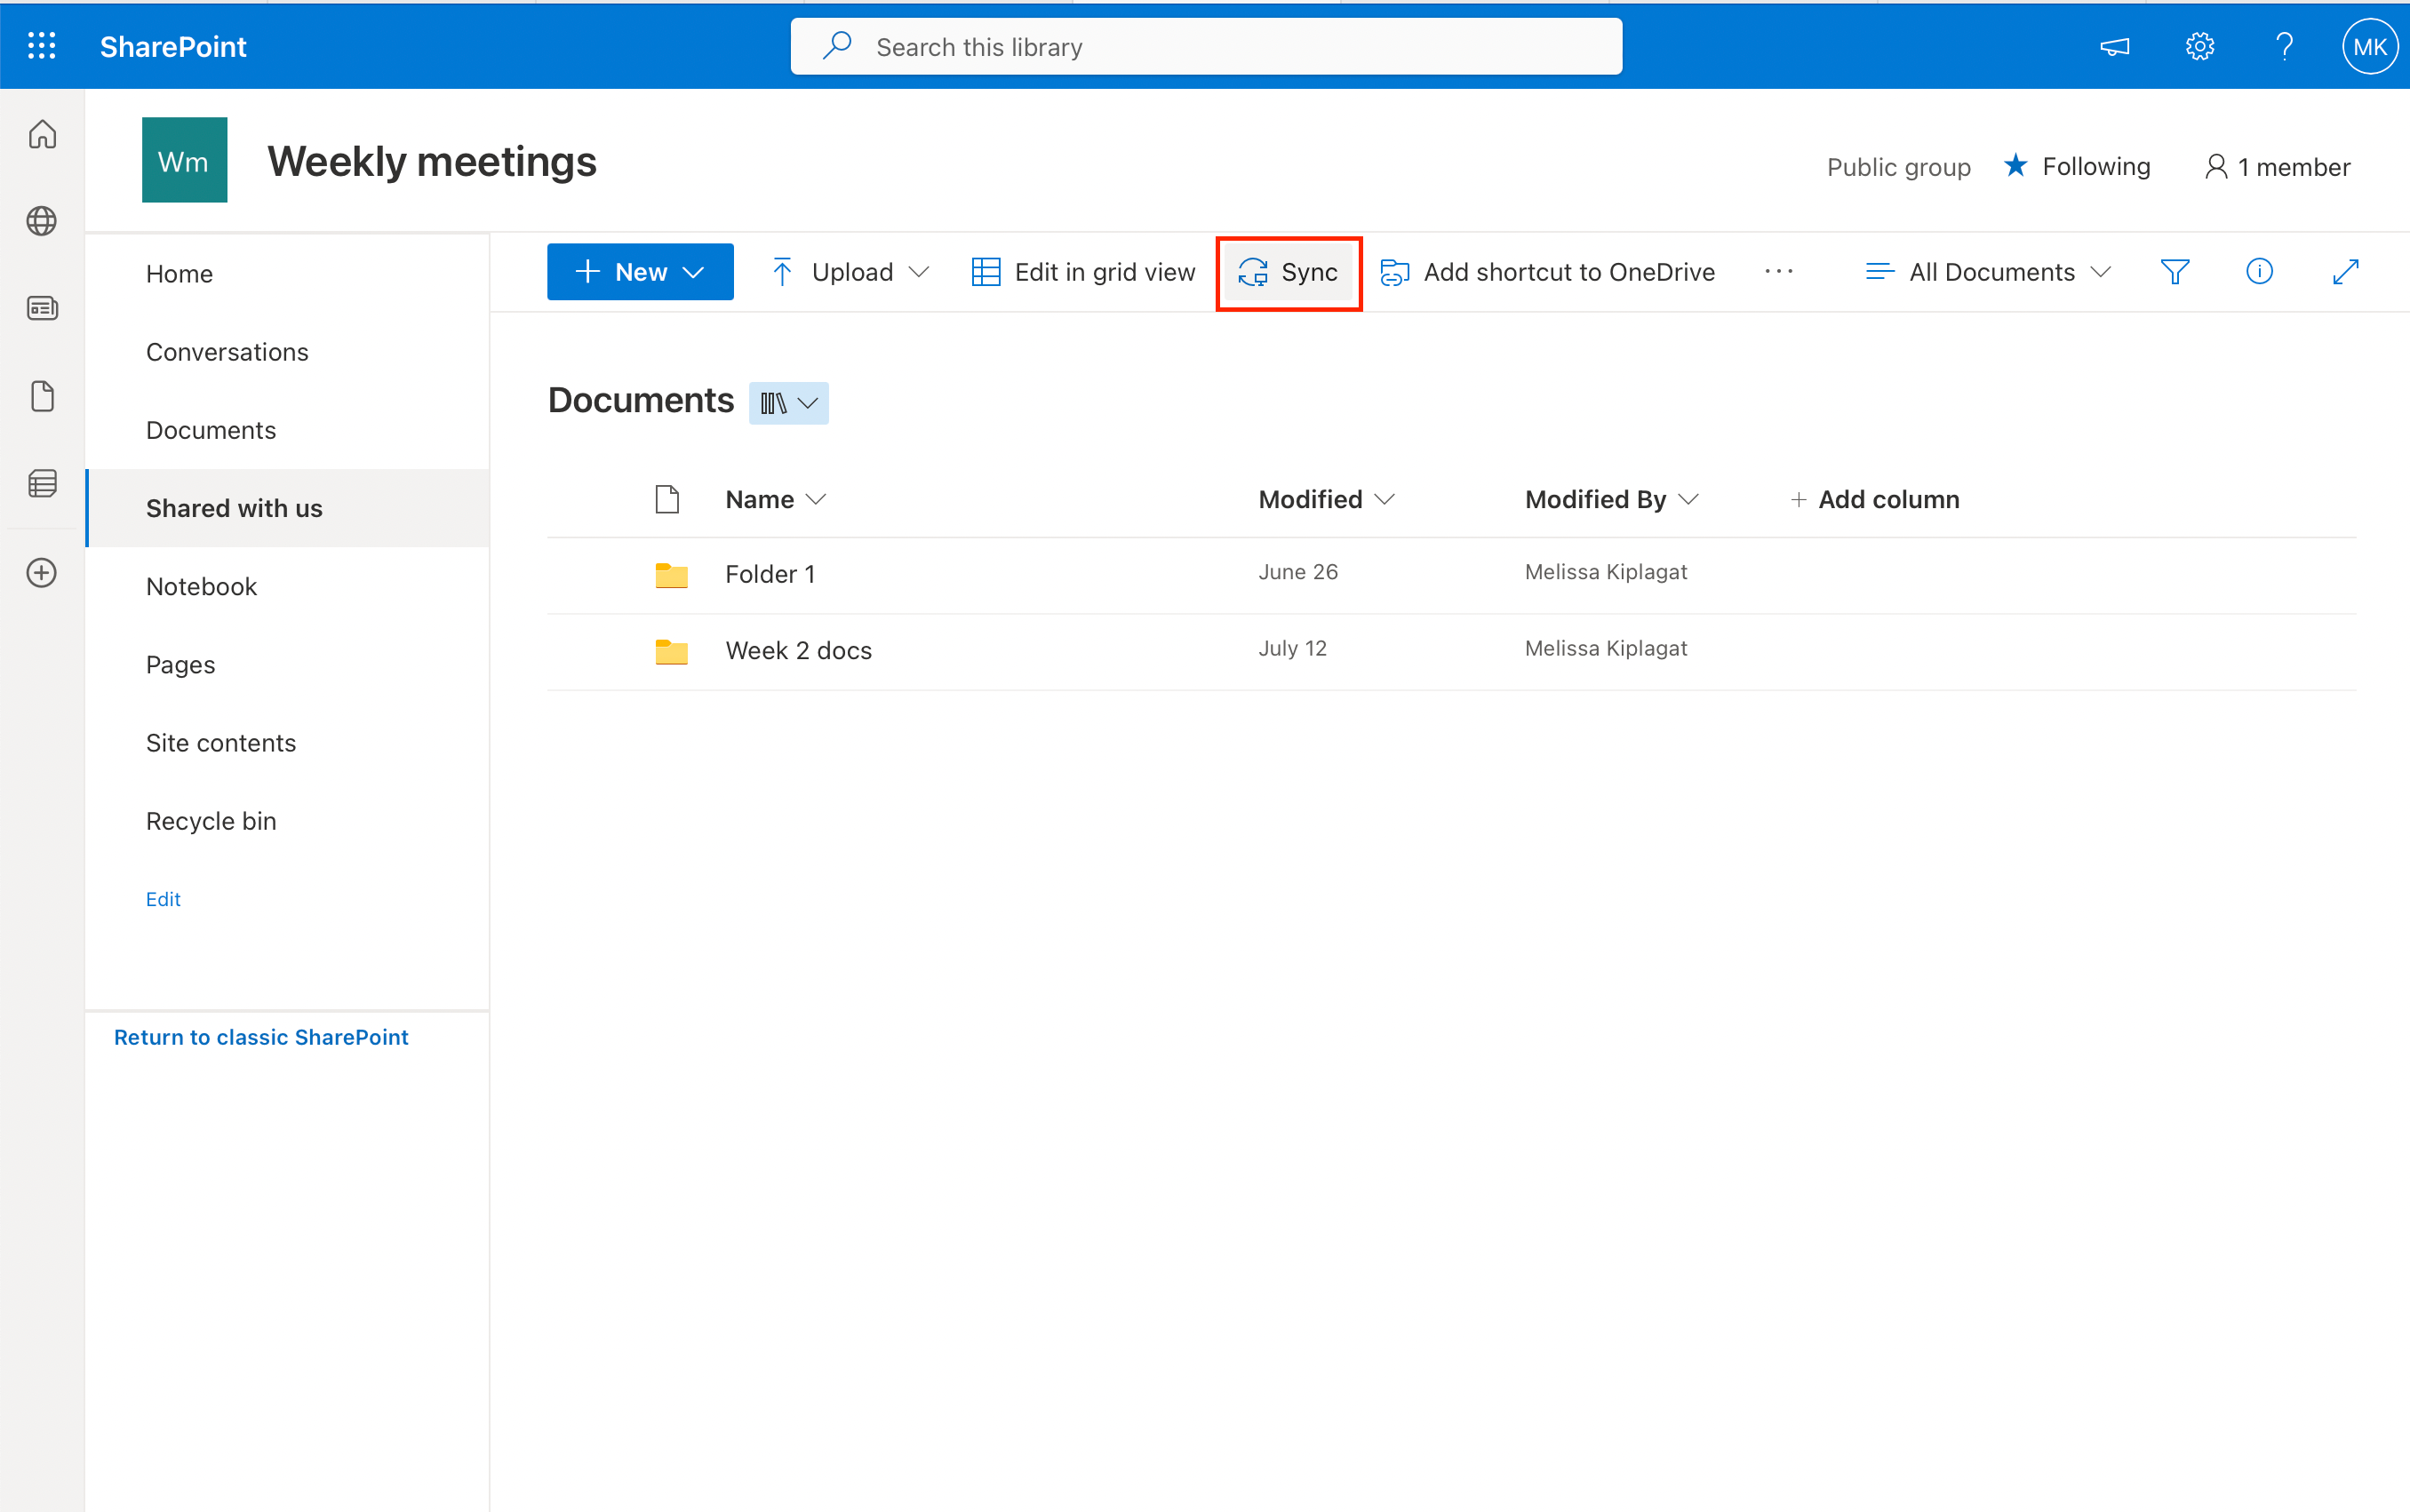
To do this:

- Download and install the OneDrive.
- Navigate to the SharePoint document library or OneDrive folder you want to sync.
- Click the Sync button in the menu bar to start the synchronization process.
Make sure to regularly sync your data for a reliable and up-to-date backup.
3. Versioning
Versioning is a critical feature in SharePoint that allows you to track changes made to documents and list items.
Through versioning, you can view or restore previous versions of your data, providing a reliable backup method to prevent the loss of critical information.
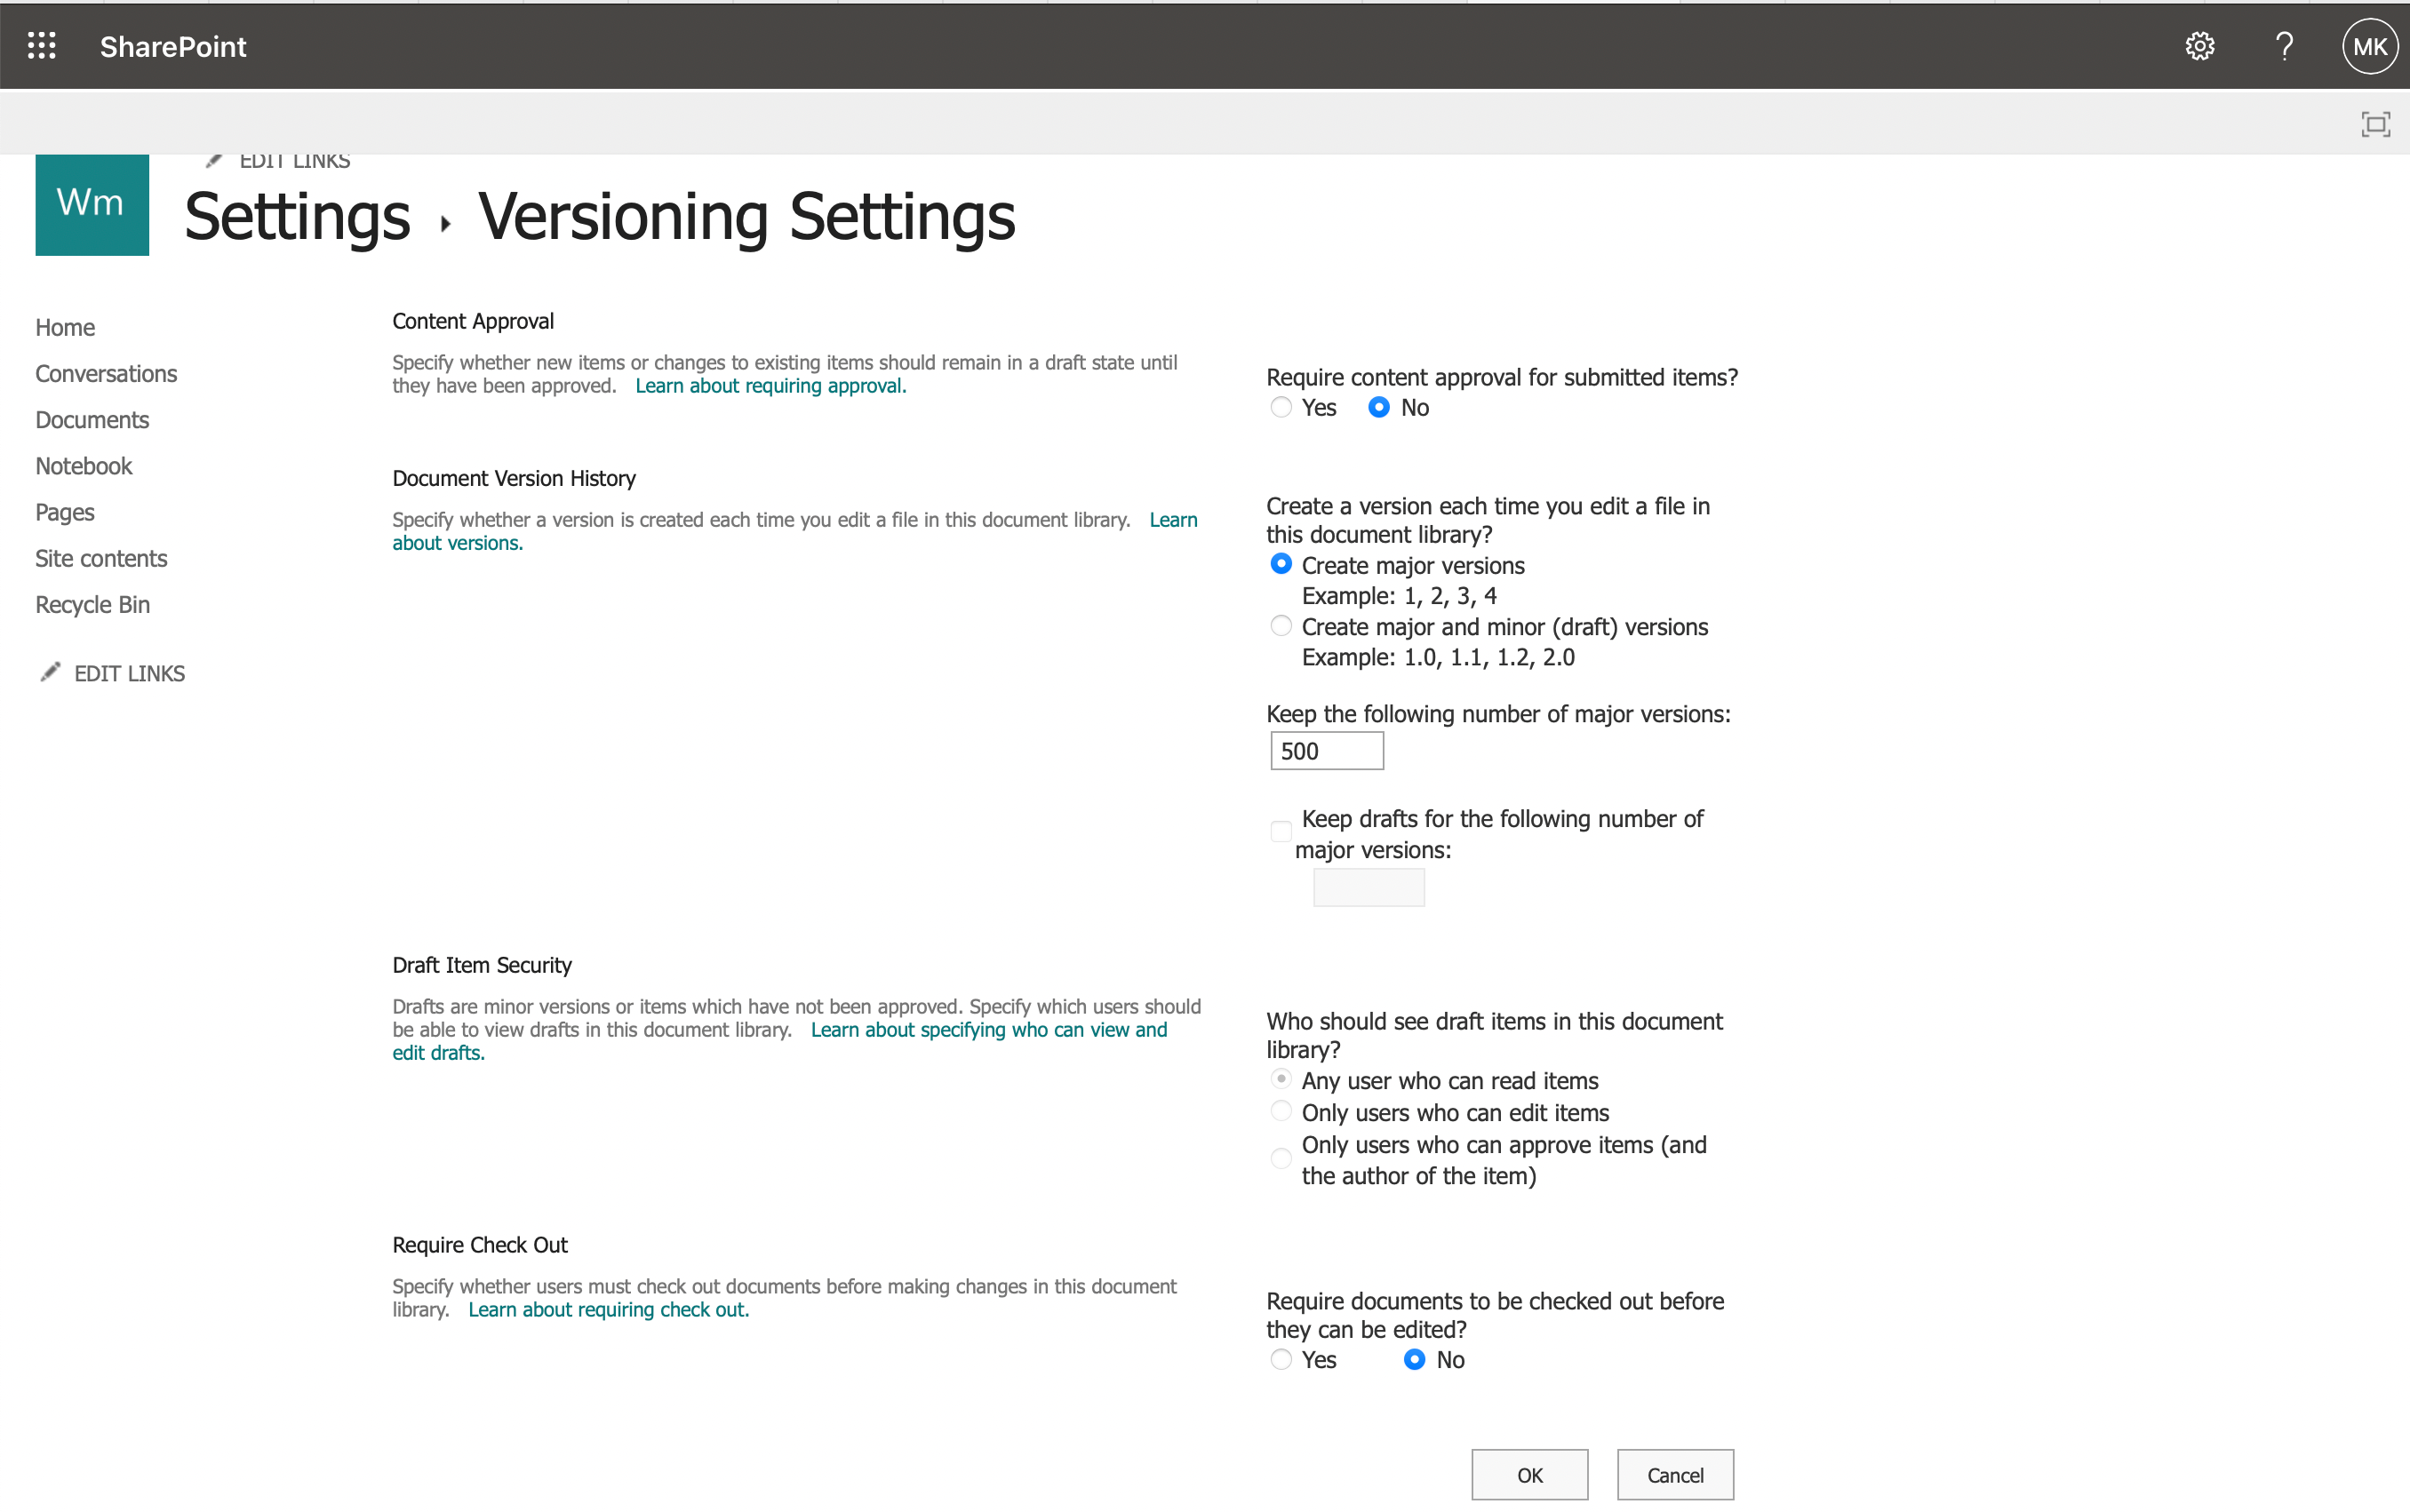
To enable versioning in SharePoint:
- Go to your document library or list.
- Click the settings icon on the top right of your screen and click on Library settings.
- Click on More library settings.
- In the library or list settings, find Versioning settings.
- Configure major and minor versions as per your organization’s requirements.
Don’t forget to review and adjust the versioning settings periodically to suit your backup needs.
4. Export
Exporting files and lists from SharePoint provides a crucial method for backing up your data. With this method, you can create local copies or maintain an archive of your important files.
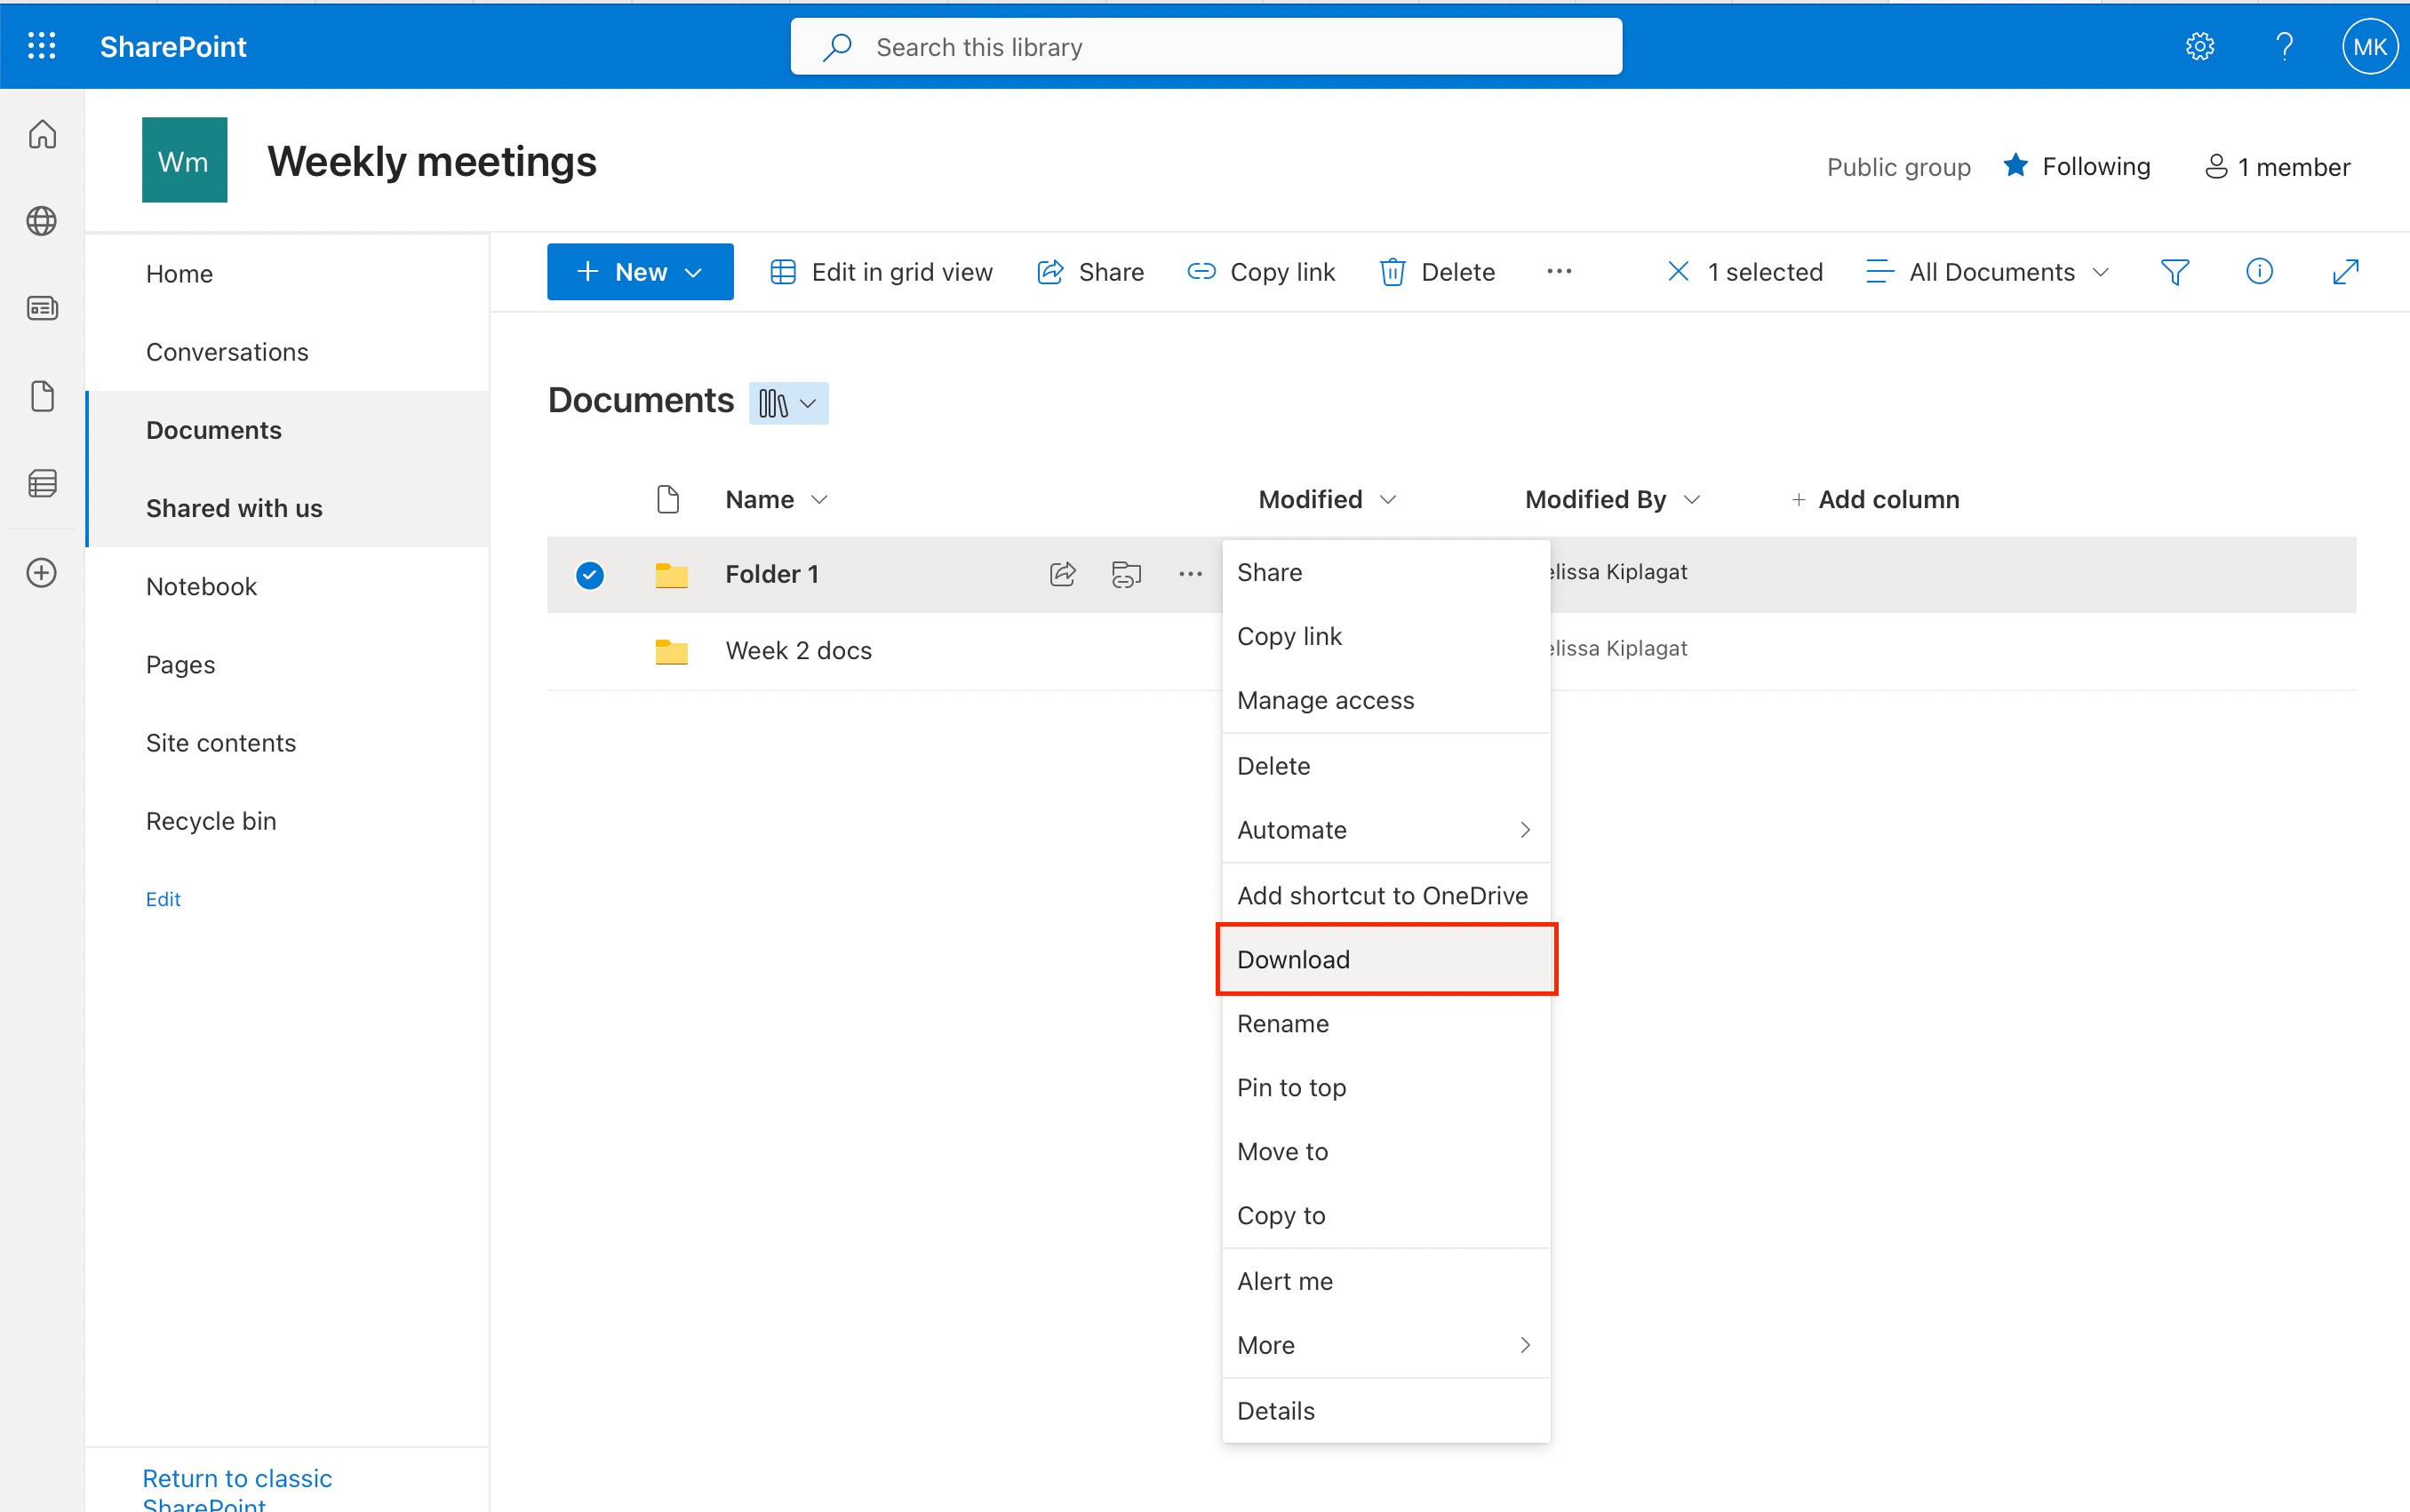
To export a document library:
- Access the library
- Select the documents you’d like to back up.
- Click on the ellipsis (…) and click Download in the drop-down menu to create a local copy.
Lists can be exported to Excel by selecting “Export to Excel” from the list settings.
By combining these backup techniques, you can safeguard your SharePoint data while maintaining compliance and ensuring easy access when needed.
If you lose vital data through accidental or malicious deletion, SharePoint offers several data restoration options. We go over some of them in the next section!
Native SharePoint Online Restoration Options
SharePoint Online, as part of Microsoft 365, provides a set of native Microsoft recovery tools that allow organizations to recover lost or modified data within the platform.
These options include:
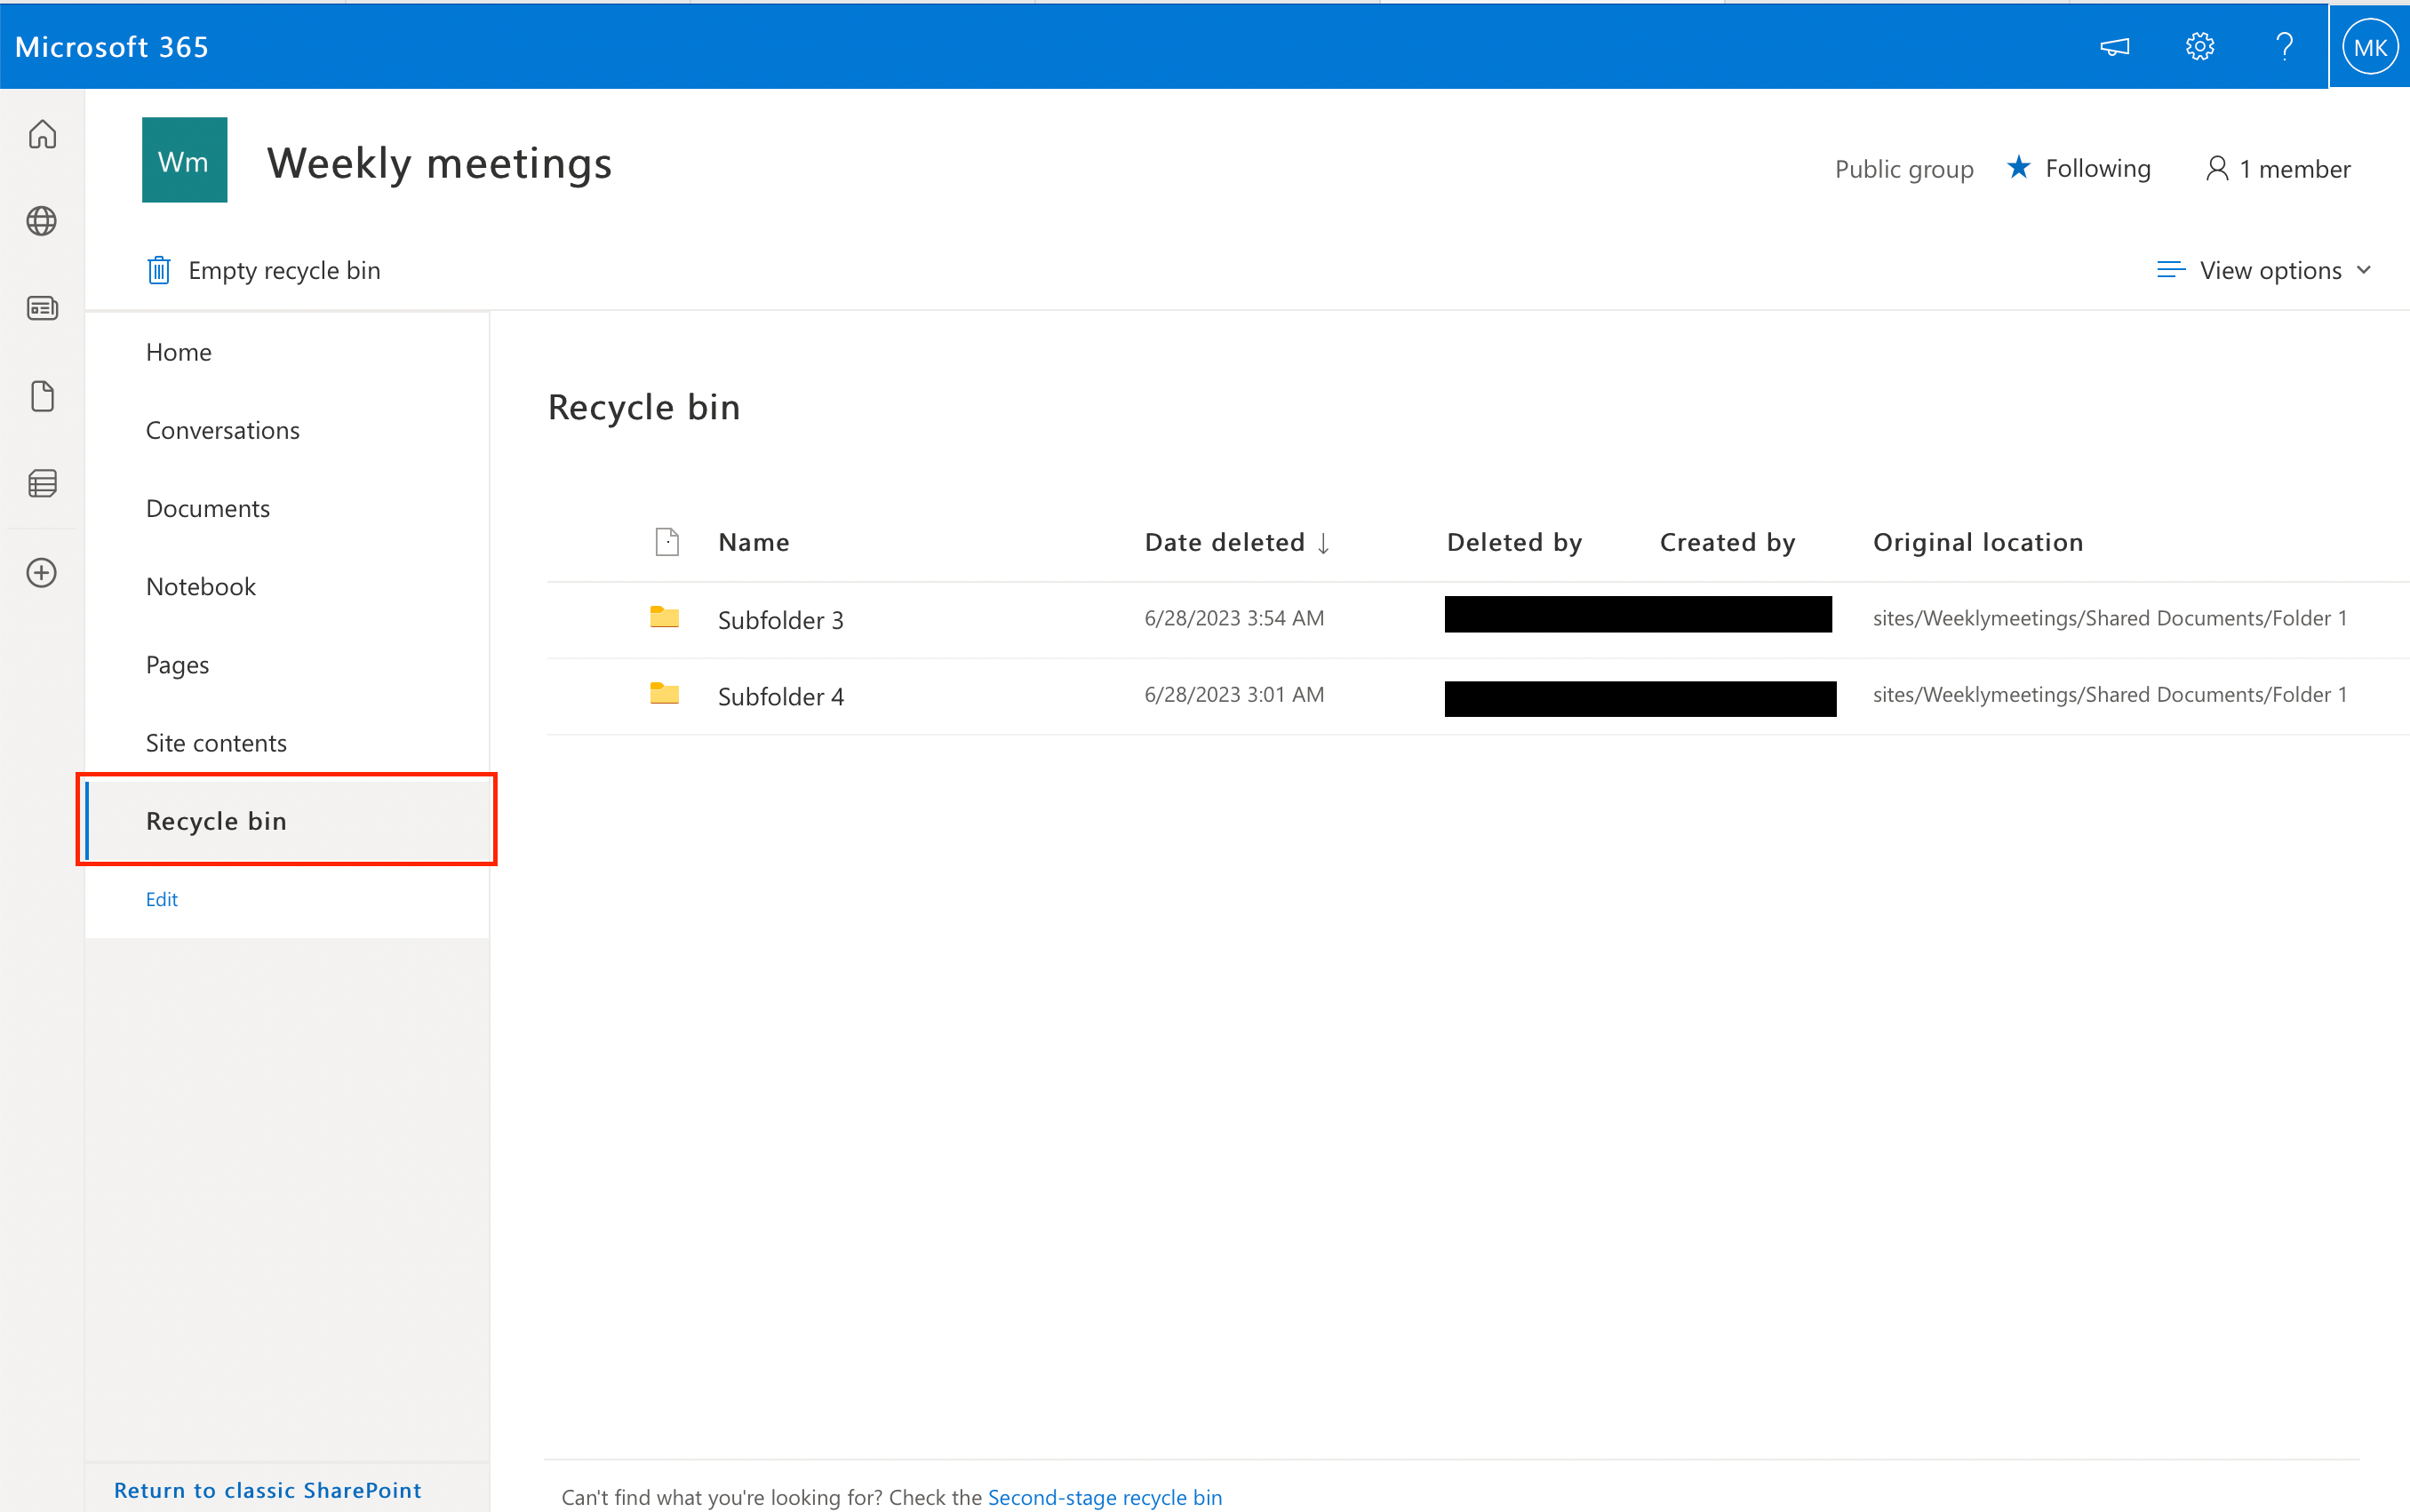
1. Recycle Bin
The first method to restore deleted files in SharePoint Online is using the Recycle Bin. When you delete a file, it is moved to the site recycle bin, where it remains for 93 days.
To restore a file from the recycle bin, follow these steps:
- Go to the SharePoint site where the file was originally located.
- Scroll down and click on “Recycle Bin.”
- Locate the file you want to restore, select the checkbox next to it, and click on “Restore.”
The file will be restored to its original location.
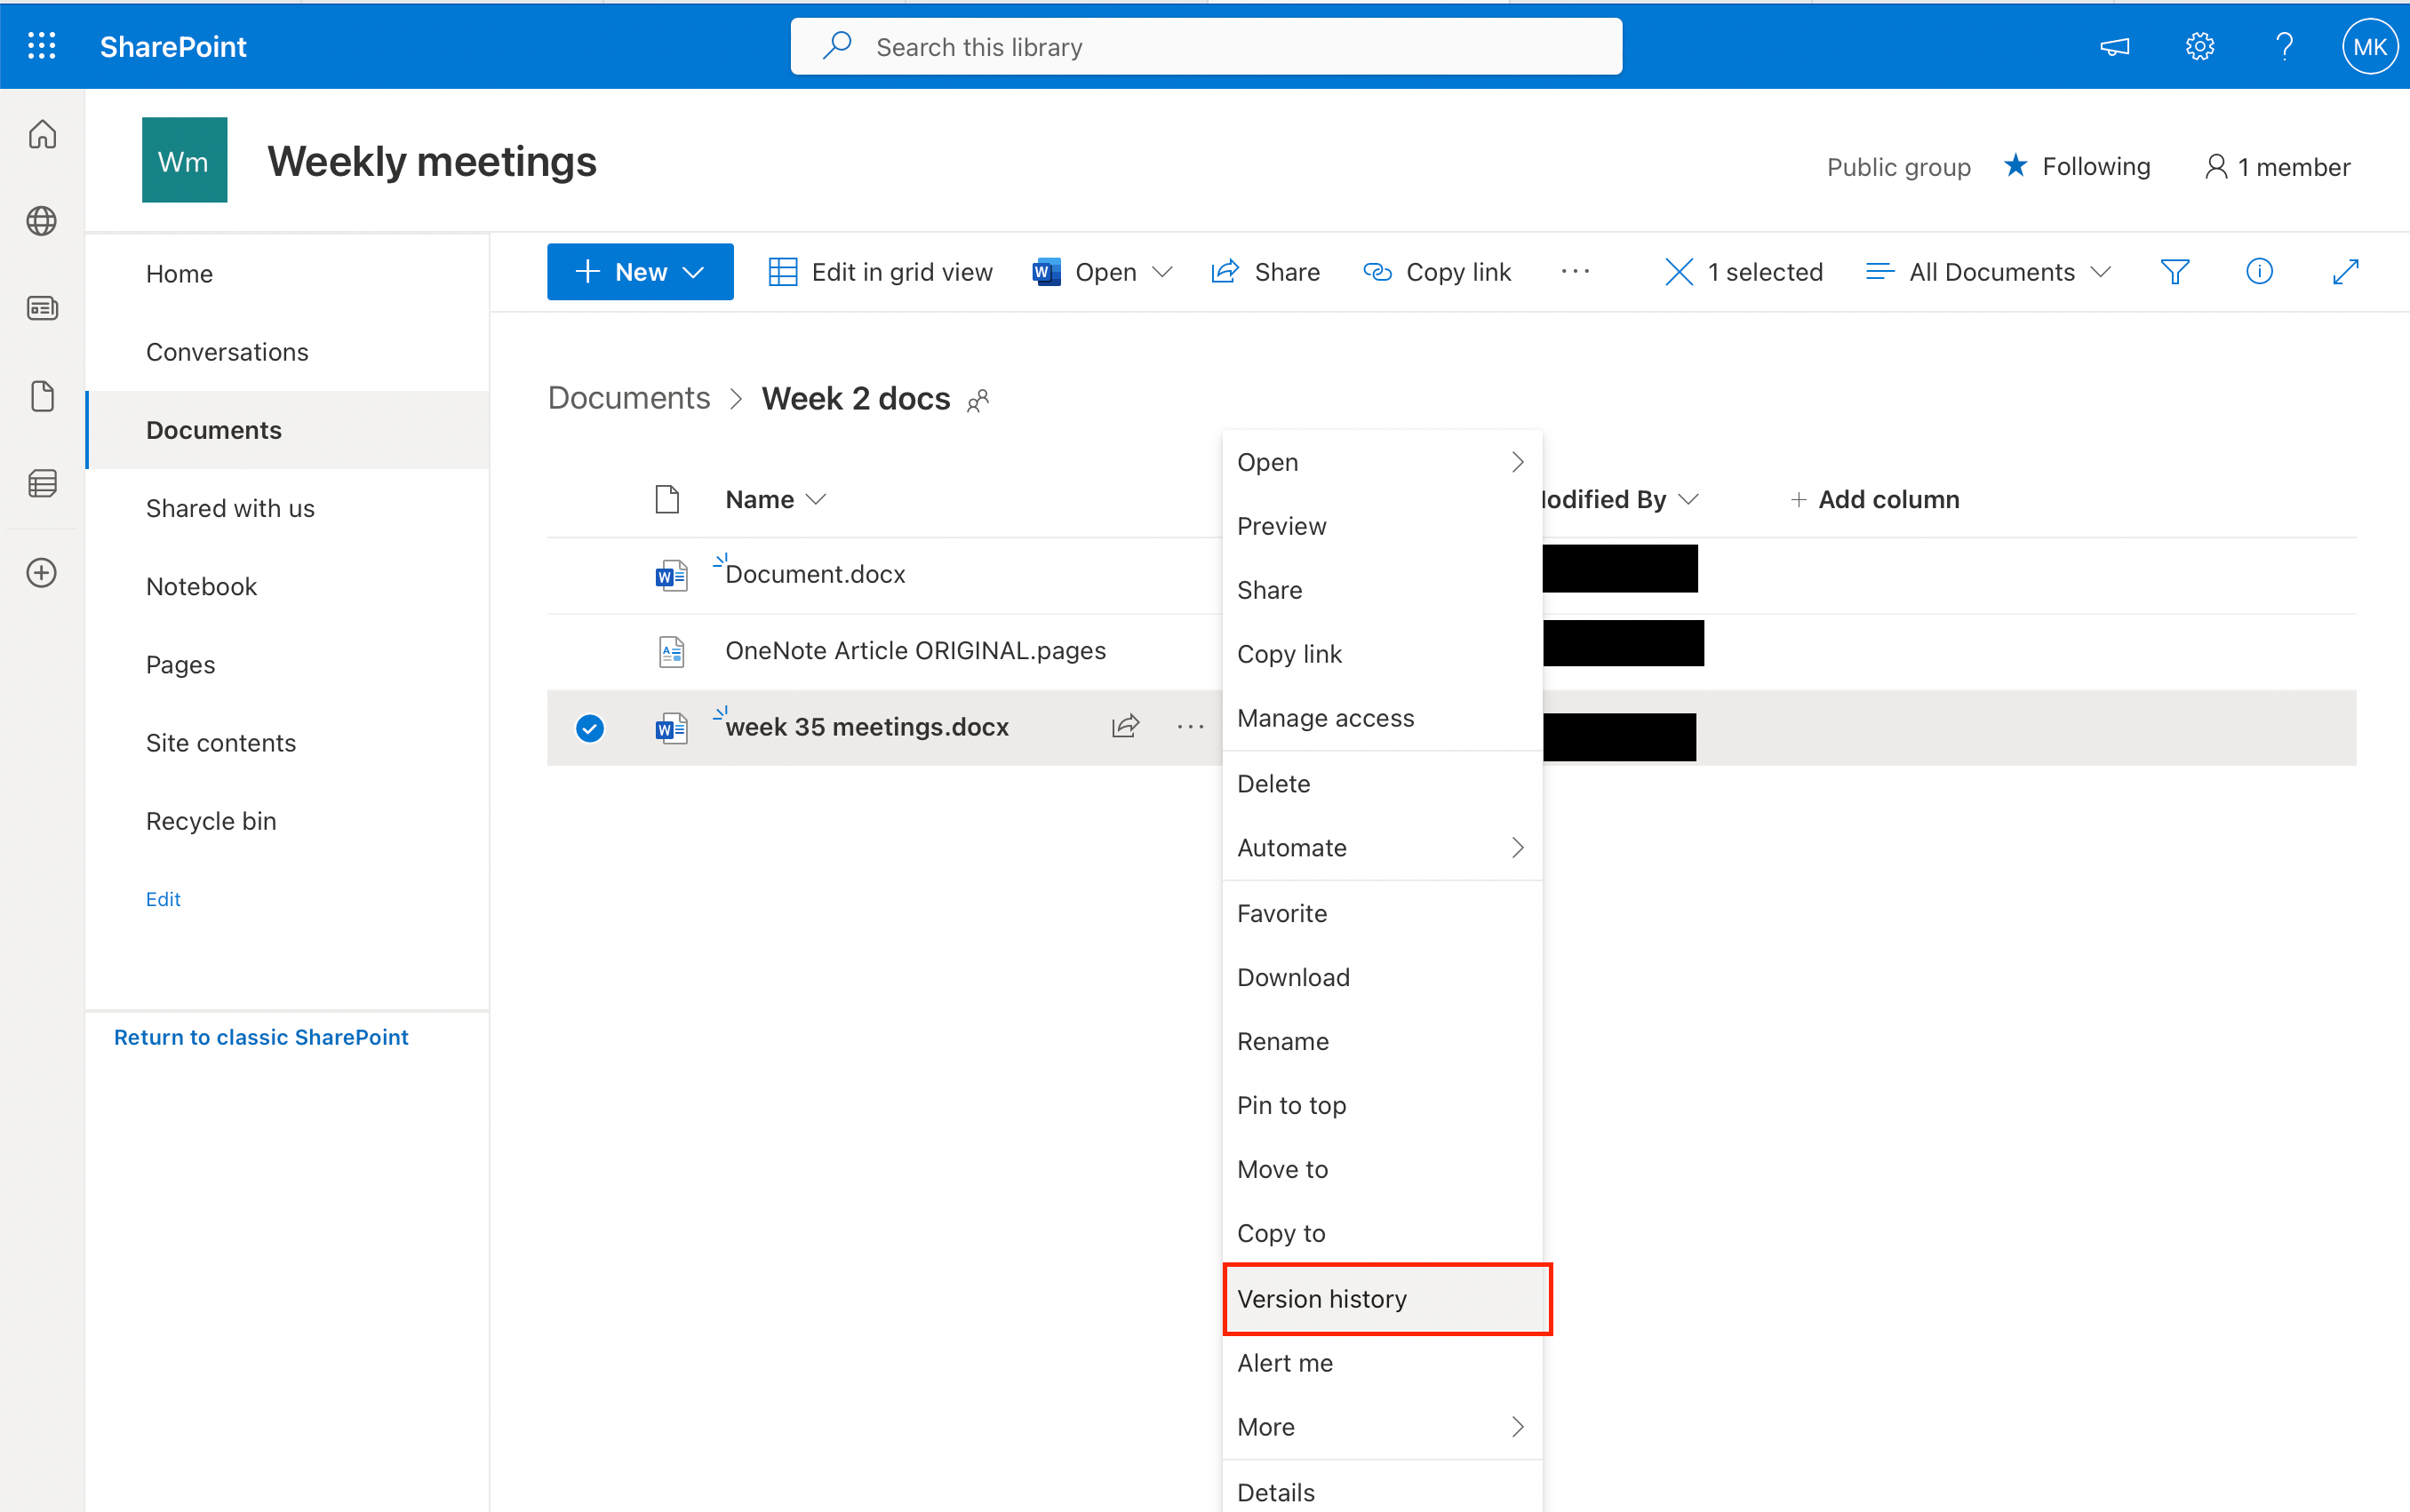
2. Document Library
Another option for restoring SharePoint data is to use the Document Library. This can be useful if a file was accidentally overwritten or saved with unwanted changes.
You can recover a previous version of the file by following these steps:
- Go to the Document Library that contains the file.
- Find the file and click on the ellipsis (three dots) next to its name.
- Click on “Version history.”
- In the version history window, locate the desired version and click on the ellipsis next to it.
- Select “Restore” and confirm.
The previous version of the file will now be the current version in the Document Library.
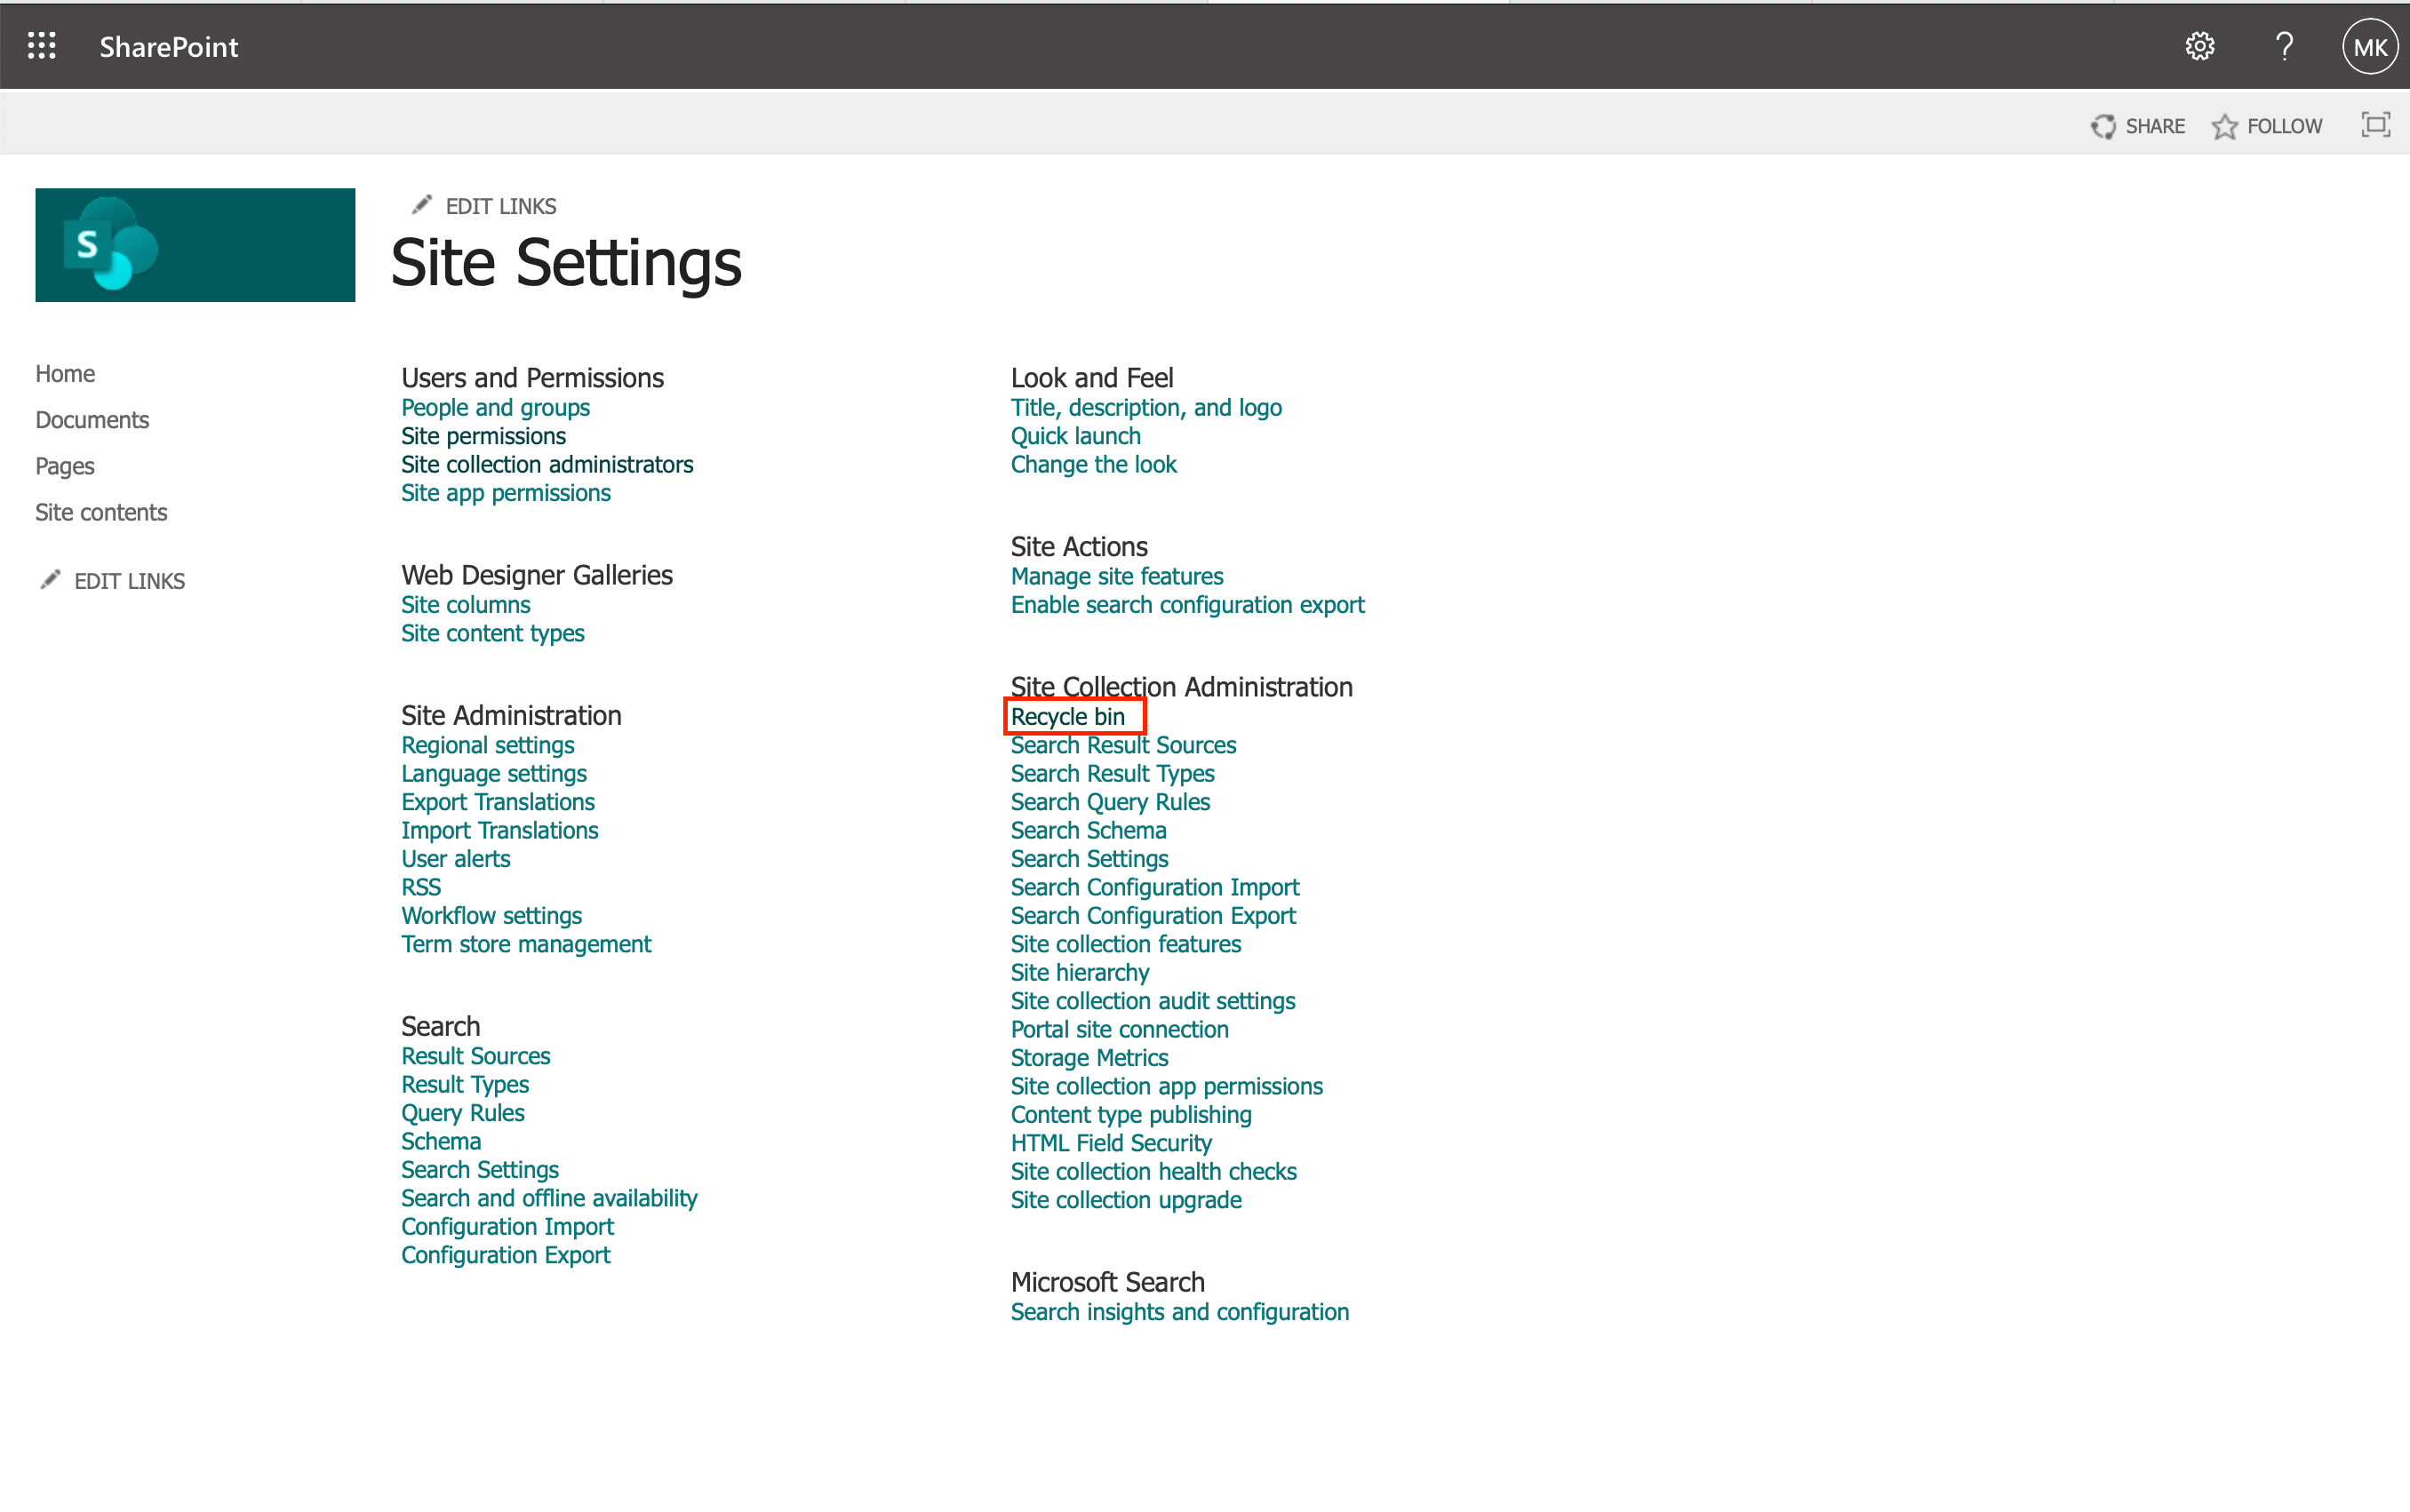
3. Site Collection Recycle Bin
The Site Collection Recycle Bin is a central location for administrators to manage and restore deleted content across the entire site collection.
To access and restore content from the Site Collection Recycle Bin:

- Go to the SharePoint site collection’s root site.
- Click on the settings icon in the top right of the screen and click on Site settings.
- Under Site Collection Administration, click on Recycle Bin.
- Browse through the items in the list and select the ones you want to restore.
- Click on Restore Selection to recover the items.
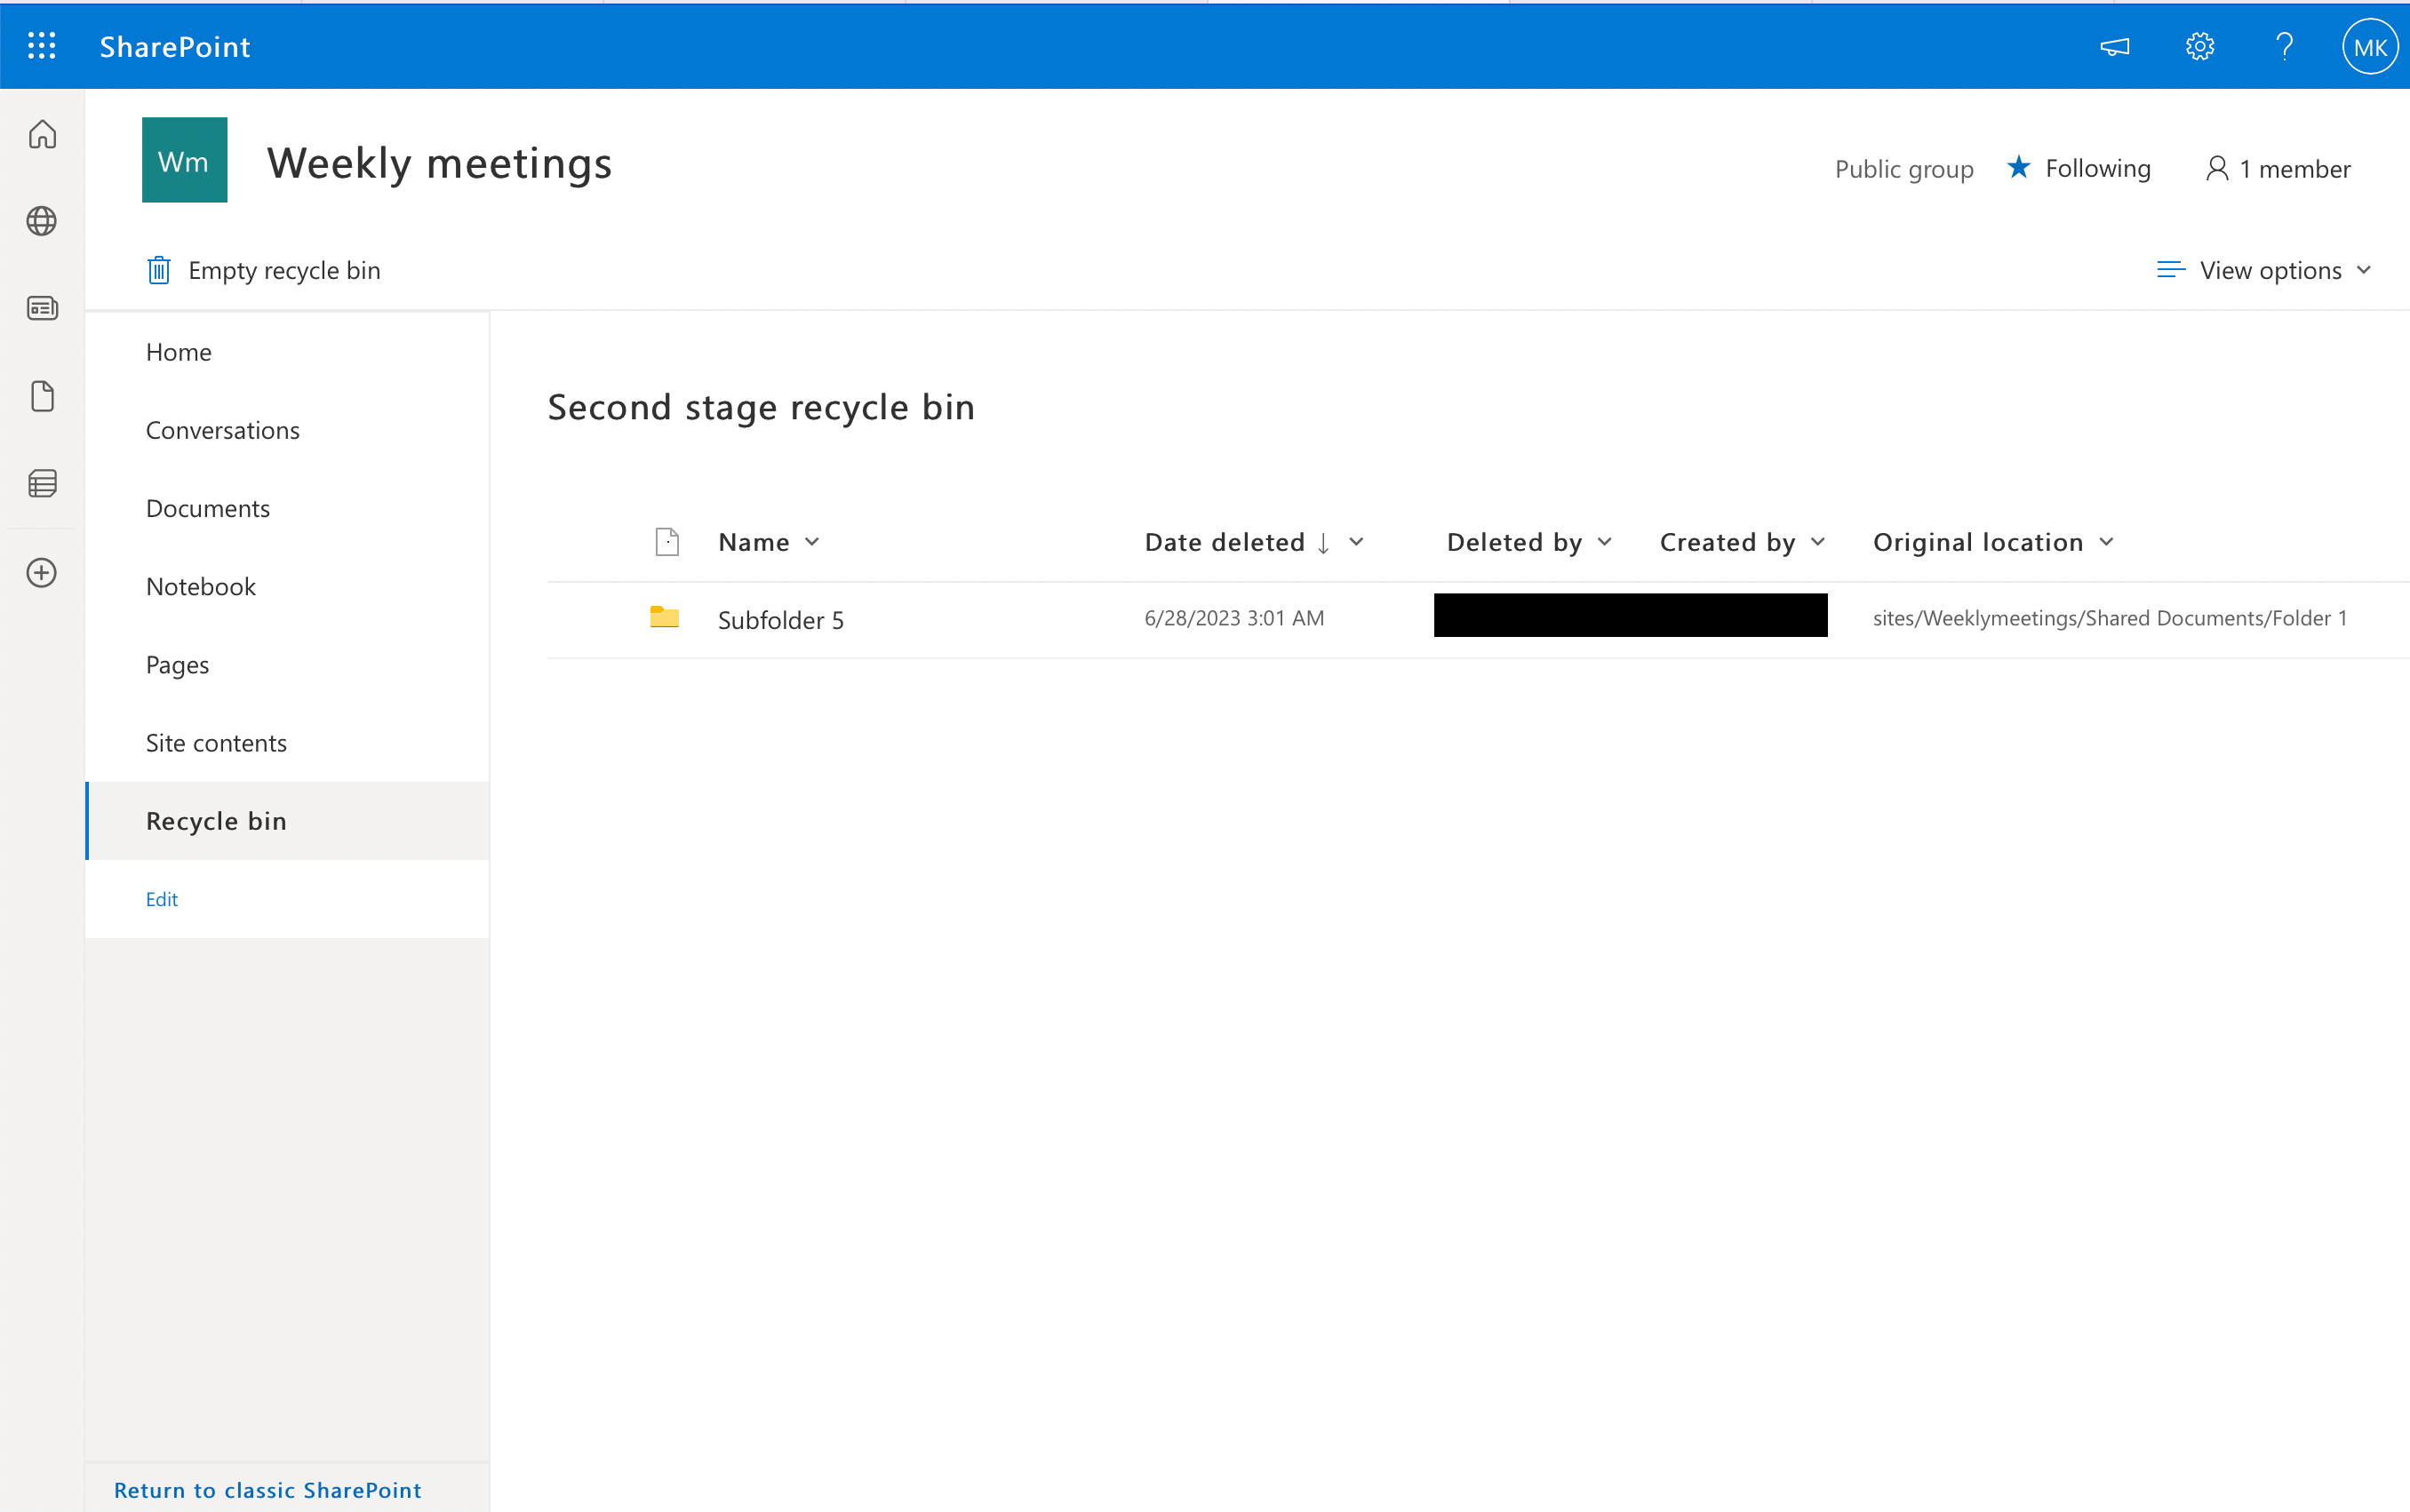
4. Second Stage Recycle Bin
If an item is deleted from the site Recycle Bin, it goes to the Second Stage Recycle Bin. This is also known as the end-user Recycle Bin. Items in this bin are retained for a designated period, typically 30 days, before being permanently deleted.
To restore items from the Second Stage Recycle Bin:
- Go to the site where the item was originally located.
- Access the site Recycle Bin, as described in the “Recycle Bin” section.
- At the bottom of the Recycle Bin page, click on “Second-stage Recycle Bin.”
- Locate and select the items you want to restore, and click on “Restore.”
The items will be restored to their original locations. Remember to act quickly, as items in the Second Stage Recycle Bin are not retained indefinitely and will eventually become permanently deleted SharePoint files.
While these native backup and restoration options are valuable, it’s important to understand their limitations and explore additional strategies to create a comprehensive backup solution tailored to your organization’s needs.
In the next section, we’ll go over some third-party backup options for you to consider.
Third-Party SharePoint Online Backup Options

While SharePoint offers native backup options, organizations with more advanced data protection needs often turn to external tools and solutions to enhance their backup strategies.
These tools provide greater flexibility, more robust features, and tailored approaches to data backup and recovery.
Here are some notable third-party tools that can significantly enhance your SharePoint backup capabilities:
1. PowerShell
PowerShell is a powerful scripting tool that allows you to automate tasks and manage your SharePoint environment. You can use PowerShell scripts to back up your SharePoint content, such as site collections, lists, and libraries.
To get started, download the SharePoint Online Management Shell and follow Microsoft’s official documentation for setting up the necessary cmdlets and performing backup tasks.
Remember to store your backup files securely and always test your scripts before running them on production environments.

2. Application Programming Interfaces (APIs)
For organizations with unique backup requirements, leveraging SharePoint Online’s APIs (Application Programming Interfaces) can enable the development of custom backup solutions.
This approach offers the flexibility to create tailored backup processes that align precisely with your organization’s backup and recovery needs.
Be prepared to invest time in learning the SharePoint Online API documentation and consider the rate limits and throttling policies when designing your backup solution.
3. Nakivo
Nakivo is a third-party backup and recovery solution that supports SharePoint along with other Microsoft 365 services, such as Exchange Online and OneDrive.
The main benefits of using Nakivo are its comprehensive backup features, easy-to-use interface, and quick recovery options.
Nakivo takes care of backing up your SharePoint data automatically, allowing you to focus on your core business activities. You can schedule regular backups, choose an appropriate retention policy, and even use advanced features like encryption and compression.
To get started with Nakivo, visit their website, and sign up for a free trial.
4. AvePoint
AvePoint is another popular third-party backup and recovery tool specifically designed for SharePoint Online. With AvePoint, you can perform granular backups, including individual sites, site collections, document libraries, and lists.
The tool provides features like incremental backups, customizable policies, and automated data synchronization. AvePoint also offers a migration tool that can help you migrate your on-premises SharePoint data to SharePoint Online or between different SharePoint tenants.
To explore AvePoint’s backup and recovery features, visit their website and request a demo.
Ultimately, the choice of an external tool will depend on your organization’s specific backup and recovery requirements, as well as its budget and technical expertise.
Implementing the right external tool can significantly enhance your SharePoint Online backup strategy, ensuring data availability, compliance, and peace of mind.
Final Thoughts

Ensuring the safety and availability of your data in SharePoint Online is of paramount importance for any organization.
While SharePoint Online provides built-in options like the Recycle Bin, version history, and site collection backups, it’s crucial to recognize their limitations and assess whether they align with your organization’s backup and recovery needs.
To create a robust backup strategy, consider incorporating external tools where appropriate. It’s important to weigh the cost, required resources, and ease of use against the level of protection provided.
By taking the time to understand your organization’s needs and the various backup options available, you are well on your way to implementing a secure and reliable backup plan!
Frequently Asked Questions
What is the best practice for backing up SharePoint Online?
The best practice for backing up SharePoint Online involves using a combination of native tools and third-party solutions.
Microsoft offers native backup and recovery options, but they may not cover all scenarios. To ensure comprehensive and granular backups, consider deploying a third-party SharePoint backup solution alongside Microsoft’s native tools.
How can I back up a SharePoint Online site using PowerShell?
While there isn’t a direct PowerShell cmdlet for backing up SharePoint Online, you can use PowerShell with PnP (Patterns and Practices) to export and import data from your SharePoint Online sites. Keep in mind that this approach may not be suitable for large sites or cover all data elements.
Does SharePoint Online have an automatic backup system?
SharePoint Online includes an automatic backup system that retains data for 14 days. This feature allows you to recover accidentally deleted items or previous versions of documents within that time frame.
However, it does not provide full-fledged disaster recovery or protection against data loss beyond the 14-day retention period.
How can I back up SharePoint Online to a local drive?
To back up SharePoint Online to a local drive, you can manually download files from your SharePoint Online document library. Access the document library, select the files or folders you want to backup, right-click, and choose the “Download” option.
This method may work for smaller files or libraries, but it is not suitable for larger sites or preserving site structures. In such cases, consider using a third-party SharePoint backup solution.


