
Ever wondered how you can make your team’s work processes more efficient and error-free?
SharePoint workflows are your answer.
These tools automate everyday tasks, leading to smoother and more reliable workflows, from approving documents to managing projects.

There are 4 main ways you can create SharePoint workflows:
SharePoint Designer
Power Automate
SharePoint Interface
Visual Studio
In this quick guide, we’ll give you step-by-step instructions for setting up workflows using each tool.
We’ll also include some troubleshooting solutions for errors you may encounter along the way.
No matter your SharePoint skill level, you’ll learn how to create workflows that save time and bring clarity and precision to your team’s operations.
Use this article to unlock the potential of SharePoint workflows and transform the way you work.
Let’s dive in!


What are Workflows in SharePoint?
SharePoint workflows are like automated assistants. Imagine you have a series of tasks that need to be done in a specific order, like reviewing a document, getting approvals, or updating data.
Instead of doing these tasks manually every time, SharePoint workflows automate the process.
Basically, they follow your set rules to ensure that each step happens correctly and at the right time. This makes work processes faster, more consistent, and less prone to error.
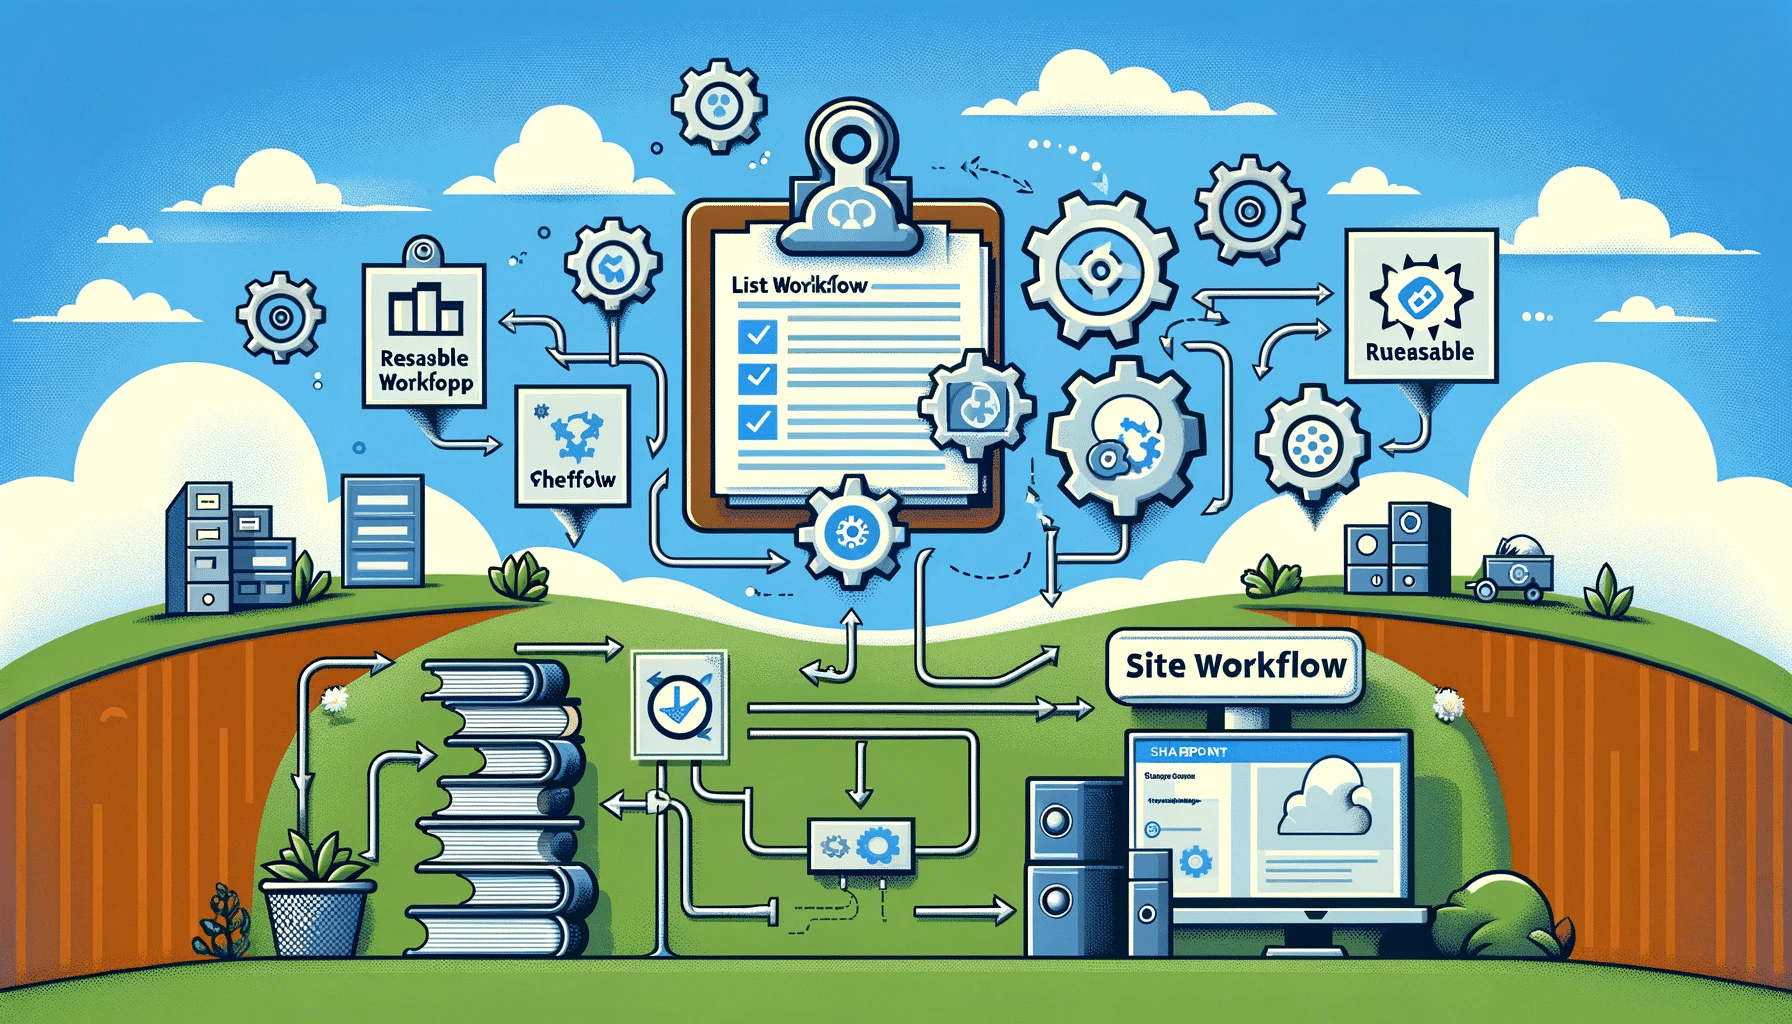
4 Types of Workflows in SharePoint
In SharePoint, workflows come in different types to suit various needs.
Here’s a simple breakdown:
List Workflows: Attached to specific lists or libraries, ideal for managing tasks related to individual items.
Reusable Workflows: Flexible and can be used across different lists or libraries for common processes.
Site Workflows: Not linked to any list or document library, but useful for site-wide tasks and procedures.
SharePoint Publishing Approval Workflow: This specific workflow is crucial for content management systems. It automates the process of content review and approval,
Each type is designed to automate and streamline specific aspects of your SharePoint site, from single-item management to broader site-level operations.
Now let’s break down a workflow.
Key Components of SharePoint Workflows
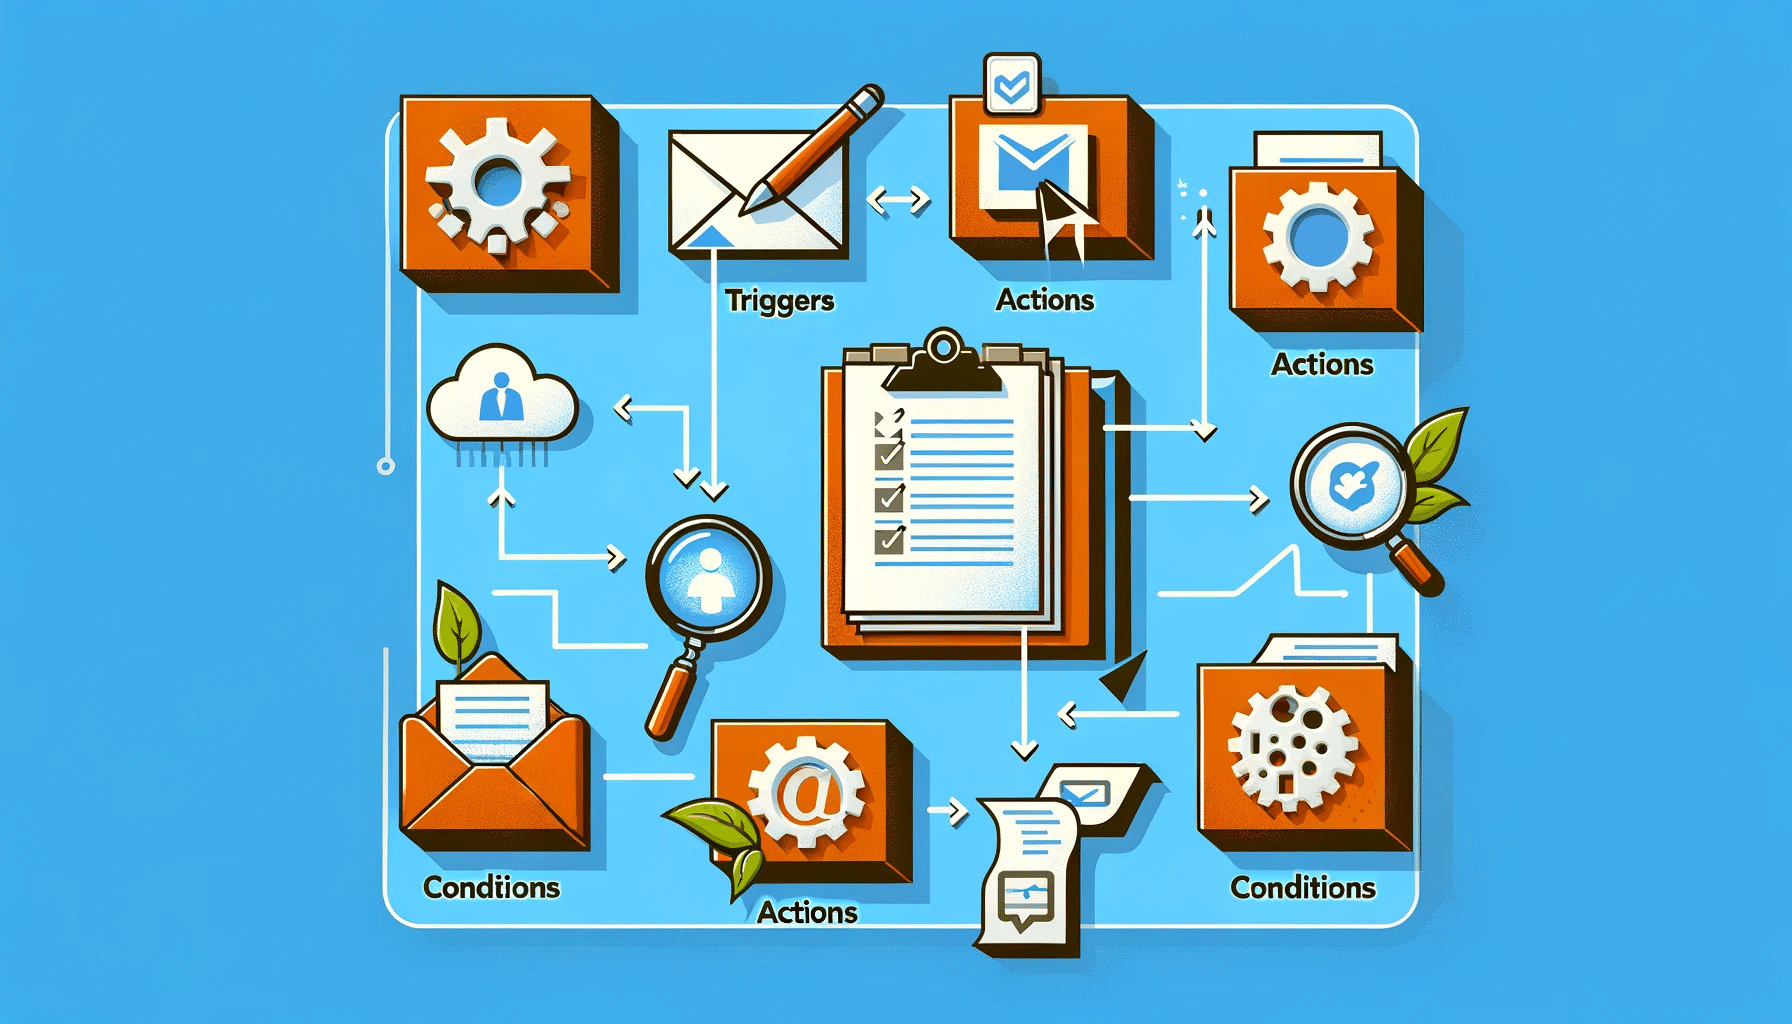
SharePoint workflows are made up of a few basic parts:
Triggers: These are the starting points of a workflow. For example, a workflow might begin when someone adds a new item to a list.
Actions: These are the tasks the workflow performs, like sending an email or updating a list item.
Conditions: These are the rules that decide when an action should happen. For instance, an email might only be sent if a list item meets certain criteria.
These components help automate and manage tasks in SharePoint, making processes more efficient and consistent.
Now that you understand what SharePoint workflows are, let’s get into the process of creating them.
Step-by-Step Guide to Create a SharePoint Workflow
Creating a workflow in SharePoint can be straightforward. Here are the 4 most popular tools you can use:
SharePoint Designer
Power Automate
SharePoint Interface
Visual Studio

To effectively design a SharePoint workflow with any of these tools, you will want to follow these 5simple steps:
Define the Goal: Start by pinpointing what you want the workflow to achieve.
Sketch the Process: Outline the key steps in a simple flowchart or diagram. This helps in visualizing and organizing the workflow.
Identify User and System Roles: Determine which tasks will be done by users and which by the system. This clarity is crucial for a functional workflow.
Set Workflow Parameters: Configure important settings like how the workflow starts, task assignments, and email alerts.
Test the Workflow: Run tests with real or simulated inputs to ensure the workflow operates smoothly.
Remember, a clear and straightforward workflow design is key. This method helps you create workflows that make your business processes smoother and more efficient.
Now, here is how you can use each tool to create your workflow.
Method 1: SharePoint Designer
SharePoint Designer is a powerful tool that you can use to create and customize workflows in SharePoint.

To create a workflow using this tool:
Install the Tool: If you haven’t already, first install SharePoint Designer 2013. You can download it for free from the Microsoft website.
Connect to a SharePoint Site: Connect Designer to the site where you want to create the workflow.
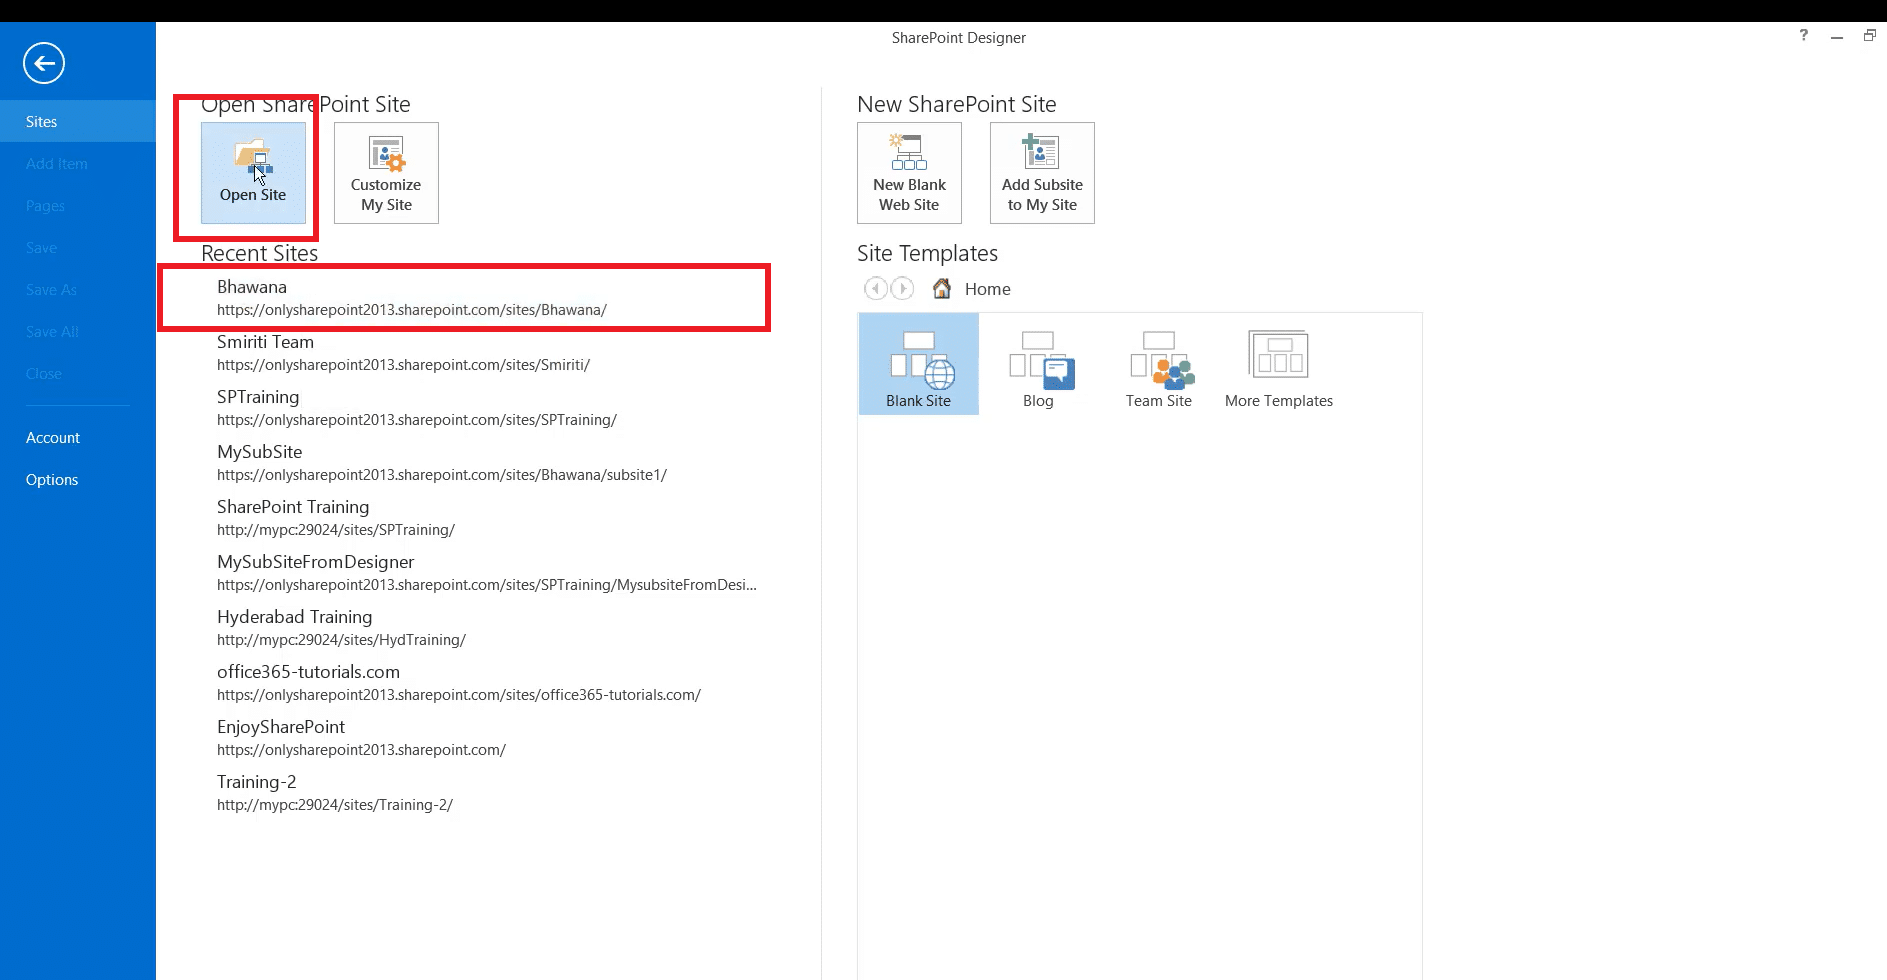
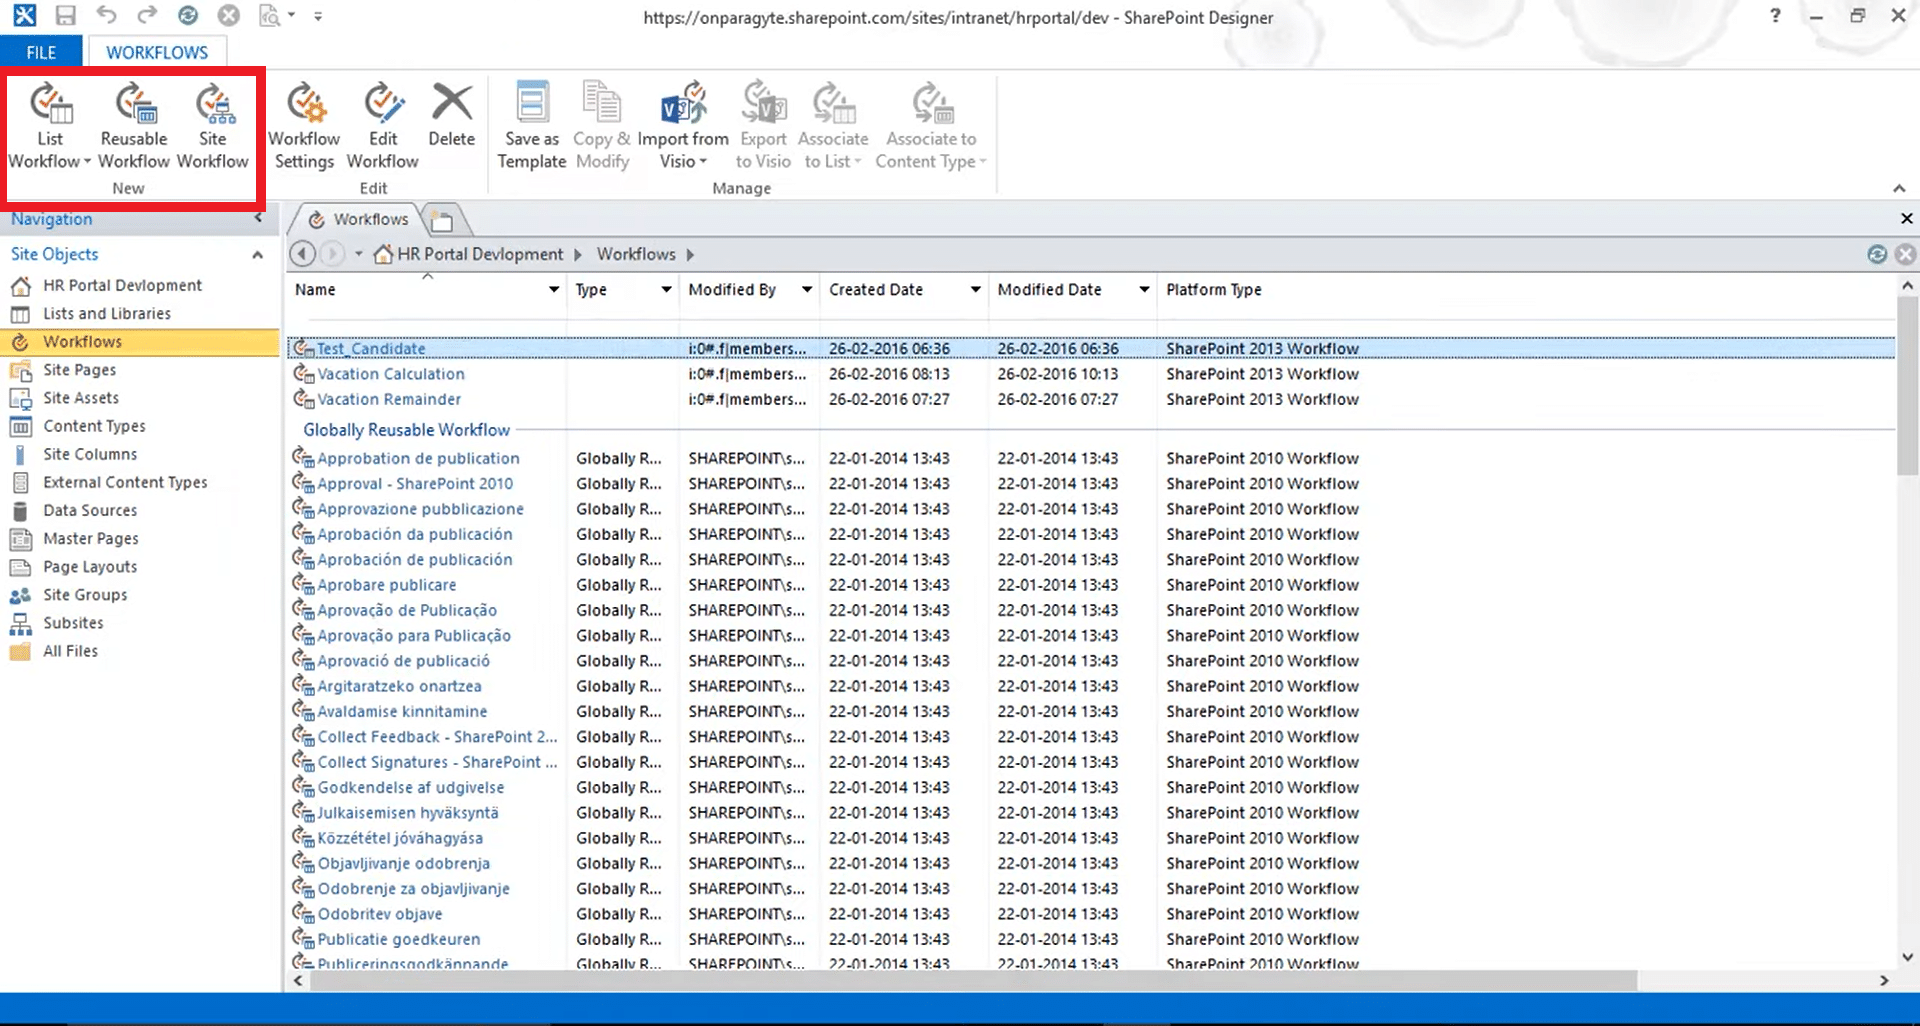
Create a List Workflow: Navigate to the desired list or library. In the Workflows tab, click on the List Workflow button and choose the list or library you want to create the workflow for. Type in a name for your workflow and click Create.
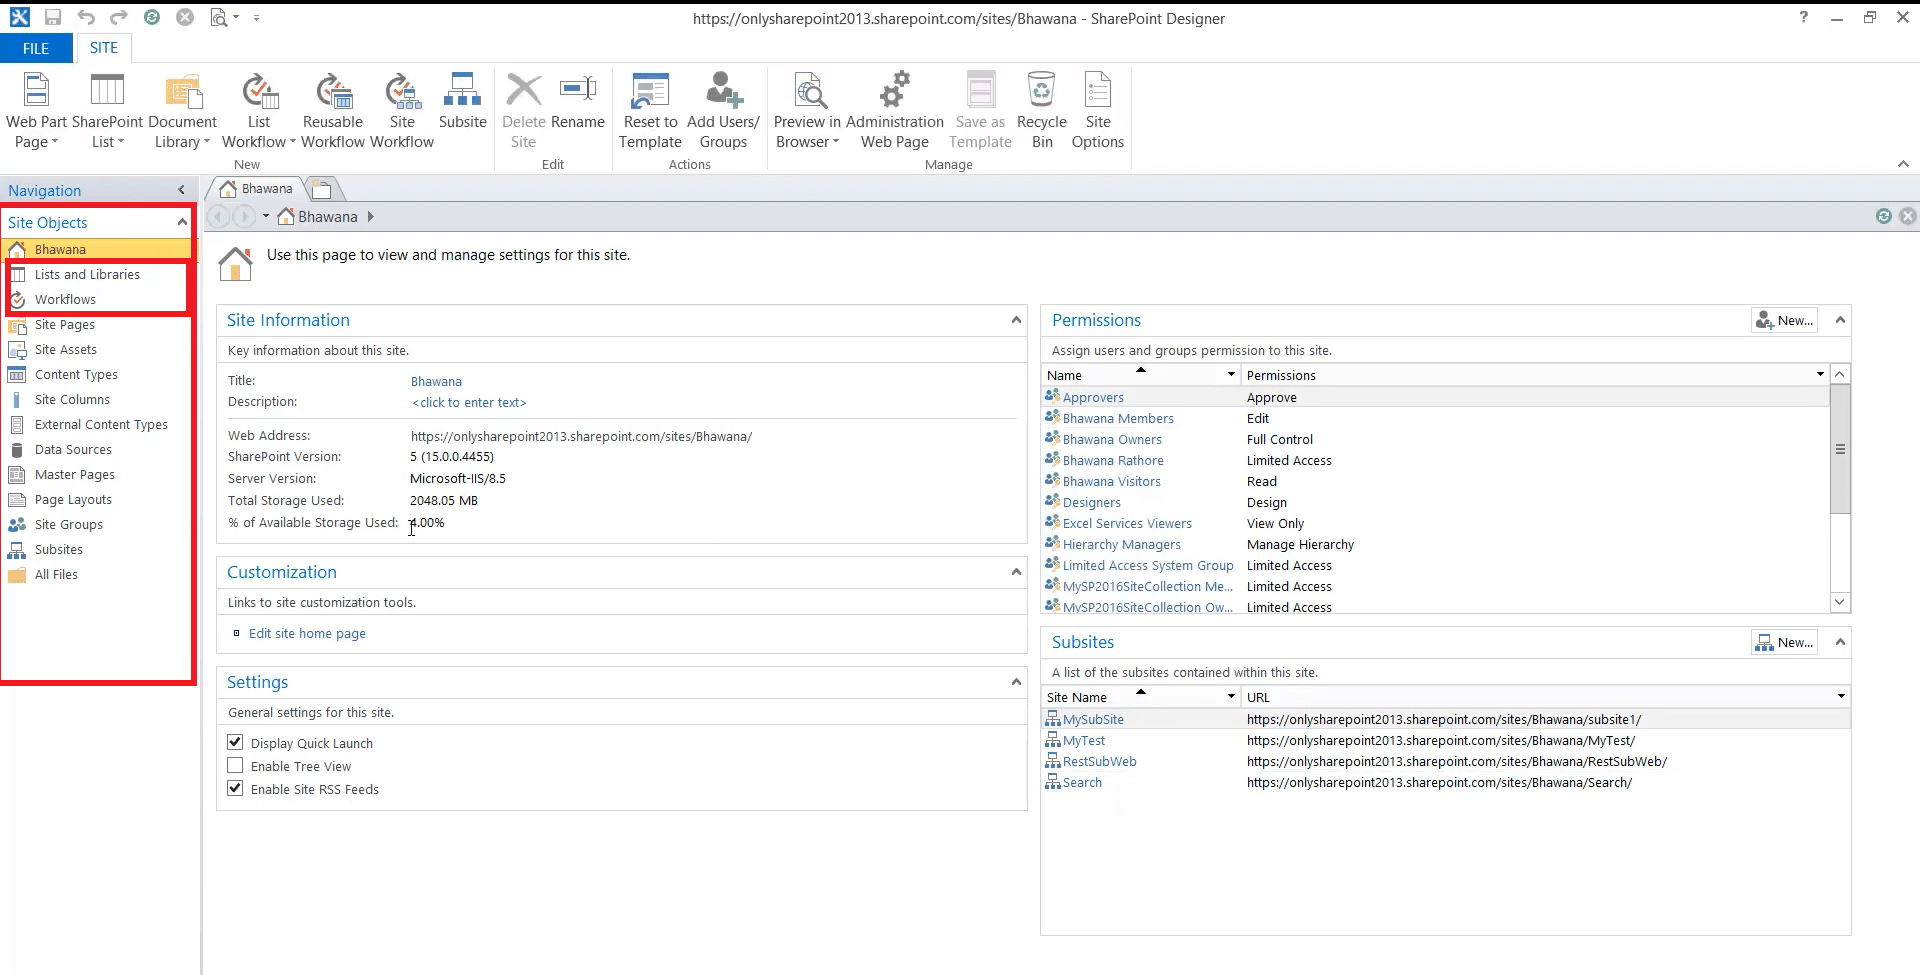
Design the Workflow: Design the workflow using the visual editor. You can create various types of workflows, including sequential, state machine, and reusable workflows.
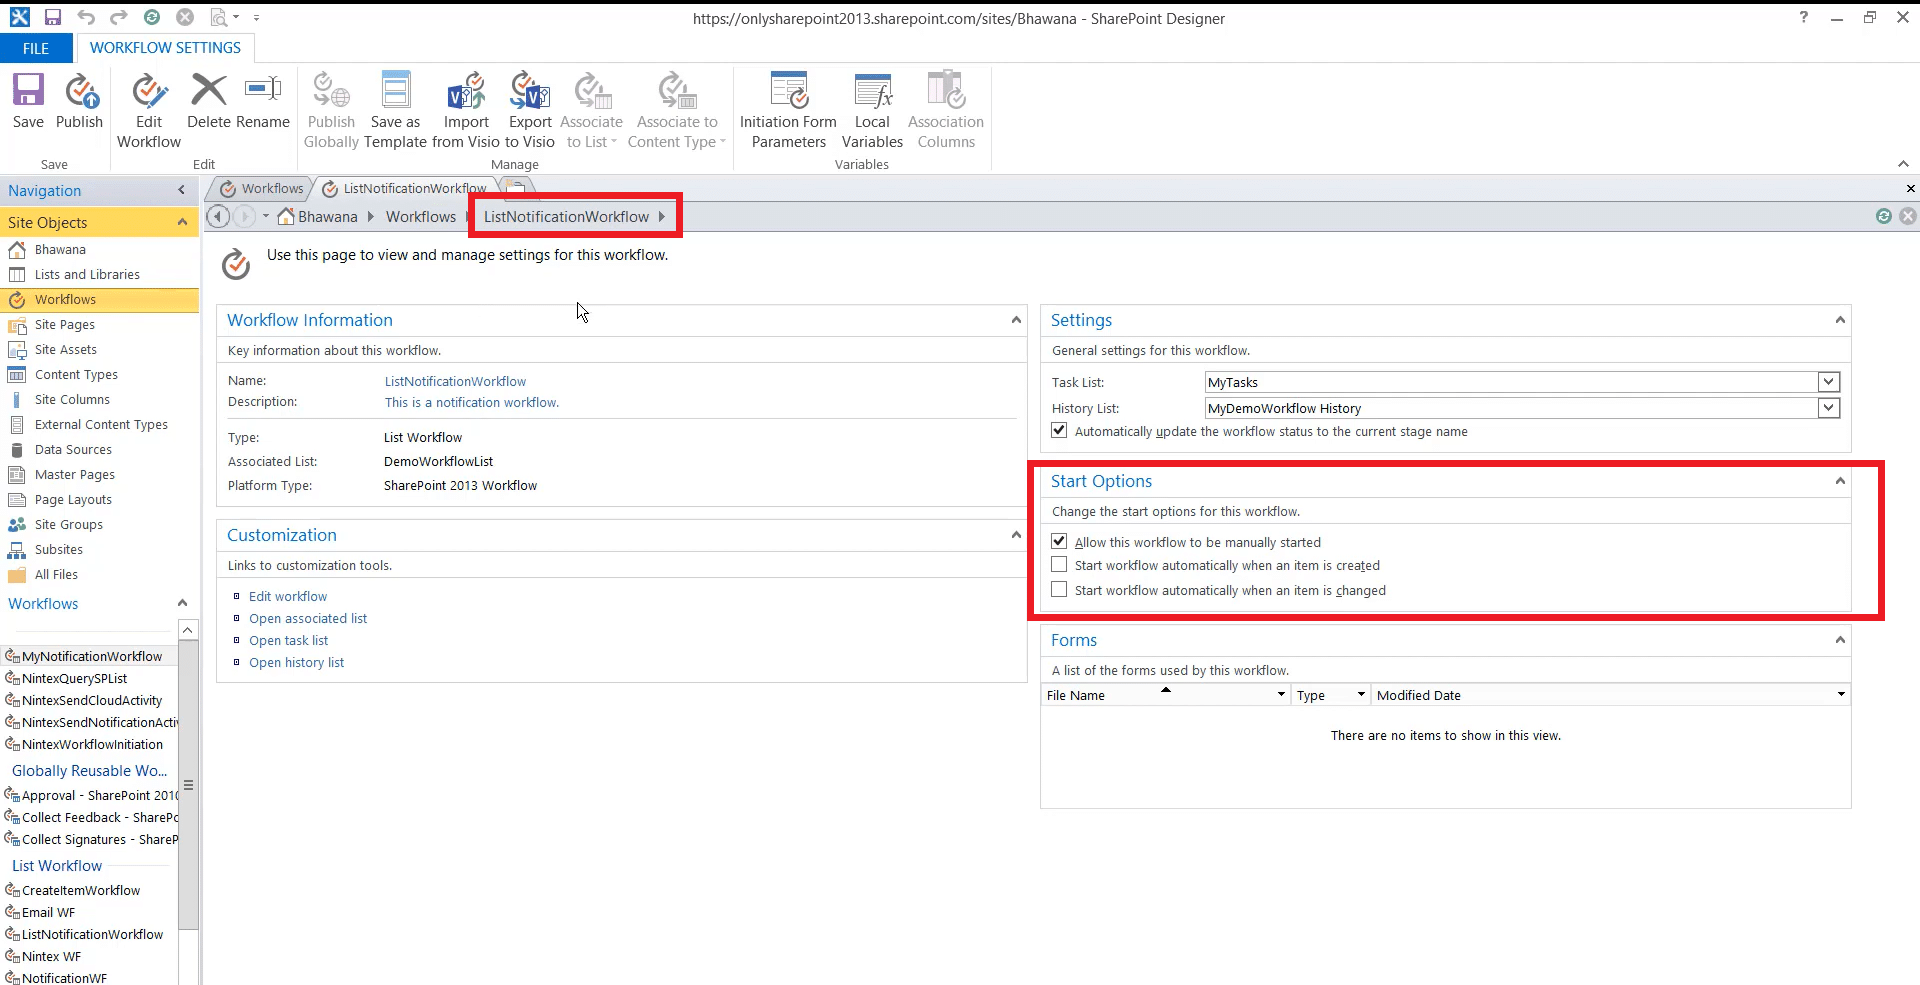
Configure Workflow Settings: After designing the workflow, configure its start options and advanced settings. You can choose to start the workflow yourself or set it up to begin automatically when certain things happen, like when an item is created or changed.
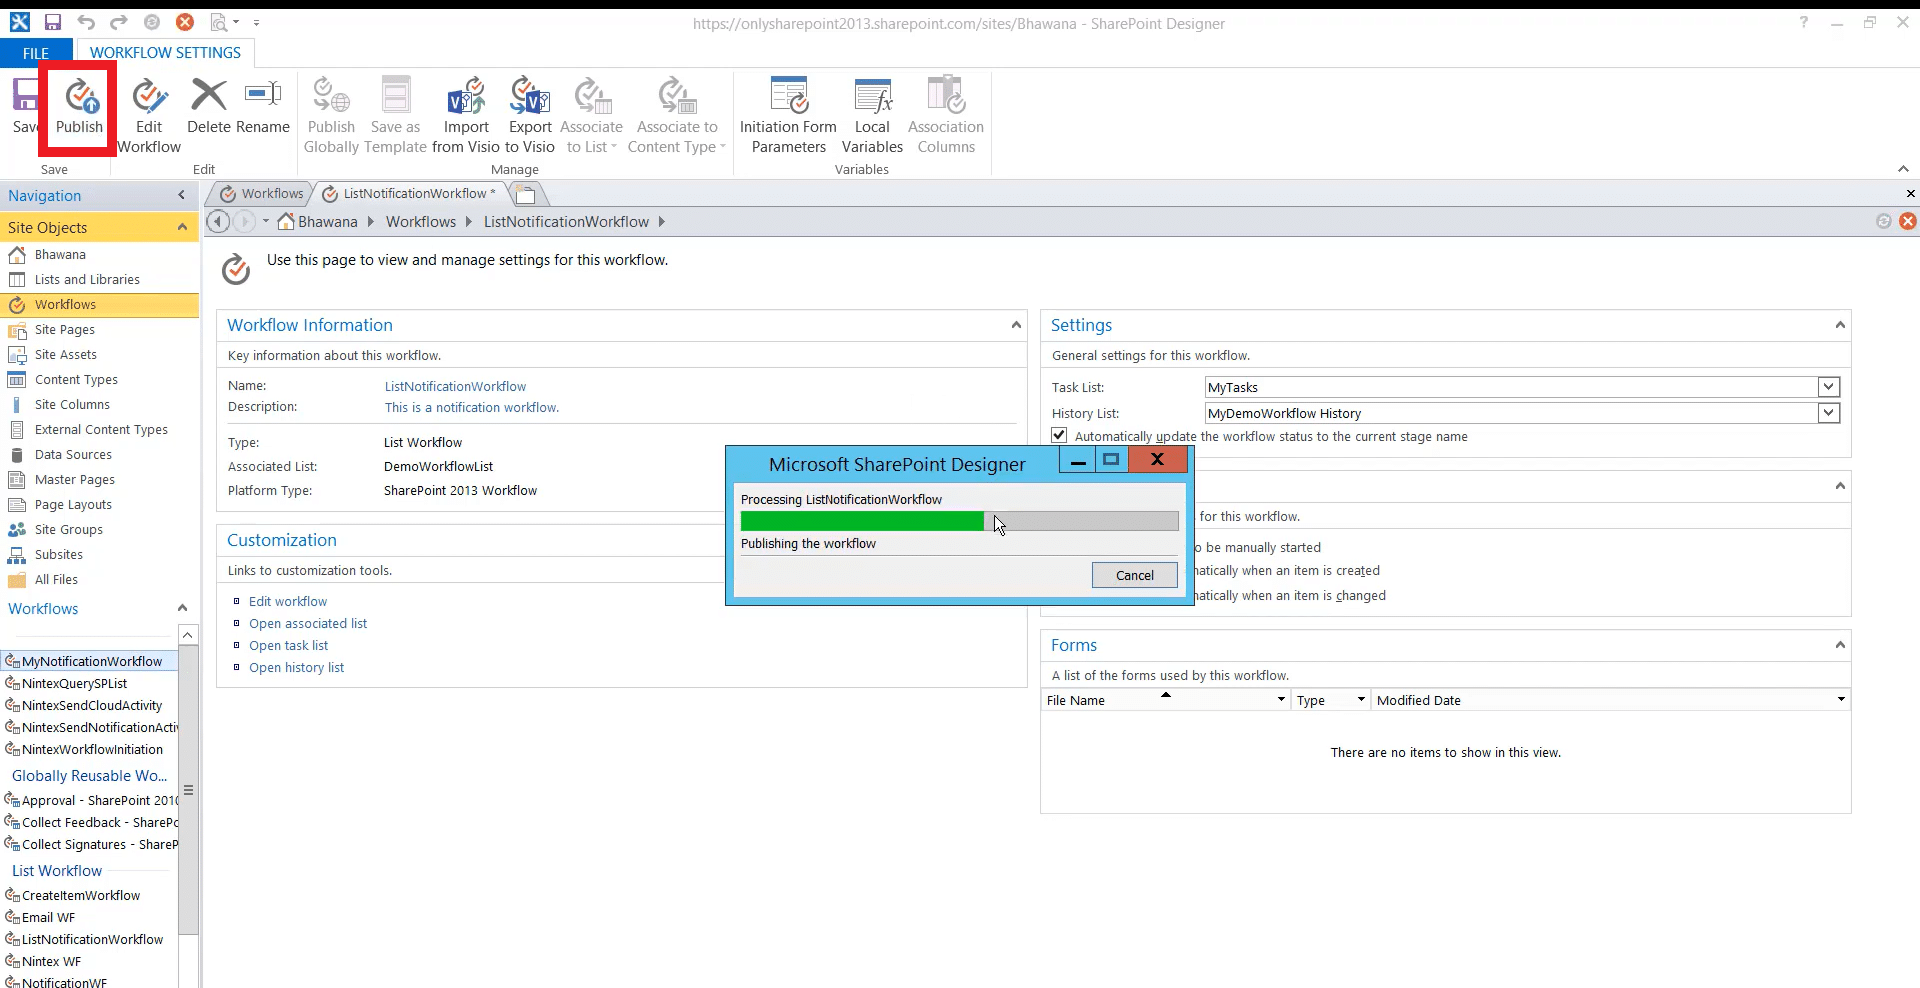
Save and Publish: Once the workflow is designed and configured, click the Save and Publish buttons in the toolbar. This will save your changes and make the workflow accessible to users on your site.
Aside from SharePoint Designer, it’s also possible to develop workflows using Power Automate.
Method 2: Power Automate
Power Automate is a useful tool designed to enhance workflow efficiency in SharePoint. This platform is deeply integrated with SharePoint and offers more than 100 customizable templates.
Additionally, its integration with third-party tools such as Google, Microsoft, and Slack makes it a powerful bridge between diverse systems.
To create a workflow in Power Automate:
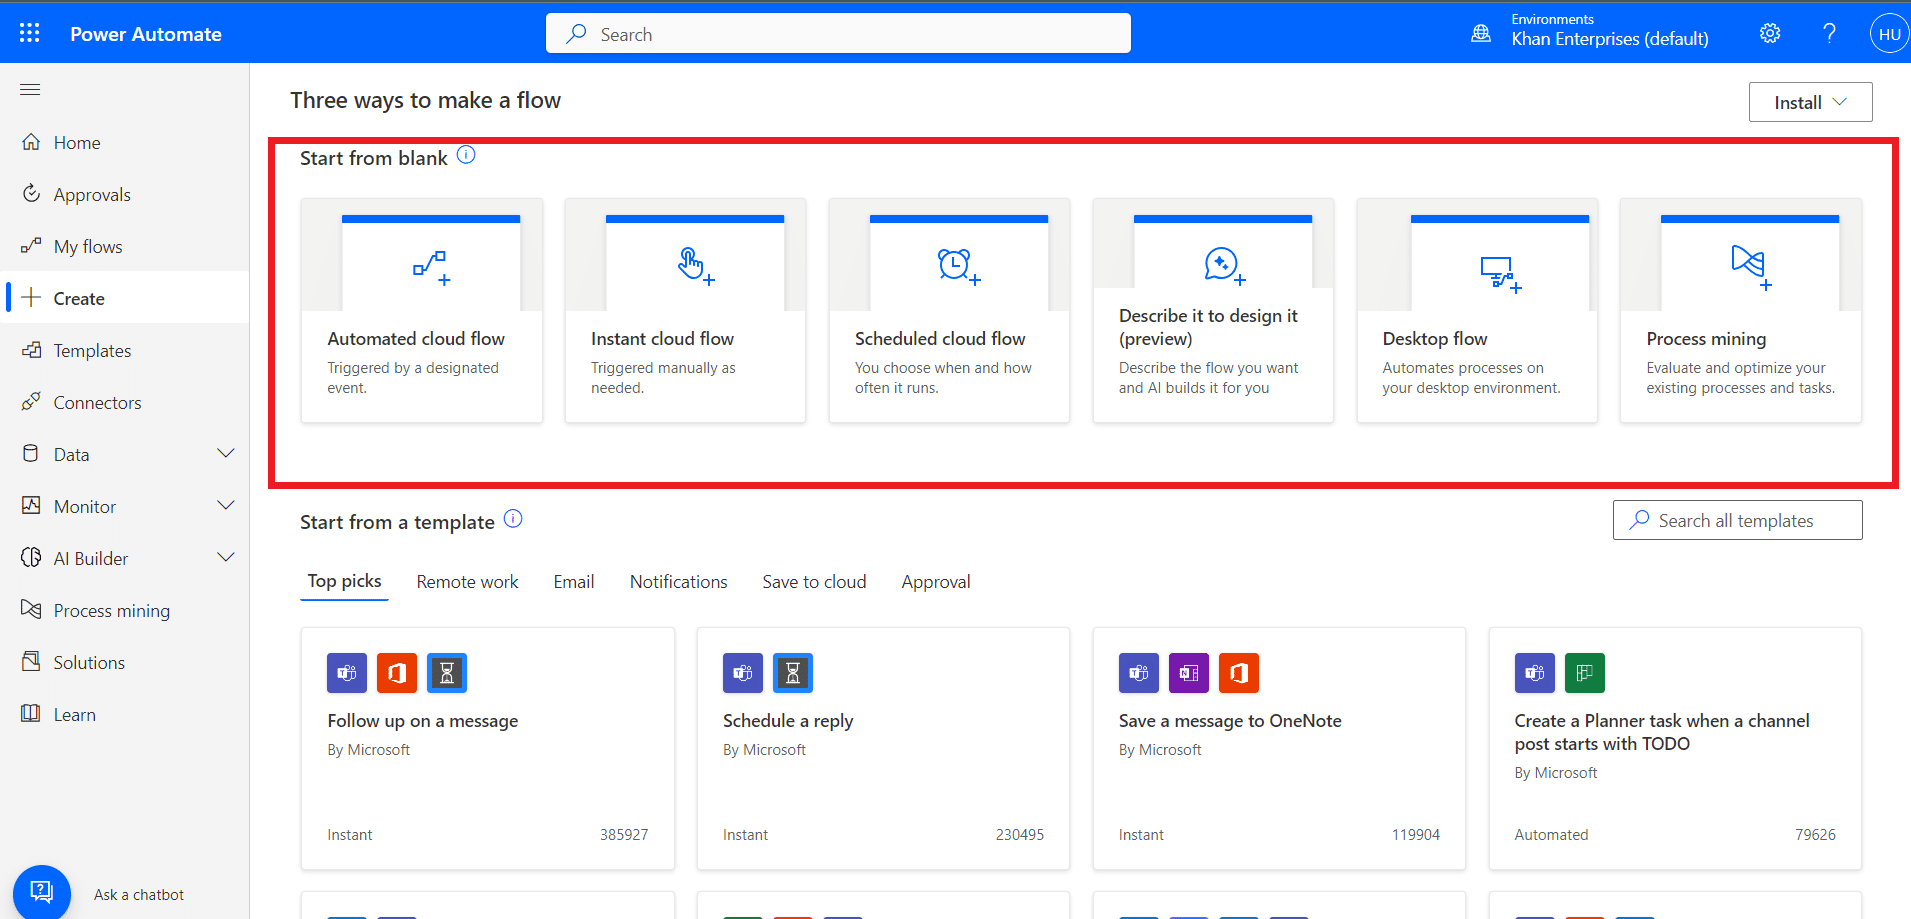
Log into Power Automate: Access your account.
Start a New Flow: Choose Create and select the type of flow (like automated, instant, or scheduled).
Set a Trigger: Pick a SharePoint trigger, like ‘When an item is created’ or ‘When an item is modified’.
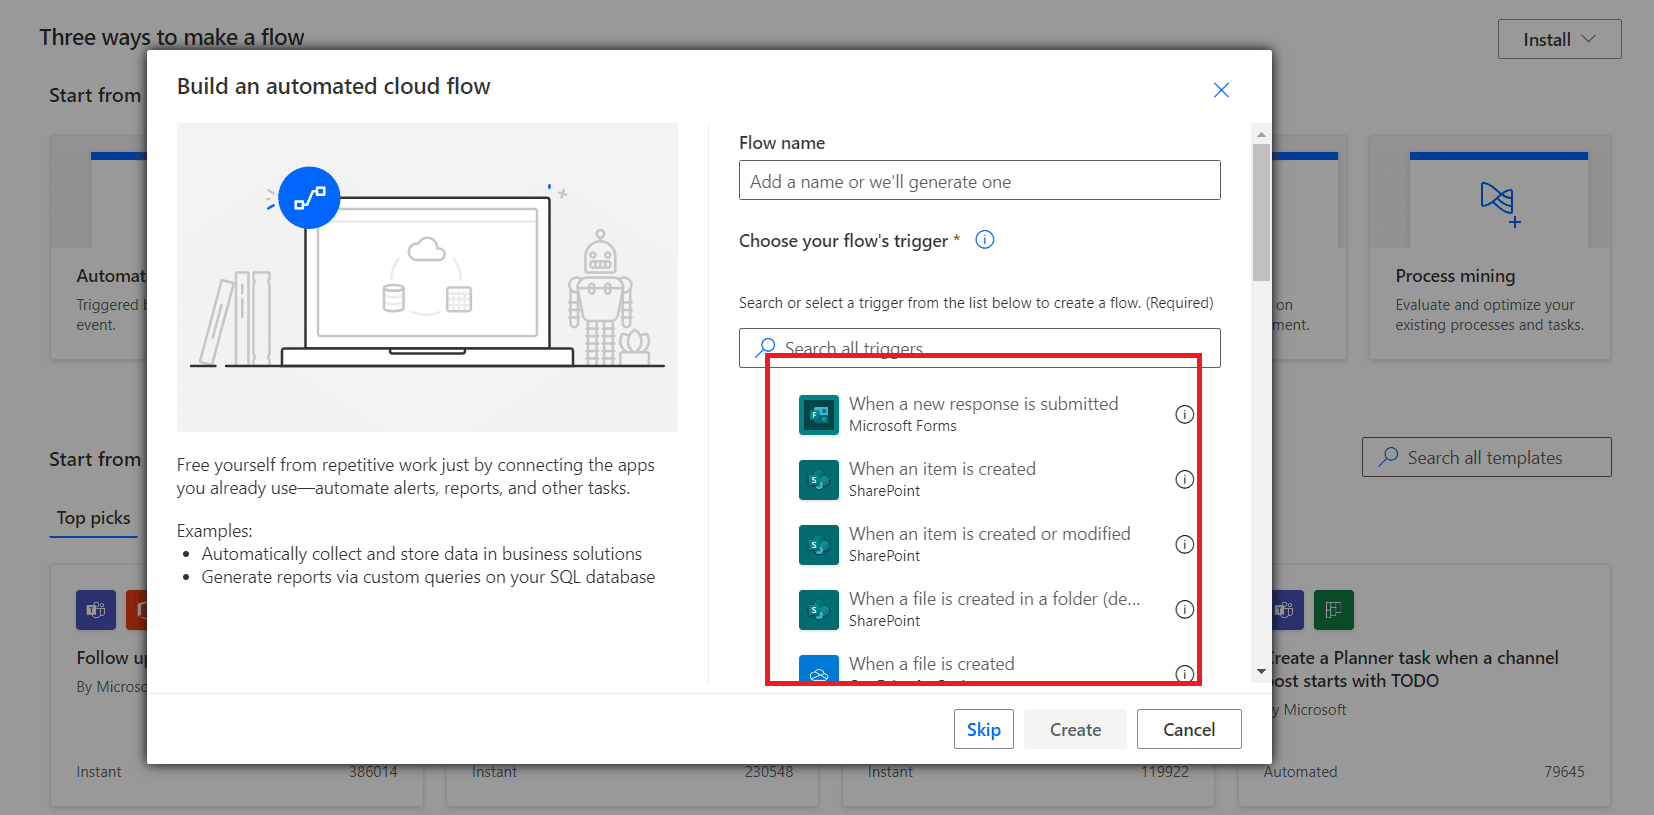
Define Trigger Details: Specify the SharePoint site and list or library.
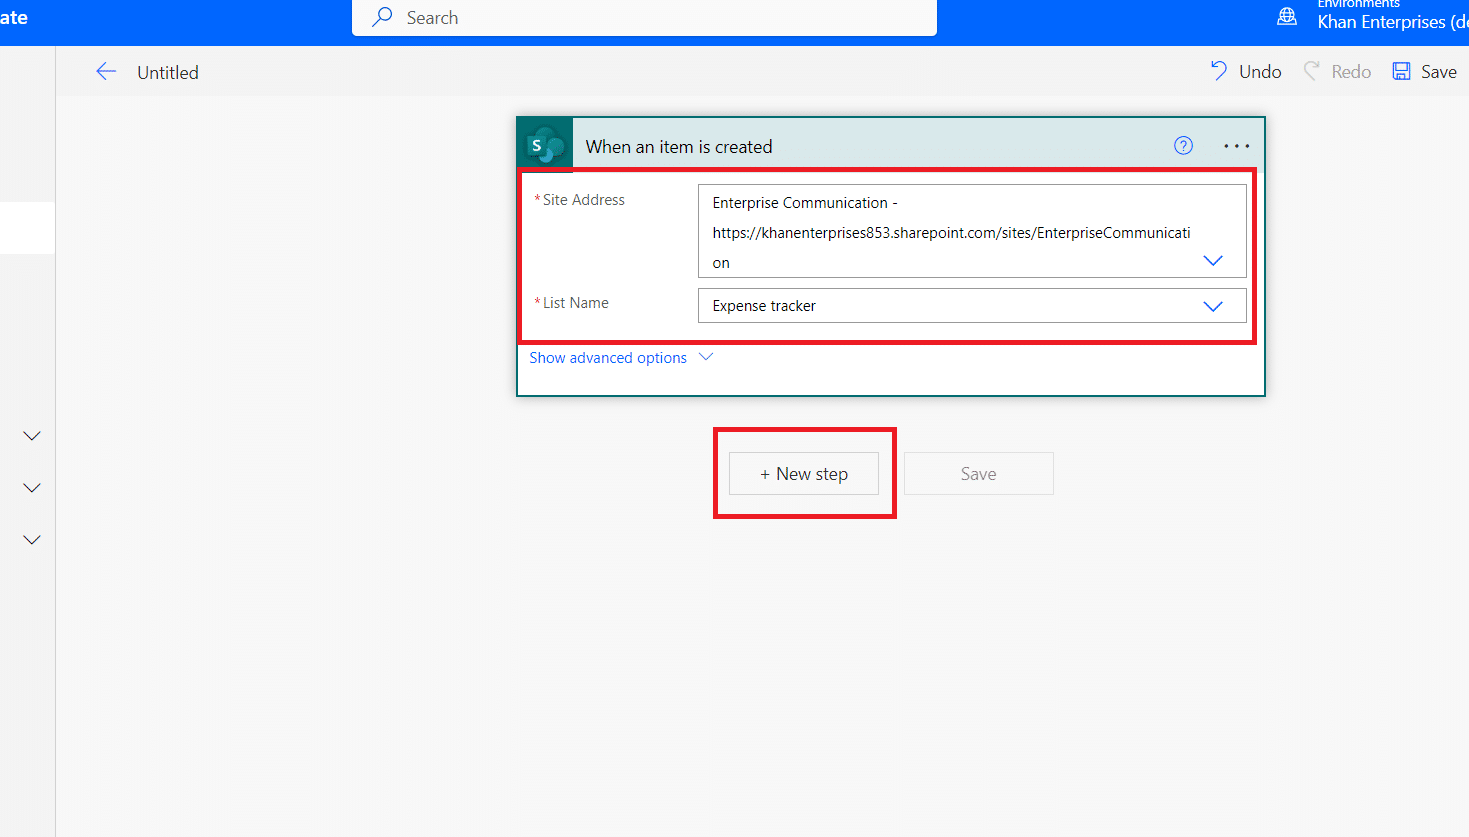
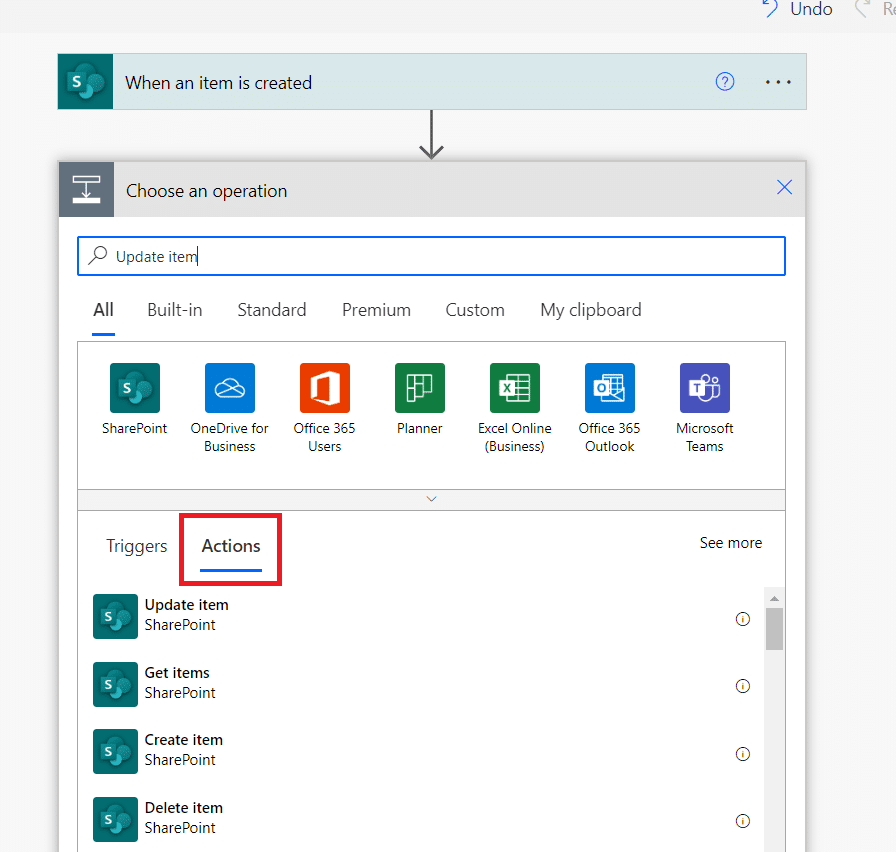
Add Actions: Insert steps the workflow should take, like sending an email or updating a list item.
Configure Each Action: Set the parameters for each action based on what you need (e.g., recipient for an email).
Add Conditions (Optional): If needed, set conditions for actions to happen (like ‘If status equals approved’).
Save Your Workflow: Ensure everything is set up as needed.
Test the Workflow: Run a test to make sure it works as intended.
This tool greatly boosts workflow efficiency in SharePoint. Using this tool, you can better track tasks, get timely notifications, and monitor progress. All saving time and boosting productivity.
Use this to become an expert in flow creation with Power Automate:
You can also use the Power Automate tool within the SharePoint interface.
Method 3: SharePoint Interface
Creating a SharePoint workflow directly within the SharePoint Online interface offers a straightforward way to automate your business processes.
To create a workflow directly in SharePoint:
Access Your SharePoint Online Site: Log into the site where you want to create the workflow.
Navigate to the List or Library: Go to the specific list or library where the workflow will be applied.
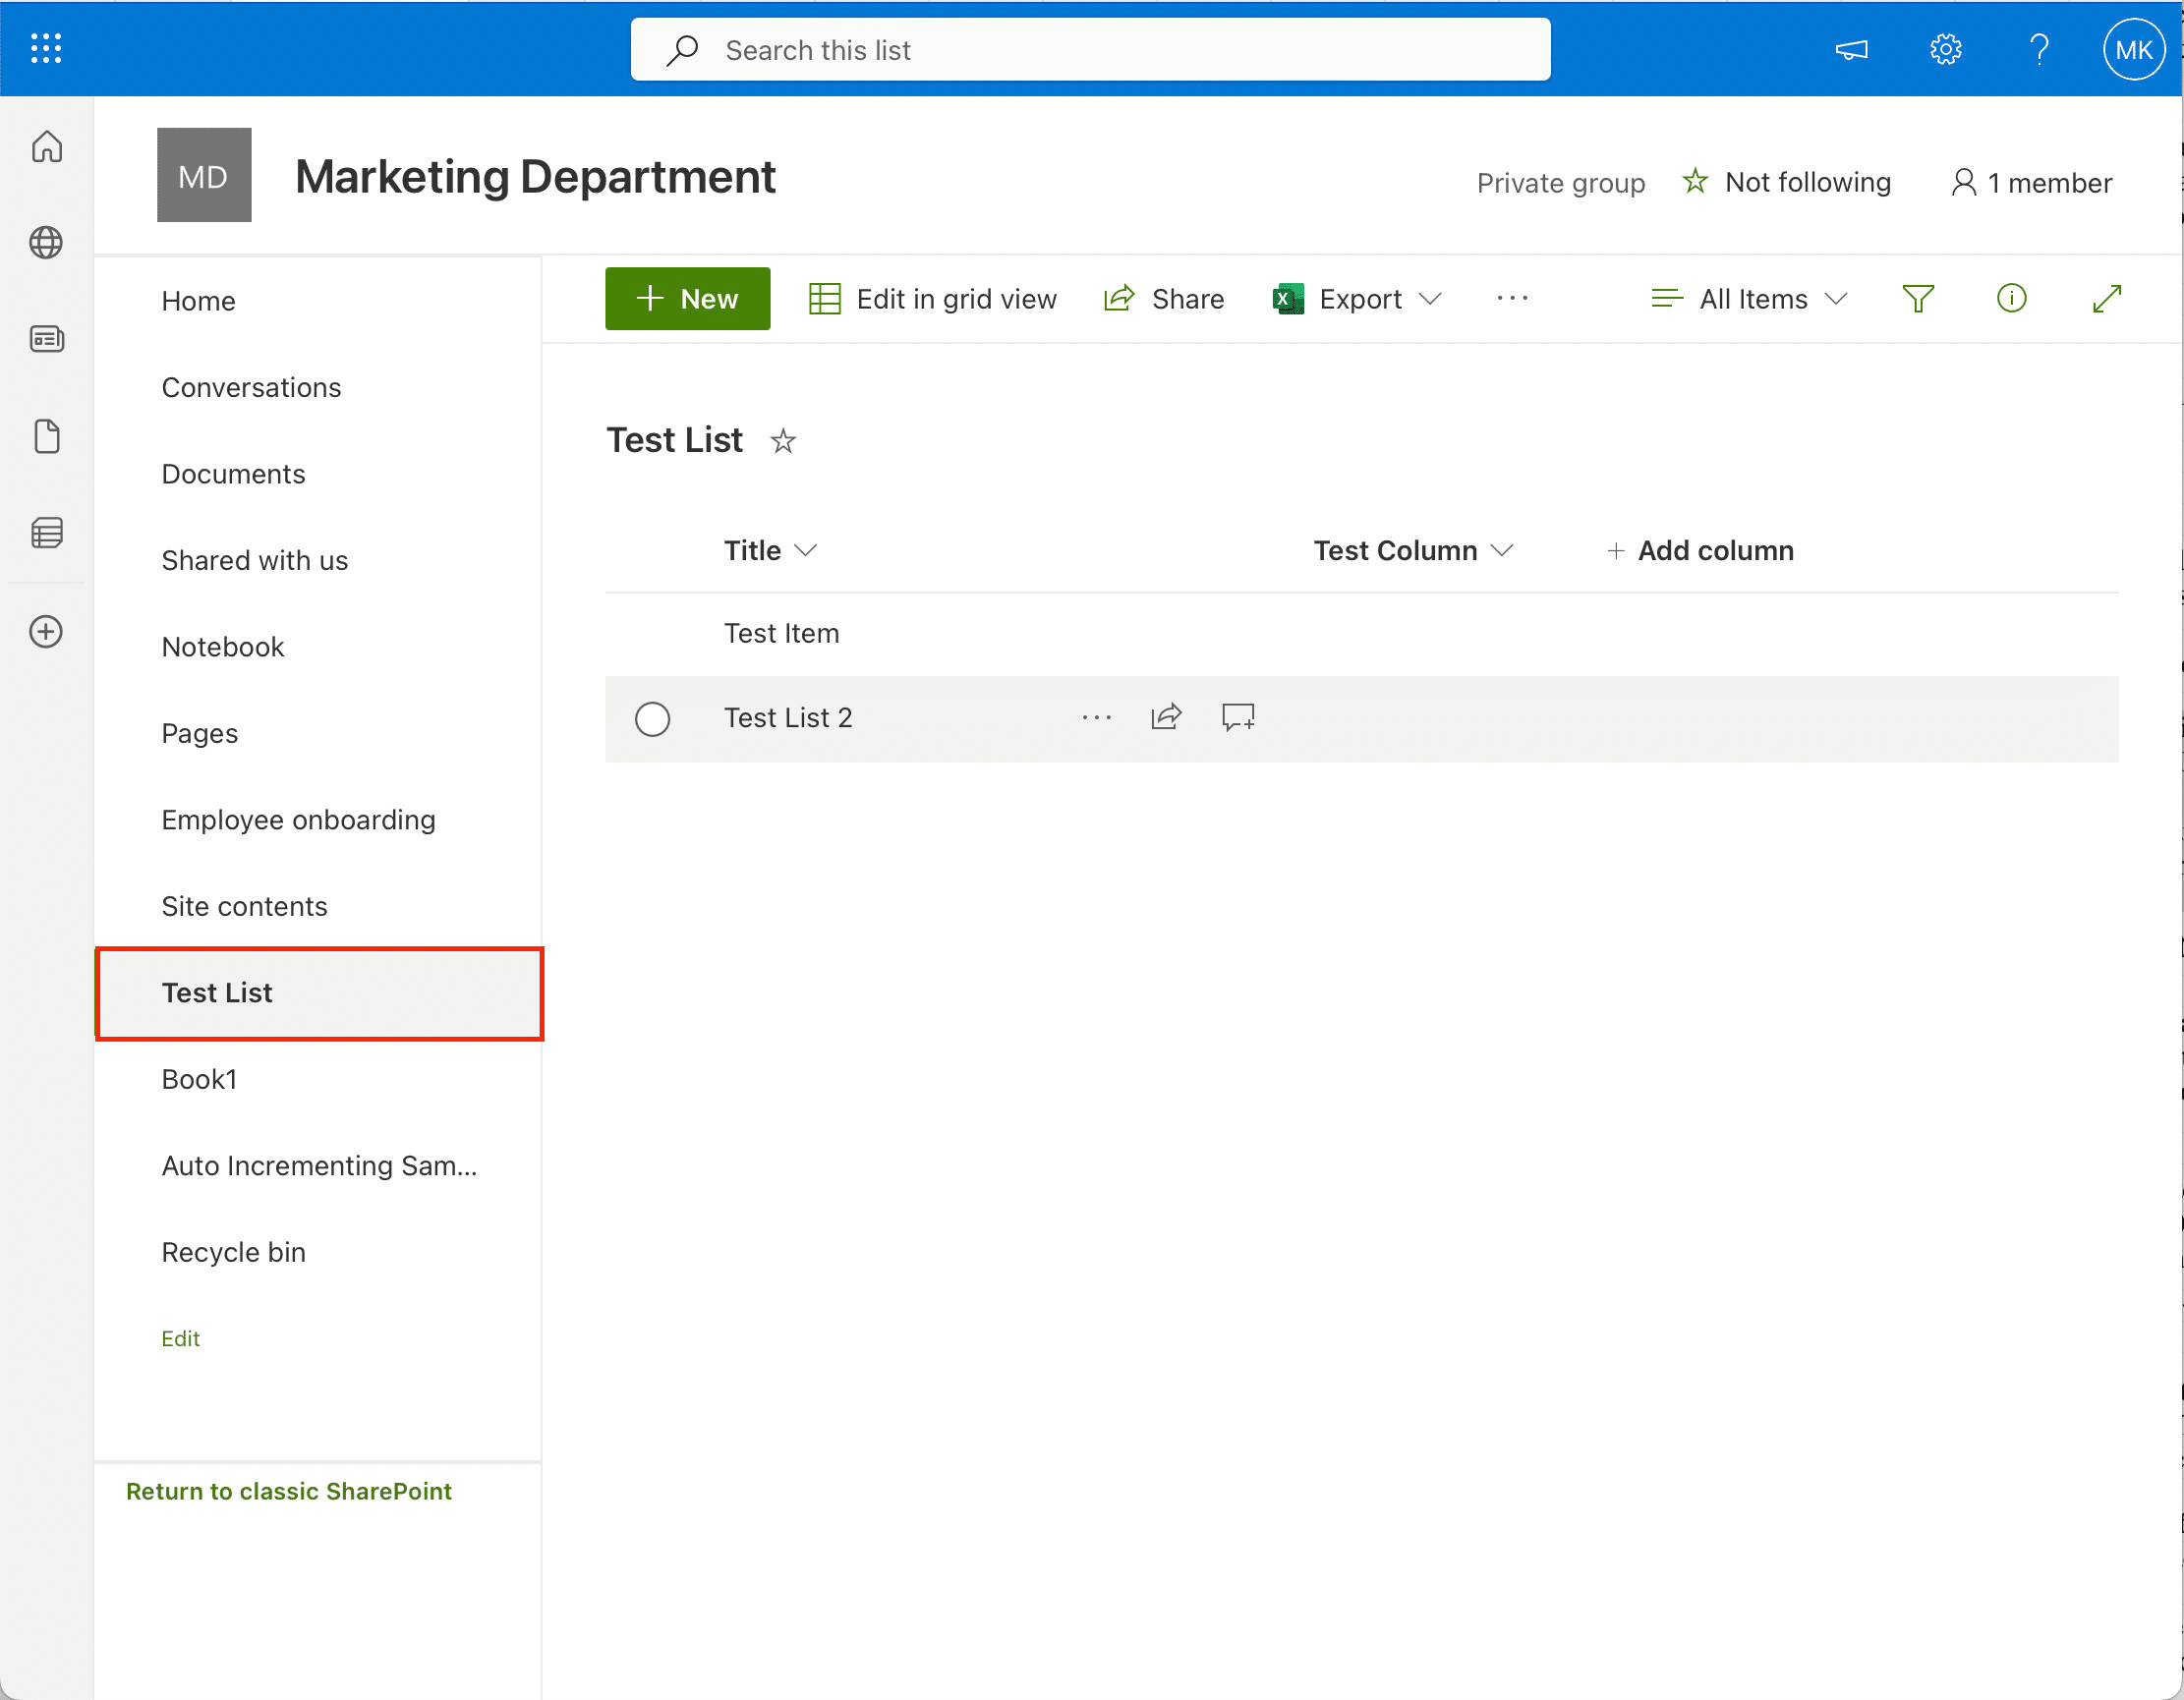
Open Workflow Settings: Click on Integrate or Automate in the toolbar options. Select Power Automate and click on Create a flow.

Select a Workflow Template: Choose from available templates (like SharePoint approval workflow, SharePoint signature workflow, or SharePoint feedback workflow).
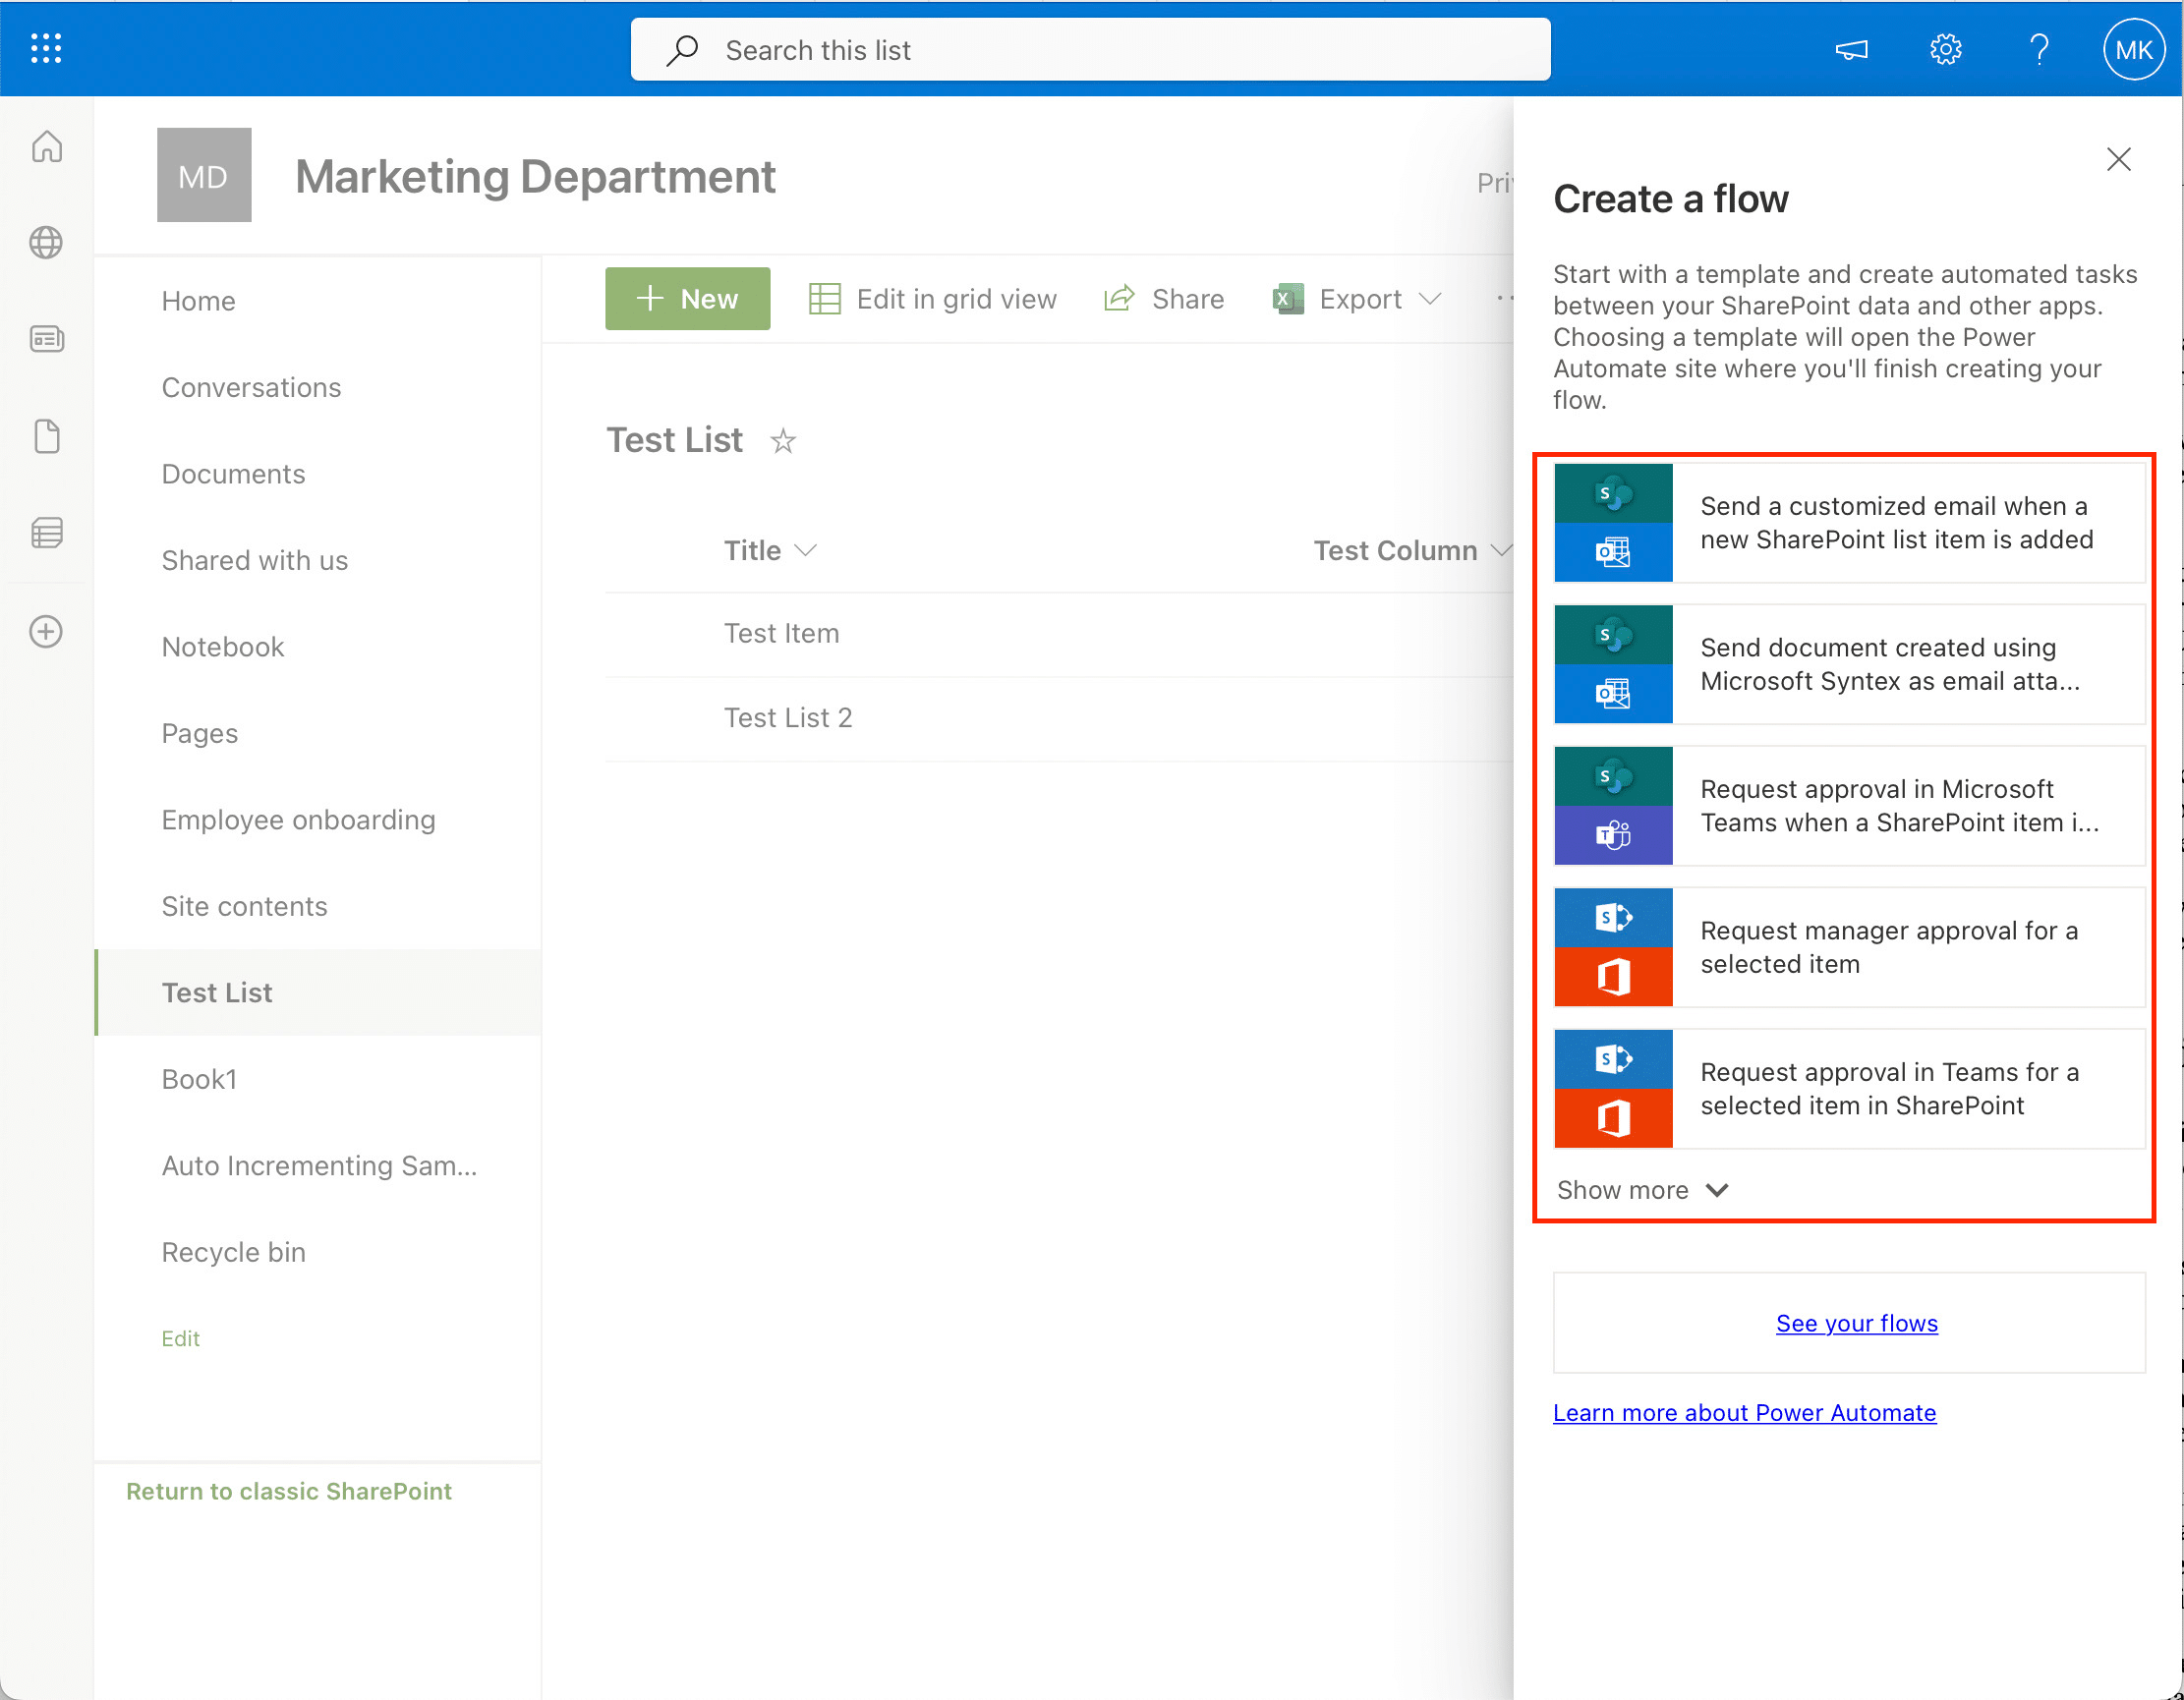
Configure Workflow Options: Name your workflow and set up the basic parameters, like workflow start conditions and task options.
Add Customization (If Needed): Customize the workflow steps according to your process, if the template allows.
Save and Publish: Save your settings and publish the workflow to make it active.
Test the Workflow: Run a test to ensure it functions as expected in your SharePoint environment.
These simple steps enable you to use SharePoint effectively for automating and streamlining your processes.
There is still one more effective tool you can use to create custom workflows: Visual Studio.
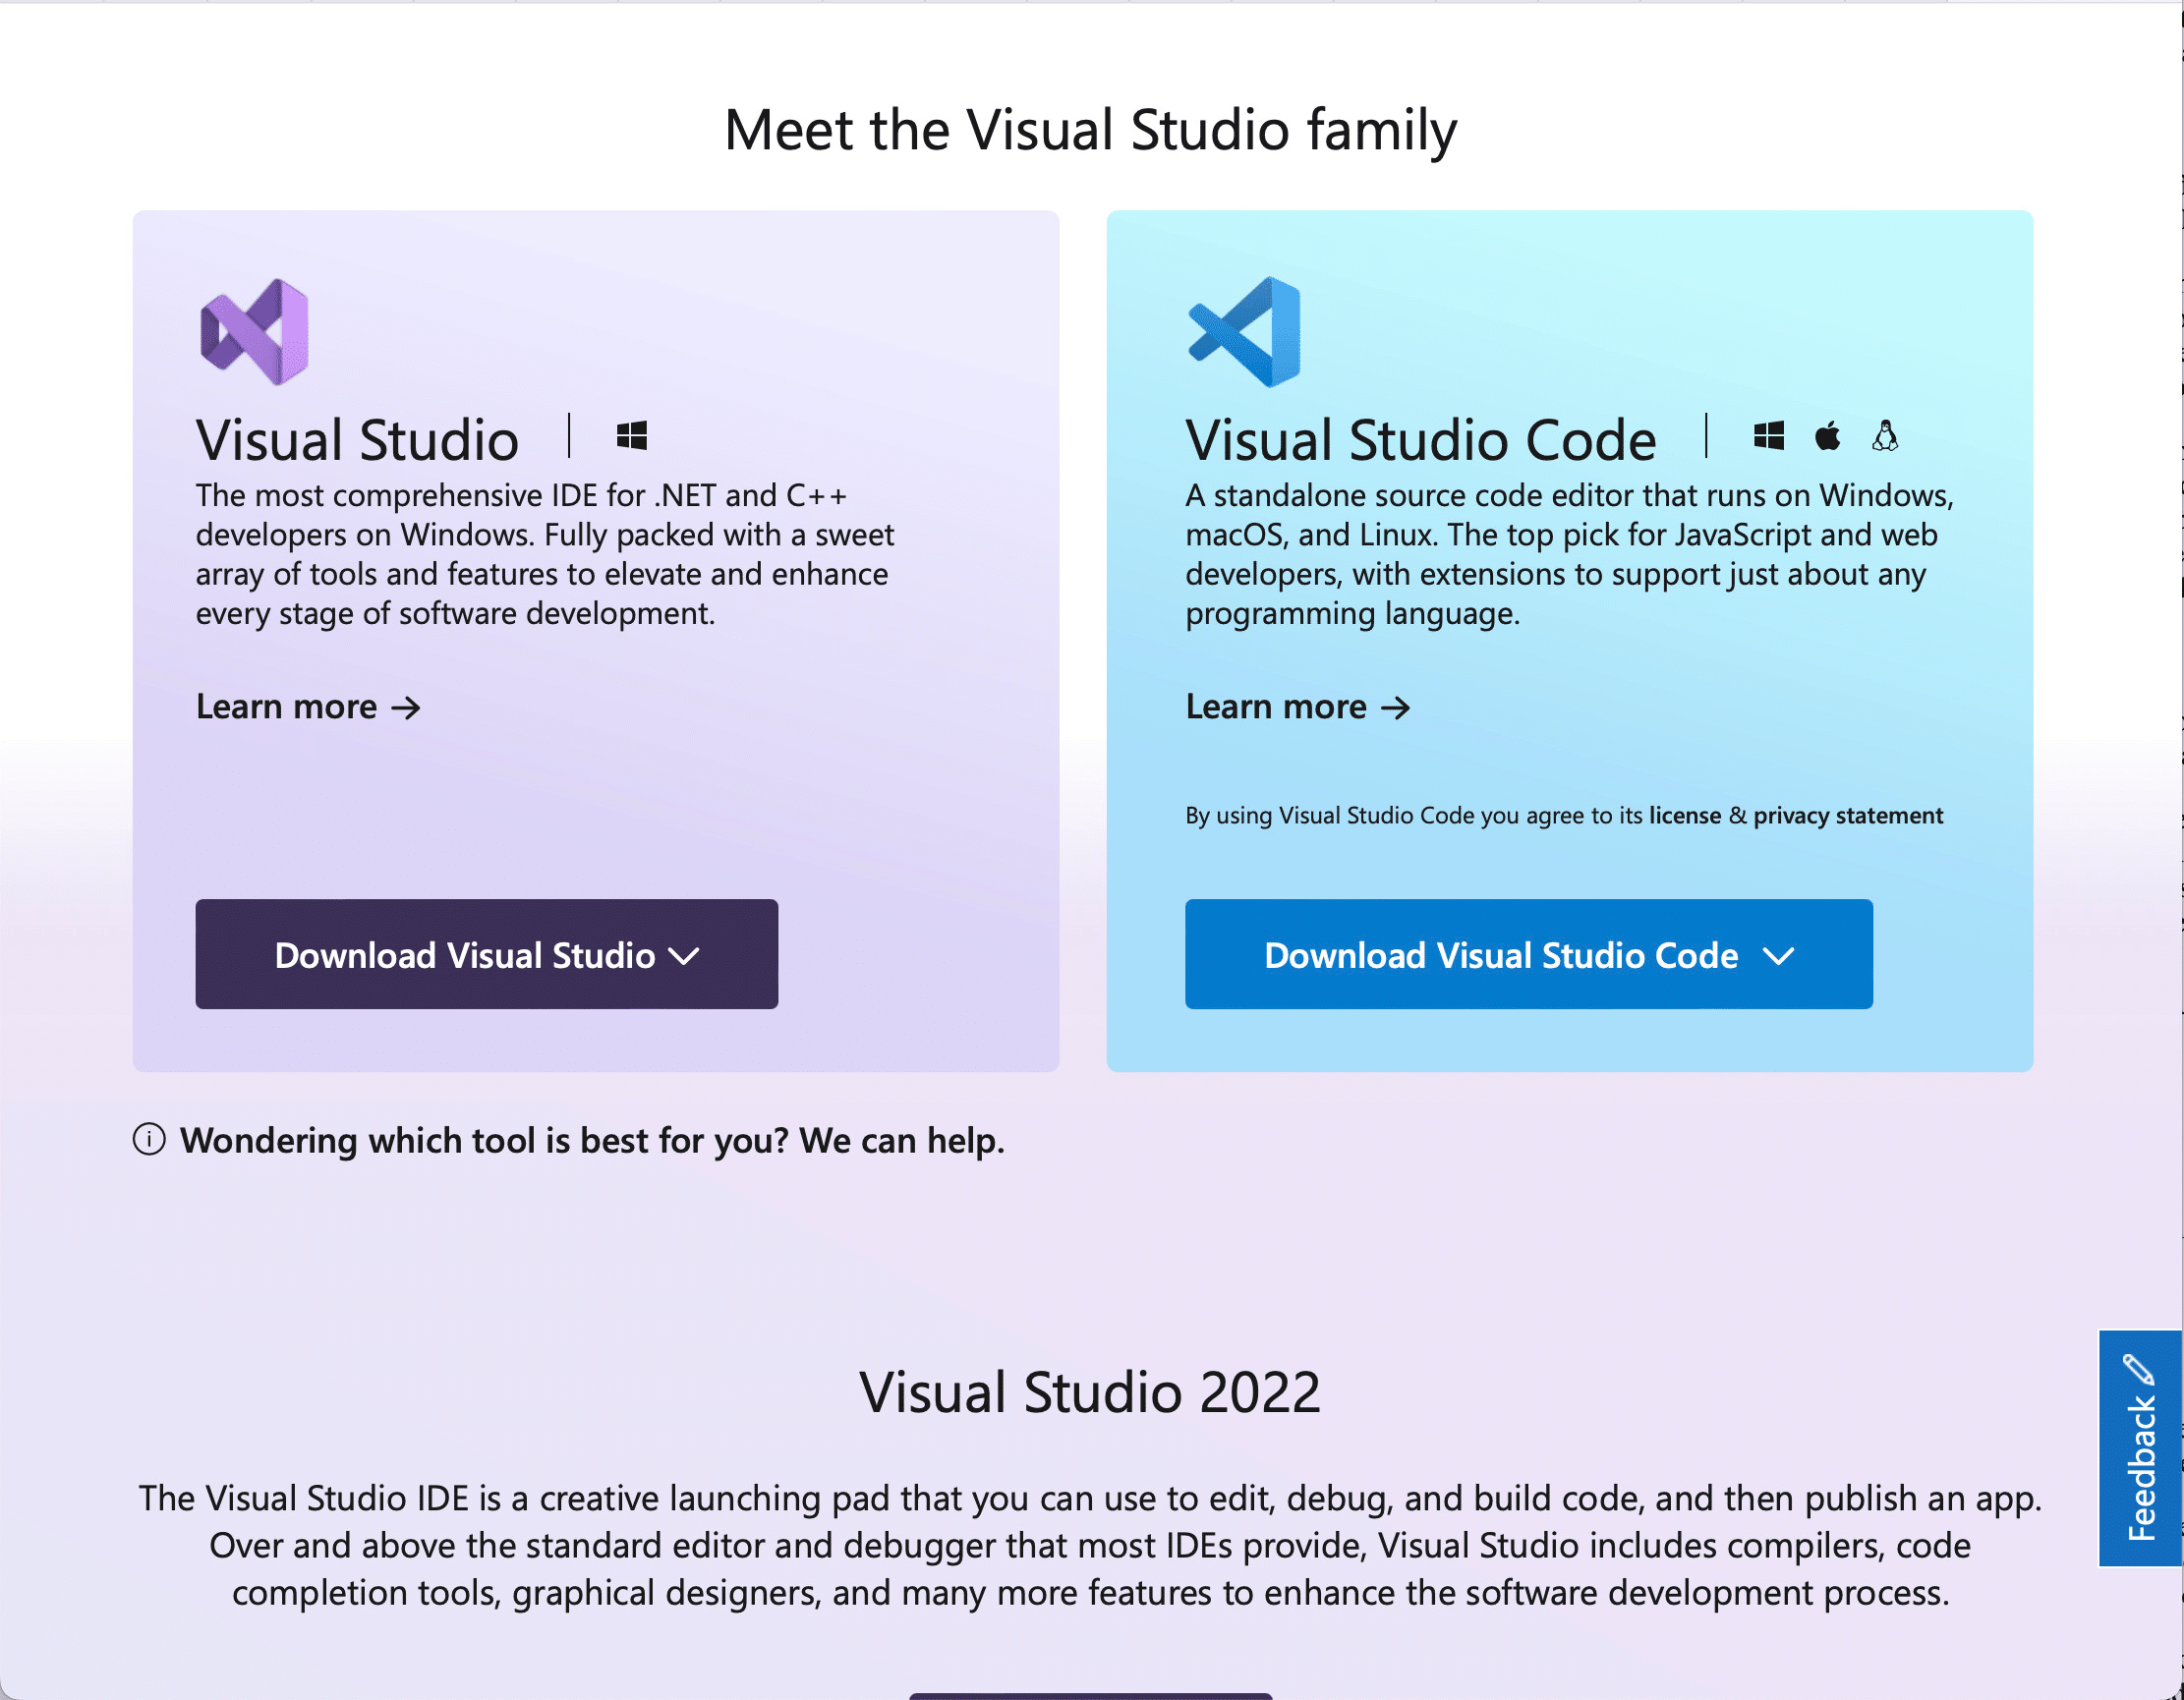
Method 4: Visual Studio
For those who need a more customized and powerful workflow in SharePoint, Visual Studio offers an advanced solution.
This approach is ideal for developers or those with programming knowledge who require granular control over their workflows.
To use Visual Studio to create a workflow:
Open Visual Studio: Launch Visual Studio on your computer.
Create New Project: Select New Project and choose a SharePoint Workflow template.
Configure SharePoint Site: Specify the target site for the workflow.
Design Workflow: Use Visual Studio’s designer or code editor to build the workflow logic and steps.
Deploy Workflow: Right-click the project and select Deploy to install the workflow on your SharePoint site.
Test and Debug: Test the workflow in SharePoint and use Visual Studio’s debugging tools to troubleshoot any issues.

By following these steps, you have laid the groundwork for a sophisticated SharePoint workflow using Visual Studio. Remember, the effectiveness of your workflow hinges on thorough testing and debugging. So take the time to refine and perfect it for optimal performance in your SharePoint environment.
Troubleshooting Common Issues in SharePoint Workflows

When working with SharePoint workflows, you might encounter some typical issues. Here’s a quick guide to identifying and resolving the most common problems:
Workflow Not Starting: This can be due to permission issues or incorrect triggers. Check the workflow settings and ensure the user has the necessary permissions.
Errors in Actions and Conditions: Incorrectly configured actions or conditions can cause errors. Review your workflow logic and settings for any inconsistencies or mistakes.
Performance Optimization: Long-running or complex workflows might slow down your system. Simplify the workflow or break it into smaller parts to improve performance.
Compatibility and Upgrade Considerations: If upgrading SharePoint, ensure your workflows are compatible with the new version. Test them in a staging environment before going live.
Understanding and addressing these common issues will help keep your SharePoint workflows running smoothly and efficiently.
Final Thoughts
In this guide, we’ve explored the essentials of creating and managing SharePoint workflows. With knowledge of various workflows and how to handle common issues, you’re set to efficiently streamline your business processes.
Remember, practice and experimentation are key. As you get more comfortable with SharePoint, you’ll be able to customize workflows more effectively and enhance productivity.

Happy workflow creating!
Frequently Asked Questions
What is a workflow in SharePoint?
A workflow in SharePoint is a predefined sequence of tasks or actions that streamline and automate business processes. It streamlines the flow of documents and tasks between people, ensuring efficient collaboration with less manual effort. SharePoint workflows enhance productivity by automating routine tasks, notifications, approvals, and data routing.
How to create a workflow?
To create a workflow, please follow:
1. Navigate to the desired list or library in SharePoint.
2. Click on “Power Automate” to create a new workflow.
3. Design the workflow using triggers, actions, and conditions in a visual interface, specifying the automation steps as needed.
How do I manually start a workflow in SharePoint?
To manually start a workflow, one needs to select the workflow from an available list of workflows for the document or item. Please note there can be a prompt to fill out a form with the workflow information. Depending on its design and configuration, customization options for the workflow will be available.
How does workflow work?
A workflow functions by automating a sequence of tasks or actions based on predefined triggers and conditions. When a trigger event occurs, such as a document upload, the workflow is initiated. It then progresses through defined steps, executing actions, sending notifications, and making decisions. This is based on set conditions, ultimately guiding a business process from start to completion.
What are the different types of SharePoint Workflows?
SharePoint offers three primary types of workflows:
Sequential Workflow: Tasks are completed in a linear sequence, ideal for processes requiring specific order and coordination.
State Machine Workflow: Progresses through defined states and transitions based on conditions, suitable for complex processes with branching paths.
Three-State Workflow: Manages simple tracking and approval processes by categorizing items into “In Progress,” “Approved,” or “Rejected” states.


