
Creating a document library in SharePoint Online is an essential skill for effectively managing your team’s documents and making collaboration seamless.
As a core feature of SharePoint, document libraries provide a central location for storing, organizing, and sharing files for your team to access and collaborate on.
To Create a Document Library in Sharepoint Online:

- Open the SharePoint Online team site where you want to create the document library.
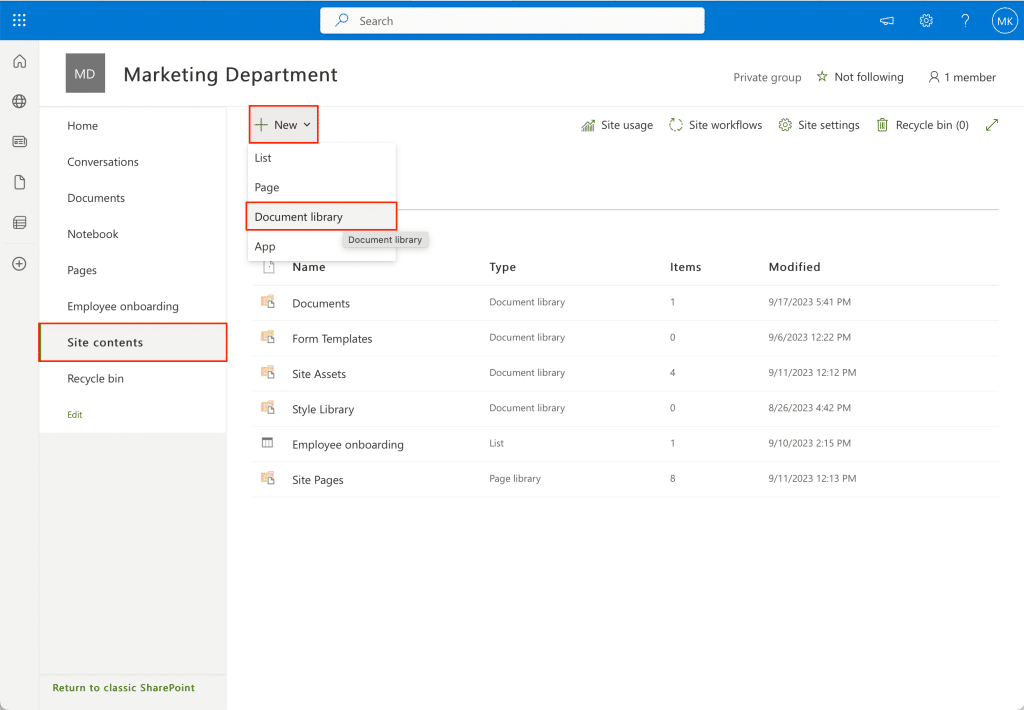
- Click on Site Contents page in the navigation menu bar.
- Click on the +New button and select Document Library.
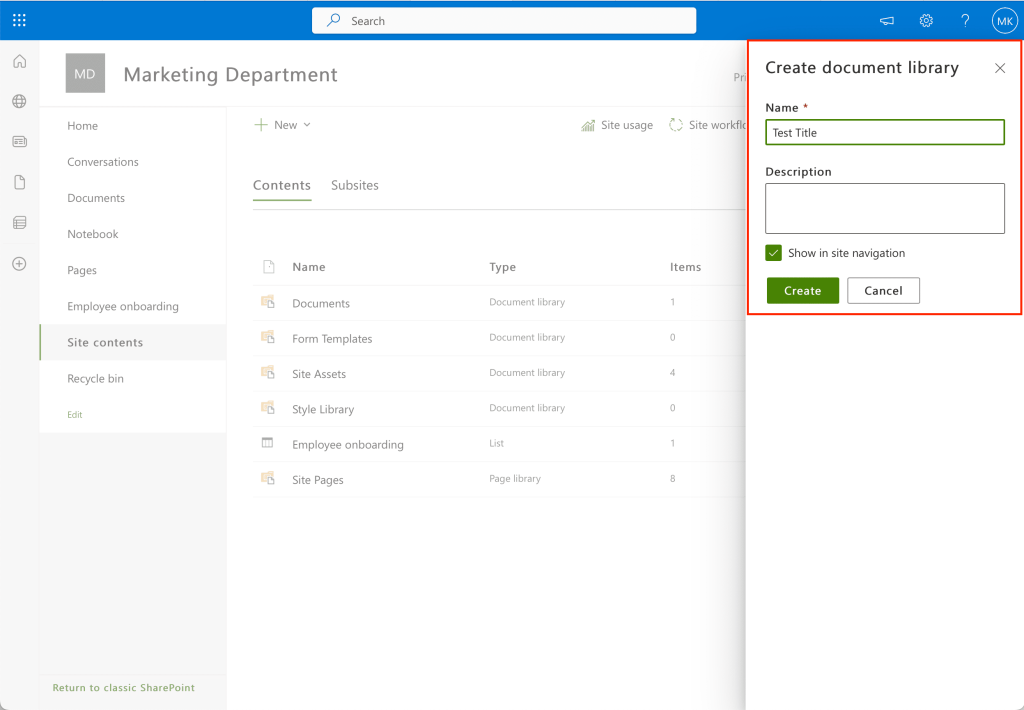
- Enter a name for your document library, and add a description if desired.
- Click Create to finalize the creation of your library.
With SharePoint Online, your team’s files and documents will be more organized and accessible than ever before. As you build your document library in SharePoint Online, you can customize it to fit your team’s specific needs.
Now, let’s dive into the process of creating your own document library in SharePoint Online.
What is a SharePoint Document Library?
A document library in SharePoint Online is a secure location where you can store, manage, and collaborate on files with your team members. It allows you and your co-workers to access files easily from any device and work on them simultaneously.
When creating a SharePoint Online site, a default document library is included, but you can add different document libraries to your site according to your needs and the various types of information you may want to group together.
Benefits of Using Document Libraries

Document libraries in SharePoint Online offer several benefits that facilitate efficient knowledge management and collaboration within your team:
- Centralized Storage: Document libraries provide a central location where all relevant files can be stored and organized, granting you and your team members convenient access to the necessary resources.
- Permission Control: You can manage access to your SharePoint library, ensuring that only authorized users can view, share, or modify the files stored within the library.
- Version History: SharePoint Online automatically keeps track of file versions, so you can review previous versions and revert changes if necessary.
- Metadata and Filters: Add metadata to your documents within the library and use filters to sort and find files effortlessly, making it easier to locate the organize documents when needed.
- Collaboration: Work together with your teammates on documents in real-time, facilitating better communication and a more cohesive work experience.
- Integration with other Microsoft tools: Seamless integration with other Microsoft tools like Word, Excel, and PowerPoint makes it easy to collaborate on a diverse range of documents directly within the SharePoint library.
With all these benefits in mind, let’s get into our step-by-step guide on how to create a document library in Sharepoint Online.

How to Create a Document Library
There are two ways to create a document library in SharePoint Online:
- Document Library Option
- Document Library App Option
Method 1: Document Library Option
To create a new document library in the SharePoint Online site:
- Open the SharePoint team site where you want to create the document library.
- Click on Site Contents in the navigation menu bar.
- Click on the +New button and choose Document Library.
- Click Create to finalize the creation of your library.
- Enter a name for your document library, and add a description if desired
It’s that simple!
Method 2: Document Library App Option
To create a new document library using an app:
- Open the SharePoint Online site where you want to create the document library.
- Click the Settings gear icon.
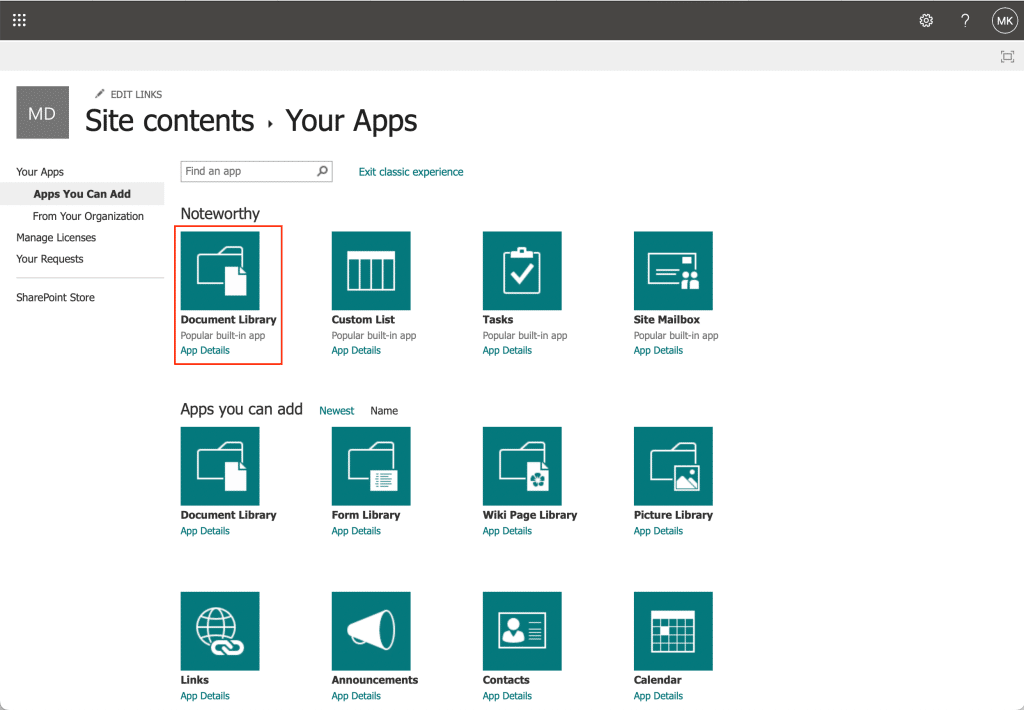
- Click on Add an App.

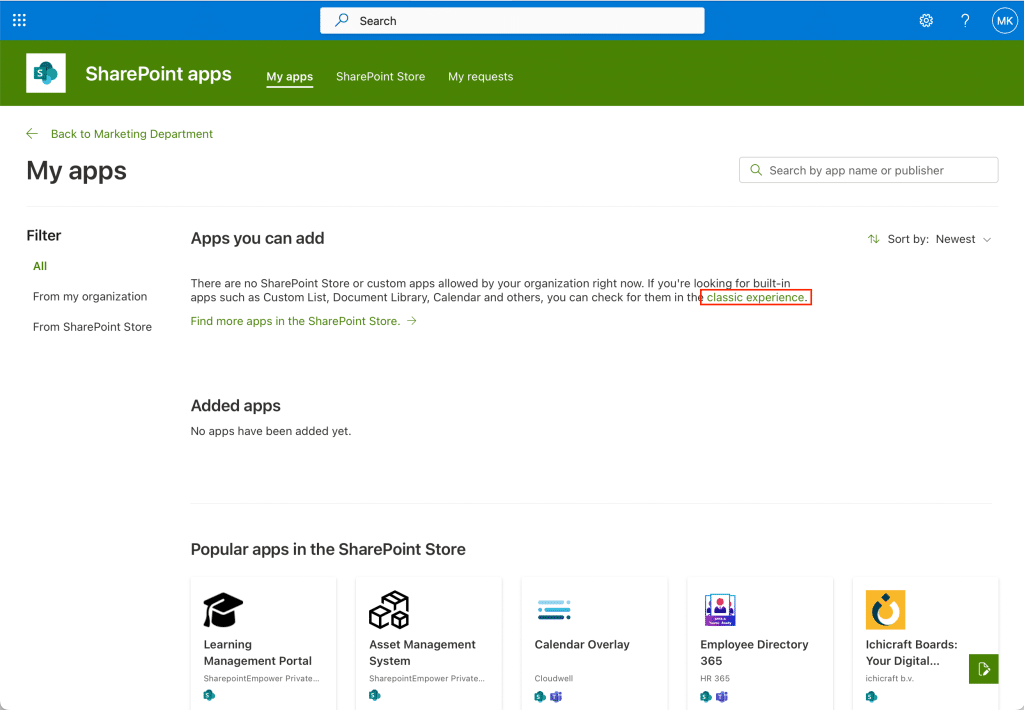
- Ensure that you are using the Classic Experience on SharePoint. If you are currently in the modern experience you can access the classic experience by selecting the option in the opening paragraph under the My Apps tab.
- Select the type of library you want such as a Document Library or Picture Library.
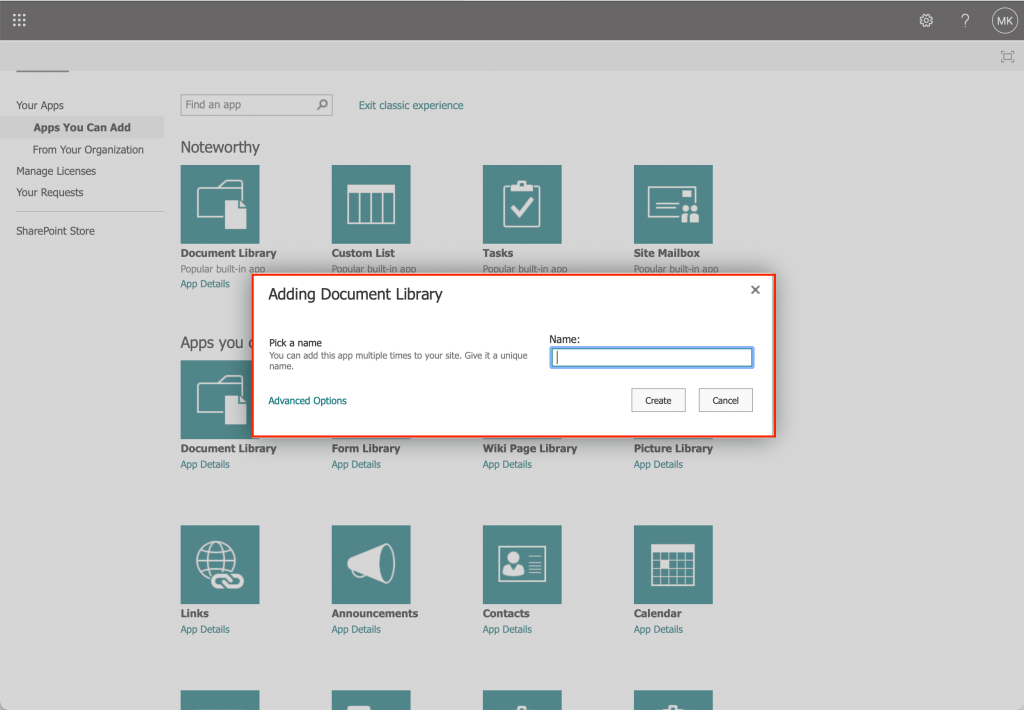
- Pick a library name for your new document library.
- Click Create.
With these two options, you should now be able to easily create a document library in SharePoint.
Now let’s talk about how to navigate your new document library.
Navigating a SharePoint Document Library
Here are some of the things you may want to do with your SharePoint document library and how to accomplish them.
1. Adding Files and Folders to Your Document Library
Once you have created your document library, you can start adding multiple files and folders to it.
There are two main methods for adding files:
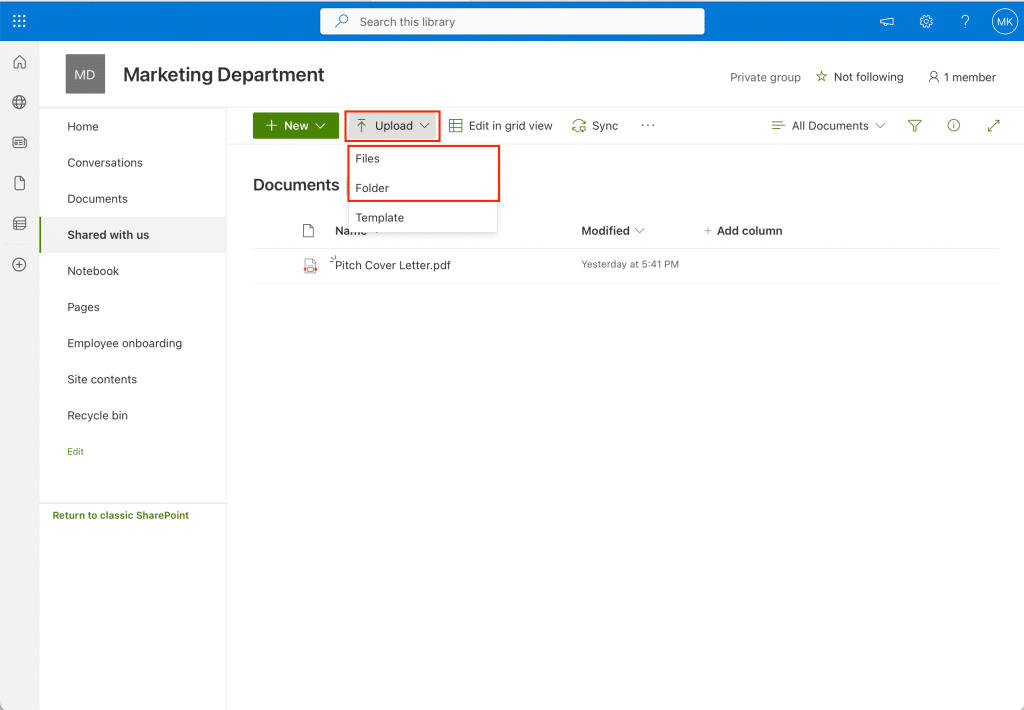
- Upload: Click on the Upload button and select the files or folders you want to add. You can also drag and drop your files directly into the library.
- New: Click on the New button and select one of the available file formats, such as Word, Excel, or PowerPoint. This will allow you to create a new file directly within the document library.
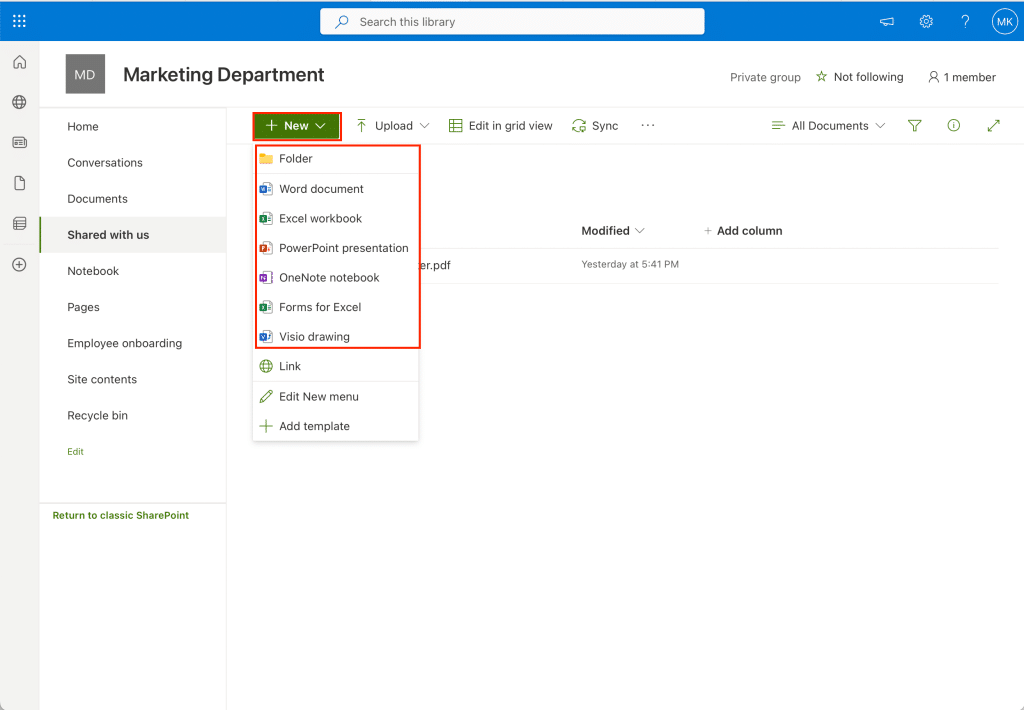
To create folders in your library, click on the New button and select Folder. You can then name your folder and click Create.
2. Renaming and Organizing your Library
Keeping your document library organized is essential for easy access and collaboration.
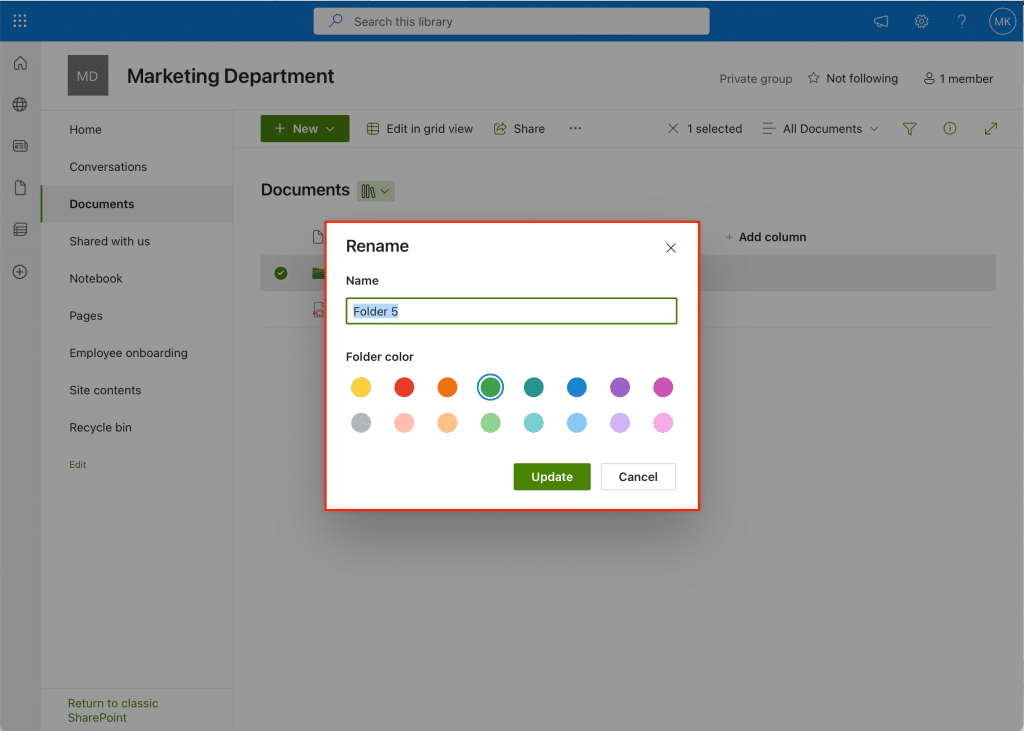
To rename a file or folder within your library:
- Select the file or folder by clicking on the checkbox next to its name.
- Click on the Rename button that appears in the toolbar.
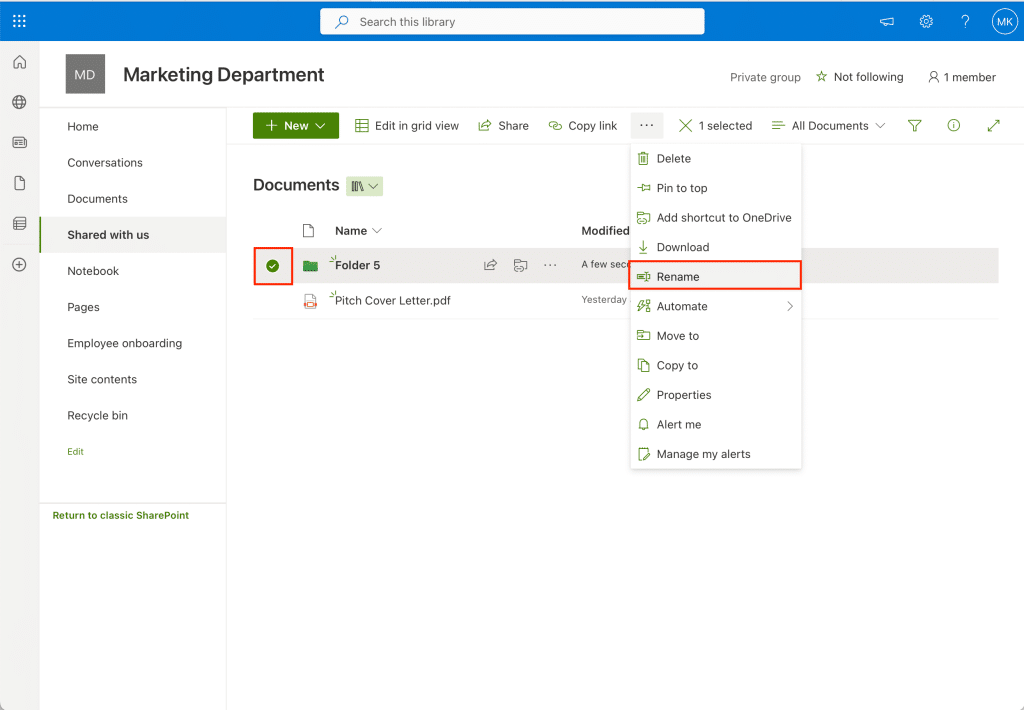
- Enter the new name for the file or folder.
- Click Update.
To organize your library, consider using meaningful folder names and nesting folders to group documents logically.
Additionally, you can create a custom view of your document library by selecting which columns to display, arranging the columns, and applying filters or sorting as needed.

3. Adding Columns to a Document Library
Adding columns to your document library enables you to easily organize and categorize your documents.
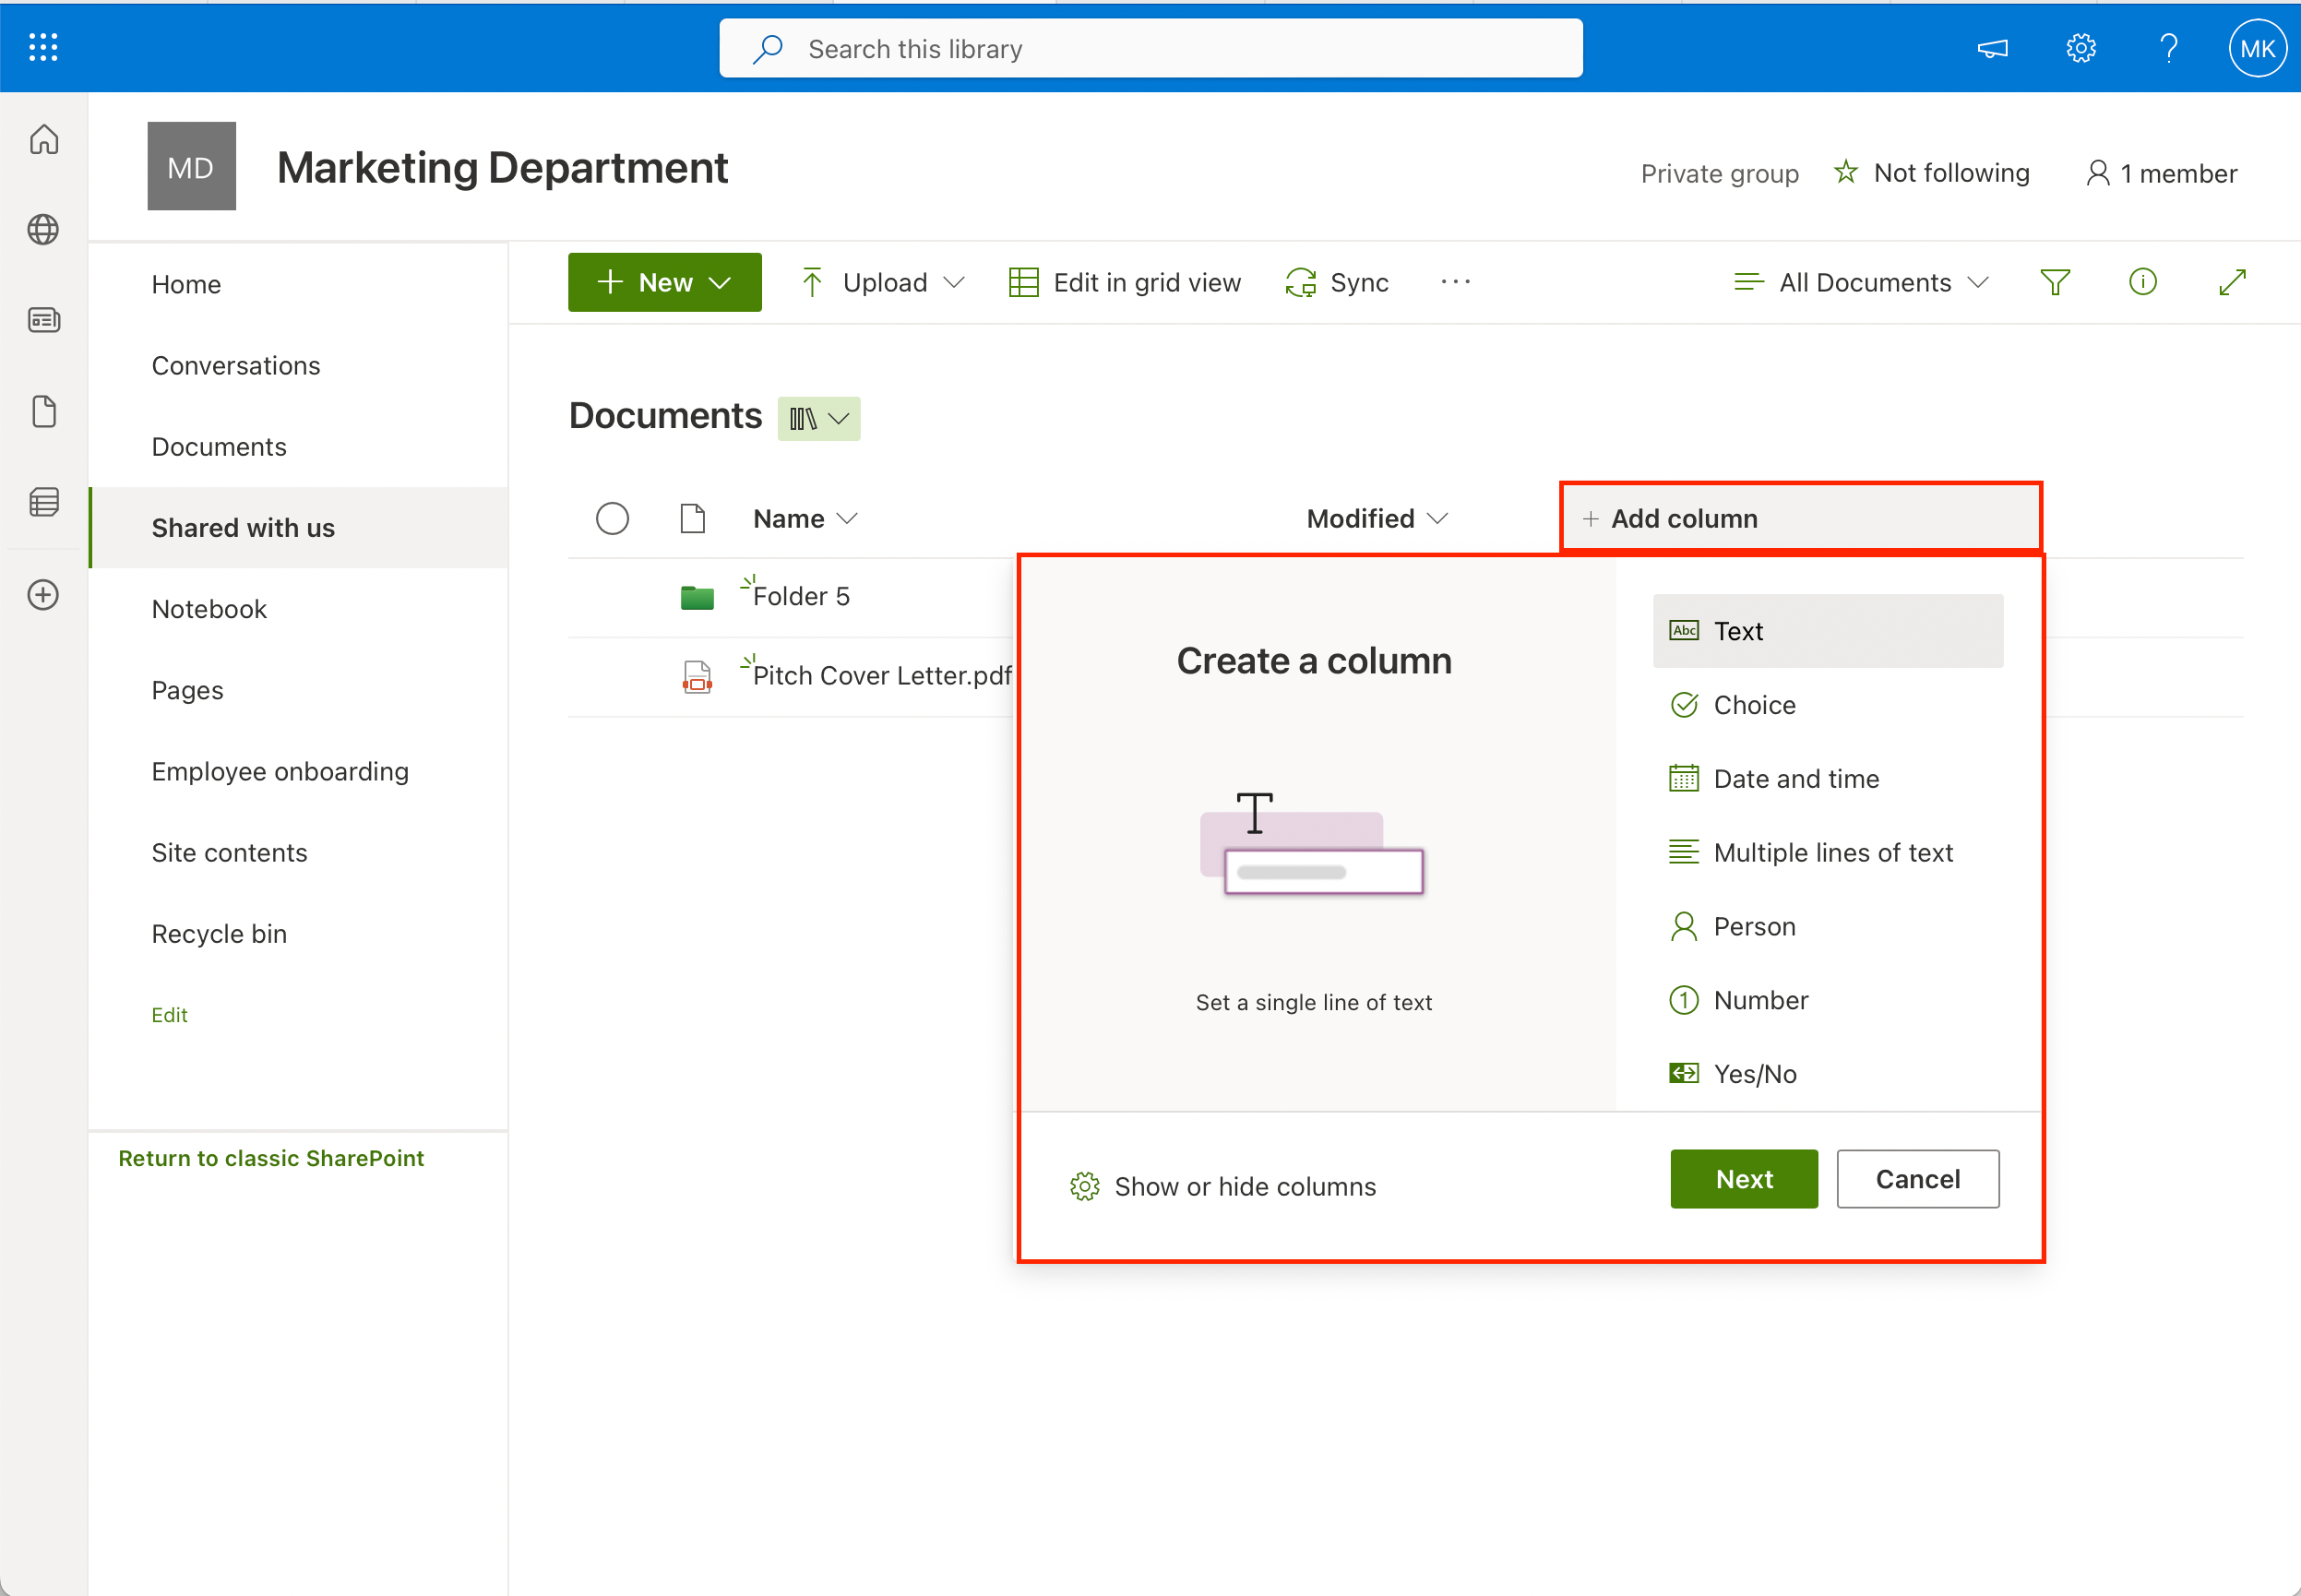
To add a column:
- Navigate to your document library.
- Click + Add column in the column header row.
- Choose the column type that suits your needs (e.g., Single line of text, Number, Date and Time, etc.).
- Enter the column name and configure any additional settings, then click Save.
Now, the new column is added to your document library, and you can use it to better organize your documents.
4. Sorting and Filtering Documents in a Document Library
Sorting and filtering documents in your document library allows you to quickly find specific files or arrange them according to your preferences.
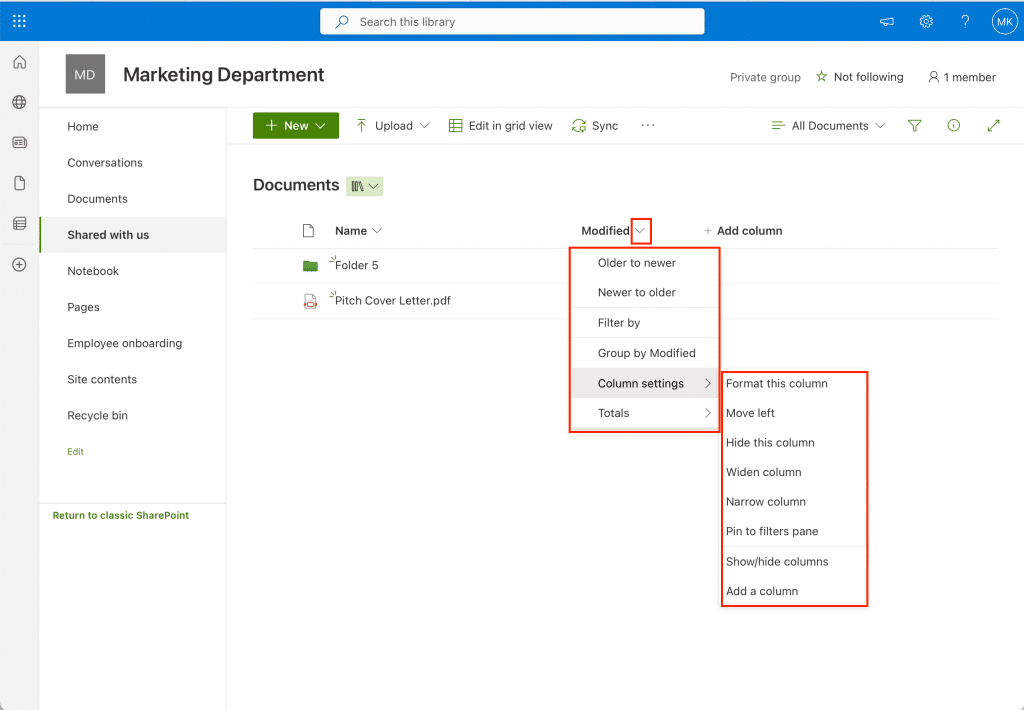
Here’s how to do it:
- Navigate to your document library.
- Click the header of the column you want to sort or filter by.
- From the dropdown menu, select the sorting or filtering option of your choice.
By sorting and filtering documents, you will be able to locate and manage your files more efficiently.
5. Sharing Documents
When working with document libraries in SharePoint Online, it’s essential to share documents with your co-workers efficiently.
To share a document with multiple users:
- Select the file you want to share so a green checkmark appears.
- Click on Share.
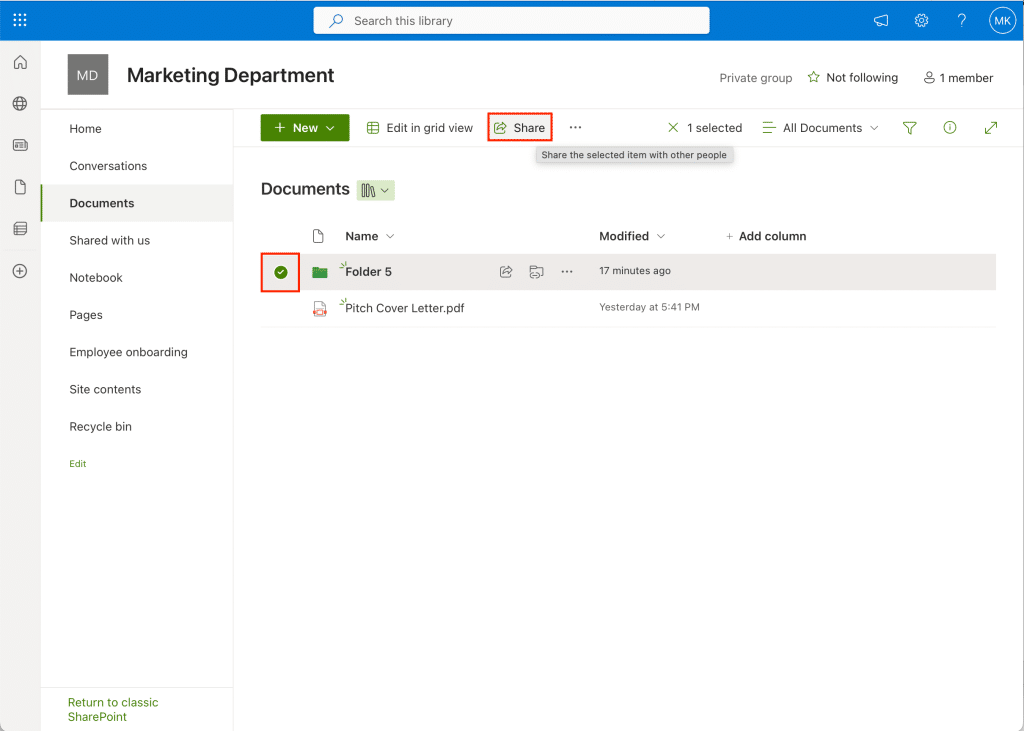
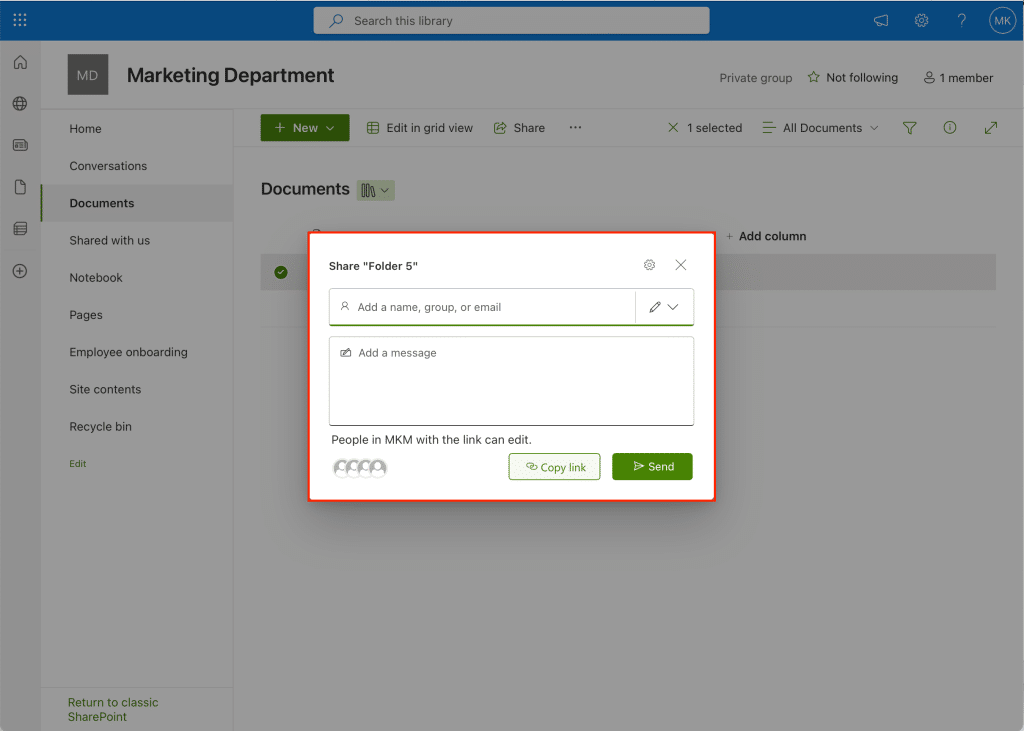
- You can either add the names of people you wish to share your file with or create a direct link to the file using the Copy Link option.
Don’t forget to adjust the editing permission settings by selecting the pencil icon on the right, and typing a message if you would like. - Click Send.
All users can now work concurrently on the same document in SharePoint.
Final Thoughts
Creating a document library in SharePoint Online is a straightforward process that can greatly enhance your organization’s document management capabilities.
By following the steps outlined in this article, you can efficiently organize, store, and collaborate on documents within your SharePoint Online environment.
Remember to carefully plan your document library’s structure, permissions, and metadata to ensure it meets the specific needs of your team or organization.
So, go ahead and get started with creating your document library in SharePoint Online, and experience the benefits of a more organized and efficient document management system.
Take a look at how you can use SharePoint to populate your Power BI report development:
Frequently Asked Questions
How do I properly structure a document library in SharePoint Online?
To structure a document library in SharePoint Online effectively, start by organizing your files into categories or topics.
Then, use folders or metadata to group these files and create a consistent naming convention for your files and folders.
This will help you maintain organization and allow for easier searching and navigation in the library.
What is the process of adding a document library to the SharePoint home page?
To add a new library to the SharePoint homepage, you need to edit your home page, add a Document Library web part, and choose the desired document library.
This will embed the document library on your home page, providing quick access to your documents and supporting seamless collaboration within your team.
What are the key differences between SharePoint folders and document libraries?
SharePoint folders are sub-containers within a document library to organize and store files.

On the other hand, a document library is a collection of folders and files that offers additional features like versioning, workflows, and metadata.
While both aim to store and manage documents, document libraries provide advanced functionalities to enhance collaboration and file management.
How can I create multiple document libraries within SharePoint Online?
To create multiple document libraries in SharePoint Online, navigate to the SharePoint site where you want to add a library.
Click on “+New” and select “Document Library.”
Provide a name and description (optional) for your library and configure the necessary settings.
Repeat the process for each document library you want to create.
How do I manage and use document sets in a SharePoint library?
A document set is a group of related documents that can be managed as a single entity in a SharePoint library.
To manage and use document sets, you need to:
- Enable the “Document Sets” feature in your site collection.
- Add the “Document Set” content type to your document library.
- Configure the document set settings, including allowed content types, metadata, and custom welcome page.
- Create a new document set by selecting “New Document” and choosing “Document Set”.
- Add documents to the set, manage metadata, and use other library features as needed.


