
Creating a list in SharePoint Online can be an incredibly useful way to organize and share data with your team members. With a robust set of features, SharePoint Online offers an intuitive platform for creating custom lists designed to accommodate a wide range of purposes and situations.
To create a list in SharePoint Online:
- Navigate to the site where you want to create the list.
- Click on the “Site Contents” page in the navigation bar.
- Click on the “New” button in the command bar.
- Select “List” from the dropdown menu that appears.
- Browse through available “templates” and choose the one that best fits your requirements or choose “Blank list” to customize a list according to your needs.
- Enter a “name” for your list in the designated field.
- Hit the “Create” button to finalize your list.
Ok, let’s show you how it is done!

This article will illustrate how to create a list as well as how to navigate and customize your list in SharePoint.
We’ll show you how to integrate your SharePoint list with other powerful Microsoft products like Microsoft Teams, Power Automate, and Excel.
This knowledge will prove invaluable as you strive to optimize your team’s collaboration and workflow using SharePoint Online.
Let’s get into it!
Understanding SharePoint Online Lists
SharePoint Online offers a versatile feature known as Lists, which enables users to create and manage various types of structured information. Lists can be thought of as organized tables where data can be collected, shared, and collaborated upon.
They provide a convenient way to track, manage, and collaborate on different types of information such as tasks, contacts, events, and more.

Lists in SharePoint Online are highly customizable, allowing you to tailor them to your specific needs, making data organization and collaboration more efficient.
Now, let’s look at how to create and customize a SharePoint Online list.
How to Create a List in SharePoint Online
Thankfully, creating a list in Microsoft SharePoint Online is an easy and simple process.
To create a list in SharePoint Online:
- Navigate to the site where you want to create the list.
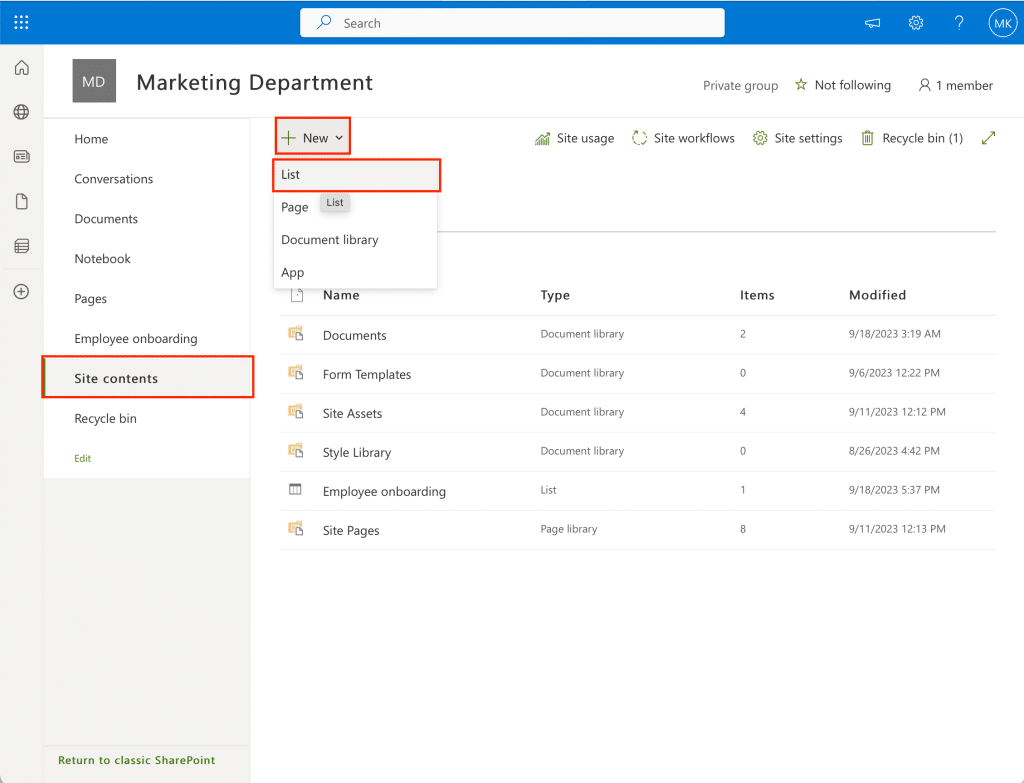
- Click on the Site Contents page in the navigation bar.
- Click on the New button in the command bar.
- Select List from the dropdown menu that appears.
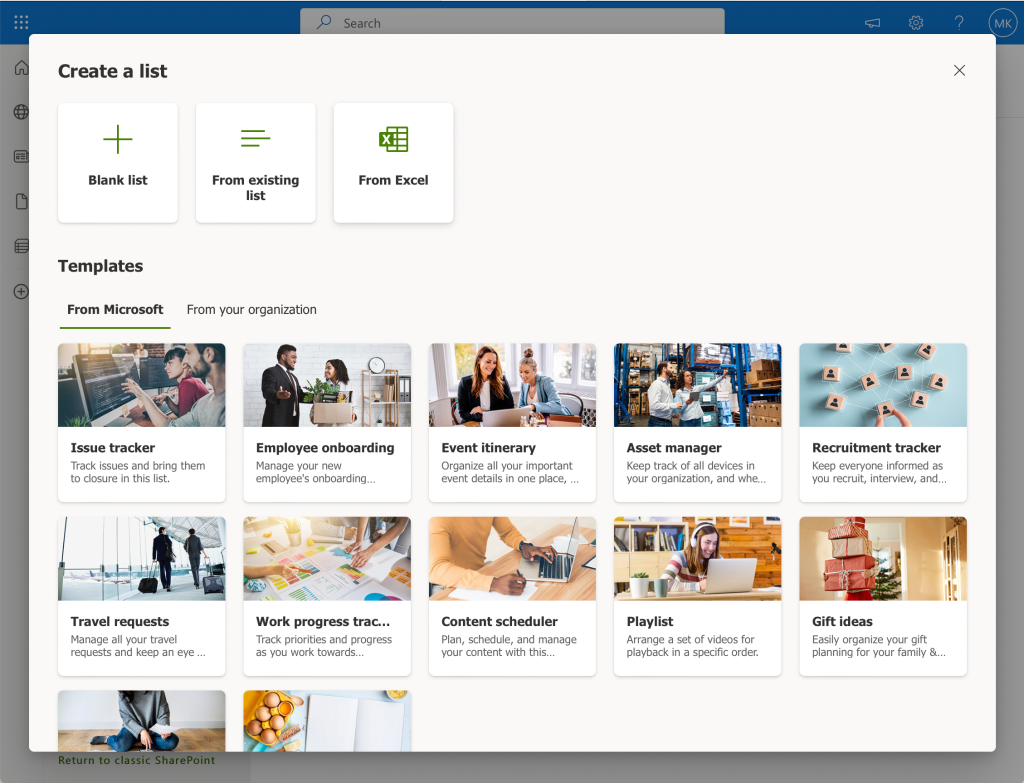
- Browse through available templates and choose the one that best fits your requirements or choose Blank list to customize a list according to your needs.
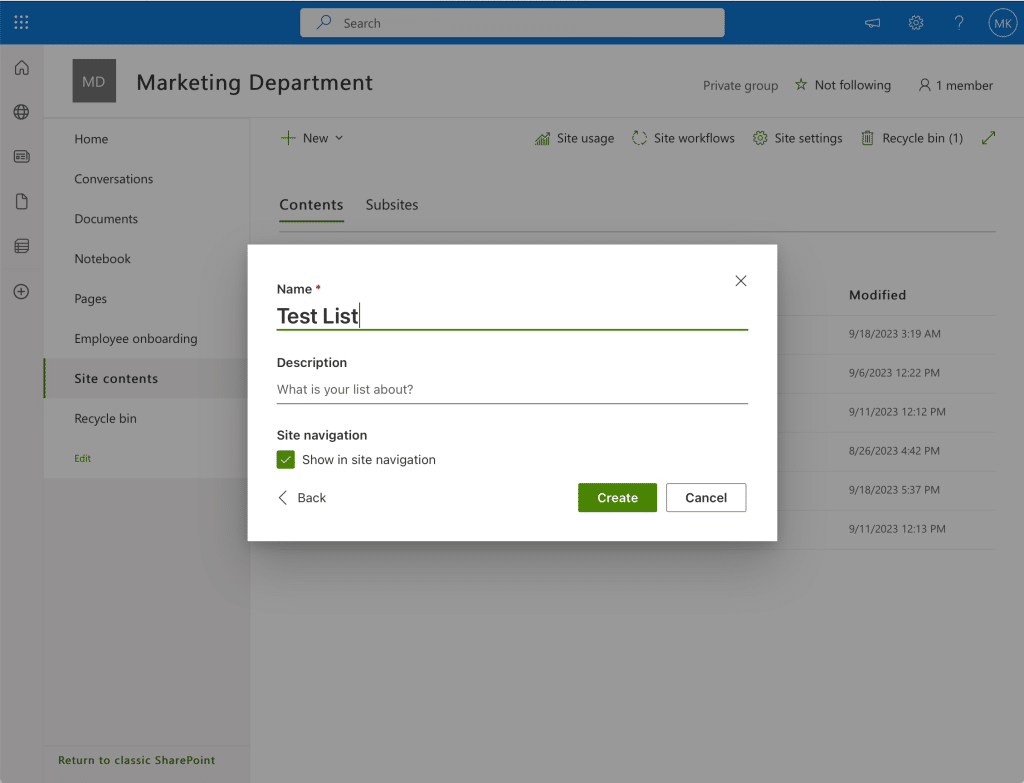
- Enter a name for your list in the designated field.
- Hit the Create button to finalize your list.
Remember, whether you choose a blank list or a template-based list, you can always add more features using the Add an app option in your SharePoint Online environment.
Customize the list to your liking and make the most of it for managing and sharing data within your team or organization.
Navigating and Customizing SharePoint Lists
Once you’ve created a SharePoint list, it’s essential to know how to navigate and customize it to make the most of its features. Here are some of the things you may need to know how to do while using SharePoint lists.
1. Adding and Editing List Items
To add a new item to your list in SharePoint Online:
- Navigate to the list you want to manage.
- Click the + New button found at the top of the list.
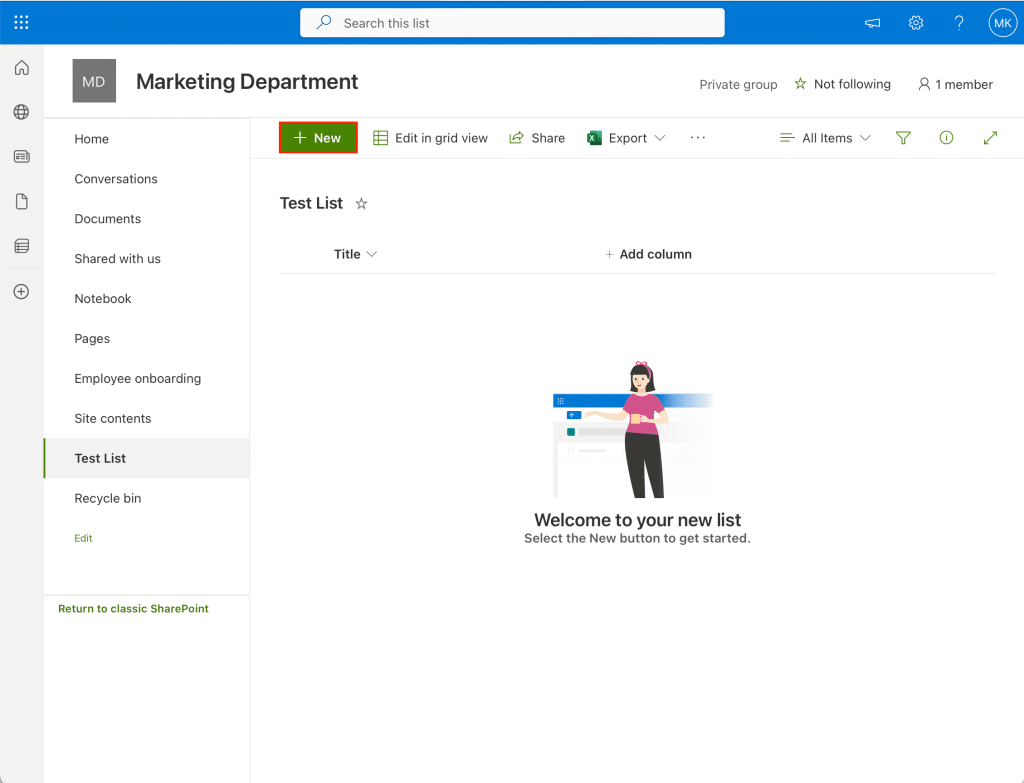
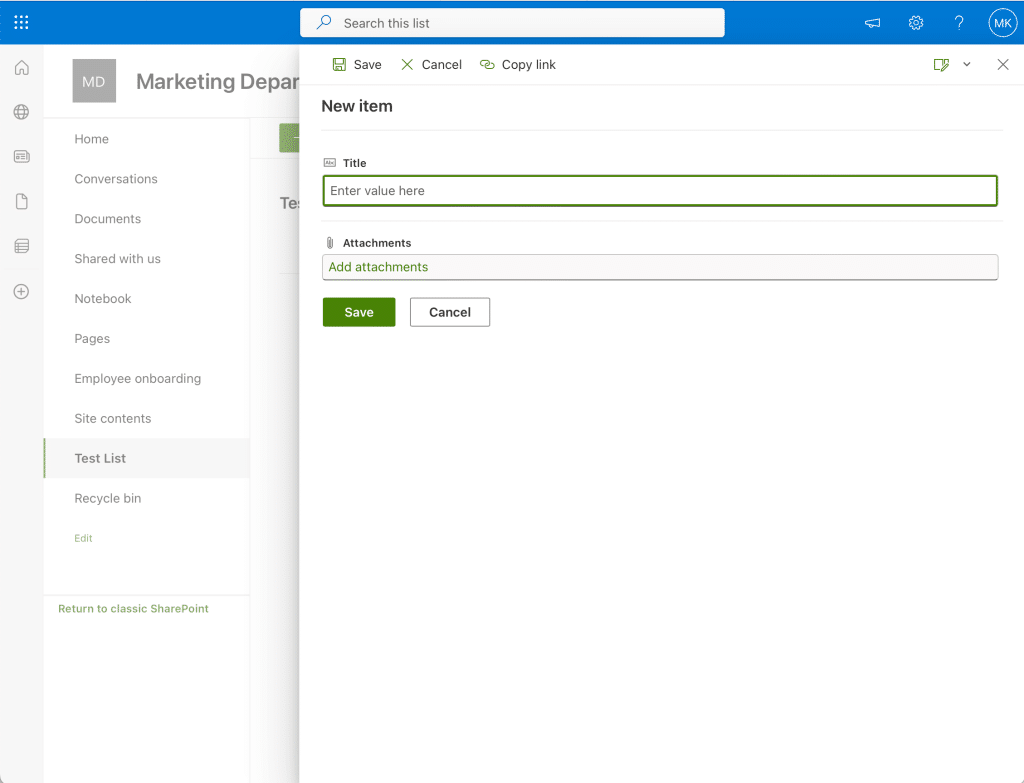
- Fill in the appropriate information in the New Item form that appears.
- Click Save to save the new item.
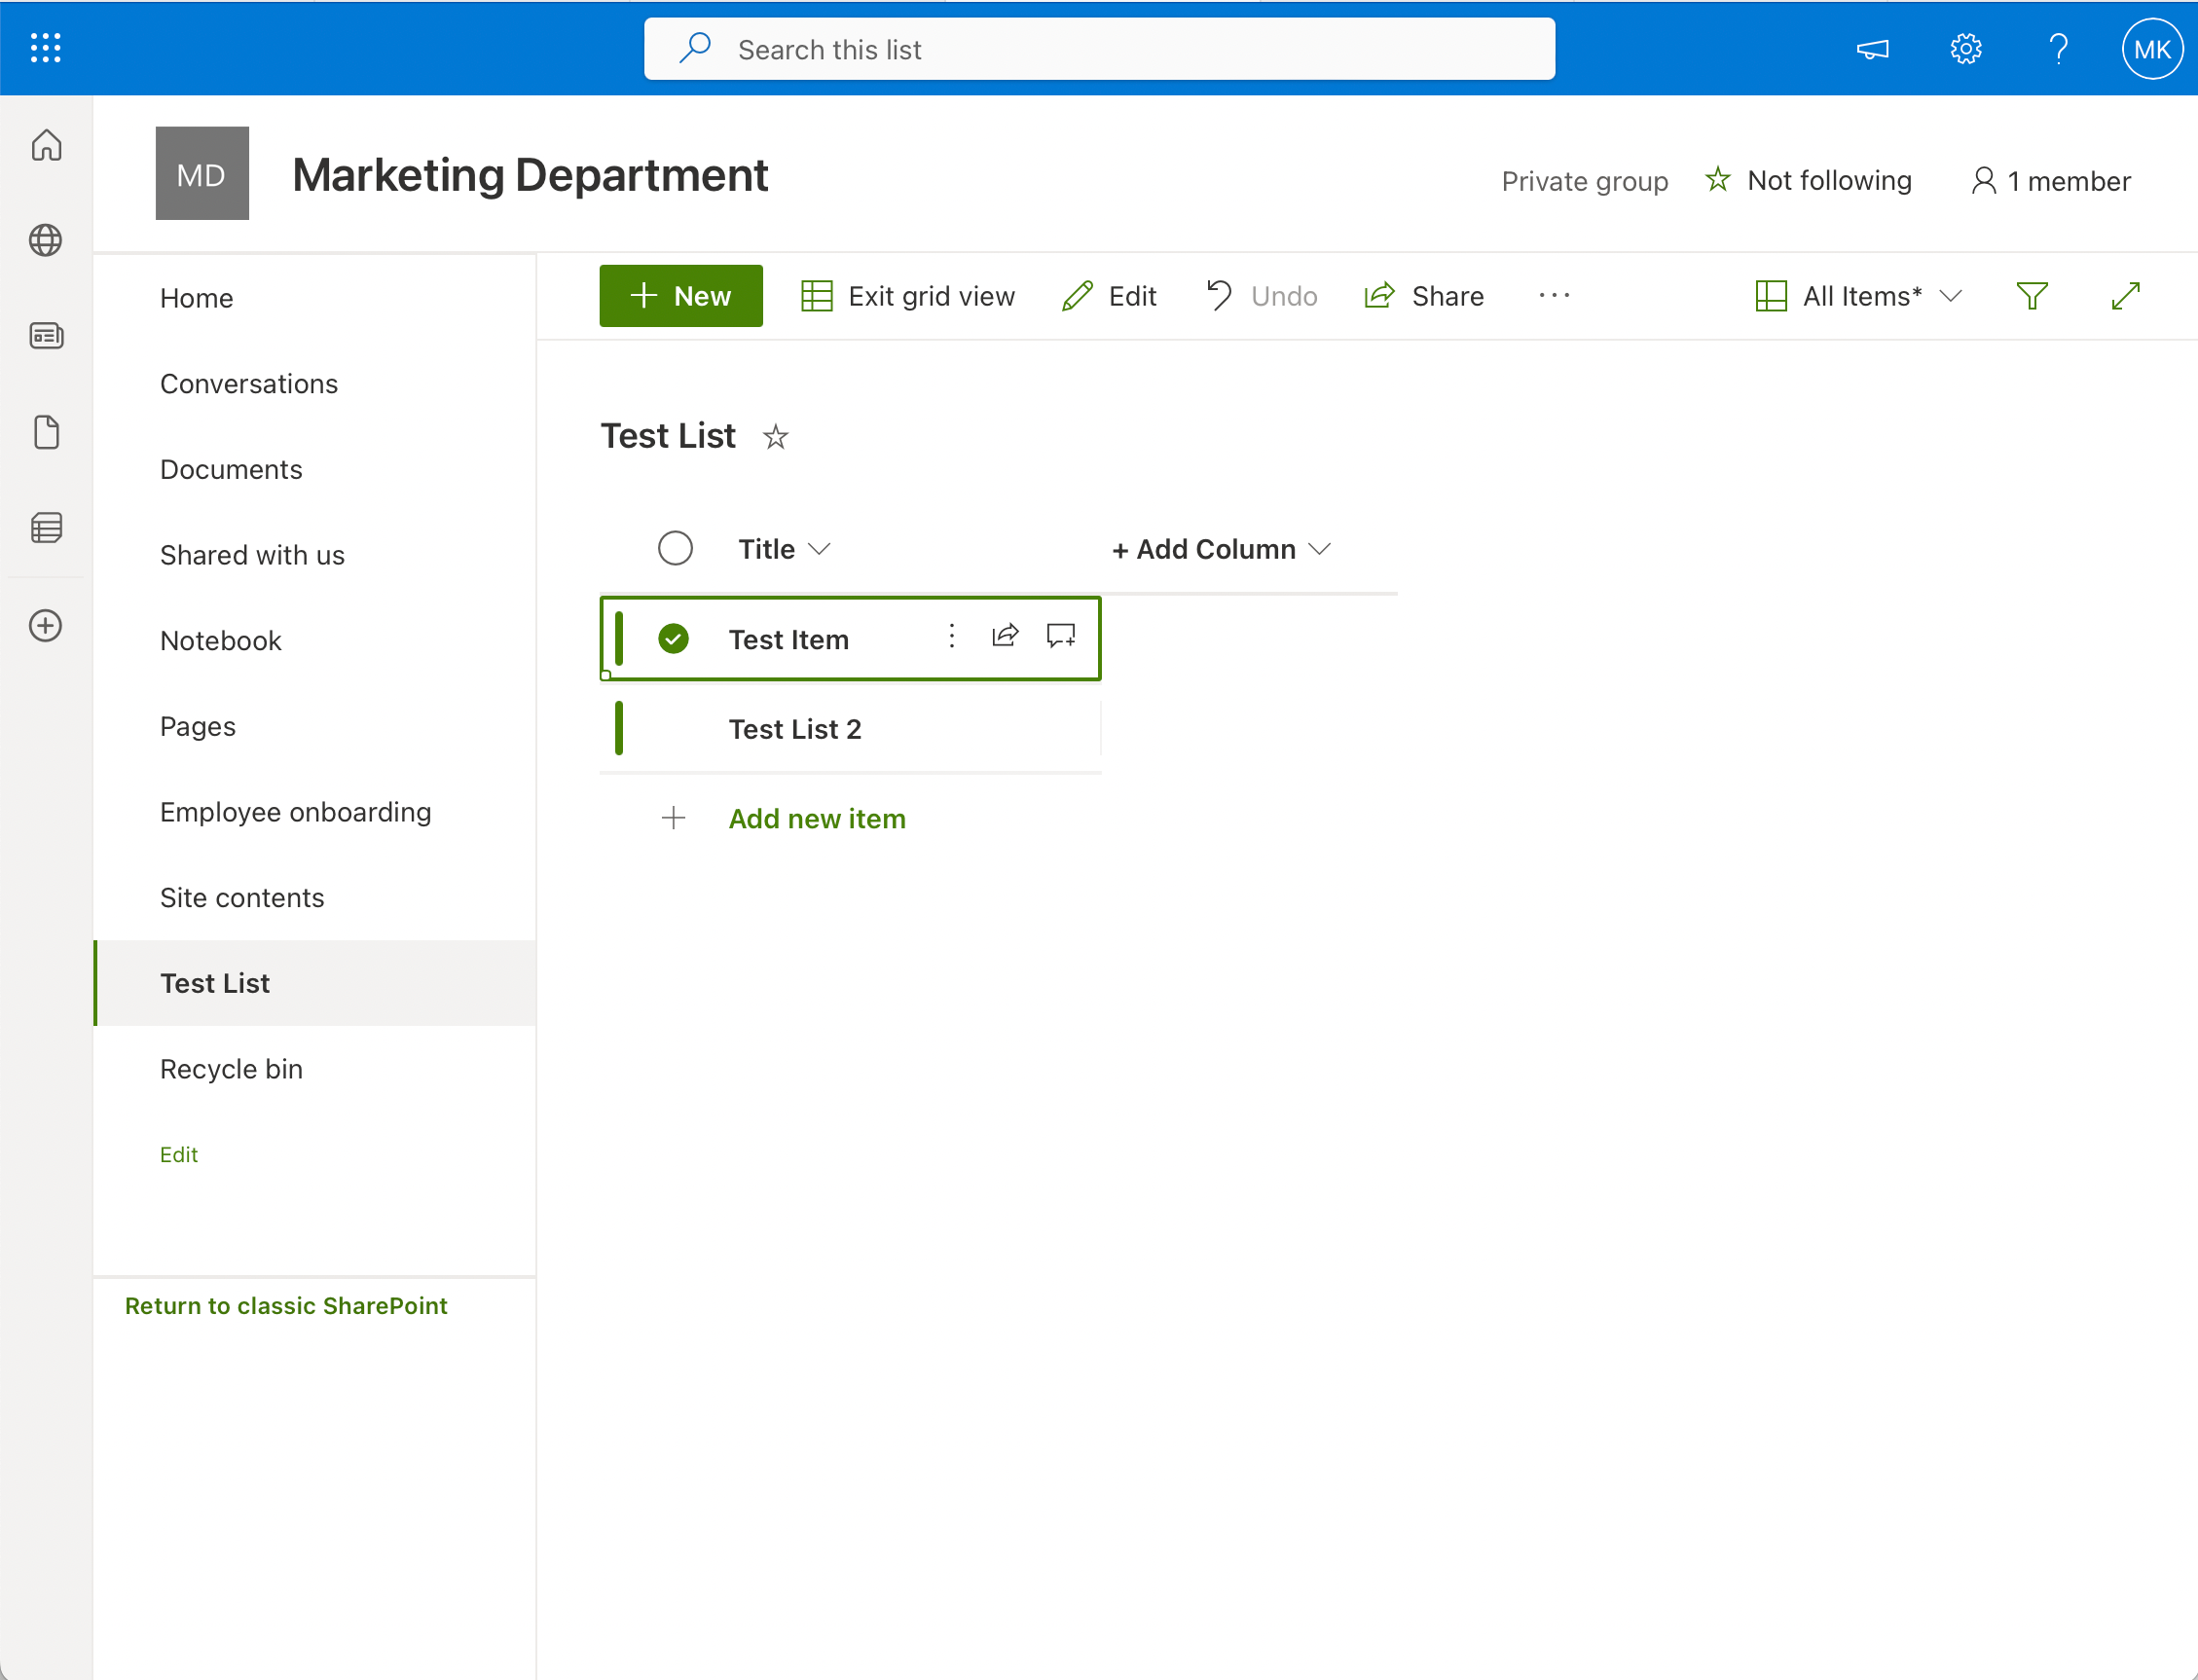
- Find the item you want to edit in the list.
- Click on the ellipsis (three dots) next to the item or click directly on the item.
- Select Edit from the context menu.
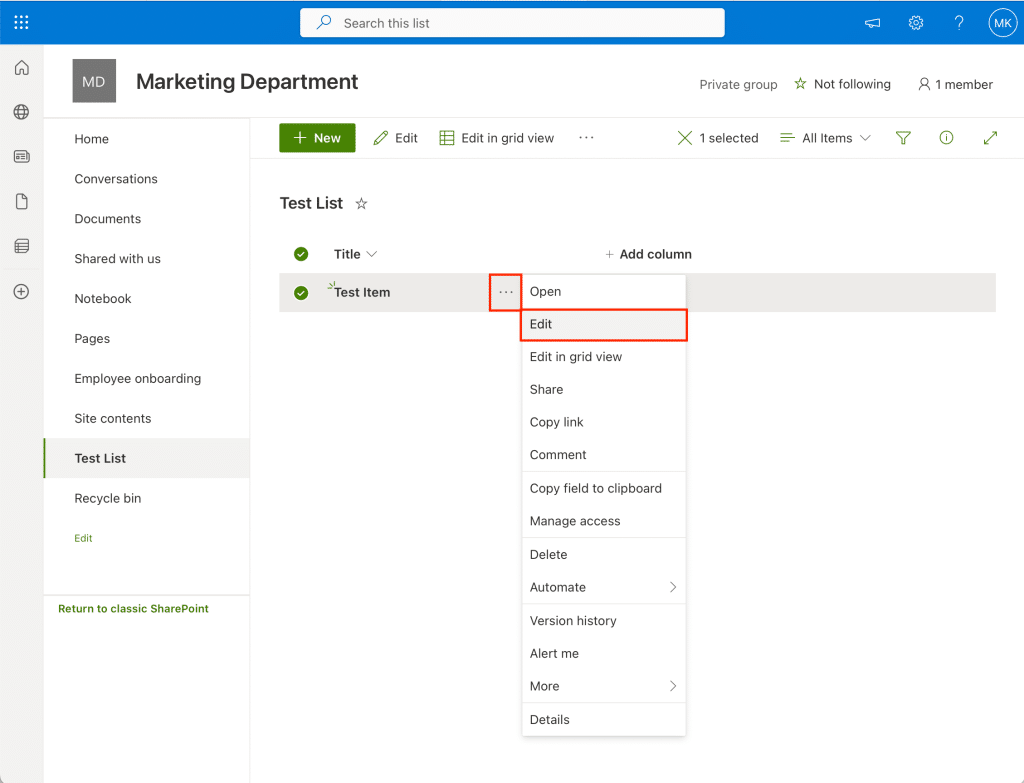
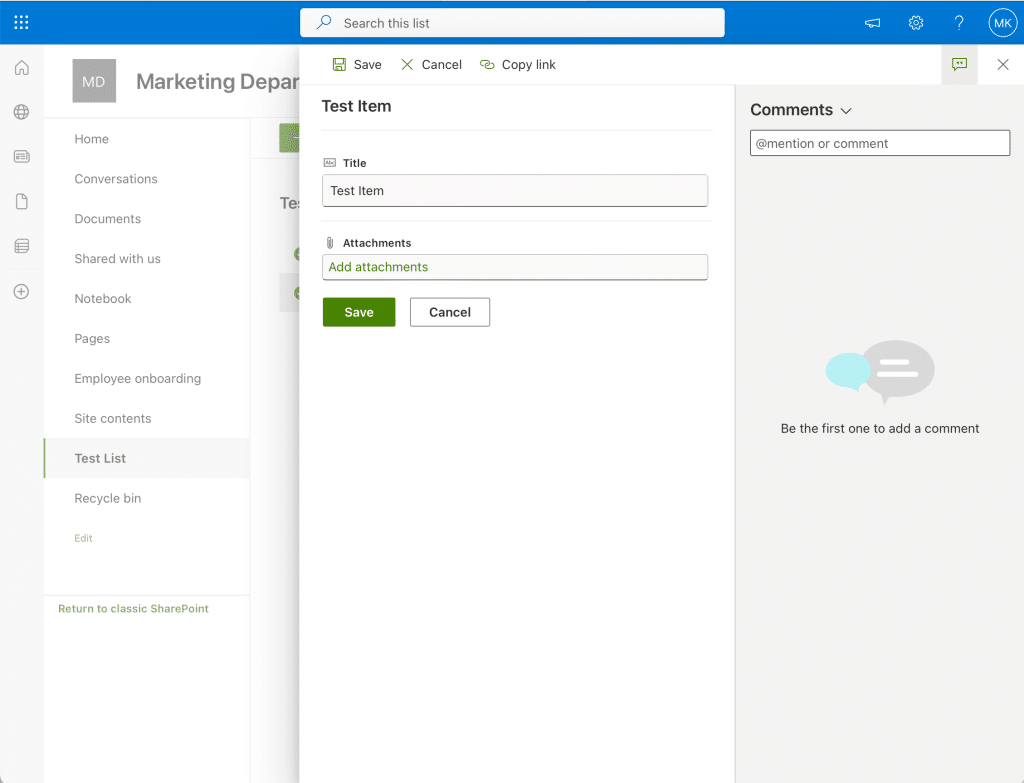
- Modify the data in the form as needed.
- Click Save to update your item.
You can also update multiple list items at once by selecting the items and using the Edit in grid view option.
2. Deleting and Restoring List Items
In case you need to delete a list item:
- Find the item you want to delete from the list.
- Click on the ellipsis (three dots) next to the item or click directly on the item.
- Select Delete from the context menu.
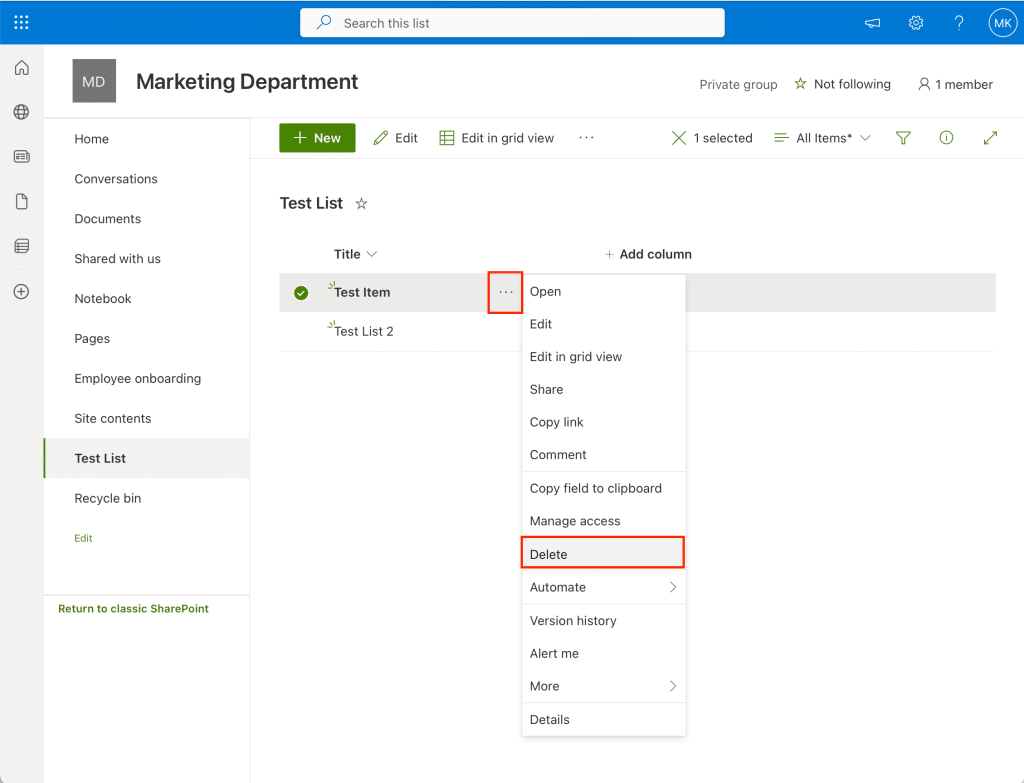
- Confirm the deletion by clicking on Yes or Delete.
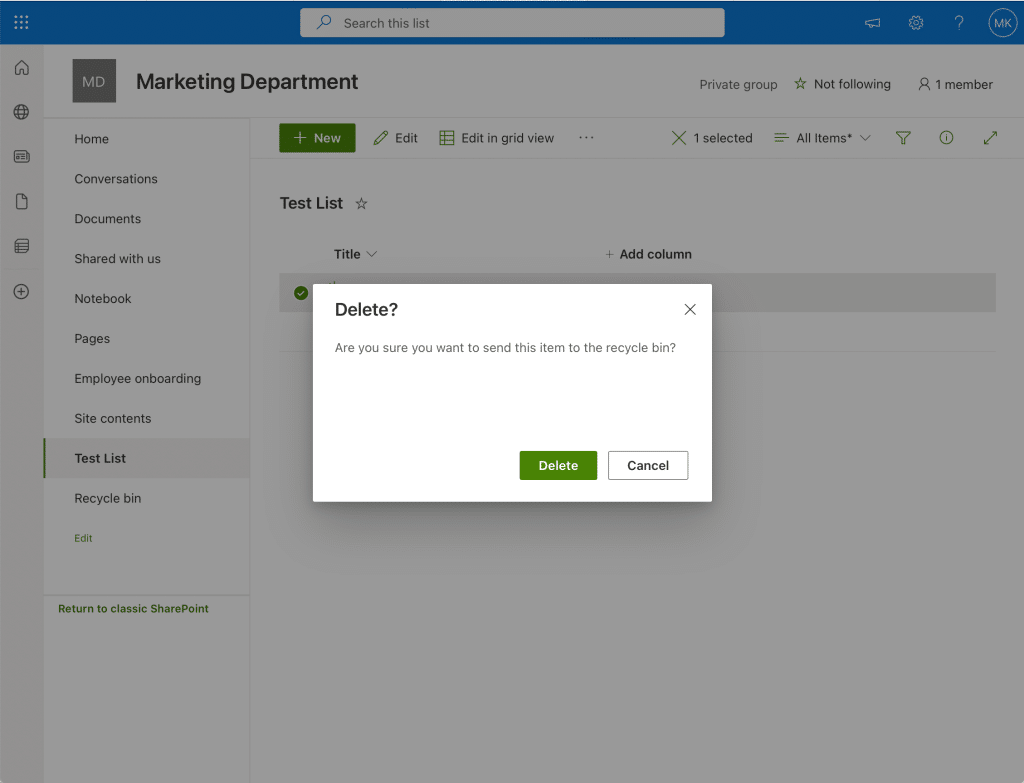
Once an item is deleted, it’s moved to the “Recycle Bin”.
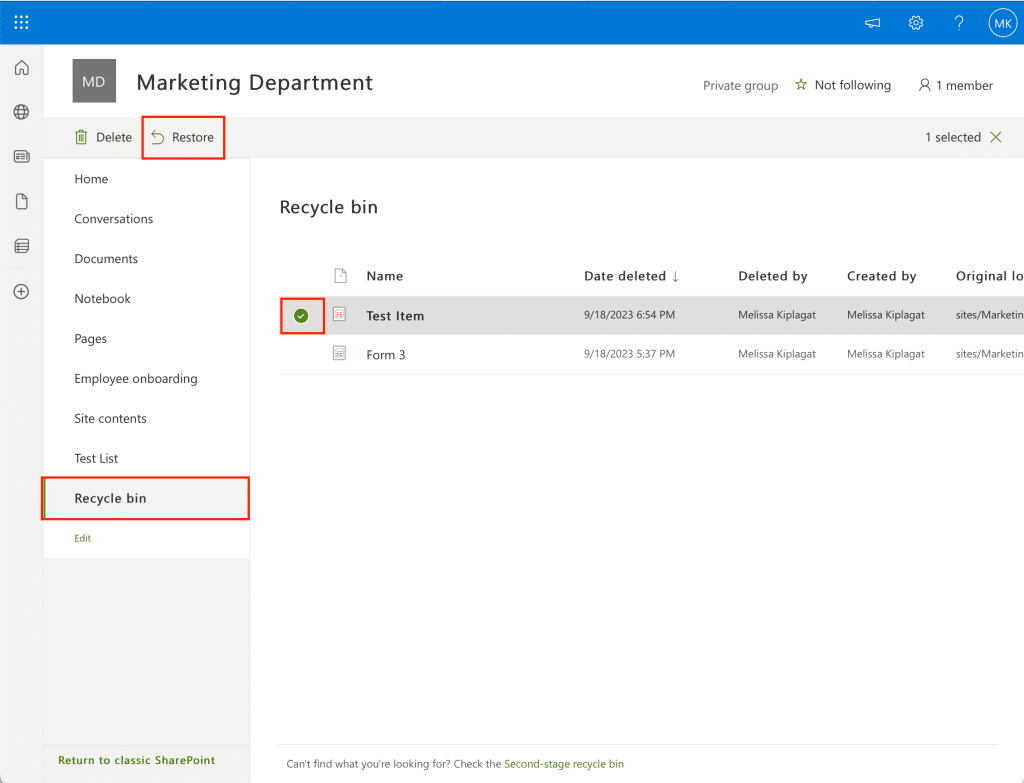
To restore a deleted list item:
- Navigate to the site from which the list item was deleted.
- Click on Recycle Bin in the navigation menu.
- Select the deleted item by ticking the box next to it.
- Click on Restore.
By following these steps, you can effectively manage, update, and maintain the content of your SharePoint Online lists.
3. Adding and Modifying Columns
To add or modify columns in your SharePoint list, start by navigating to the list you’d like to customize.

To add a column:
- Click on the Add column button on the right side of the list.
- Choose the type of column you’d like to add (e.g., Single line of text, Number, Choice, Date and Time, etc.).
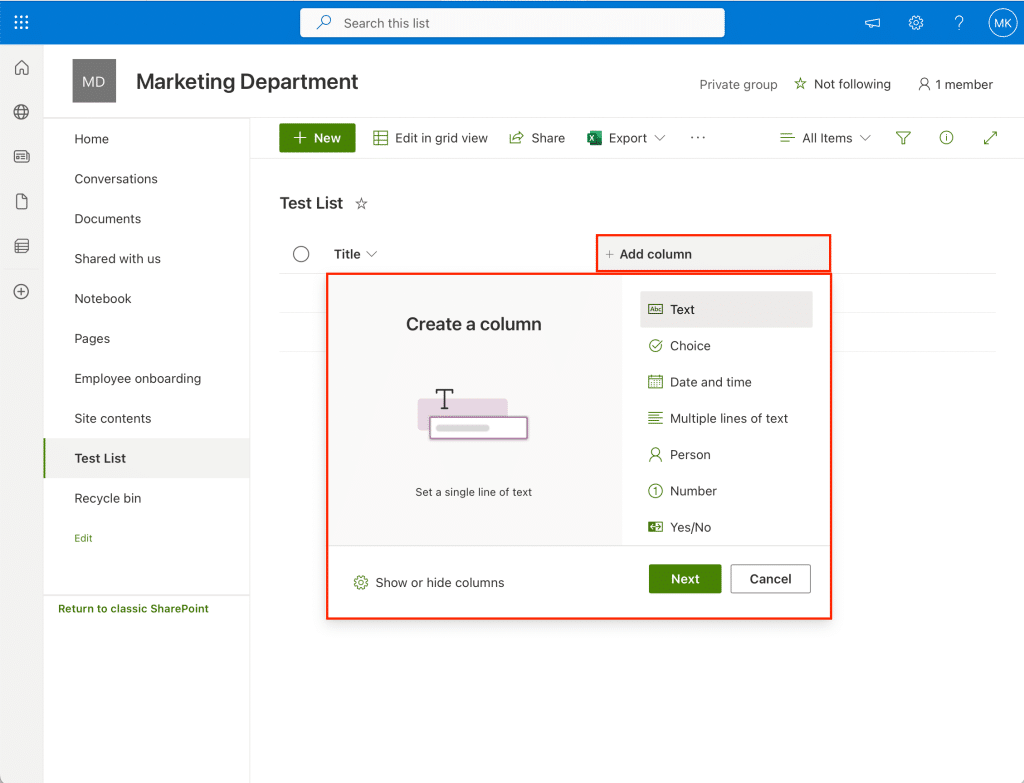
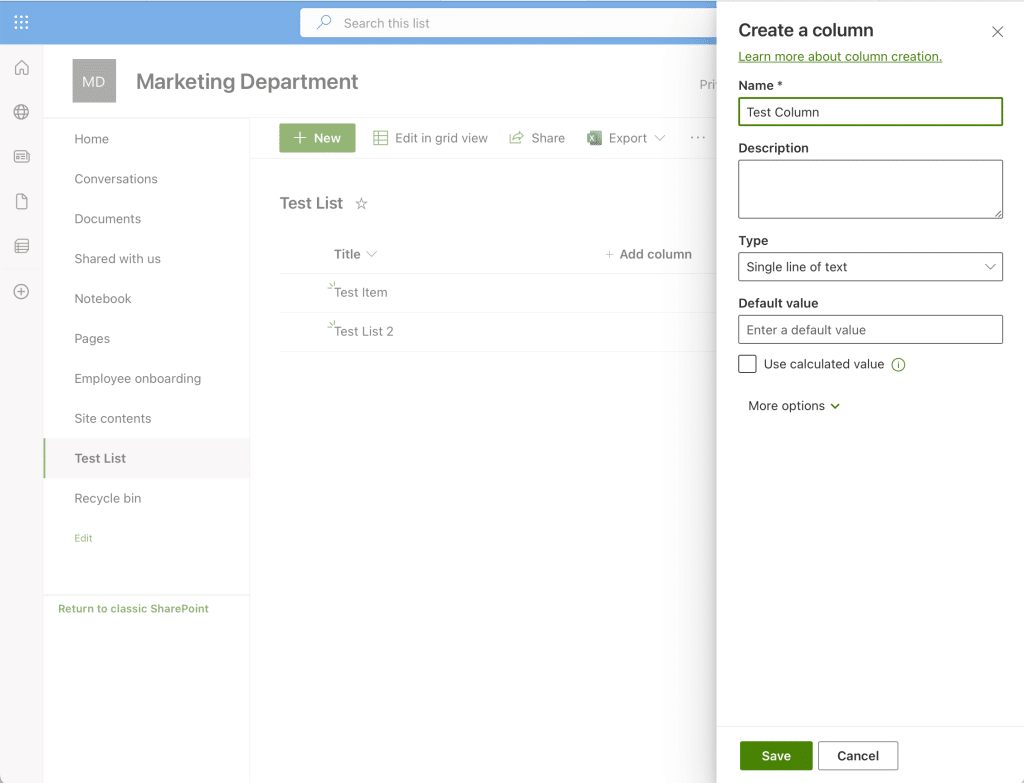
- Provide a name for the new column and configure any additional settings as needed.
- Save your changes by clicking the Save button.
Similarly, to modify existing columns:
- Hover over the column header and click the down arrow that appears.
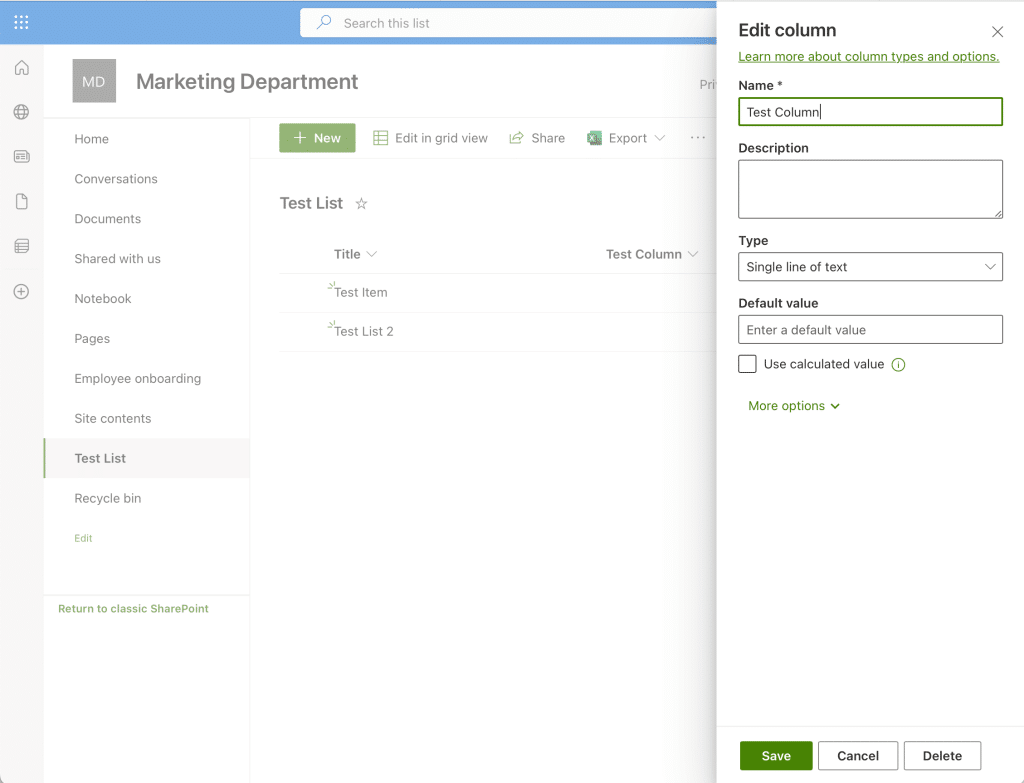
- Select Column settings then Edit.
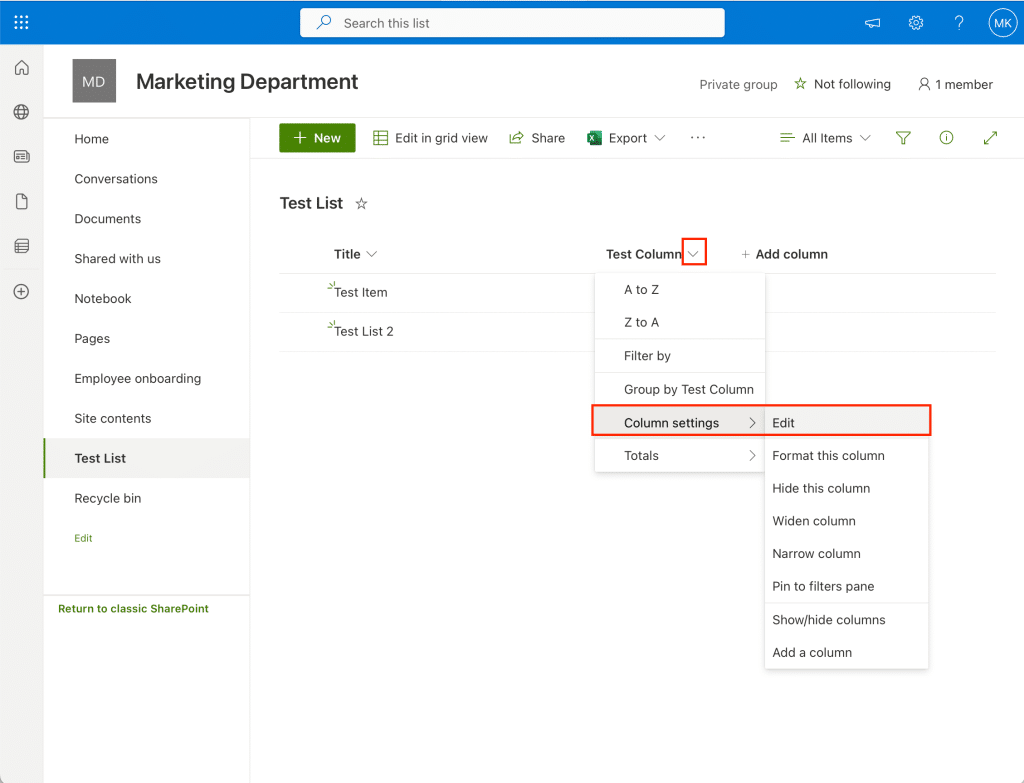
- Make your desired changes and click on Save.
Remember that you can rearrange the columns by simply dragging and dropping them in the desired order.
4. Customizing List Settings
To access and modify the list settings:
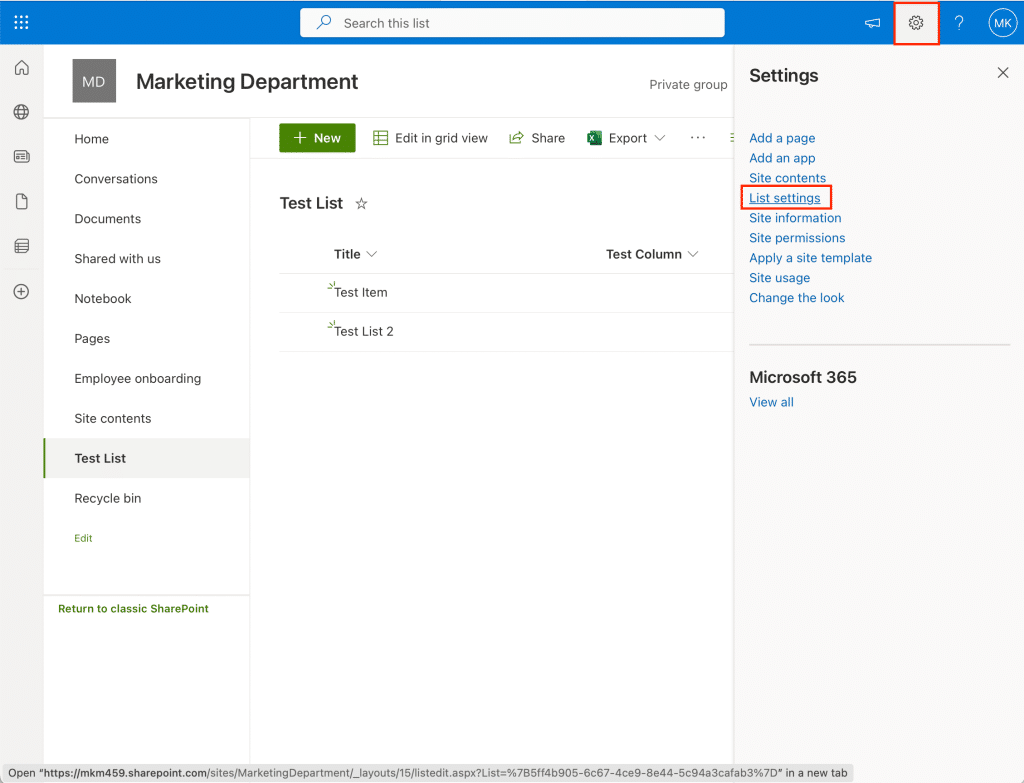
- Click on the Settings gear icon in the top-right corner of the page and select List settings.
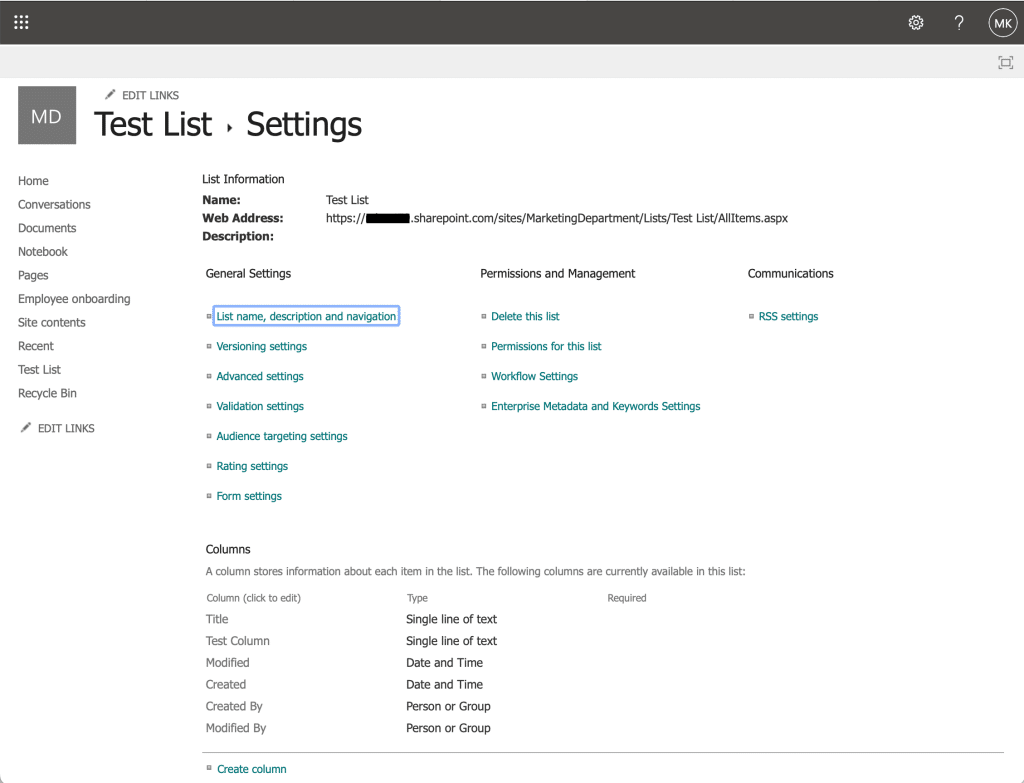
- In the settings page, you will find various sections like Columns, Views, and Permissions and Management.
- Customize your desired settings by editing existing columns, creating new views, or managing user permissions.
Consider enabling versioning to keep track of changes made to items in the list.
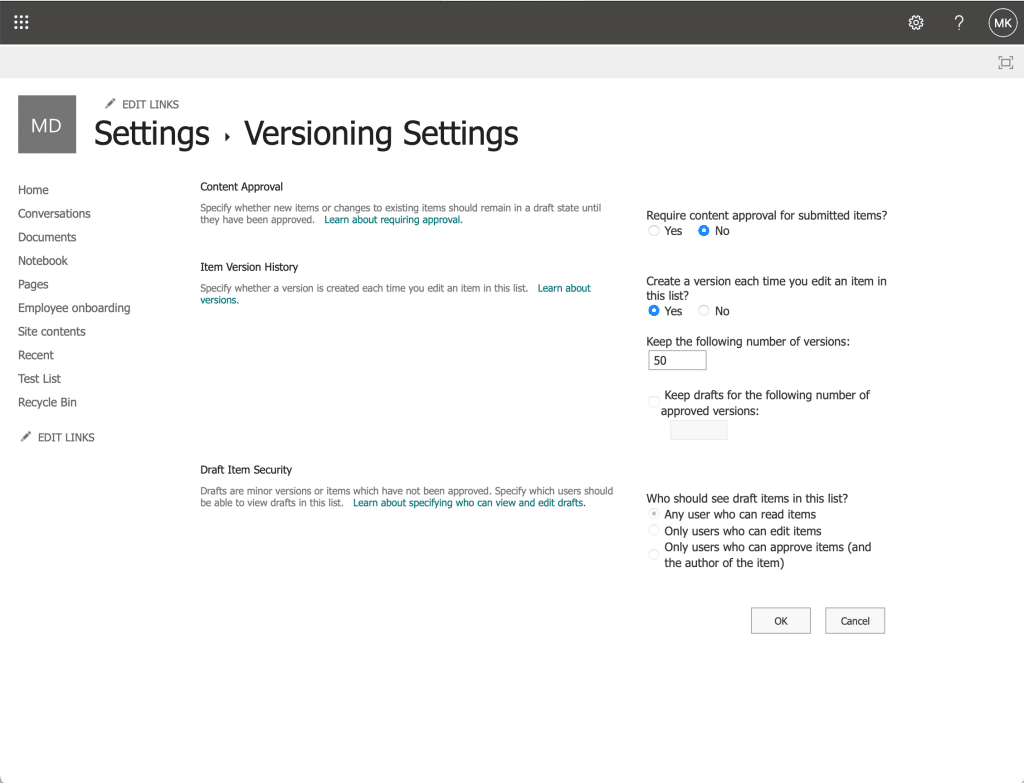
To enable versioning for SharePoint lists:
- In the list settings page, click on Versioning settings under General Settings.
- Choose the desired settings and click on OK to save.
By effectively navigating and customizing your SharePoint list, you can optimize its usability, making it a powerful tool for data management, collaboration, and decision-making within your organization.
Importing Lists from Excel

With SharePoint Online, you can easily create a list based on an existing Excel spreadsheet. This feature allows you to reuse your existing data and leverage it in SharePoint’s powerful list functionalities.
To import a list from an Excel spreadsheet:
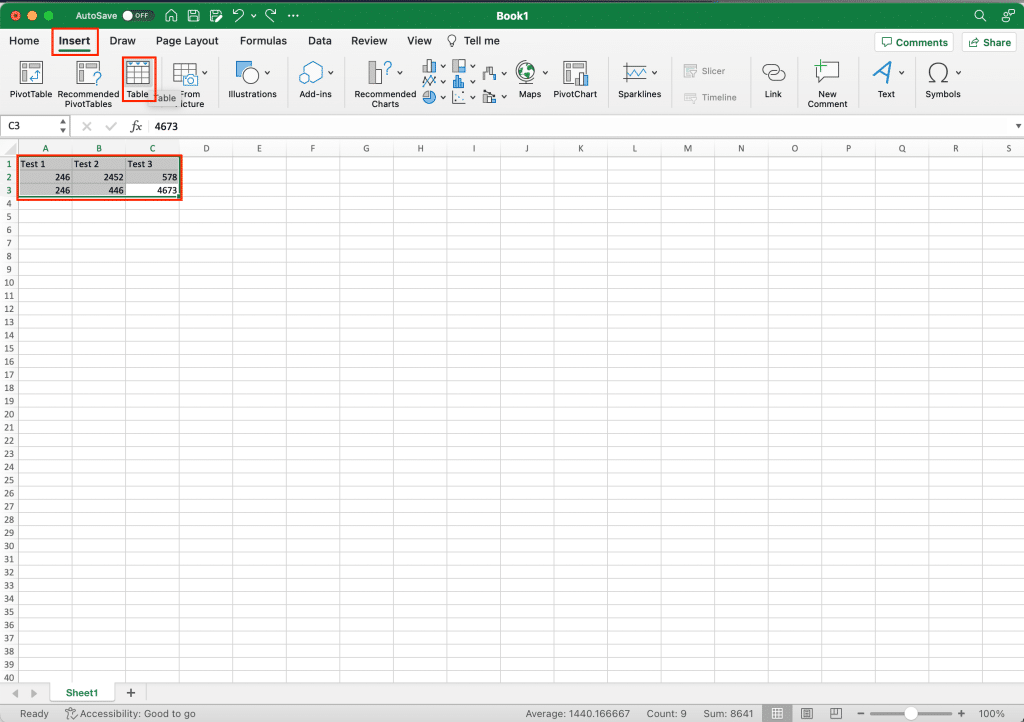
- Format your Excel file into a table. To do this:
1. Select your data in Excel.
2. Click on the Table button on the Insert tab. This step is crucial to ensure a trouble-free import process.
- Go to the SharePoint site where you’d like to create a new list using the Excel spreadsheet.
- Click on the Site Contents page in the navigation bar.
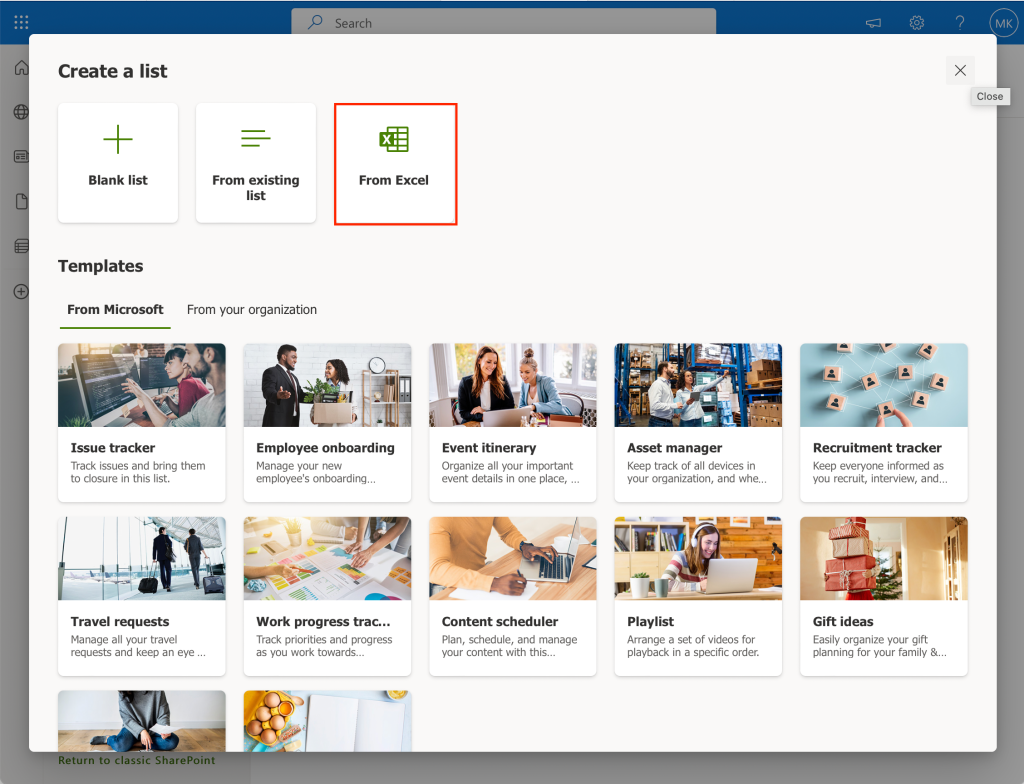
- Click New and choose List.
- From the Create a list page, choose From Excel.
- Click Upload file and select the file from your computer or default site document library.
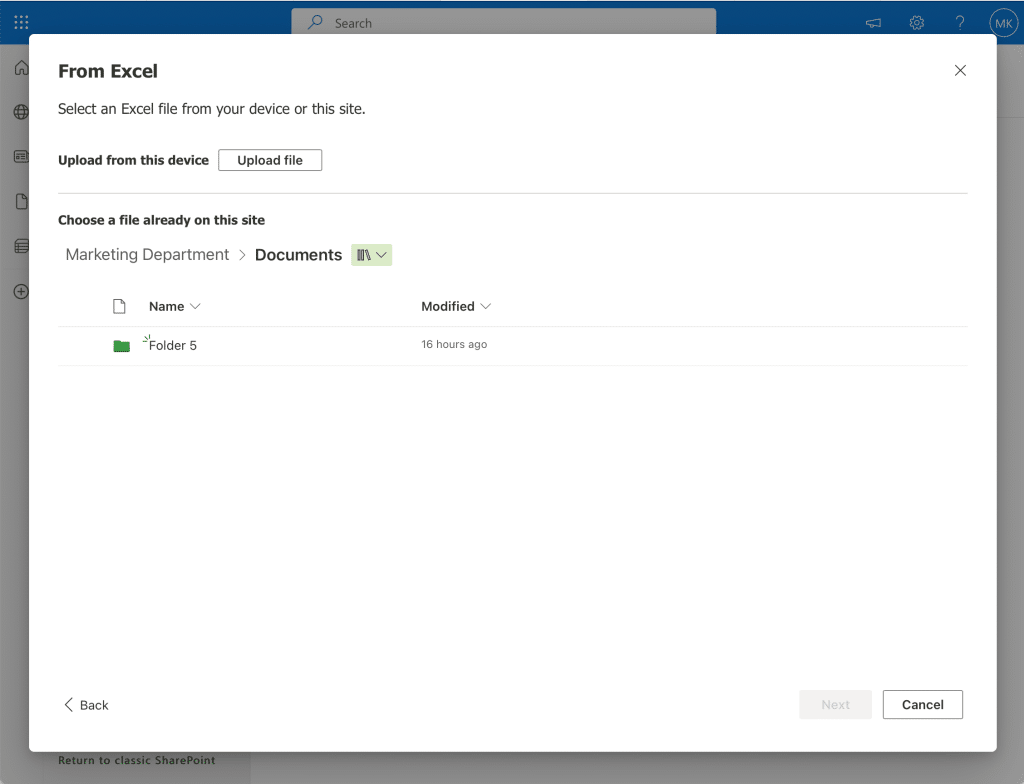
- Click Open, and the system will import the Excel data, creating a new SharePoint list.
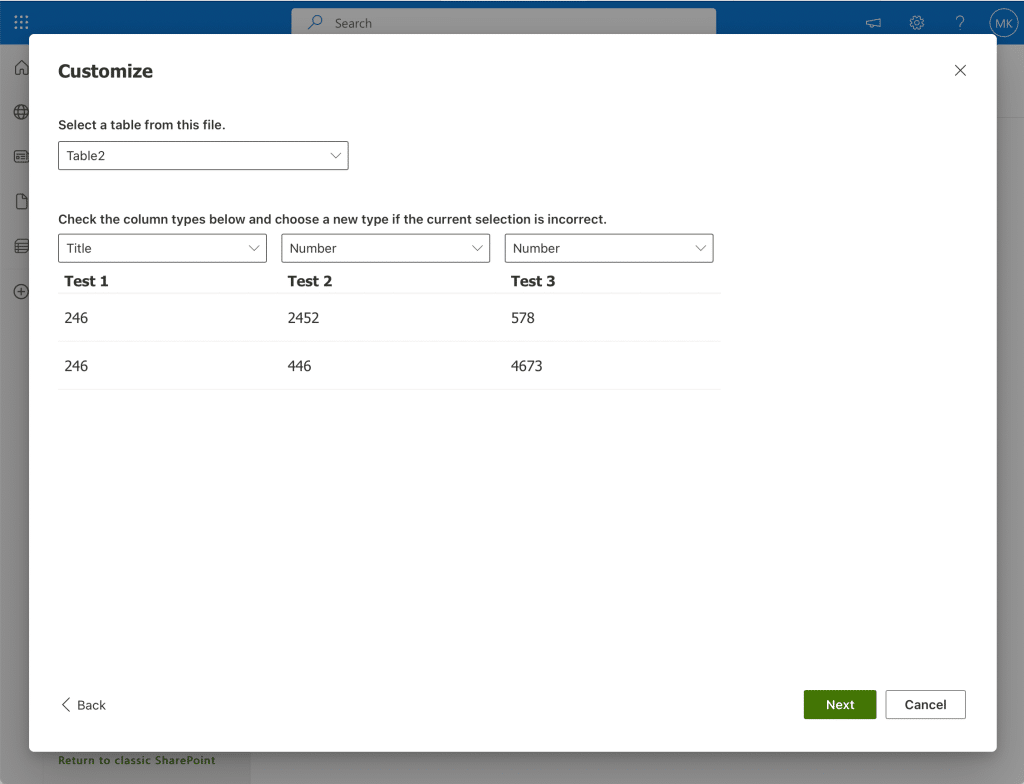
- Customize your table and click Next.
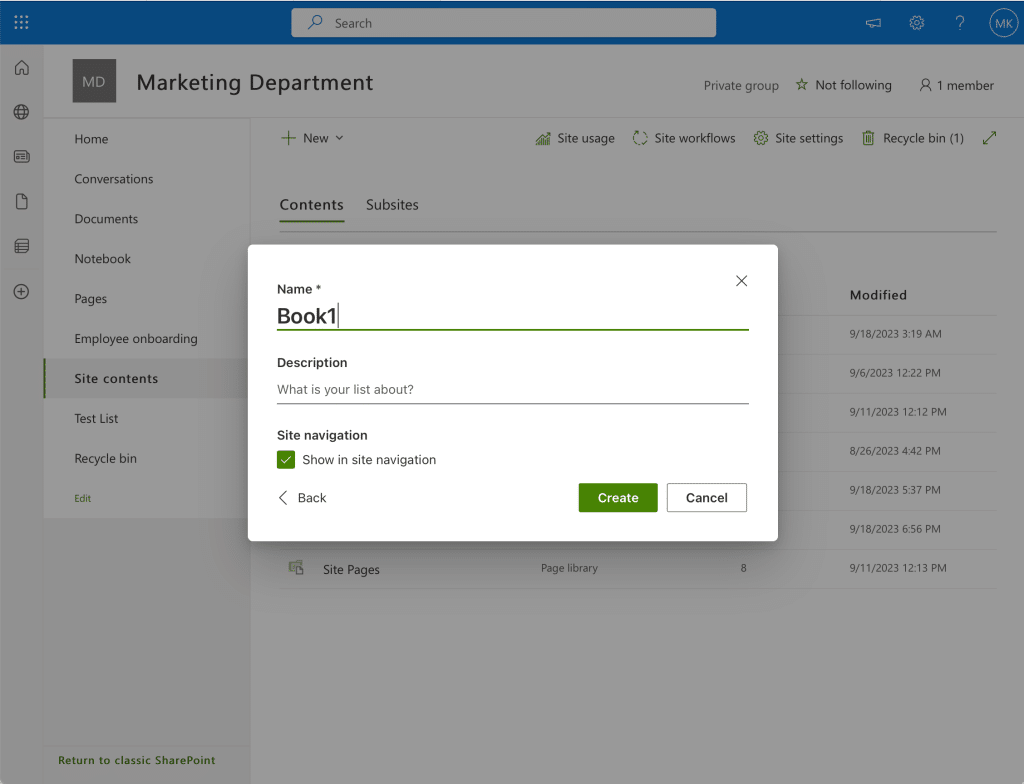
- Name your table and click Create.
By following these steps, you can quickly and effortlessly import an Excel spreadsheet into a SharePoint list, allowing you to work with your data in a more collaborative, flexible environment.
Take a look at how you can refresh an Excel File in Sharepoint with Power Automate Desktop:
Integration with Microsoft Teams and Power Automate
Integrating your SharePoint Lists with Microsoft Teams and Power Automate provides a seamless way to collaborate with your team and automate processes.
Microsoft Teams Integration

To add a list to your Microsoft Teams channel:
- Open the desired channel in Microsoft Teams.
- Click on the “+” icon to add a new tab.
- Search for and select “Lists”.
- Choose whether to create a new list, add an existing list, or use a list template.
Power Automate Integration

Power Automate (formerly known as Microsoft Flow) is an automation tool that can help you create automated workflows between your list and various other services.
You can set up triggers and actions to automate tasks such as sending notifications, updating items, or creating new entries based on specific conditions.
To create a flow using Power Automate:
- Go to the Power Automate website and sign in with your Microsoft 365 account.
- Click on “Create” from the left-hand menu.
- Choose the type of flow you wish to create (Automated, Instant, or Scheduled).
- Search for SharePoint in the list of connectors and select the appropriate trigger/action.
- Configure your flow’s settings, selecting your SharePoint site and list.
- Add any additional actions required for your workflow and save your flow.
These advanced features within SharePoint Lists offer you a more efficient way to manage your data and collaborate with your team.
Troubleshooting Common Issues

While creating a list in SharePoint Online, you might encounter some issues.
Here are some of the most common problems and some solutions you can try:
- Syncing issues: If your SharePoint lists aren’t syncing offline properly or you’re noticing sync icons appearing for longer than expected, refer to this Microsoft article on troubleshooting syncing issues.
- Unable to create a list from an Excel file: If you’re having trouble creating a list using data from an existing Excel file, try the following steps:
- Ensure you’re using a supported file format, such as .xlsx or .xls.
- Check your column headings, ensuring they are formatted correctly and do not contain special characters or exceed the character limit.
- Reduce the number of rows or columns and try again, as there may be limits on the amount of data that can be imported.
- Navigation or search issues: In case you have trouble finding an article or section in SharePoint Online troubleshooting, refer to Microsoft’s SharePoint Online troubleshooting library. This resource offers guidance for various topics, allowing you to easily track and resolve your issues.
Remember, by following these troubleshooting steps and referring to the provided resources, you can efficiently address common issues that you might face while creating a list in SharePoint Online.

Final Thoughts
Creating a list in SharePoint Online is a straightforward process that opens the door to efficient data organization.
By following the steps outlined in this article, you can start harnessing the power of SharePoint lists to streamline tasks, track information, and improve teamwork.
Remember, SharePoint offers a wealth of customization options, allowing you to tailor your list to your unique needs.
So, dive in, create your lists, and discover how SharePoint Online can simplify your data management and boost productivity across your team or organization.
Frequently Asked Questions
What are some common examples of SharePoint lists?
Common examples of SharePoint lists include:
- Issue tracking lists: For managing and tracking issues within a project.
- Task lists: To assign and manage tasks among team members.
- Event calendars: For scheduling events and meetings.
- Contacts lists: To maintain contact information for team members and external stakeholders.
These lists can be customized to fit the specific needs of your organization.
Is it possible to create a SharePoint list within Microsoft Teams?
Yes, you can create a SharePoint list within Microsoft Teams.
To do so, follow these steps below:
- Begin by adding a new tab to your team channel by clicking the + symbol.
- Choose the Lists app and select Create a List.
- Choose a pre-built template or create a custom list in SharePoint from scratch.
- Enter the necessary details, and your new list will be available within your Microsoft Teams channel.
How do I add a list to the SharePoint home page?
To add a list to the SharePoint home page:
- Navigate to your home page and click the Edit button.
- Next, click on the plus icon (+) to add a new web part and select the List web part.
- Choose the list that you wish to display on your home page, configure its appearance, and click Publish.
What’s the difference between a SharePoint list and a SharePoint library?
A SharePoint list is a collection of structured data, such as tasks, contacts, or events, that can be organized, displayed, and managed in various ways.
A SharePoint library is a document storage location where users can upload, share, and manage files, such as Word documents, Excel spreadsheets, and PDF files.
The primary difference is that lists contain structured data items, while libraries store documents and files.
Can I create a task list in SharePoint Online?
Yes, you can create a task list in SharePoint Online.
To do so, navigate to your SharePoint site’s home page or the Site Contents page, click on New, and select List.
Choose a pre-built template designed for task lists or create a custom list by selecting a blank list.
Add the appropriate columns, such as task name, start date, end date, and assignee, and then begin adding tasks to your list.
Can I create an app in a SharePoint list?
Yes. By integrating with Power Apps you are able to create or choose an app for your list.
To do this:
- Open your SharePoint list.
- In the menu bar at the top, select Integrate.
- Select Power Apps and then choose Create an app or open the See all apps option to see the available app list.


