In Tableau, grouping is a technique used to combine similar items in a visualization. This process simplifies the data by grouping related information, making it easier to understand and analyze.
To group in Tableau:
Select the items you want to group in the view.
Right-click on the selected items and choose the “Group” option from the context menu.
A new group will be created, and you can rename it as needed.
Tableau allows for dynamic or constant group, enabling you to easily adapt your groupings based on the needs of your analysis. Grouping allows you to organize your data and present it in a clear and insightful manner.
In this article, we’ll delve into the specifics of grouping in Tableau. You will learn how to group your data in a view, followed by examples to help you better understand the concepts.
Let’s get started!

3 Methods of Grouping Data in Tableau
In this section, we will go over 3 methods of creating groups in Tableau.
Specifically, we will discuss the following:
Grouping Using The Context Menu
Grouping Using The Toolbar Menu
Manual Grouping Within the View
Before we discuss each of the methods above, connect to a data source and check for any data errors in your dataset. Proceed to create groups only when you are done correcting data errors in your dataset.

1. How to Group Using the Context Menu
To create groups using the context menu, follow these steps:
Step 1
Right-click on the items you want to group in the view.
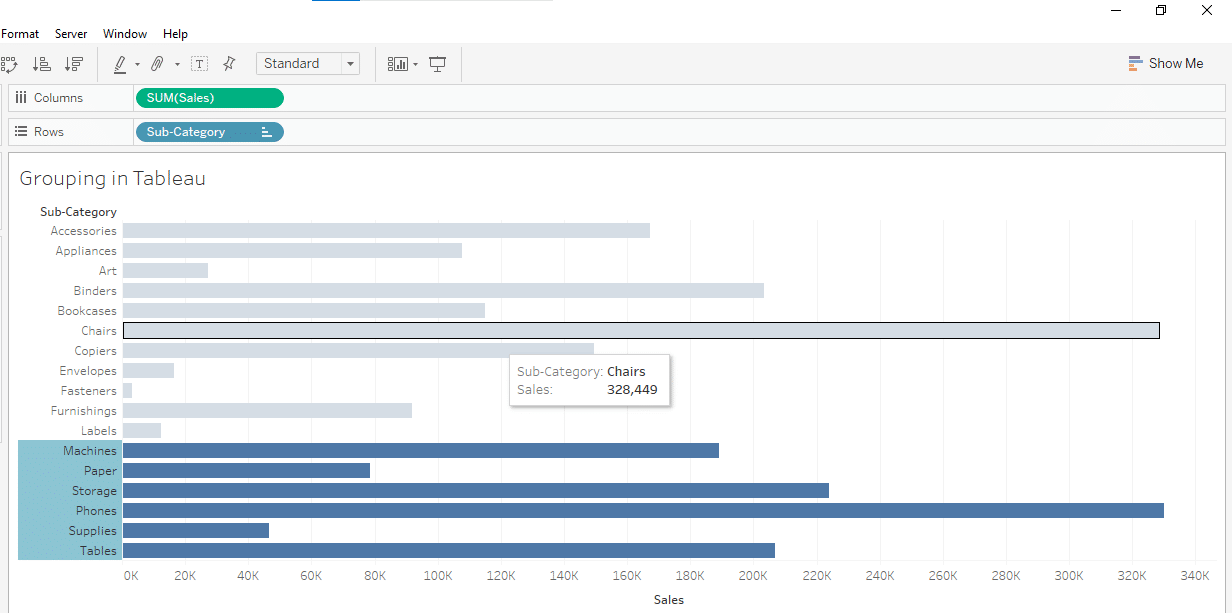
Step 2
Select the group icon from the context menu.
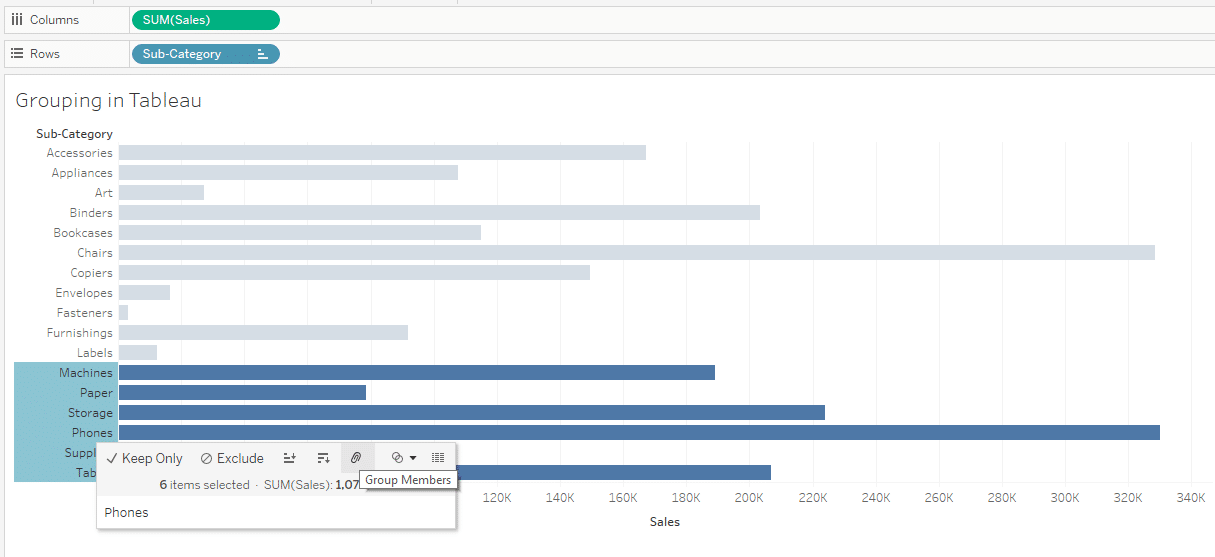
A new tableau group will be created, with multiple members combined into a single group.
Step 3
After executing step 2, a new group will be created as shown below:
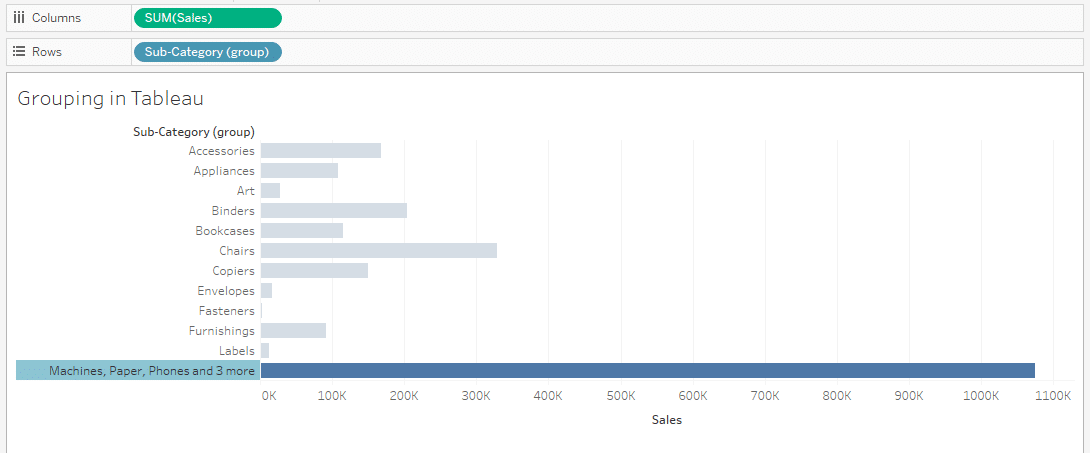
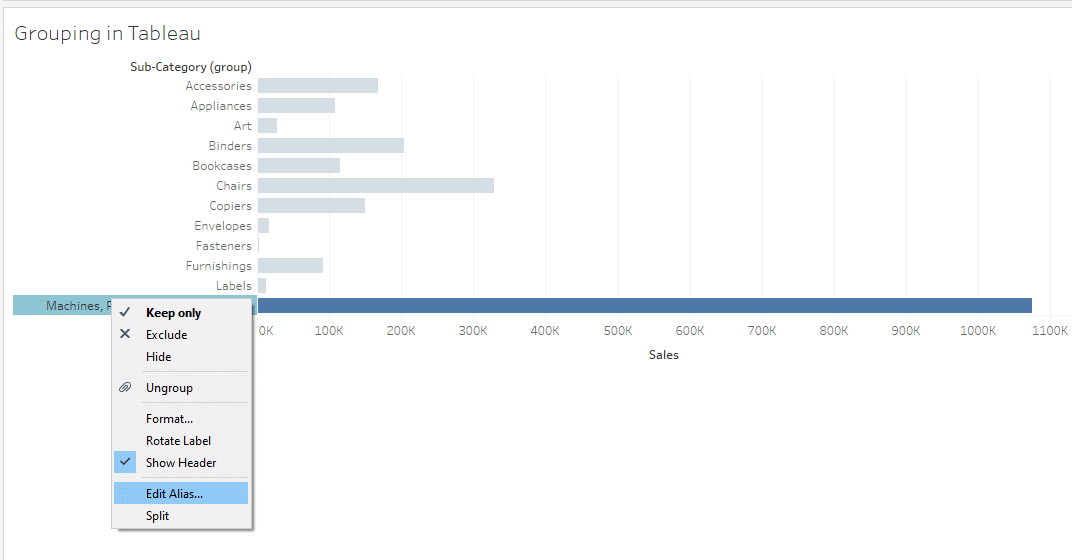
You can rename the group by right-clicking it and selecting Edit Alias.
2. How to Group Using The Toolbar Menu
To create groups using the toolbar menu in Tableau, follow the steps given below:
Step 1
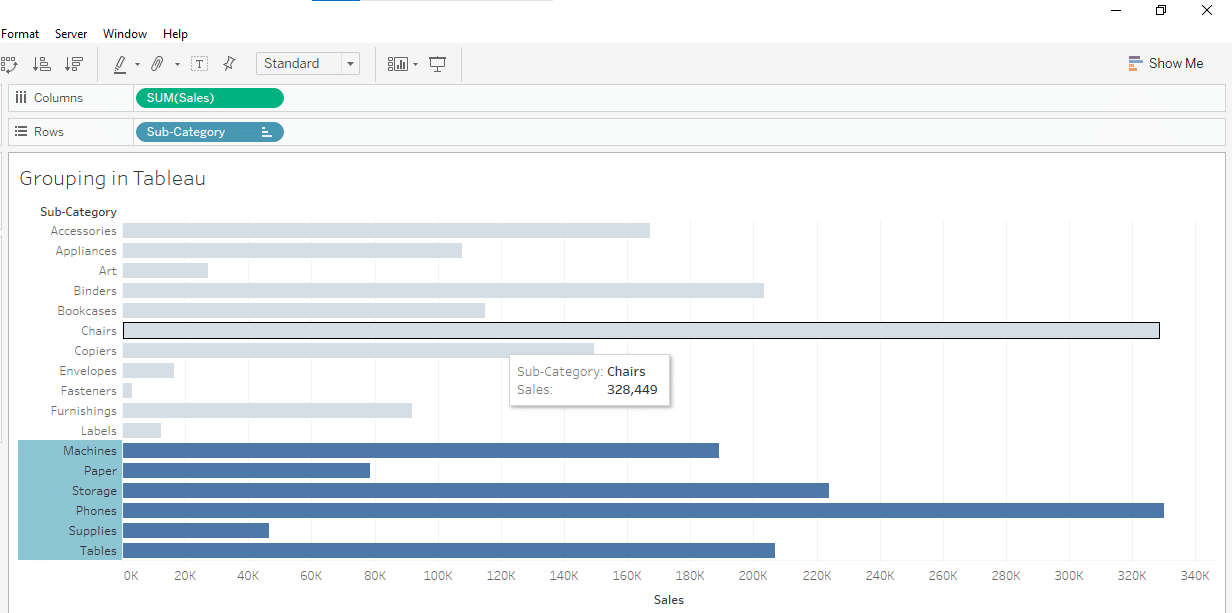
Right-click on the items you want to group in the view.
Step 2
Locate the group icon in the Toolbar menu. Click on it to group the selected item.
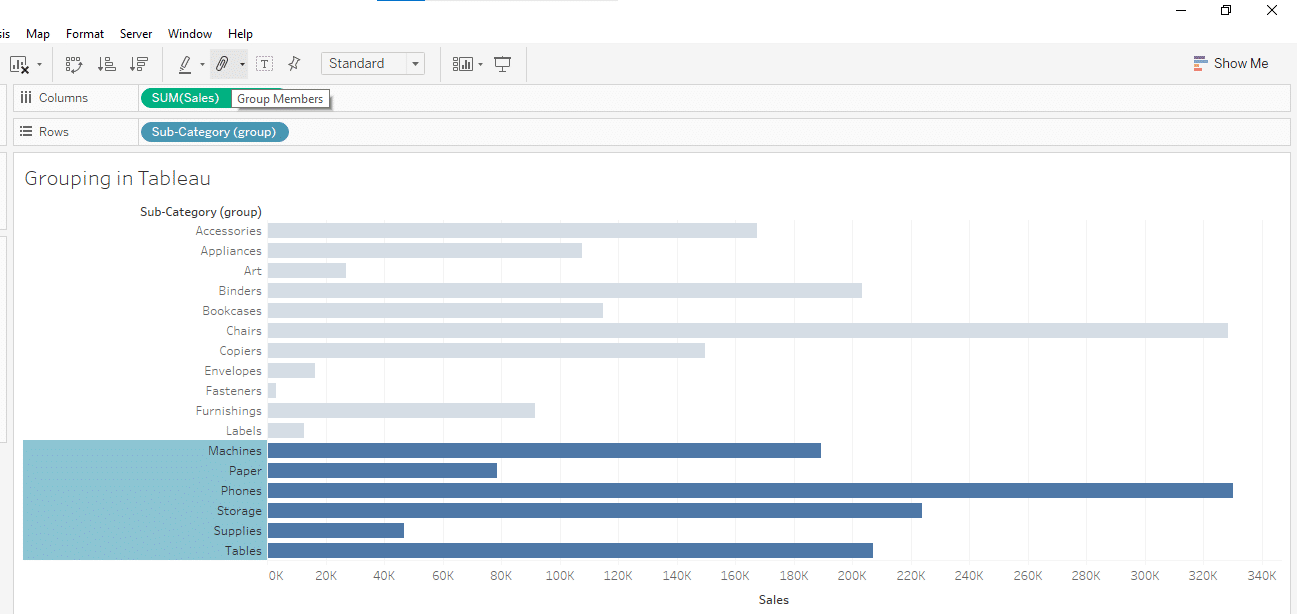
This will create a new group and you can change its names and items according to your needs.
3. How to Manually Group Items
You can also manually create groups in Tableau. To group items, follow the steps given below:
Step 1
Select all the items you want to group in the view.
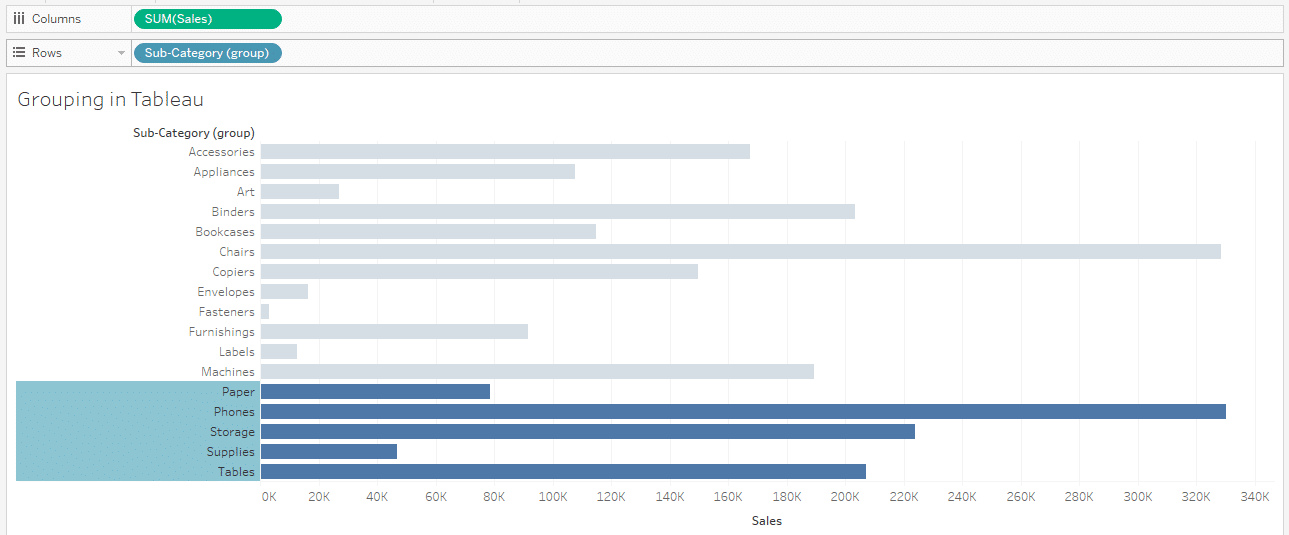
Step 2
Right-click on the selected items and click Group.
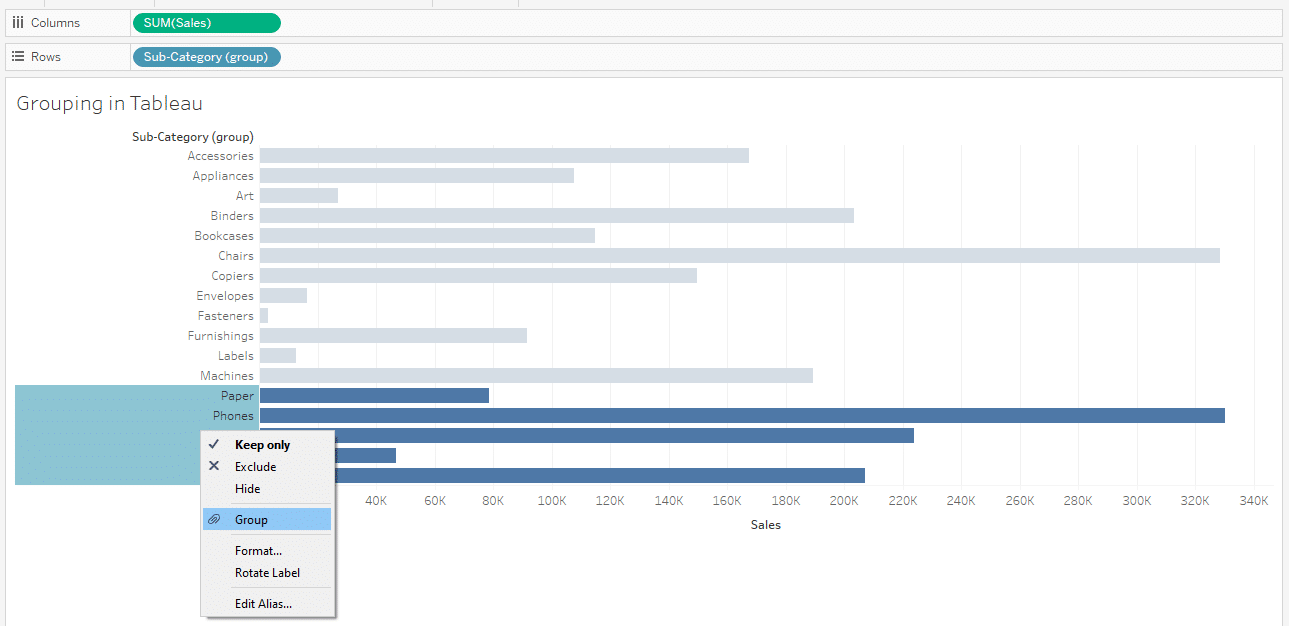
This will create a new group of items. You can change its properties according to your needs.
How to Ungroup in Tableau
Ungrouping in Tableau is the process of breaking a group into one or more members, or regrouping them differently.
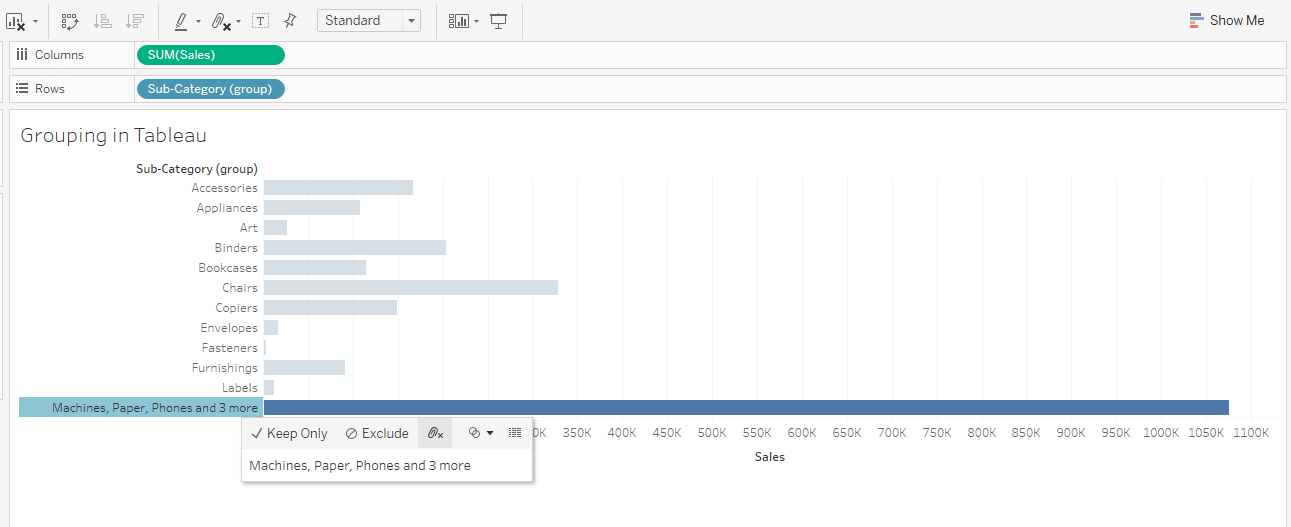
To ungroup an existing group in Tableau, you can select the desired group and click on the ungroup icon in the context menu as shown below:
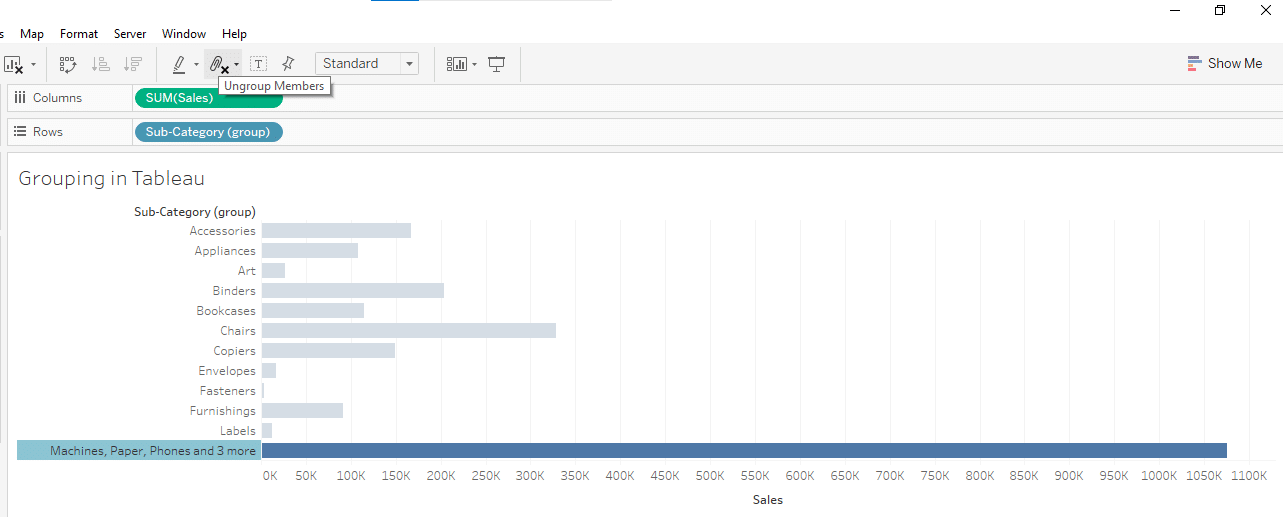
You can also ungroup by clicking the ungroup icon in the toolbar menu.
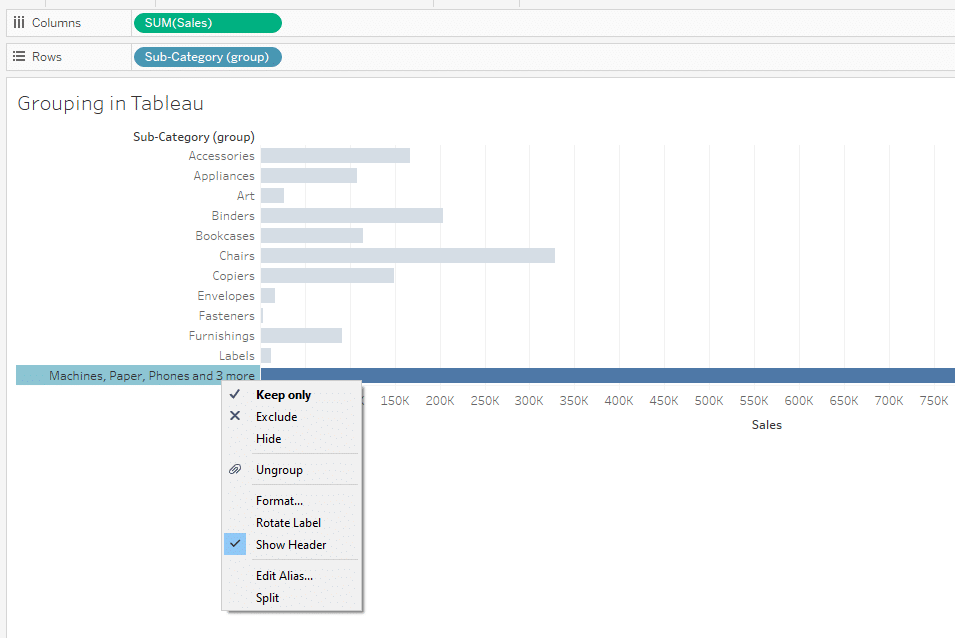
Another way of ungrouping in Tableau is the right-click on the group, and select Ungroup from the list of options.
This will ungroup all the elements of the group into its original form in the view.
Learn Advanced Data Analytics by watching the following video:
Final Thoughts
In this article, we’ve explored the various ways to group and ungroup data in Tableau. Whether you’re using the context menu, the toolbar menu, or manually creating groups, Tableau provides a flexible and powerful set of tools for managing your data.
As you become more familiar with these techniques, you’ll find that they not only help you organize your data effectively but also enable you to create more insightful visualizations.
The more you utilize groups in your projects, the better you’ll understand its use cases, and admire its uniqueness in Tableau. Therefore, experiment and explore different grouping options to find the best approach for your specific needs.
Frequently Asked Questions
In this section, you will find some frequently asked questions you may have when working with grouping in Tableau.

How do I create a group based on values in Tableau?
To create a group based on values in Tableau, you can follow these steps:
Select the values you want to group in the view by clicking on them while holding the Ctrl key (Cmd key on Mac).
Right-click on the selected values and choose the “Group” option from the context menu.
A new group will be created, and you can rename it as needed.
How can I use the Group dialog box in Tableau?
To use the Group dialog box in Tableau, you can follow these steps:
Select the items you want to group in the view.
Right-click on the selected items and choose the “Group” option from the context menu, or use the keyboard shortcut Ctrl+G.
In the Group dialog box, you can add or remove items, change the group’s name, or modify its properties.
Click “OK” to create the group.
What is the difference between groups and sets in Tableau?
In Tableau, groups and sets are both ways to combine and categorize data.
The main difference between them is that groups are used to combine data at a lower level of detail, such as individual data points, while sets are used to group data at a higher level of detail, such as aggregated data.
How do I ungroup data in Tableau?
To ungroup data in Tableau, you can follow these steps:
In the Data pane, locate the grouped field you want to ungroup.
Right-click on the grouped field and choose the “Ungroup” option from the context menu.
The grouped field will be ungrouped, and the individual members will be displayed in the Data pane.


