
SharePoint Online has become an essential tool for businesses and teams looking to streamline their collaboration and information management.
One key feature of SharePoint is the ability to create custom forms for various purposes, such as collecting data, managing tasks, or submitting requests.
To create a SharePoint Online form:

- Access your desired list for which you want to create a new form.
- Click on the +New button located at the top of the list. This will open a default form template that you can customize as per your requirements.
- Click Add New to add fields and questions to your form based on the information you want to collect.
- Configure the field settings, like making it required or adding a default value if necessary.
- Click Save to publish your form.
In this article, we’ll show you the process of creating a form in SharePoint Online using different tools and techniques.
We will cover embedding Microsoft Forms, leveraging the power of Power Apps, and creating a simple SharePoint form within the platform.
We’ll also show you how to customize your forms and how to use them the most effectively within your organization.
Let’s Begin!

SharePoint Forms Basics
SharePoint forms are digital tools used to collect and organize information within Microsoft SharePoint.
These forms allow users to input data in a structured manner, much like filling out a paper form, but in a digital format.

SharePoint offers different tools for creating forms, including built-in options like SharePoint lists or libraries, as well as more advanced capabilities through tools like Microsoft PowerApps or third-party form solutions.
By understanding and utilizing SharePoint forms, you can streamline data management processes and create a more organized and efficient workflow and business processes for your organization.
Now let’s talk about why you should be using forms in SharePoint.

Why Use SharePoint Forms
Organizations use forms in SharePoint for several important reasons:
- Data Collection and Standardization: SharePoint forms provide a structured way to collect data, ensuring that information is consistently and accurately recorded.
This helps organizations maintain data quality and integrity. - Streamlined Processes: Forms in SharePoint automate and streamline various business processes, reducing manual data entry and paperwork.
- Data Accessibility: SharePoint forms make it easy to store and access collected data.
- Customization: SharePoint allows organizations to customize forms to meet specific business needs. They can create forms for various purposes, such as surveys, feedback collection, employee onboarding, and more.
- Integration: SharePoint forms can be integrated with other Microsoft tools like Microsoft PowerApps, Flow, and Excel.
This enables organizations to create more complex and interactive forms that can trigger automated workflows. - Reporting and Analysis: Collected data from SharePoint forms can be used for reporting and analysis.
Organizations can gain insights into trends, make data-driven decisions, and monitor performance. - Compliance and Security: SharePoint provides features for managing data security and compliance requirements, ensuring that sensitive information is protected and meets regulatory standards.
- Mobile Accessibility: SharePoint forms can be accessed from mobile devices, allowing users to submit data and access information while on the go.
To access all of the above benefits and more, here is a step-by-step guide to creating SharePoint forms.
How to Create a SharePoint Online Form

There are 3 main ways to create forms for use in SharePoint:
- SharePoint Forms
- Using Power Apps integration
- Using Microsoft Forms
Option 1: SharePoint Online Forms
Creating a form in SharePoint Online is a straightforward process that ensures efficient data collection and management.
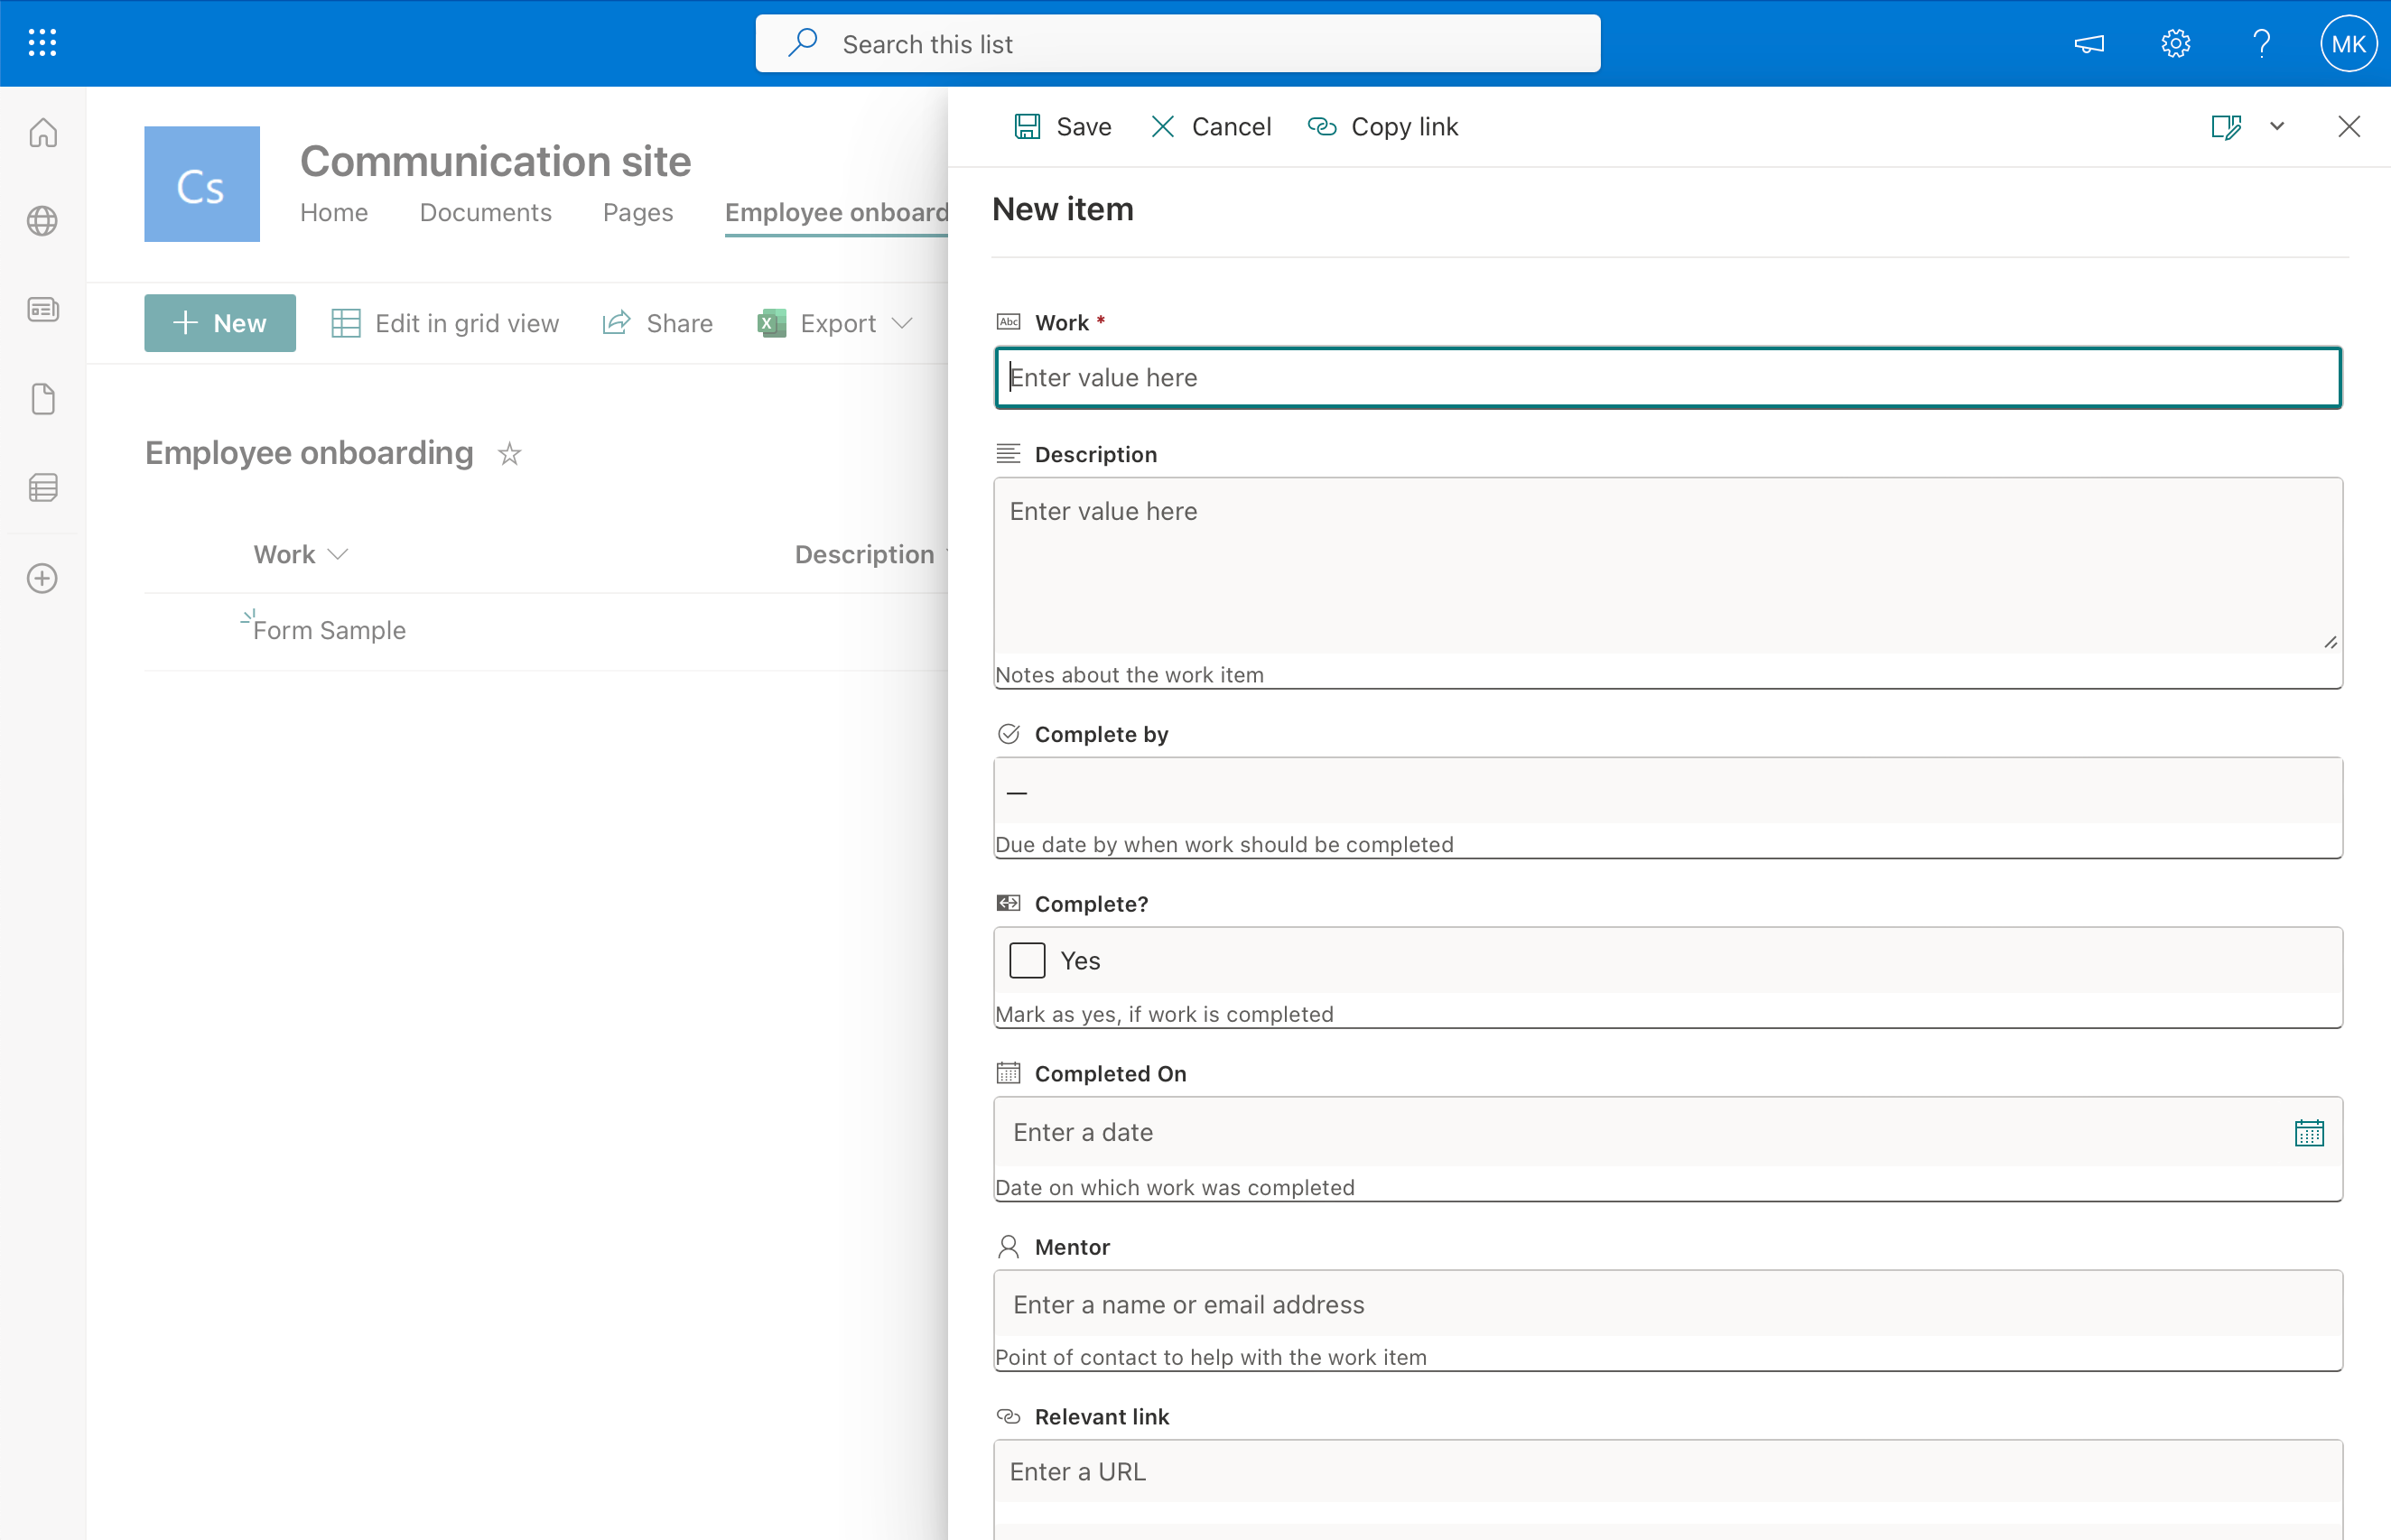
To create a SharePoint Online form:
- Access your desired list for which you want to create a new form.
- Click on the +New button located at the top of the list. This will open a default form template that you can customize as per your requirements.
- Click Add New to add fields and questions to your form based on the information you want to collect.
- Configure the field settings, like making it required or adding a default value if necessary.
- Click Save to publish your form.
When creating a form in SharePoint, it’s essential to choose the right column types to ensure that only relevant and formatted data is stored in the respective columns.
Column options include:
- Text columns are perfect for storing short strings, such as names or addresses. By default, the maximum character limit for a text column is 255 characters, but you can adjust this if necessary.
- Date columns allow you to store dates, making them ideal for deadlines, events, or other time-sensitive information. SharePoint’s date column also supports a date and time format to capture more specific timeframes.
- Choice columns provide a predefined set of options for users to select from. You can create a choice column to offer selections formatted as drop-down menus, radio buttons, or checkboxes.
Remember that you can always go back and edit your form to make further changes or add new fields whenever required.
To further customize SharePoint forms:
- Open the SharePoint form.
- Click Edit form and select Customize with Power Apps.

In the Power Apps editor, you can modify the layout, font, colors, and sections of your form.
Option 2: Creating SharePoint Forms using Power Apps
Creating custom forms for your SharePoint Online lists is easier than ever with Power Apps, a powerful and user-friendly tool that integrates seamlessly with Microsoft services.
Here are the steps to create a form using Power Apps:

Step 1: Create a list
To create a list in SharePoint:
- Access the site where you want your list to reside.
- Click the gear icon to access the settings.
- Click on Site Contents.
- Click on + New and click List.
- Choose your template and name the list.
- Click Create.
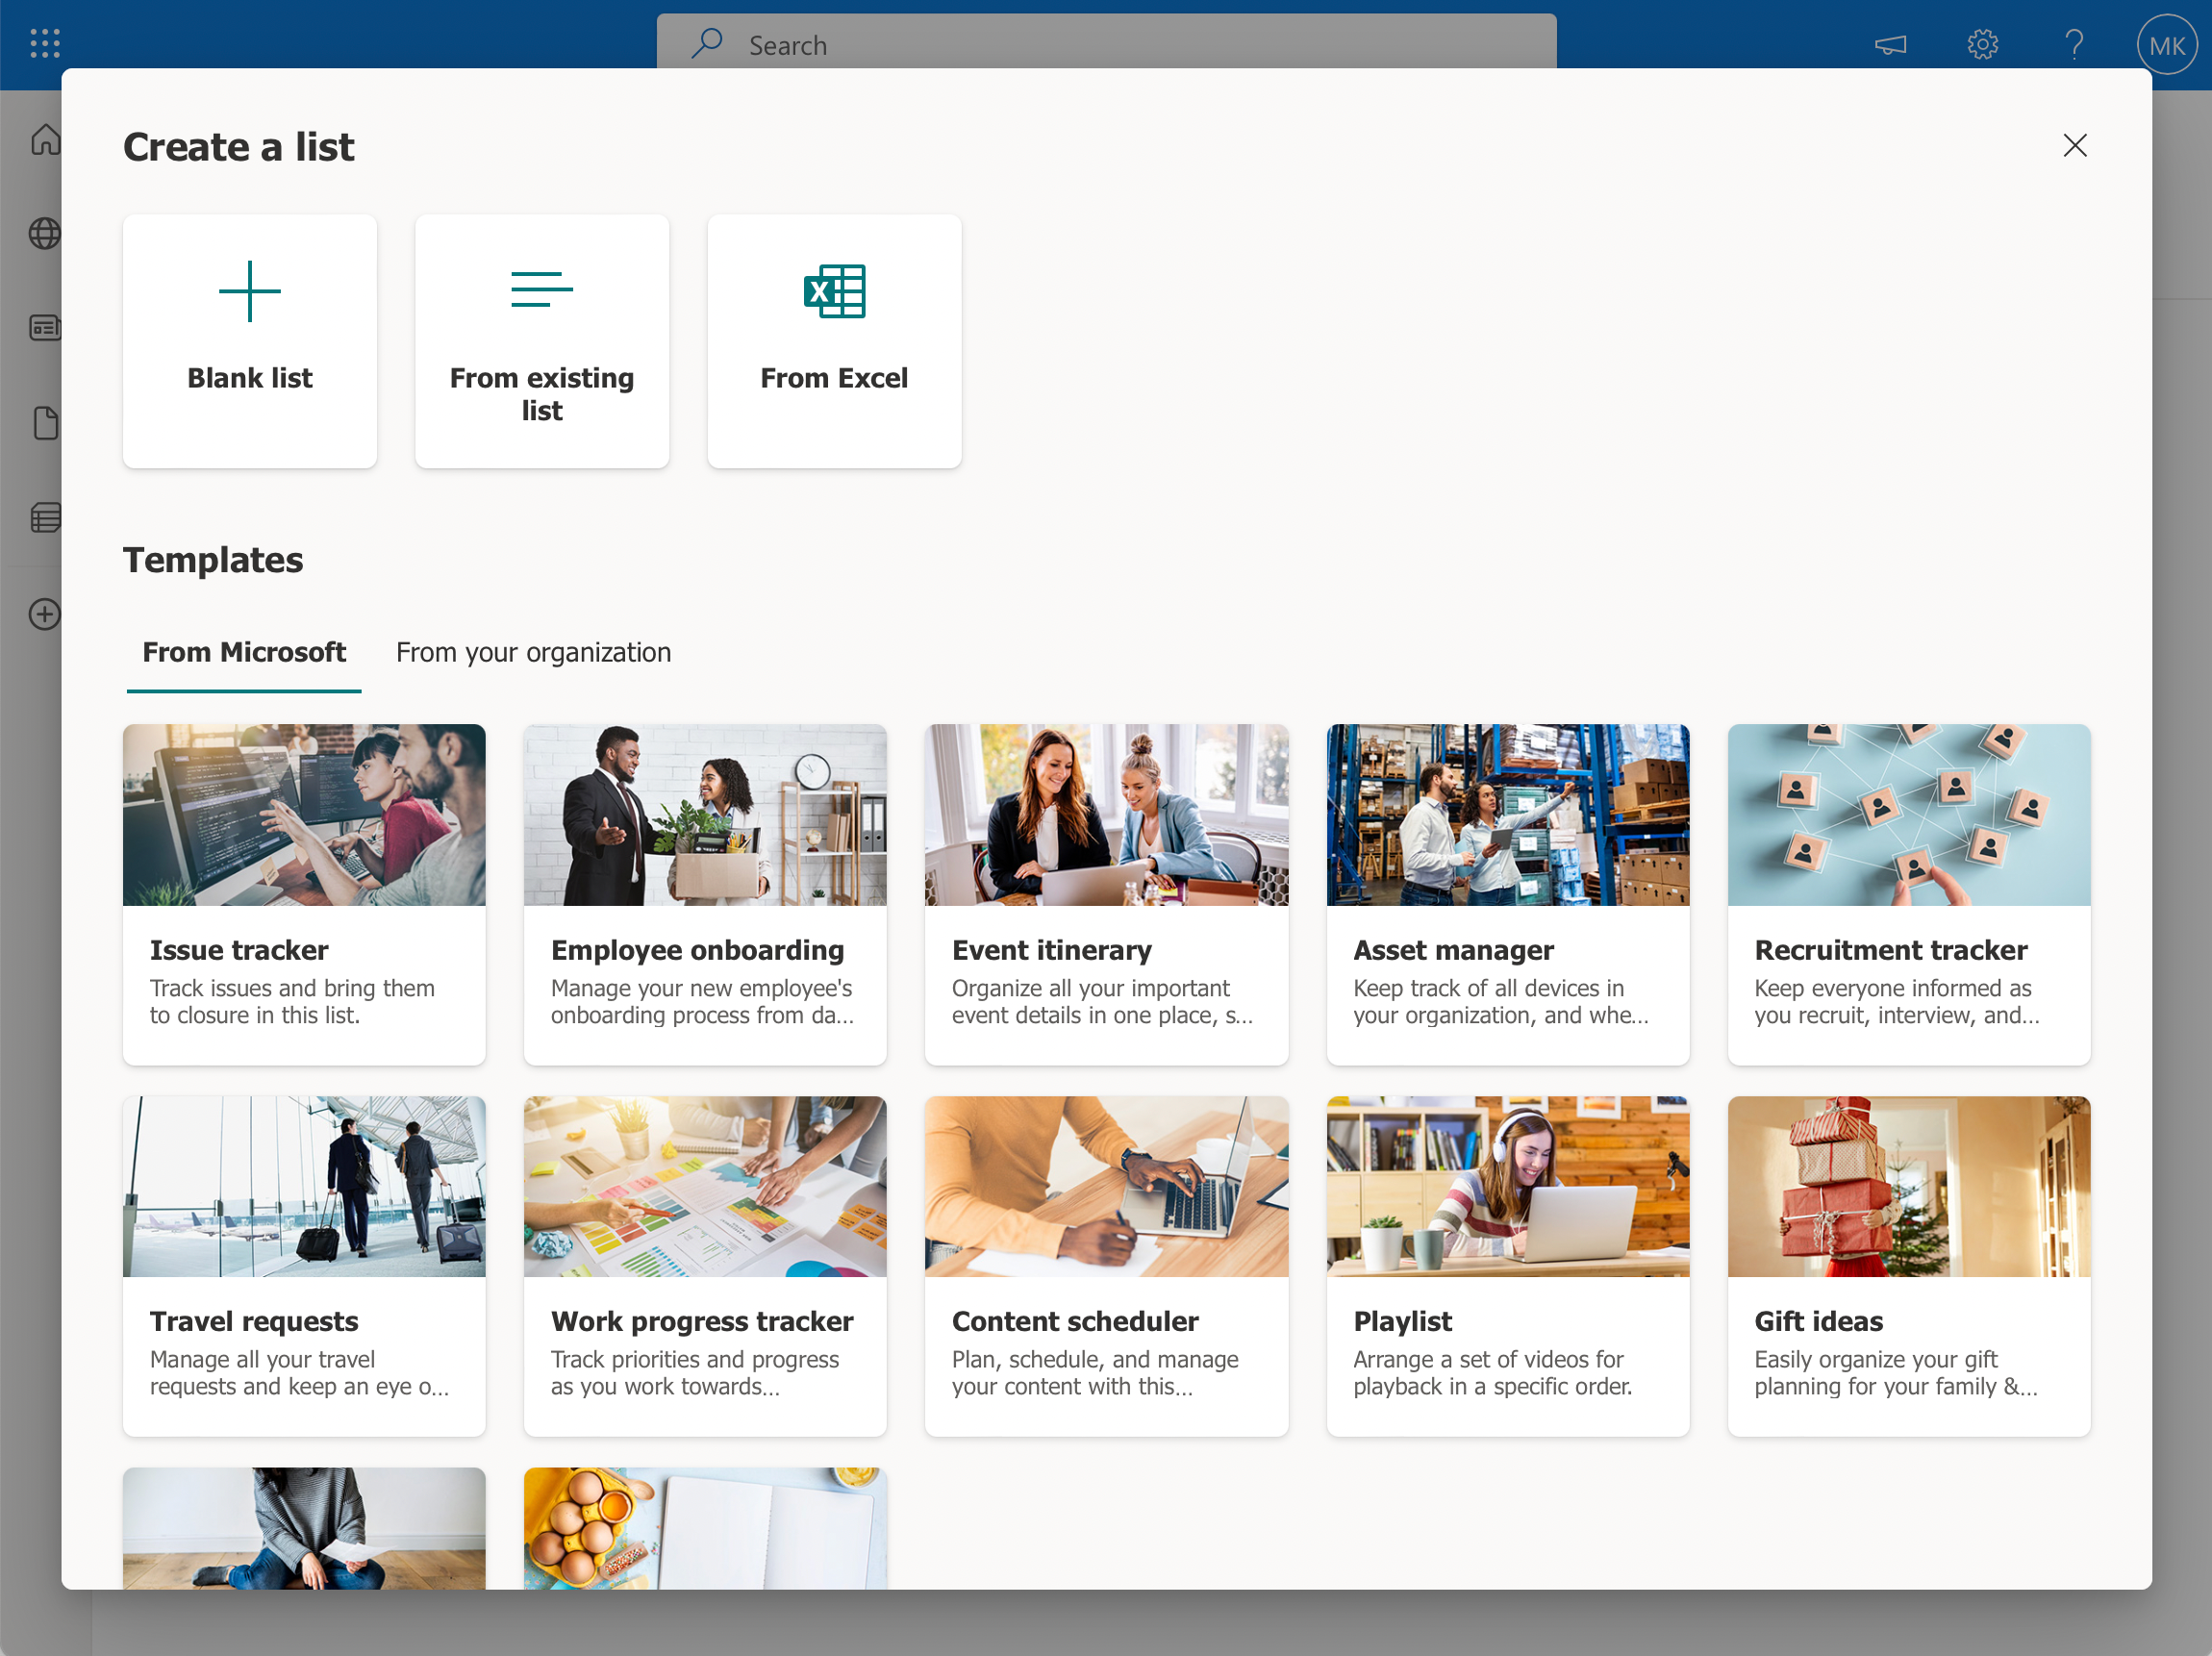
If you have already activated lists, you can skip steps 1-3 and click + New in the site’s command bar and click Lists to create a list.
Step 2: Create a form with Power Apps
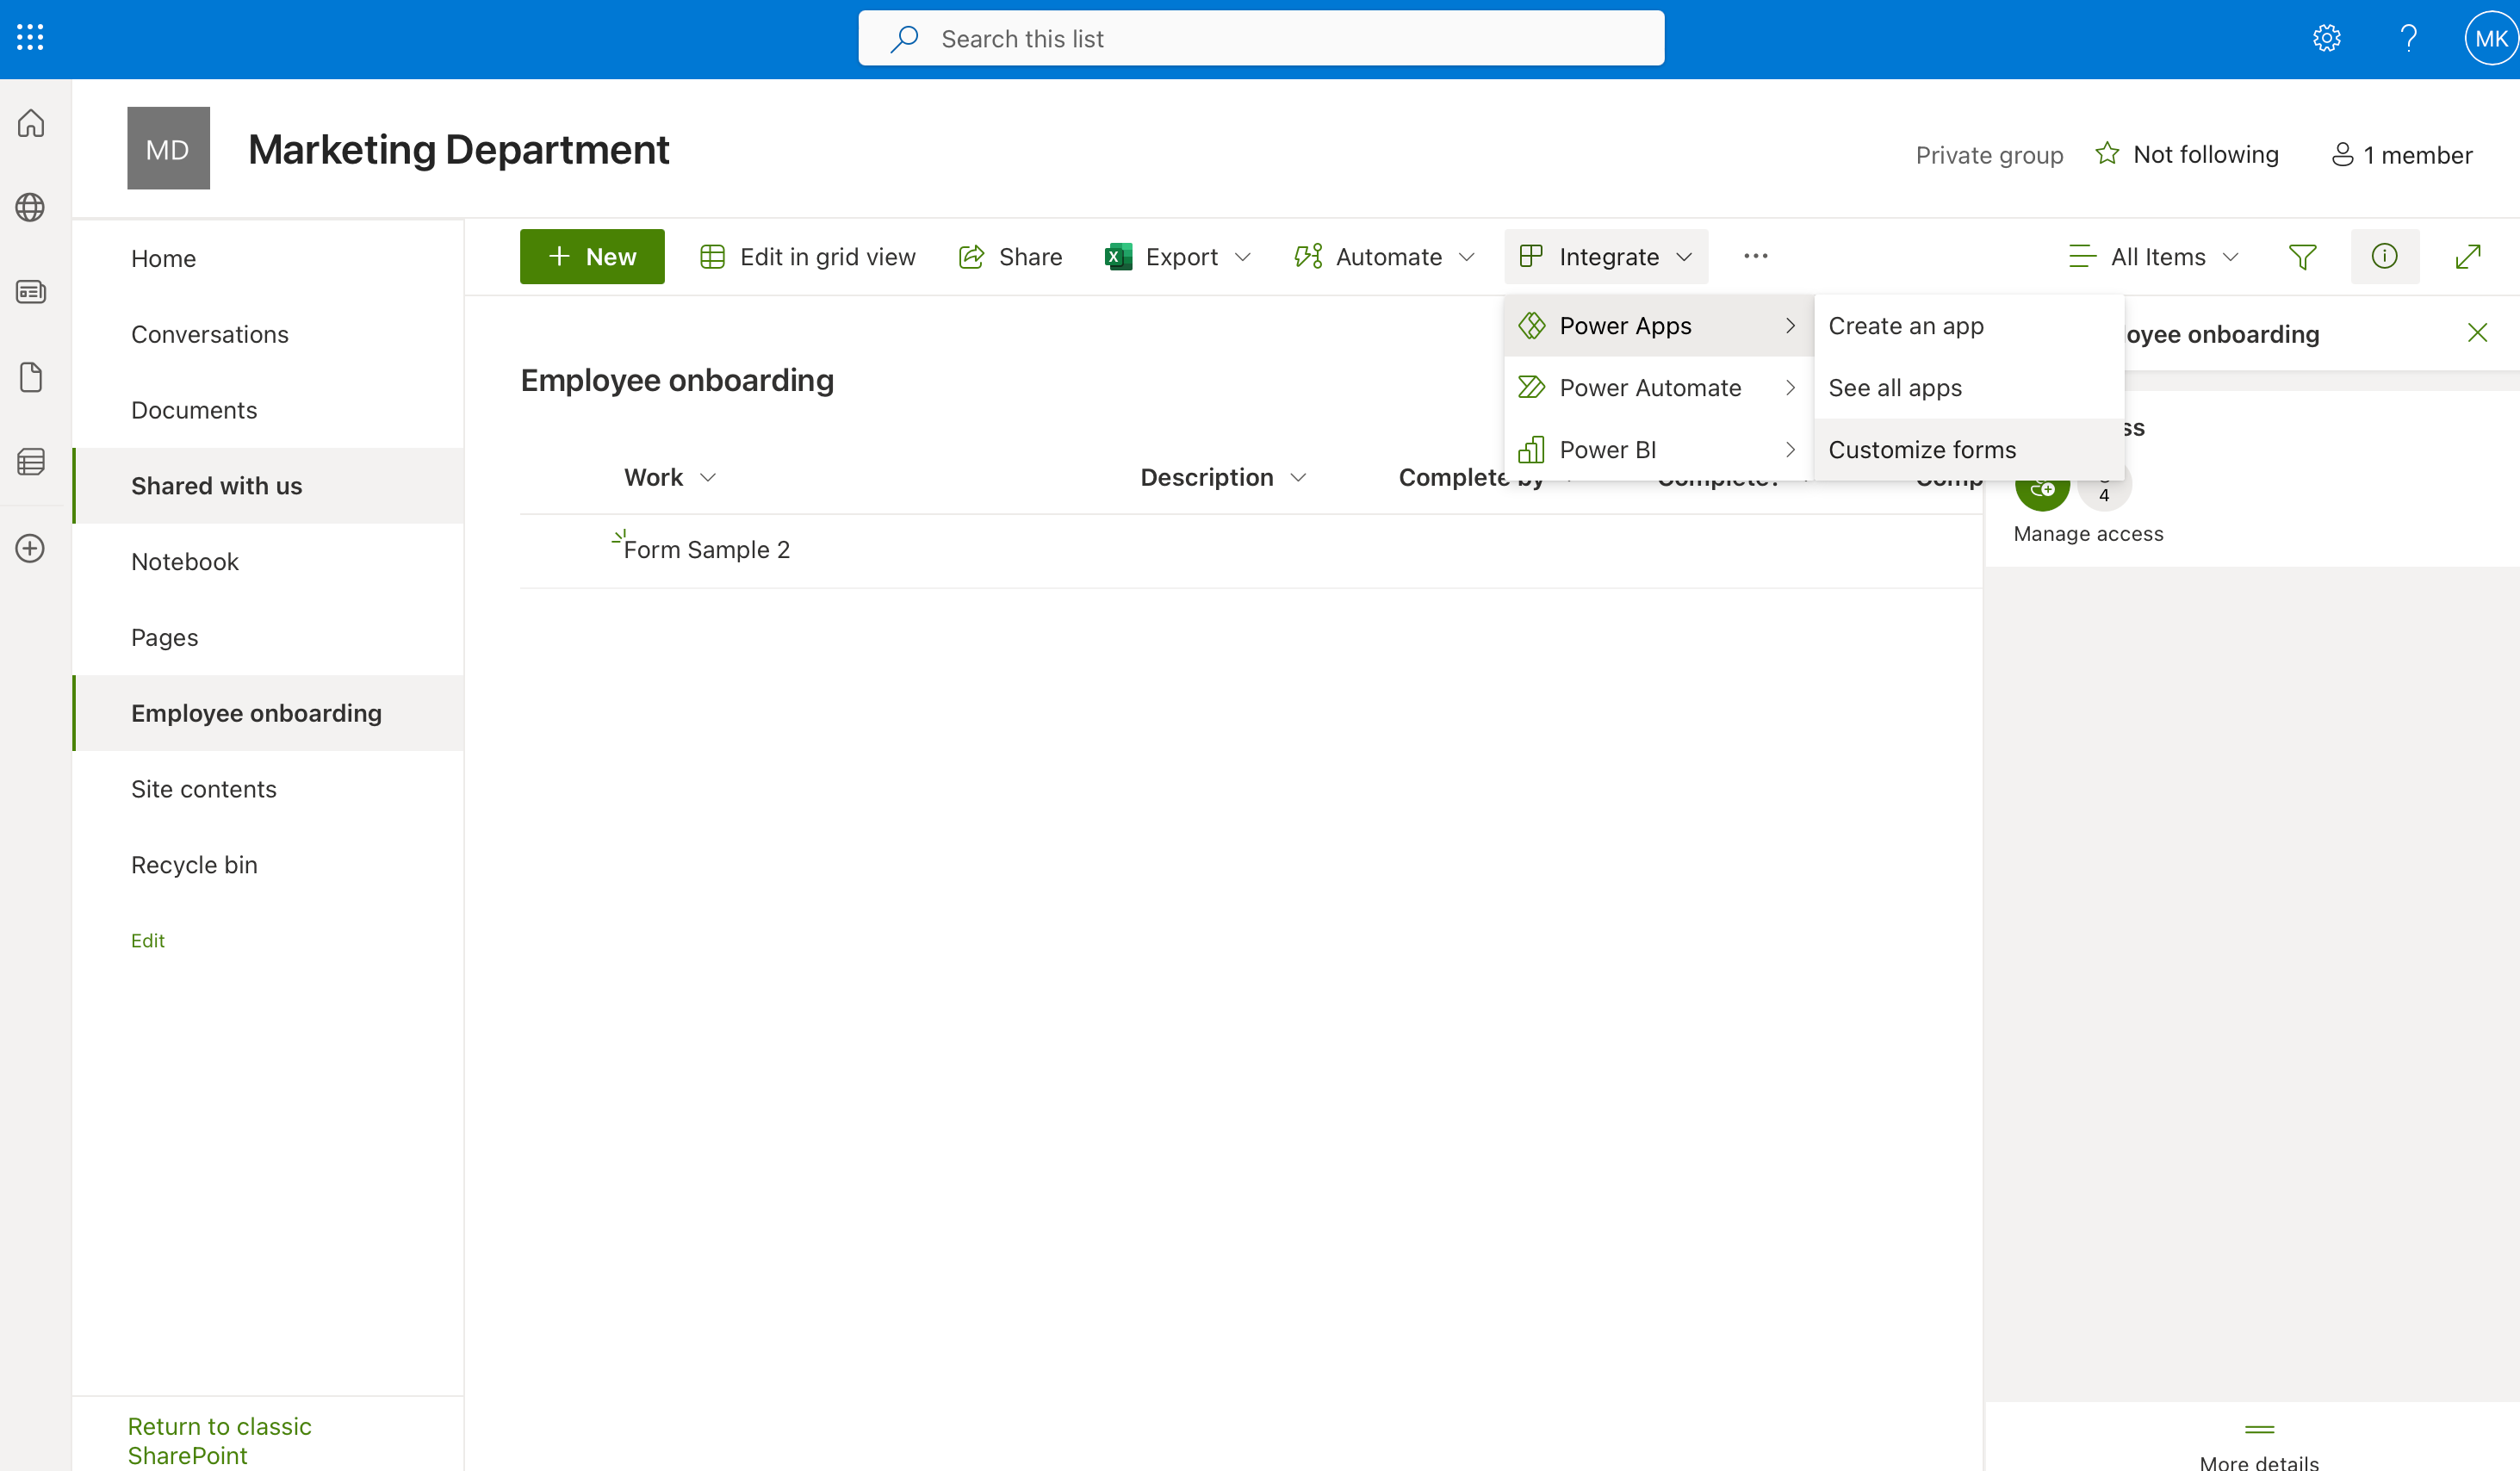
- Open your list by clicking on your chosen list in the command bar.
- Click Integrate in the command bar.
- Navigate to Power Apps and then Customize forms.
- Customize your form in the Power Apps Studio.
- Click the Publish button in the top right of the command bar.
- Click on Publish to SharePoint to make it accessible in SharePoint.
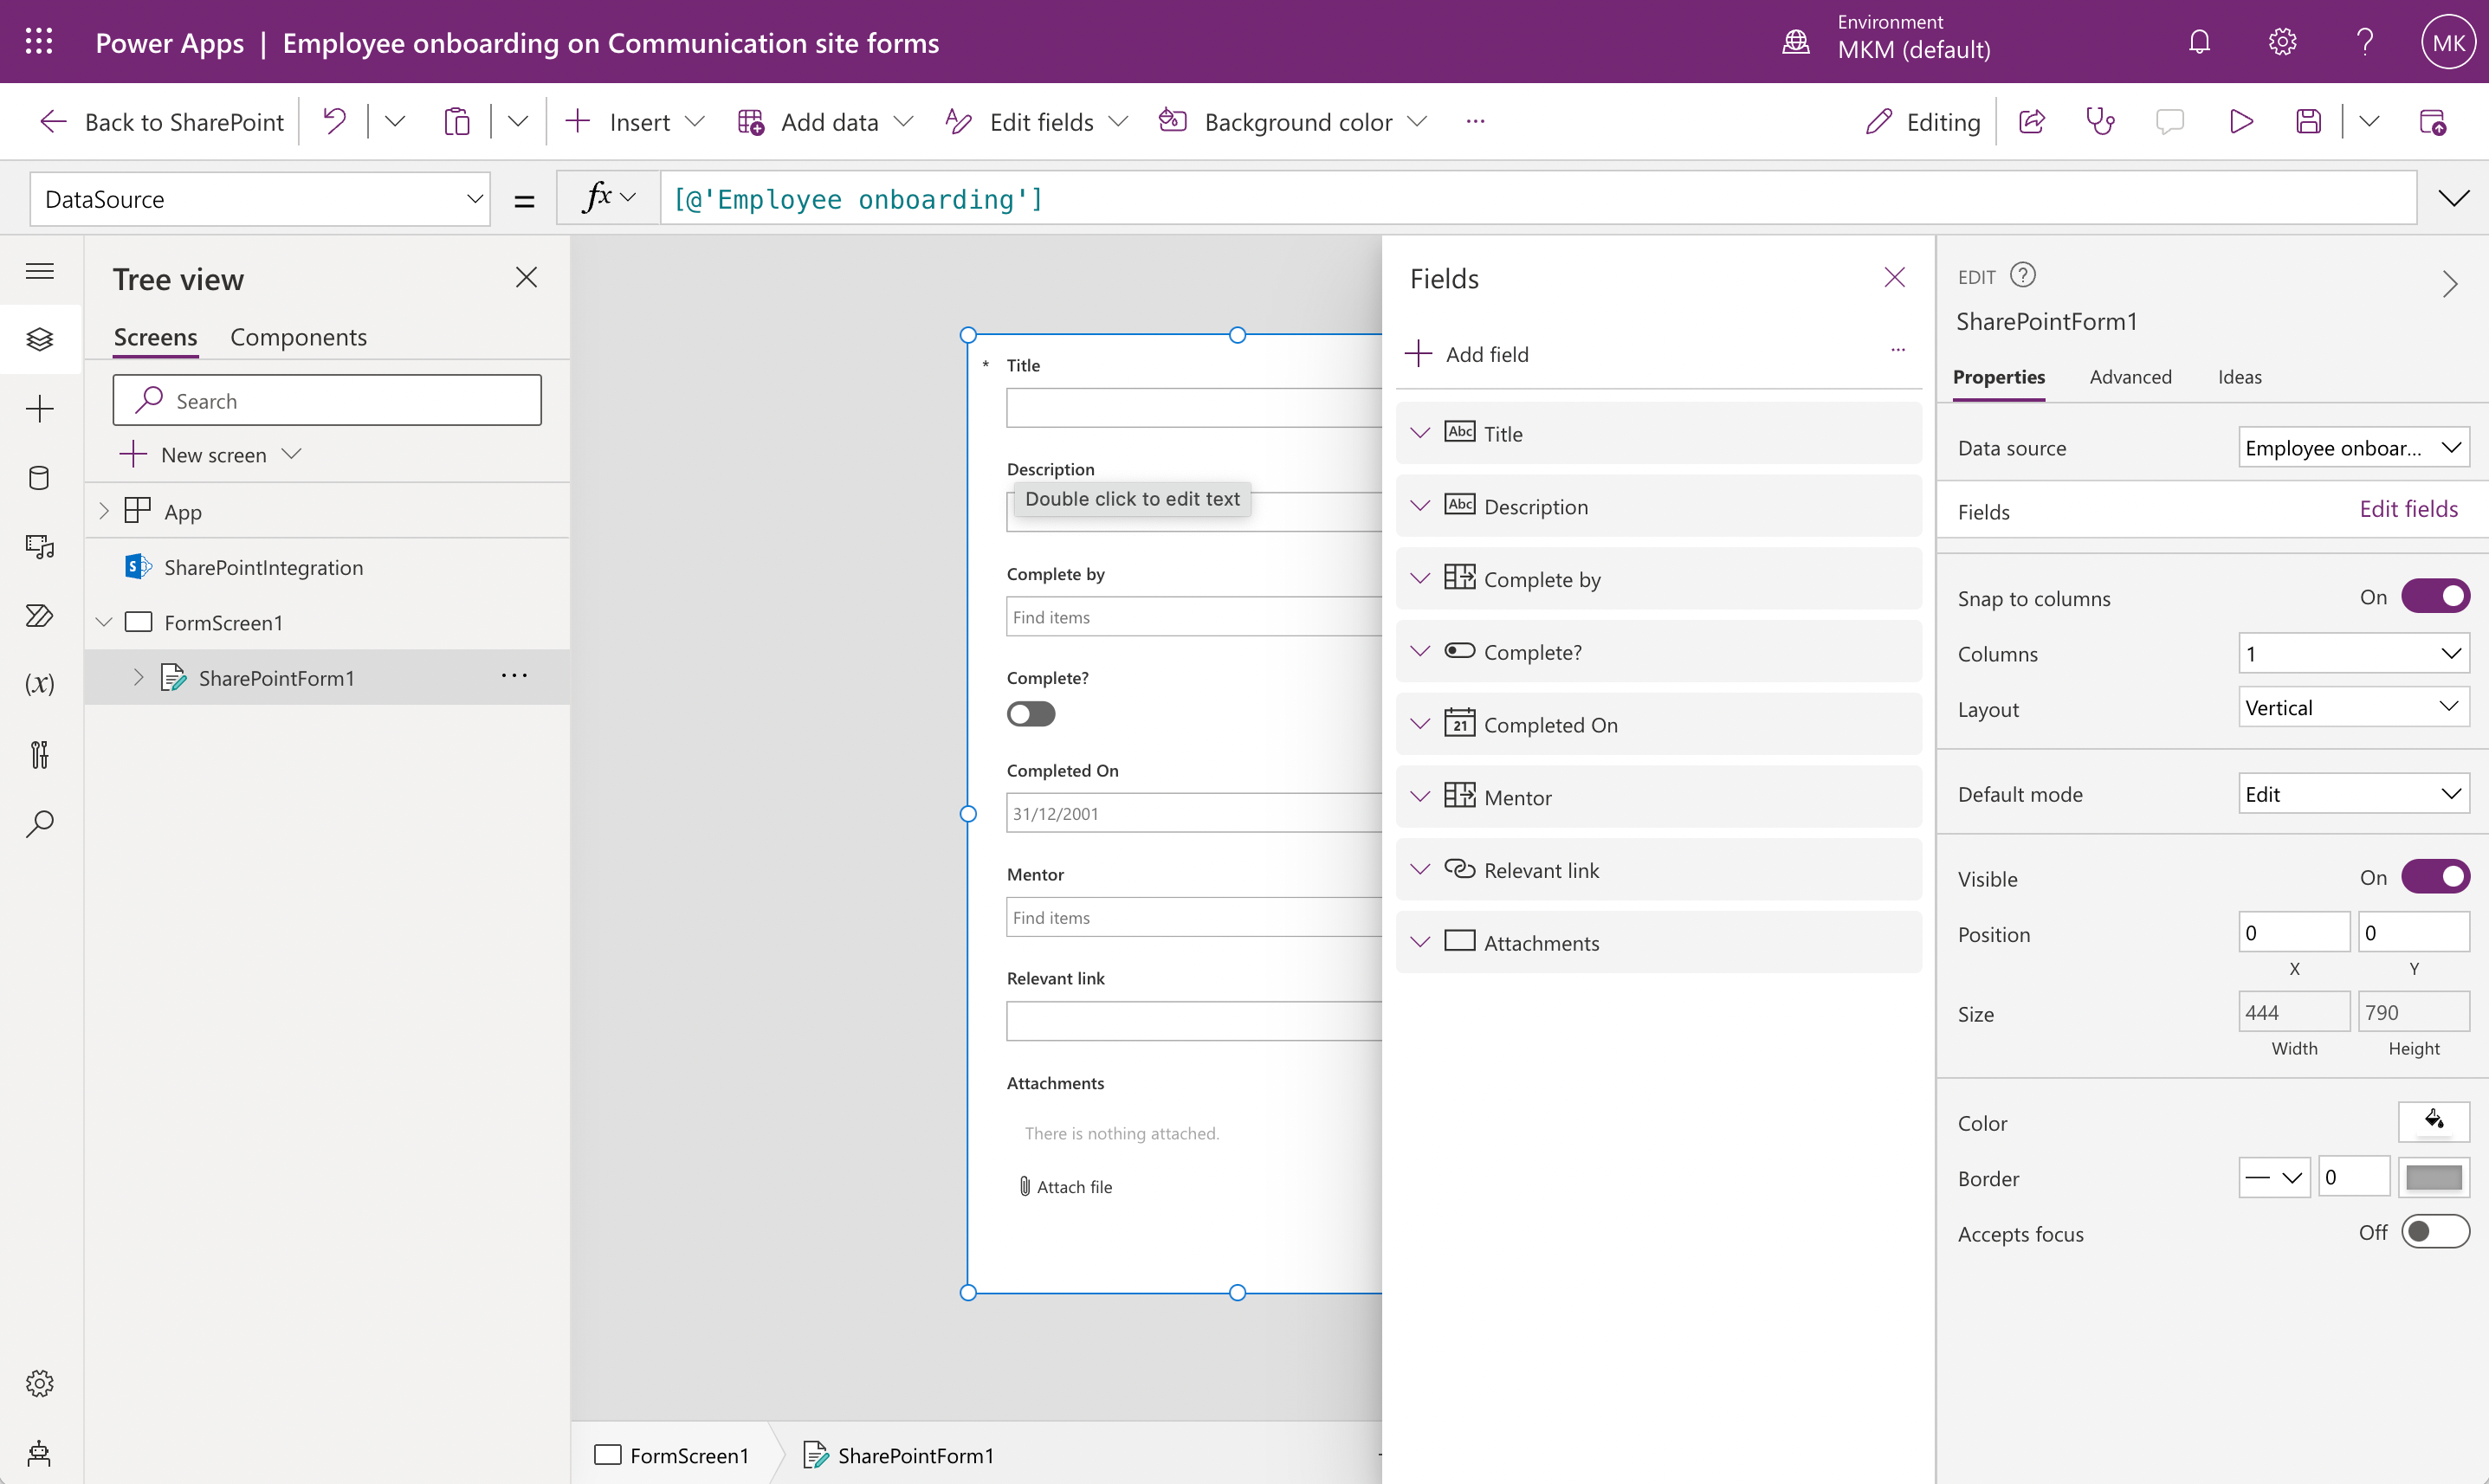
Some useful features you may want to consider while creating a custom form in Power Apps include:
- Reordering fields: Arrange fields in your form to ensure a logical and coherent flow by dragging and dropping fields within the form as needed.
- Conditional visibility: Use conditional rules to display or hide certain fields based on specific criteria.
For example, you may choose to display certain fields only for a specific user group or based on the value of another field. - Data validation: Ensure your form collects accurate and consistent data by implementing data validation rules, such as required fields, input types, and allowed values.
Once you are satisfied with your form and have published it, users can now access and fill out the form, providing data that gets stored in the associated SharePoint list.
Option 3: Creating SharePoint Forms using Microsoft Forms
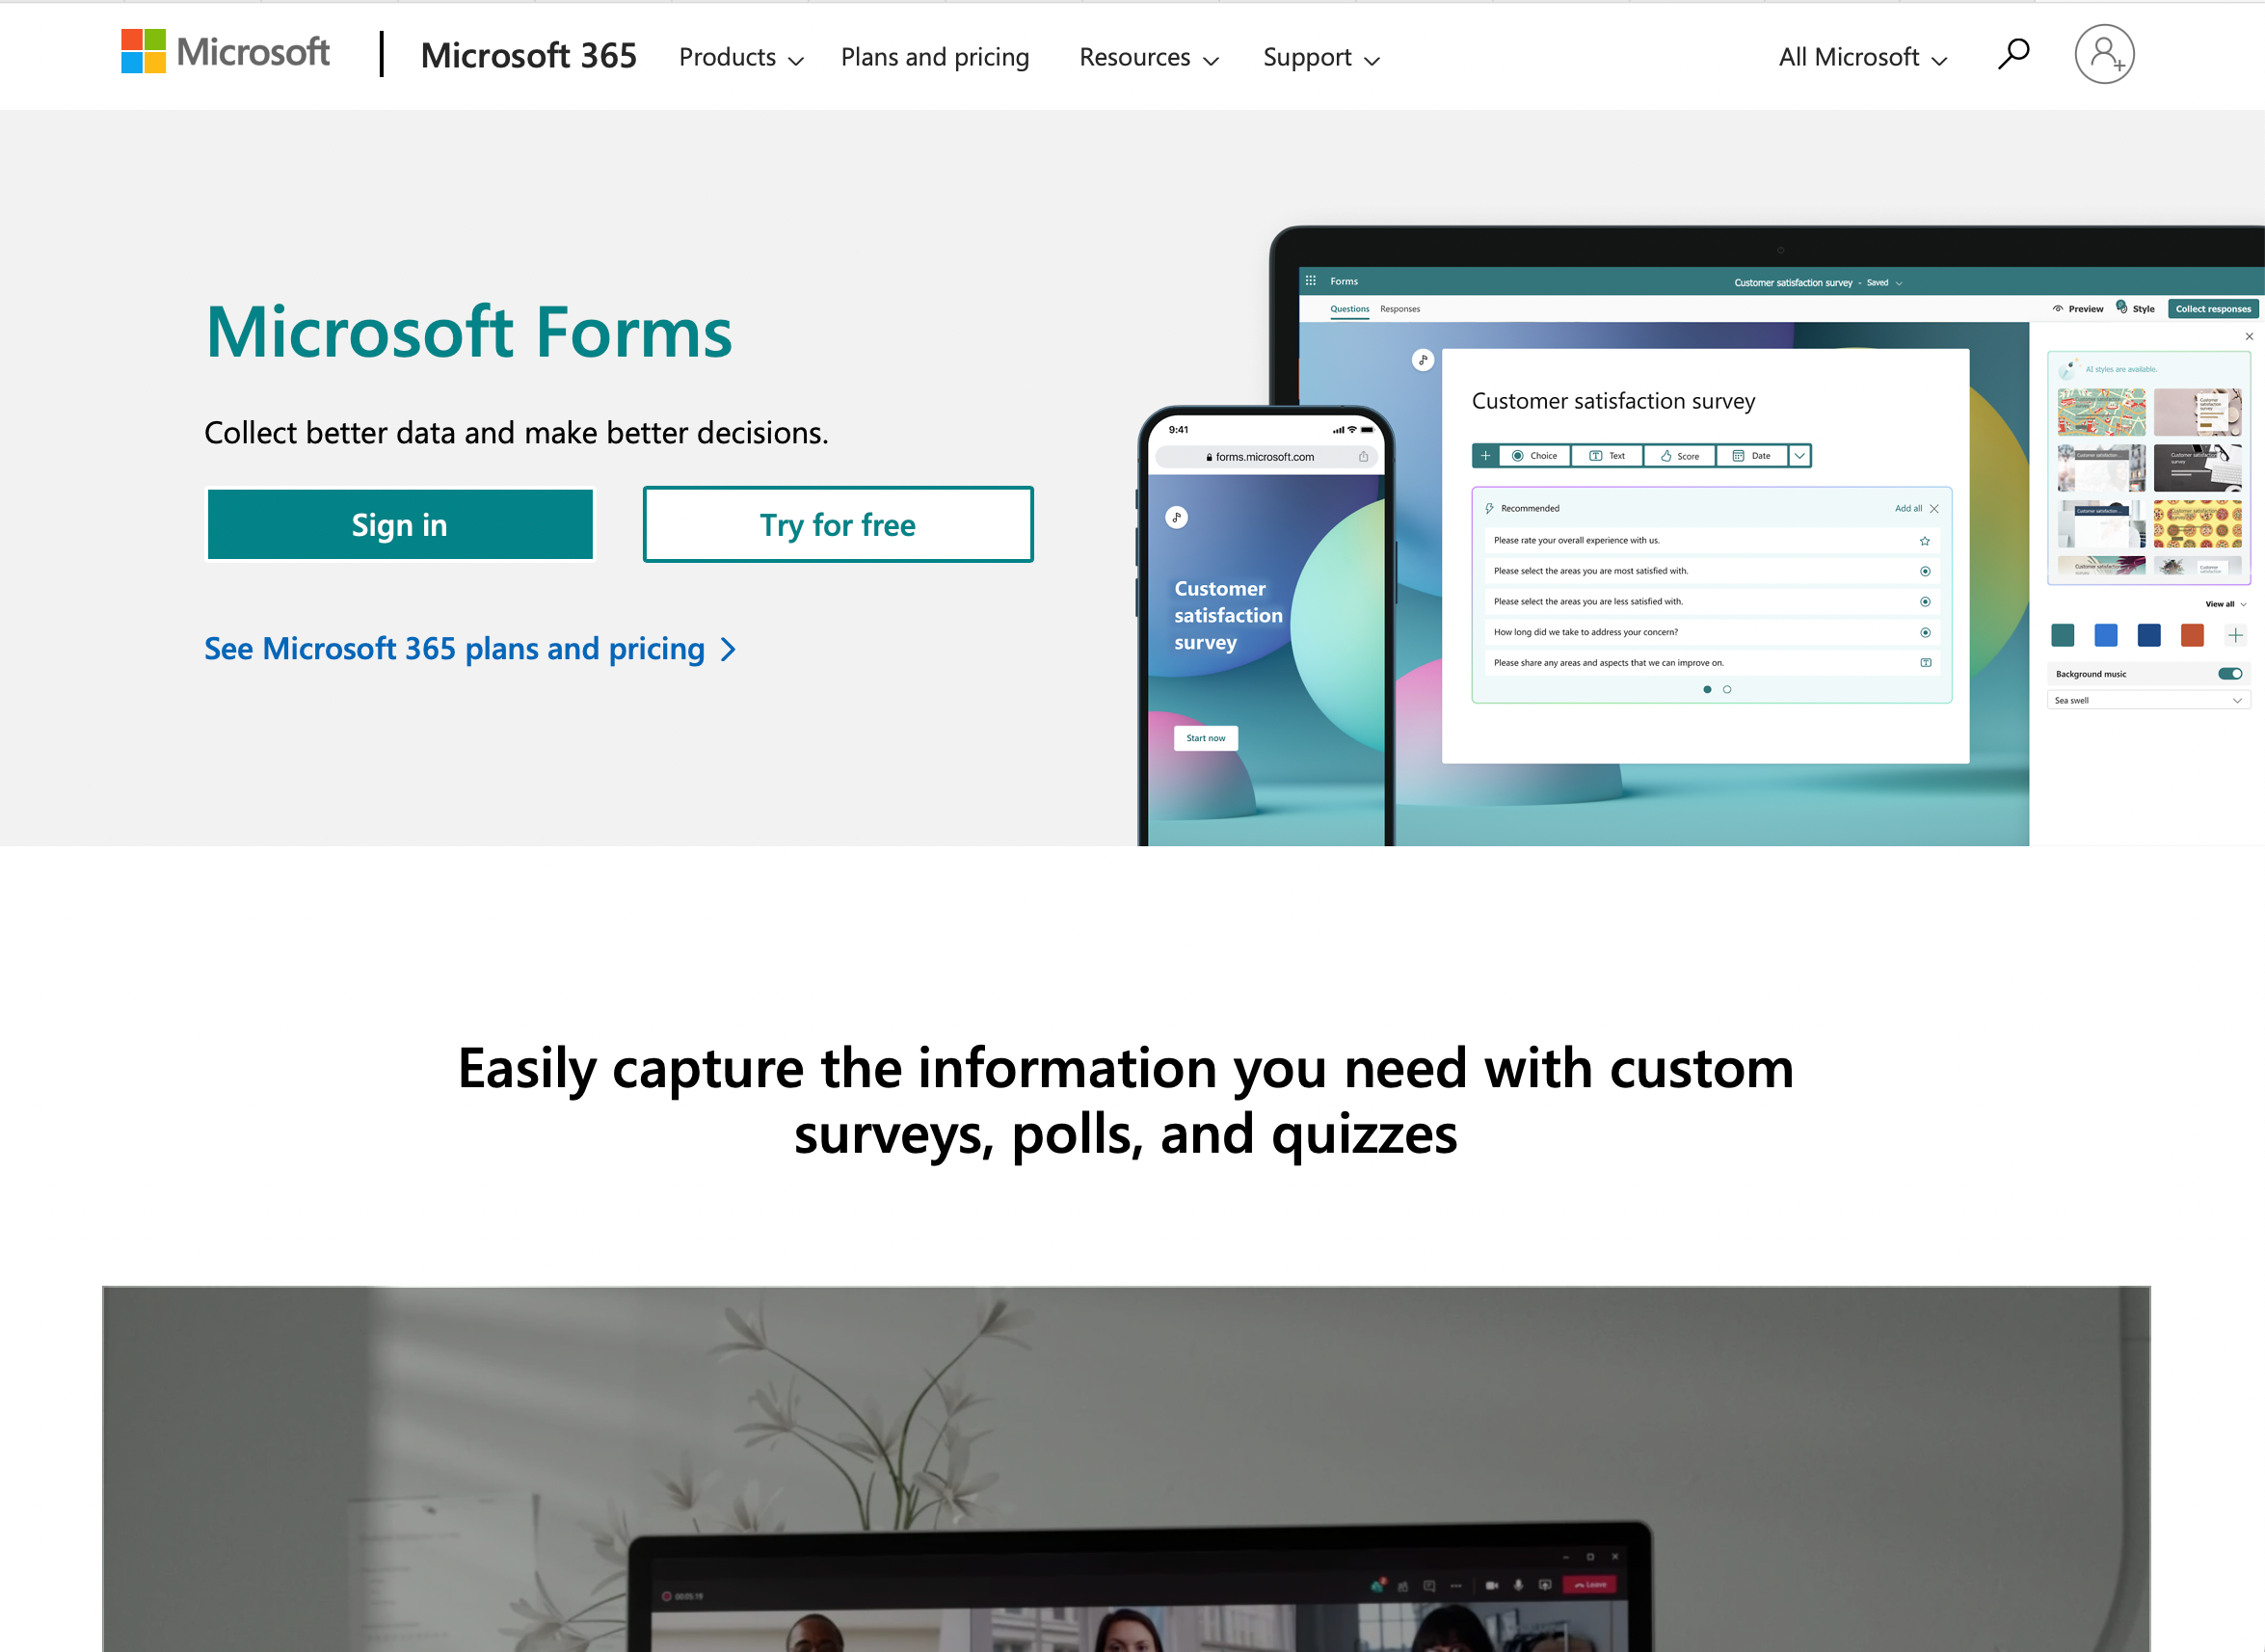
Microsoft Forms is a powerful tool that allows you to create surveys, quizzes, and polls easily.
Integrating Forms with SharePoint Online can enhance collaboration and provide a seamless way to collect and analyze data within your organization.
To create a form and add Microsoft Forms to SharePoint there are 2 main steps.
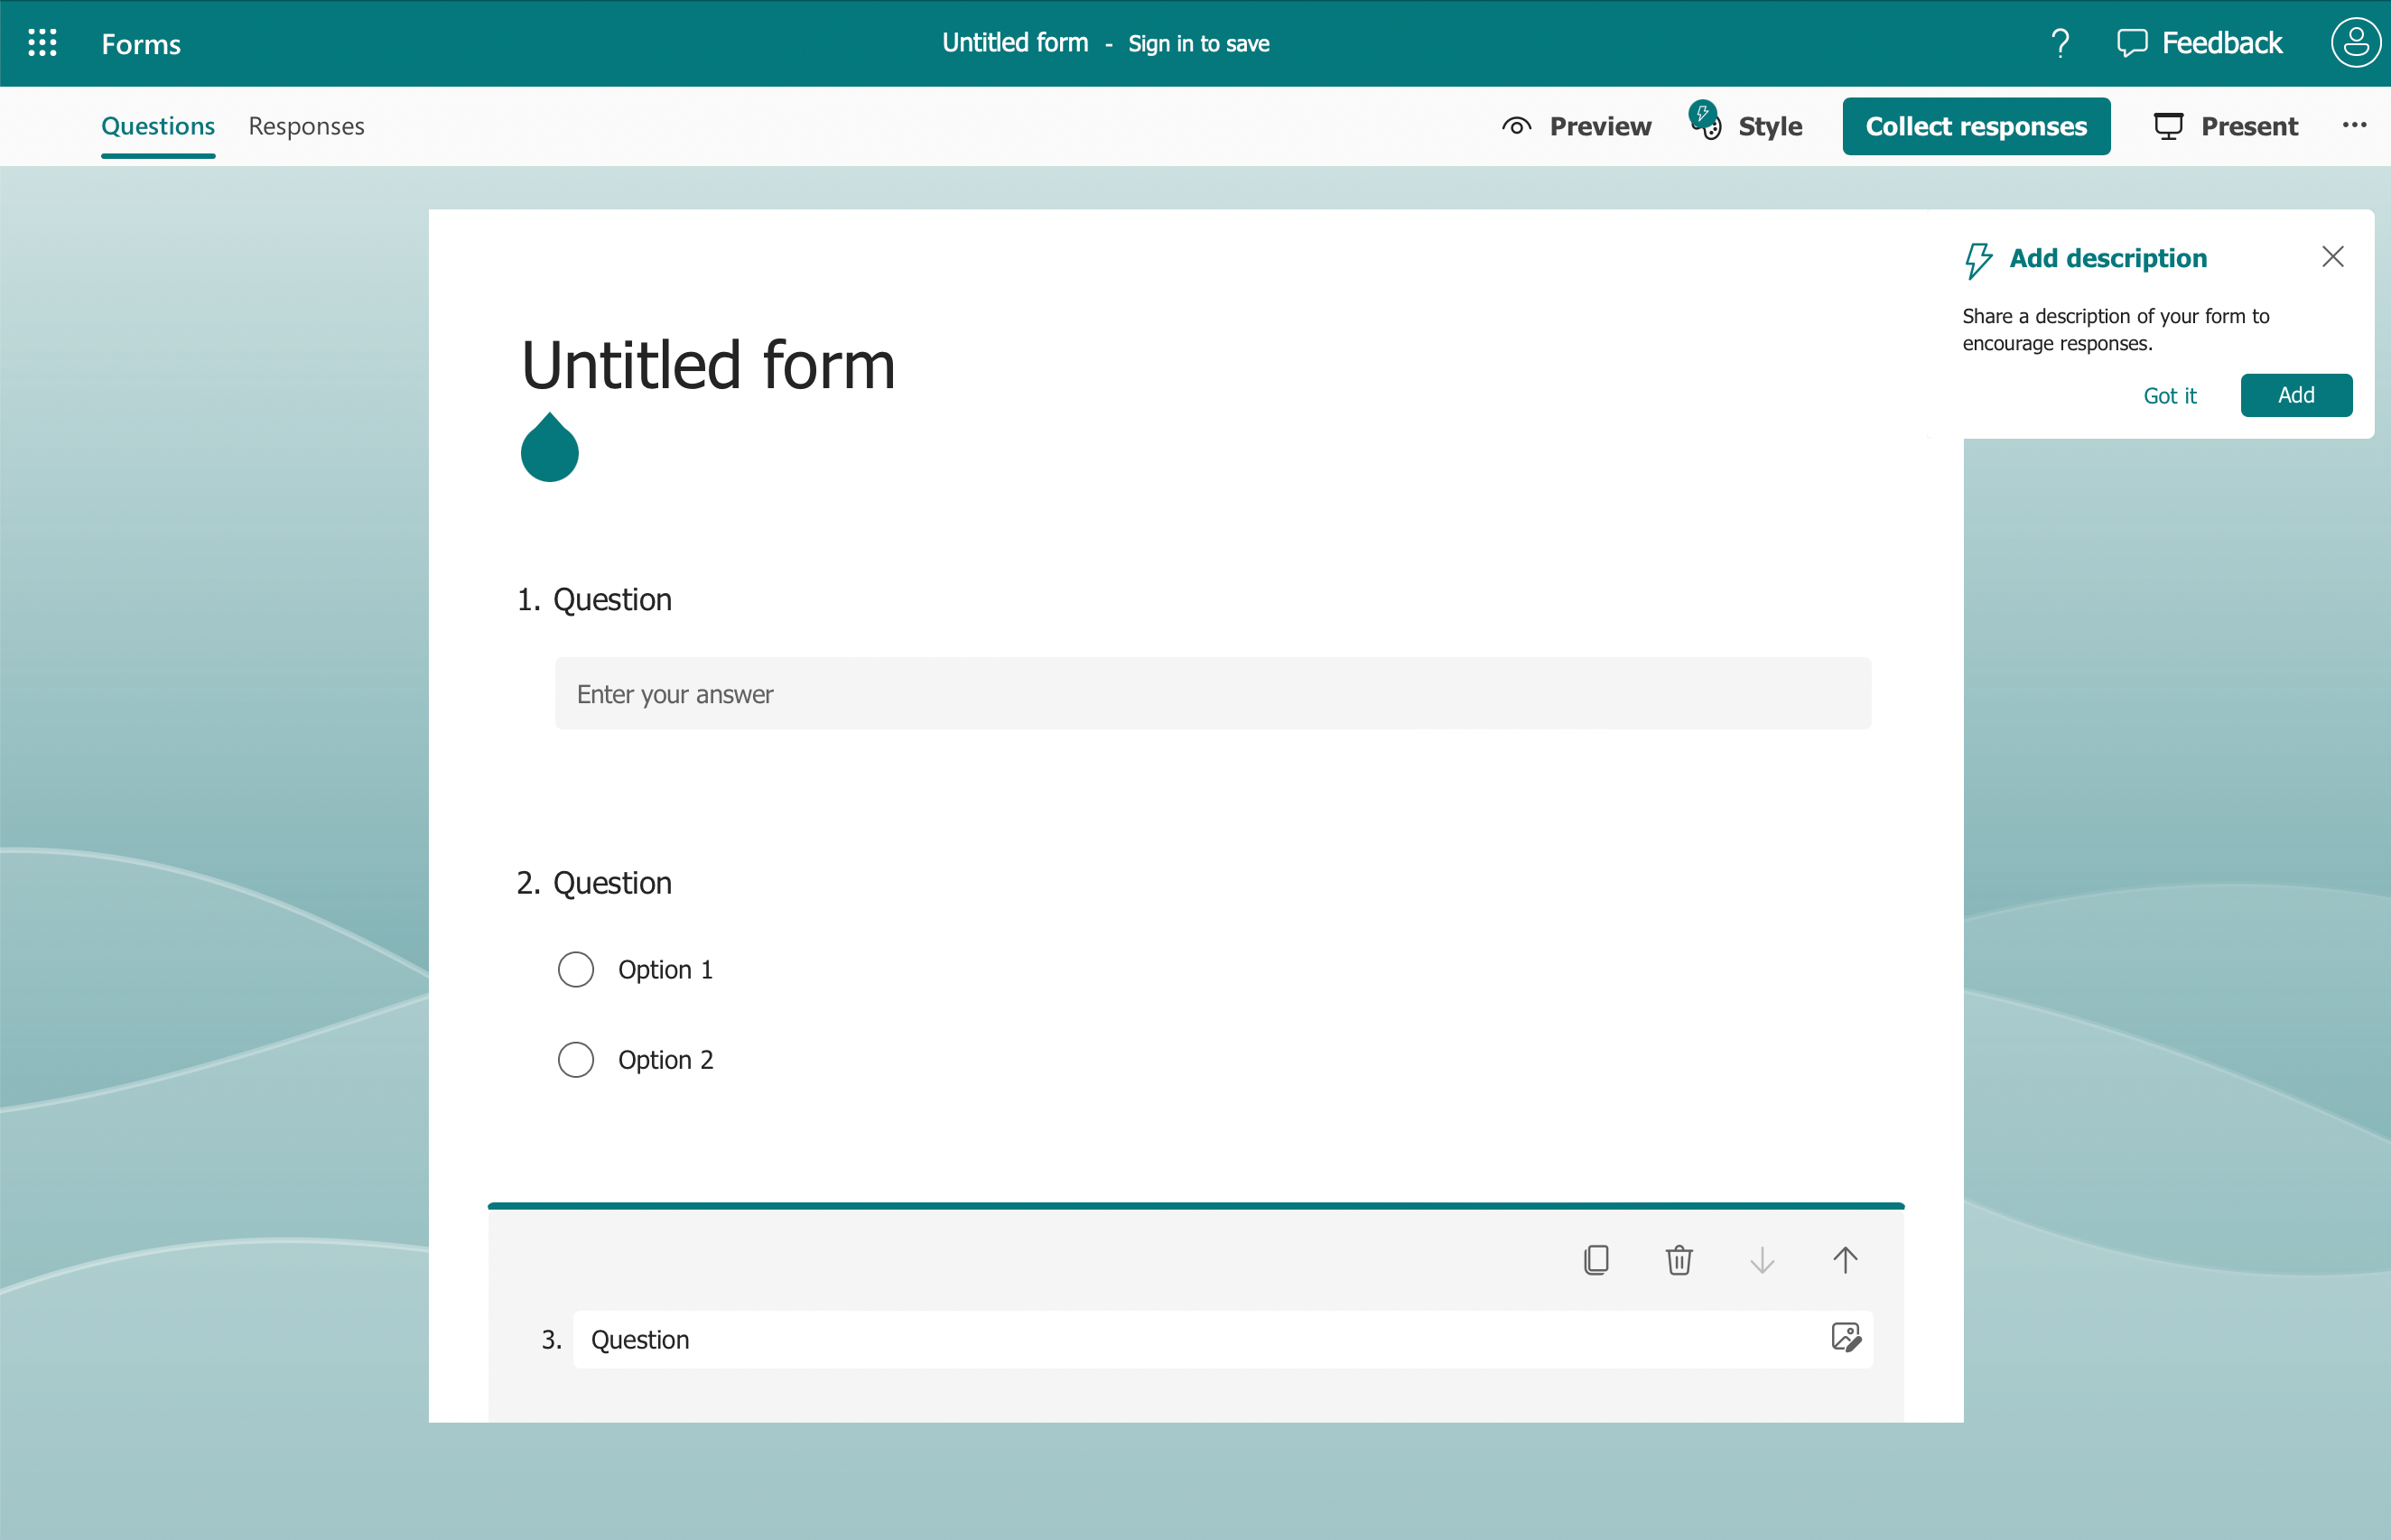
Step 1: Create the form in Microsoft Forms
- Navigate to Microsoft Forms and sign in with your Microsoft account.
- Click on New Form and provide a title and description for your form.
- Add questions by selecting Add New and choosing the appropriate question type.
- Customize settings if necessary, such as response limitations and automatic notifications.
- Copy the form web address.
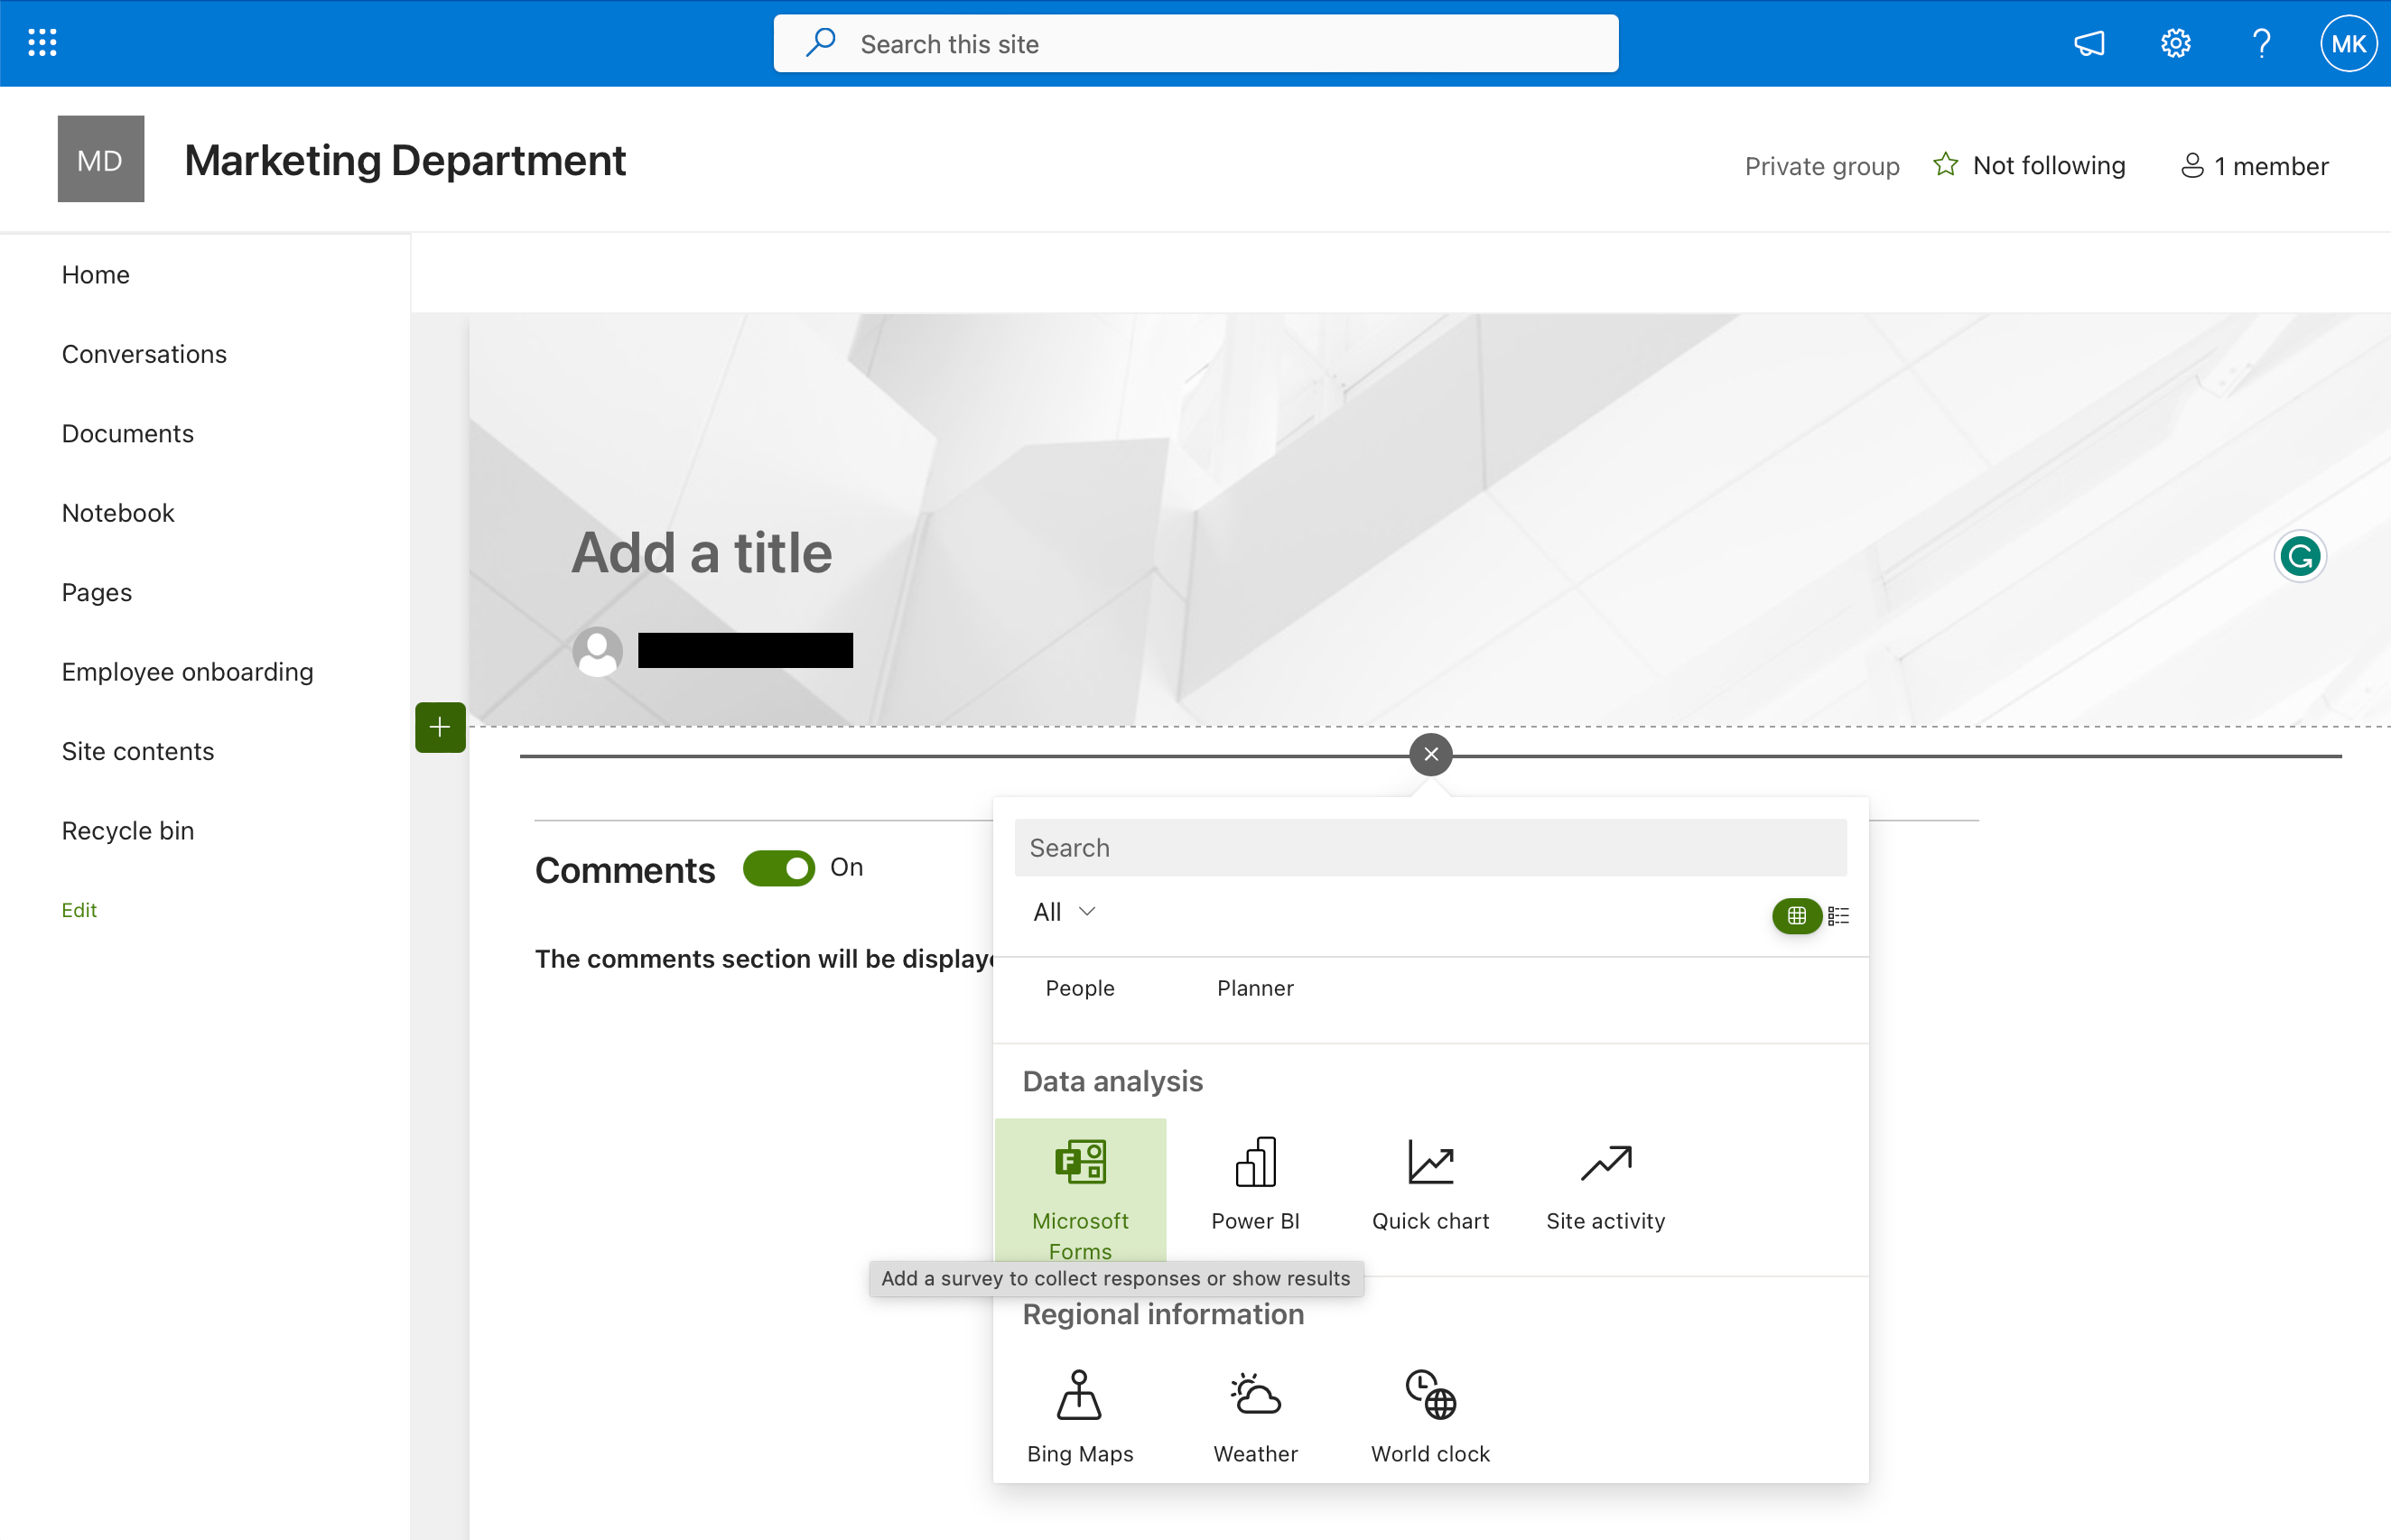
Step 2: Integrate your form with SharePoint
- Go to your SharePoint and create a page or navigate to an existing page where you want to add the form.
- Edit the page layout to meet your desired design.
- Click on the small “+” icon to insert a new web part.
- From the list of available web parts, choose the Microsoft Forms web part.
- You will now have the option to add your existing form to the page by selecting Add an existing form.
Additionally, you can search for your form in the list or you can post the form code of your form. - Save and publish your SharePoint page when you’re satisfied with the form placement and settings.
Your form is now integrated into your SharePoint Online site, and users can easily access it to provide their responses.
To view and analyze the form results:
- Navigate back to Microsoft Forms.
- Select the specific form.
- Access the Responses tab to view Microsoft Forms data. You’ll see a summary of results, and detailed responses, and will even be able to download the data in an Excel file for further analysis.
You can view the form results as charts, diagrams, lists, etc., depending on your preferences.

By following these instructions, you’ve confidently and clearly integrated Microsoft Forms with SharePoint Online.
Design Your Form Using SharePoint Forms Designer

When designing a form in SharePoint, you can also utilize SharePoint Forms Designer to create an interactive and visually appealing form.
This tool not only allows you to create custom forms but also enhances the user experience and ensures consistency across your SharePoint environment.
To start designing your form, first access SharePoint Forms Designer in the web interface. This can be found under the Site Settings or in the SharePoint Designer interface. Open your desired list or library, and then navigate to the “Forms” section.
In the SharePoint Designer, focus on the layout and structure of your form. Use drag-and-drop functionality to rearrange fields and easily adjust the appearance to match your organization’s branding.
You can also control the visibility of fields based on certain conditions or user roles.
By using SharePoint Forms Designer effectively, you can create professional, streamlined forms that cater to your team’s needs while maintaining a consistent experience throughout your SharePoint environment.

Final Thoughts
Creating a form in SharePoint Online is a user-friendly and powerful way to collect and manage data for your organization.
With a few simple steps, you can design custom forms tailored to your specific needs, whether it’s for gathering customer feedback, handling employee requests, or any other data collection task.
SharePoint’s intuitive interface and integration with other Microsoft tools make the process straightforward. By harnessing the capabilities of SharePoint forms, you can streamline your data collection processes and enhance collaboration all in a secure and accessible online environment.
So, get started today and unlock the benefits of efficient data management with SharePoint Online forms!
Explore the power of the Power Automate integration to populate SharePoint lists:
Frequently Asked Questions
How can I customize a SharePoint list form?
You can customize a SharePoint list form using Power Apps.
Simply navigate to the desired list, click on the “Power Apps” button in the toolbar, and select “Customize forms.”
This will open Power Apps, where you can modify the form design, add fields, or change its layout.
What are some SharePoint forms examples?
Some common examples of SharePoint forms include:
- Employee onboarding forms for collecting personal information and emergency contacts.
- Leave request forms for tracking vacation and sick leave.
- Expense reimbursement forms for submitting receipts and calculating reimbursements.
- Event registration forms for attendees to sign up and provide necessary information.
How do I set up a request form template in SharePoint?
To set up a request form template in SharePoint, follow these steps:
- Go to the SharePoint site where you want to create the form.
- Click on “Site Contents” in the site menu, then click “New” and choose “List.”
- Name your list and add the desired columns to collect information from the form.
- To create a customized form, use Power Apps (as mentioned in the first question) or add a Microsoft Forms web part (as described in the search results: “How to Create Forms in SharePoint – Process Street”).
Can I create a form from a SharePoint list?
Yes, you can create a form based on a SharePoint list by using Power Apps. Simply go to the list, click on “Integrate” in the toolbar, and choose “Power Apps.” Then, select “Create an app” or “Customize forms,” depending on your needs.
What are the differences between SharePoint Forms and Microsoft Forms?
SharePoint Forms is a feature within SharePoint that allows you to create and manage forms directly connected to SharePoint lists or libraries.
Microsoft Forms is a separate application that helps you create surveys, quizzes, and polls, with results stored in Excel.
You can integrate Microsoft Forms with SharePoint using a web part, but it is not native to SharePoint like SharePoint Forms.
Is it possible to create a SharePoint form from Excel?
While you cannot directly create a SharePoint form from Excel, you can import an Excel table into a SharePoint list and then create a form based on that list.
To do this, go to the desired SharePoint site, click “Site Contents,” and choose “New” followed by “List.”
Then, click “From Excel” and upload your Excel file.
After the list is created, you can use Power Apps to create and customize the form based on the imported data.


