Frustrated by the struggle to maintain formatting? How can you ensure that your beautifully designed PDF document stays just as polished when integrated into your PowerPoint presentation?
There are 3 main ways that you can insert a PDF into PowerPoint:
- Inserting a PDF as an object.
- Inserting a PDF as an image or screenshot.
- Hyperlinking a PDF to your PowerPoint slide.
Combining PDF content into a PowerPoint presentation will enable you to present data and information from different sources in a visually engaging way, without the hassle of retyping or recreating the content.
This article will cover the simple yet effective process of inserting a PDF file into a PowerPoint slide, providing step-by-step guidance to make your next presentation more impactful and informative.
Let’s get started!

How to Insert PDF into PowerPoint
Inserting a PDF into a PowerPoint presentation can enhance your slides by incorporating detailed documents, charts, or graphics.
Whether you want to display a full PDF file or just a specific part of it, PowerPoint offers several methods to achieve this.
In this section, we are going to show you the 3 quickest and easiest ways you can insert a PDF into PowerPoint.
1. Inserting a PDF as an Object
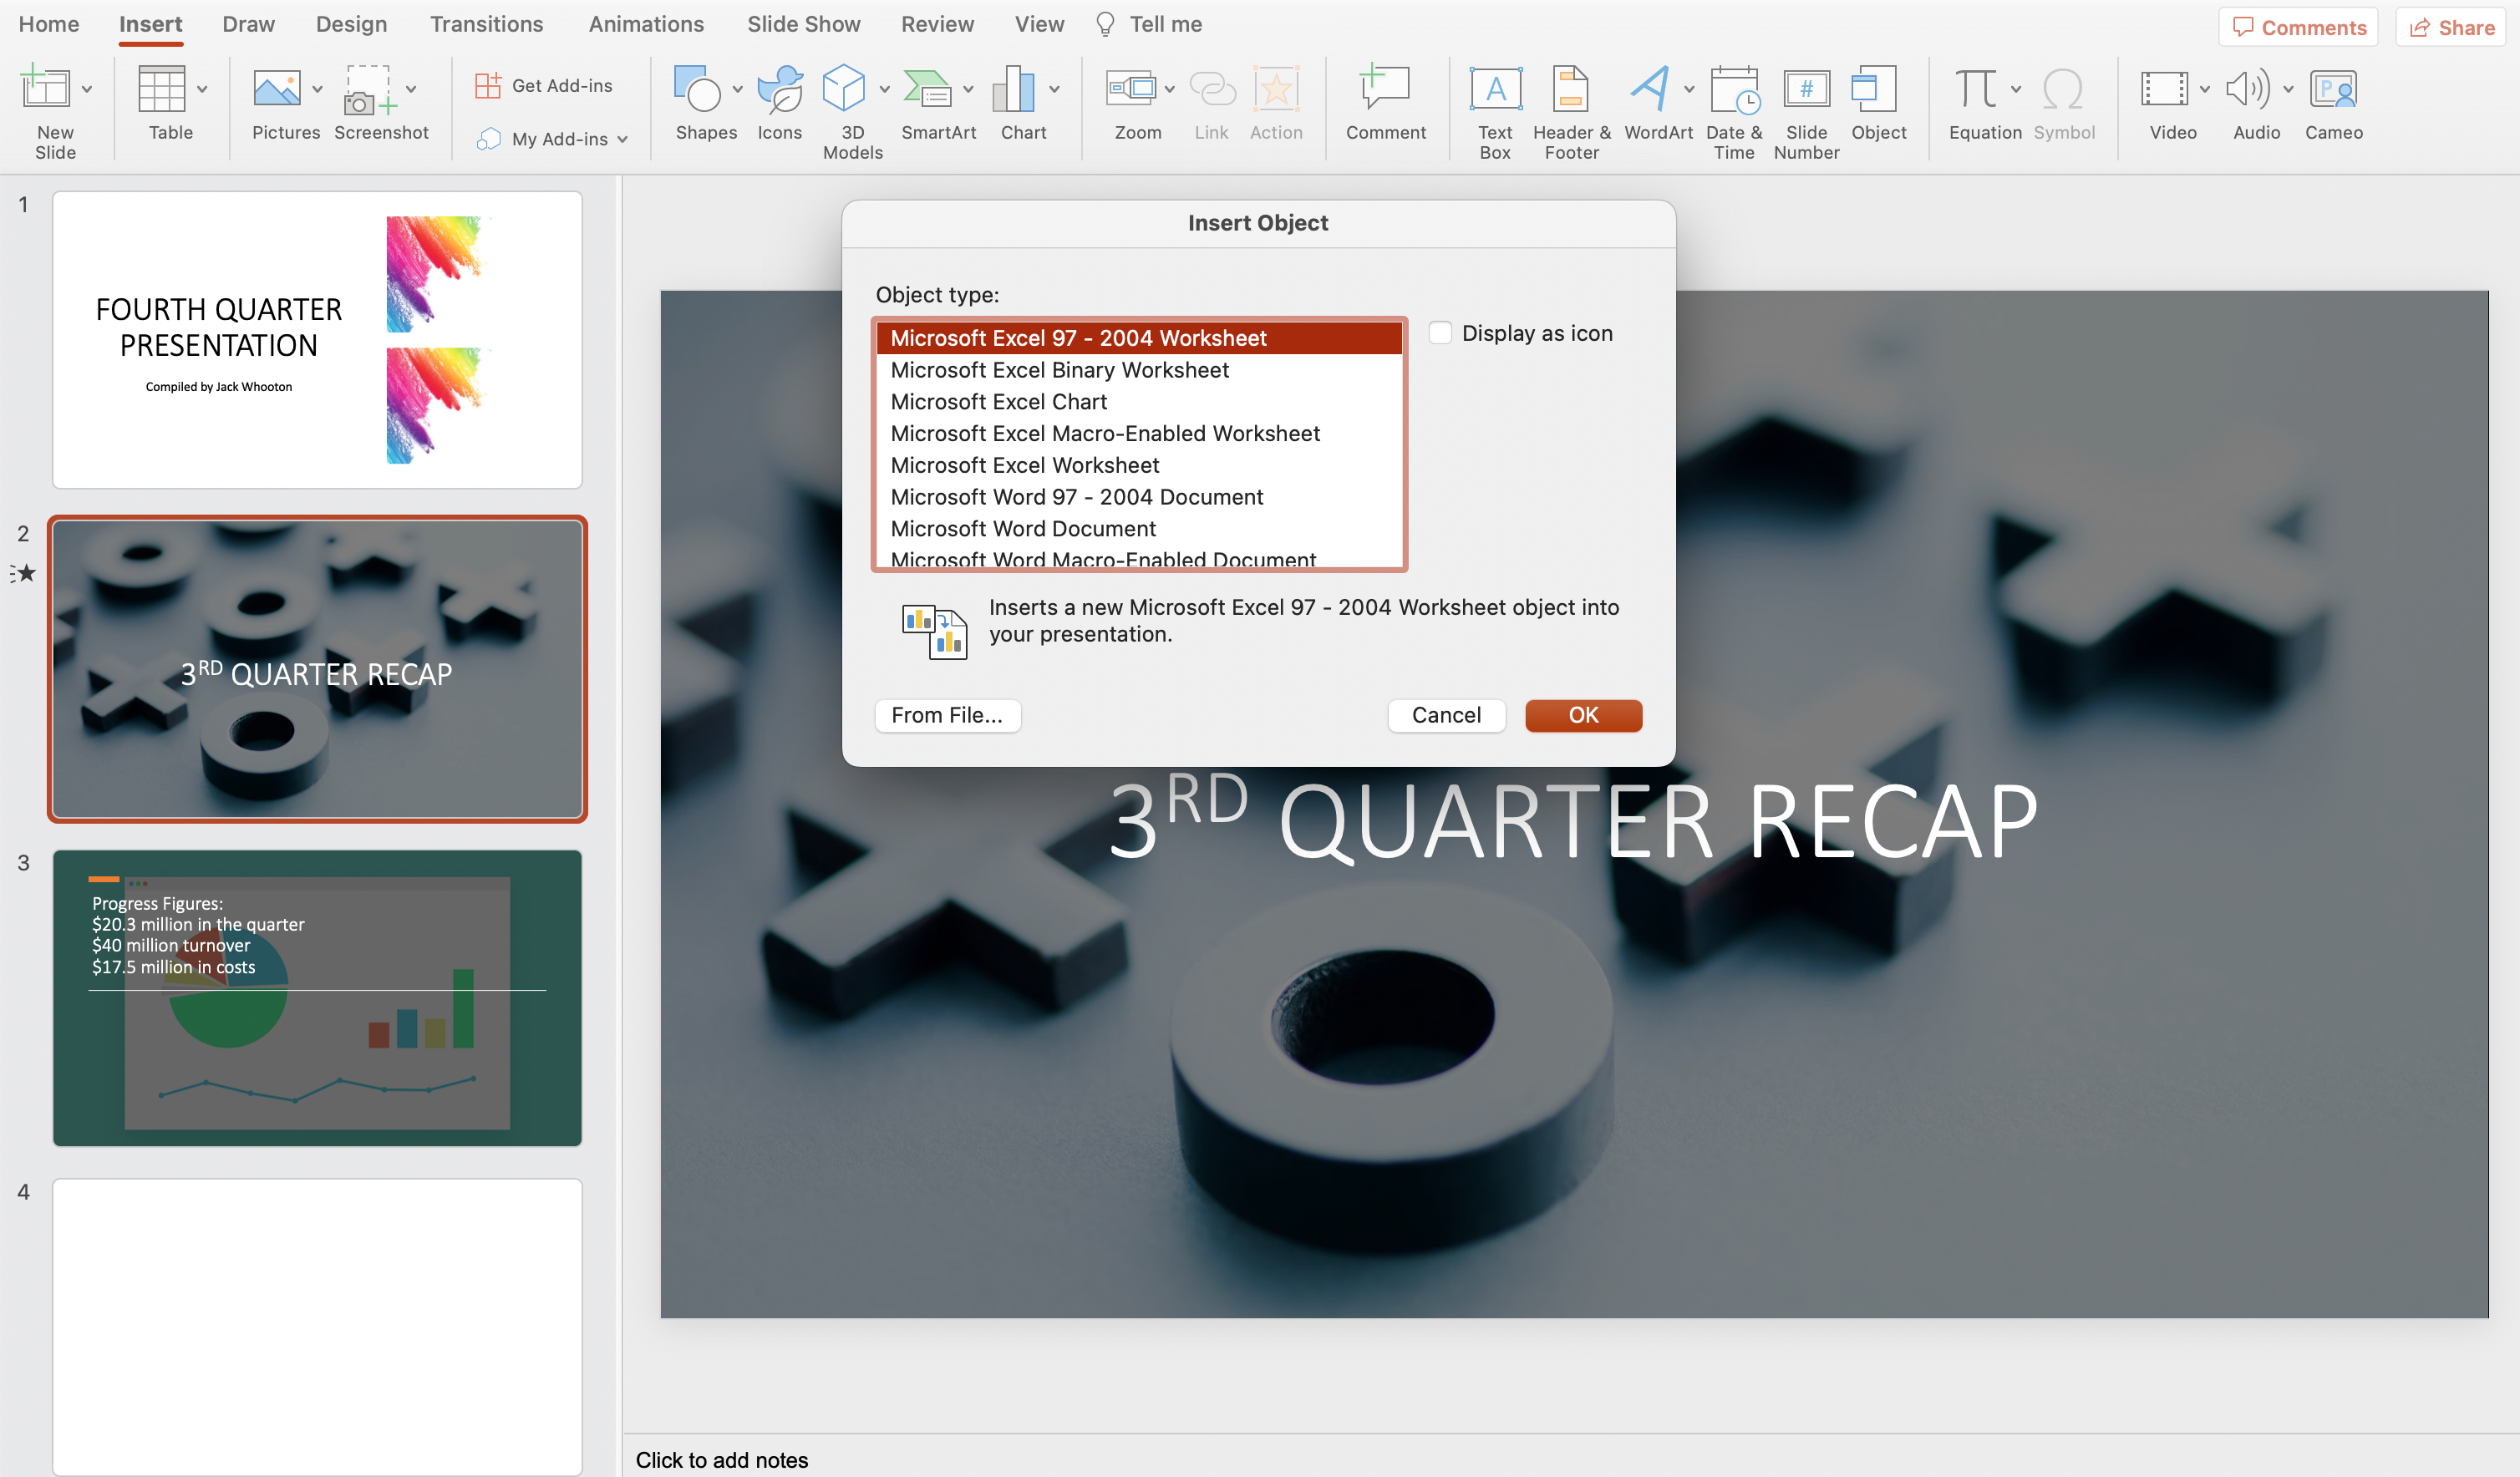
To insert a PDF file into your PowerPoint presentation, you can use the ‘Create from file’ option.
By doing this, you can display the content of the PDF directly on your slide as an object.
Follow these simple steps to use this feature:
- Make sure your PDF is closed.
- Open PowerPoint and navigate to the slide in the PowerPoint presentation file where you want to insert the PDF.
- Click on “Insert” in the menu bar.
- Click on “Object”.
- In the Insert > Object box, click on “Create from File”.
- Select the PDF file you wish to insert.
- Click “OK” to insert it.
Once the PDF file is inserted, you will see a PDF file icon with the file name displayed on the slide.
Double-click on the icon to open the inserted PDF file. This will launch your default PDF reader and display the contents of the PDF file for easy reference during your presentation.
Please note that embedding a PDF as an object can increase the file size of your PowerPoint presentation.
If you’re concerned about maintaining a smaller file size, consider inserting the PDF file as an image or linking to it instead.
2. Inserting as an Image or Screenshot
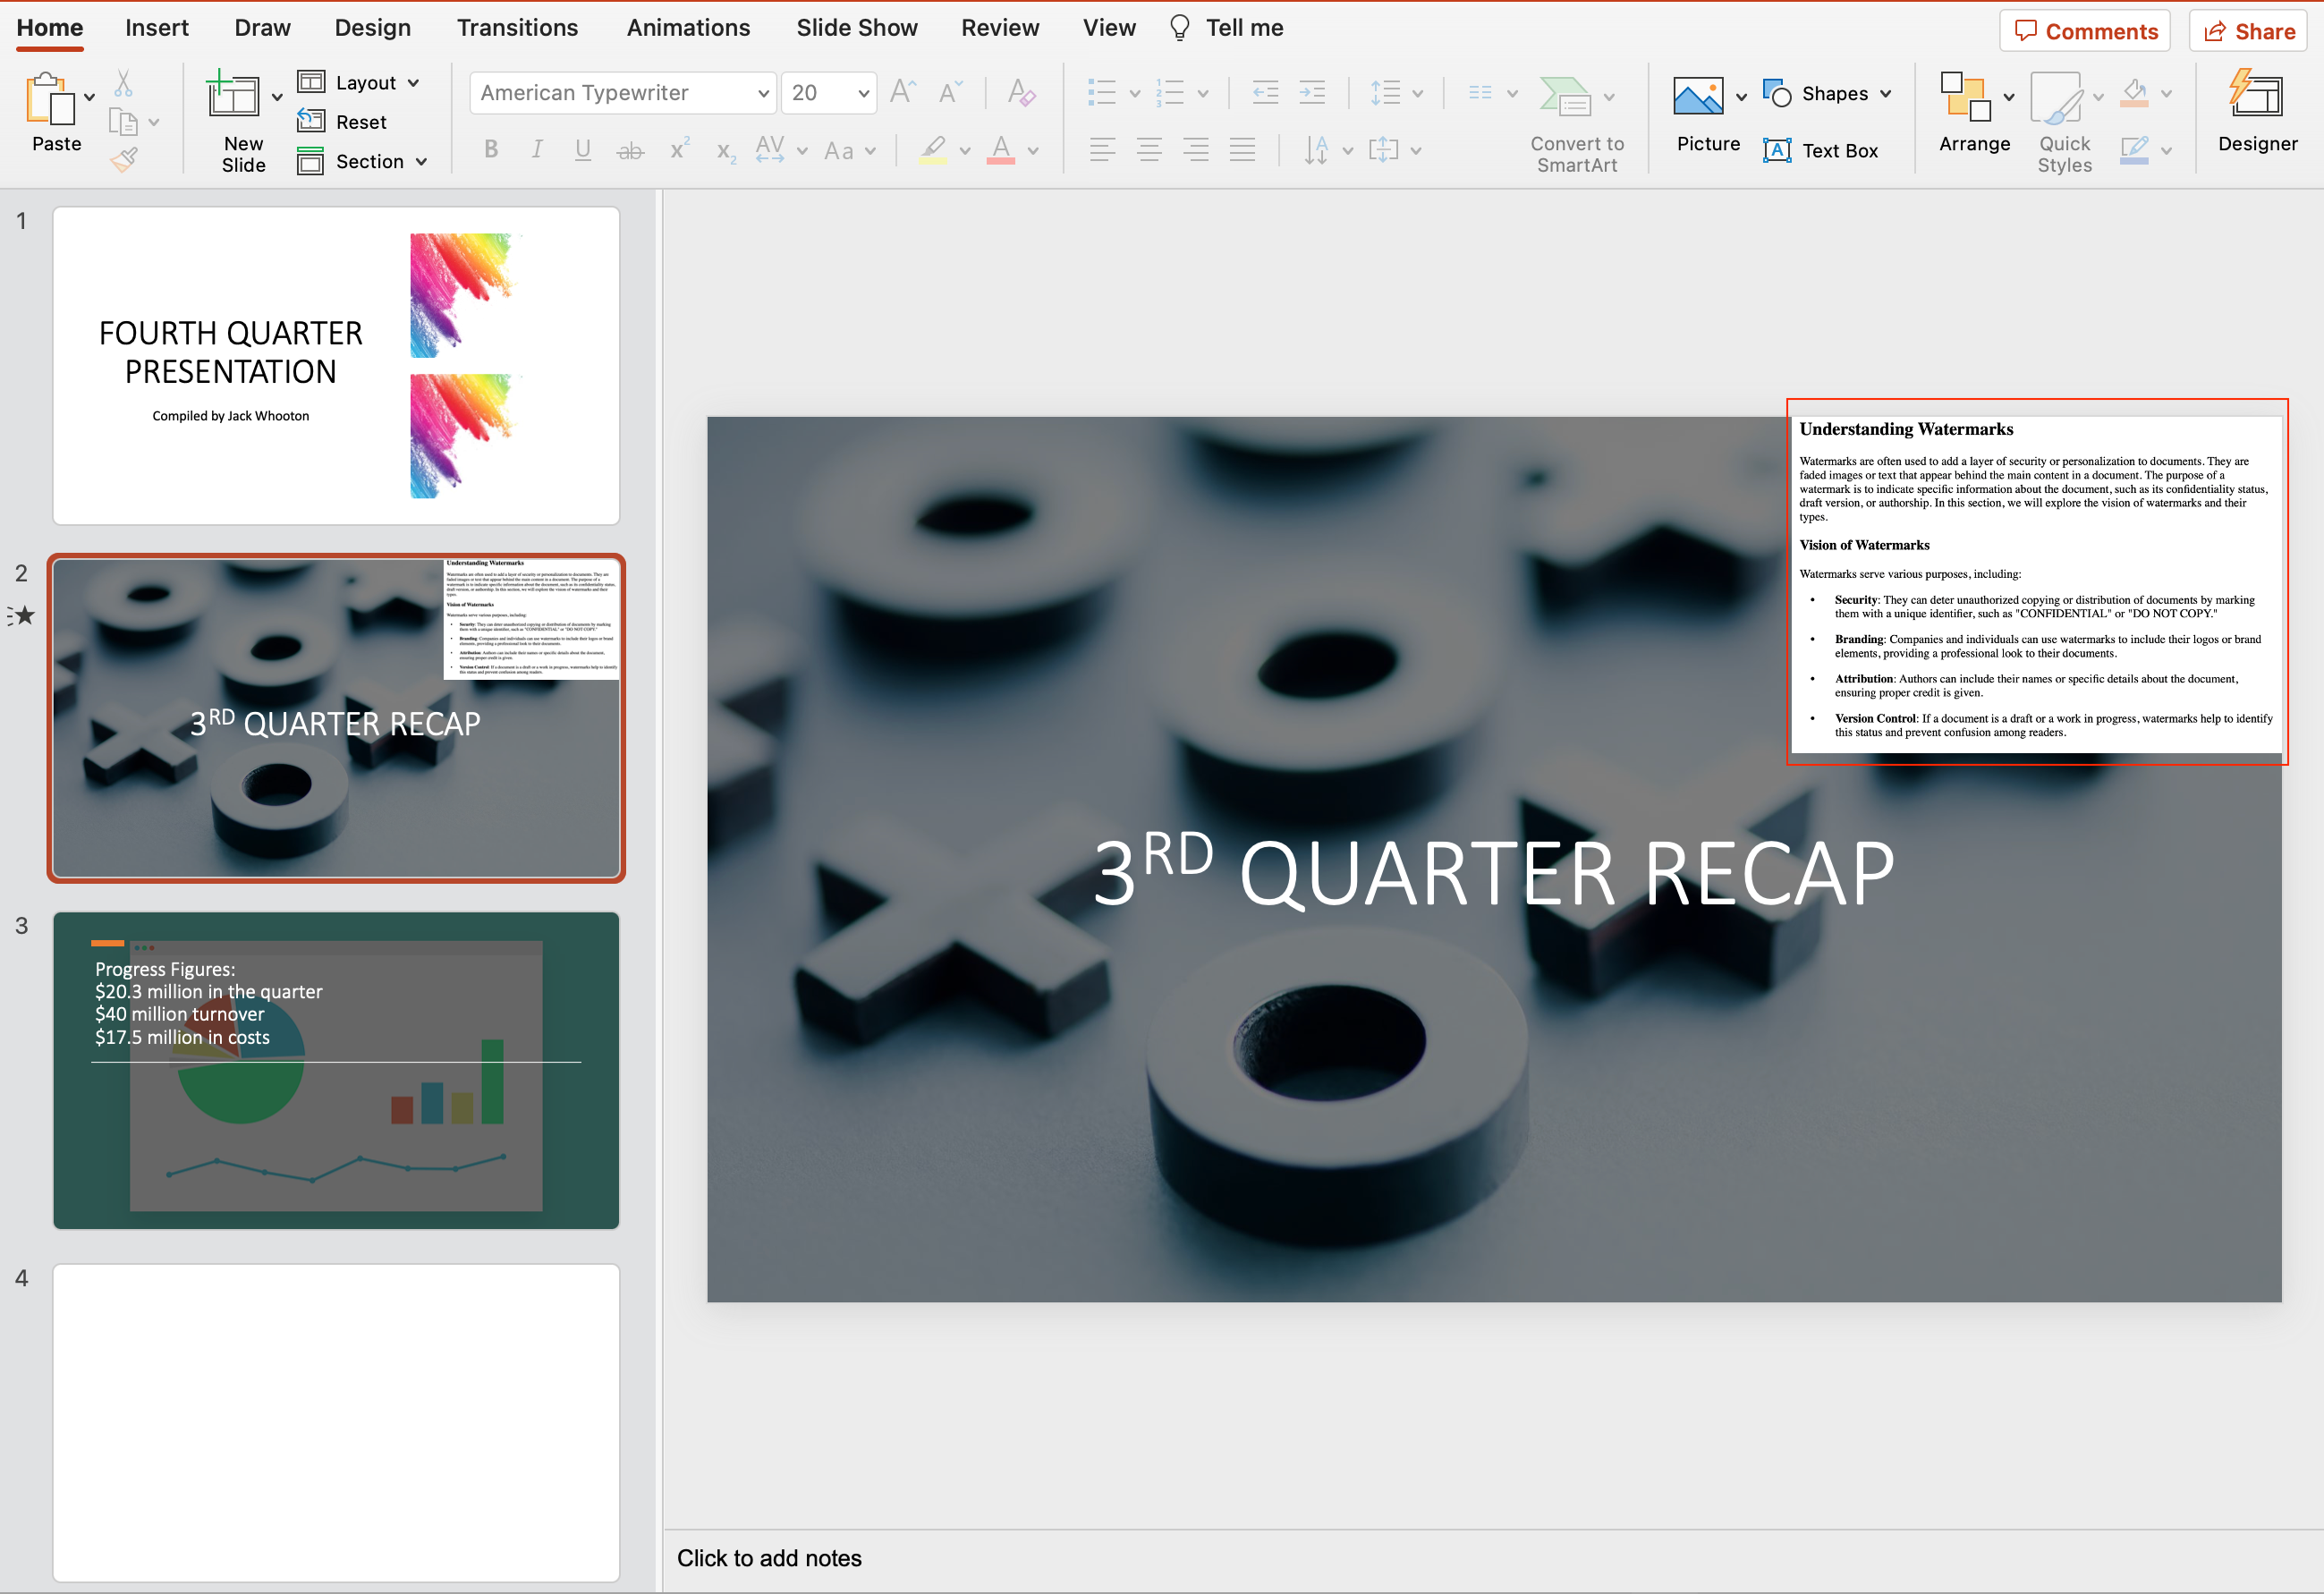
Inserting a PDF into PowerPoint as a screenshot can be useful when you want to display a specific portion of the PDF document without embedding the entire file.
This method allows you to maintain the PDF file’s visual formatting, making it easy for your audience to understand the content.
There are three methods for inserting PDF content as an image or screenshot: using the Snipping Tool, using Screen Clipping, and converting a PDF into an image.
1. Use Snipping Tool
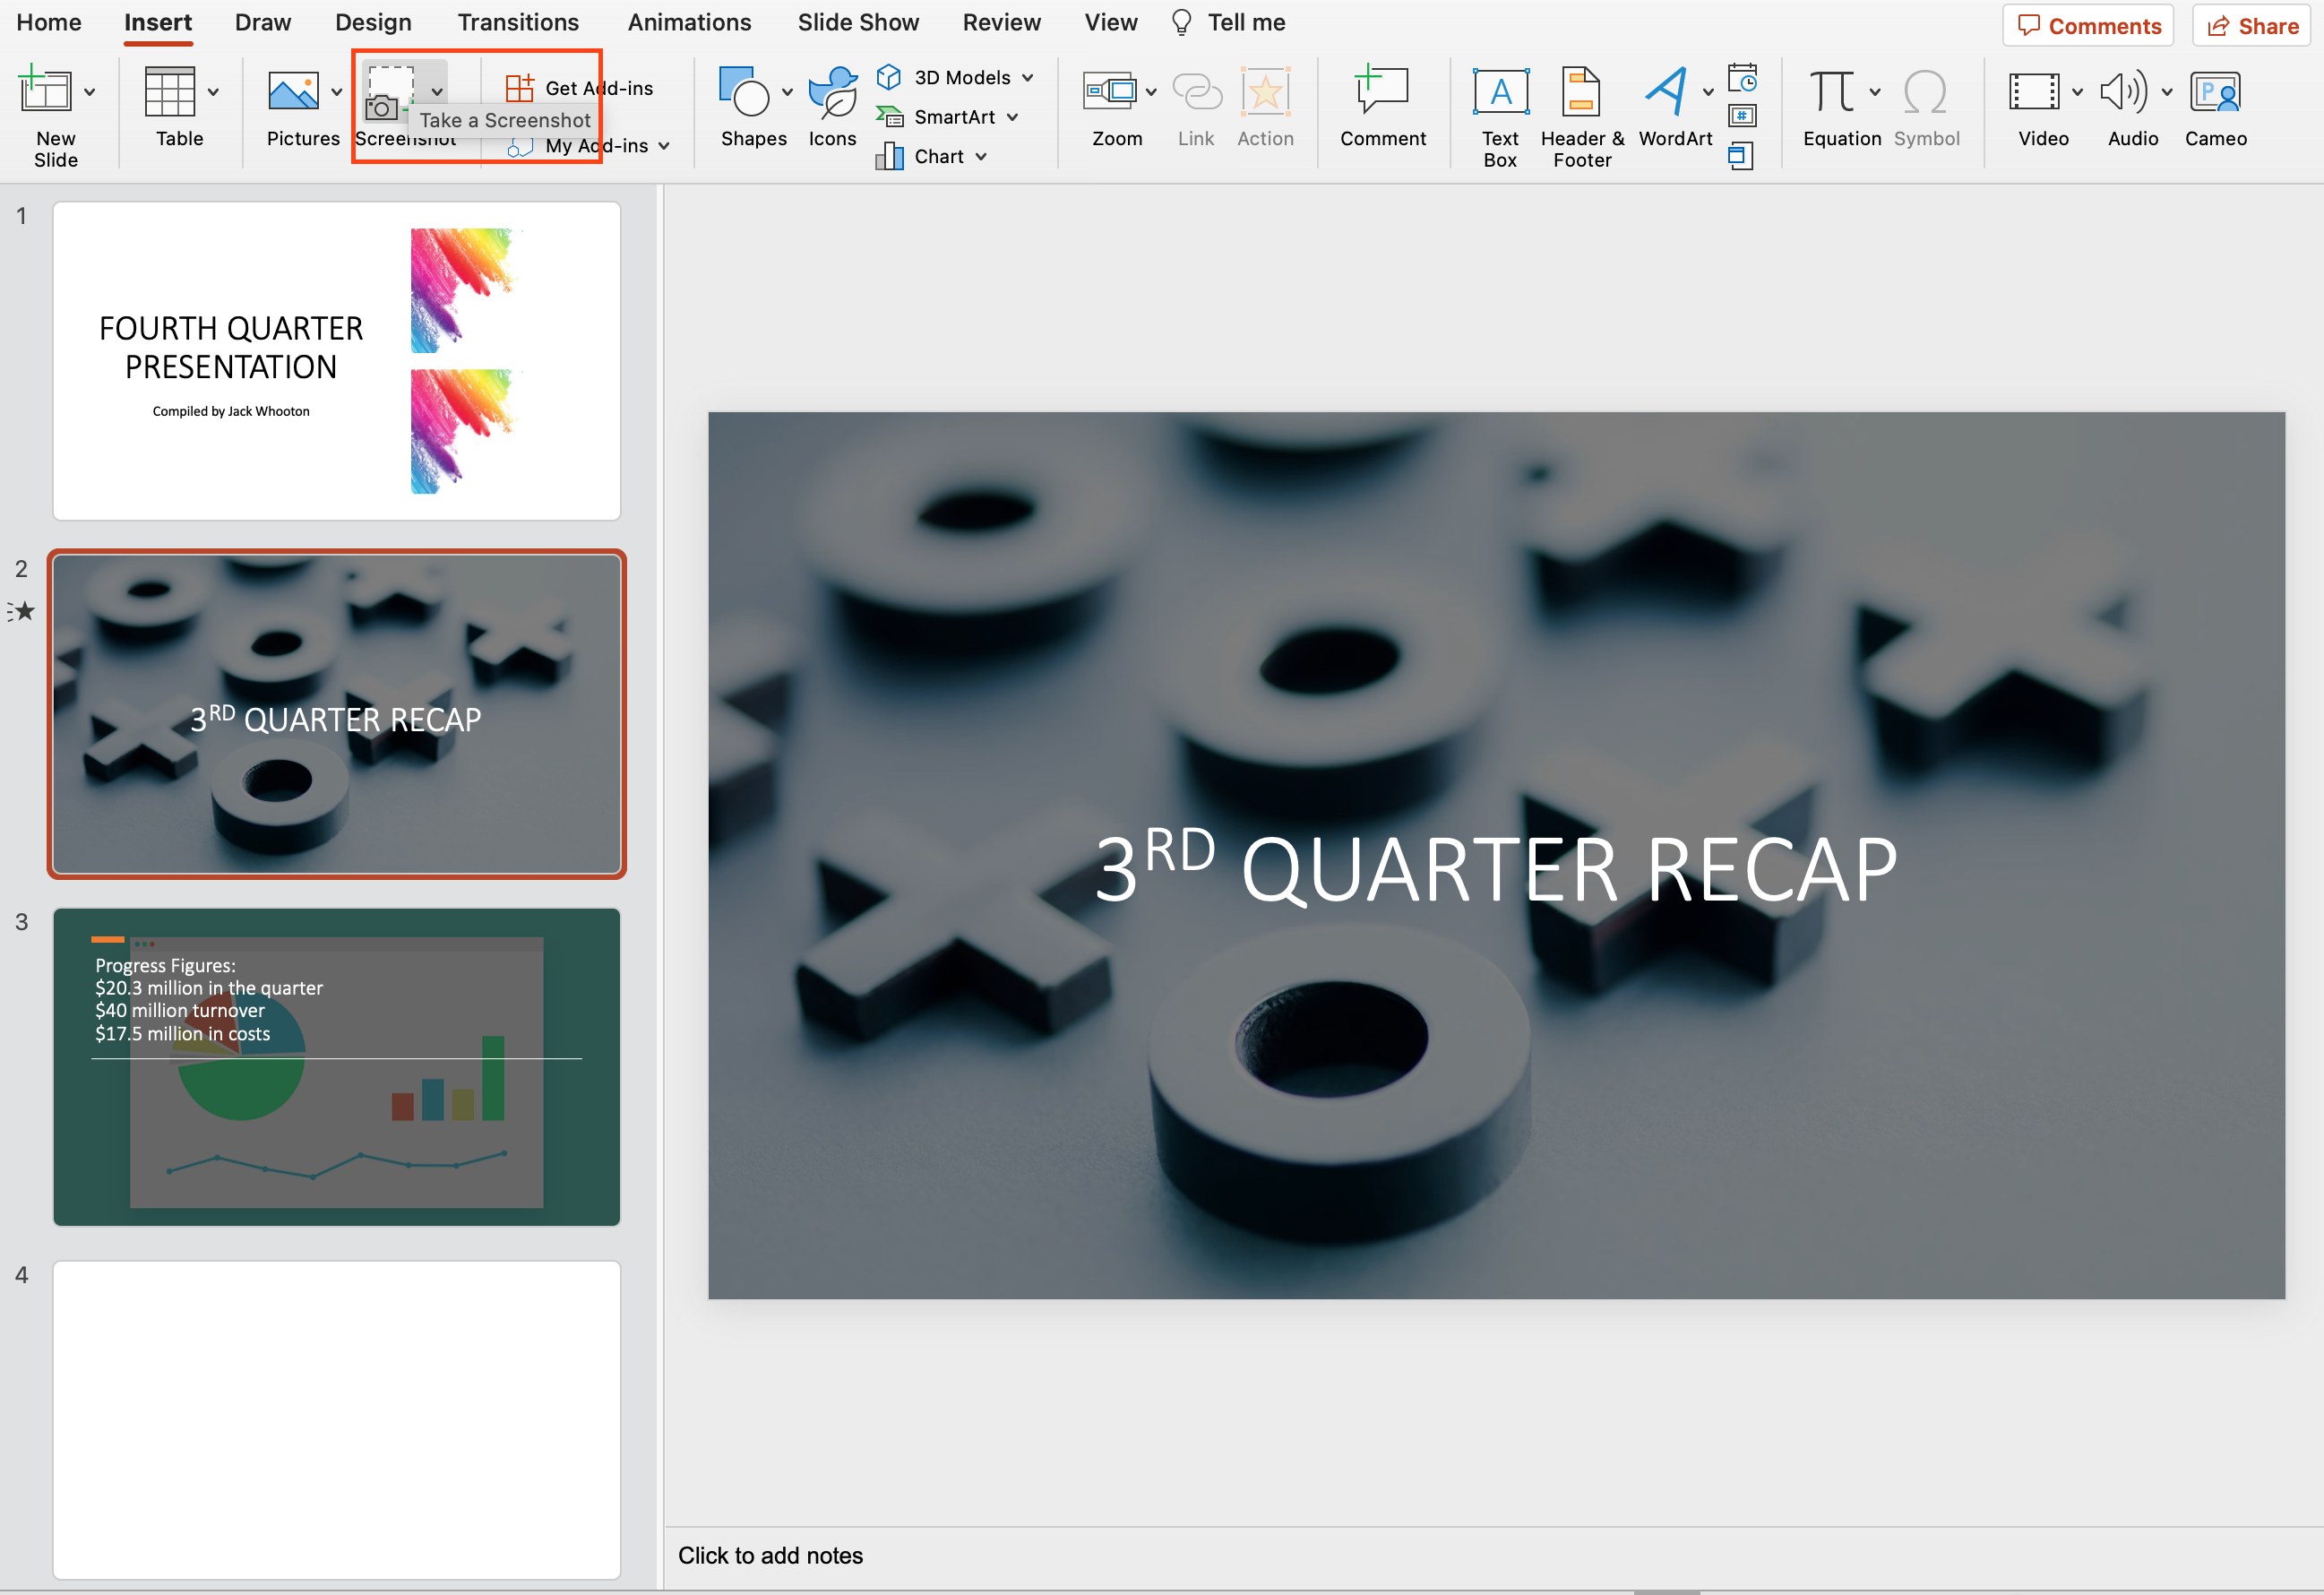
The Snipping Tool is a built-in feature in Windows and Mac operating systems that allows you to take custom screenshots of any open window or a selected area on your screen.
To use the Snipping Tool to capture a PDF image for your PowerPoint presentation:
- Open the PDF file and navigate to the page you want to capture.
- Launch the Windows Snipping Tool from the Start menu or by searching for it in the search bar.
- Select the “New” button in the Snipping Tool window.
- If you are using a Mac, disregard steps 2 and 3 and use the shortcut Shift+Command+4.
- Click and drag your mouse to create a custom selection around the area of the PDF you want to capture.
- Release the mouse button, and the Snipping Tool will capture the selected area.
- Save the captured image as a JPEG or PNG image.
Now, you can insert the saved image into your PowerPoint presentation:
- Open your PowerPoint presentation and select the slide where you want to add the image.
- Click the “Insert” tab in the PowerPoint toolbar.
- Click “Pictures,” then navigate to the saved image file and click “Insert.”
2. Use Screen Clipping
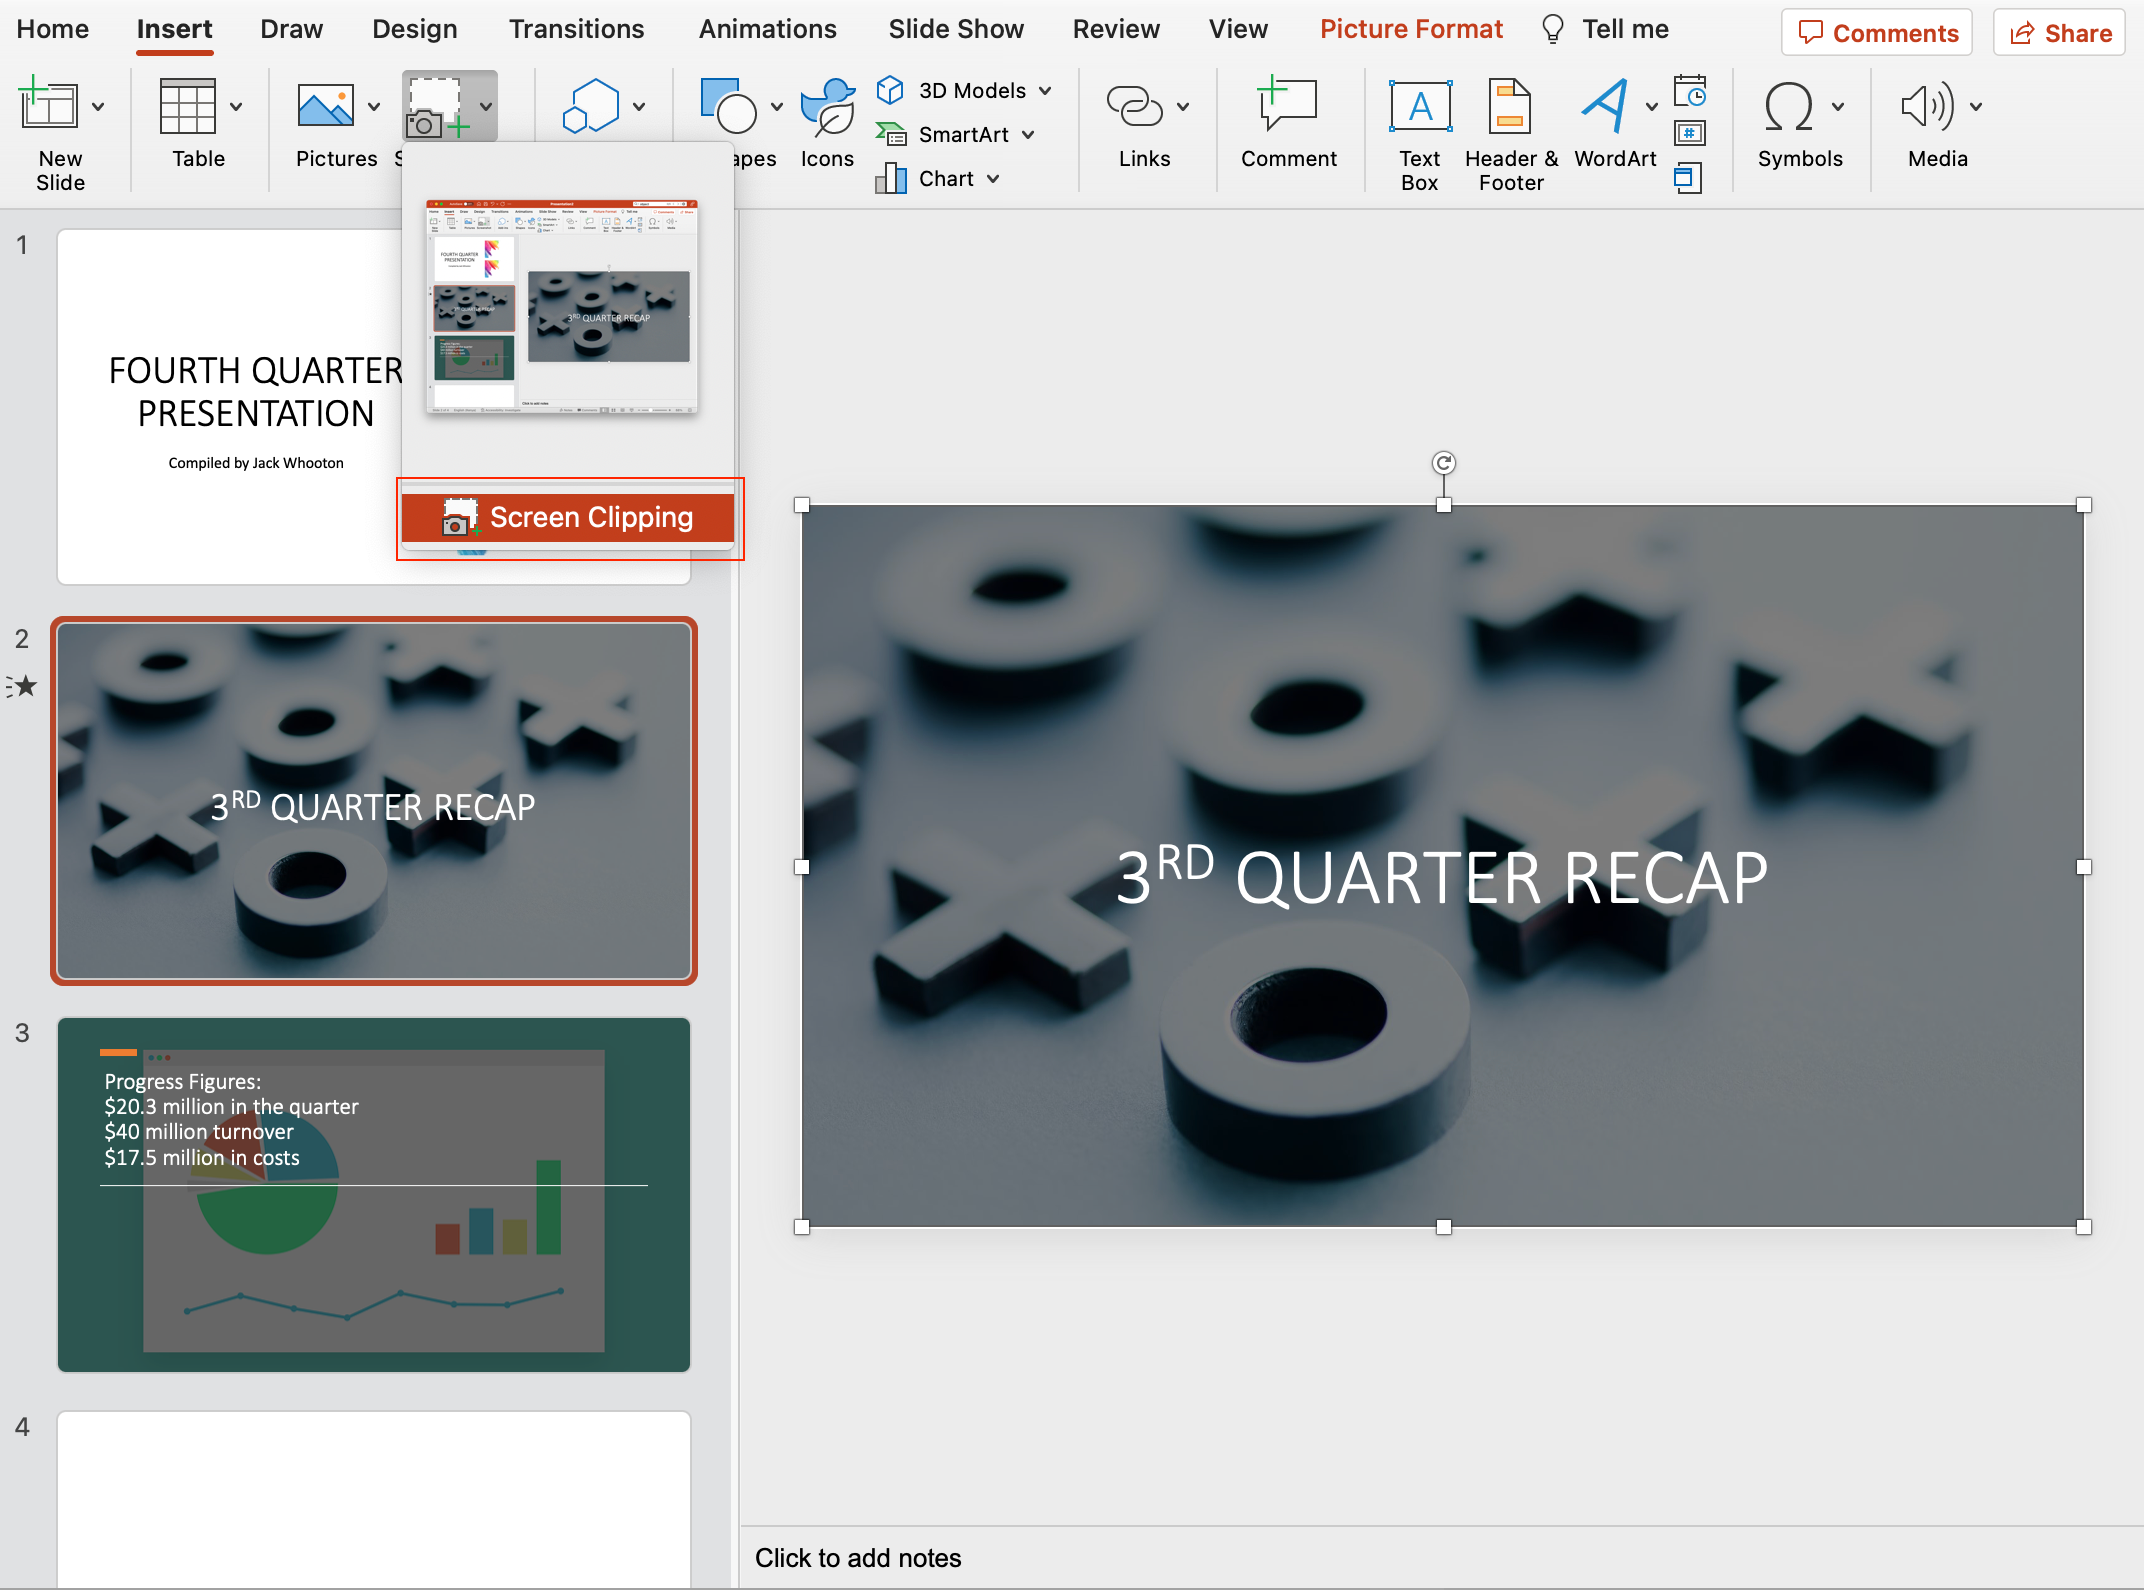
PowerPoint also has a built-in screen clipping feature that allows you to capture an image of another open window directly from the application.
To use this feature:
- Open both the PDF file and your PowerPoint presentation.
- In the PDF file, navigate to the page you want to capture.
- Switch to PowerPoint and select the slide where you want to insert the image.
- Click on the “Insert” tab in the PowerPoint toolbar.
- In the “Images” section, click “Screenshot.”
- You’ll see a list of available windows; click on the window displaying the PDF file to capture a screenshot.
- If necessary, resize or crop the image by selecting it and using the formatting options in PowerPoint.
By following these steps, you can confidently insert PDF content as an image or screenshot within your PowerPoint presentation, making your content more visually engaging for your audience.
3. Convert PDF into Images
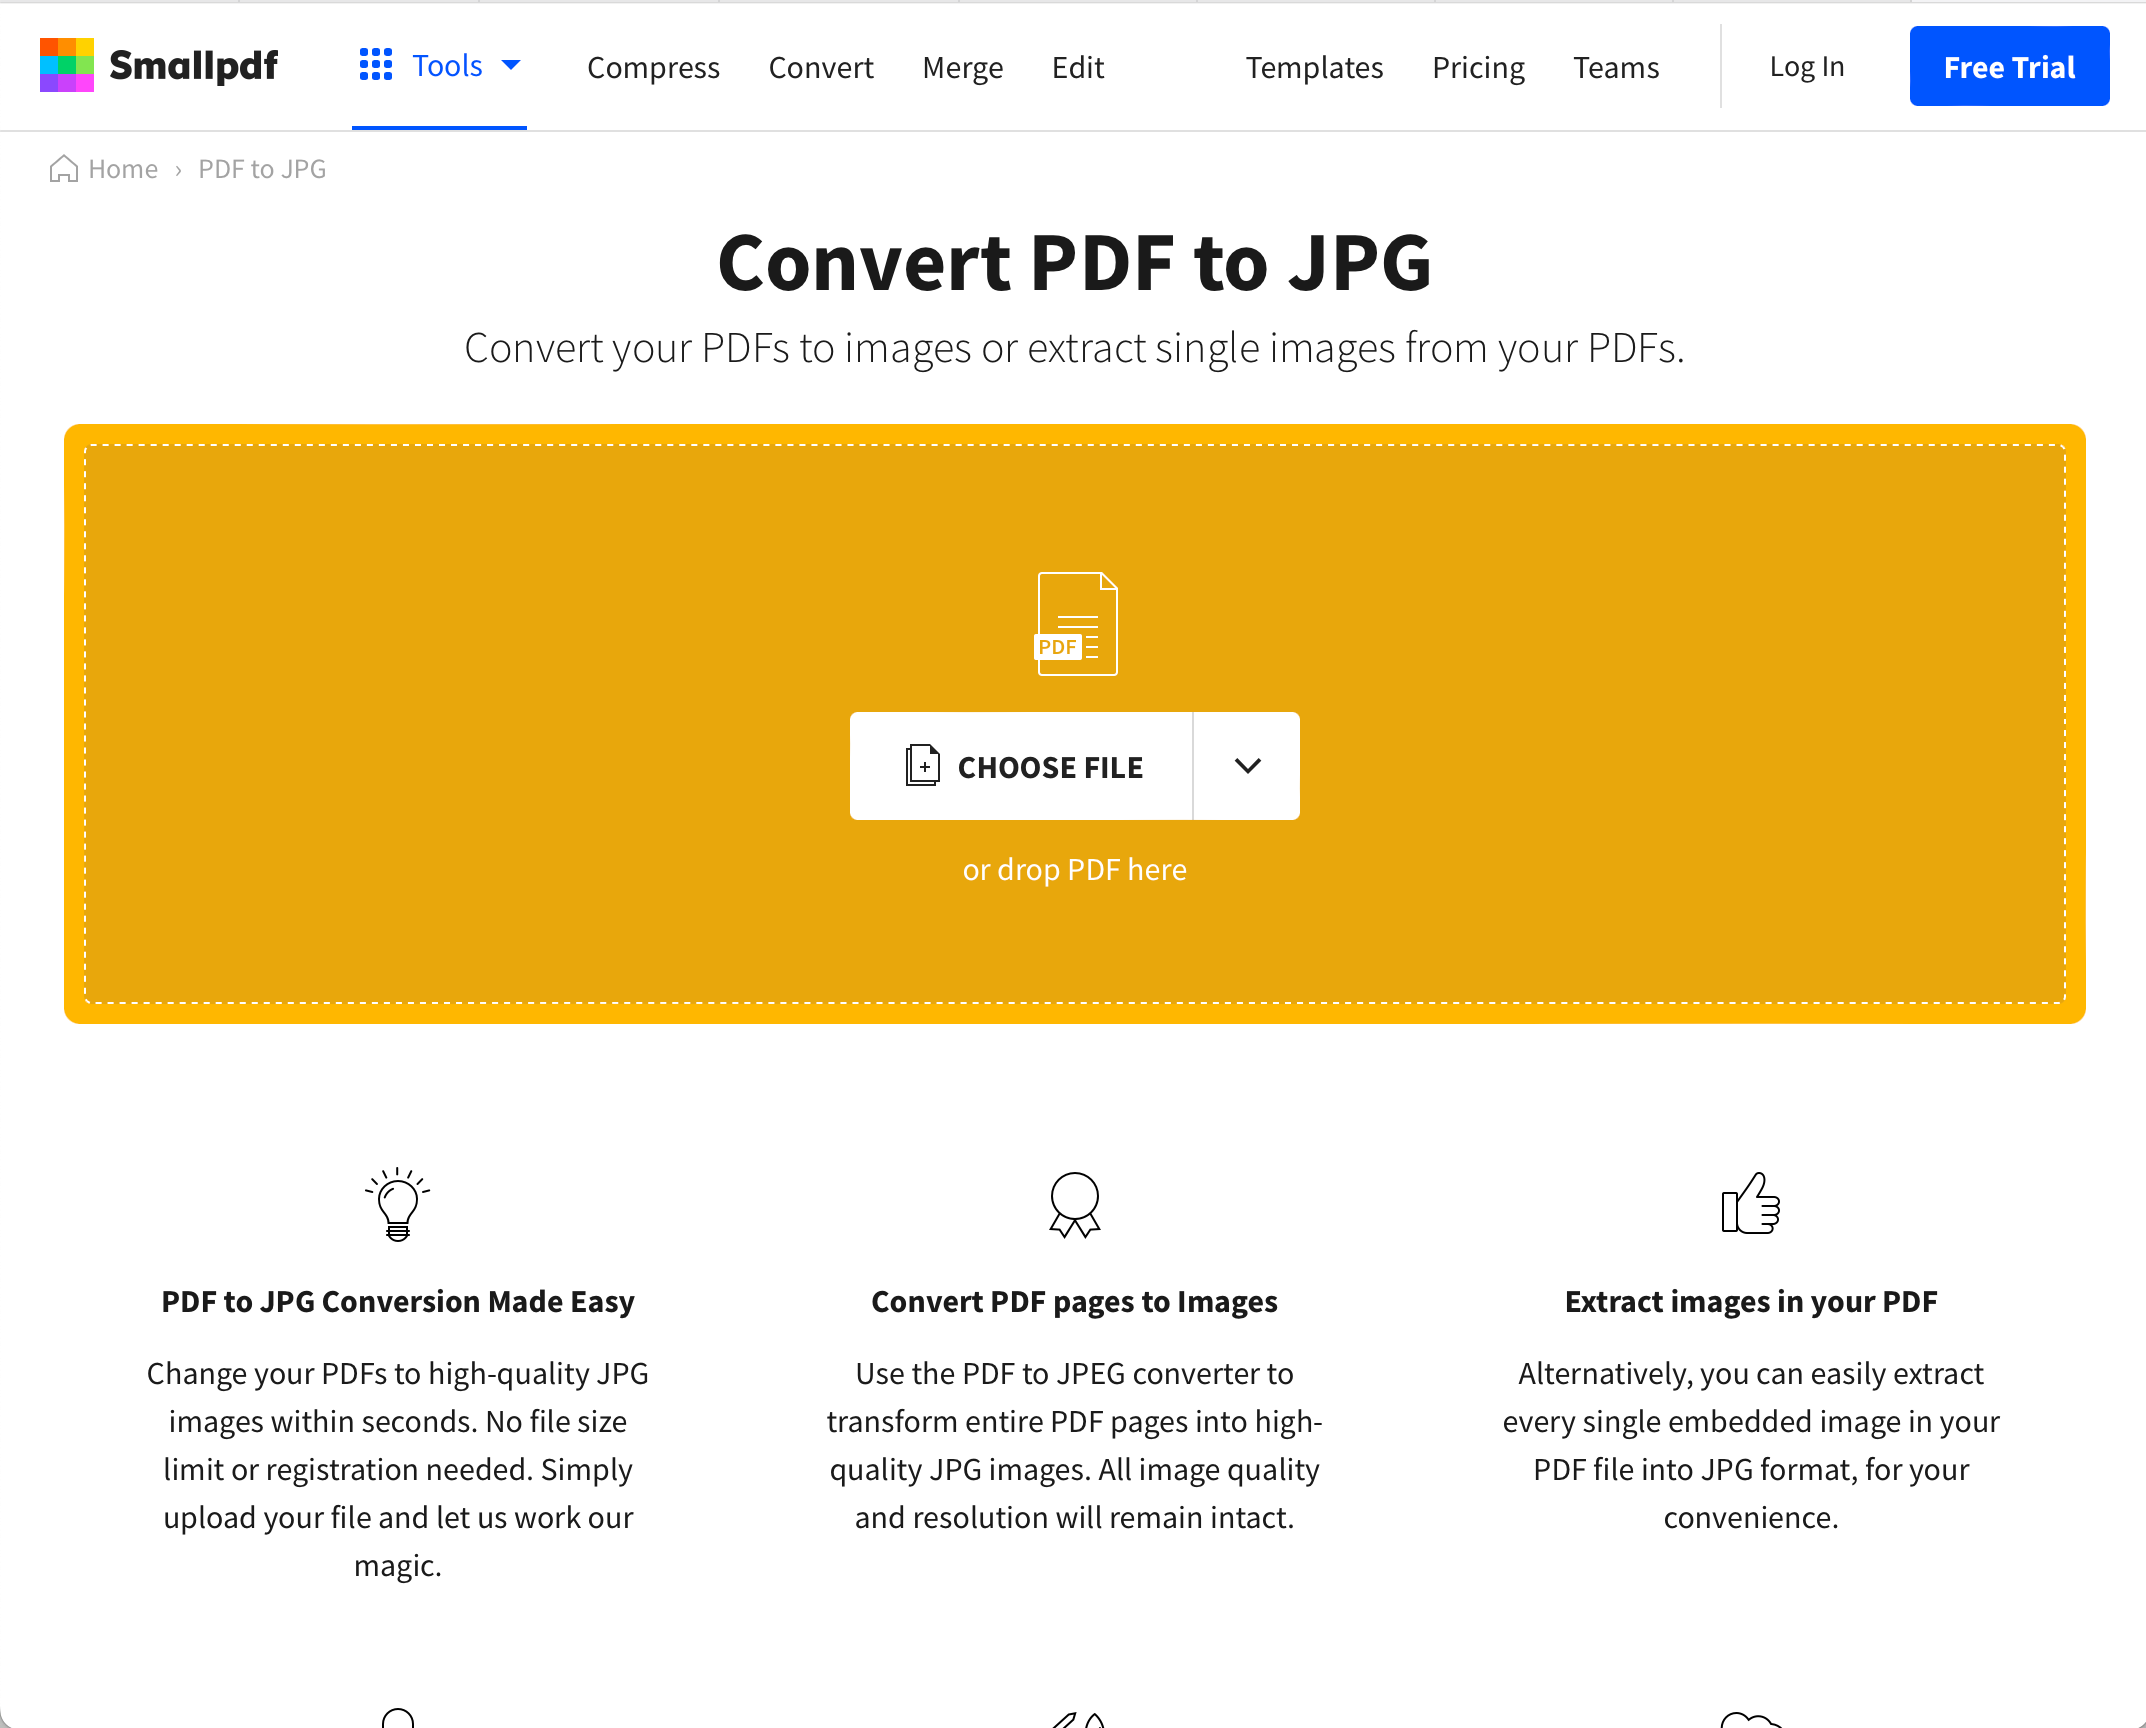
One effective method to insert a PDF file into a PowerPoint presentation is by converting the PDF file into image format.
This approach allows users to effortlessly insert the images into their slides in a clear and visually appealing manner.
To do this you can use an online tool or software applications designed for this purpose. Online tools like Smallpdf or ILovePDF offer quick and secure options for PDF-to-image conversions.
These tools usually support different image formats such as JPEG, PNG, or BMP.
Follow these simple steps for online conversion:
- Choose an online PDF-to-image converter.
- Upload the PDF file you would like to convert.
- Select the desired image format for the converted file.
- Click the convert button and wait for the process to finish.
- Download the converted images and save them on your computer.
For those who prefer a more robust solution, software applications like Adobe Acrobat or PDFelement can conveniently convert PDF files to images with enhanced functionality and output quality.
To insert the converted images into PowerPoint:
- Navigate to the desired slide.
- Click on the “Insert” tab.
- Select “Pictures.”
- Select the image files on your computer.
- Insert them one by one into the slides.
By converting a PDF to images, you maintain the visual fidelity of the original file while seamlessly integrating it into your PowerPoint presentation.
This method proves versatile and practical, demonstrating a confident, knowledgeable, neutral, and clear approach to presenting information.
3. Hyperlinking PDF to PowerPoint Slide
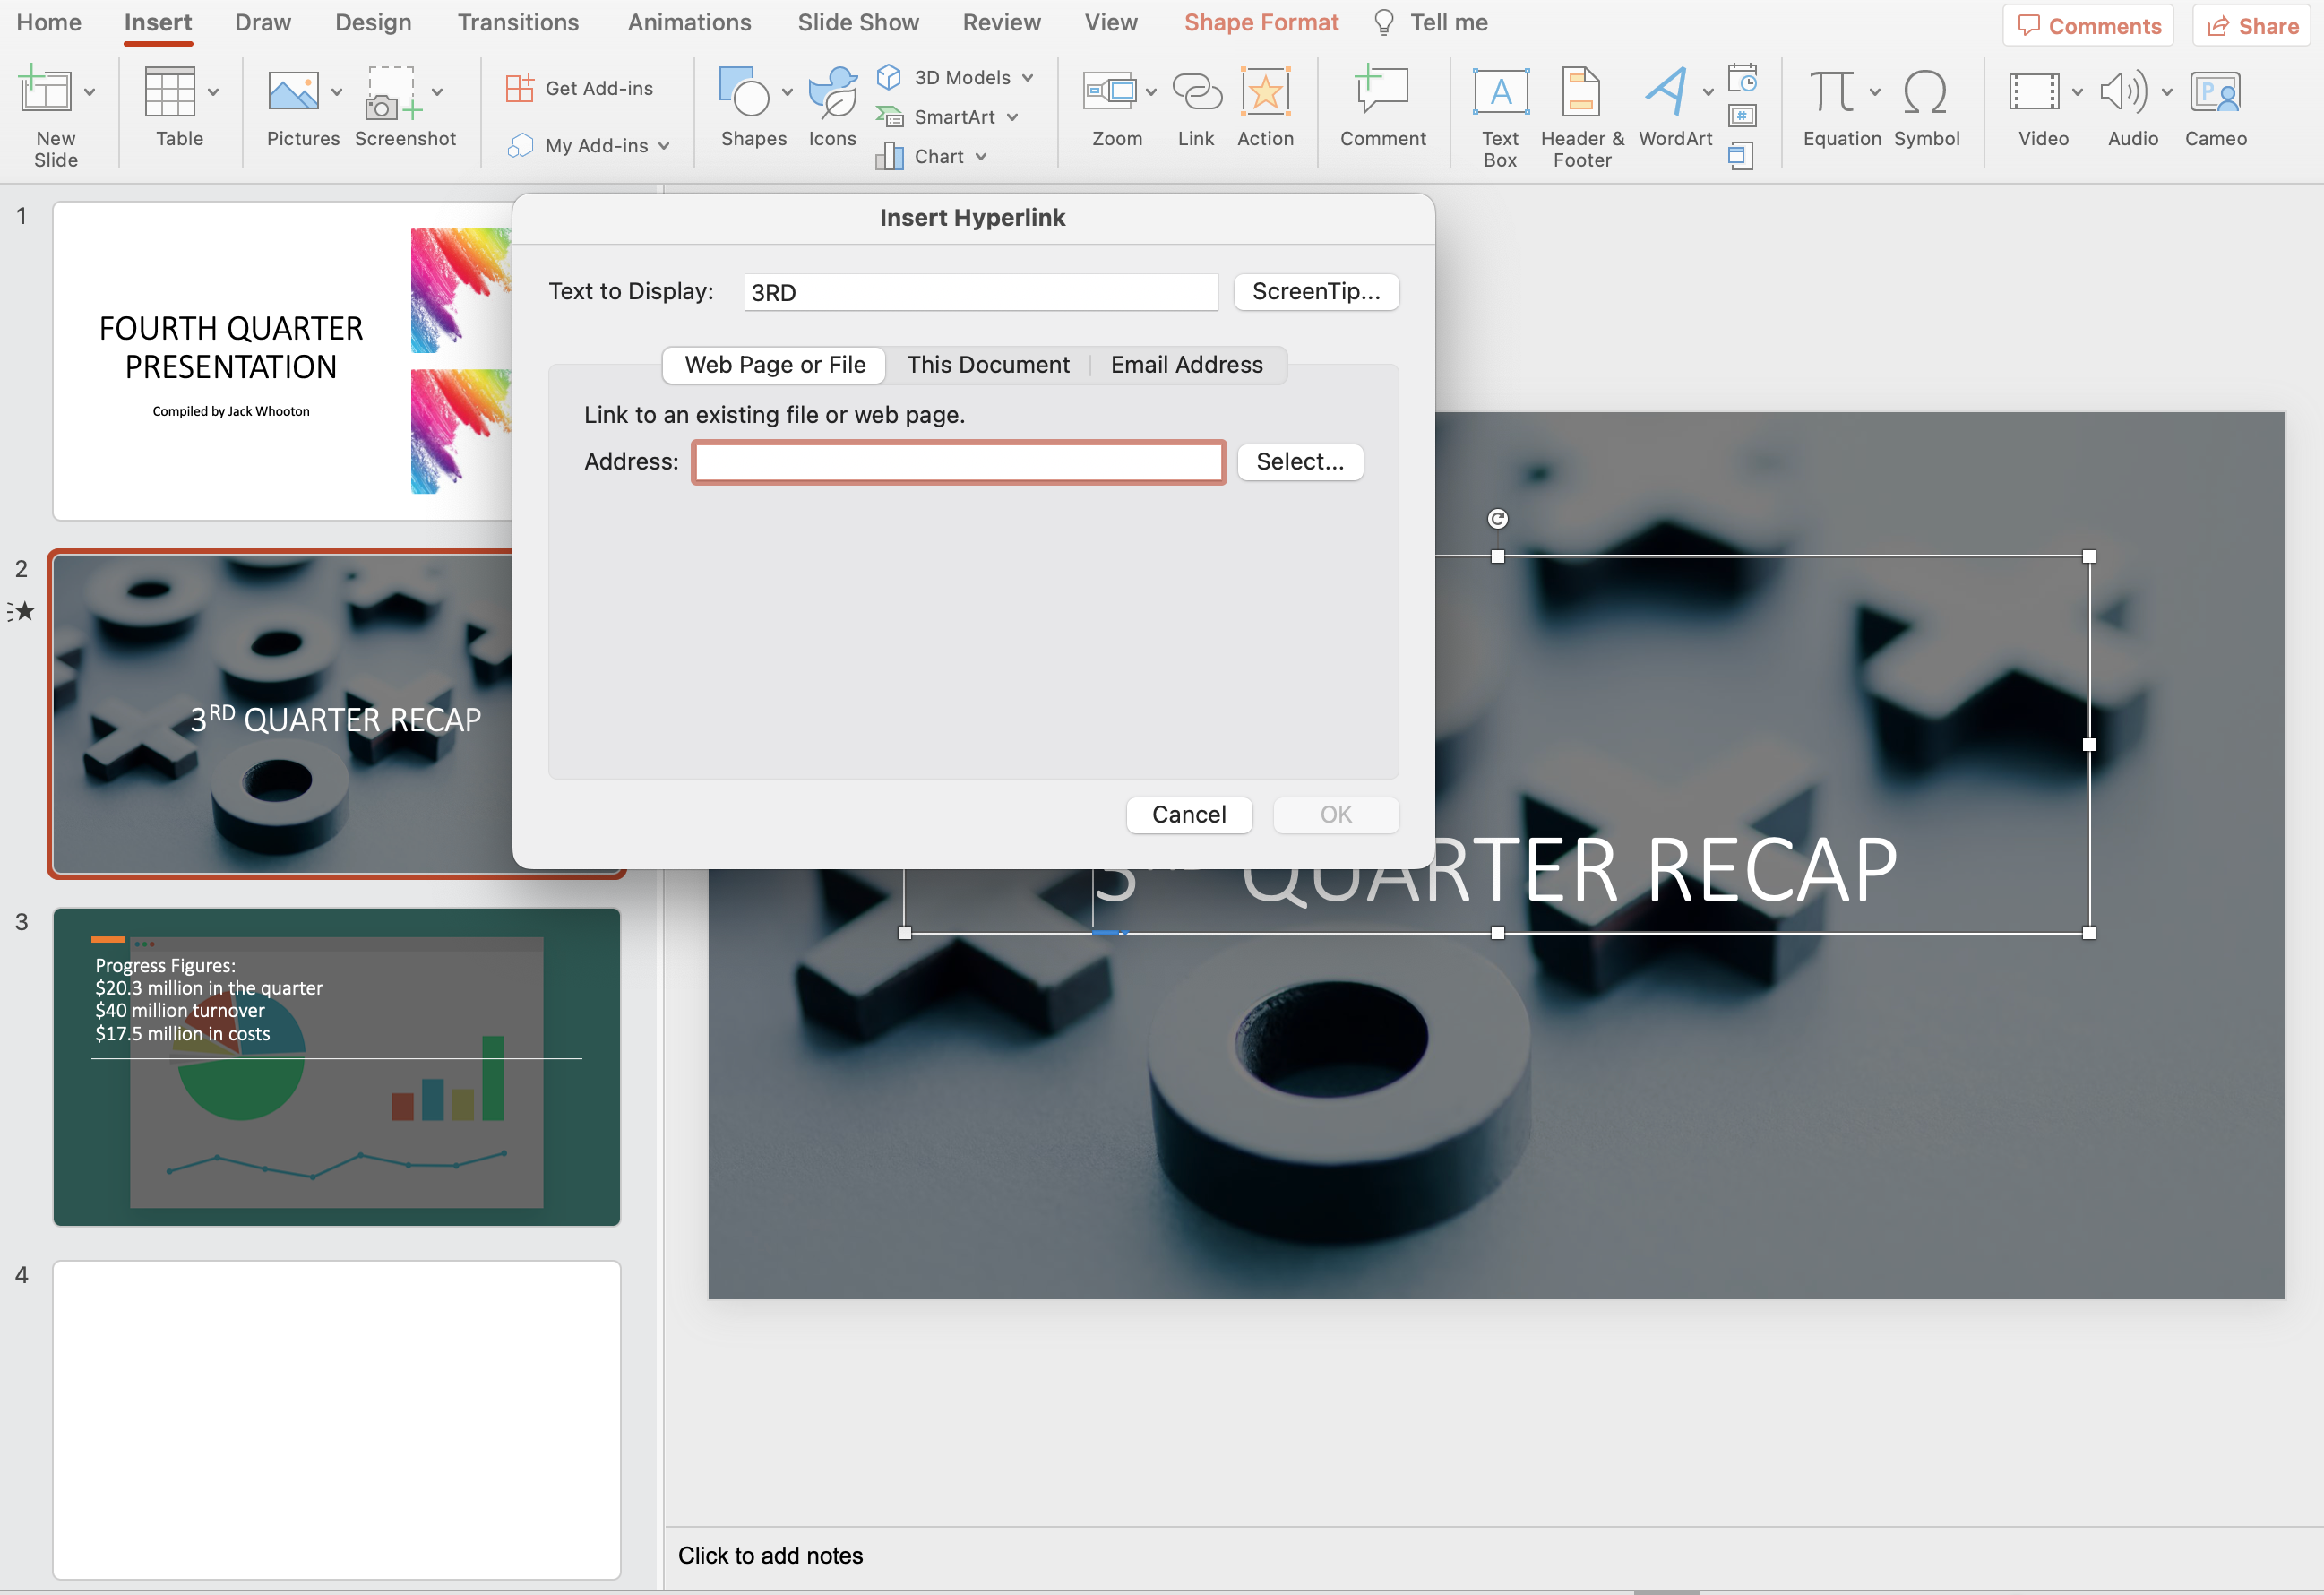
Adding a PDF as a hyperlink in PowerPoint is a convenient way to connect relevant documents or external information to your presentation.
By hyperlinking a PDF, you’ll have the option to click on the link within the slide, allowing your audience to access the PDF content seamlessly.
To create a hyperlink to your PDF file on a PowerPoint slide, follow these simple steps:
- Select the text, image, or object on the slide where you want to insert the hyperlink. This will act as the anchor for the PDF link.
- Click the “Insert” tab in the PowerPoint toolbar, and then choose “Hyperlink” to open the Hyperlink dialog box.
- Select “Existing File or Web Page” from the left-hand pane of the Hyperlink dialog box.
- Click “Browse”, “Select” or the File Folder icon, and find the PDF file you want to link to. Select the file and click “OK” to insert the PDF hyperlink.
- Customize the Display Text or Tooltip (optional). If you want to change the displayed text for the hyperlink or add a ScreenTip to provide more information, you can edit these fields in the Hyperlink dialog box.
Once you’ve followed these steps, your PDF hyperlink will be inserted into your PowerPoint slide.
When clicked, the PDF file will open in the default PDF viewer, giving your audience easy access to the content.
By hyperlinking PDFs to your PowerPoint slides, you can create an interactive presentation experience and provide additional resources for your audience to explore.
Editing and Customizing PDFs in PowerPoint
Once you have inserted your PDF into a PowerPoint slide, you may wish to edit and customize it to fit your presentation’s design and layout.
In this section, we’ll cover various editing techniques, such as resizing and cropping, as well as assigning mouse actions.
1. Resizing
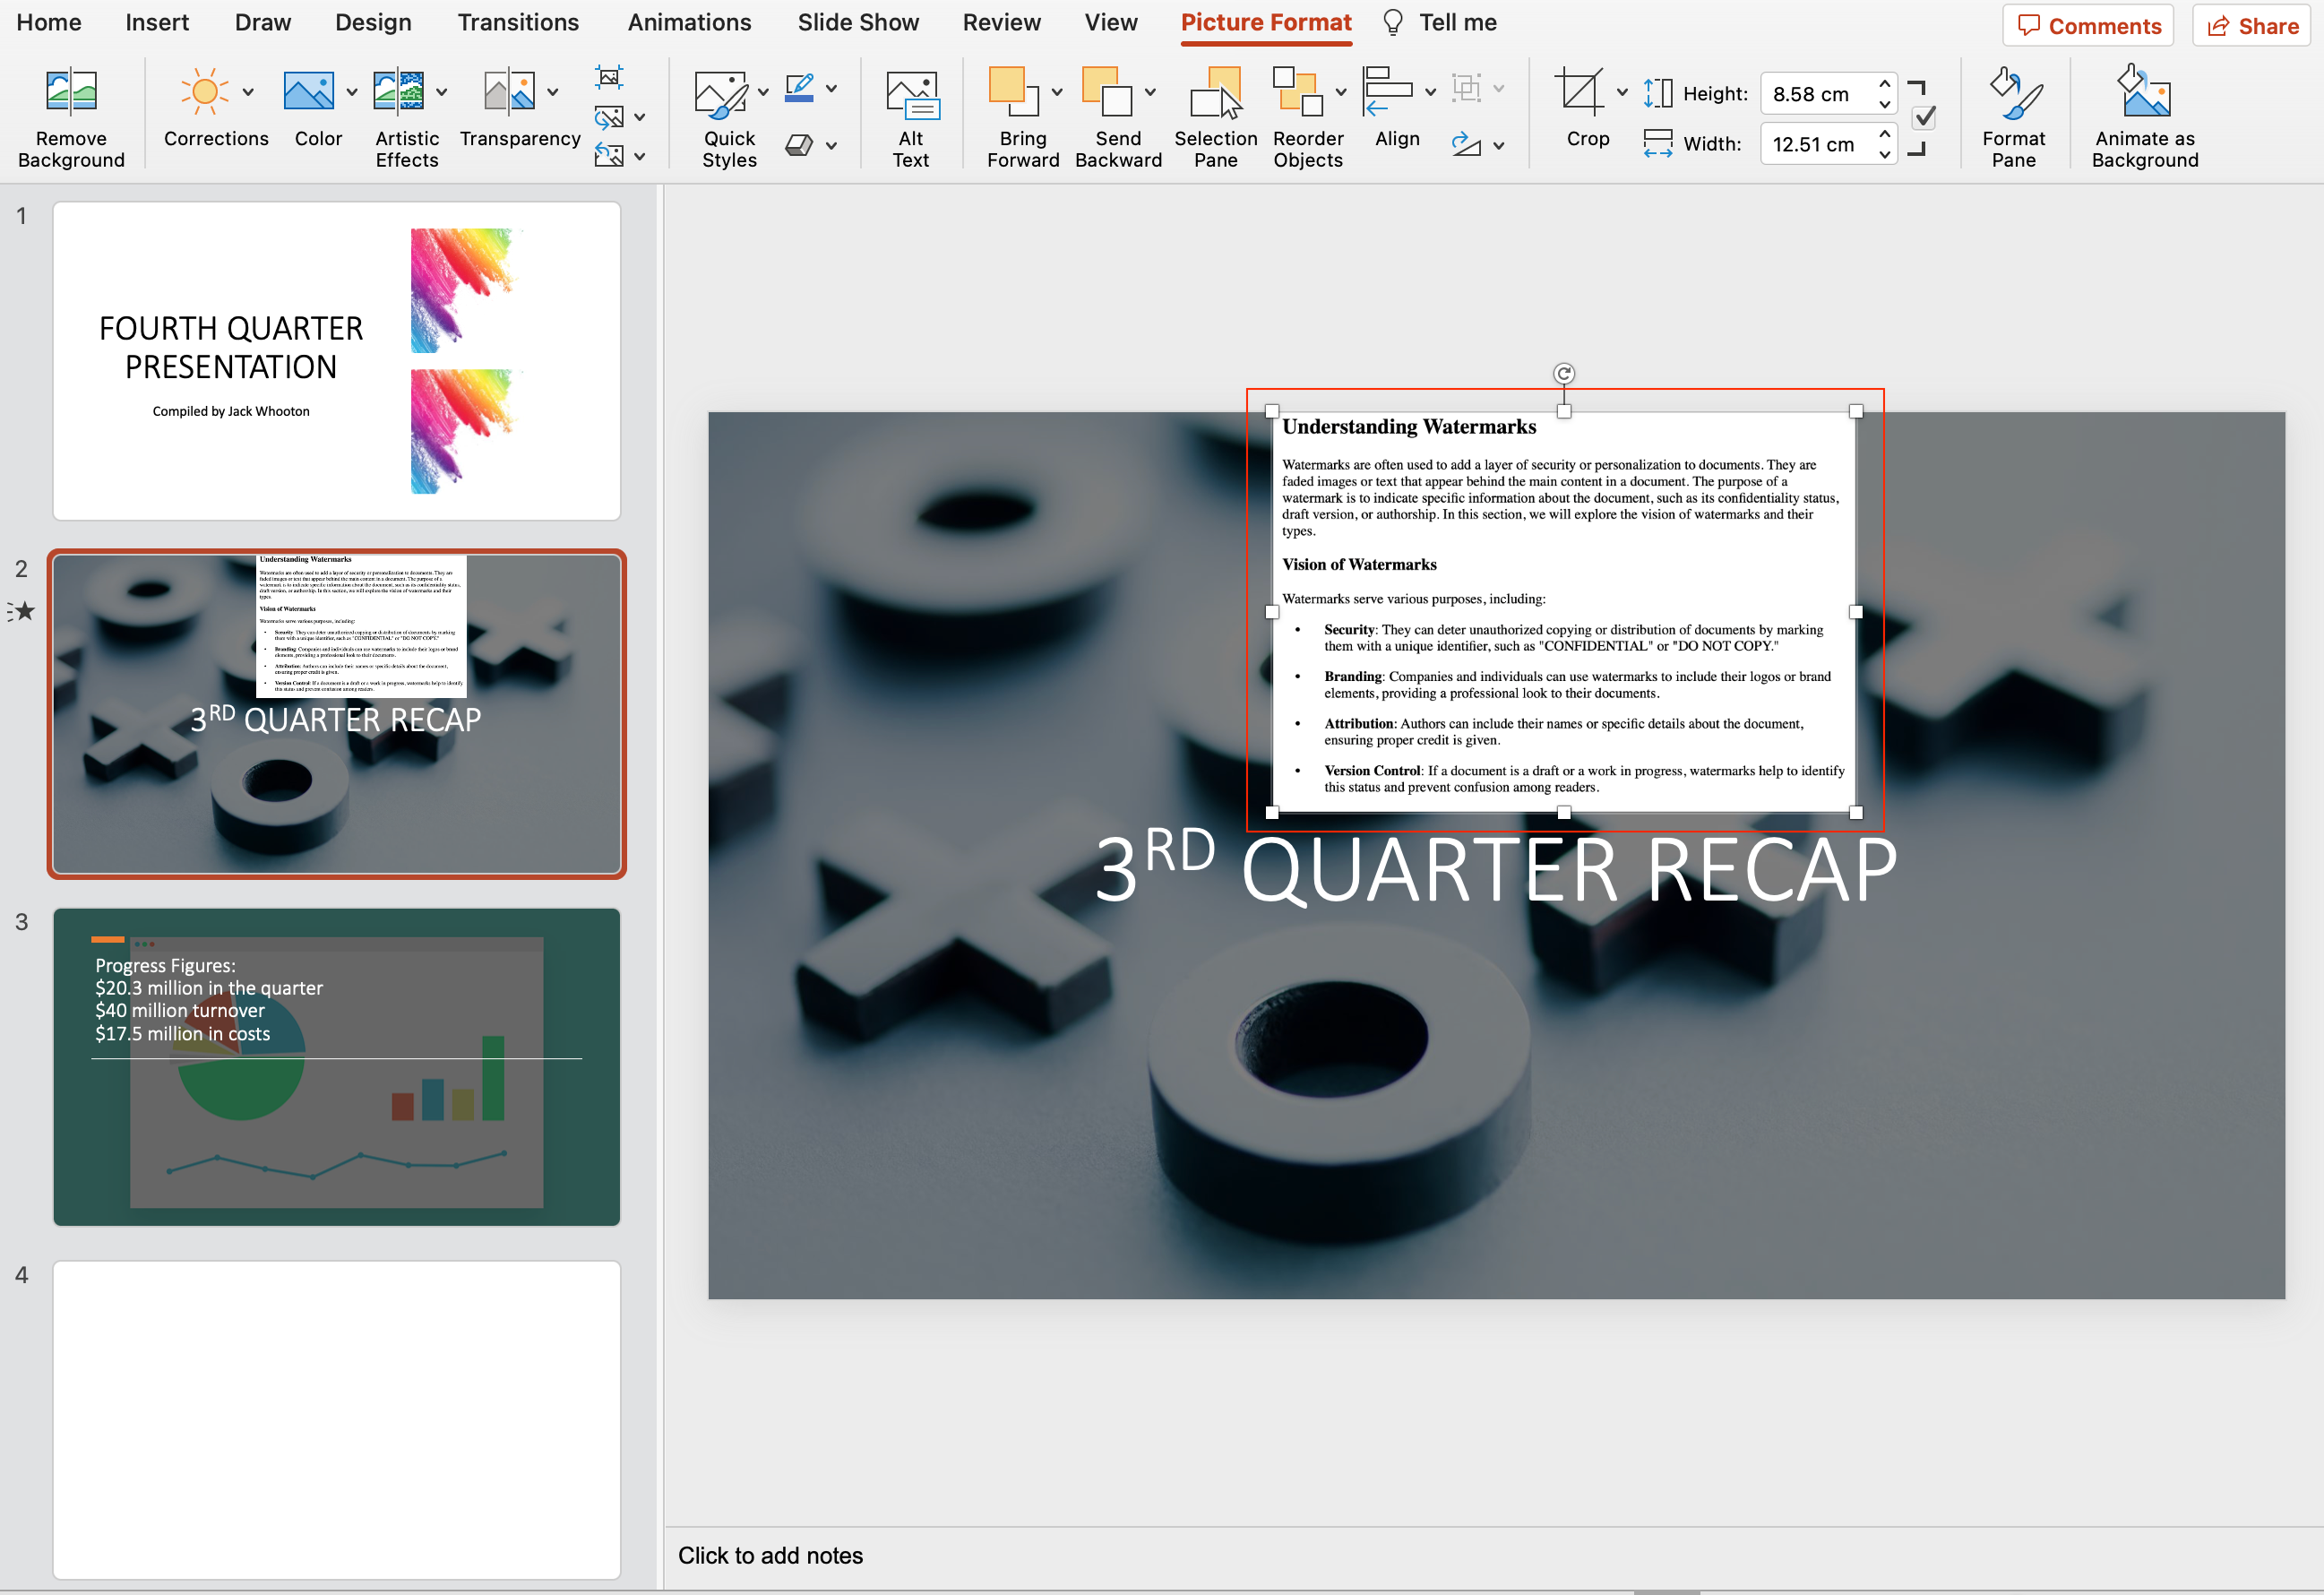
Resizing a PDF within PowerPoint is a simple task.
To adjust the dimensions of the PDF, follow these steps:
- Click on the PDF object to select it.
- You will notice small squares, or “handles,” on the corners and edges of the object.
- Click and drag one of the handles to resize the PDF proportionally.
To stretch it horizontally or vertically, click and drag one of the edge handles. - Release the mouse button when you reach the desired size.
Remember that resizing the PDF may impact its resolution and might result in a pixelated or blurry appearance.
2. Cropping
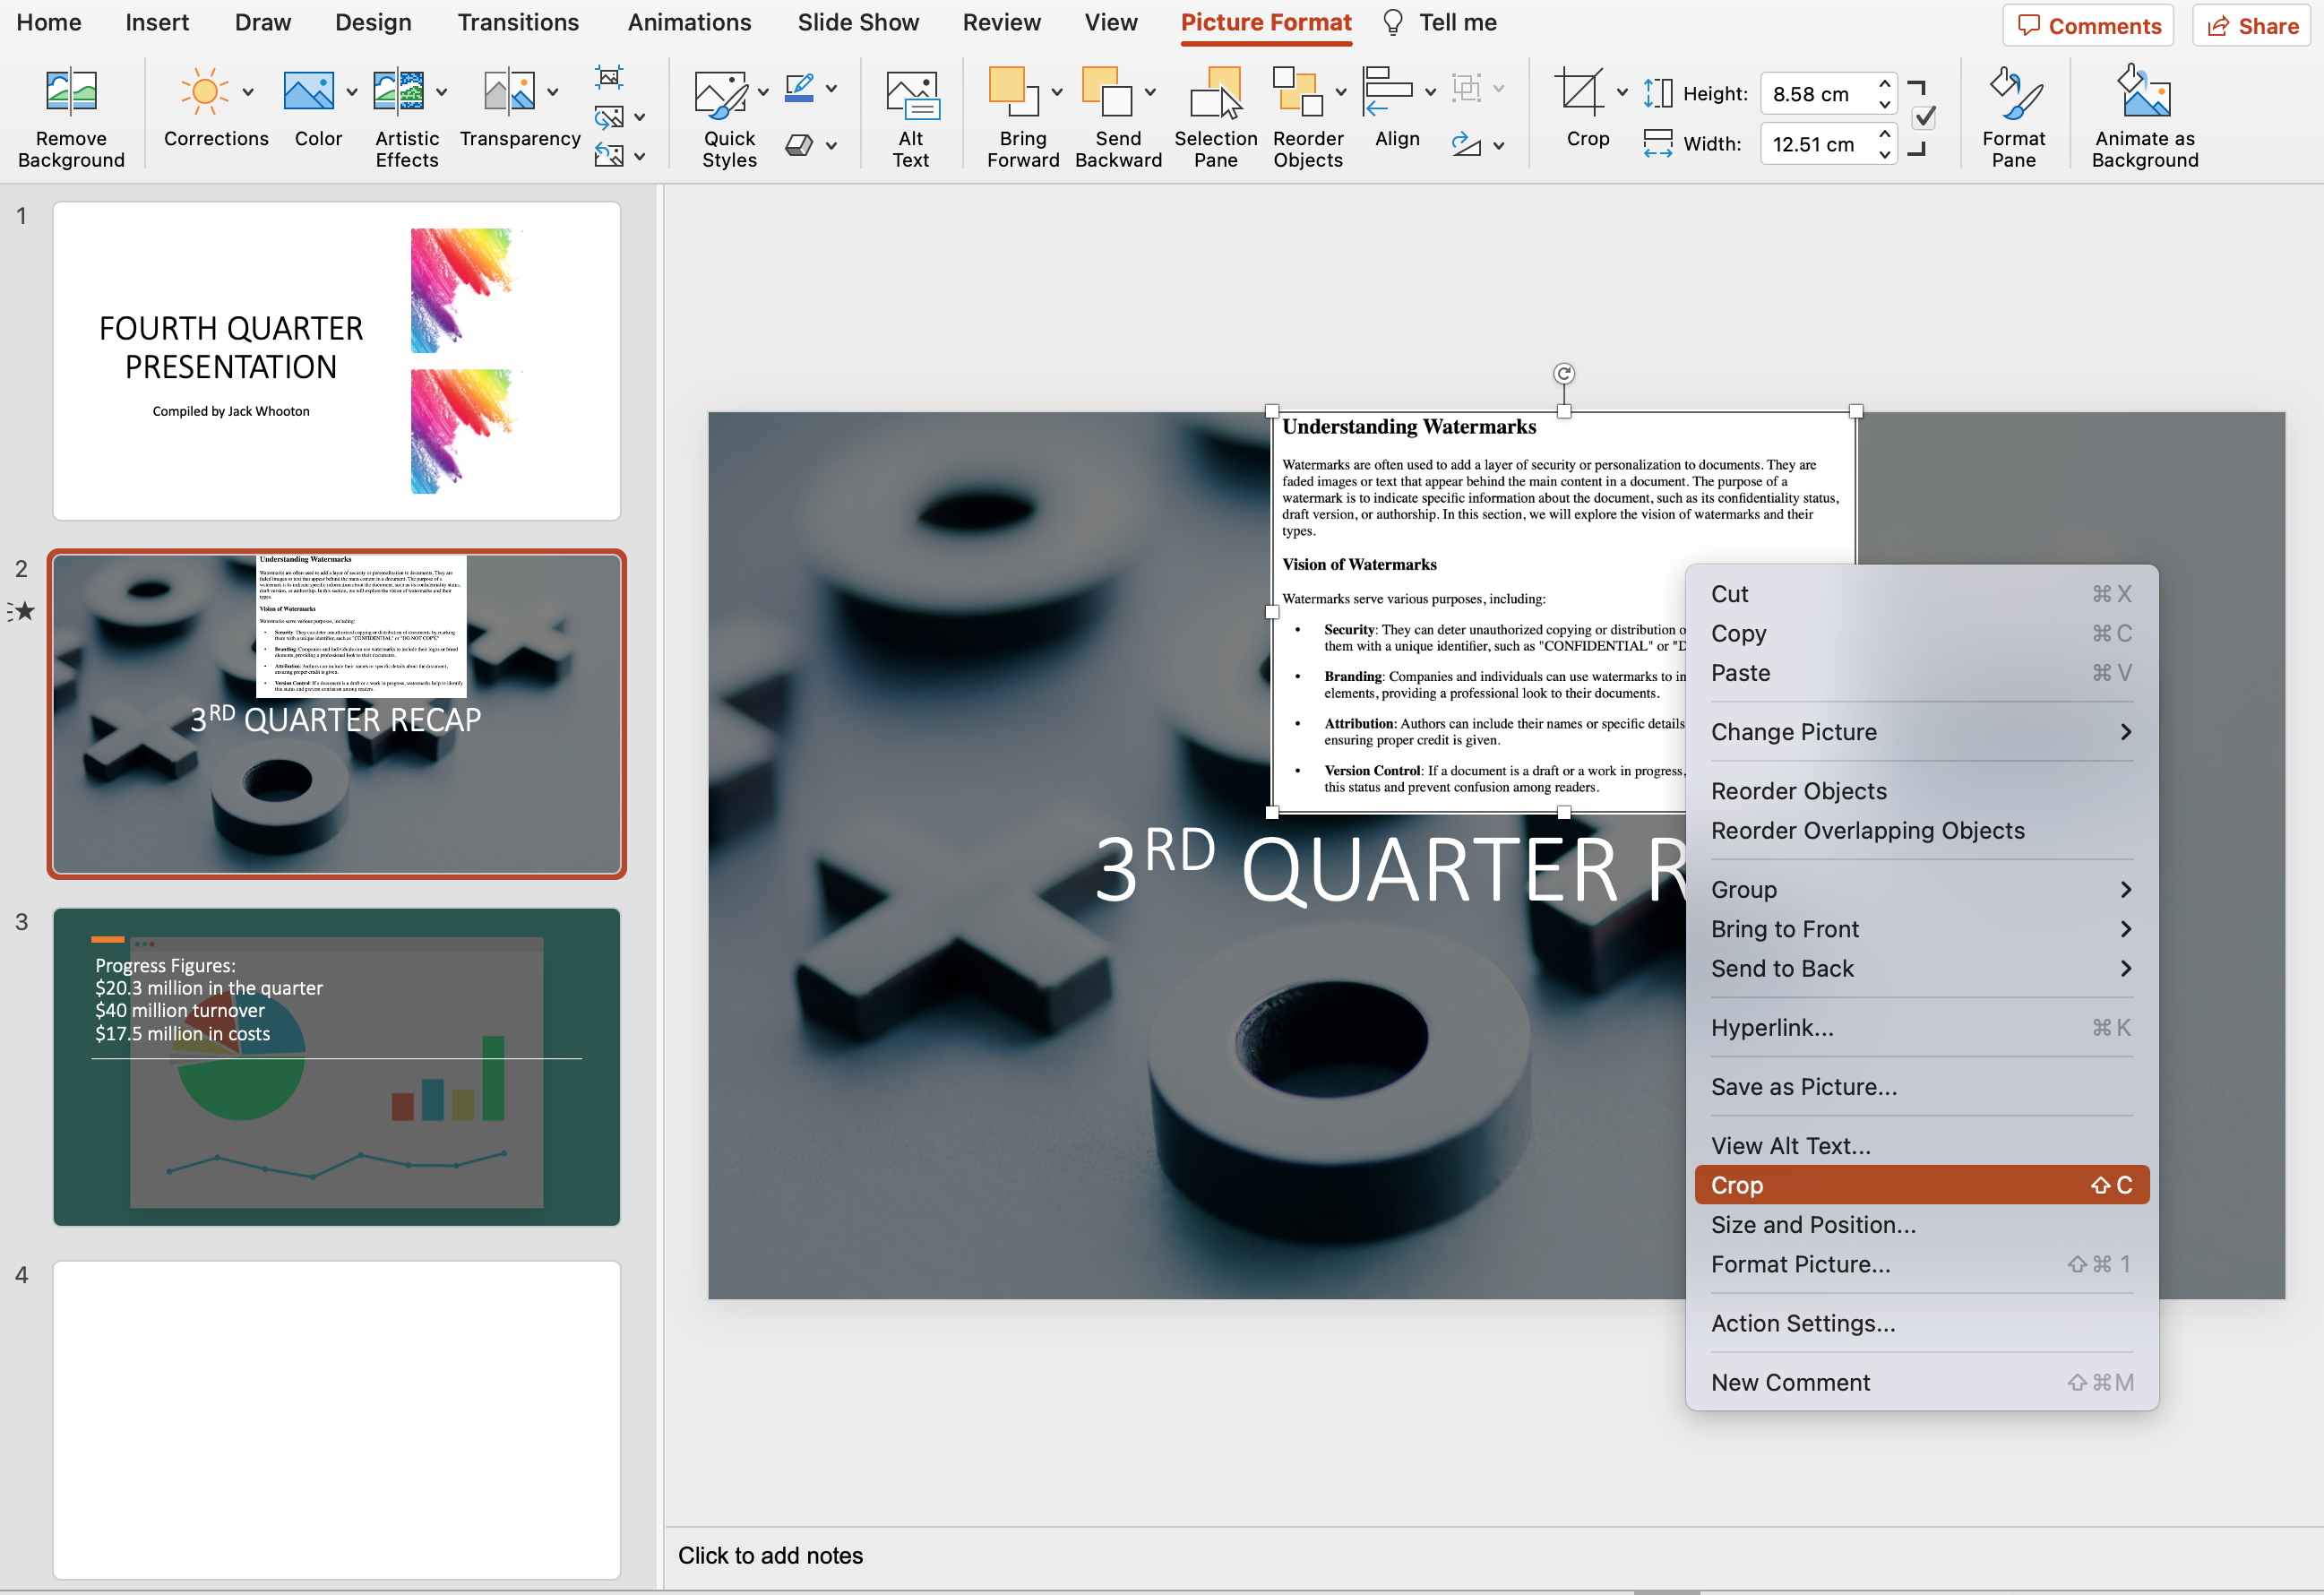
Cropping a PDF in PowerPoint allows you to remove unwanted portions and focus on specific areas.
Here’s how to crop your PDF:
- Click on the PDF object to select it.
- Under the ‘Format’ tab located on the toolbar, select the ‘Crop’ command.
- Crop handles will appear on the object’s edges and corners.
- Click and drag the handles inward to determine the portion of the PDF you want to keep.
- Press ‘Enter’ or click elsewhere on the slide to finalize the cropping.
3. Mouse Actions
Adding mouse actions, such as mouse-over or mouse-click effects, can enhance the interactivity of your presentation.
To set a mouse action on your PDF object, follow these steps:
- Click on the PDF object to select it.
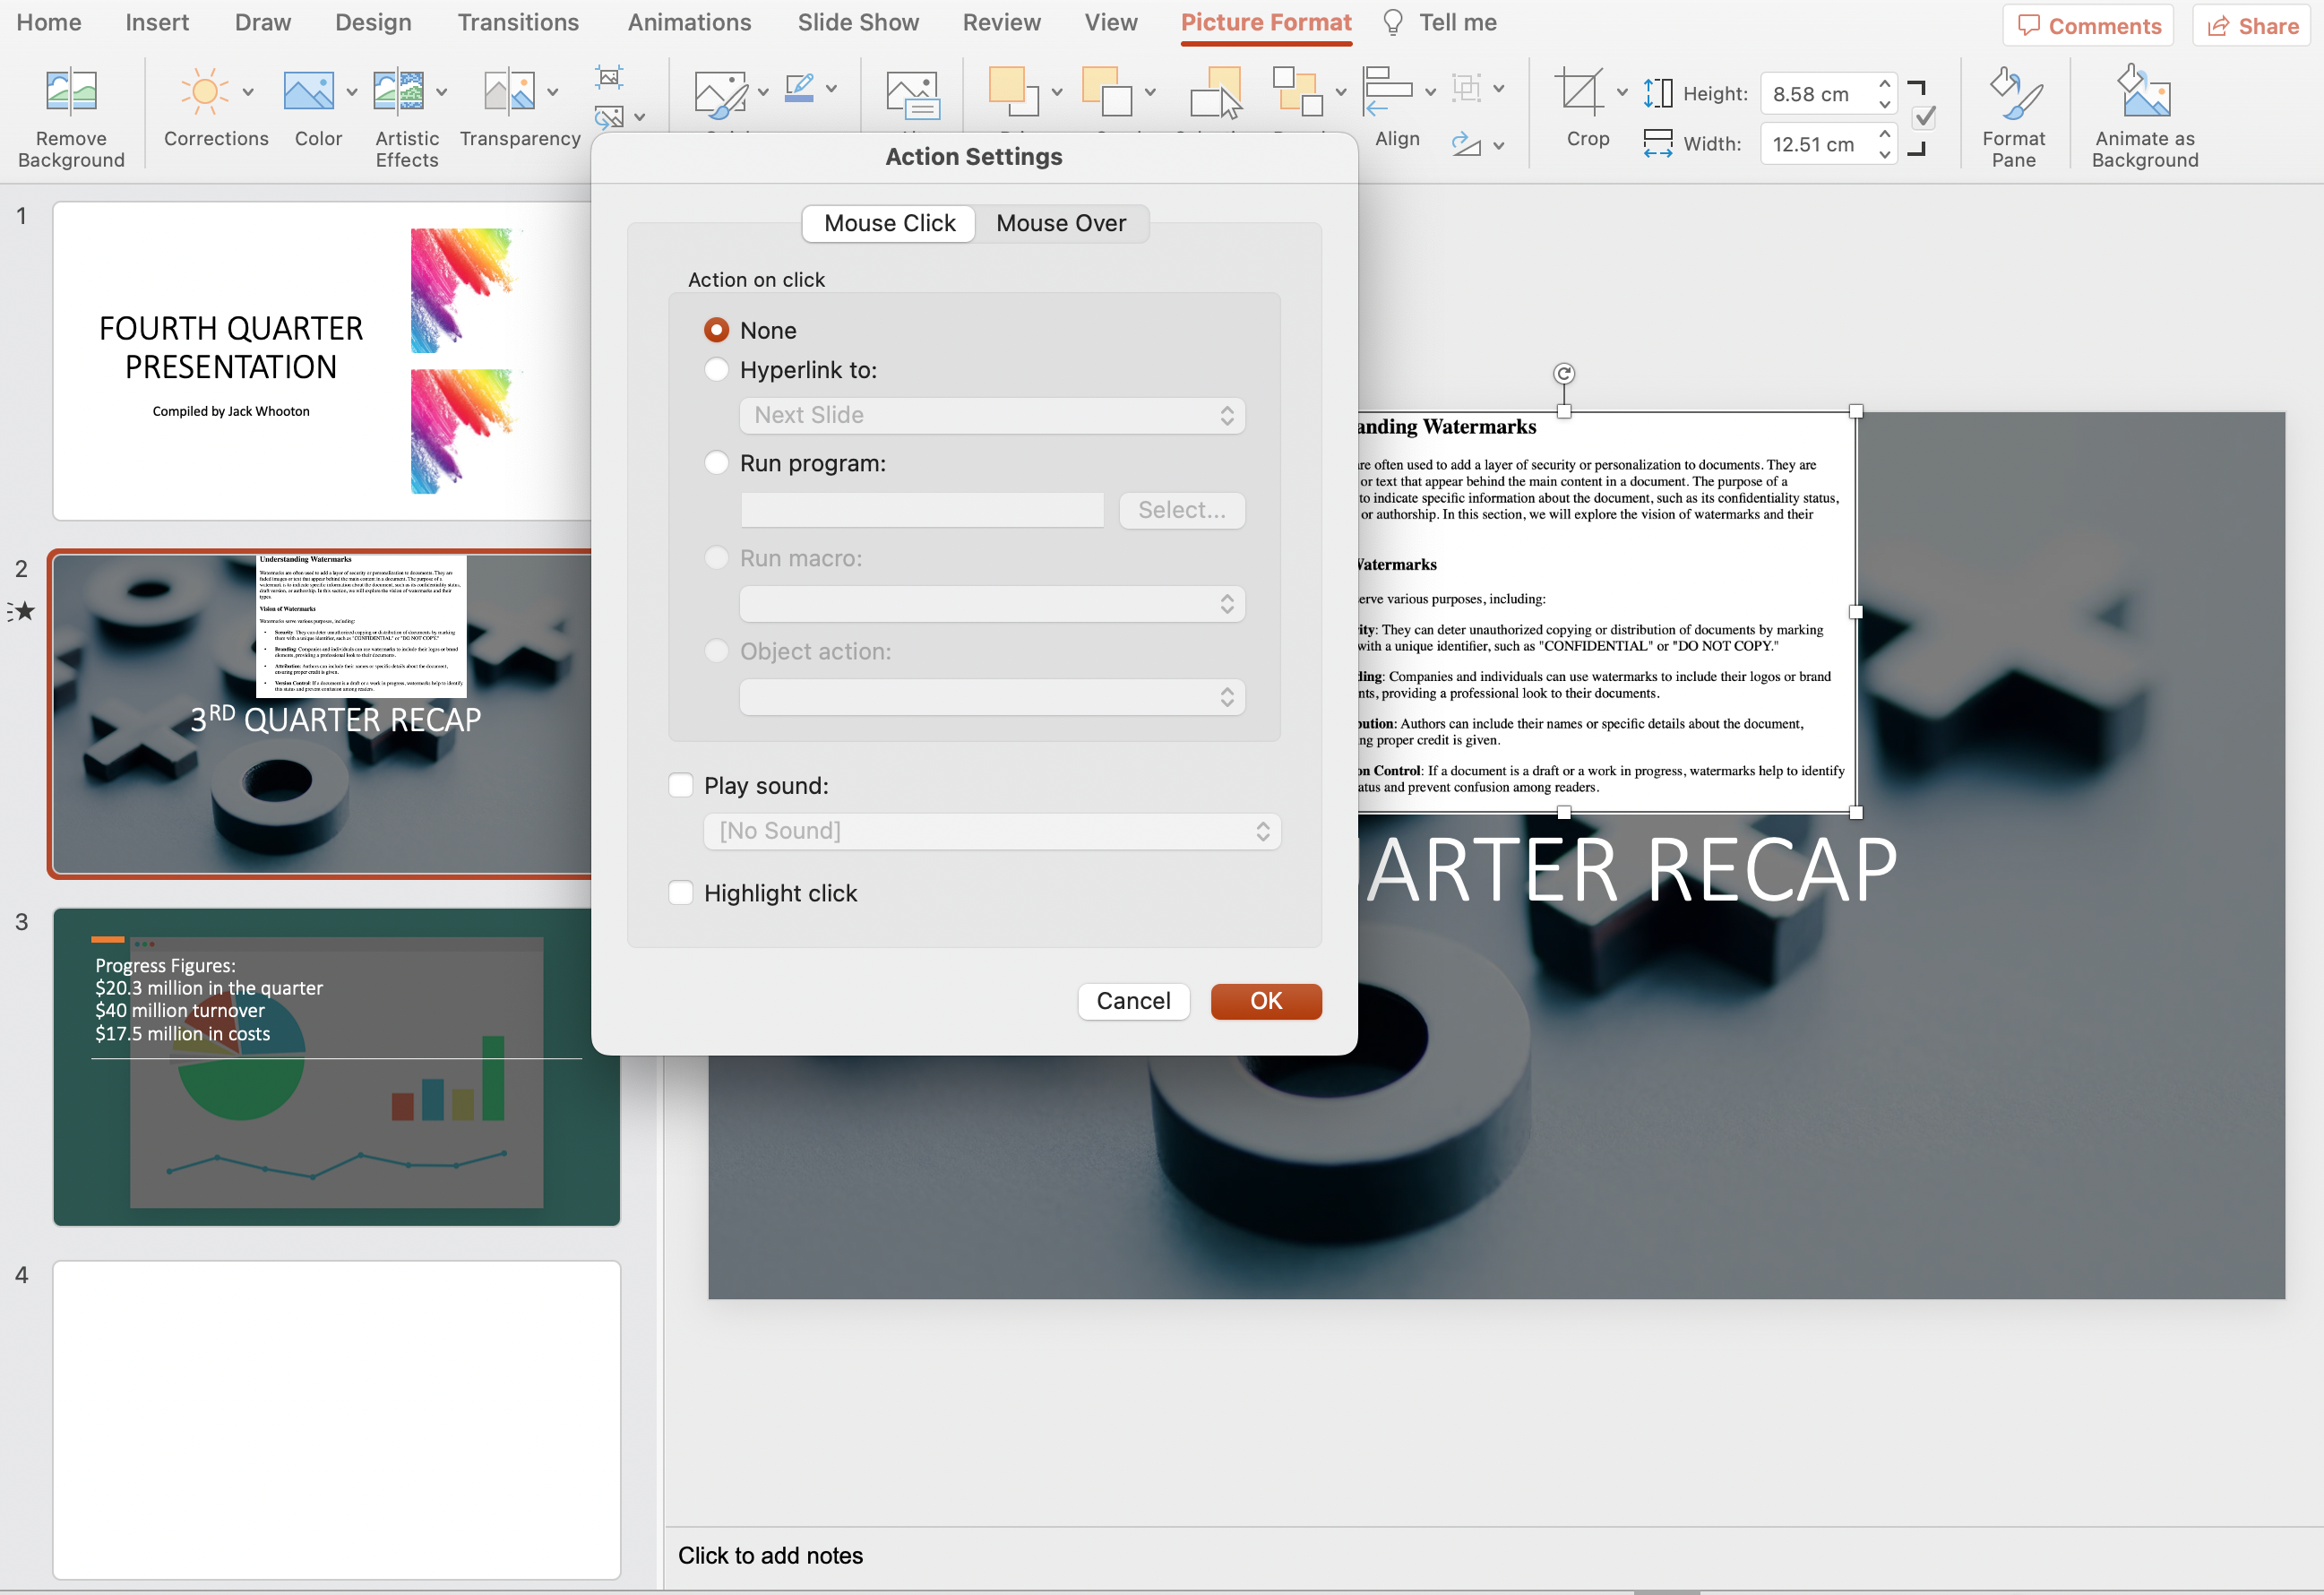
- Navigate to the ‘Insert’ tab, and in the ‘Links’ group, click on the ‘Action’ button or double right-click on the pdf object.
- In the ‘Action Settings’ window, you may choose between two actions: Mouse Click and Mouse Over.
- Mouse Click: This action occurs when you click on the PDF object during your presentation.
- Mouse Over: This action occurs when you hover the cursor over the PDF object without clicking.
- Choose how you want the PDF to be activated during the PowerPoint slideshow by clicking the Mouse Click tab or the Mouse Over tab.
- Click ‘OK’ to save the action settings.
With these editing techniques, you can customize your PDF and make it an interactive element within your PowerPoint presentation.
4. PDF Preview and Thumbnail in PowerPoint
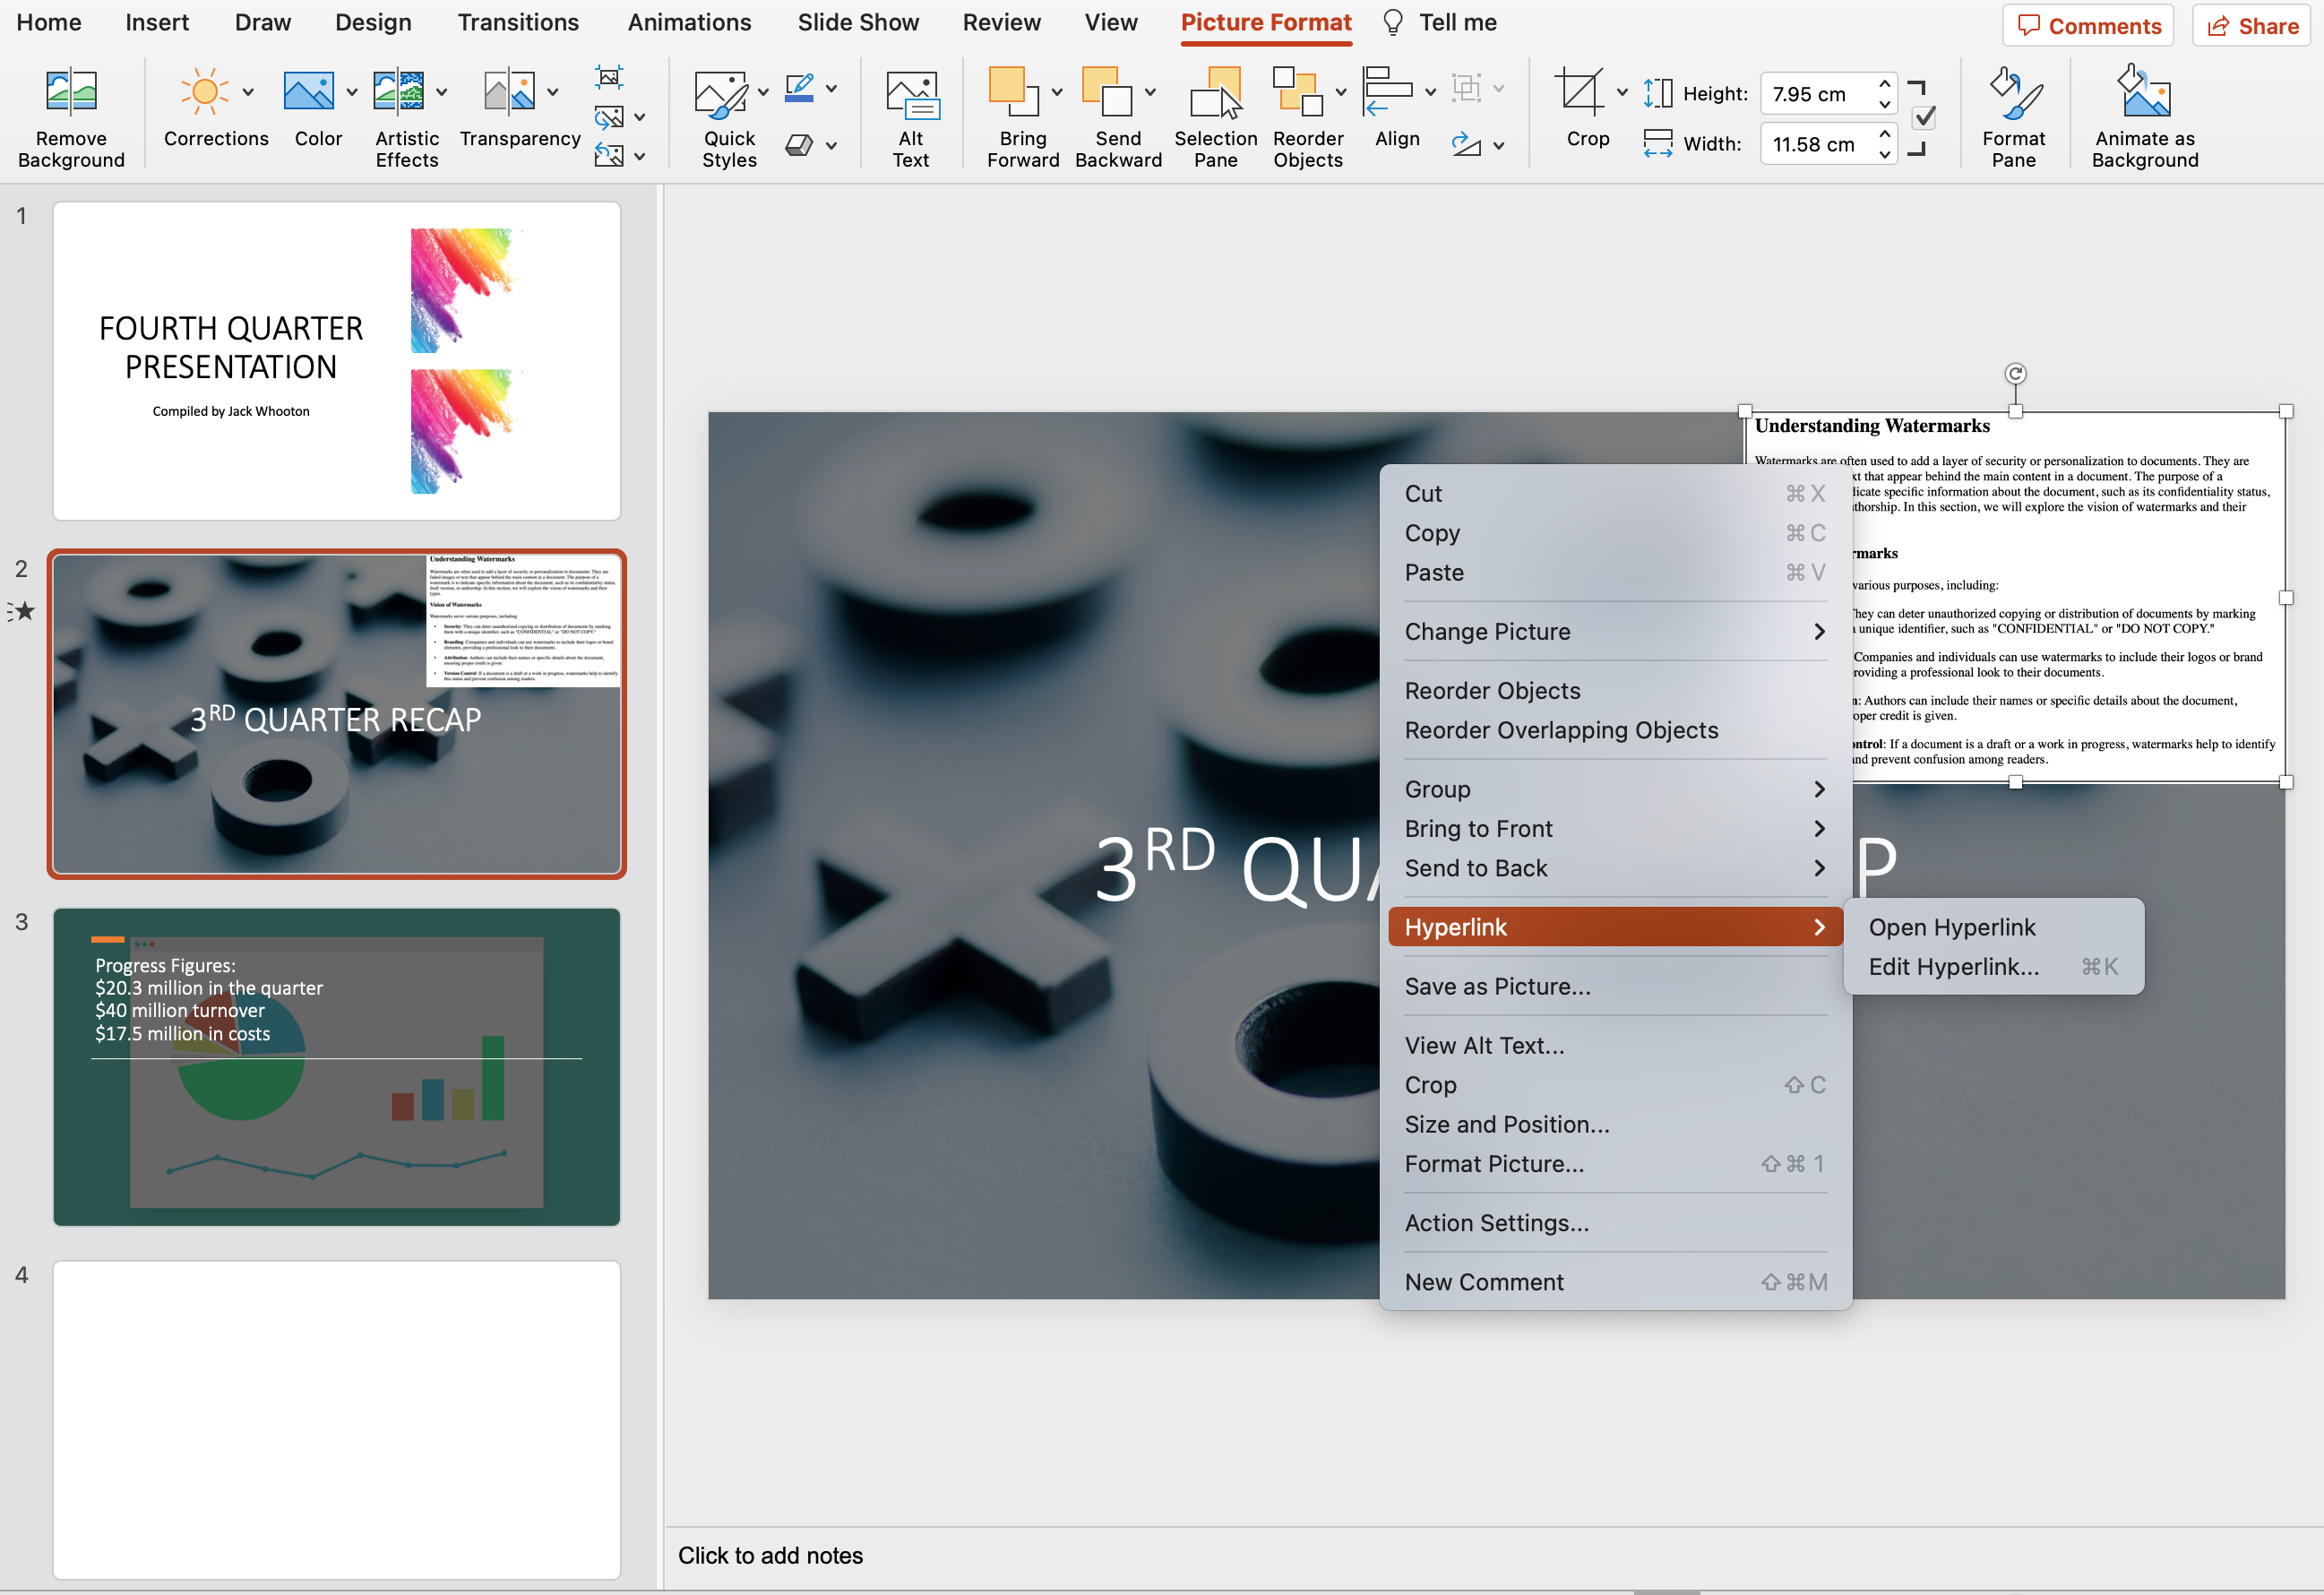
If you want to enhance your presentation you have the option to display PDF previews and thumbnails within PowerPoint.
To do this:
- Go to the part of your PDF file that you would want to use as a thumbnail.
- Take a screenshot of it with the steps we’ve provided.
- Insert the screenshot into your desired slide.
- Hyperlink your full PDF into the screenshot with the steps we’ve provided.
Your audience will see the thumbnail of the PDF content during the presentation.
You can add multiple thumbnails to your presentation by following the same steps and selecting different pages from the PDF file.
This allows you to create visually appealing presentations and keep your audience’s attention.
Final Thoughts
Embedding a PDF into a PowerPoint presentation can help you integrate valuable information from external sources into your presentation, providing both a visually appealing and comprehensive experience for your audience.
Remember, always ensure that you have the necessary permissions to use the content from the PDFs, and be careful not to infringe on copyright laws.
By following these guidelines, you can confidently and knowledgeably insert PDFs into your PowerPoint presentations, enhancing their overall clarity and effectiveness.
If you’d like to learn more about the recent strides Microsoft’s products have made, check out the following video:
Frequently Asked Questions
How can I add a PDF file to a PowerPoint slide?
There are 3 main ways to add a PDF file to a PowerPoint slide:
- Inserting a PDF as an object.
- Inserting a PDF as an image or screenshot.
- Hyperlinking PDF to PowerPoint Slide.
There are step-by-step instructions to accomplish each one within the article
What are the steps to convert a PDF to PowerPoint?
You can use Adobe Acrobat or other online tools to convert a PDF file to a PowerPoint.
Generally, you upload the PDF file, select the “convert” option, and download the converted PowerPoint file.
Open the converted file and add the relevant slides to your presentation.
Why can’t I insert a PDF into PowerPoint on Mac?
On Mac, the option to insert a PDF directly into PowerPoint might not be available due to technical limitations and compatibility issues between software versions.
Instead, you may convert the PDF to images or slides using Adobe Acrobat or other online tools and then insert the converted images or slides into your PowerPoint presentation.
How do I include a PDF as an icon in PowerPoint?
To include a PDF as an icon in PowerPoint, go to the desired slide, then click on Insert > Object.
Choose the “Create from file” option, and either enter the file location or use the Browse option to find the PDF.
Check the “Display as icon” box and click OK.
An icon representing the PDF file will now be inserted on your slide.
Is it possible to insert a PDF into Google Slides?
Inserting a PDF directly into Google Slides is not possible.
However, you can convert the PDF into images or slides and insert these into your Google Slides presentation.
You can use Adobe Acrobat, online tools, or screenshot methods to convert the PDF into a suitable format for Google Slides.
How can I add multiple pages of a PDF to my PowerPoint presentation?
To insert multiple pages of a PDF into a PowerPoint presentation, consider converting the PDF into images (one image per page) using Adobe Acrobat or other online tools.
Then, insert each image into individual slides in your presentation.


