In today’s digital age, creating professional presentations is an essential skill. And when it comes to crafting impactful slideshows, PowerPoint is the go-to tool for many professionals.
One feature that adds depth and sophistication to your presentations is the ability to make pictures transparent in PowerPoint.
To make a picture transparent in PowerPoint:

Insert the picture you want to use.
Select the picture by clicking on it, and go to the “Picture Format” tab on the ribbon.
In the “Adjust” group, click on the “Color” button and choose “Set Transparent Color”.
After selecting the “Set Transparent Color” option, click on the color in the image that you want to make transparent.
By learning how to make images transparent in, you can easily blend them into your slides and enhance the overall visual appeal.
This article will provide you with a step-by-step guide on how to make pictures transparent in PowerPoint, along with useful tips and tricks to optimize your presentation design.
Let’s get started!

Why Should You Make a Picture Transparent in PowerPoint?
As you work on your PowerPoint presentation, you might find that the images you want to include are a little too bold or overpowering.
Making a picture transparent can help you achieve a more subtle, professional look. It allows your text and other graphics to remain visible while still providing a visual element.

Here are some reasons why you should make a picture transparent in PowerPoint:

Enhance Text Readability: Transparent images in PowerPoint can improve the readability of your text. By reducing the intensity of the image, the text can stand out more, making it easier for your audience to read.
Highlight Key Information: Making images semi-transparent in PowerPoint allows you to focus on specific parts of the image, drawing attention to the most important details.
Create Layered Effects: Picture transparency can help you achieve a more polished and professional look in your presentations. It allows you to overlay multiple images and elements without making the PowerPoint slide appear cluttered.
Customize Image Blending: PowerPoint transparency allows you to blend images with other elements on your slide, giving you more control over the overall design and visual appeal.
Remember that transparency should be used strategically. It’s not just about making images look good, but also about guiding your audience’s attention and conveying information effectively.
Now, let’s move on to the process of making a transparent picture in PowerPoint.

How to Make a Picture Transparent in PowerPoint
In this section, we will provide you with a step-by-step guide on how to make an image transparent in PowerPoint.
Follow these steps to make your images more visually appealing and seamlessly integrate them into your presentations.
1. Inserting the Image
To get started, you’ll need to insert the image you want to make transparent. Here’s how you can do that:
Option 1: Inserting Image From Your Computer
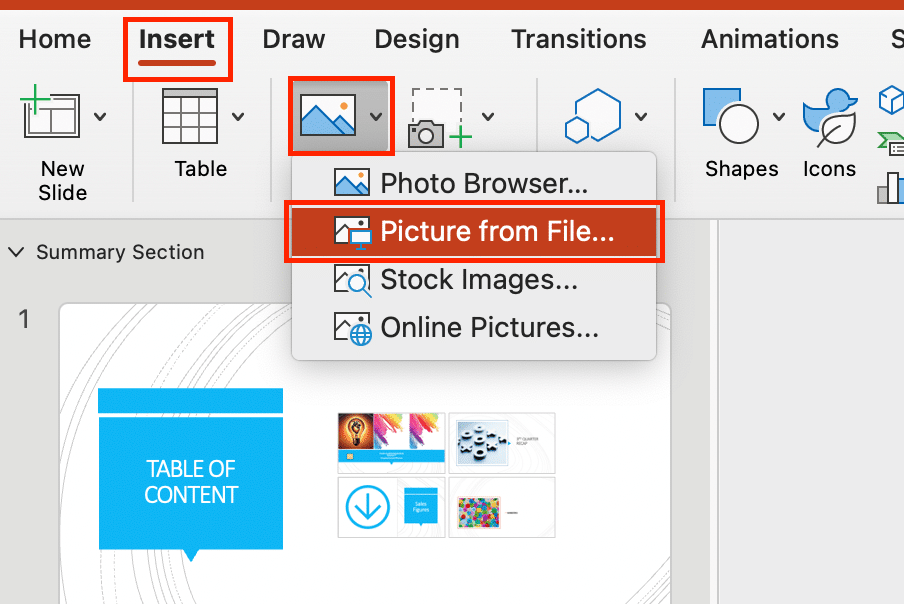
Click on the Insert tab on the PowerPoint ribbon.
In the Images group, click on Pictures and select This Device or Picture from File from the drop-down menu.
Navigate to the folder where your image is stored and select it. Then, click on the Insert button.
Option 2: Inserting Image from the Web
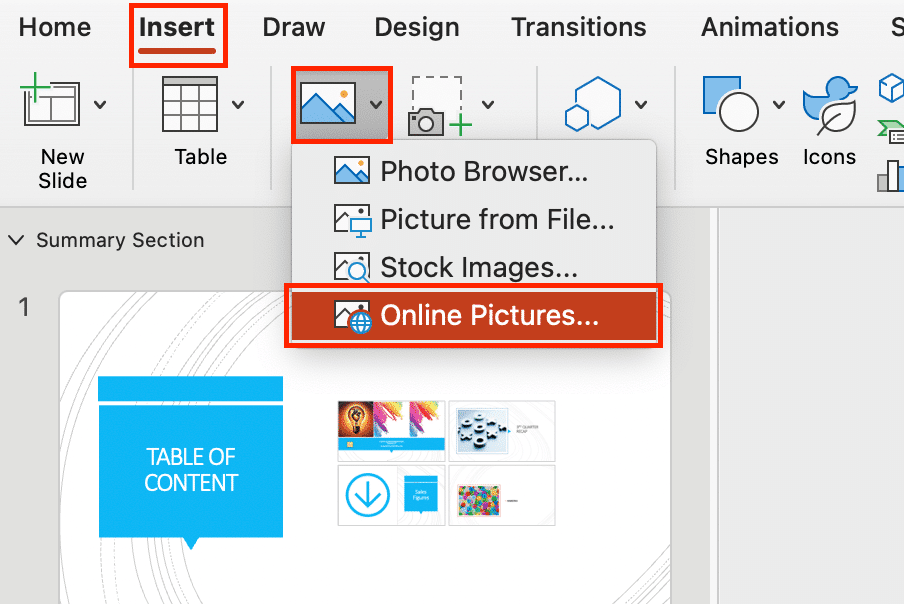
Click on the Insert tab on the PowerPoint ribbon.
In the Images group, click on Online Pictures. Alternatively, click on Pictures and select Online Pictures.
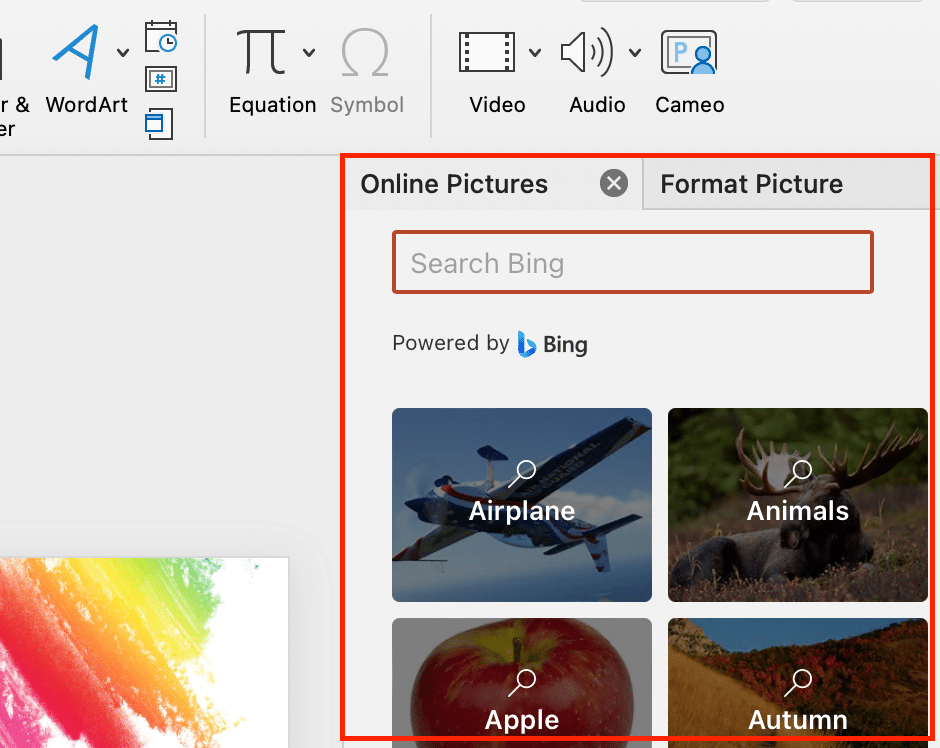
A dialog box will appear. Use the search bar to find the image you want from the web.
Once you find the desired image, click on it and then click the Insert button.
2. Accessing the Transparency Settings
Now that you’ve inserted the image, click on the picture to select it.

After selecting the picture, click on the Picture Format tab on the PowerPoint ribbon.
You will see several option groups, including Adjust, Picture Styles, and Arrange.

3. Choosing the Transparency Tool
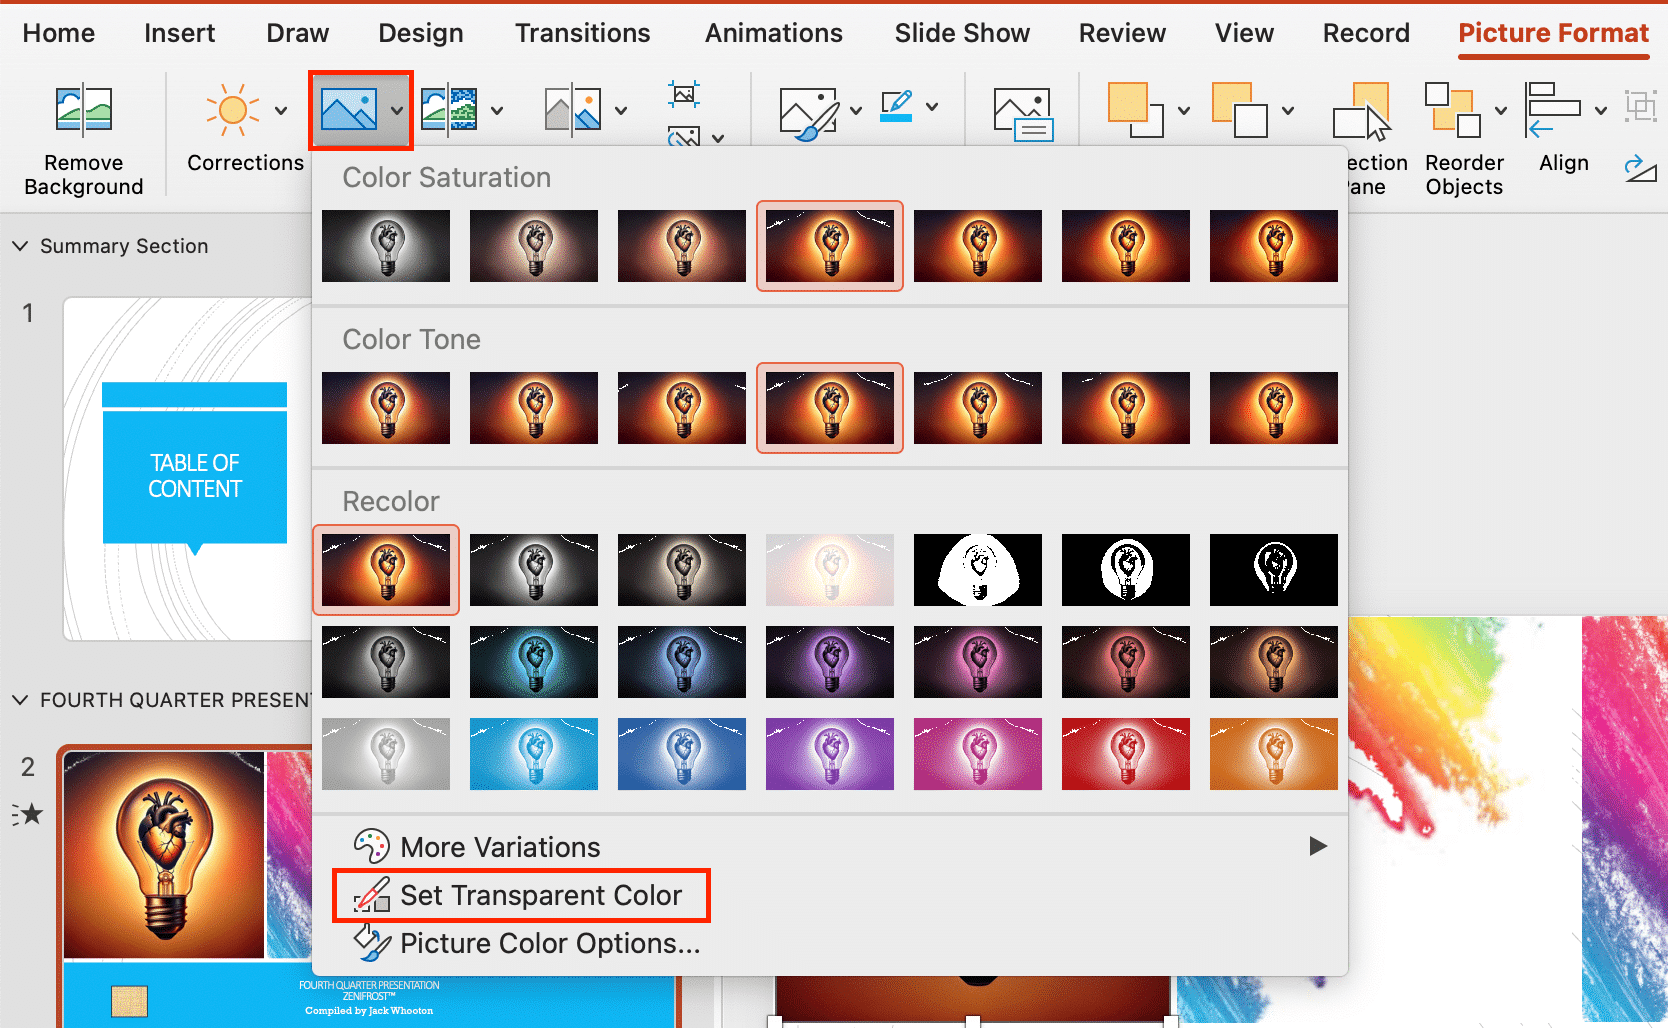
In the Adjust group, click on the Color button. You will see several options, including Presets, Grayscale, Black & White, and Set Transparent Color.
Choose the Set Transparent Color option. This will change your cursor to a small, solid color box.
4. Setting the Transparent Color
Click on the color in the image that you want to make transparent.
PowerPoint will automatically make the color you clicked on transparent. To adjust the color transparency level to a specific area of the image, click and drag the cursor to precisely select the area you want to make transparent.
5. Finalizing the Transparency
Once you have selected the desired area to make transparent, release the mouse button. PowerPoint will apply the transparency effect to the selected area.

If you’re not satisfied with the result, you can repeat the process and adjust the selection until you achieve the desired transparency level.
Additional Tips for Making Pictures Transparent in PowerPoint
In this section, we will provide you with some additional tips and best practices for making pictures transparent in PowerPoint.
Follow these tips to enhance your presentations and create visually appealing slides.
1. Be Selective
Not all images need to be fully transparent. Be selective when deciding which parts of an image should be transparent. It’s often more effective to make specific elements transparent rather than the entire image. For example, you could choose to only make the picture background transparent.

2. Maintain Consistency
When using transparency in PowerPoint, aim for a consistent look throughout your presentation. This will create a cohesive visual experience for your audience.
3. Test Different Transparency Levels
Experiment with different transparency levels to find the right balance. Some images may require more transparency, while others may look better with a subtle effect.

4. Consider Layering
Layering transparent images can create depth and visual interest. This technique is especially useful for backgrounds and complex designs.
5. Use the Eyedropper Tool
To match the transparency levels of an image or shape to another element in your presentation, use the Eyedropper tool. This ensures a seamless and harmonious look.
6. Edit Images in External Programs
If you need more precise control over transparency, consider editing your images in an external program like Photoshop or GIMP. These tools offer advanced transparency features.
7. Remember Exporting
Keep in mind that transparency may affect how your presentation is exported or printed. Test your slides in different formats to ensure the desired outcome. Exporting your presentation as a PNG file is ideal for maintaining your transparency settings.
By following these additional tips, you’ll be able to create professional-looking presentations with transparent images that enhance your message and captivate your audience.
Final Thoughts
Making a transparent image in PowerPoint can significantly enhance your presentations. It allows you to seamlessly integrate images into your slides, creating a polished and professional look.
Remember to be strategic in your use of transparency, focusing on the areas that need emphasis. With the step-by-step guide and additional tips provided, you now have the knowledge to effectively apply this technique in your presentations.
To elevate your PowerPoint use, check out the video below on how to create backgrounds for PowerBI reports with this powerful tool:
Frequently Asked Questions
How can I make a picture semi-transparent in PowerPoint?
To make a picture semi-transparent, select the picture and go to the “Picture Format” tab on the PowerPoint ribbon. In the “Adjust” group, click on the “Color” button and choose “Set Transparent Color”. Click on the color in the image that you want to make transparent, and PowerPoint will automatically make it semi-transparent.
What is the process for creating a transparent background in PowerPoint?
To create a transparent background, select the picture and go to the “Picture Format” tab. Click on “Remove Background” in the “Adjust” group. PowerPoint will then mark the areas to remove. Adjust the selection as needed, and click “Keep Changes” to finalize the transparent background.
Can I adjust the transparency of a shape or object in PowerPoint?
Yes, you can adjust the transparency of shapes and objects in PowerPoint. Select the shape or object, and go to the “Shape Format” tab. In the “Shape Fill” or “Shape Outline” dropdown, click on “Picture or texture fill”. You can then use the transparency slider under “Transparency”.
How do I apply a transparent overlay to an image in PowerPoint?
To apply a transparent overlay, insert the image and a shape (e.g., a rectangle) on top of it. Select the shape and adjust its transparency as described in the previous answer. You can also use the “Set Transparent Color” tool for the shape. Resize and position the shape as needed to create the overlay effect.
Is it possible to make only part of a picture transparent in PowerPoint?
Yes, you can make only part of a picture, rather than the entire picture, transparent. Use the “Set Transparent Color” tool and click on the color you want to make transparent. If the selection is too broad, hold the “Ctrl” key and click again to refine the selection. Continue adjusting the selection until you achieve the desired level of transparency.