
Embedding Word documents in Excel spreadsheets lets you consolidate information from various sources into a single, comprehensive document.
There are 3 ways to embed a Word document in Excel:
Inserting the document as an object.
Embedding a link to the Word document.
Copy-and-pasting the contents of the document.
This article shows you how to implement these three techniques. You will learn the benefits and limitations of each method, and which approach best suits your needs.

Let’s get started!
How to Embed a Word Document in Excel by Insertion
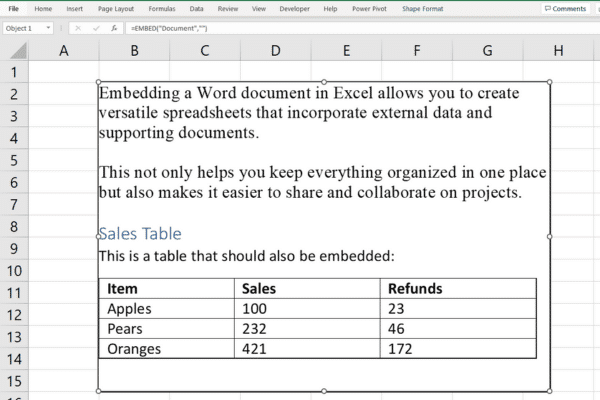
When you insert a Microsoft Word document as an object, you’re embedding the entire Word file into the Excel workbook.
This means that the Word document becomes a part of the Excel file, and you can view or edit the Word document directly from Excel. The result looks like this:
It’s important to understand that:
If you share the Excel workbook, the Word document is also shared within it.
Changes to the original Word document will not be reflected within Excel.
The size of your Excel data may increase, as it now includes the contents of the Word document.
If your files start to get too large, there are several methods to reduce the size of an Excel file.
Step-by-Step Guide
To insert a Word document it as an object:

Click inside the cell where you want to insert the Word document.
Go to the Insert tab on the Excel Ribbon.
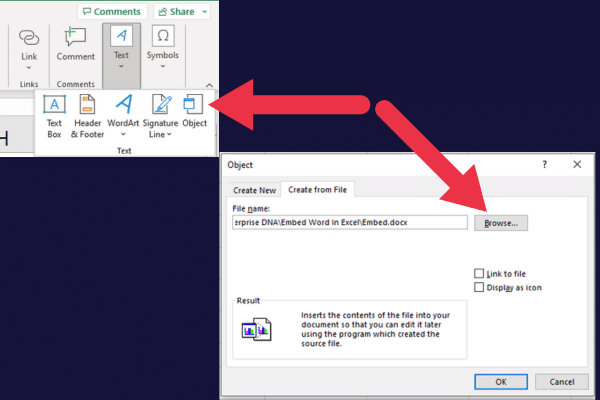
In the Text group, click Object.
In the Object dialog box, select the Create from File tab.
Click Browse and locate the Word document you want to embed.
If you want to insert the document as an icon instead of displaying its contents, check the Display as icon box.
Click OK to embed the Word document in the selected cell.
You can double-click the embedded object (or the icon, if you chose to display one) to open and edit the Word content in a separate window.
Displaying a Portion of the Contents
There is an option on the “Create from File” tab that controls how the embedded Word document is displayed in your spreadsheet.
When you don’t check the “display as icon” checkbox (it’s off by default), the contents of the first page will be displayed.
Displaying Your Word Document as an Icon
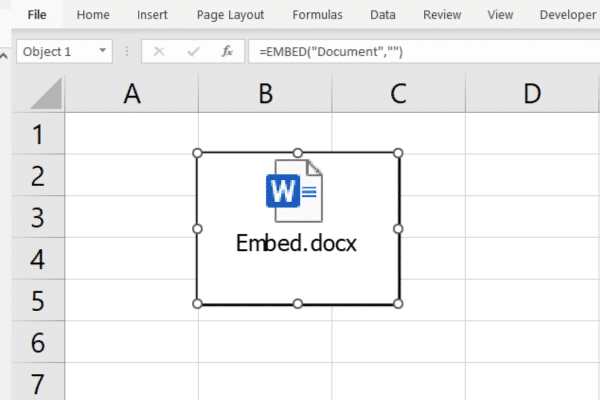
When you check the “display as icon” checkbox, the spreadsheet will show an icon that indicates there is an inserted Word document.
This picture shows an example:
Embedding a Word document in Excel using insertion is a straightforward process, but as you’ll see in the next section, you also have another option — linking.
How to Embed a Word Document in Excel by Linking
When you create a link to a Word document, you’re establishing a connection between the workbook and the external Word document. The link allows you to open the Word document by clicking on the hyperlink in Excel.
There are important differences in the outcome of this method and inserting the document as an object:
The size of the workbook remains unaffected.
Changes will be reflected when you open the document through the hyperlink in Excel.
When you share the Excel workbook with a link, the Word document is not included.
Keep these limitations in mind when you’re sharing your Excel file on SharePoint or other shared storage.
Step-by-Step Guide
To link to a Word document from within an Excel spreadsheet:
Click on the cell where you want the link to appear.
Go to the Insert tab on the Excel ribbon.
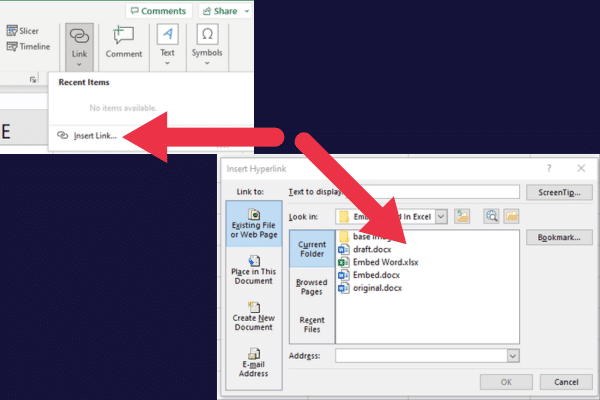
Click “Link” in the Links group.
In the “Insert Hyperlink” dialog box, click “Existing File or Web Page” in the left pane.
Browse to the Word document you want to link and select it.
Click OK to create the hyperlink.
When you click on the linked Word document, the document opens in Microsoft Word.
Embedding a Word document into Excel via linking is good enough for most cases, but you also have the option to copy and paste the contents of your Word document, which is what we’re covering next!
How to Use Copy and Paste to Embed the Contents of Word within Excel
If you’re looking for a quick alternative method, you can simply copy and paste the contents of a Word document into your Excel spreadsheet.
This works well with plain text or a simple word table.
The main drawback is that you don’t retain the formatting and advanced features of the Word document. The other methods in this article are more suitable for retaining Word features.

To Copy and Paste from Word to Excel:
Open the Word document that you want to embed in Excel.
Select the content you want to copy from the Word document (use “Ctrl+A” for the entire document).
Copy the selected content by pressing “Ctrl+C”.
Open the Excel workbook where you want to paste the Word content.
Click on the cell where you want the Word content to appear.
Press “Ctrl+V” to paste data directly into Excel.
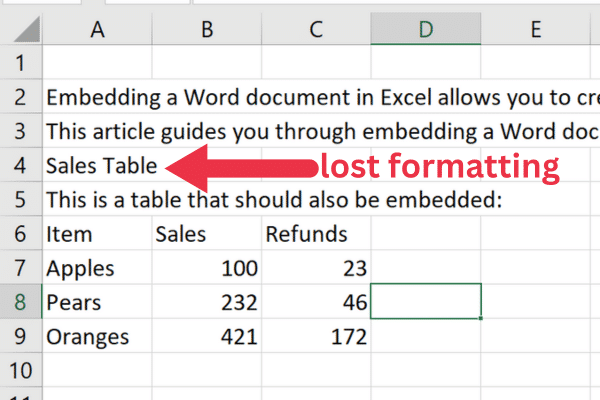
This picture shows an example of the results. Note that the format of the H2 heading in Word has not been retained in the Excel spreadsheet. However, the table displays well as Excel data.
Copying and pasting data is one of the fundamental tasks in Excel. Check out our introduction to Microsoft Excel for other fundamental operations.
Next, we cover how you can work with embedded documents, how you can embed multiple documents, and how to embed a document in multiple cells in the coming sections. Let’s go!
Working with Embedded Documents in Excel
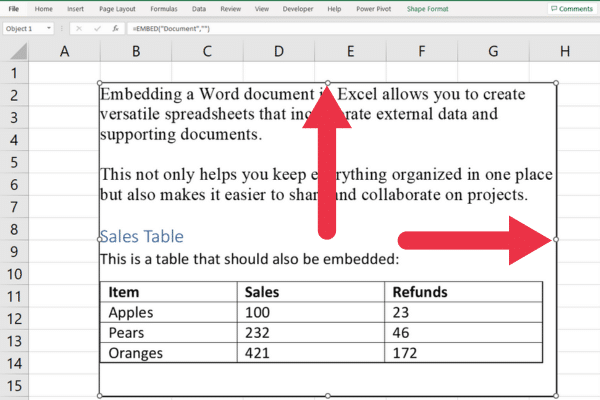
An advantage of embedding a document as an object is that you can resize or move it to have a clearer display in your spreadsheet.
How to Resize the Embedded Object
To resize an embedded Word document in Excel, follow these steps:
Click once on the embedded object to select it.
You will see white circles, called “handles,” appear around the object’s border.
Move your cursor over one of the handles; it should change into a double-headed arrow.
Click and drag the handle to resize the object according to your needs.
Release the mouse button when you’re satisfied with the new size.
You can resize the object proportionally by holding the Shift key while dragging the corner handles.
How to Move the Embedded Object
To move an embedded Word document in Excel, open Excel and follow these steps:
Click once on the embedded object to select it.
Place your cursor over the object, but not on a resize handle. The cursor should change into a four-headed arrow.
Click and hold the mouse button.
Drag the object to the desired location within the spreadsheet.
Release the mouse button to place the object in its new position.
How to Embed Multiple Documents
When working with multiple Word documents, it’s possible to embed them all into a single Excel worksheet. To do this, simply open Excel and follow the standard embedding process for each file:
Click the cell where you want to embed the first Word document.
Go to the Insert tab, then click Object in the Text group.
In the Object dialog box, select the Create from File tab.
Click Browse to navigate to the file.
Leave the “Link to file” option unchecked.
Select a different cell.
Repeat steps 1 to 6 for the remaining Word documents.
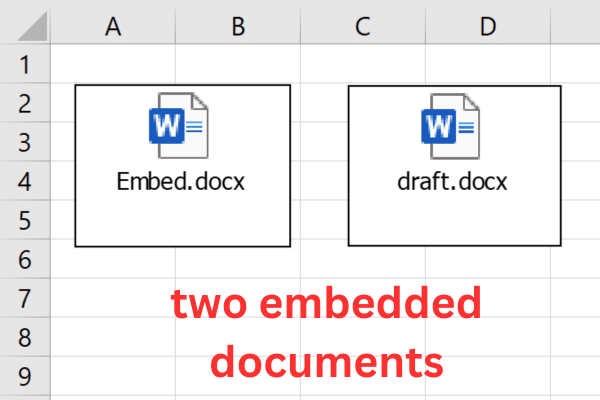
Here is an example of two embedded documents (displayed as icons):
Keep these considerations in mind for embedding multiple documents:
Your Excel files can become quite large in size.
Organize them in a logical way to make it easier to navigate and understand the information.
Cells with embedded documents may expand, so adjust the column widths or row heights accordingly.
How to Embed a Document into Multiple Cells
There are times when you may need to embed a Word document into multiple cells within an Excel sheet. This can provide a better structure for your information, which makes it more accessible and easier to understand for your audience.
There are two methods to achieve this:
Merging the cells before embedding the document.
Manually resize after you have embedded the document.
1. Merging Before Embedding
To use this method before insertion, follow these steps:
Select the range of cells where you want to embed the Word document.
Go to the Home tab, then click the Merge and Center in the Alignment group.
Select the merged cell.
Follow the steps earlier in this article to embed your document.
2. Manual Resizing
To use this method after insertion, follow these steps:
Complete the embedding process in a single cell.
Click the embedded document, and you will see its handles around the border.
Drag the handles to resize the document to span multiple cells as needed.
Remember to maintain a consistent format and style throughout the sheet for a cohesive and professional appearance.
Now that we’ve looked at the ways to embed documents in different scenarios in Excel, let’s talk about how object linking and embedding works in the next section!
How Object Linking and Embedding (OLE) Works

Object Linking and Embedding (OLE) is a technology used in Microsoft Office applications, which allows you to insert content from one program into another by creating a dynamic link between the two.

It is the underlying technology that enables the embedding of a Word document into Excel. OLE allows the Word document to maintain its functionality within Excel, enabling you to view or edit the document directly from the Excel workbook.
There are four technical components of the technology:
OLE establishes communication between Microsoft Word and Microsoft Excel using a standard protocol.
For inserted documents, OLE creates an instance of the Word document within Excel.
Inserted documents are stored within the Excel file as a binary object.
OLE allows you to use Word’s features and formatting tools within the Excel environment to make changes to the embedded Word document.
Final Thoughts
Embedding a Word document into Excel allows you to consolidate information, streamline collaboration, and enhance productivity.
You learned three methods in this article and should now understand which technique suits your requirements. By leveraging the combined power of Word and Excel, you will create more organized, accessible, and professional documents.
It’s all about finding the method that suits you and your needs. So go on, grab that Word doc and give your Excel spreadsheet a bit of a textual twist. And remember, don’t be afraid to experiment. Excel’s cooler than you think. Happy embedding!


