
Embedding Power BI reports in SharePoint Online is a powerful way to display interactive data visualizations within your organization’s internal web portal.
By combining the strengths of both platforms, you can deliver relevant and up-to-date insights directly to your team members, empowering them to make data-driven decisions.
In 4 Steps you can embed a Power BI report in SharePoint Online:

- Publish the report in Power BI.
- Generate the report’s embed code.
- Add the Power BI web part to your SharePoint Online page.
- Update the web part properties and set the report’s embed code.
Read on, as we show you a step-by-step guide to accomplishing each of these tasks.
By following this process, you will be able to effortlessly share Power BI reports and collaborate with your team within the SharePoint Online environment.

Understanding Power BI and SharePoint Online
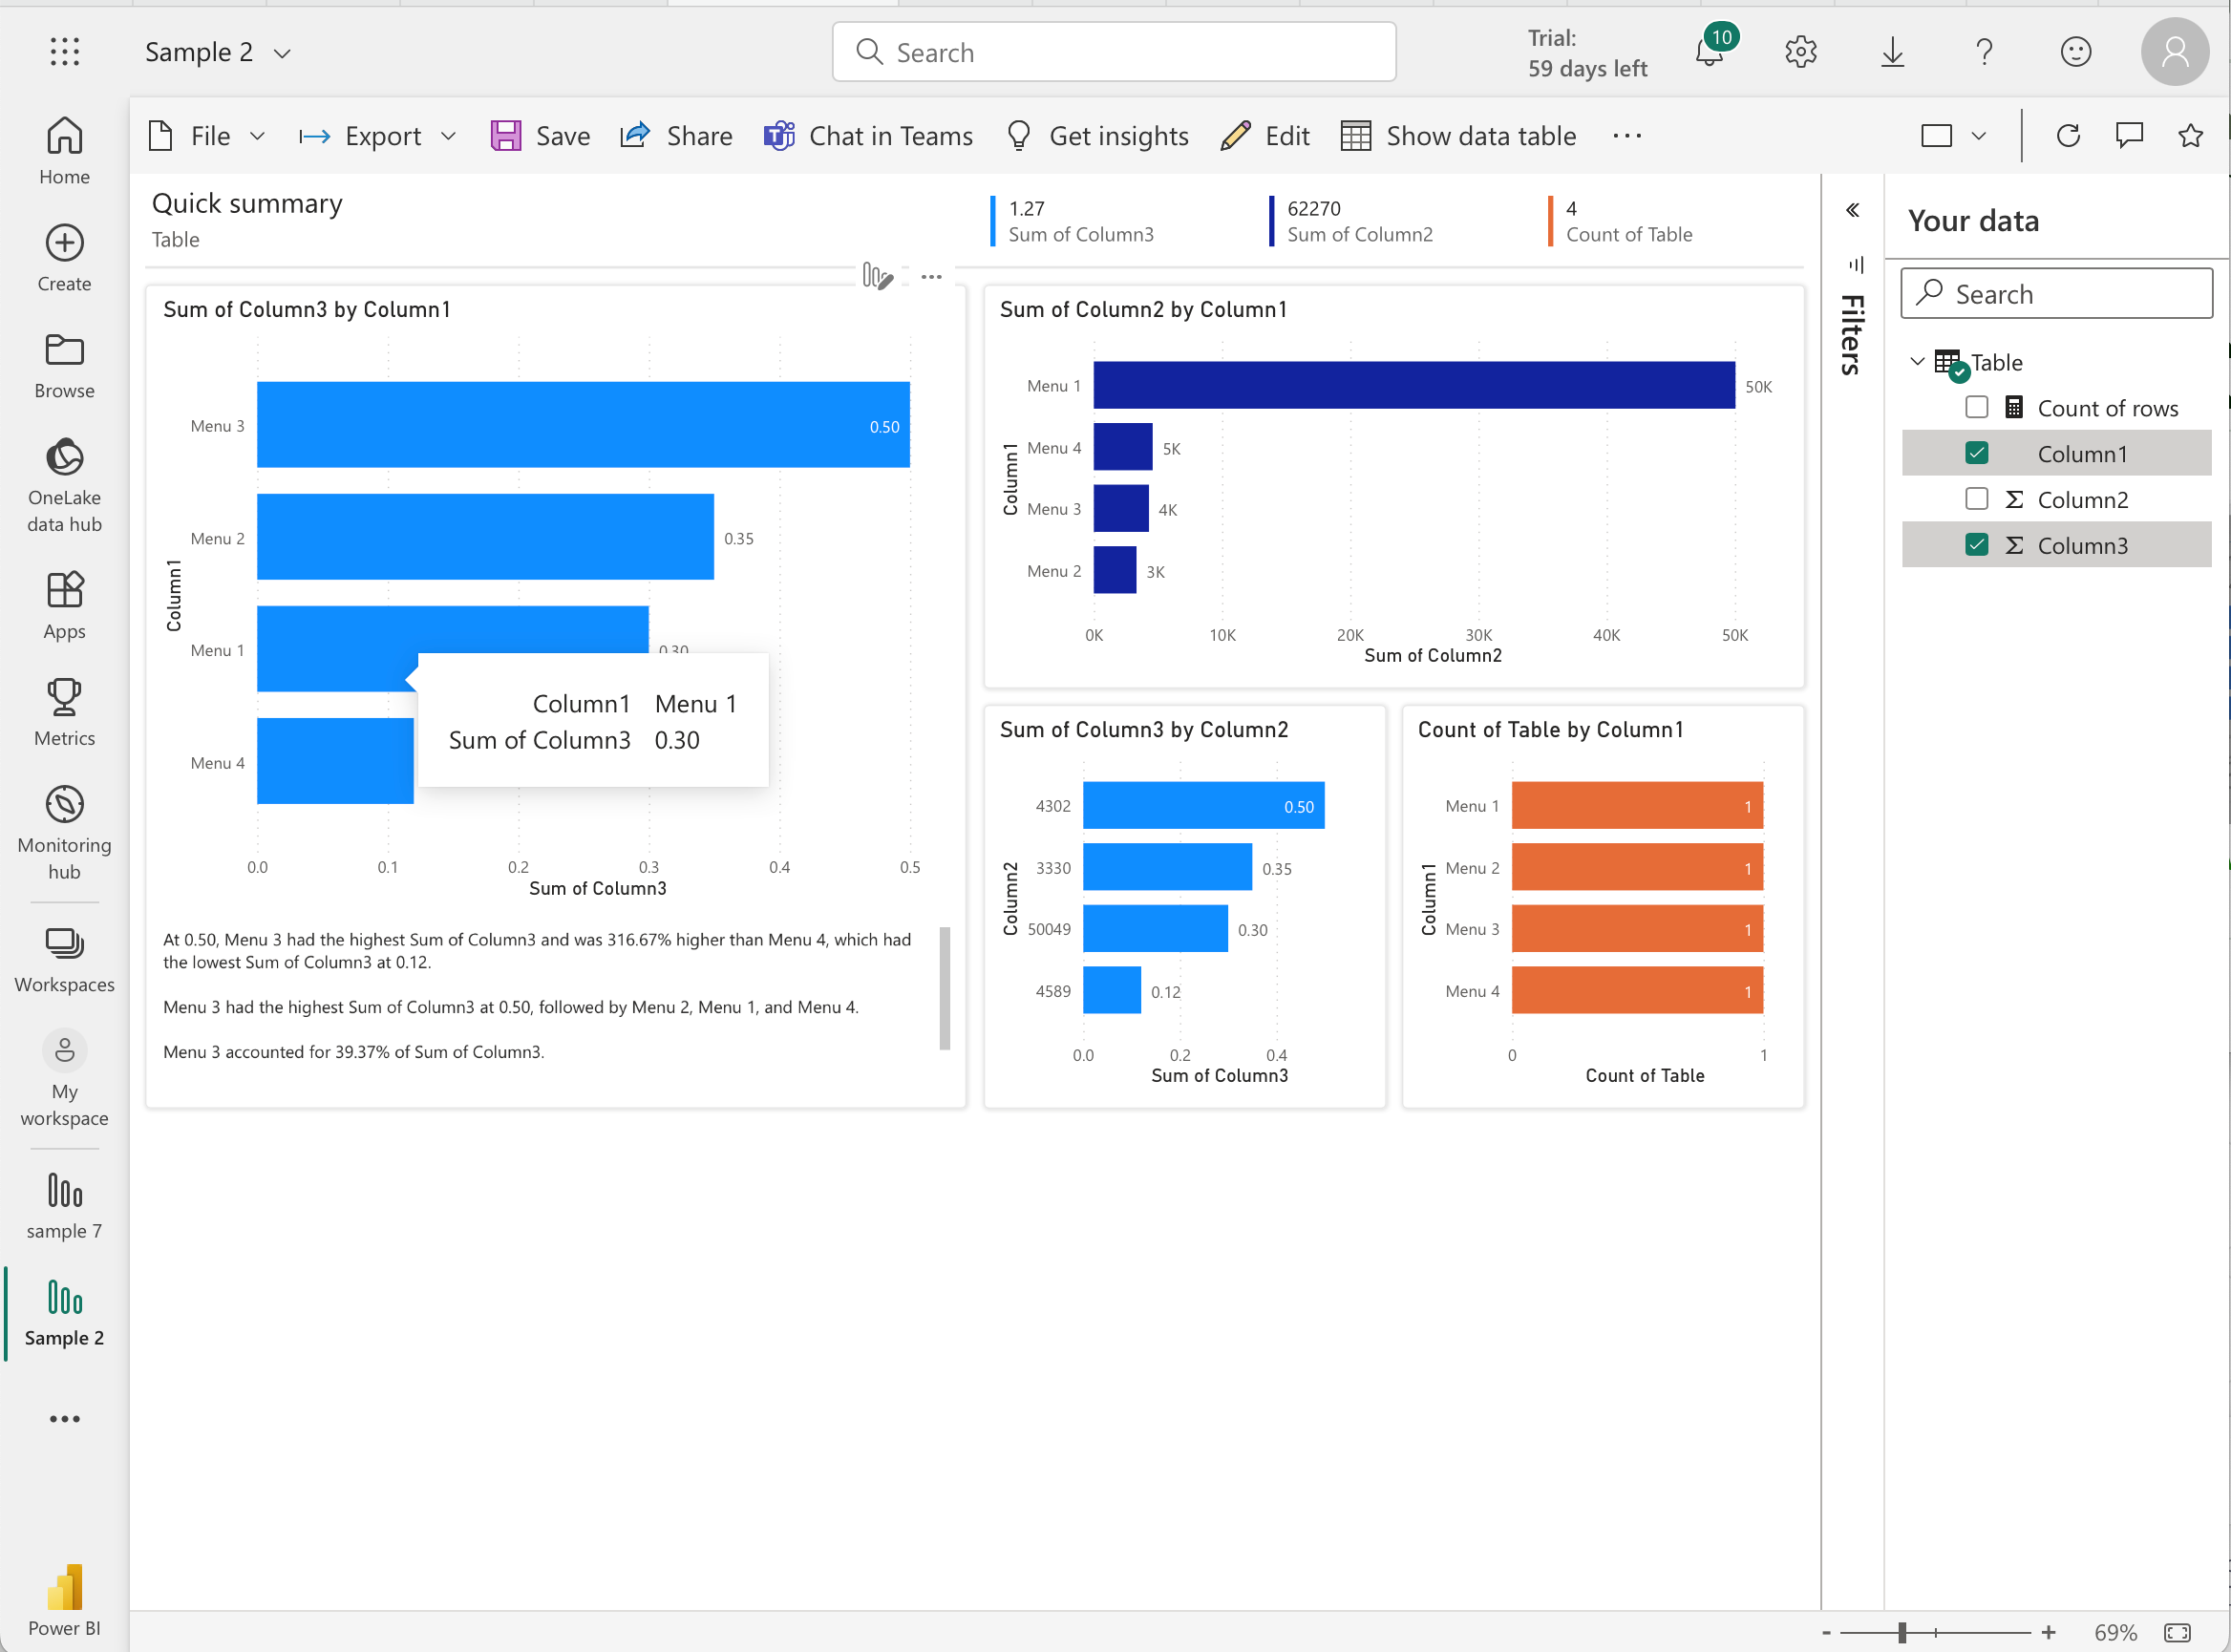
Power BI is a business analytics service provided by Microsoft allowing you to visualize and share insights from your data.
Offering a wide range of customizable graphs, charts, and reports to help you make informed decisions.
With Power BI, you can easily connect to various data sources, create data models, and produce interactive visualizations on a user-friendly interface.
Learn more about Power BI below:

SharePoint Online is a cloud-based service within Microsoft 365 that enables organizations to create, manage, and collaborate on sites and documents.
Embedding Power BI reports in SharePoint offers an interactive and seamless experience to access important data without leaving the SharePoint environment.
It also provides a comprehensive way to create, share, and manage content within the organization while leveraging the capabilities of both Microsoft services.
How to Embed Power BI Reports in SharePoint Online in 4 Steps
To embed Power BI reports in SharePoint Online, you need to accomplish these 4 simple steps:
- Publish your Power BI report
- Open your Power BI desktop application.
- Select the File menu, and choose Publish to Power BI.
Make sure you have the required permissions to publish reports to your organization’s Power BI service.
- Generate an embed link for your report
- Log into your Power BI account and open the desired report.
- Click File.
- Select Embed Report and select SharePoint Online.
- Copy the Power BI report URL from the dialog box and save it as you will need it later.

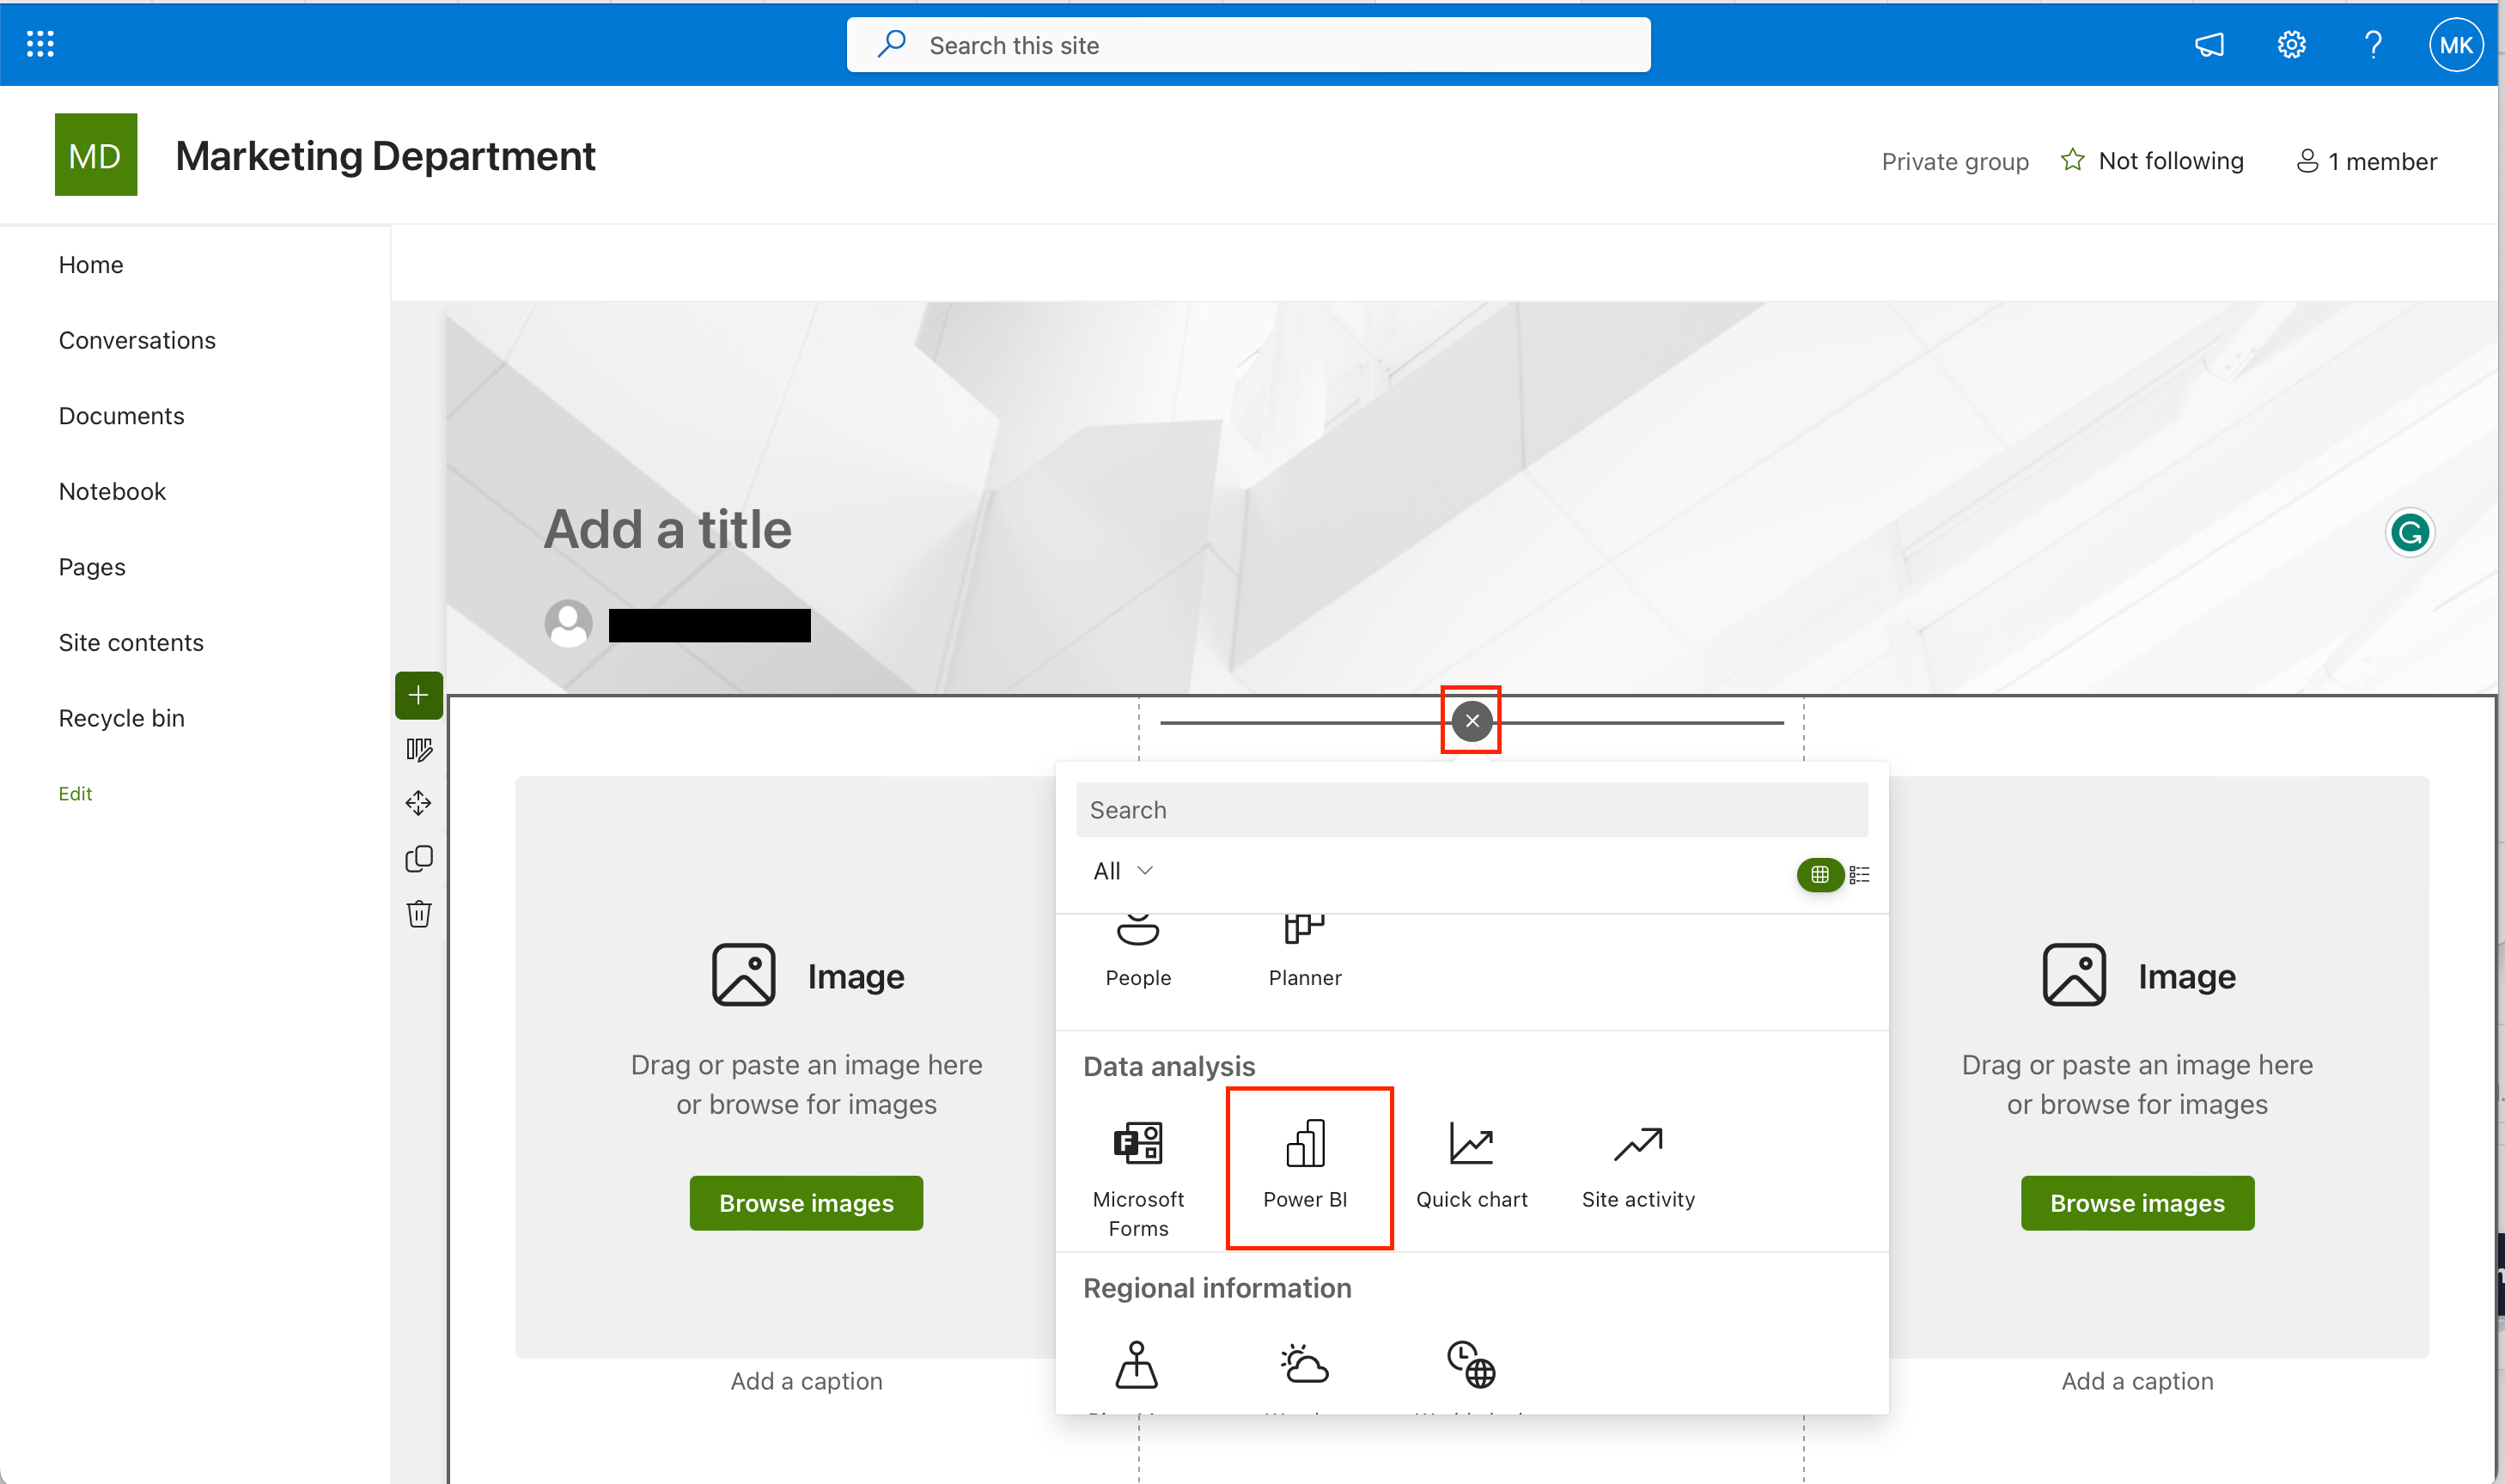
- Add the Power BI web part to your SharePoint Online page
- Open your SharePoint Online team site and navigate to the target page where you want to embed the report.
- Click Edit while viewing the SharePoint page.
- Click the + symbol and select Power BI web part.
This will add the Power BI widget to your SharePoint Online page.
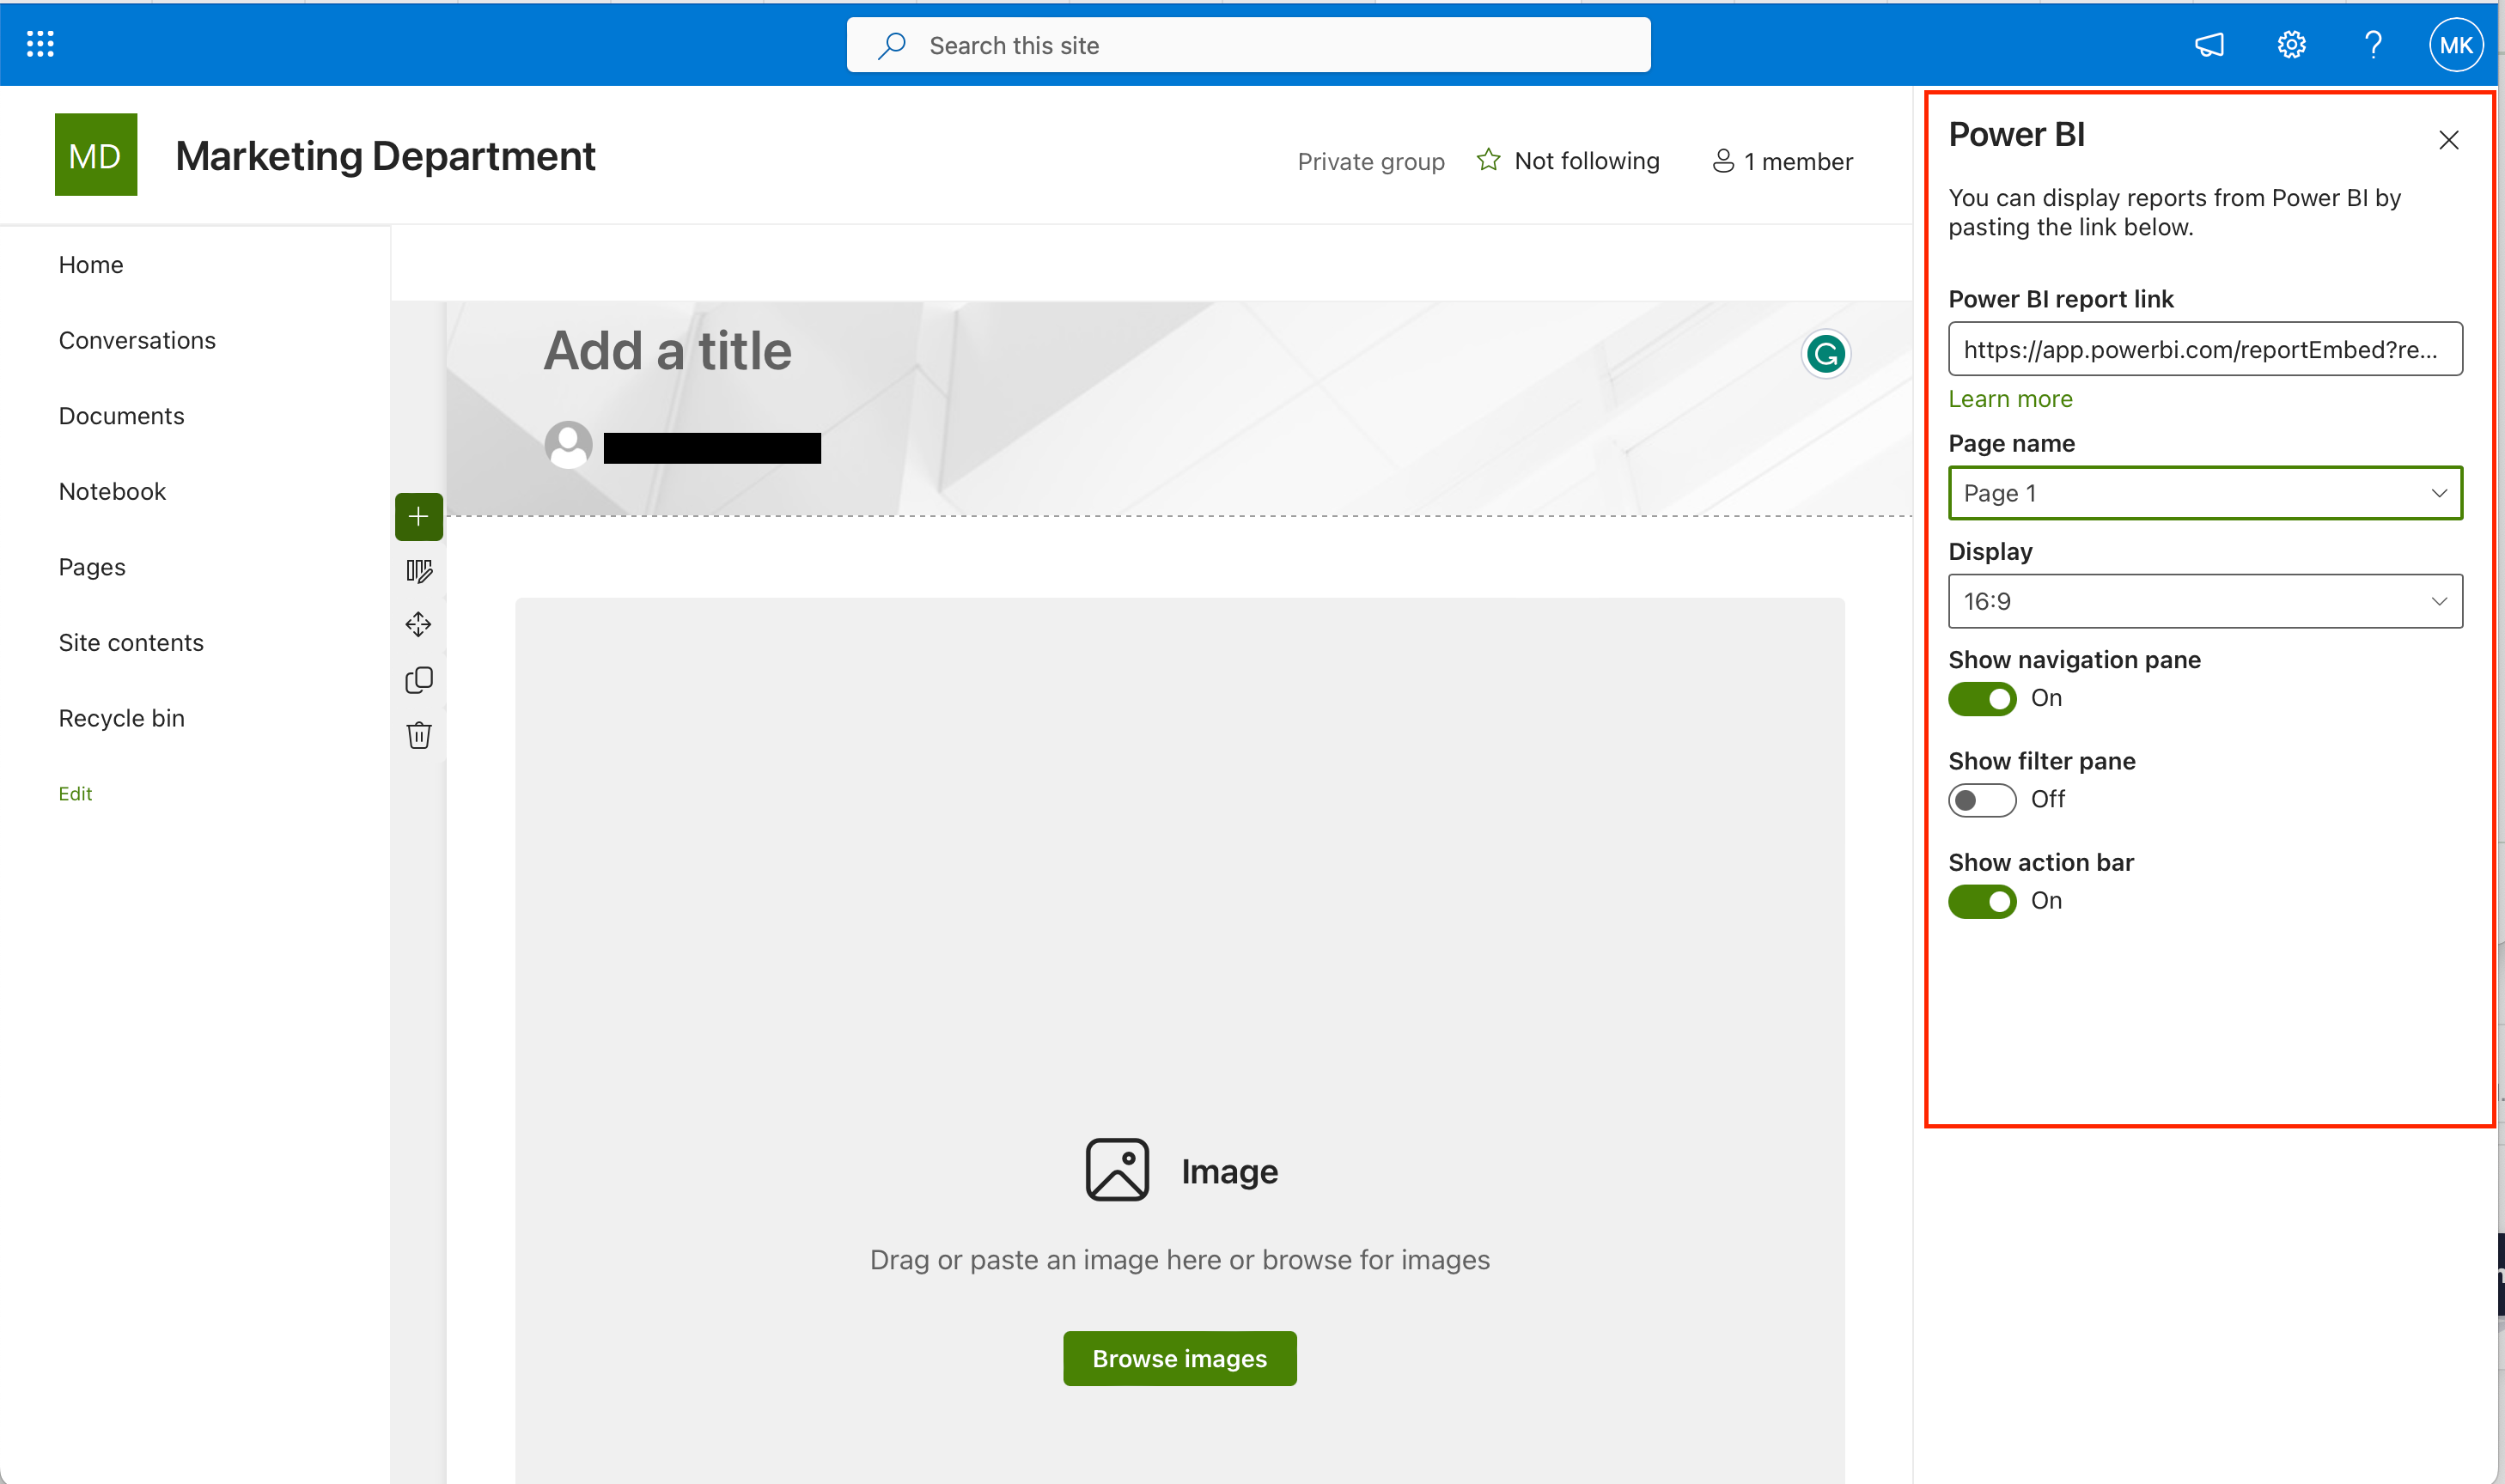
- Update the web part properties and set the report’s embed code.
- In the properties panel, paste the copied embed link into the Report link field.
- Configure additional settings, such as the page’s appearance, interaction mode, and navigation visibility.
- Click Publish to make your report accessible on the SharePoint Online page.
By following these steps, you’ve successfully embedded a Power BI report in SharePoint Online.
You have provided your team members with an interactive and engaging way to explore data within your organization’s web pages.
Embedding Limitations and Considerations
When you’re embedding Power BI reports in SharePoint, it’s essential to be aware of a few limitations and considerations to ensure seamless integration and a smooth user experience.
Here are some of the things you need to consider:
1. Access and Permissions
It is essential to make sure that users have proper access to the Power BI report itself.
If they don’t have access to the report in the Power BI service, embedding the report in SharePoint Online won’t automatically grant them access.
You can grant access to the report either through individual permissions or by adding them to appropriate security groups.
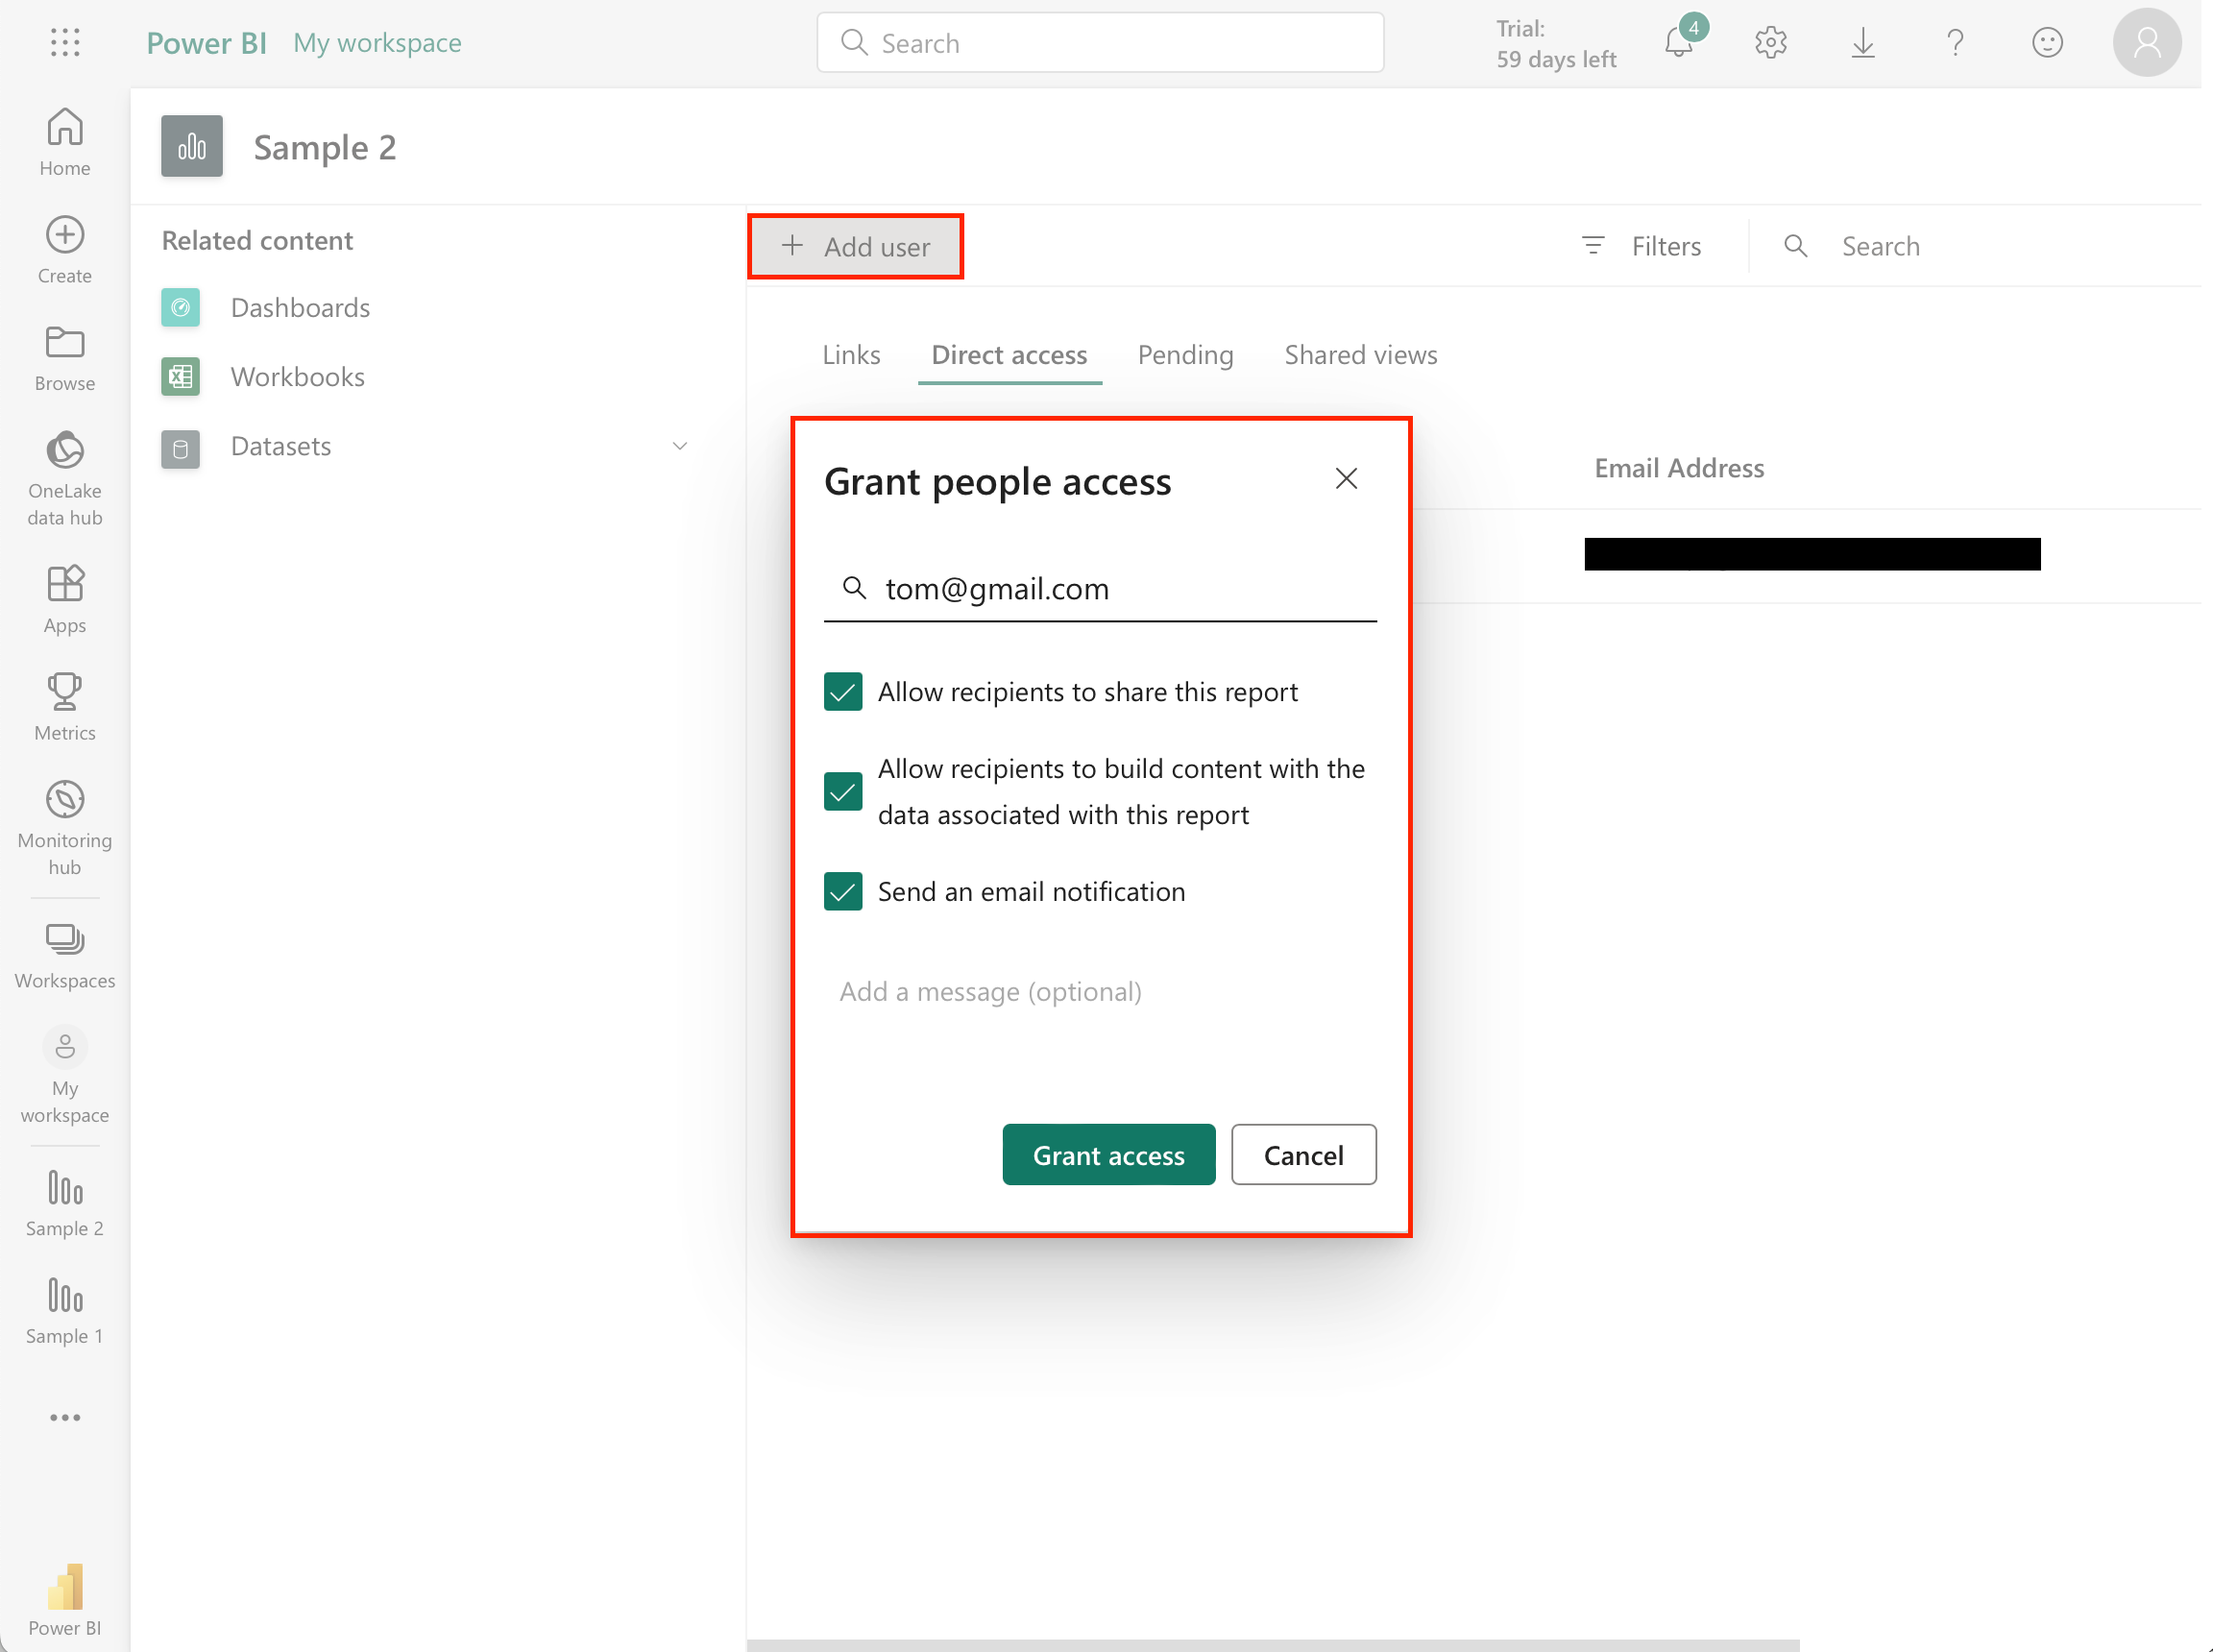
To grant access to a user:
- Open your report.
- Click File then click Manage Permissions.
- Click on the Direct Access tab and then click the + Add User button.
- Enter the details of the user and then click Grant Access.
When setting up permissions, it’s important to provide users with a secure single sign-on experience.
Integrating multi-factor authentication (MFA) adds an extra layer of security to the single sign-on process, ensuring that only authorized users can access the embedded report.

To further enhance your data security, you can also choose to implement row-level security (RLS) which will allow you to control who can access specific data within your report.

By taking these steps with access and permissions, you can ensure a secure and seamless experience when embedding Power BI reports in SharePoint.
2. Licensing Models
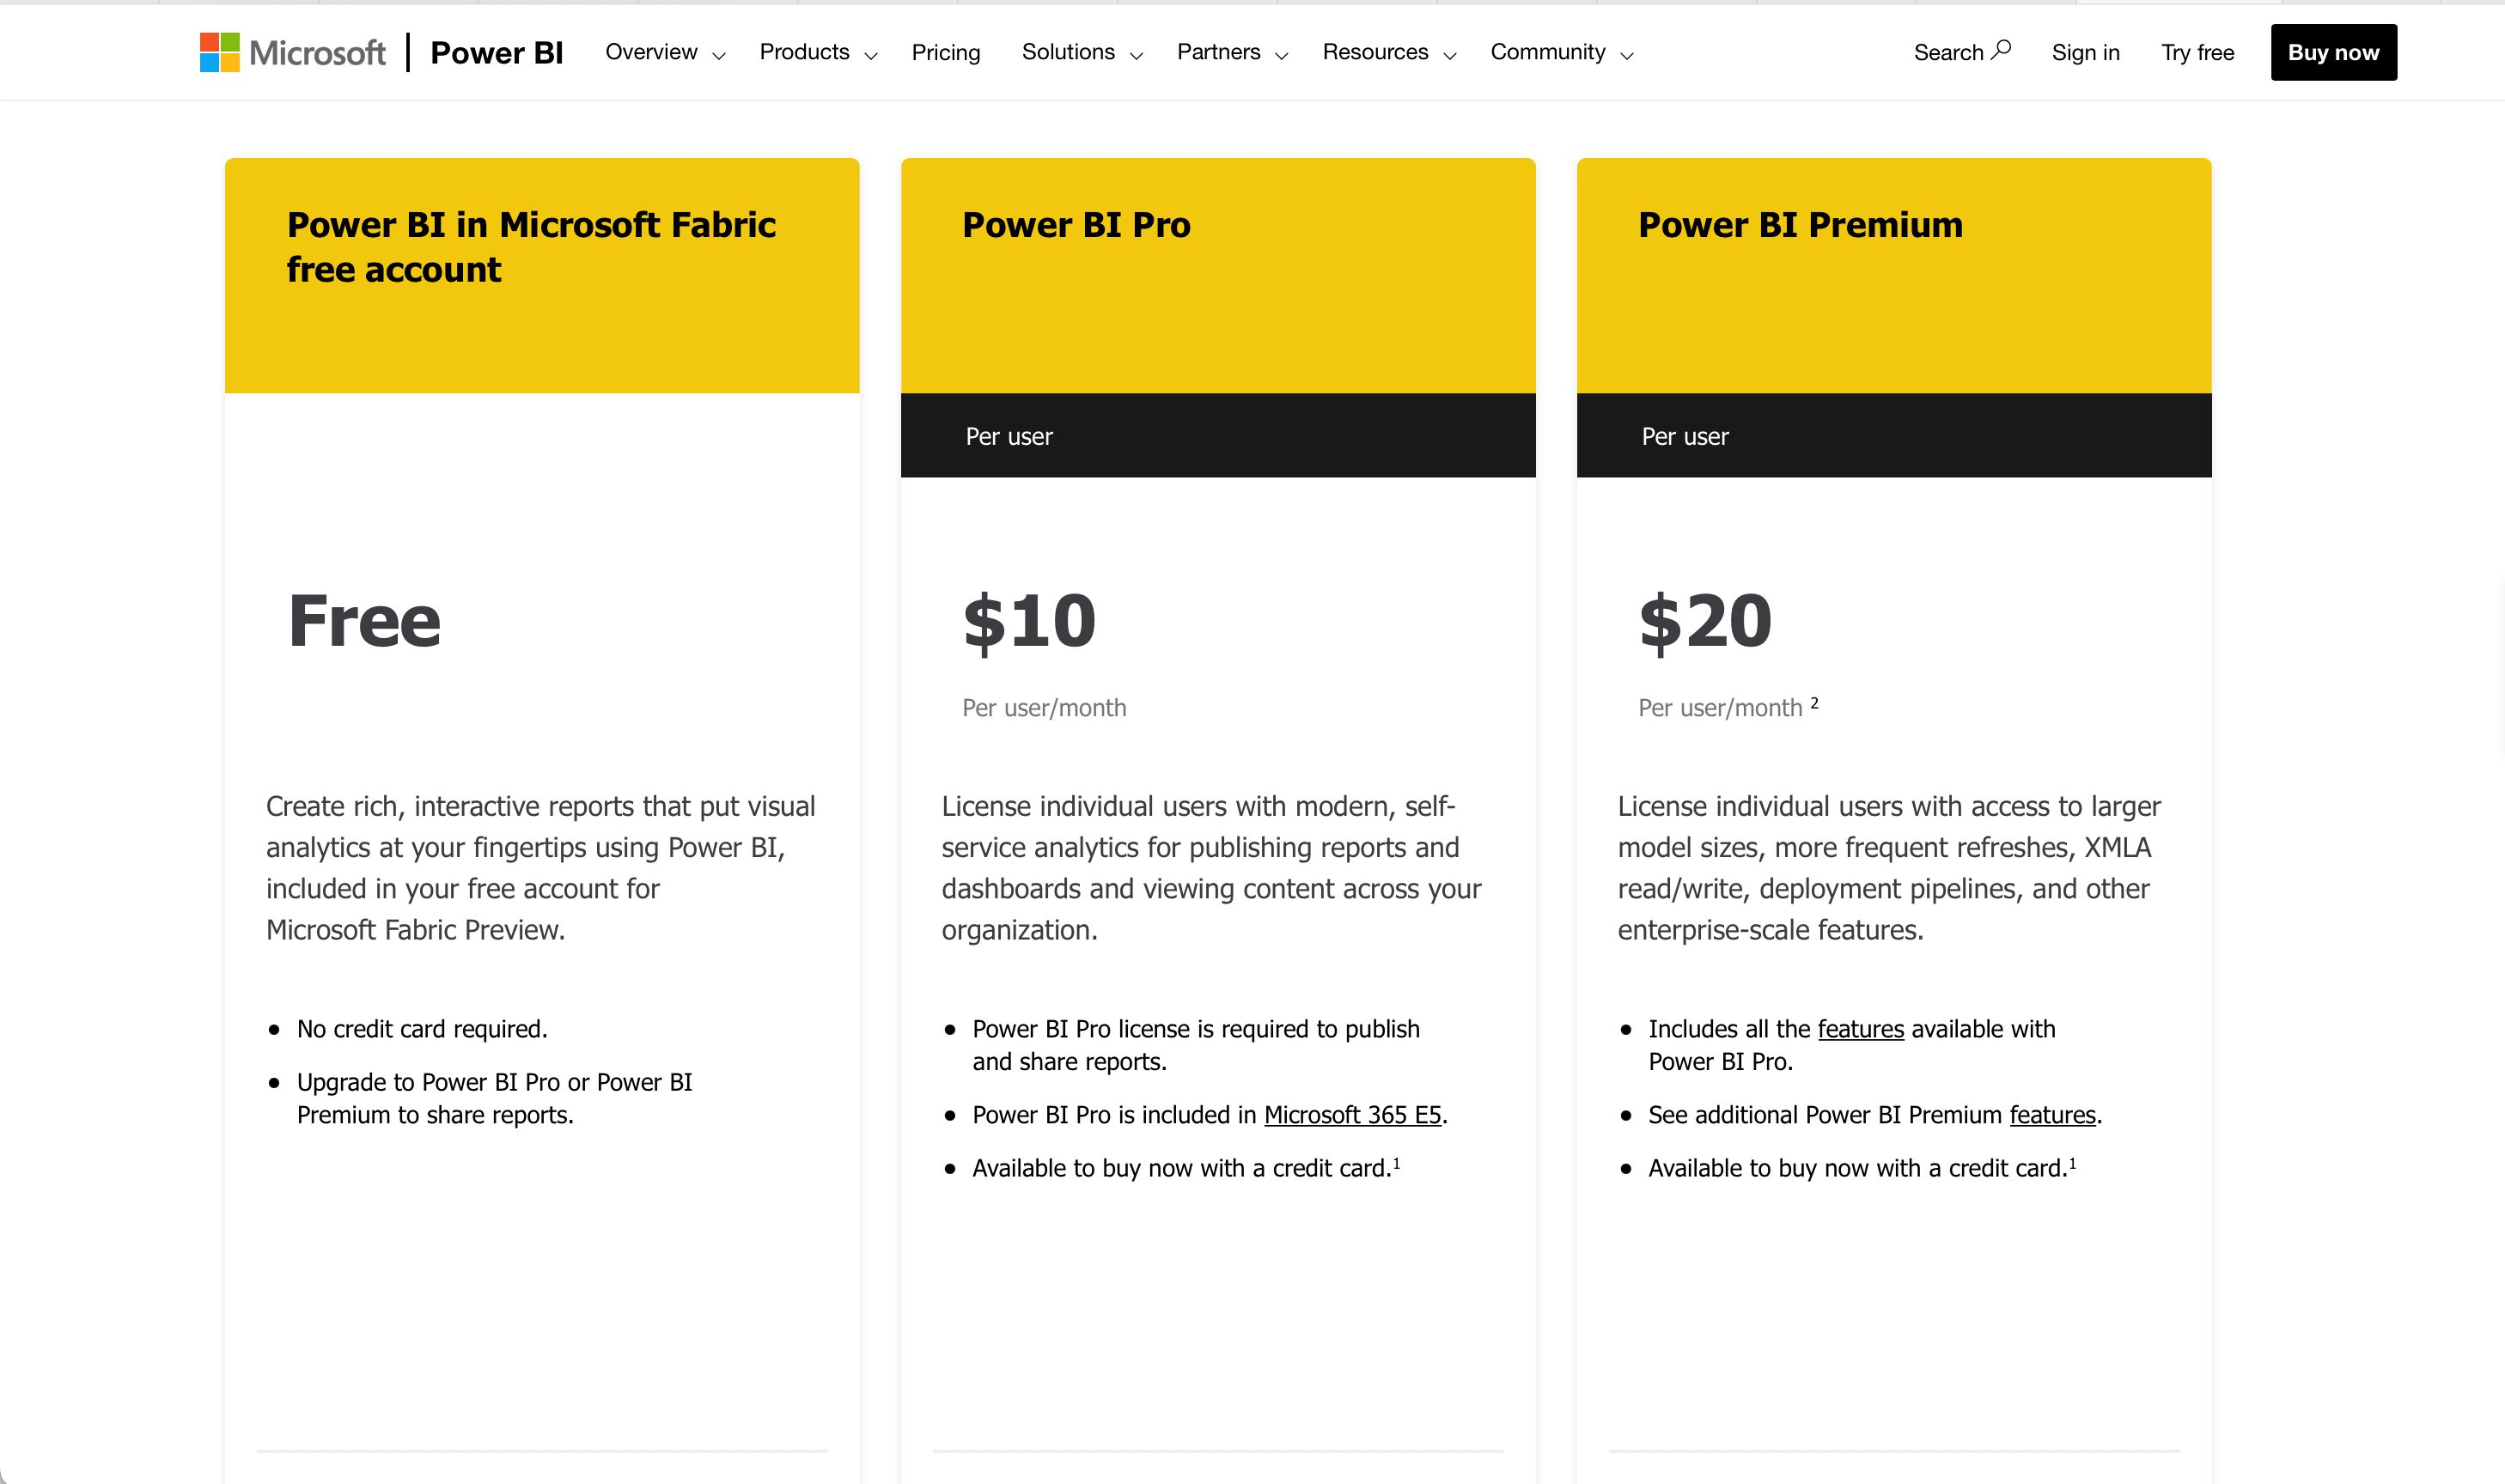
When embedding Power BI reports in SharePoint, understanding the licensing models is crucial. There are several licensing options available to cater to different needs and requirements.
Power BI Premium Capacity: This licensing model is ideal for organizations with a large number of users that require dedicated resources and enhanced performance.
With Premium capacity, the reports embedded in SharePoint Online will benefit from faster load times, better reliability, and enhanced security features.
Power BI Premium Per User (PPU): The Premium Per User (PPU) license is a more cost-effective option for smaller organizations or those with a limited number of users needing access to Power BI reports.
This model allows for scalability without requiring significant upfront costs. Team members using a free Power BI license can view reports hosted by a Power BI Premium account.
Power BI Pro license: The Power BI Pro license is a per-user license model that enables users to create, share, and consume Power BI reports within SharePoint Online.
All users accessing the embedded reports in SharePoint Online must have a Power BI Pro license, including external users.
By carefully evaluating these factors, you can choose the licensing model that best suits your organization’s needs while embedding Power BI reports in SharePoint.
3. Additional Considerations

Apart from access control and licensing decisions, here are a few additional considerations to keep in mind:
- To embed a Power BI report in SharePoint Online you need to use Modern Pages. Traditional SharePoint pages may not support this feature.
- Embedded reports will respect all item permissions and data security, including row-level security (RLS), which helps maintain a secure internal portal.
- Some features of Power BI might not be available when embedding reports. For instance, certain visualizations, custom visuals, and report layouts could be impacted. Make sure to test your embedded report and adapt as needed to ensure an optimal presentation for your users.
By understanding these limitations and considerations, you can effectively integrate Power BI reports into your SharePoint Online environment.
Final Thoughts
Embedding Microsoft Power BI reports in SharePoint Online offers a powerful way to enhance data visualization and collaboration within your organization.
By seamlessly integrating these two Microsoft tools, you can easily share Power BI content like interactive reports and dashboards with your team, making data-driven decision-making more accessible and efficient.
Whether you’re a business analyst, manager, or IT professional, this integration simplifies the process of data analysis and sharing insights. In turn, promoting data transparency, and fostering collaboration across your organization.
So, take advantage of this feature to harness the full potential of your data and empower your team to make informed decisions.
Frequently Asked Questions
How can I configure Power BI SharePoint permissions?
To configure Power BI SharePoint permissions, you should follow these steps:
- Navigate to the SharePoint site that contains the page with the Power BI report.
- Click on the cogwheel icon (Settings) in the top-right corner of the page.
- Select Site Settings and then click on Site Permissions under the Users and Permissions section.
- Here, you can manage access to your site by adding or removing users/groups and assigning appropriate permissions levels.
Keep in mind that to embed Power BI reports in SharePoint Online, users must have view permissions on the report.
What is the process for connecting a Power BI report to a SharePoint folder?
To connect a Power BI report to a SharePoint folder, follow these steps:
- Open Power BI Desktop and go to Home > Get Data > More.
- In the Get Data window, scroll down to the Online Services category and select SharePoint Folder.
- Click on Connect and enter the URL of your SharePoint site.
- After connecting to SharePoint, select the folder containing your data and click Load.
How to optimize phone layout for Power BI reports?
To optimize the phone layout for Power BI reports, follow these steps:
- Open your Power BI report in the Power BI service.
- Click on View > Mobile Layout in the top menu.
- Use the Mobile Layout canvas to arrange and resize visuals according to your desired layout.
- Save your changes and close the Mobile Layout view.
What are the steps to connect Power BI to a SharePoint Excel file?
To connect Power BI to a SharePoint Excel file, follow these steps:

- Open Power BI Desktop and go to Home > Get Data > More.
- In the Get Data window, select the Web connector under the Other category.
- Click on Connect and enter the URL of your SharePoint Excel file.
- Choose the desired authentication method and enter your credentials if necessary.
- After connecting to the Excel file, select the data you want to use in your Power BI report and click Load.
How can I integrate a Power BI report with a SharePoint list?
To integrate a Power BI report with a SharePoint Online list, follow these steps:
- Open Power BI Desktop and go to Home > Get Data > More.
- In the Get Data window, select the SharePoint List connector under the Online Services category.
- Click on Connect and enter the URL of your SharePoint site.
- After connecting to SharePoint, select the desired list from the list of available SharePoint lists and click Load.


