In this tutorial, you’ll learn how to test the Row Level Security (RLS) and Object Level Security (OLS) in Power BI DAX Studio.
In simple terms, Row Level Security prevents user access to specified rows. Meanwhile, Object Level Security prevents user access to specified columns and tables.
Examples for testing RLS and OLS in DAX Studio are shown below.
Row Level Security In Power BI
To create Row Level Security, go to the Modeling tab and click Manage roles.

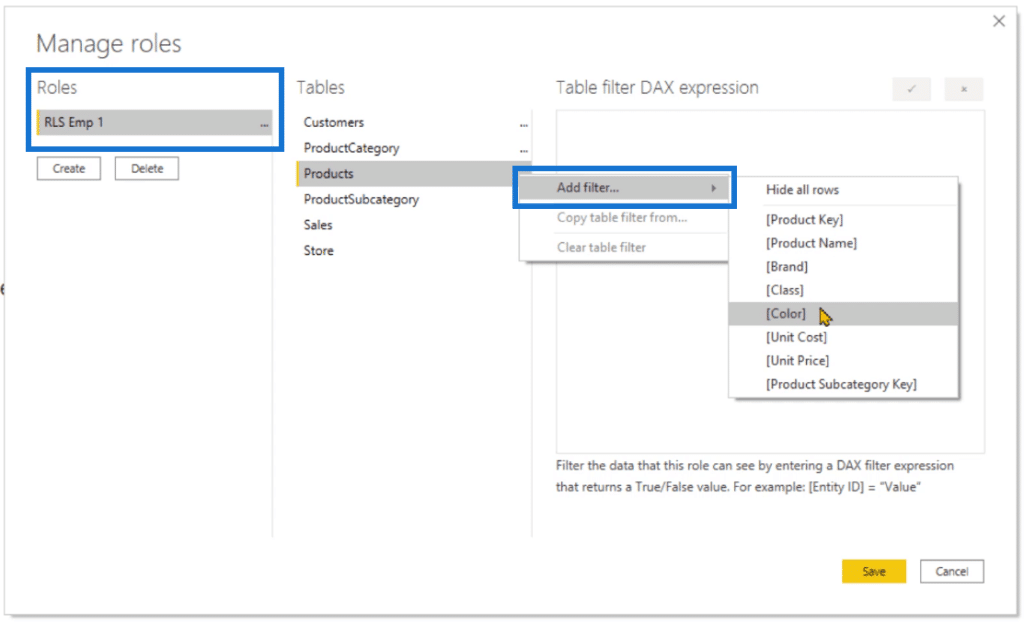
Create a new role and name it. In this case, it’s called RLS Emp 1. Then, place a filter on the Products table.
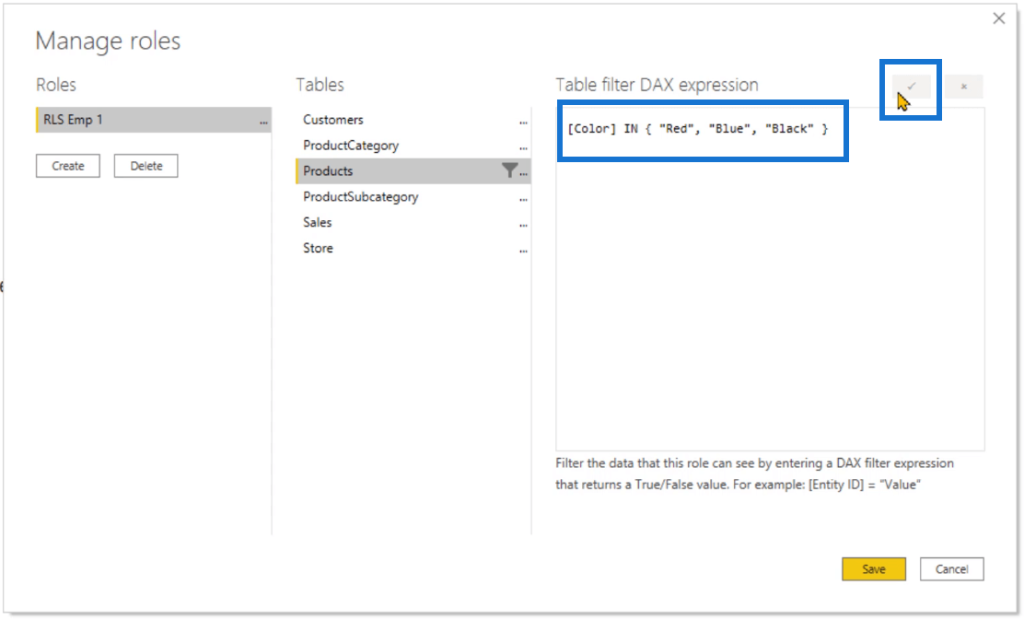
For this example, the products color should be in red, blue and black. Then, click the checkmark ( ? ) to confirm. If the role works, click Save.
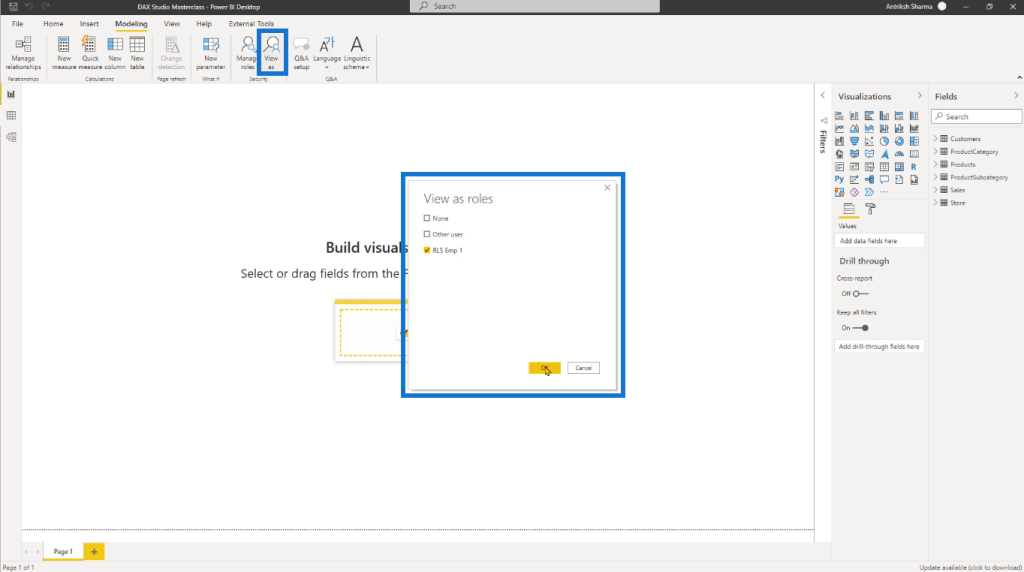
To test the role, go to the Modeling tab and click View as. Click the Role name and then click OK.
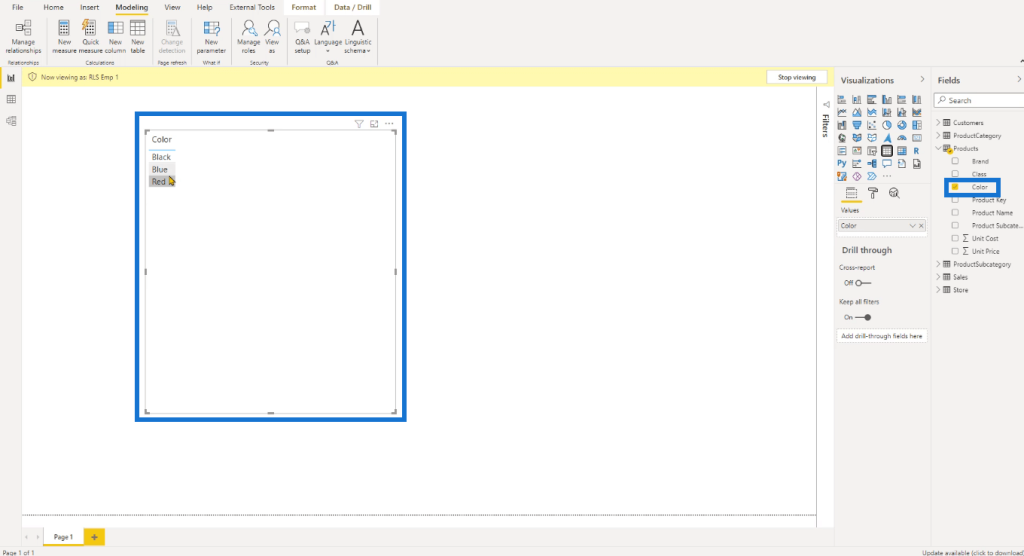
Drag and drop the Color table to the canvas. You’ll see that the only visible colors are Red, Blue, and Black.
Test RLS In DAX Studio
Go to the External Tools tab and click DAX Studio. Under the Home tab in DAX Studio, click Connect. Once the pop-up window appears, click Advanced Options.
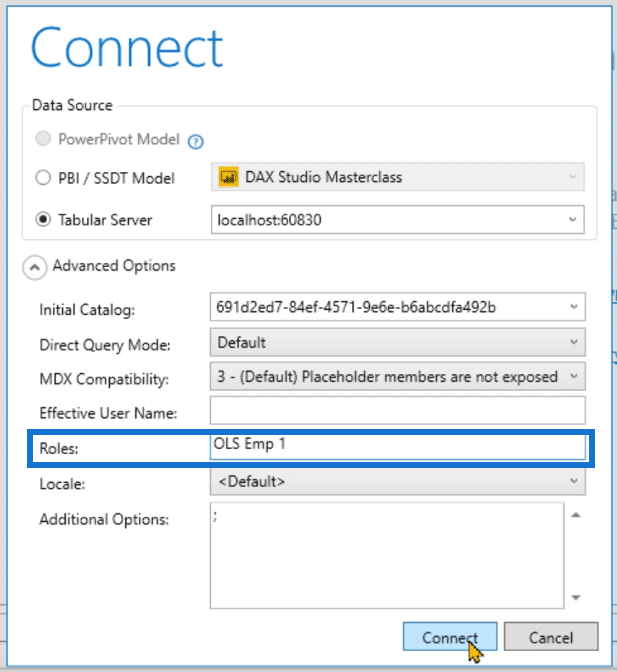
In the Roles textbox, type in the name of the new role you created and then click Connect.
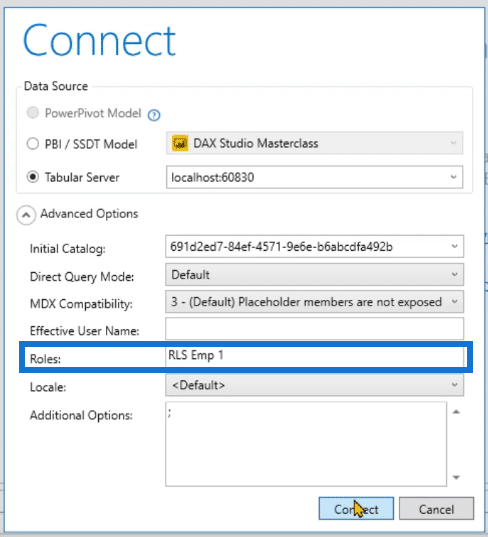
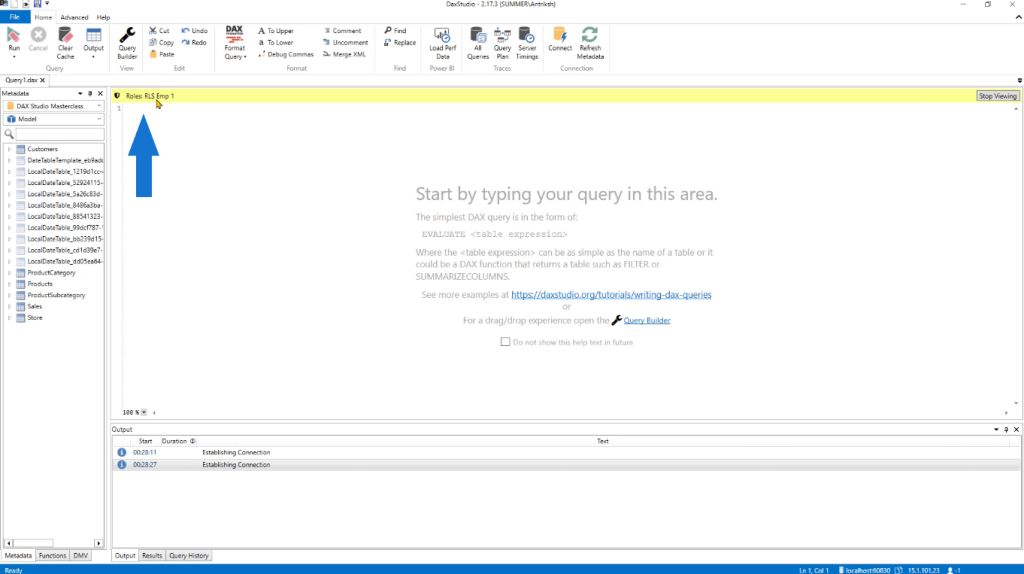
Afterwards, you’ll notice a yellow bar in DAX Studio which shows that it’s currently viewing the RLS Emp 1 Role.
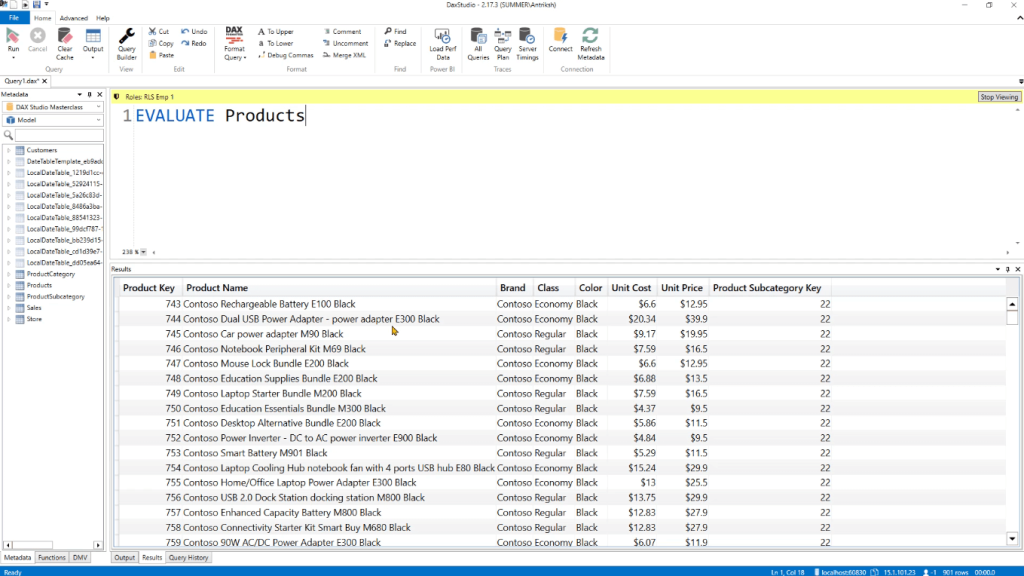
If you run the DAX code EVALUATE Products, you’ll see that the results are only returning 901 rows instead of 2,517. Each of these 901 rows contain either Red, Blue, or Black as a product color.
You can use the VALUES function to reduce the table.
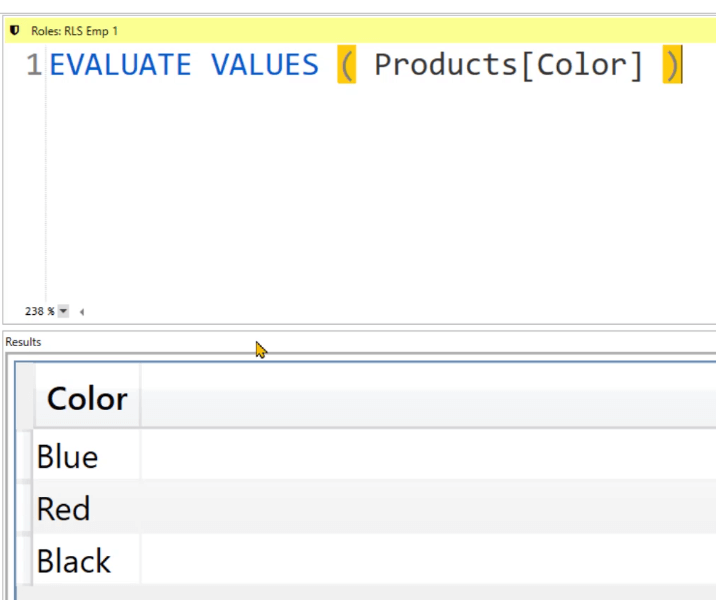
This is a way to connect to DAX Studio and take a look at the row level security you created in Power BI or in Analysis Services.
Object Level Security In Power BI
Next, let’s test the Object Level Security. Create a new role and name it OLS Emp 1.
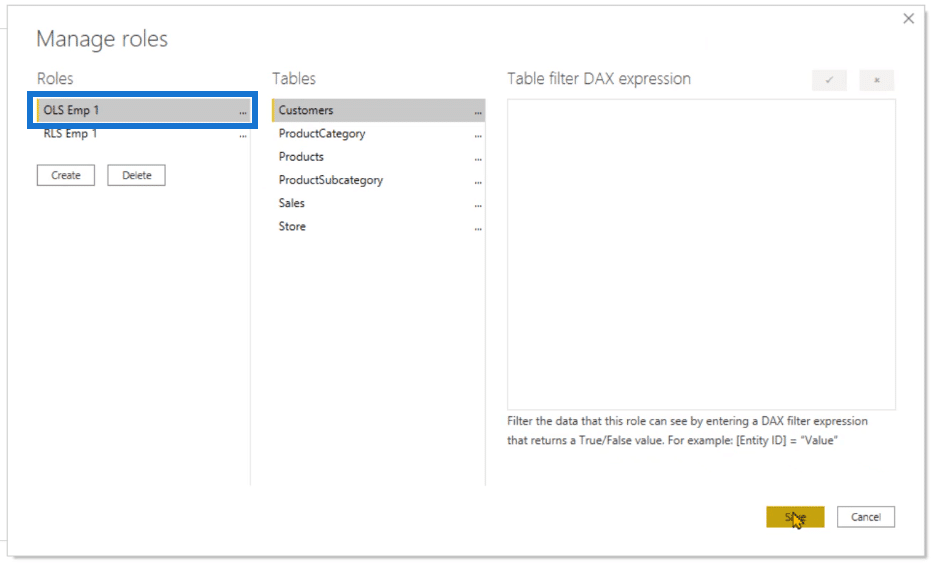
For this role, you don’t need to create a filter. This will only be a shell. You’ll be modifying the content inside the table.
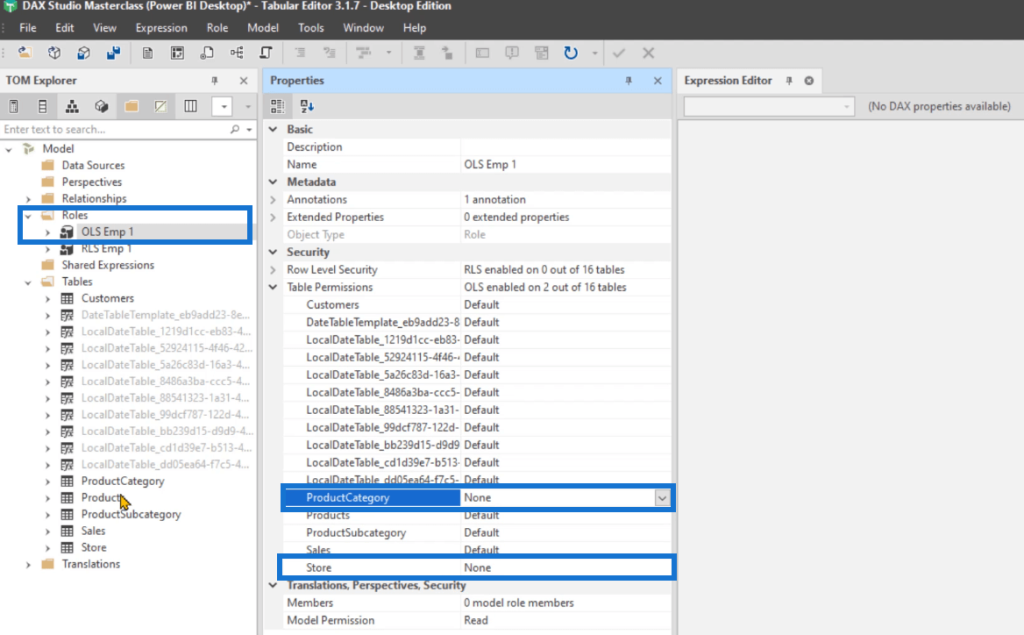
Next, go to the External Tools tab and click Tabular Editor 3.

Under the Roles folder, select OLS Emp 1. In the Table Permissions option, change the Store and Product Category to None.
In the Products table, select Unit Price. Then, change the OLS Emp 1 option to None. Do the same for the Unit Cost.
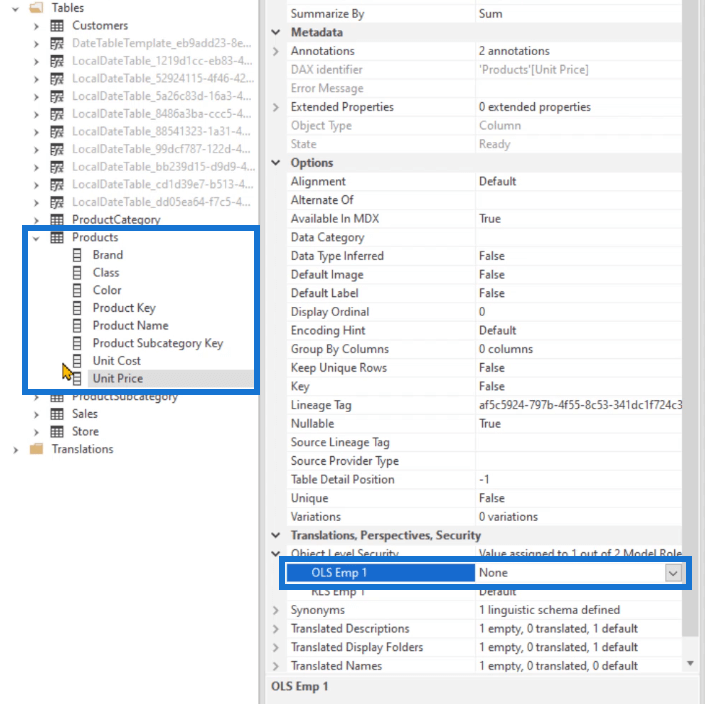
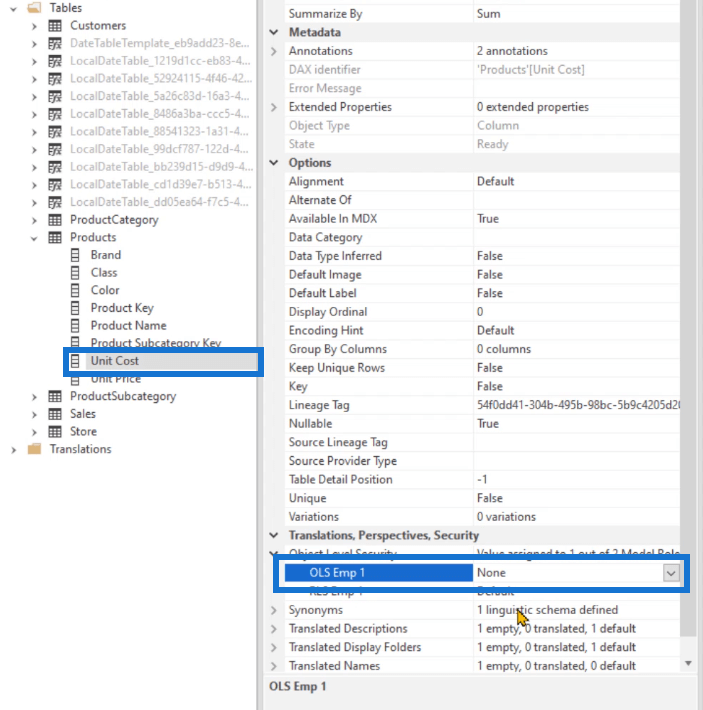
Then, click Save.

Turn Off Auto Date/Time Option In Power BI
Before you click Save, make sure you turn off the Auto date/time option in Power BI. To turn this off, go to Options and under the Current File tab, click Data Load. Then, uncheck the box for the Auto date/time option.
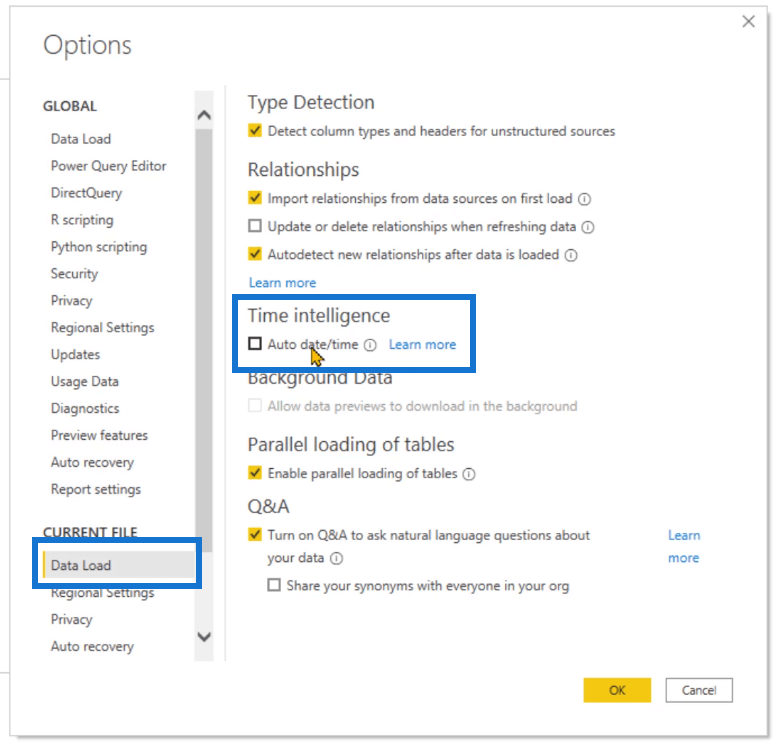
If you don’t do this, you’ll get an error message in Tabular Editor while trying to save your work.

The error means that because you haven’t unchecked the auto date/time option, the DAX Engine has created several date tables. Some of these date tables depend on the Sales table or the Products table.
After you uncheck the Auto date/time option and go back to Tabular Editor, you’ll see that the invisible Date tables are no longer in the TOM Explorer.
Test OLS In Dax Studio
Once the changes are done to the data model, go back to Power BI. Launch a new DAX Studio file and then click the Connect button found under the Home tab.
In the Advanced options, type the role name. In this case, it’s OLS Emp 1. Then click Connect.
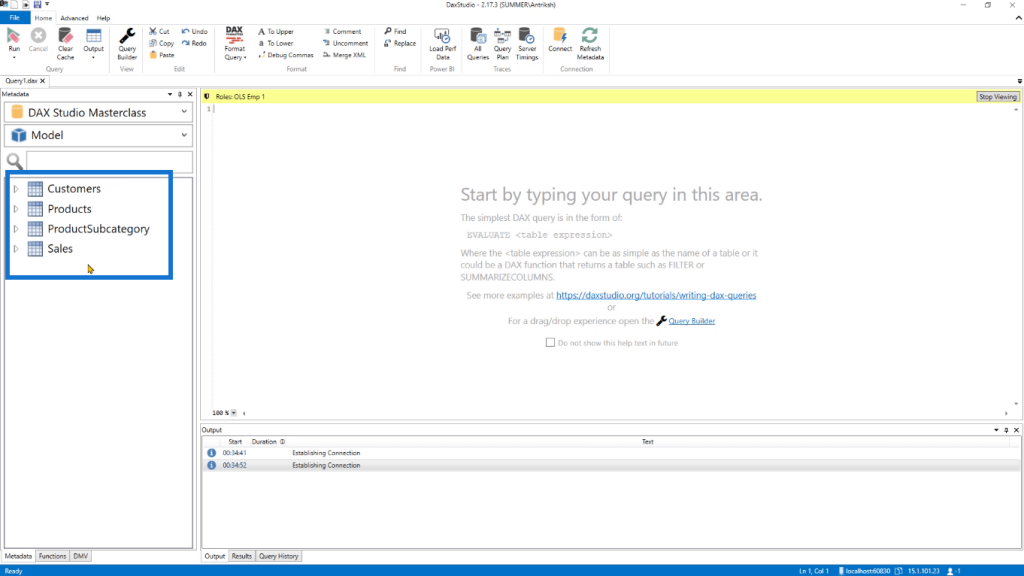
In the Metadate pane, you can see that you don’t have access to the Store and Product Category tables.
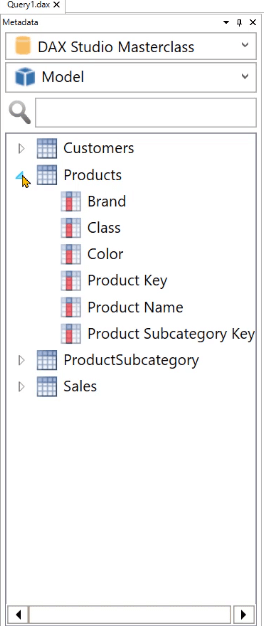
If you expand the Products table, you also won’t be able to view the Unit Cost and Unit Price.
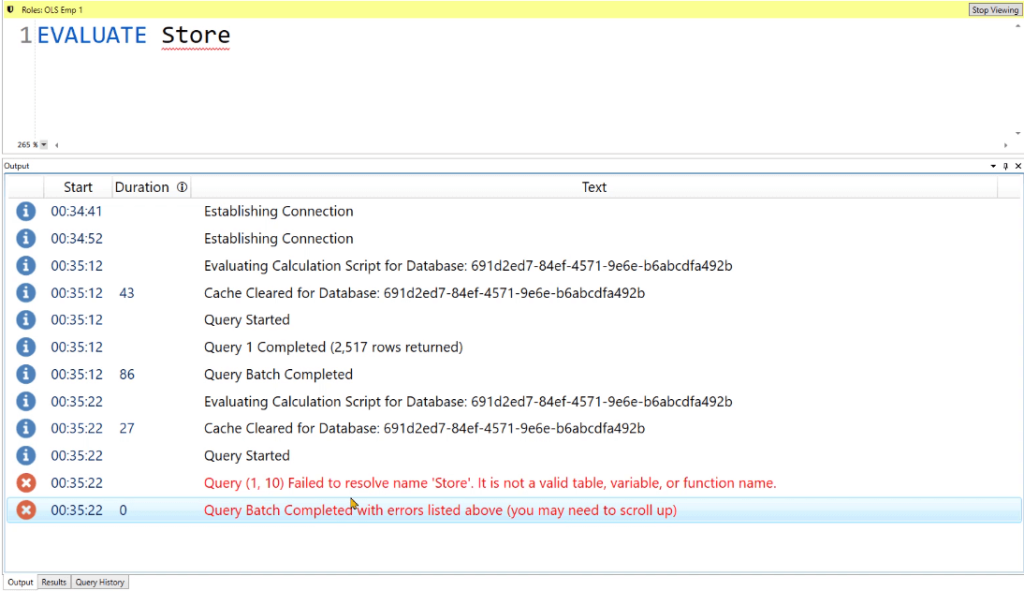
If you try to EVALUATE Store, you’ll get an error saying that it’s not a valid table or expression.
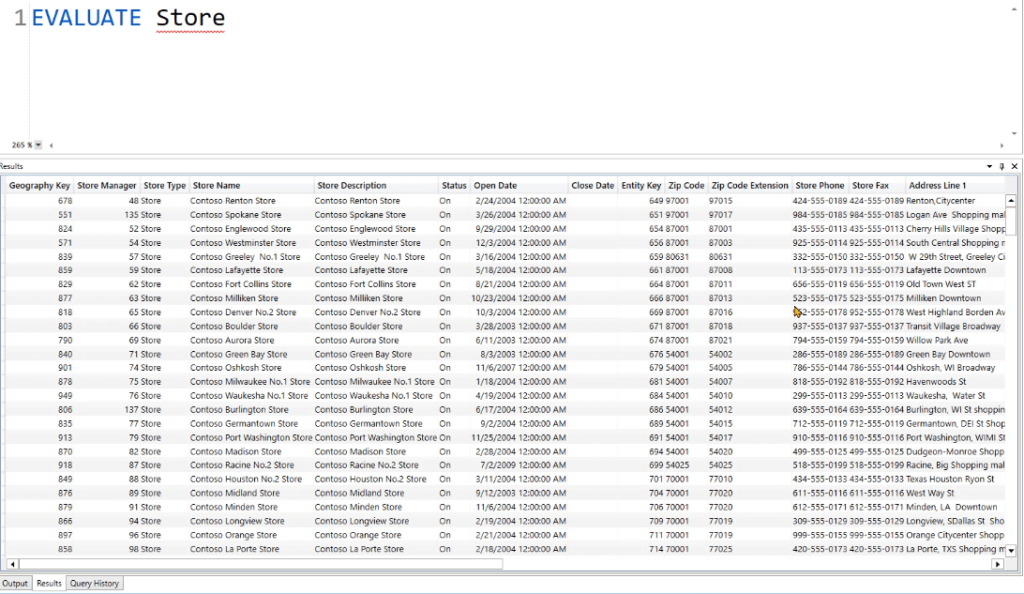
But when you click the Stop viewing button found on the right-most part of the yellow bar, you’ll be allowed to view the Store table.
***** Related Links *****
Connect DAX Studio To Power BI And SSAS
Subquery In SQL For Power BI Users
Common SQL Table Expressions For Power BI Users
Conclusion
This was a brief tutorial on how to implement and test the row level security and object level security in DAX Studio.
These two features are especially helpful when you want to restrict data access for specific users. You can set what data can be viewed depending on the workspace accessed in the Power BI Service. This is especially useful when dealing with sensitive business information.
Enterprise DNA Experts


