
Ever wondered how to protect your important documents from being copied or used without your permission?
Or do you frequently share drafts of your work and worry about them getting misconstrued as final versions?
Using watermarks in Microsoft Word can help you maintain control over your content.

To add a watermark in Word:
- Open your Word document
- Go to the Design tab
- Click on Watermark
- Choose to have a Picture watermark or Text watermark
- Choose your picture or write your text of choice
- Enjoy your watermarked document
This article will give you steps and options for inserting a watermark in Word and give you the knowledge to effectively utilize these versatile additions to your documents.
Let’s dive in!
What is a Watermark?

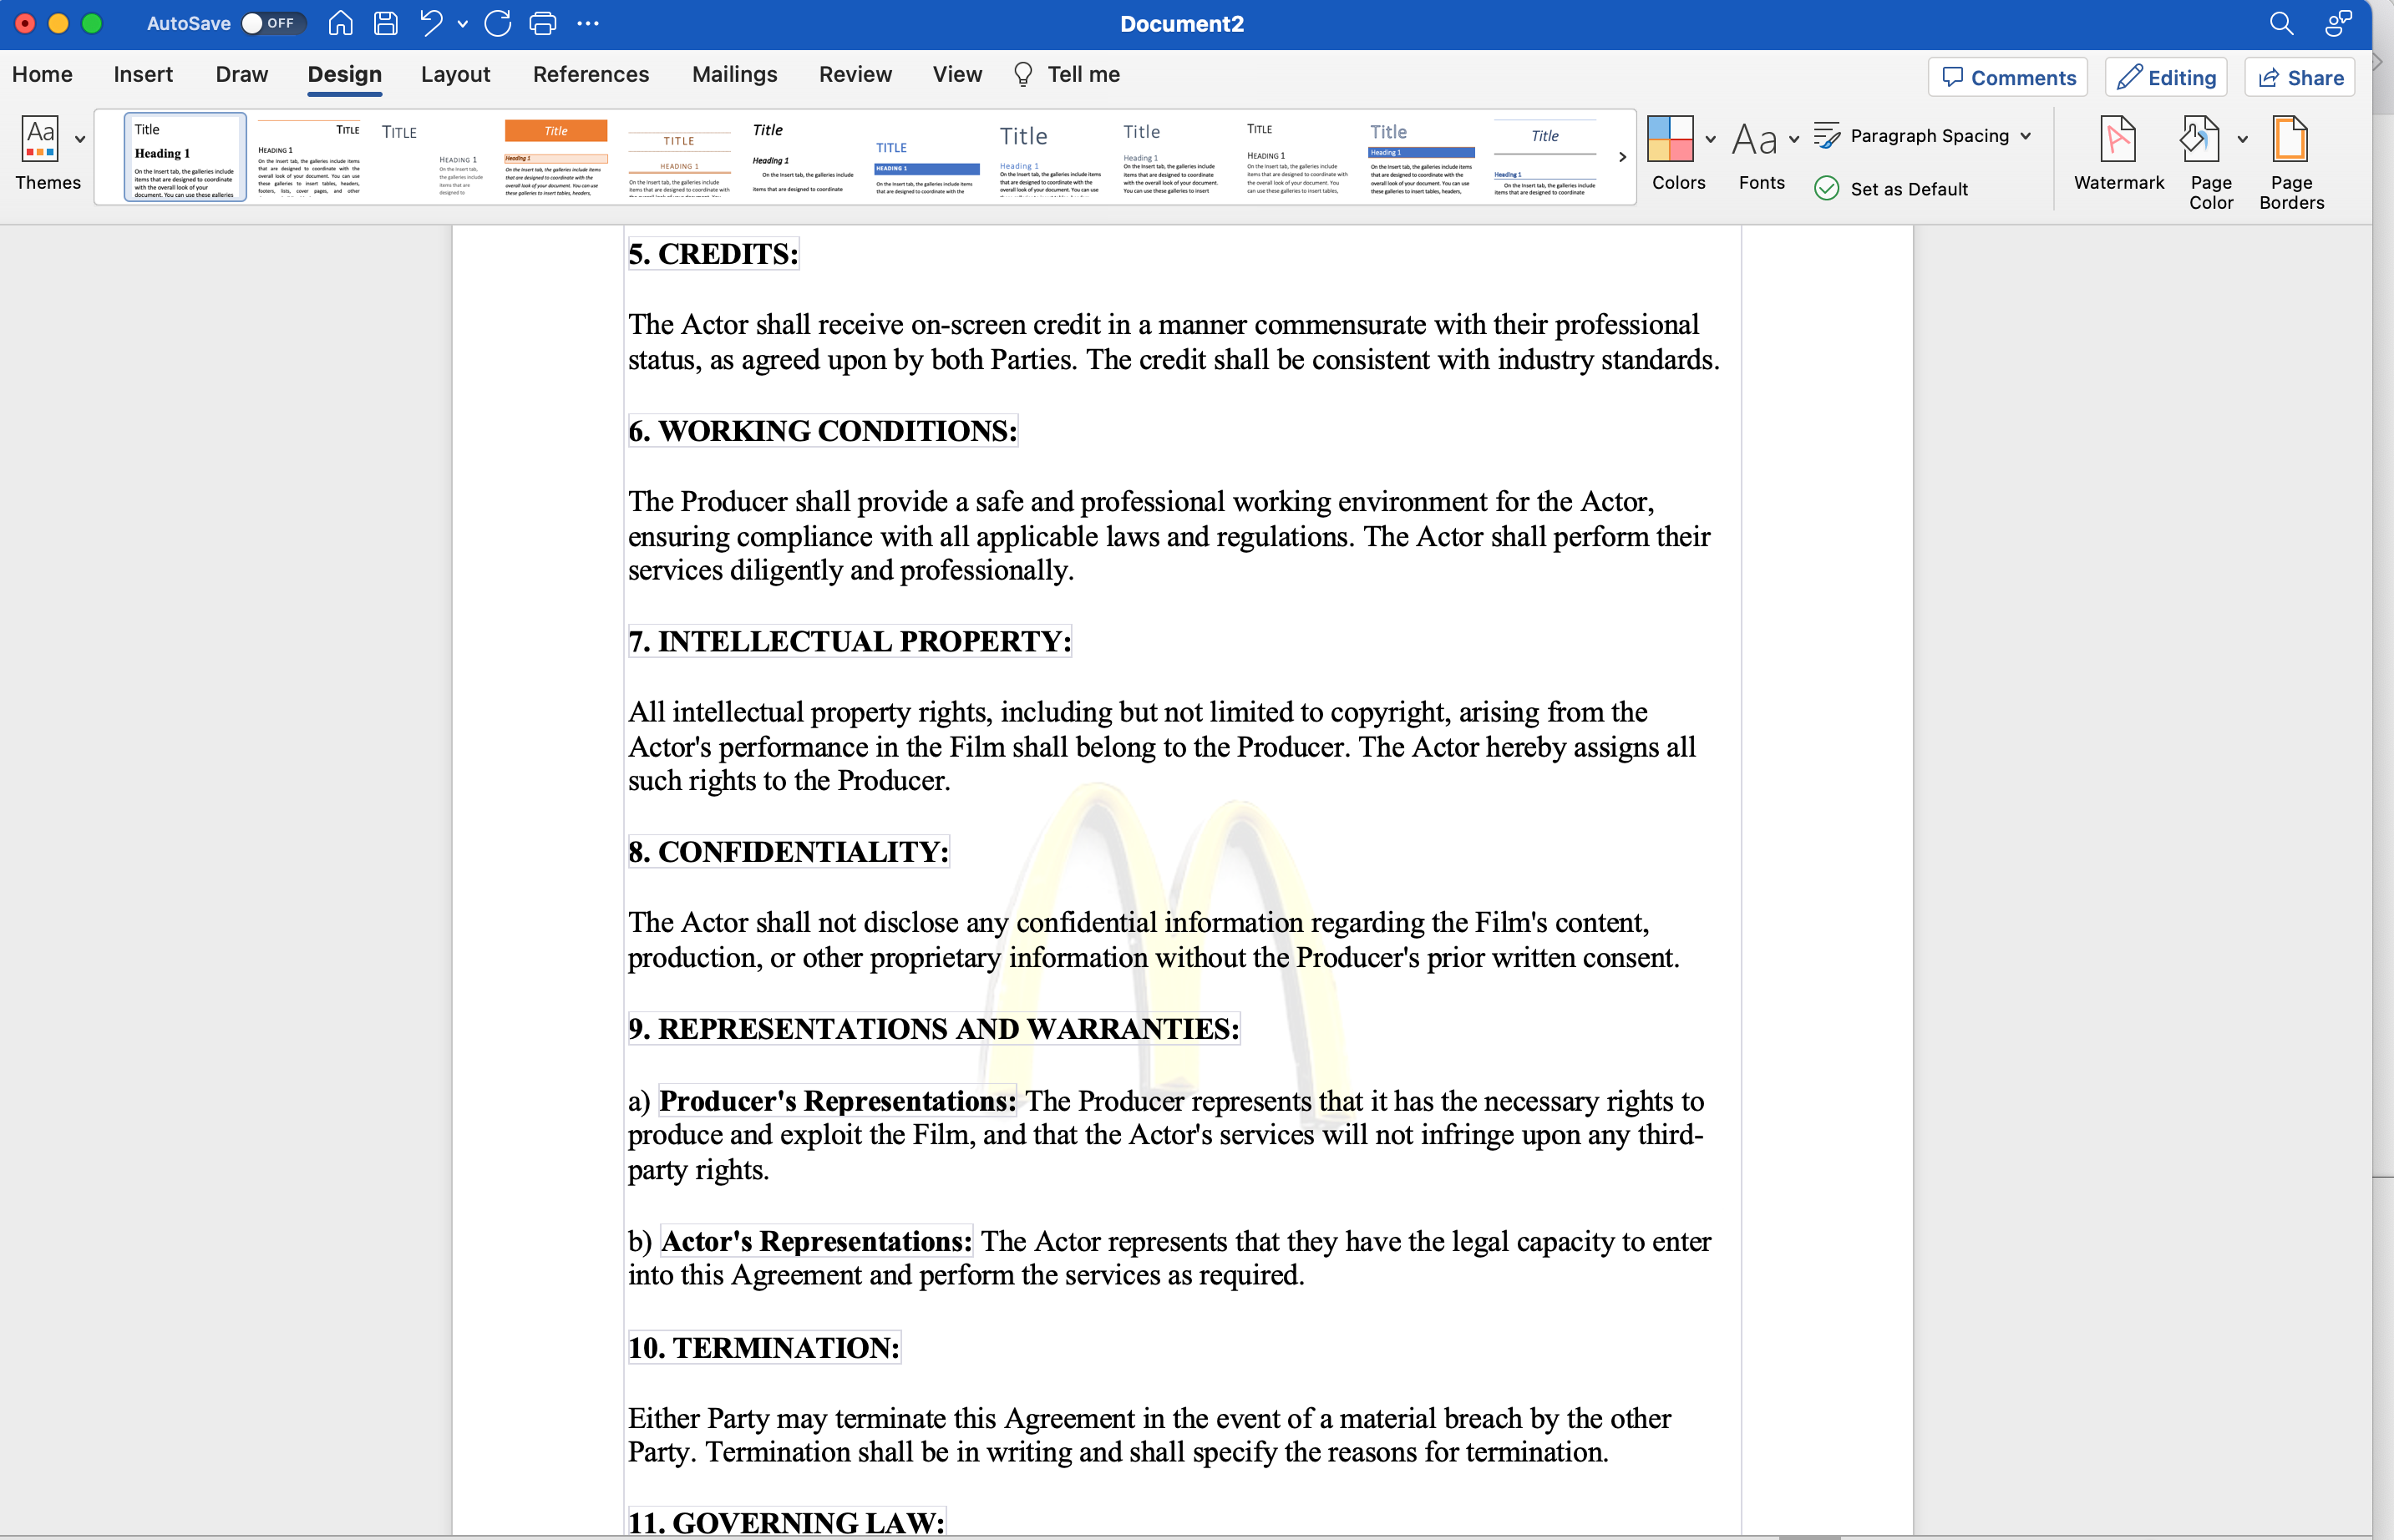
Watermarks are faded images or text that appear behind the main content of a document.
They are a useful tool in Word documents that can help you assert document ownership, note copyright or confidentiality, or indicate a document’s status, such as “DRAFT” or “FOR REVIEW”.
Why Use a Watermark?

Watermarks are used for a variety of reasons. Some of the purposes they serve include:

- Security: They can deter unauthorized copying or distribution of documents by marking them with a unique identifier, such as “CONFIDENTIAL” or “DO NOT COPY.”
- Branding: Companies and individuals can use watermarks to include their logos or brand elements, providing a professional look to their documents.
- Attribution: Authors can include their names or specific details about the document, ensuring proper credit is given.
- Version Control: If a document is a draft or a work in progress, watermarks help to identify this status and prevent confusion among readers.
Now, there are a few types of watermarks you can get. Let’s talk about them.
Types of Watermarks You Can Add in Word

There are mainly two types of watermarks:
- Text Watermarks: These are simple text-based watermarks, such as “DRAFT” or “CONFIDENTIAL,” that can be inserted into a document as a predefined option or as a custom text. Custom text watermarks allow you to create unique watermarks tailored to your specific needs.
- Picture Watermarks: These are image-based watermarks, such as a logo or a custom design. Picture watermarks can be inserted using an image file from your computer or a picture available online.
Below are the steps you need to get a watermark in your Word document.
How to Create a Watermark in Microsoft Word
A watermark is a subtle yet powerful tool that can elevate the professionalism of your document or simply add a touch of personal flair.
Furthermore, It’s a feature that’s often overlooked, but once you know how to use it, you’ll find it can be invaluable in various scenarios.
In this section, we’ll walk you through the straightforward process of creating a watermark in Word, ensuring your documents have that extra layer of information or protection they might need.
Let’s get started.
1. How to Create a Text Watermark in Word
To insert a text watermark:
- Open your Word document.
- Go to the Design tab. If you are using Office 2010 or an earlier version, use the Page Layout tab.
- Click on Watermark in the Page Background group.
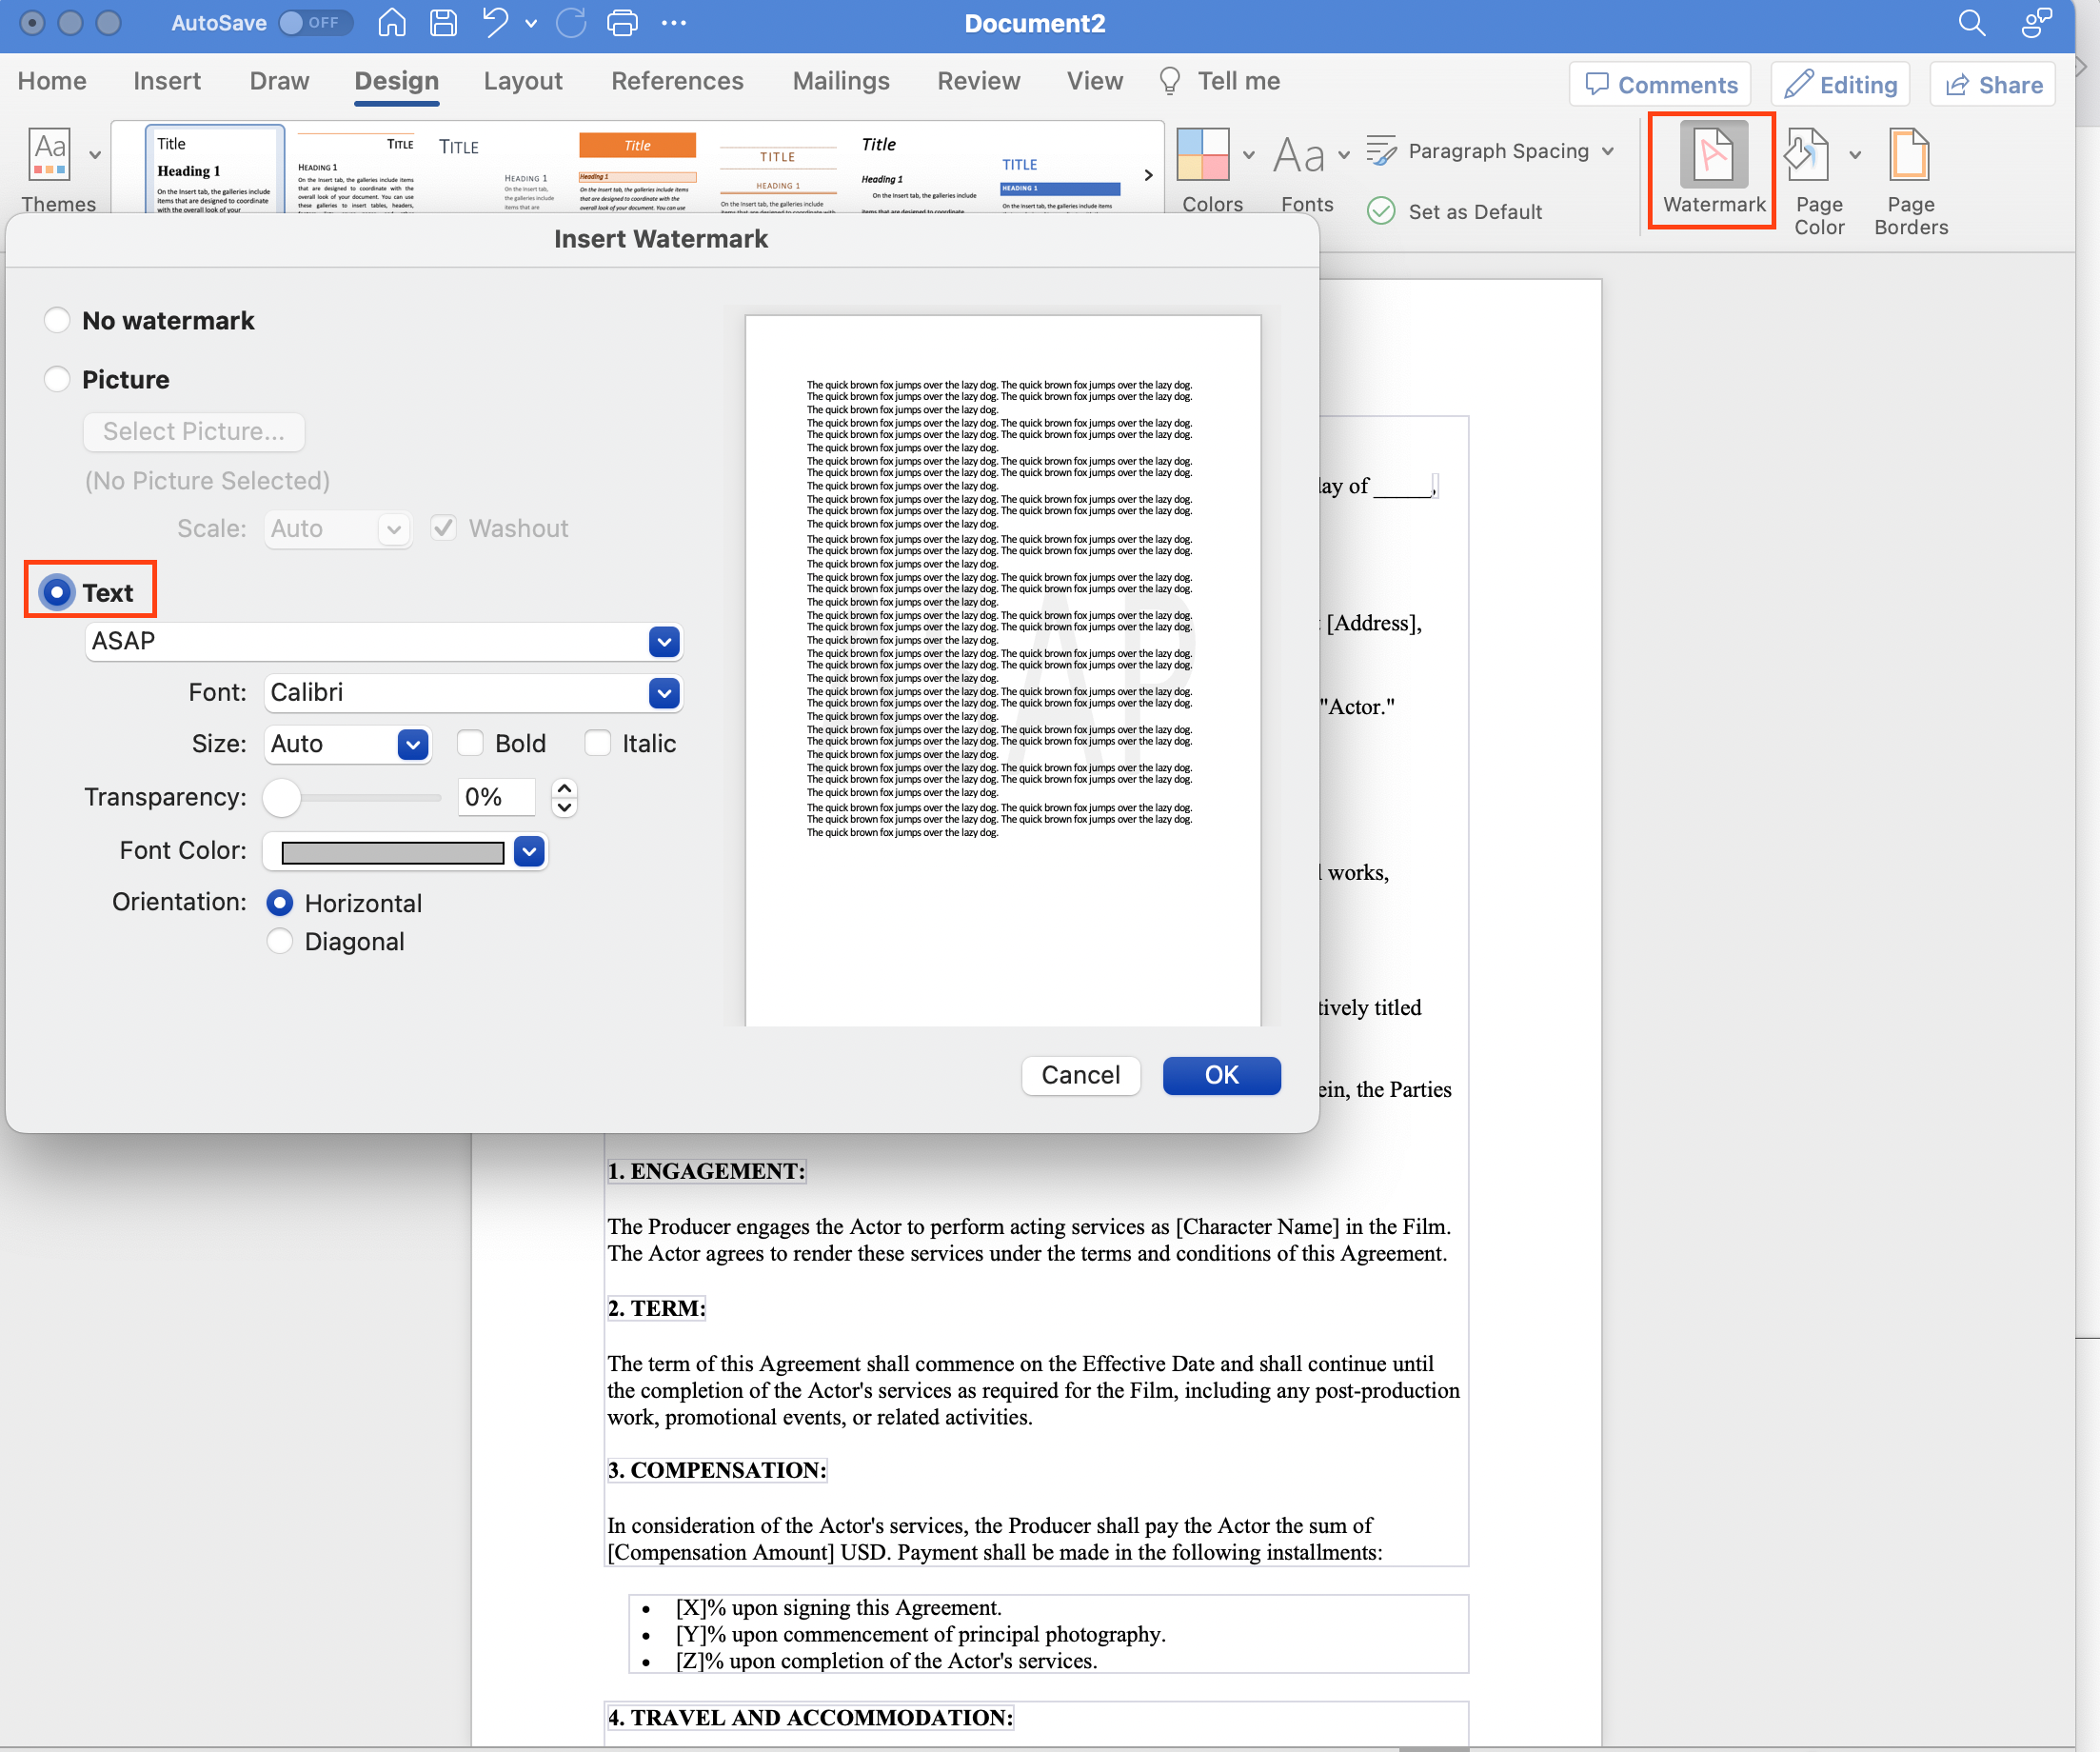
- In the insert watermark dialog, Select the Text watermark radio button.
- Choose from the list of text watermark options.
- Customized the watermark as needed.
- Click OK.
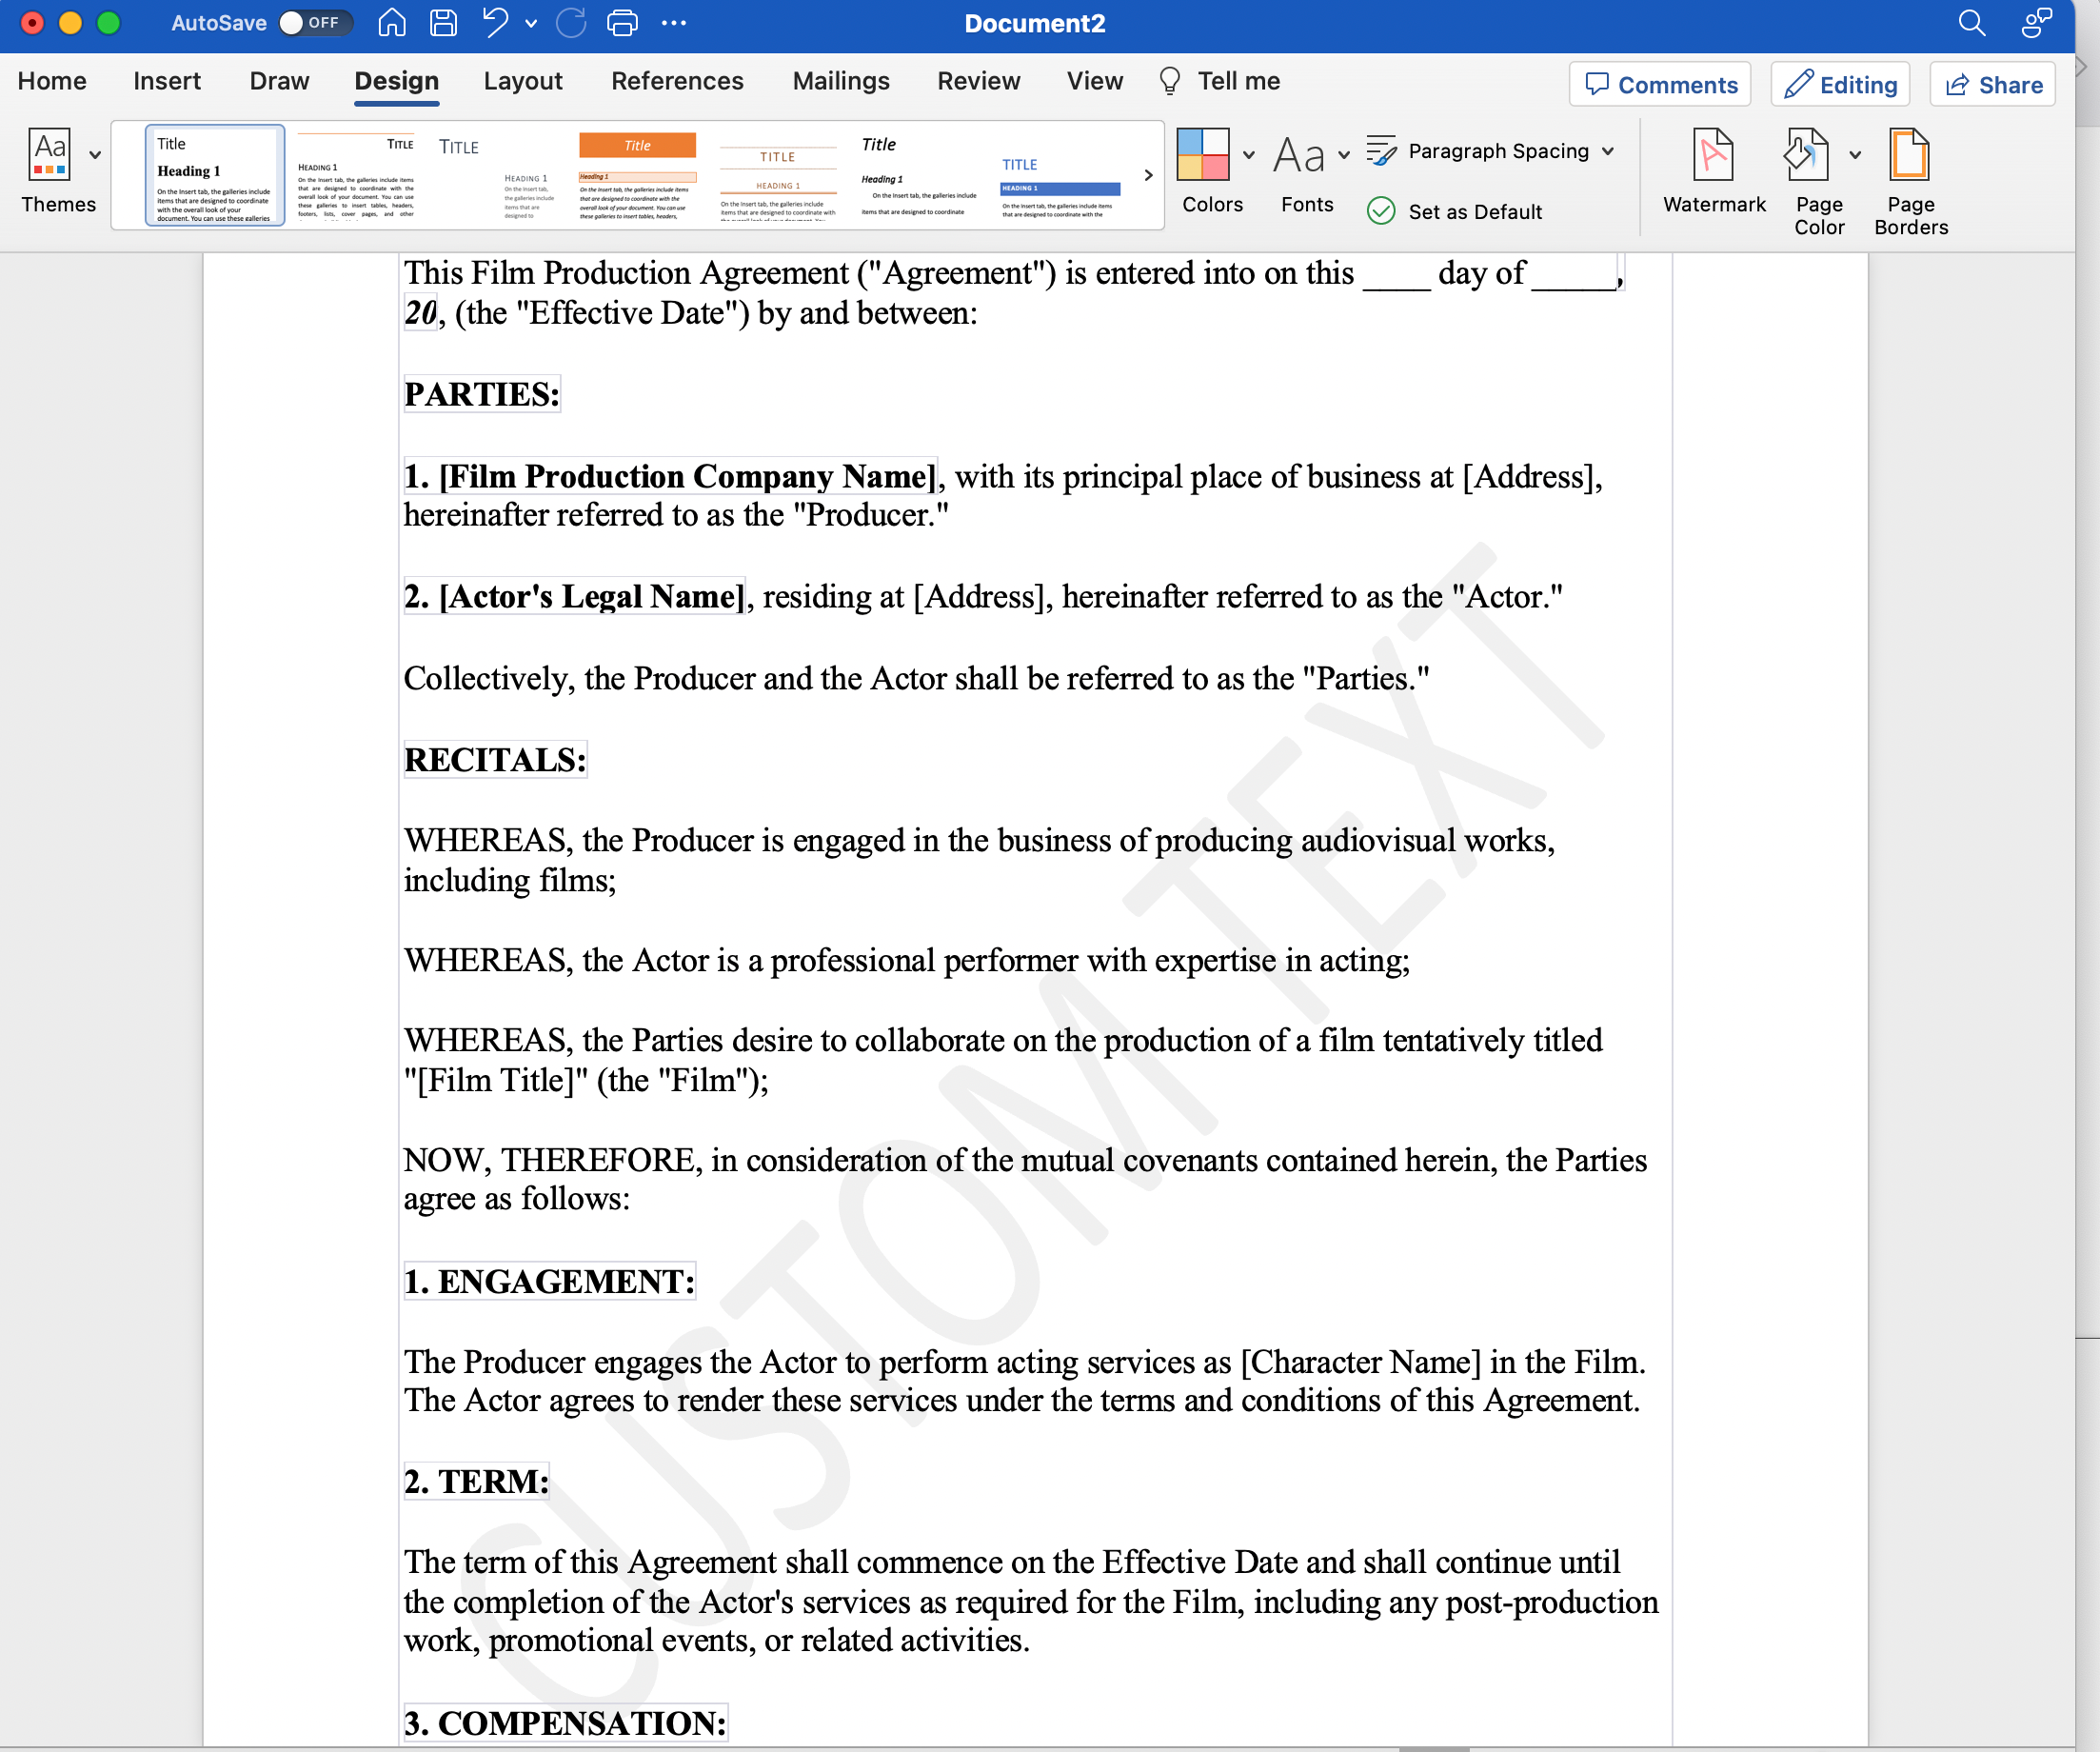
Your text watermark will now appear in your document behind the text.
2. How to Create a Custom Text Watermark in Word
If you’d prefer a custom watermark option, this is available as well.
To insert custom watermarks:
- Open your Word document.
- Go to the Design tab. If you are using Office 2010 or an earlier version, use the Page Layout tab.
- In the Page Background group, click on Watermark.
- Choose Custom Watermark from the drop-down menu.
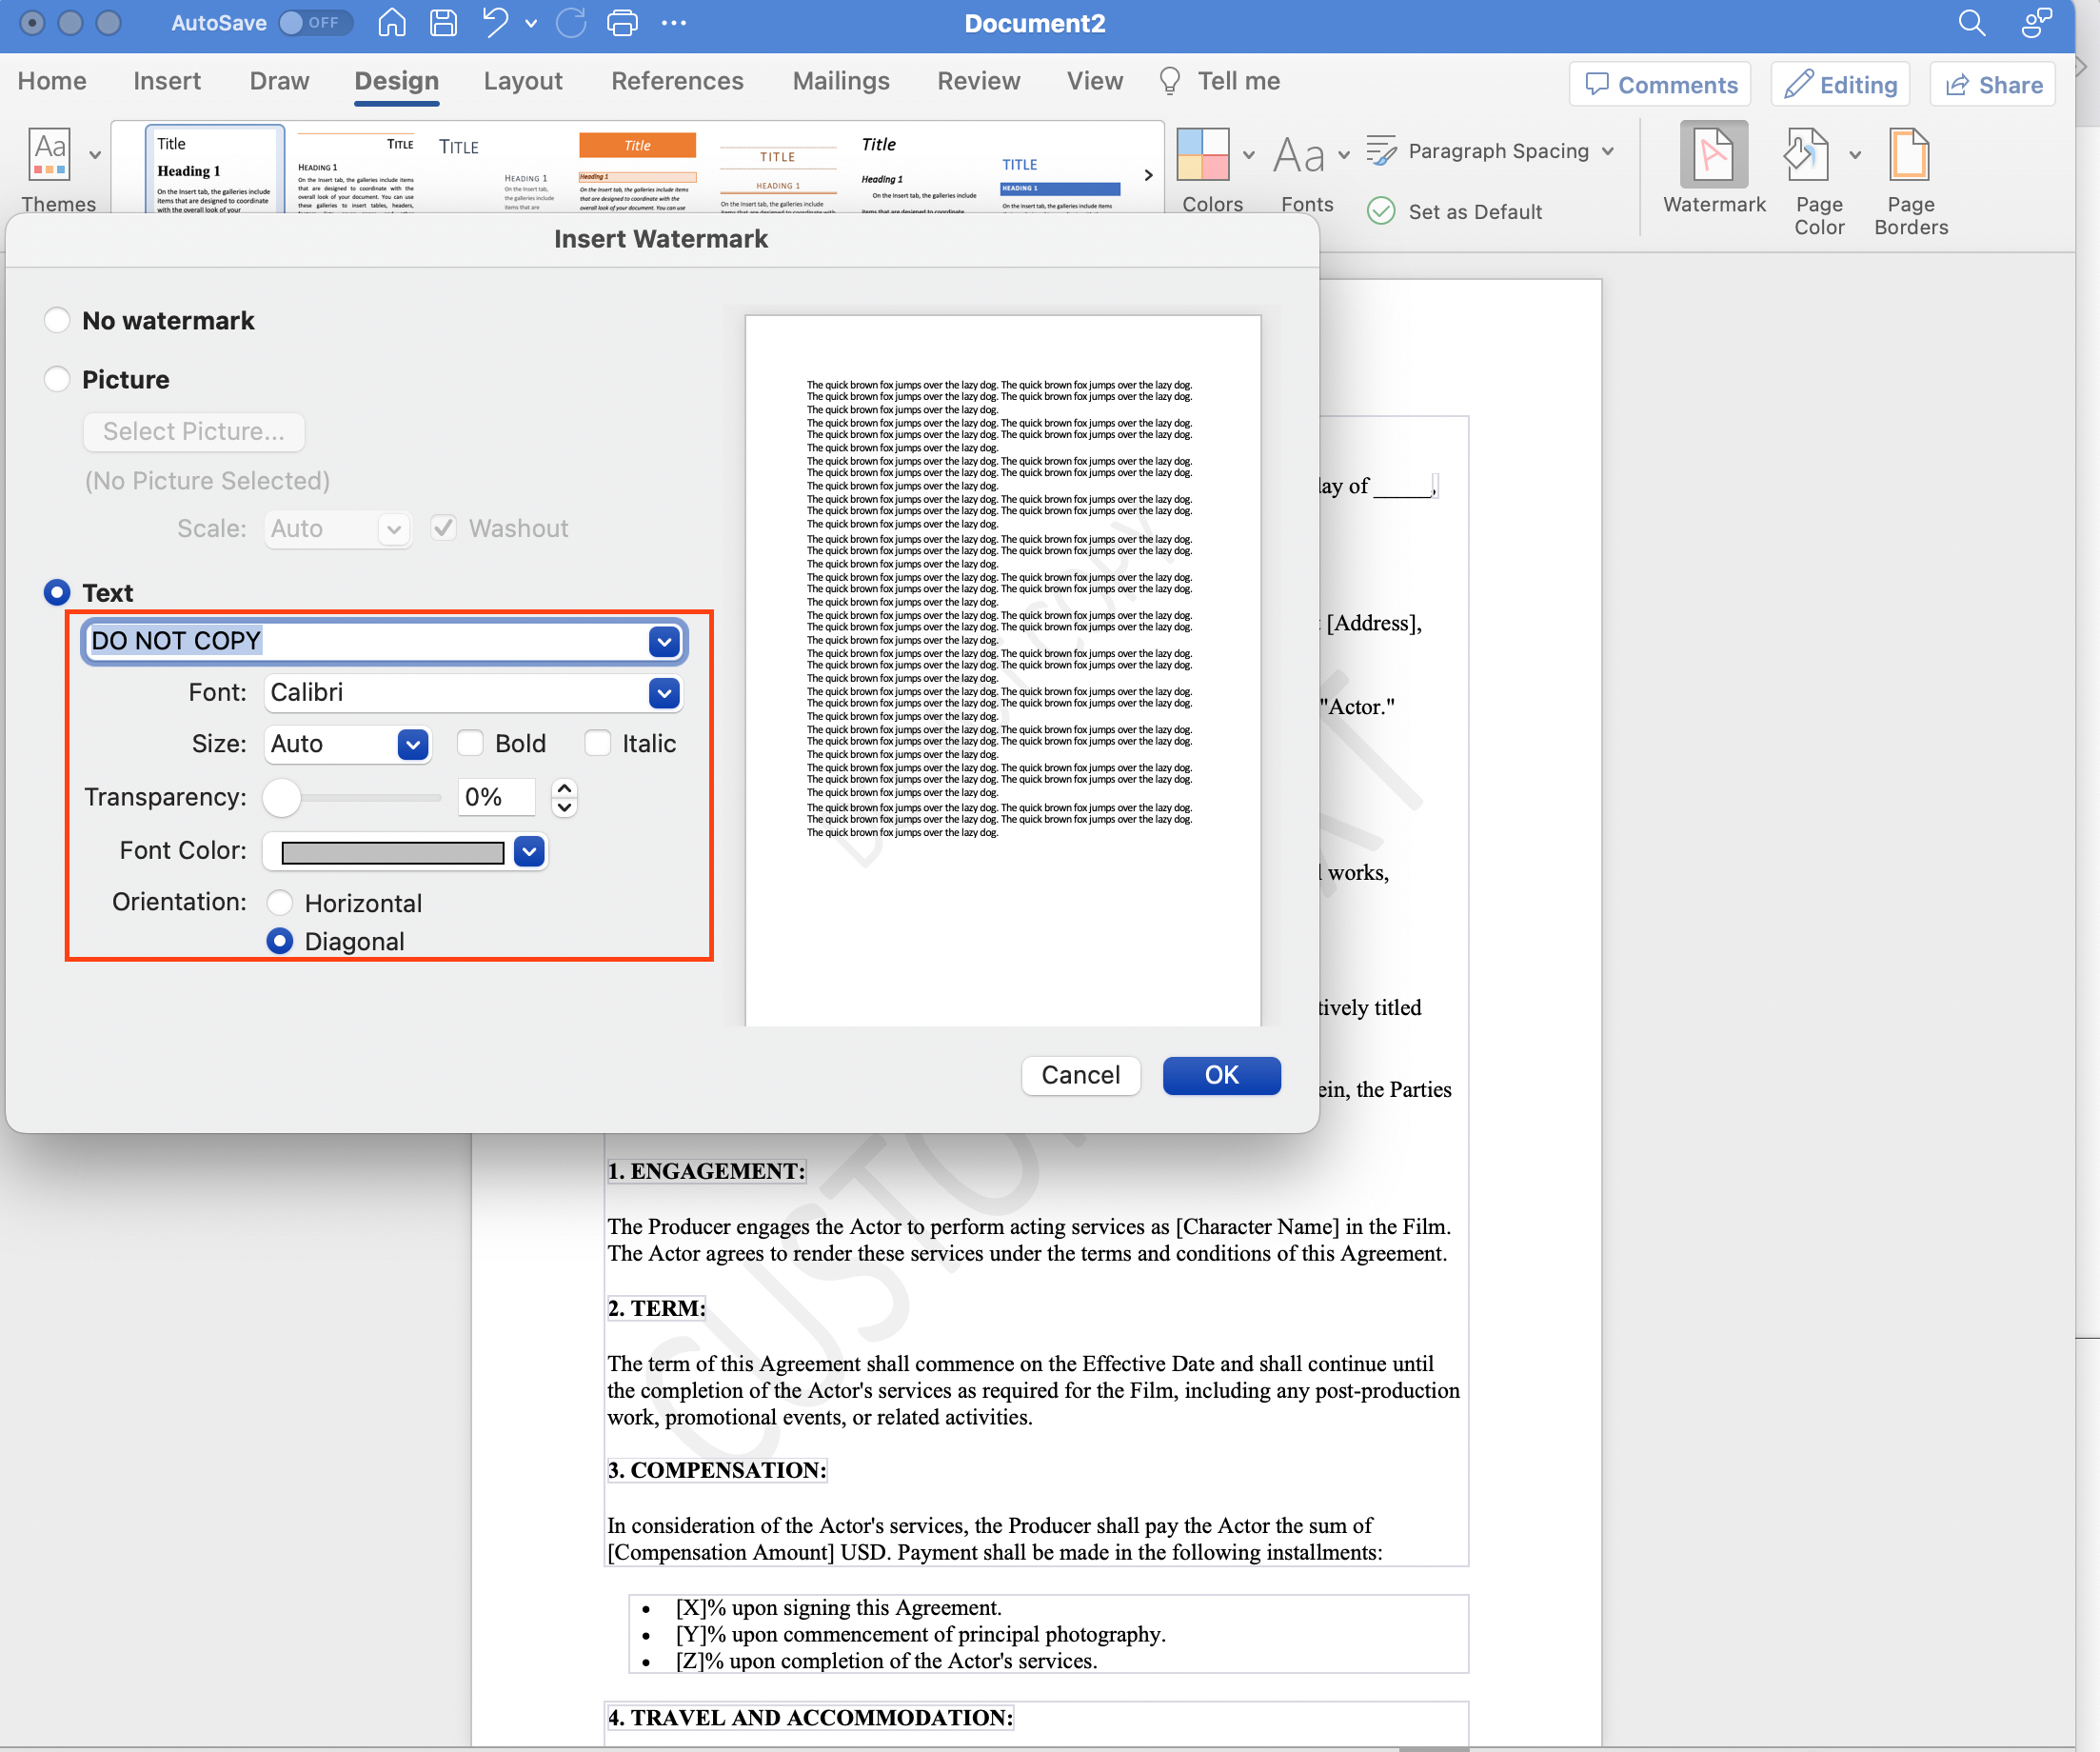
- In the insert watermark dialog, select the Text watermark option.
- Enter your desired text in the “Text” box.
- Choose the desired font style, size, color, and layout options.
After setting the custom text watermark options, click Apply. Your custom text watermark will now appear in your document behind the text.
3. How to Customize a Text Watermark in Word
Customizing your text watermarks in a Word document can be crucial to ensure correct positioning and adjust their appearance according to your needs. Let’s discuss how to customize watermarks in a Microsoft Word document:
To move your watermark:
- Click on the watermark to select it, making sure the text box containing the watermark is visible.
- Move the watermark by clicking and dragging the text box to the desired position.
Remember to be careful when moving the watermark, as it could affect the readability of the document’s text.

To rescale a watermark:
- Select the watermark text box by clicking on it.
- Resize the watermark by clicking and dragging one of the square handles located at the corners or edges of the text box.
Keep in mind that making the watermark too large or too small could affect its purpose, potentially making it too distracting or unreadable.
4. How to Use WordArt for Watermark
WordArt offers more visually distinctive and creative options for watermark creation.
To use WordArt as a watermark in Word, follow these steps:
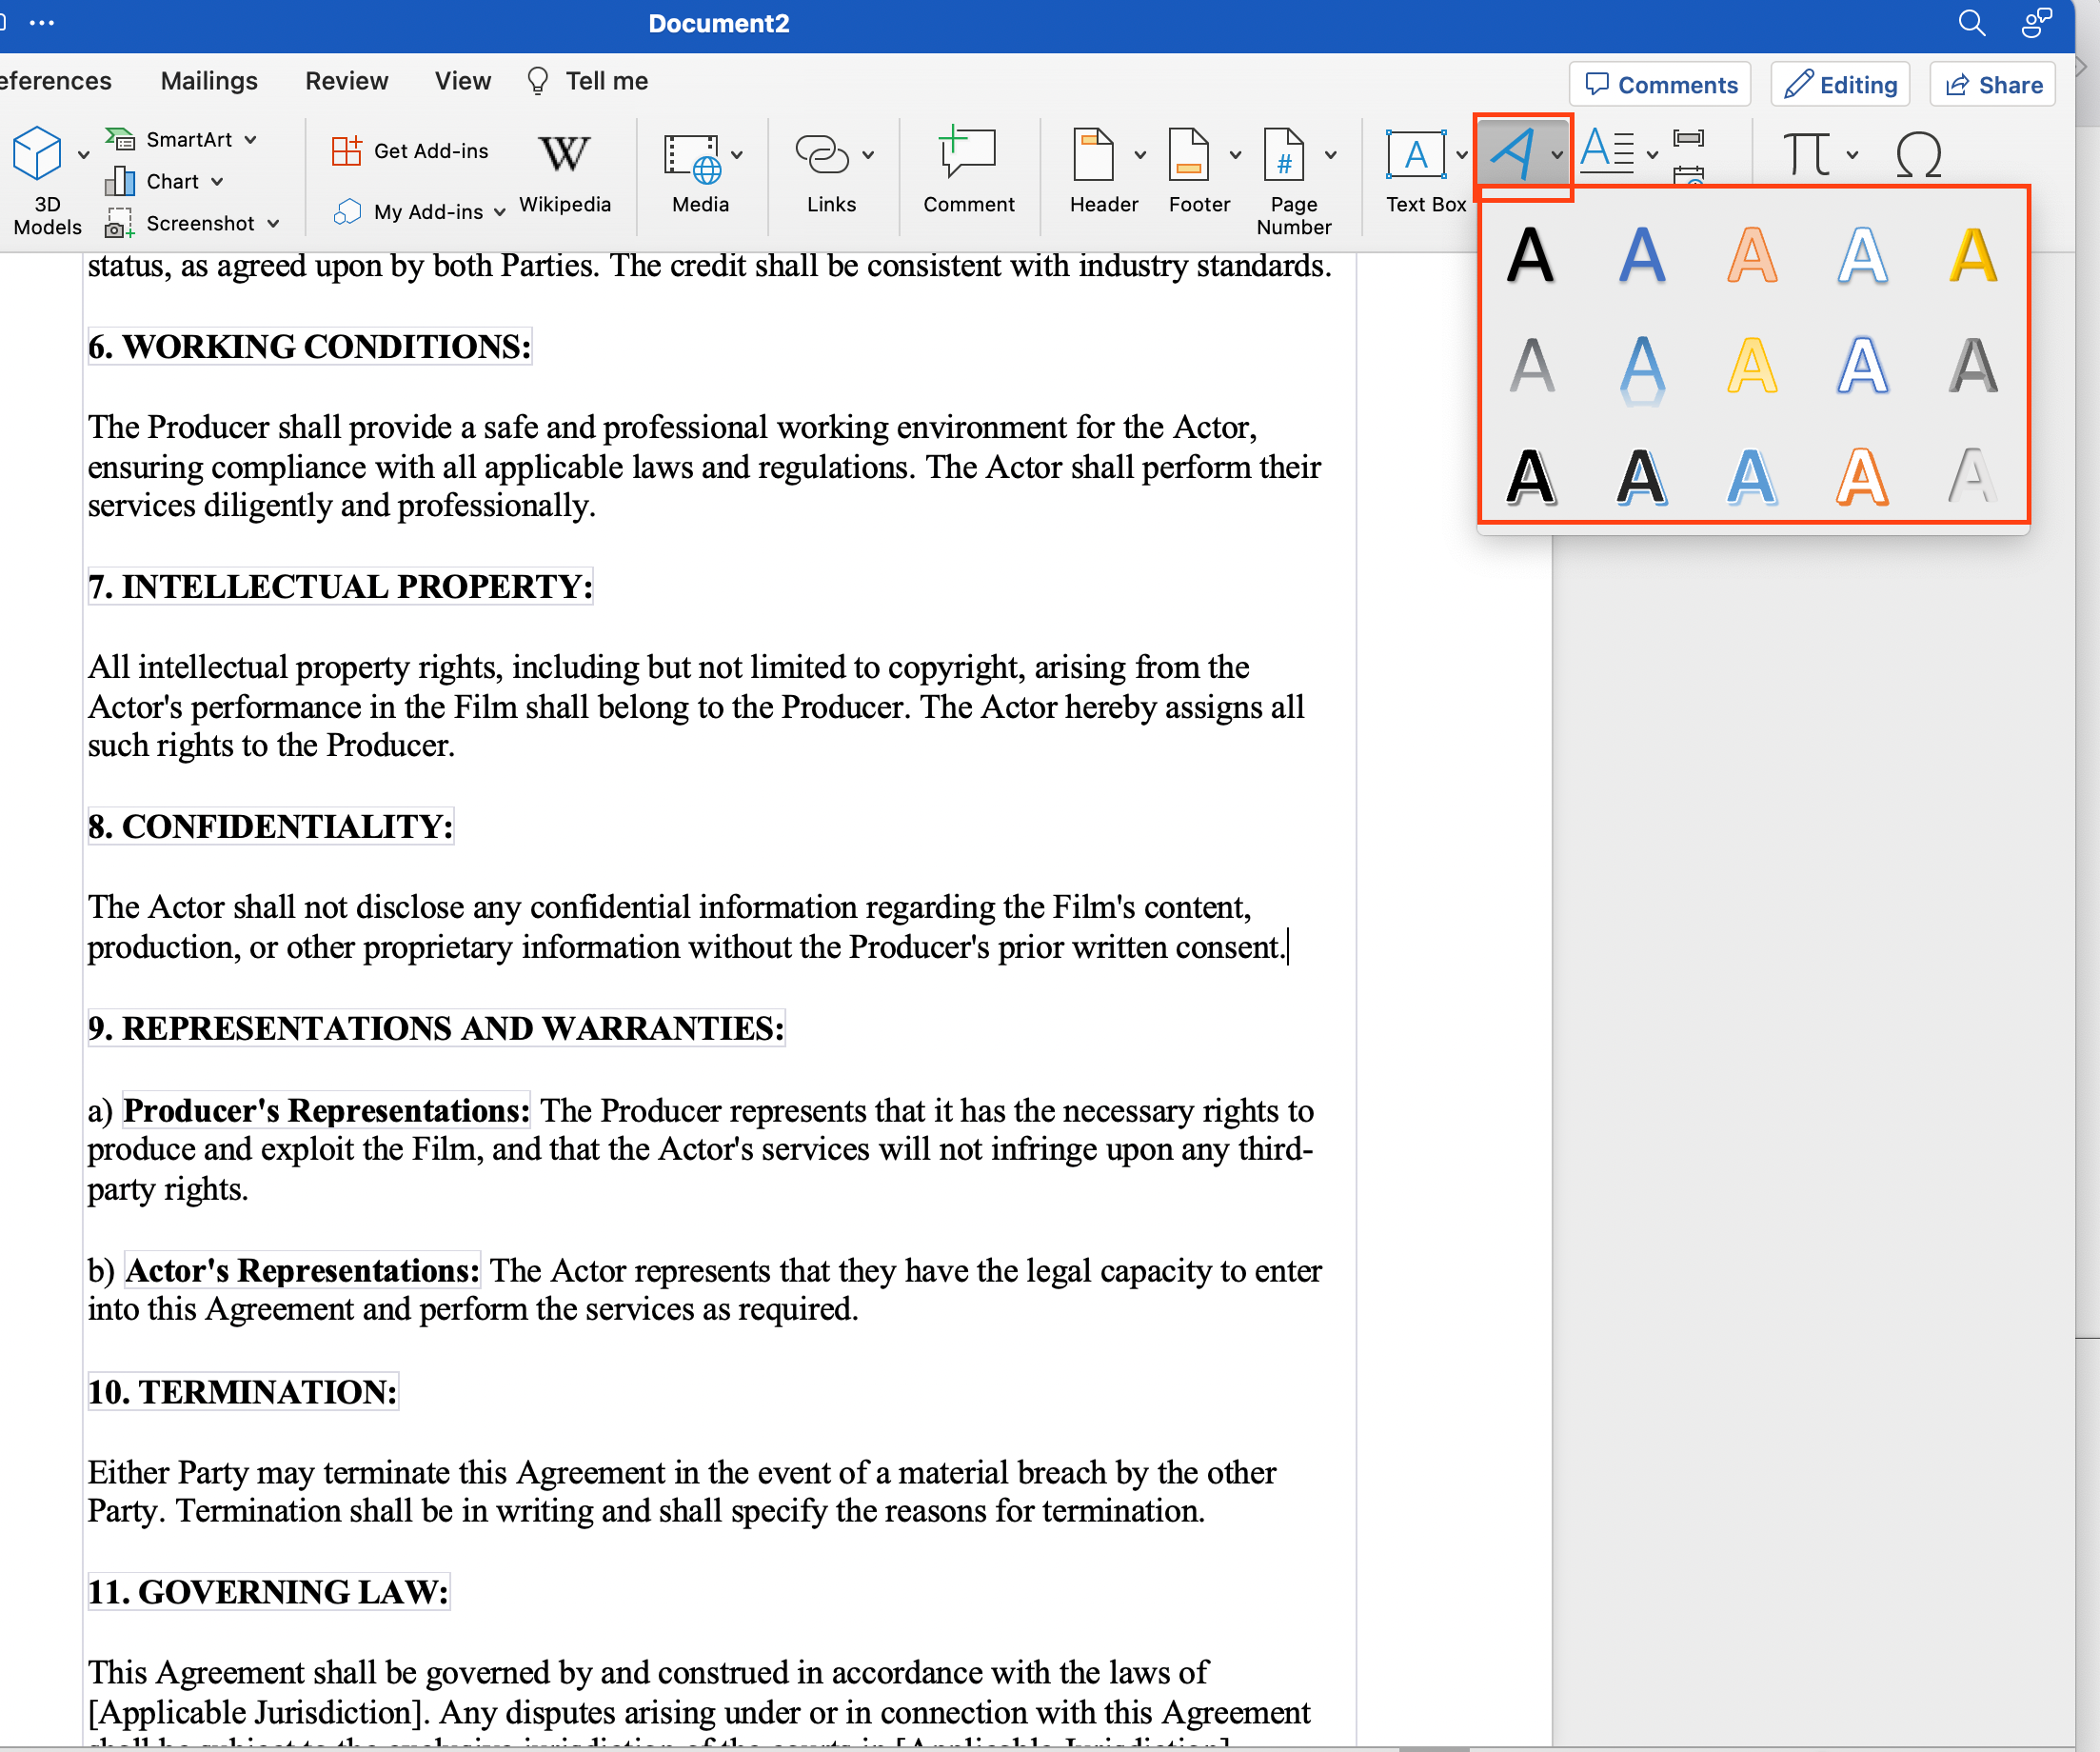
- Navigate to the Insert tab in Word.
- Click on WordArt in the Text group.
- Choose a style from the available options.
- Type your desired text and format it as needed.
- Right-click on the WordArt object in the document.
- Choose “Send to Back” to position the WordArt behind the main text of the document.
- OPTIONAL: Adjust the transparency (under Format > Shape Fill) to create a more subtle watermark effect.
By using WordArt, you can create custom, semi-transparent, and visually appealing watermarks in Word to suit your specific needs.
5. How to Add an Image Watermark in Word

As well as a text watermark, Microsoft Word also offers a picture watermark option.
To insert a picture watermark in Microsoft Word, follow these simple steps:
- Open the Word document in which you want to add the watermark.
- Click on the Design tab from the ribbon at the top of the screen. If you are using Office 2010 or an earlier version, use the Page Layout tab.
- In the insert watermark dialog, click the Picture option.
- Choose Custom Watermark from the drop-down menu that appears.
- In the Printed Watermark dialog box, select the Picture Watermark radio button option.
- Click on Select Picture and choose the image that you want to use as a watermark. This can be a company logo or any desired image.
- After selecting the image, click on Insert to set it as your watermark.
6. How to Customize an Image Watermark in Word
Once you have inserted a picture watermark, you can modify its appearance to better fit your document. Here are a few customization options:
- Size: To change the size of your watermark image, go back to the Printed Watermark dialog box and adjust the Scale option. You can choose from predefined percentages or select Auto for the best fit.
- Opacity: To change the transparency of your watermark image, adjust the Washout checkbox in the Printed Watermark dialog box. When checked, the image will appear fainter so that the document’s text remains easily readable.
- Position: To change the position of your watermark image, you can use the Horizontal and Vertical options in the Printed Watermark dialog box. Adjusting these settings will allow you to fine-tune the placement of your watermark on the page.
Use these instructions to effectively create and customize picture watermarks in your Microsoft Word documents.
But whether you want to insert a preset watermark or a custom watermark, Microsoft Word allows you to protect your content and make it easily identifiable as belonging to your company or brand.
7. How to Remove Watermark from a Word Document

There might be instances where you need to remove a watermark from your document entirely.
To remove a watermark:
- Go to the Design tab in the Word toolbar. If you are using Office 2010 or an earlier version, use the Page Layout tab.
- Click on Watermark in the Page Background group.
- Select Remove Watermark from the dropdown menu.
Final Thoughts

Adding a watermark to your Word documents is a simple yet impactful way to enhance their visual appeal and protect your valuable content.
Whether you’re looking to brand your documents, indicate their status, or deter unauthorized use, Word’s watermark feature has got you covered.
By following the step-by-step guide we’ve provided, you can now confidently and creatively customize your documents with watermarks that suit your needs.
So go ahead, give it a try! With just a few clicks, you can transform your documents into well-designed, informative, and safeguarded pieces of work.
If you’d like to learn more about how Microsoft’s products are transforming the workforce, check out the video below:
Frequently Asked Questions

How can I apply a watermark in Word 2016?
In Word 2016, click on the Design tab, then select Watermark. Choose a pre-configured watermark. To add a custom watermark, click Watermark > Custom Watermark > Picture watermark or Text watermark, and make your desired adjustments.
How can I insert a watermark in Word Online?
Unfortunately, the Word Online application does not support the full range of watermark features. However, you can add a watermark in the Word desktop application and then continue editing the document in Word Online.
How can I add a watermark to a single page in Word?
To insert a watermark on only one page, click where you want the watermark to appear, and then select Design > Watermark.

Right-click on the desired watermark and choose Insert at Current Document Position. The watermark will appear as a text box on the selected page.
How can I edit an existing watermark in a Word document?
To edit a watermark, go to the Design tab and click Watermark. Choose Custom Watermark to access the watermark settings.
Here, you can modify the text, font, size, or transparency. To edit an image watermark, click on Picture watermark and make the necessary adjustments.
Is there a shortcut for inserting a watermark in Word?
There’s no direct keyboard shortcut to insert a watermark in Word. However, you can quickly access the watermark options by pressing Alt + G then W. This will open the watermark menu where you can choose a pre-defined or custom watermark.


