
As you work on your Excel sheets, have you ever wondered “Does Excel have a spell-check feature?”. If so, you’re in luck!
The answer is yes, Excel does have a built-in spell checker, here’s how to access it:
Click on the ‘Review’ tab in the ribbon at the top of Excel. Within this tab, locate and click on the ‘Spelling’ button. This will start the spell-checking process, scanning your document for any potential errors.
Alternatively, use the keyboard shortcut F7. Simply press F7 on your numeric keypad (or numerical section of your QWERTY keyboard) to initiate the spell check process instantly.
It does not provide real-time spelling correction like Microsoft Word, but you can still manually check the spelling of your content at any point.

In this article, we will explore the spellcheck tool in Excel, how to use it effectively, its limitations, and the best practices to follow while employing it in your work.
Let’s get ppellchecking!
Understanding Excel’s Spell Check Feature

In Excel, maintaining accuracy in your worksheets is crucial, especially in terms of spelling and grammar. Thankfully, Excel offers a robust spelling and grammar checker that thoroughly scans your data.
Let’s get to know the spell-check dialogue box.
The Spell-check Dialogue Box
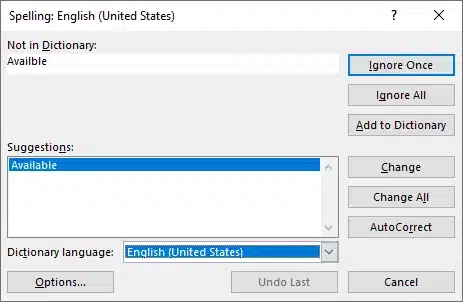
Once you’ve activated the spell-check tool, it will start checking all the text in your active worksheet.
Also, It will highlight any words that it believes to be misspelled and suggest possible corrections. If a word is not in Excel’s dictionary, you can choose to add it to your dictionary for future use.

Furthermore, the spell-check tool also allows you to customize the language of your dictionary and ignore certain words that you know are spelled correctly but are flagged as misspelled. For example, if you have a proper noun like “Google” that is flagged as misspelled, you can choose to ignore it so that it is not flagged in the future.
In addition to checking individual cells, you can also check entire ranges of cells or even entire worksheets by selecting them before activating the spell-check tool. This can be especially helpful if you’re working with a large amount of data.
Moving on, let’s discover how to implement the spellcheck tool.
How to Use Excel Spell Check
Excel has a built-in spell check feature to help you identify and correct spelling errors in your worksheets and workbooks.
Spell Checking a Worksheet
To spell-check a single worksheet, follow these steps:
Open the worksheet you want to check for spelling errors.
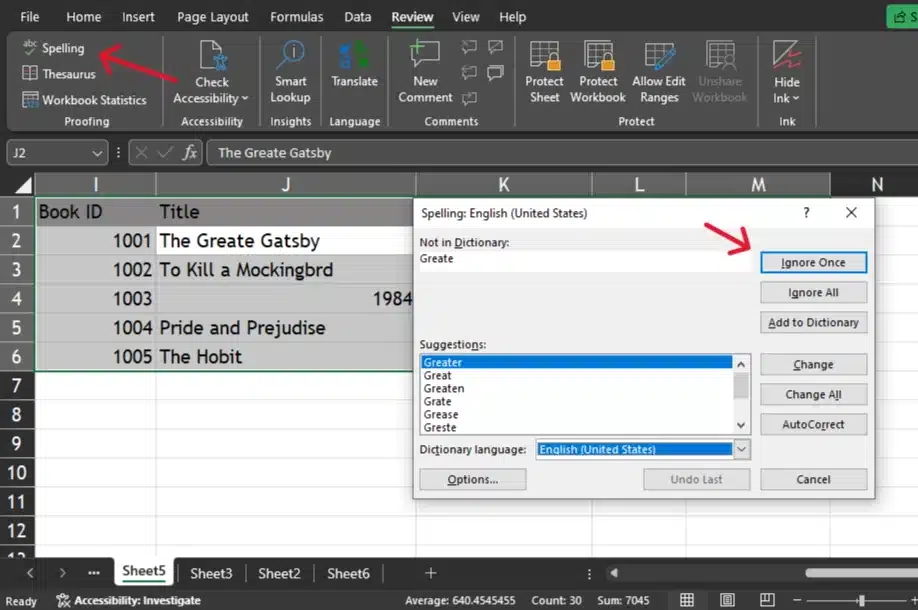
Click Spelling in the Proofing group. Alternatively, you can use the shortcut key F7 to initiate the spell check.
Excel will open the Spell Check dialogue box and start checking the spelling in the worksheet from the currently selected cell. If you want to spell-check the entire worksheet, select a single cell before starting the spell-check.
When Excel finds potential spelling errors, it will display suggestions in the dialogue box. You can choose to Ignore, Ignore All occurrences, or Change the misspelled word to the suggested correction.
Continue through the dialogue box until the spell check is complete.
Keep in mind the Review tab, Spell Check dialogue box, and F7 shortcut key to easily access and use this helpful feature.
Next up, let’s check out the Autocorrect feature in Excel.
Understanding The Autocorrect Feature in Excel
Using Autocorrect
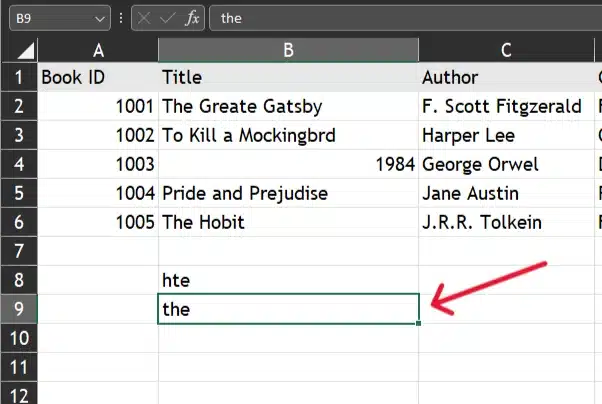
Autocorrect in Excel is a handy feature that automatically corrects common typing errors and capitalizes the first letter of sentences. To use Autocorrect, simply start typing in a cell, and Excel will automatically apply corrections as you type.
For example, if you accidentally type “hte” instead of “the”, Autocorrect will promptly fix it for you.
Now, let’s explore how to personalize your autocorrect settings.
Open the Proofing Settings
To make the most of the Autocorrect feature, you can customize its settings according to your preferences.
To access Autocorrect options, follow these steps:
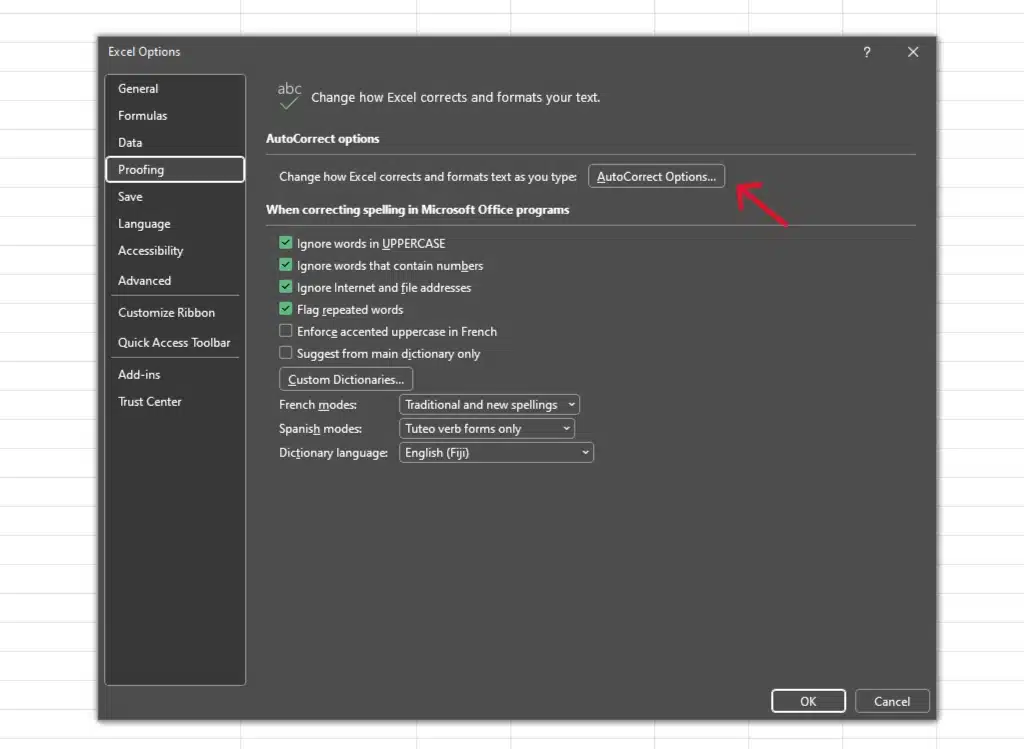
Click on the File tab and then click on Options.
In the Options dialog box, select Proofing.
Click on the AutoCorrect Options button.
Let’s move on to adjusting the autocorrect settings to suit your needs.
Select Custom Autocorrect Options
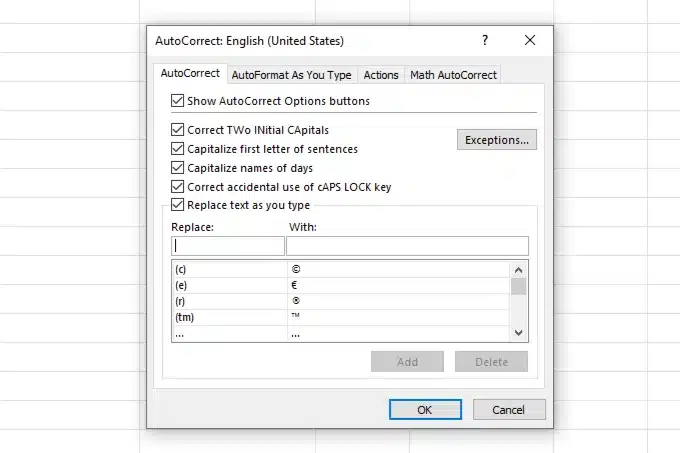
In the Autocorrect dialog box, you will find several options:
Capitalize the first letter of sentences: When enabled, Excel will automatically capitalize the first letter of every sentence.
Correct Two Initial Capitals: This option fixes instances where you may accidentally type two initial uppercase letters in a word.
Replace text as you type: This option allows Excel to replace specific text with predefined entries from the Autocorrect list.
What if you want to add a word to the autocorrect list? Read on below.
Add a word to the Autocorrect list
To add a word to the autocorrect list, follow these steps.
Open the Autocorrect options on your device or application.
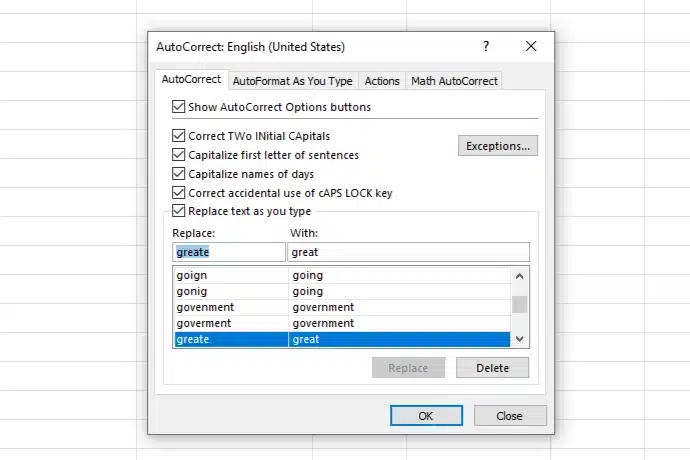
Locate the “Replace” box and type in the incorrect word that you often mistype.
Move to the “With” box and enter the correct version of the word that should replace it.
Click the “Add” button to save the new Autocorrect entry.
If you need to edit or remove a word from the Autocorrect list, find and select the word from the existing list.
To delete the entry, click the “Delete” button. If you’re editing, make the changes in the appropriate boxes and click “Add” to update.
By customizing the Autocorrect options, you can enhance your productivity and minimize the risk of typing errors while working in Excel.
Next up, we’ll delve into strategies for handling typos in Excel.
Understanding Special Cases in Excel Spell Check

Excel’s spell-check functionality is a powerful tool for maintaining accurate spelling within your worksheets, but it may face challenges with industry-specific terminology, formulas, or proper nouns. Let’s examine these special cases in more detail.

Special Cases Using Spell Check:
Numbers: Excel’s spell check skips cells with only numbers but checks cells with text and numbers.
Repeated Words: It doesn’t identify repeated words within cells; manual checking is required.
Formula Bar: For specific text spell checking, select the text in the formula bar.
Formulas: Cells with formulas are not checked, except for text within quotation marks.
VBA Code: VBA code is not covered by Excel’s spell checker; use a separate editor for code review.
Addresses: Excel ignores internet and file addresses during a spell check. It’s a helpful feature, preventing unnecessary stops during your review of content that would rarely require correction.
By confidently navigating these special cases, you’ll improve the clarity and professionalism of your Excel-based projects.
And with that, we reach our final observations.
Final Thoughts

In essence, while Excel’s spell check might not highlight typos as quickly as Word, it’s a valuable tool to guarantee error-free spreadsheets.
Accessible through the ‘Review’ tab or pressing F7, it enables users to manually comb through their data – whether it’s a single cell, a worksheet, or an entire workbook.
Excel’s spell checker catches common errors and is adjustable, allowing users to add words to the dictionary and tweak Autocorrect settings. Though it won’t identify errors in formulas or repeated words in cells, regularly using this feature will significantly reduce spelling mistakes.
In summary, Excel’s spell check is essential for maintaining the accuracy of your work. Utilize it prudently, and your spreadsheets will showcase not only precise data but also an attentiveness to detail in every aspect.
Good luck with your spellchecking!
Are you looking for more great content on Data Analysis and Excel? Check out the Enterprise DNA YouTube channel:
Frequently Asked Questions
How do I enable auto spell check in Excel?
Excel does not offer an automatic spell-check option to highlight misspelled words like MS Word. To manually run spell check, select the cells you want to check (Ctrl+A for all the cells), go to the Review tab on the ribbon, and click the Spelling button to open the spelling dialog box.
Can Excel underline misspelled words automatically?
Excel cannot automatically highlight misspelled words with a red underline. To find wrongly spelled words, you need to run the spell check manually using the spelling checker in the Review tab.
How does Excel’s spell check compare to Word’s?
Unlike Word, which has a real-time grammar-checking feature and underlines grammatical errors, Excel requires you to manually initiate a spell check. Excel does not automatically highlight errors as you type, and its grammar-checking capabilities are more limited than those in Word.
Will Excel’s spell check ignore internet and file addresses?
By default settings, Excel’s spell checker may ignore words that appear to be internet addresses or file paths. If it doesn’t, you can click ‘Ignore’ when such suggestions come up during the check.
What happens if I click ‘Change’ or ‘Autocorrect’ in Excel’s spell check?
When the spelling dialog box offers a correction, clicking ‘Change’ will replace the wrongly spelled word with the selected suggestion. Clicking ‘Autocorrect’ will not only correct that instance but also automatically correct it in the future.
How can I make the most of Excel’s spell-check feature?
To ensure the accuracy of your data, regularly perform spell check words, add frequently used technical jargon to your custom dictionary, and review any changes closely, as Excel can sometimes suggest incorrect changes for specialized terms.


