It’s no secret that data is the new gold, and for businesses looking for ways to tap into its immense potential, Power BI gateway is an excellent solution.
Power BI gateway is a component of Microsoft Power BI that allows you to securely connect and refresh data from on-premises data sources in Power BI reports and dashboards. It acts as a bridge between the Power BI service in the cloud and your on-premises data sources, enabling data transfer and refreshing in a secure and controlled manner.
This article will dive into the essential aspects of Power BI gateway and cover its functionalities, installation requirements, and best practices.
Whether you are an IT professional, a business analyst, or a data enthusiast, this Power BI gateway guide will enhance your understanding of its role in facilitating real-time data analytics and business intelligence.
Let’s get started!
2 Types of Power BI Gateway
There are two main types of Power BI Gateways: On-Premises Data Gateway and Personal Mode.
We will cover their differences, use cases, and benefits to help you determine which one is right for your needs.
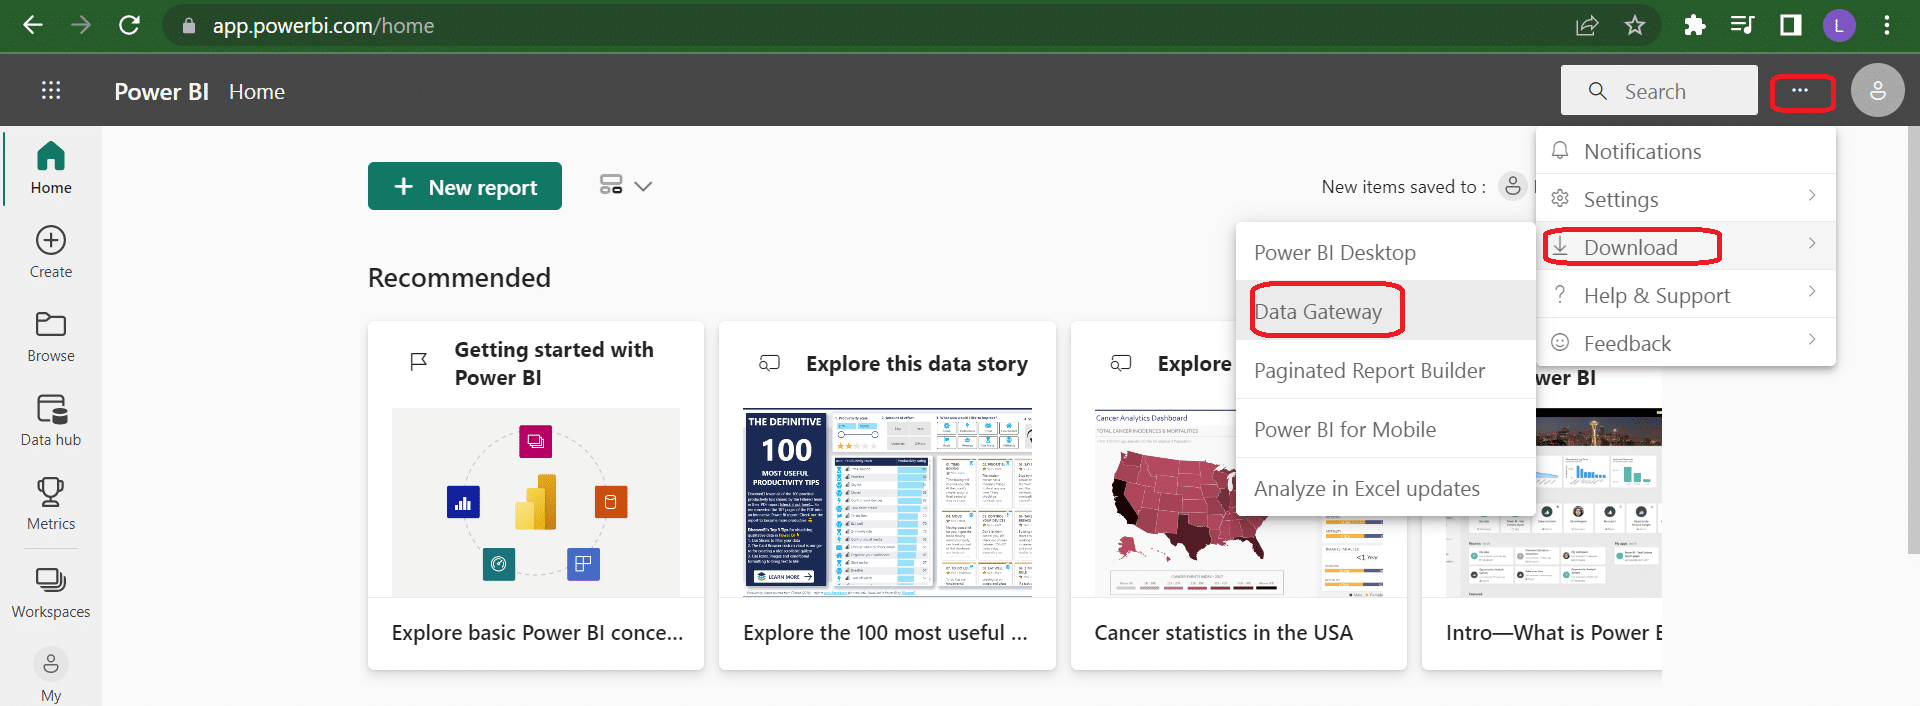
1. On-Premises Data Gateway
The On-Premises Data Gateway allows multiple users to connect to various on-premises data sources. It is best suited for enterprise operations, where different teams need access to a range of data sources.
Some key features of this gateway include:
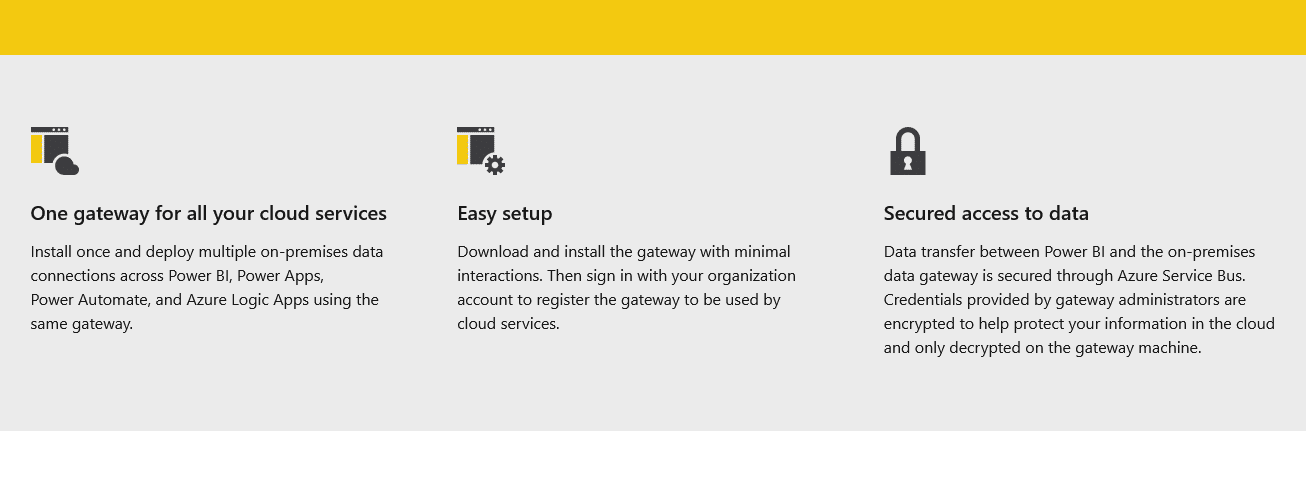
It can be used with Power BI, Power Apps, Power Automate, and Azure Logic Apps.
It requires only a single gateway installation.
To set up the on-premises data gateway, follow these steps:
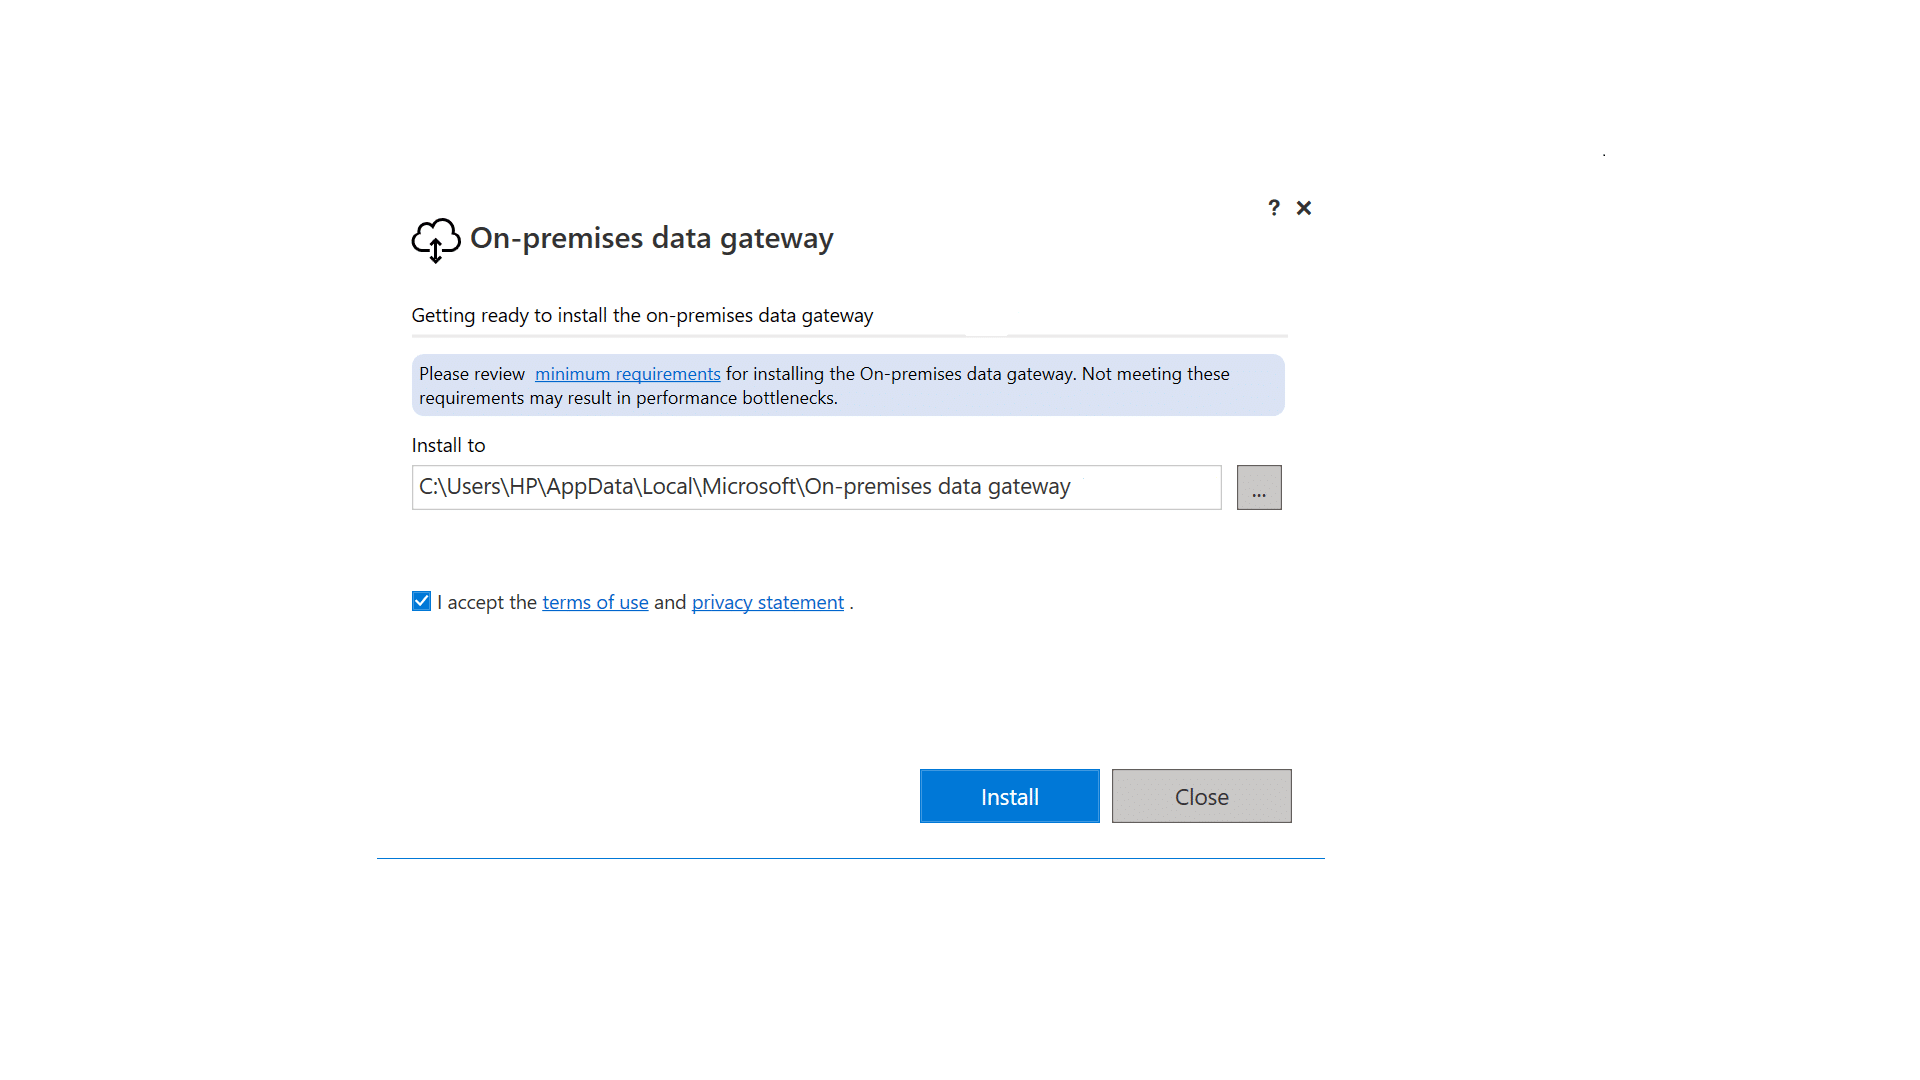
Download and install the gateway software on your local machine.
Sign in with your organization account to register the gateway.
Configure the gateway settings in Power BI Service to connect to your on-premises data sources.
2. Personal Mode
Personal Mode is a Power BI Gateway designed mainly for single-user scenarios. It focuses on providing an individual with access to on-premises data sources.
Some key points of Personal Mode include:
It is free to use and does not require a paid license.
It caters to individual needs rather than team environments.
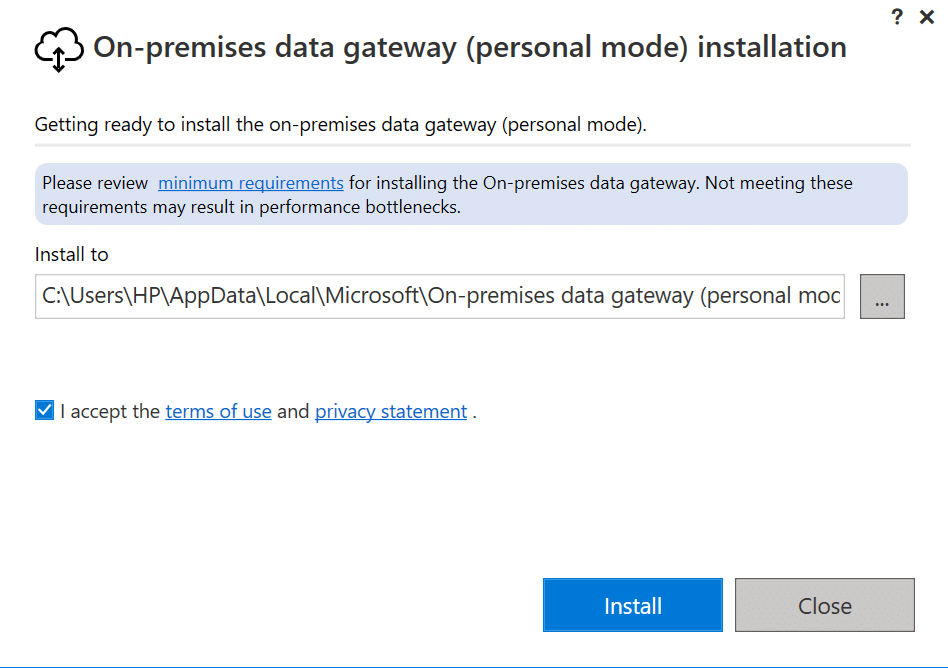
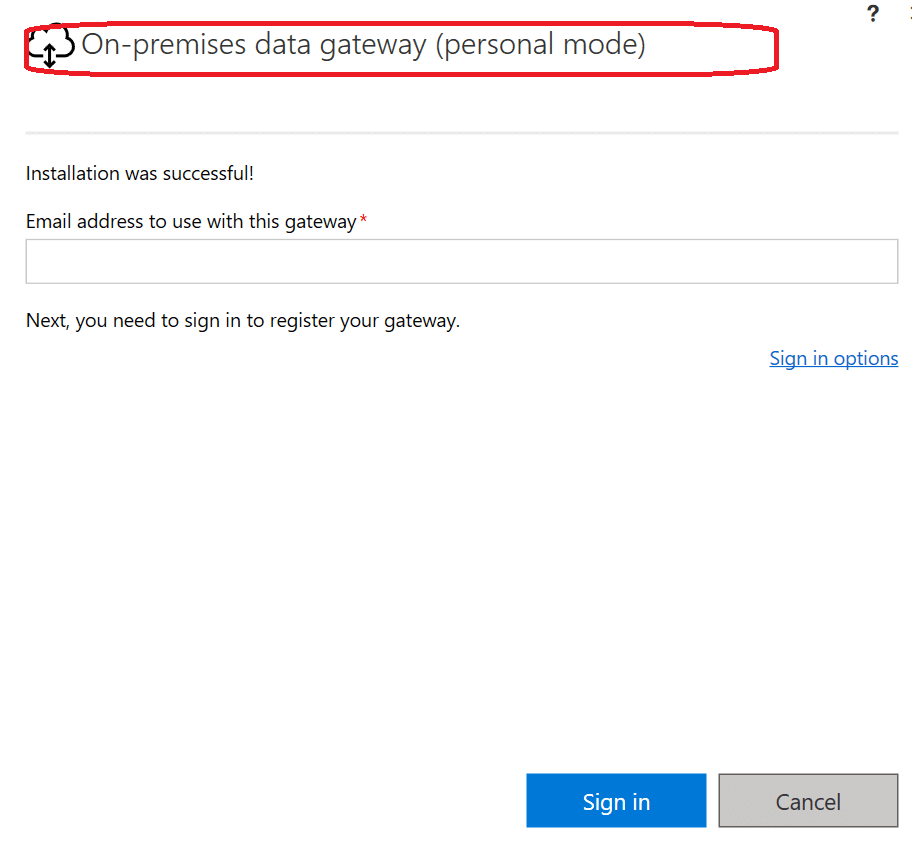
Setting up Personal Mode involves the following steps:
Download and install the Personal Mode version of the gateway software.
Sign in with your personal credentials to register the gateway.
Configure the gateway settings to access your desired on-premises data sources.
When choosing between on-premises data gateway and personal mode, consider your specific use case and the number of users who require access to on-premises data.
Enterprises with multiple teams and data sources should opt for the on-premises data gateway, while individuals with simpler needs may find Personal Mode sufficient.
Now that we’ve covered the two types of Power BI Gateway installed, we’ll go over how to set it up in the next section.
How to Set Up Power BI Gateway
To use Power BI to access on-premises data sources, you must first configure a Power BI gateway.
We’ll walk you through how to set up Power BI gateway so you can start using Power BI to access on-premises data sources:
1. Downloading and Installing
Before you begin the installation process, ensure your machine meets the minimum requirements by having .NET Framework 7.4.2 or later installed and running on Windows Server 2012 R2 or higher.
To download and install the Power BI Gateway:
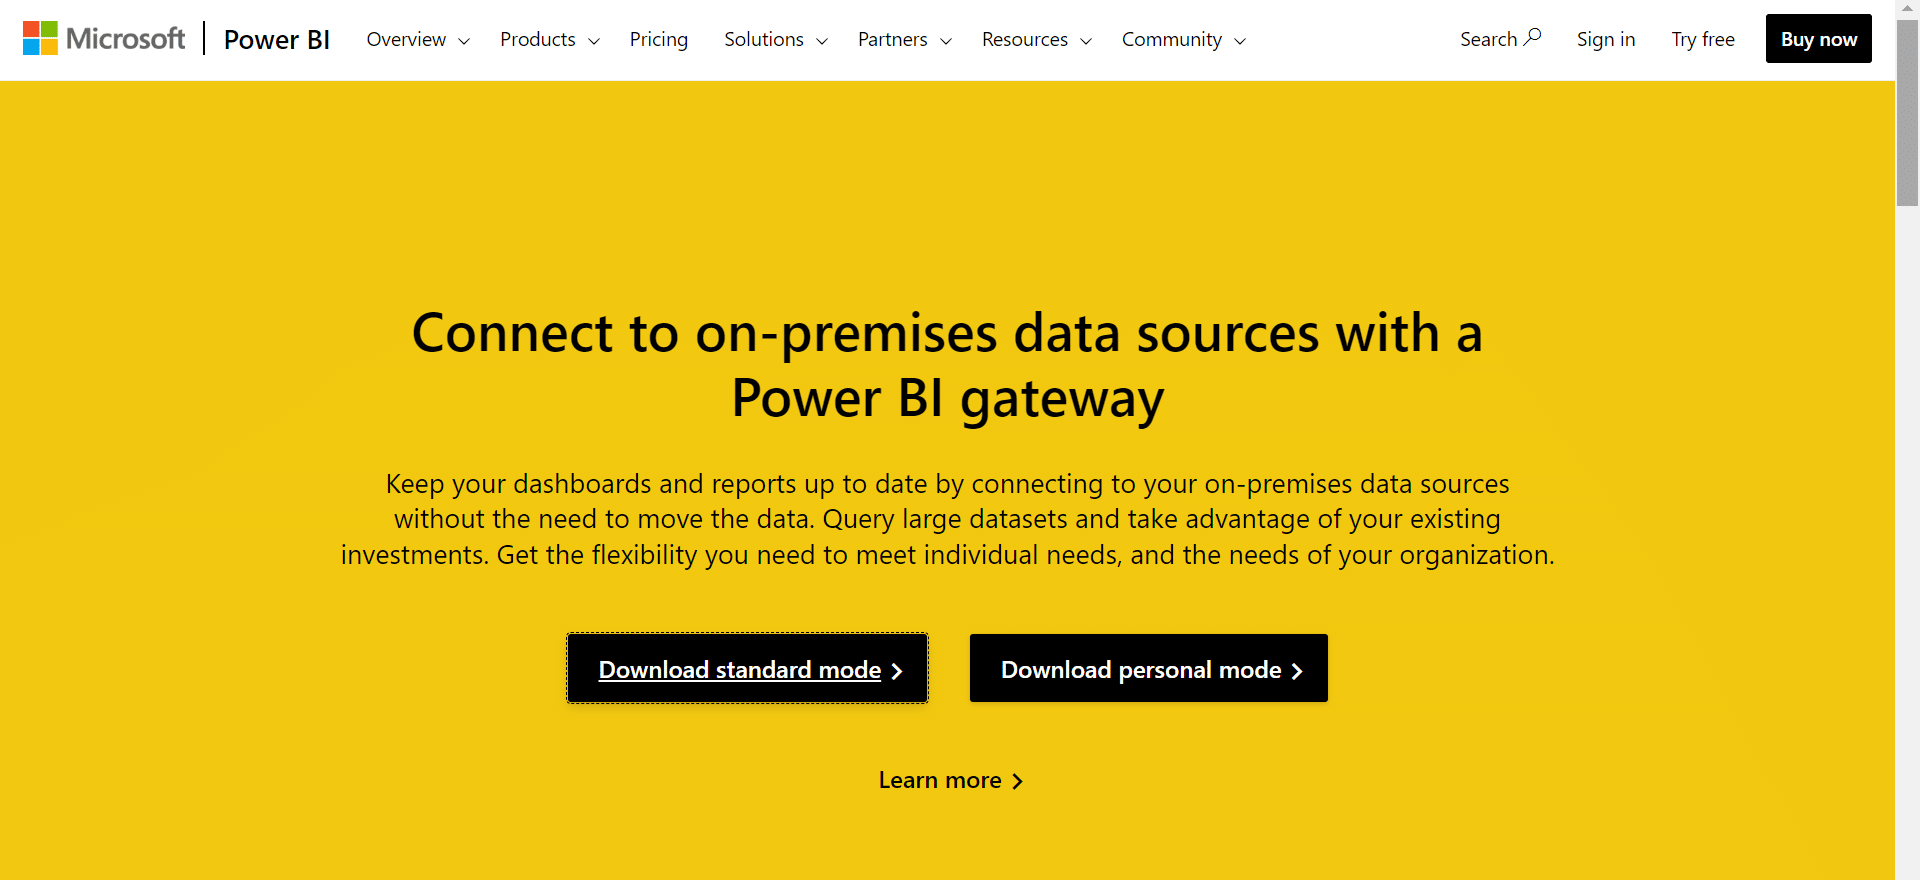
Visit the Microsoft Power BI Gateway page and download the installer.
Run the installer and follow the prompts.
Choose the default installation path, accept the terms of use, and click “Install.”
Once the installation is complete, sign in with your Office 365 organization account to register the gateway.
2. Configuration
After the installation, you need to configure your gateway by following the steps below:
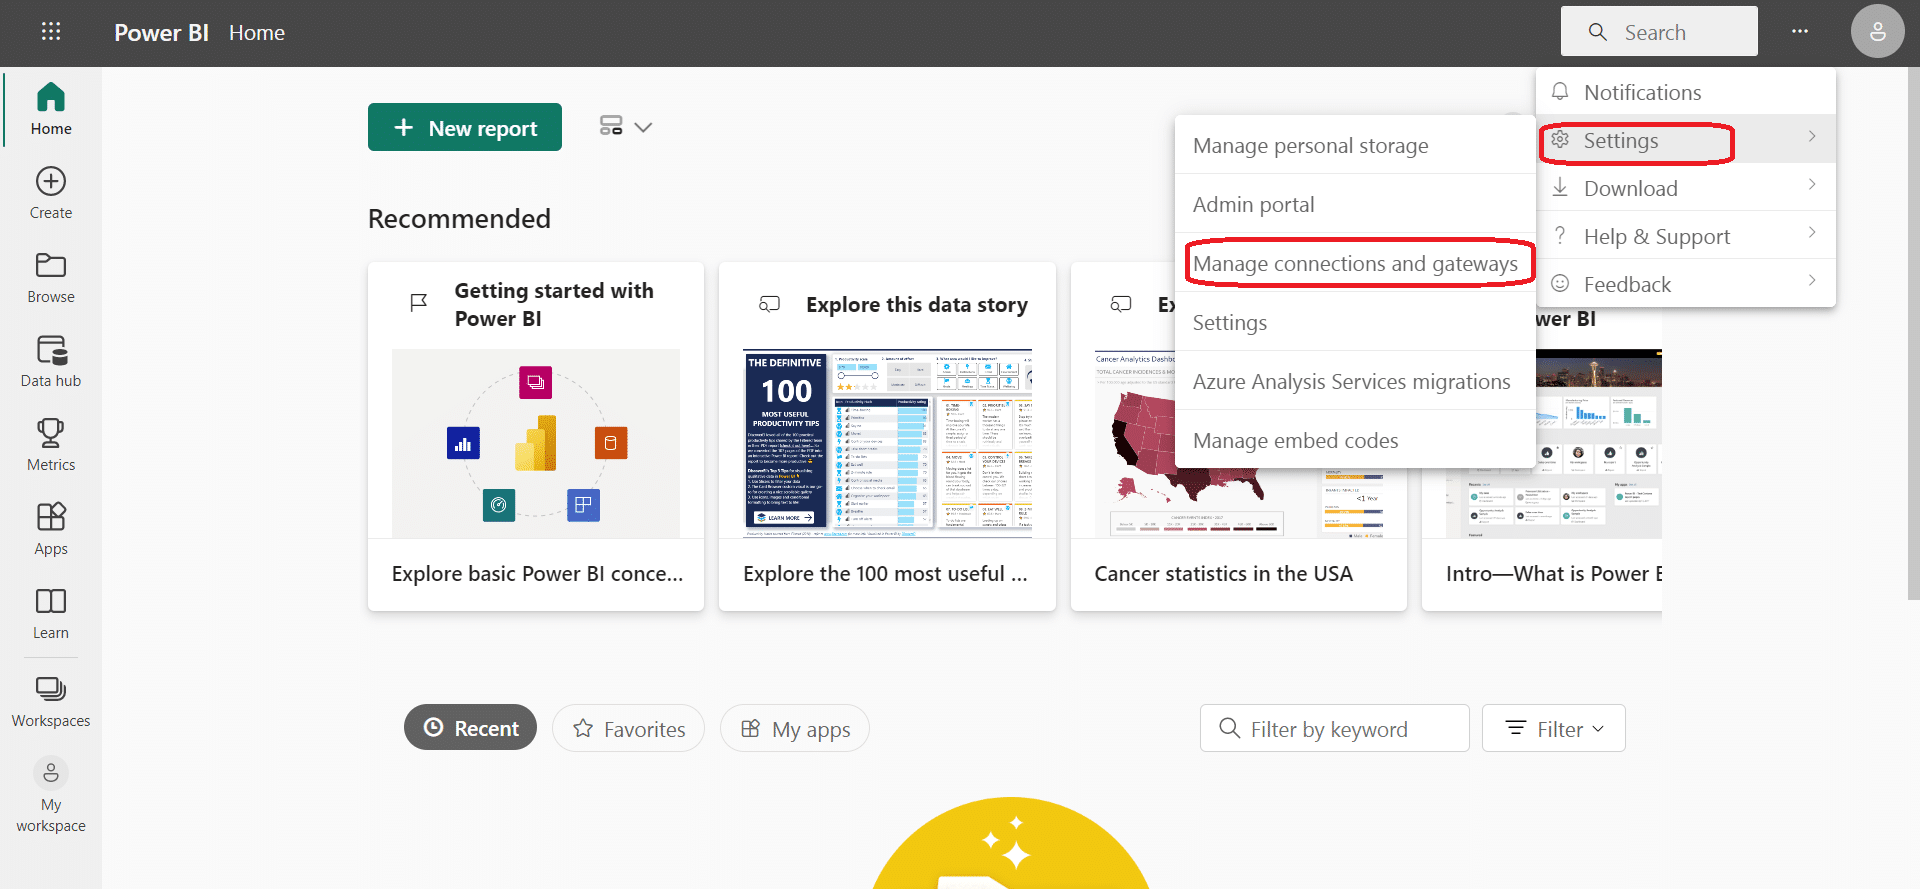
Open Power BI and navigate to “Settings.”
Click on “Manage Connections and Gateways.”
Select the gateway you’ve just installed and configure the data source settings based on the specific data source (SQL Server, Files, Folders, etc.) you want to connect to.
3. Proxy Settings
If your organization uses a proxy server, the Power BI Gateway may need additional configuration to function correctly by following the steps below.
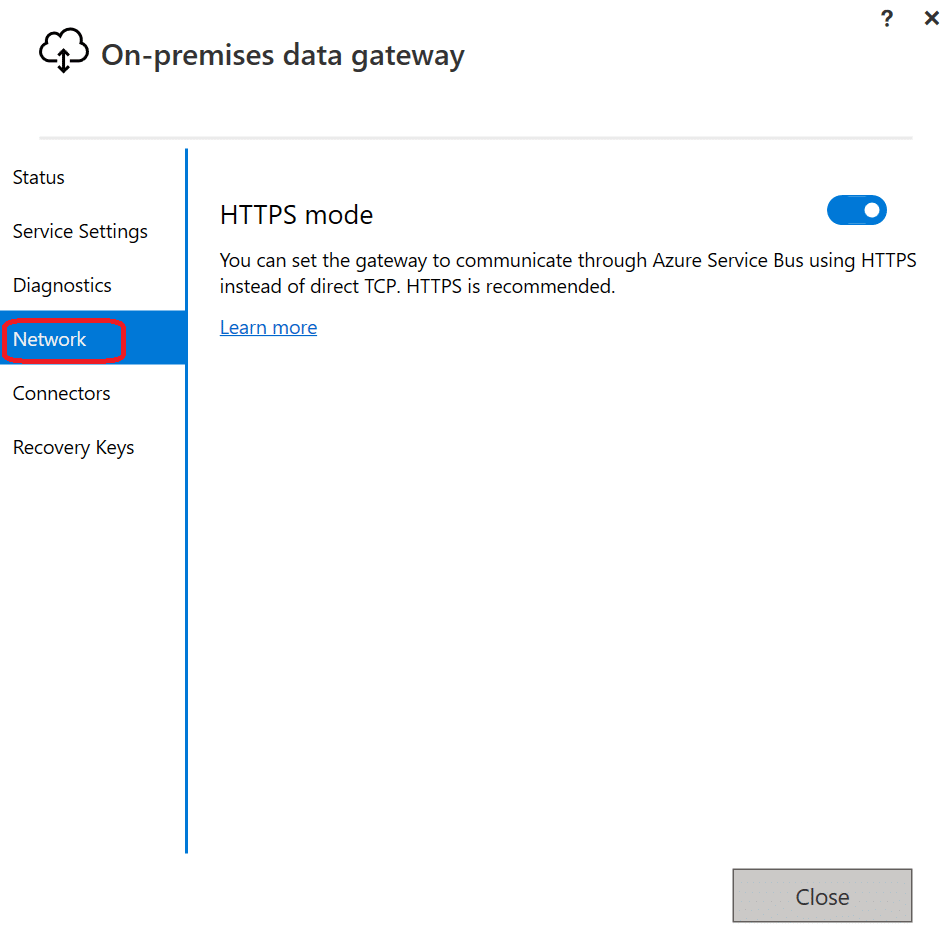
Open the gateway configuration application.
Navigate to the “Network” section.
Configure the required proxy settings (address, port, authentication).
Save the updates to apply the proxy settings.
Note that specific configurations may vary depending on your organization’s security settings and policies. For more information, consult your organization’s network administrator.
Since we have explained how to set up the Power BI gateway, the next section will go over how to manage data with the Power BI gateway.
How to Manage Data with Power BI Gateway
Managing data with Power BI Gateway involves configuring and maintaining data sources, refreshing data, and monitoring data connectivity.
Here are the steps to manage data effectively with Power BI Gateway:
1. Data Sources
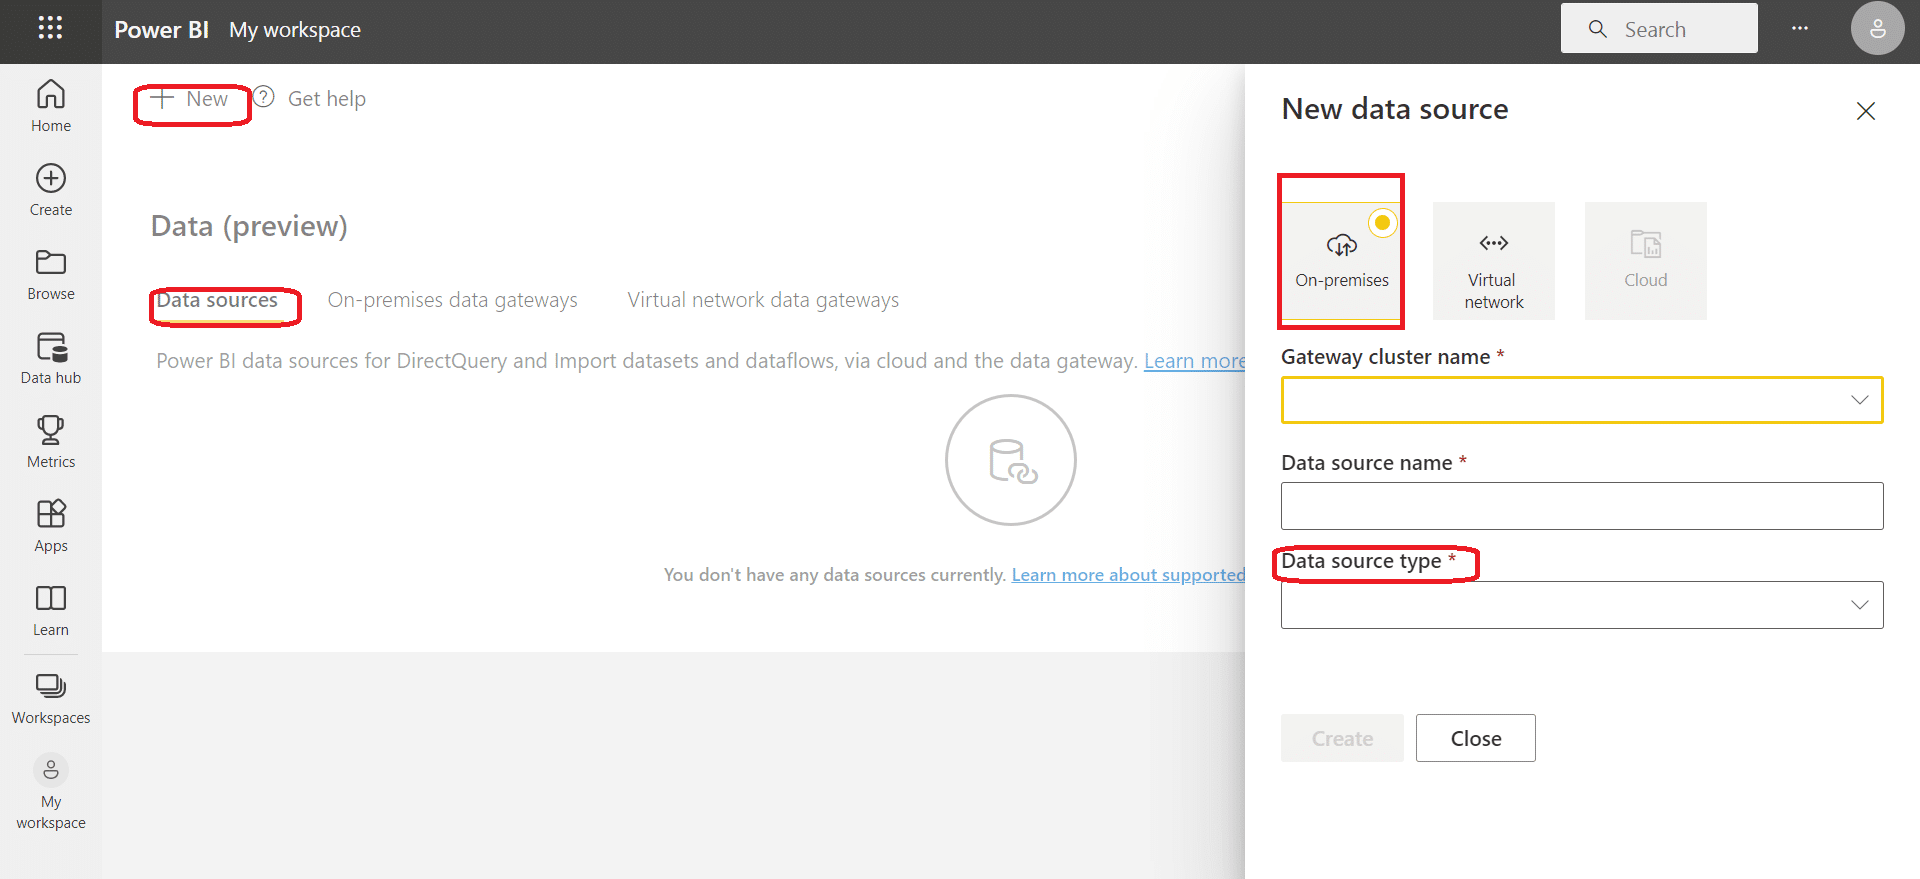
With Power BI Gateway, you can manage and access data from your on-premises data sources such as SQL Server, Oracle, Teradata, and more.
You can easily access and analyze your data by configuring and connecting these data sources to cloud services like Power BI, Power Apps, Power Automate, and Azure Logic Apps.
Just install the gateway once and register it with your organization account to enable secured access to your data.
2. Datasets
Datasets are the result of your data source connections in Power BI. You can use two main modes to work with datasets: DirectQuery and Import.
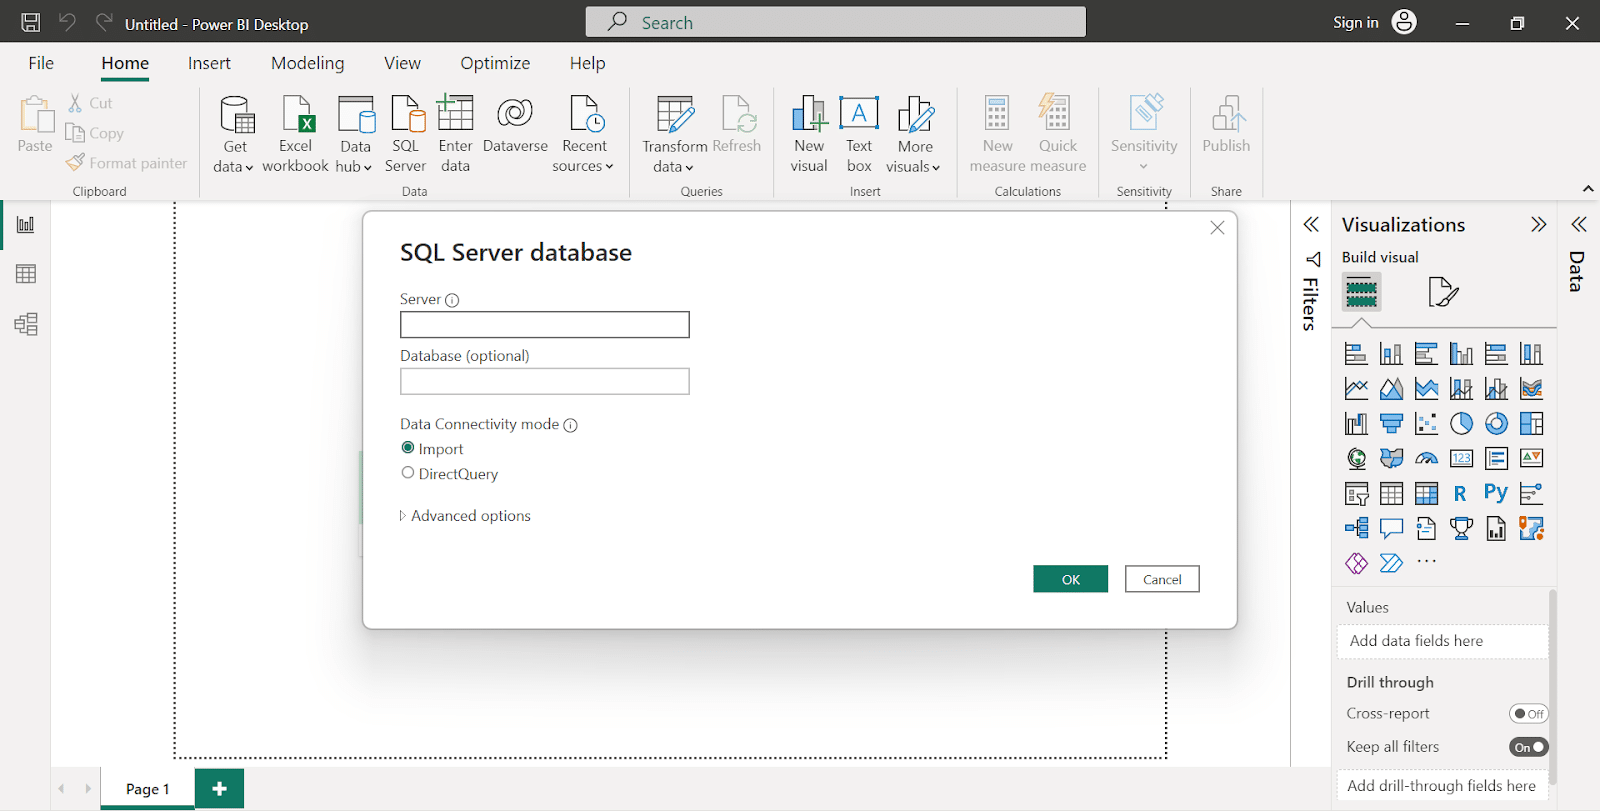
DirectQuery allows you to store metadata in Power BI and fetch data from your data source in real time. This is useful when you need up-to-date data for your reports and dashboards.
Import mode lets you copy data from your sources into Power BI, which is then stored and optimized for fast query performance. This is ideal when you don’t require real-time access to your data.
When working with datasets that connect to on-premises data sources, you’ll need to use an Enterprise Gateway to refresh and update the data.
3. Dataflows
Dataflows are a way to collect, clean, and transform data from various sources before loading it into Power BI datasets.
They’re designed to simplify the process of preparing and integrating your data. When using dataflows with on-premises data sources, an Enterprise Gateway is required to bridge your on-premises data and the cloud services.
4. Scheduled Refresh
Power BI provides a scheduled refresh feature that allows you to keep your data up to date at regular intervals.
This is particularly useful when you need to maintain the accuracy of Power BI reports and dashboards. When working with on-premises data sources, you’ll need to set up a gateway to enable the scheduled refresh.
Only one gateway can be used per report, and if a dashboard is based on multiple reports, it’s possible to have a dedicated gateway for each contributing report.
By leveraging the capabilities of Power BI Gateway, you can efficiently manage your data resources and ensure seamless connectivity between on-premises data sources and cloud services.
The next section will review the system requirements and recommendations you should know when using Power BI gateway.
System Requirements and Recommendations for Power BI Gateway

To set up and run the Power BI Gateway effectively, you need to know the minimum requirements and specific recommendations for ideal performance.
1. Minimum Requirements
Meeting the minimum requirements for Power BI gateway is important to avoid performance bottlenecks. Below are some important considerations for the minimum requirements:
Operating System: A 64-bit version of Windows Server 2012 R2 or later is mandatory for the proper functioning of the gateway. This is important to ensure compatibility with various features available in Power BI.
CPU: An 8-core CPU is the minimum requirement to handle the processing demands of the gateway. This configuration helps avoid potential bottlenecks in data flow and ensures smooth operation.
Memory: 8 GB of memory or RAM is essential for your server to efficiently handle the workloads the Power BI gateway will process.
Solid-State Drive (SSD): To support spooling and deliver better performance, it is advised to equip your server with SSD storage. This improves read/write speeds and overall efficiency.
Disk Space: Ensure you have sufficient disk space to accommodate the needs of your data and gateway operations. Depending on your data warehouse size and other factors, disk space requirements may vary.
Internet: A reliable and fast internet connection is crucial, as the gateway facilitates data connections between on-premises data sources and Microsoft’s cloud services. You should have a wired connection rather than relying on a wireless network.
TLS 1.2: To ensure secure data transfers, the gateway requires TLS 1.2. Make sure that your server supports this protocol to avoid any security issues.
2. Recommendations
You can ensure that your Power BI Gateway is set up and running effectively to provide reliable and timely data access to your cloud services by following the recommendations below:
Automatic Updates: Regularly update your Power BI gateway to the latest version. This ensures you receive new features, improvements, and security patches.
.NET Framework: Verify that the appropriate .NET Framework version is installed based on your operating system. This is essential for the proper functioning of the gateway.
With these requirements and recommendations in mind, you can ensure the optimal setup and performance of your Power BI Gateway.
Next, we will look at managing authentication and authorization when working with Power BI Gateway.
How to Manage Authentication and Authorization When Working with Power BI Gateway

When working with Power BI Gateway, it is crucial to understand how to manage authentication and authorization for various data sources.
Here, we will explore different authentication methods, including Windows Authentication, Active Directory, and single sign-on (SSO).
1. Windows Authentication
For on-premises data sources like SQL Server, you can use Windows Authentication. In this method, the gateway leverages your Windows credentials to authenticate access to the data source.
To set it up, follow these steps:
In Power BI Gateway, navigate to the data source settings and select “Windows” as the authentication method.
Enter your Windows username and password to establish a connection to the on-premises data source.
It’s important to note that the gateway needs to be installed on a machine in the same domain as the SQL Server instance.
2. Active Directory
You can also use Azure Active Directory (Azure AD) to authenticate and manage access to on-premises and cloud data sources. When configuring access to a data source, follow these steps:
Choose “OAuth2” as the authentication method.
Enter the necessary Azure AD tenant and instance information.
Set the privacy level according to your organization’s requirements. This ensures proper data isolation between different users and reports.
By utilizing Azure AD, you can benefit from several features, including role-based access control, conditional access, and multi-factor authentication.
3. Single Sign-On
Implementing single sign-on (SSO) for your data sources provides a seamless user experience and enhanced security.
SSO enables users to access their data through Power BI Web or Power BI Mobile apps using their existing credentials.
Configure SSO for the data source: Queries will execute under the identity of the user interacting with Power BI.
For Azure AD-based authentication, configure Azure AD SSO on the on-premises data gateway. Queries will run under the Azure AD identity of whoever interacts with the Power BI report.
Remember to adjust the region settings for your gateway to match the location where your Azure AD tenant is provisioned.
Using these authentication and authorization techniques, you can effectively manage data access and security for your Power BI Gateway, enabling users to access relevant information securely while maintaining compliance with your organization’s policies.
The next section will review how to manage and monitor Power BI Gateway.
Managing and Monitoring the Power BI Gateway
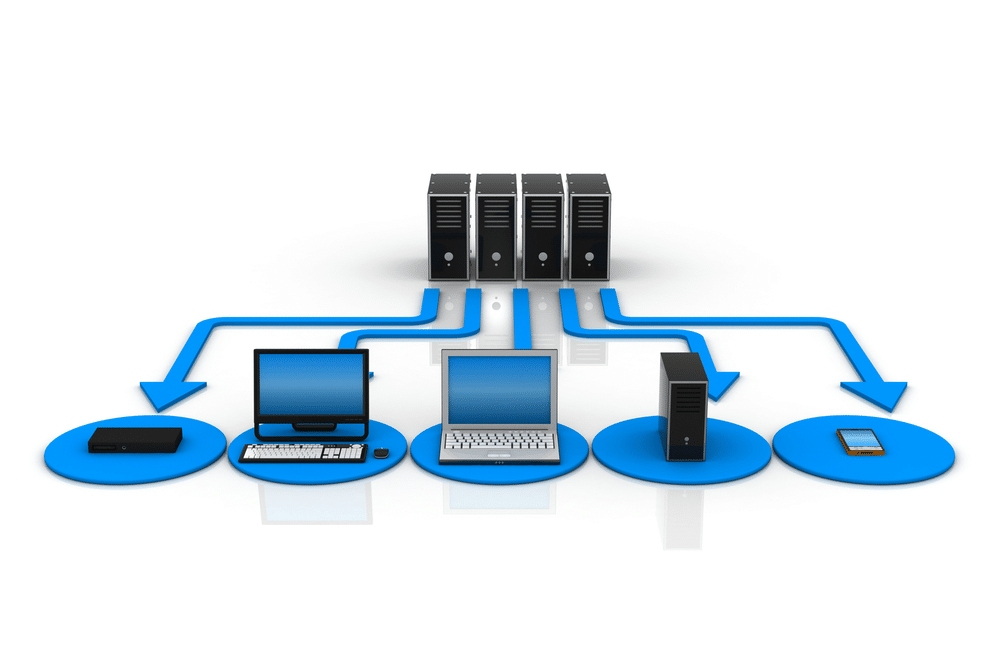
Managing and monitoring the Power BI Gateway is crucial to ensure its effective operation. Here are some key aspects to consider for managing and monitoring the Power BI Gateway:
1. Manage Gateways
You should be familiar with the Power Platform admin center to manage your on-premises data gateway effectively. After installing a gateway, you’ll have to manage it based on your requirements.
However, each service might integrate gateways differently, so the management options may vary depending on the service.
Remember that you’ll only see the “manage gateways” option once you’re an admin of at least one gateway. In the management dashboard, you can:
Add or remove gateway administrators
Configure gateway settings such as contact information, request distribution, and custom data connectors
Manage security roles and permissions through the “Manage Users” button
2. Troubleshooting
Monitoring the performance of your on-premises data gateway is important.
Instead of manually monitoring performance counters through the Windows Performance Monitor tool, Power BI offers additional query logging and a Gateway Performance PBI template file to visualize the results.
This can save you time and effort while monitoring your gateway’s health.
When troubleshooting issues, check the following items:
Verify the gateway software version and whether it’s up to date
Inspect the logs for errors or irregularities in data processing
Consult the Power BI community forum for solutions to common problems or insights from other users
3. High Availability
Ensuring high availability for your datasets and reports in Power BI is a top priority. A well-architected on-premises data gateway setup should be designed with failover and redundancy in mind.
To achieve high availability:
Cluster multiple gateway instances together: This can help balance workload and distribute requests evenly among the instances.
Monitor the health of each gateway instance: Use performance metrics and logging to keep a close eye on each instance’s performance, utilization, and any potential issues.
Regularly test your failover strategy: Make sure to test your failover process and have contingency plans in place to minimize downtime and data loss.
Ultimately, managing and monitoring your Power BI gateway with the right tools and strategies will help you maintain efficient and reliable access to your data while minimizing downtime and operational challenges.
As we progress to the next section, we will go over how to connect services in Power BI gateway.
Connecting to Cloud Services in Power BI Gateway

To connect to cloud services in Power BI Gateway, you can follow these general steps:
1. Power BI Desktop
When working with Power BI Desktop, you can connect to various cloud services such as Power Automate, Power Apps, and Azure Logic Apps.
This flexibility allows you to integrate data from multiple sources and mix on-premises and cloud data to create interactive dashboards.
Remember to install and configure the Power BI Gateway to facilitate these connections.
2. Power Automate
Power Automate is a cloud-based service for creating automated workflows between different applications and services.
To use Power Automate with Power BI, you need the gateway to connect your on-premises data sources. This enables you to retrieve and use on-premises data within Power Automate workflows.
Here’s how you can establish a connection:
Install the Power BI Gateway.
Sign in to Power Automate and create a new workflow.
Add a Power BI connector to your workflow.
Connect to your on-premises data source through the gateway.
3. Azure Logic Apps
Azure Logic Apps is a cloud service that provides a platform for creating and running serverless workflows.
Integrating Power BI with Azure Logic Apps allows you to build powerful data-driven applications and dashboards with on-premises and cloud data sources.
To connect Azure Logic Apps to your on-premises data using the gateway:
Install the Power BI Gateway.
Create a new Logic App in the Azure Portal.
Add a Power BI connector to your Logic App.
Configure the connector to use your on-premises data gateway.
4. Power Apps
Power Apps is a cloud-based service for building custom applications without writing any code.
With Power Apps, you can create apps that use data from various sources, including on-premises data, through the Power BI Gateway.
Follow these steps to connect Power Apps to your on-premises data:
Install the Power BI Gateway.
Sign in to Power Apps and create a new app.
Add a data connection to your app.
Select your on-premises data source and the gateway you installed.
By using the Power BI gateway, you can seamlessly connect your Power BI, Power Automate, Azure Logic Apps, and Power Apps to both on-premises and cloud data sources to build engaging and insightful dashboards and applications.
In the next section, we will discuss security and compliance when using Power BI gateway.
How to Improve Security and Compliance When Using Power BI Gateway

When using Power BI Gateway, ensuring the security and compliance of your data and reports is important.
Here are some best practices to improve security and compliance when using Power BI Gateway:
1. Encryption
One of the ways to ensure your data is protected when using the Power BI gateway is through encryption. Power BI uses encryption to secure data both at rest and in transit.
Data at rest – Power BI leverages Azure Storage Service Encryption to encrypt your data while it’s stored.
Data in transit – The gateway employs transport encryption using SSL/TLS protocols when transmitting data between on-premises and cloud environments.
By utilizing these encryption methods, your data remains secure and protected throughout its lifecycle.
2. Access Control
Another crucial aspect of Power BI Gateway security is access control. Power BI employs different mechanisms to manage access levels for the data gateway, ensuring that only authorized users can access crucial resources.
Role-based access control (RBAC) – RBAC allows you to define roles within your organization with specific permissions. The on-premises data gateway has various security roles that establish clear boundaries of responsibility and access within your organization.
Authentication – Power BI integrates with Azure Active Directory (AAD) to provide secure authentication services. AAD uses a token-based system that verifies user identity and allows users to access resources according to their roles and permissions.
These access control mechanisms help ensure that your data is accessible only to authorized users and help maintain data integrity within your organization.
Final Thoughts
In wrapping up, Power BI Gateway emerges as an indispensable tool in the realm of business intelligence and data analytics, particularly for organizations employing Microsoft’s suite of products.
It serves as a reliable and secure bridge between on-premises data sources and Power BI’s cloud services, ensuring real-time data availability and seamless data refresh.
Understanding its functionality, installation process, and best practices is integral to maximizing the potential of Power BI in any organization.
Whether it’s for interactive data visualization, generating insightful reports, or driving data-driven decisions, Power BI Gateway undoubtedly plays a pivotal role.
With Power BI Gateway, your data’s journey from local databases to cloud-based visualizations is a breeze. As we move forward, tools like this will only get more important. So, let’s keep digging into data and uncovering those golden nuggets of insight!
If you’d like to learn more about how Power BI works, you can watch the video below:


