If you’re part of a business that relies heavily on collaboration, chances are you’ve encountered SharePoint. It’s Microsoft’s gem that helps businesses organize, share, and access information from any device, anywhere.
Now, have you heard of ChatGPT? If not, you’re missing out! ChatGPT is an incredibly intelligent piece of technology brought to you by OpenAI. It’s a language model that can engage in conversation, answer questions, write essays (heck, it could even pen a best-selling novel if it wanted to), and a lot more.
The easiest no-code way to integrate ChatGPT into SharePoint is through Power Virtual Agents. Microsoft has enabled AI-based chatbots that harness the power of ChatGPT and large language models. Once you create a Power Virtual Agent, you can seamlessly embed it into your SharePoint site or app and gain direct access to ChatGPT.
Integrating ChatGPT into SharePoint is like a match made in digital heaven. You get to leverage the power of artificial intelligence to supercharge your SharePoint experience.
In this article, we’re going to guide you, step-by-step, on how to integrate ChatGPT into SharePoint and start reaping the benefits. So, buckle up, grab your favorite beverage, and let’s get started!
Understanding SharePoint and ChatGPT
Before we get into the integration part, let’s take a moment to understand what we’re dealing with here. It’s always a good idea to know your tools well, right?
SharePoint Online, part of Microsoft’s family, is a versatile platform that has become the go-to for many businesses when it comes to document management and collaboration.
With SharePoint, you can create websites to share with colleagues, partners, or customers. You can also use it to securely store, organize, share, and access information from almost any device. It’s like your digital filing cabinet, office messenger, and meeting room all rolled into one.
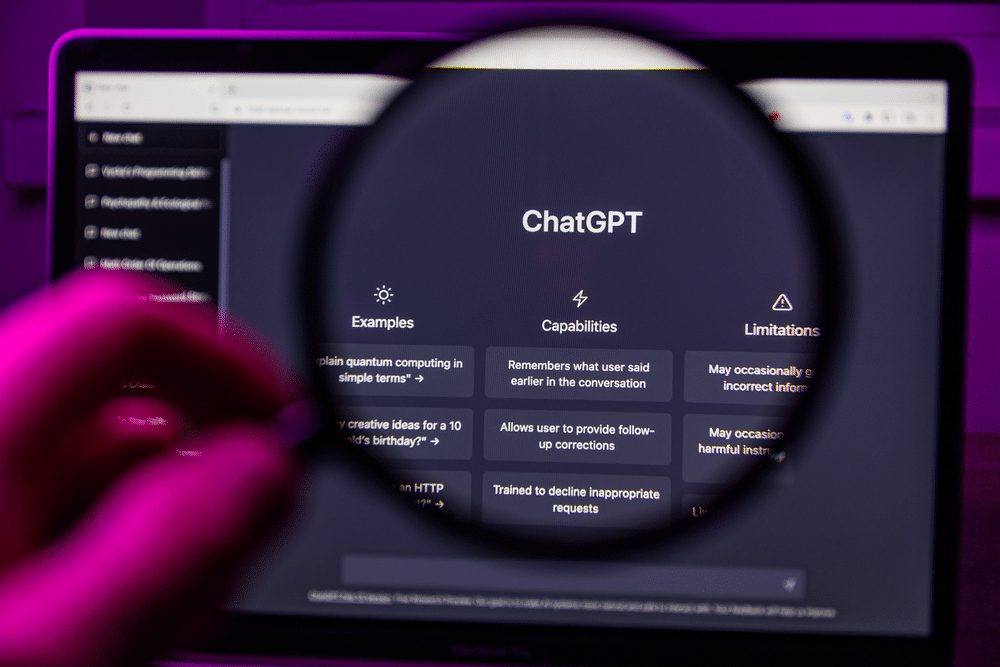
Next up, we have ChatGPT, the language wizard created by OpenAI. It’s designed to interact with humans in a natural, dynamic way.
Think of it as a super-intelligent chatbot that can understand context, answer queries, generate human-like text, and even crack a joke or two. From handling customer inquiries to generating creative content, ChatGPT can do it all!
So, why are we talking about SharePoint and ChatGPT together? Well, when you integrate ChatGPT into SharePoint, you’re basically turbocharging your SharePoint experience.
You get the organizing and collaborative capabilities of SharePoint coupled with the smart, dynamic interaction of ChatGPT. It’s like having an AI assistant at your disposal, ready to make your life easier at every turn.
There are a variety of ways to integrate ChatGPT into SharePoint. For example, you could use the ChatGPT API and integrate it into your SharePoint site or app; however, that’s a technical route that requires experience with handling API keys and some code.
For this guide, we’re going to solely focus on integrating ChatGPT into your SharePoint using Power Virtual Agents. This is a much easier route that’s available to everyone, regardless of your technical experience.
So, ready to bring these two powerhouses together?
Let’s go!
Step 1: Create a Power Virtual Agents Account
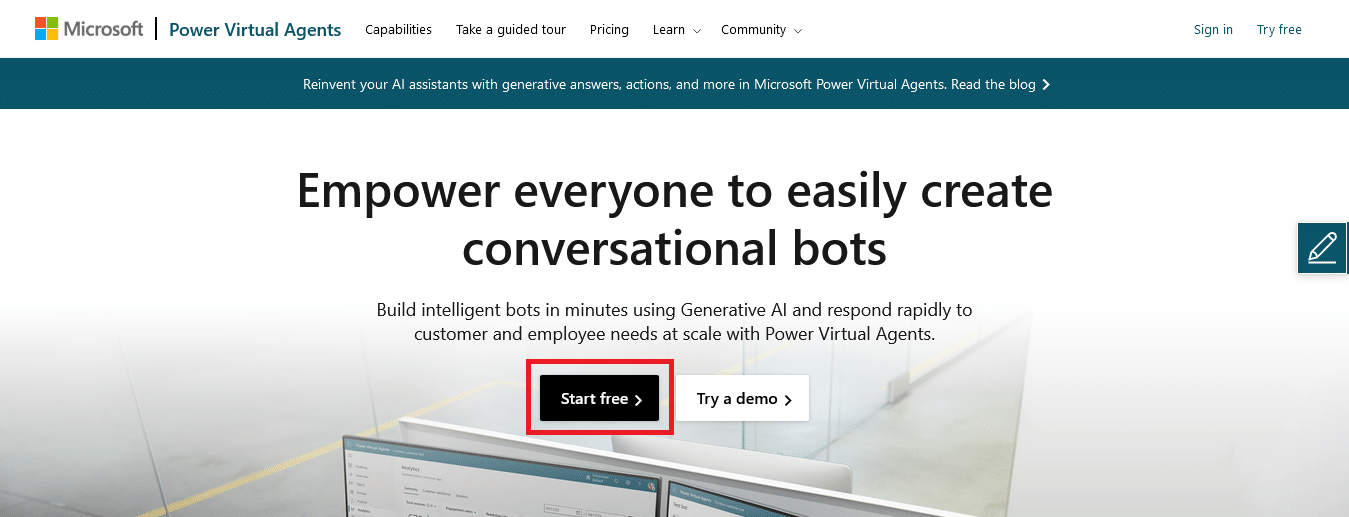
Power Virtual Agents is Microsoft’s bot-as-a-service offering that lets you build and deploy intelligent, conversational bots, and it works great with SharePoint.
Here’s a step-by-step guide to creating a Power Virtual Agents account:
Go to the Power Virtual Agents website: First things first, you’ll need to visit the Power Virtual Agents website. You can find it by typing ‘Power Virtual Agents’ into your favorite search engine, or you can use this link: https://powervirtualagents.microsoft.com/.
Sign in with your Microsoft account: Click on the ‘Start free’ button in the center or the ‘Sign in’ button at the top right of the page. If you’re not already signed into your Microsoft account, you’ll be prompted to do so. Don’t have a Microsoft account yet? No problem! Click on ‘Create one’ and follow the prompts.
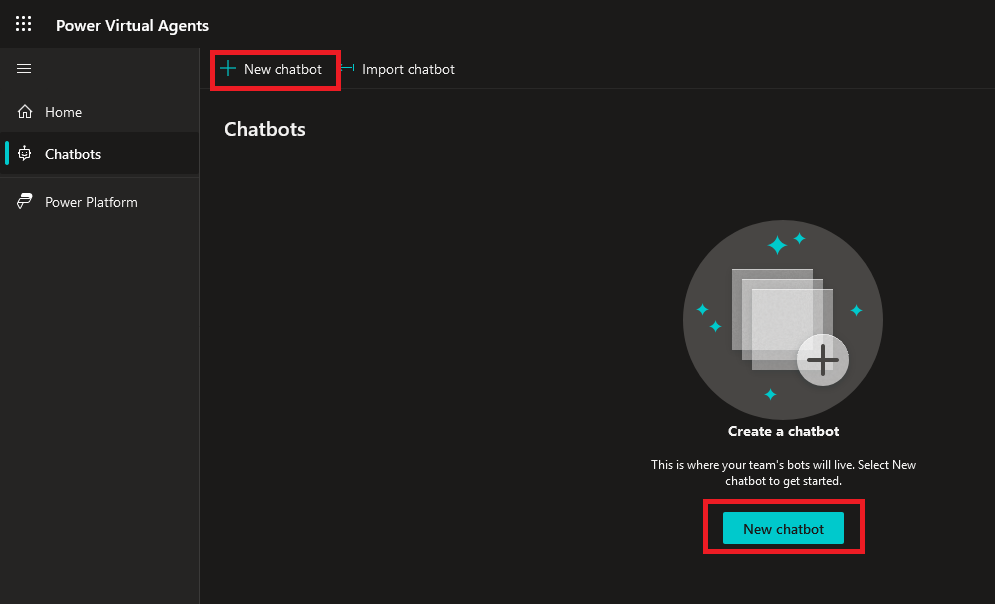
Start your free trial: Once you’re signed in, you’ll be taken to a dashboard. Click on the ‘Start free’ button to begin your Power Virtual Agents trial. You’ll need to fill in some details, like your region and organization type. Once that’s done, hit ‘Next’.
Create your bot: After the trial has started, you’ll be directed to a page where you can create your bot. Click on ‘New chatbot’, give your bot a name, and you’re off to the races!
And voila! You’ve just created your Power Virtual Agents account. Now, you can start exploring and creating your own intelligent bots for SharePoint or any other platform that supports it.
In the next section, we’ll go over how you can create an AI-based chatbot that harnesses ChatGPT’s abilities.
Step 2: Create an AI-Based Chatbot in Power Virtual Agents
Now that you have a Power Virtual Agents account, you can create an AI-based chatbot that harnesses the large language model used by ChatGPT.
Microsoft made a multi-billion-dollar investment in OpenAI and has slowly been rolling out AI integration into all of its products through its Azure OpenAI service. Some products that already have AI integration include Microsoft Teams, GitHub, Excel, Word, Power BI, Power Apps — basically everything available in Microsoft 365.
AI-based chatbots in Power Virtual Agents were announced in May 2023. However, please note that at the time of writing, chatbots in Power Virtual Agents that use large language models are still in preview and are only available to users in the US.
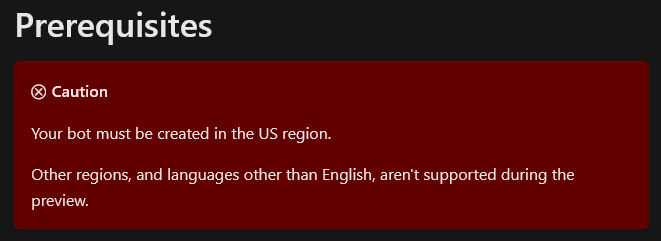
Now that we’ve gotten the prerequisites out of the way, let’s go over how you can create an AI-based chatbot!
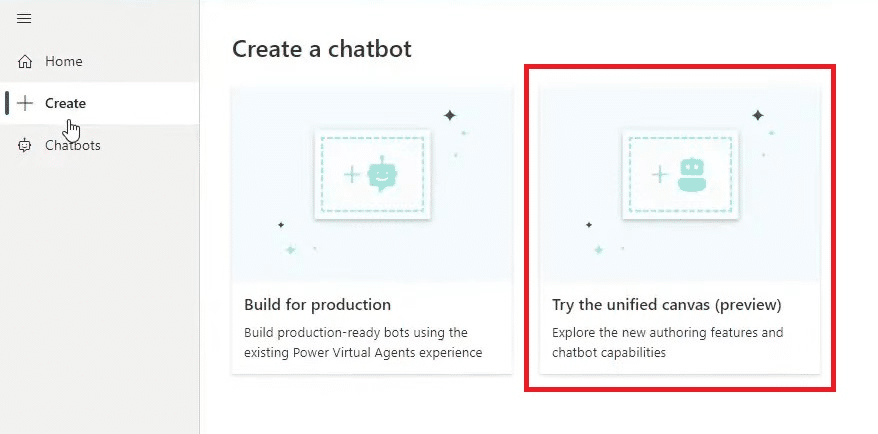
1. On the Power Virtual Agents dashboard, click the “Create” button and then choose the “Try the unified canvas (preview)” option
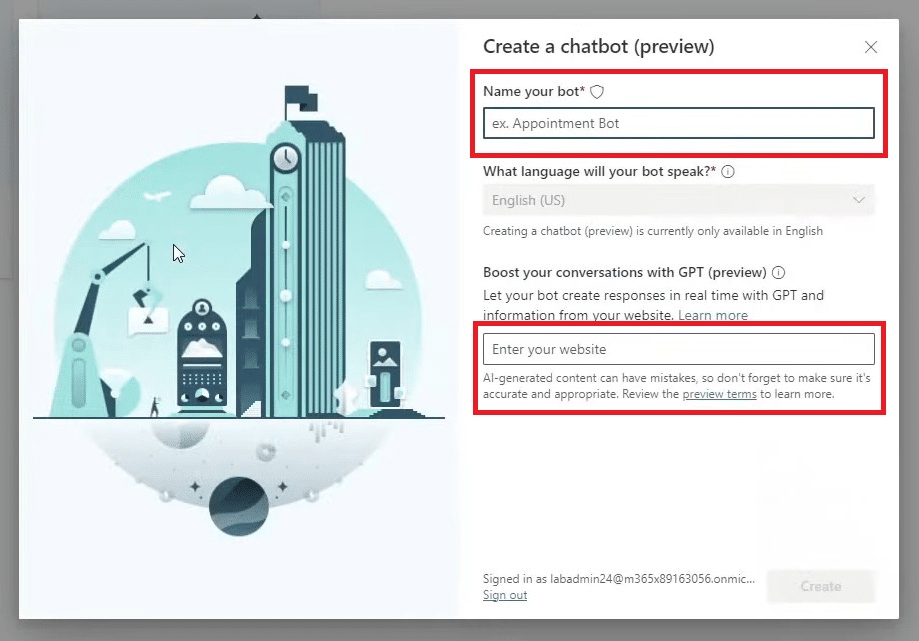
2. Name your bot. You also have the option to give the bot access to content and resources from your website to create responses in real time
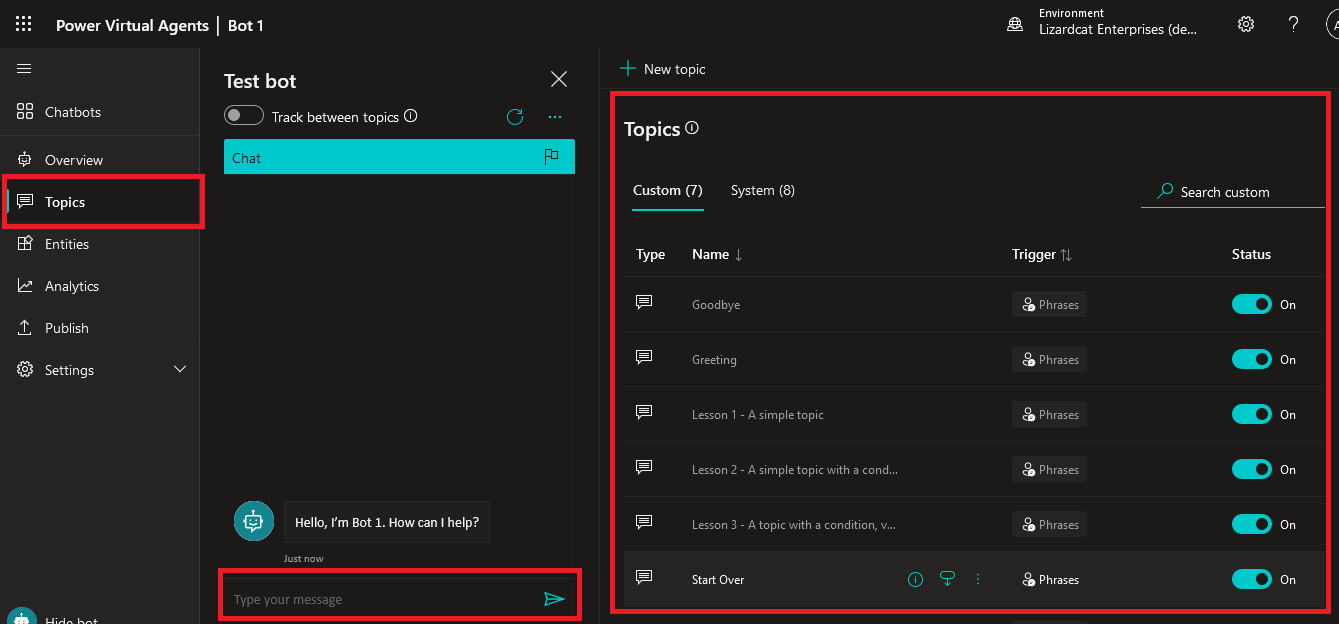
3. Set up and tweak the bot’s responses and test it to make sure it works as expected before you publish it
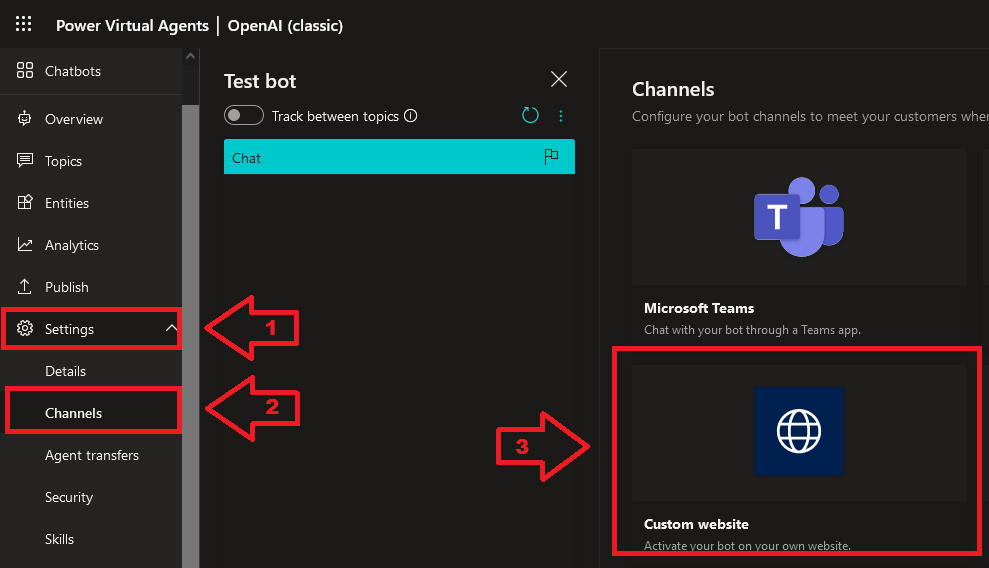
4. Once your bot is ready, create the embed code by going to the “Settings” menu and choosing “Channels” and then “Custom website”
5. Copy the embed code and save it for your SharePoint site
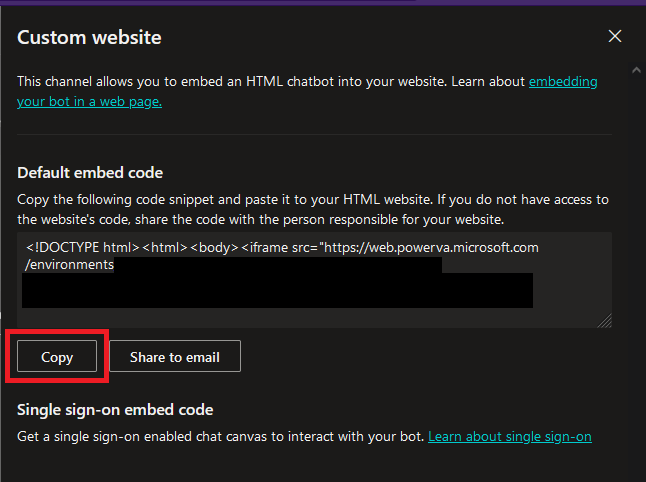
Remember, if you include your website during the setup, the chatbot will use GPT (generative pre-trained transformer technology) and Azure OpenAI to access your existing resources to create real-time responses, which is pretty neat!
OK, with your bot ready to go, let’s go over how you can embed it into a SharePoint site in the next section!
Step 3: Embed the ChatGPT Model into SharePoint
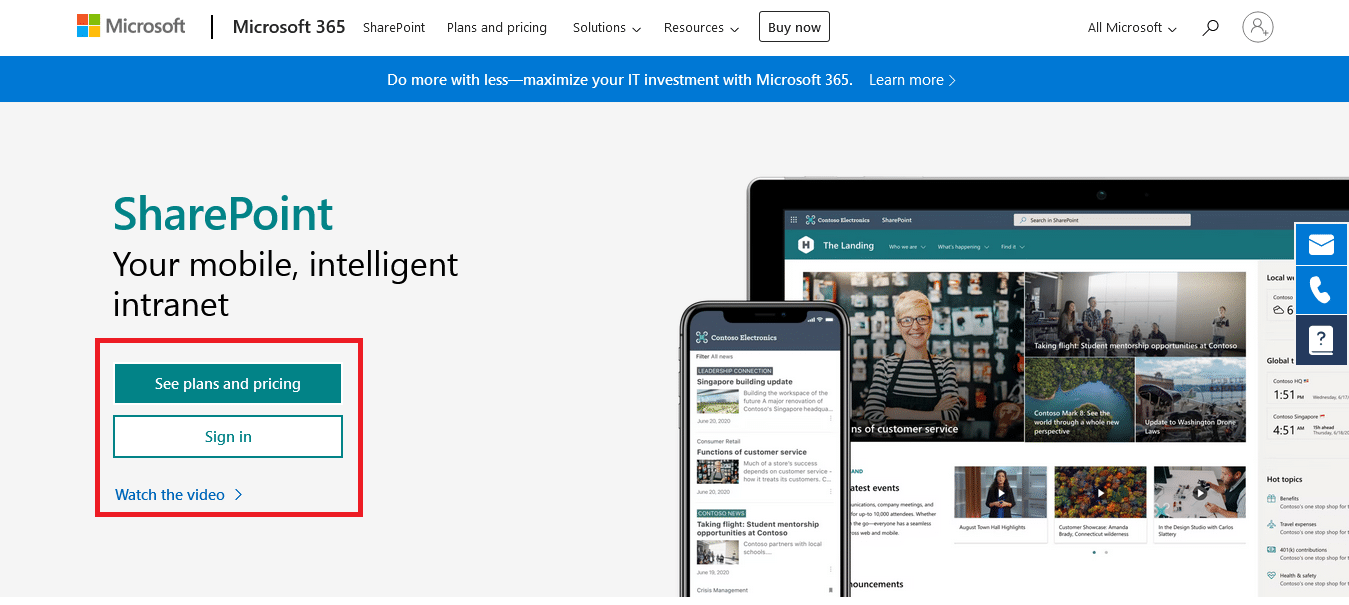
With your embed code handy, you can now add it to your SharePoint site. The process is fairly straightforward, but you have to be an admin for your SharePoint site.
Let’s go over the steps!
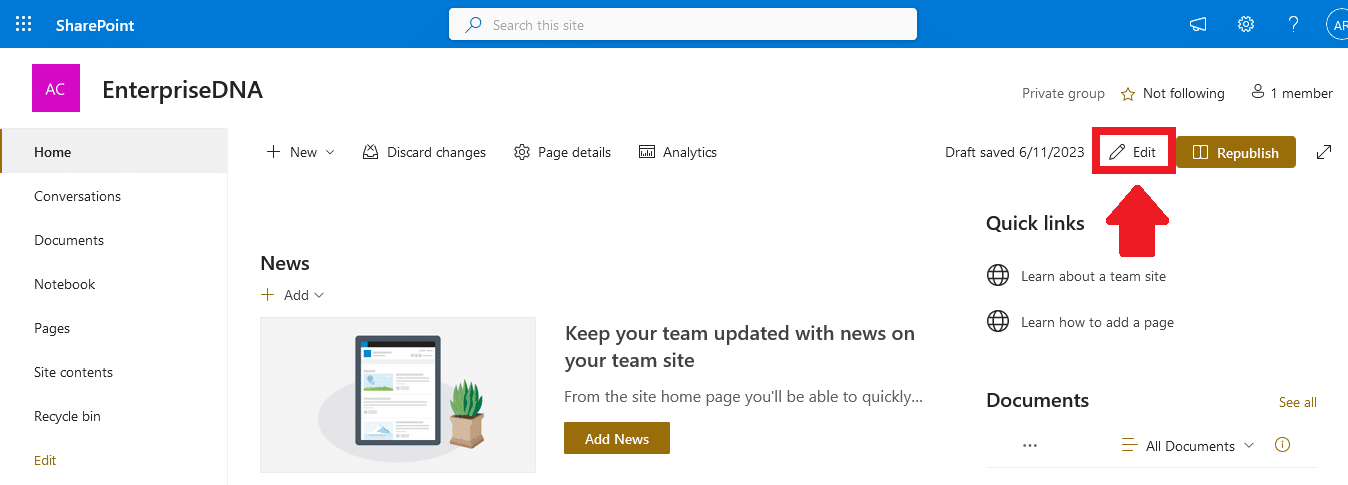
1. Open the SharePoint page where you want to add the chatbot and click on the “Edit” button to add an embedded web part
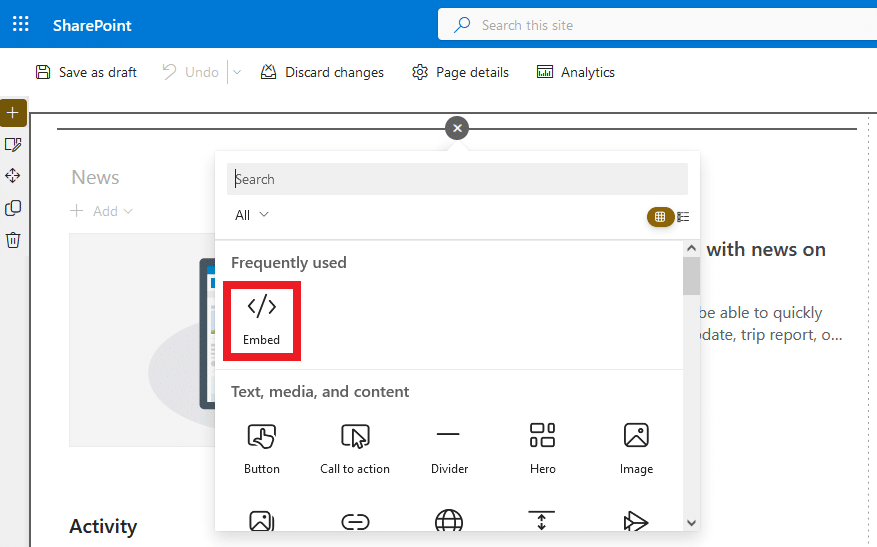
2. Create a new web part and choose “Embed”
3. Enter the embed code to activate the web part and then republish your site
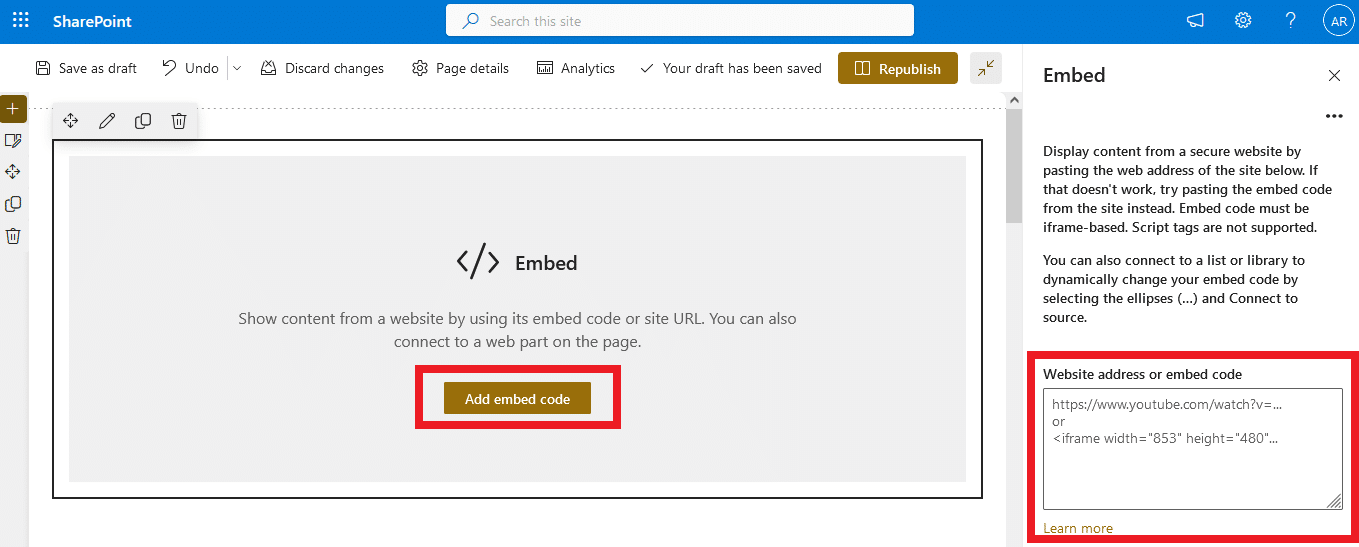
Note: If you get an error stating that you can’t embed content from external websites without permission, follow these instructions from Microsoft to sort it out.
And that’s it! Your SharePoint site will now have access to the ChatGPT model! In the next section, we’ll go over a few ways you can use this powerful integration to supercharge your SharePoint site.
Step 4: Profit? Benefits of Integrating ChatGPT in SharePoint
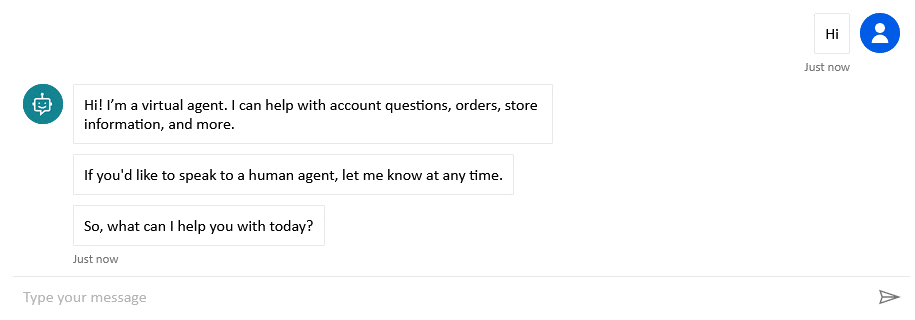
Alright, now that you’re set, let’s talk about what you can actually do with ChatGPT in SharePoint. The possibilities are nearly endless, but here are a few applications and use cases to get you started.
1. Enhancing User Experience
The first thing you’ll probably notice is how ChatGPT can seriously boost your user experience. Let’s look at a couple of ways it does that.
Smart Search Function: Ever tried to find that one specific document in the labyrinth that can sometimes be SharePoint? Well, with ChatGPT on your team, those days are over. The AI can sift through thousands of documents stored in your SharePoint and fetch you relevant information faster than you can say, “Where’s that sales report from Q4 2022?”
User-friendly Bot Responses: ChatGPT isn’t just smart, it’s also friendly. You can program the model to answer user inquiries in a natural, human-like manner, making your SharePoint experience more engaging and less like you’re talking to a robot.
2. Improving Content Management
But ChatGPT doesn’t stop at enhancing user experience. It can also lend a hand in managing your content.
Auto-Tagging and Categorizing Content: With ChatGPT, you can have your documents automatically tagged and categorized based on their content. That way, you always know where to find what you need. No more lost documents in the digital abyss.
Generating Summaries for Long Documents: Also, got a 100-page report that you need to understand in 5 minutes? ChatGPT to the rescue! It can generate summaries for long documents, giving you the gist without having to read the entire thing.
3. Facilitating Team Collaboration
Finally, ChatGPT can do wonders for your team collaboration.
Automated Meeting Scheduling: Tired of the back-and-forth when trying to schedule a meeting? Let ChatGPT handle it. Just tell it when everyone is free, and it will find the best slot for your meeting.
Task Assignment and Reminders: ChatGPT can also help keep your team on track by assigning tasks and sending out reminders. That way, everyone knows what they need to do and when they need to do it.
As you can see, the applications of ChatGPT in SharePoint are wide-ranging and can truly transform your experience. So, what are you waiting for? Start exploring what ChatGPT can do for you today!
Final Thoughts
Alright, there you have it, folks! We’ve journeyed through the world of SharePoint and ChatGPT, discovered why they’re perfect for each other, and how they can revolutionize your experience.
Integrating ChatGPT into SharePoint is like having an ultra-efficient digital assistant who’s always on call. It elevates the SharePoint environment, making it more dynamic, more efficient, and a whole lot more enjoyable to work with.
We’ve also looked at how this dynamic duo can boost your user experience, streamline your content management, and foster team collaboration. Like we said, a match made in digital heaven!
We hope this guide helps you in integrating ChatGPT with SharePoint and leveraging it for maximum efficiency and productivity. So go ahead, dip your toes into this exciting new world of AI and SharePoint. Trust us, you won’t regret it!
Frequently Asked Questions
Can you use the OpenAI API to integrate ChatGPT into SharePoint?
Yes. You can use the OpenAI API to integrate ChatGPT into SharePoint. It requires some technical knowledge, but it’s possible.
How do I implement a chatbot in SharePoint?
The easiest way to create a chatbot for SharePoint is by using Power Virtual Agents (PVA). Create a chatbot in PVA and then embed it into your SharePoint site or app.
Can ChatGPT build a SharePoint site?
Yes, ChatGPT can assist you in building a SharePoint site. However, it can’t create a fully functional SharePoint site on its own. You’ll have to use multiple prompts and test its output to make sure it’s correct.

