
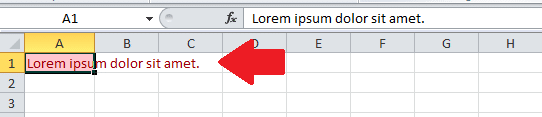
Are you struggling with text that spills over to other cells in your Excel spreadsheet? Fear not! We have some simple solutions that will make your data presentation look neater and more professional.
It can be frustrating when your data is too big for the cell, and it spills over, making your spreadsheet look messy and hard to read. Luckily, there are a few simple steps you can follow to make sure your text fits perfectly in its cell.
In this article, we will cover different methods to fit text in Excel cells. We’ll start by changing the cell width manually or with the AutoFit feature. Then, we’ll dive into more advanced techniques like using the “Wrap Text,” “Shrink to fit,” and “Merge & Center” features.

So let’s get started and make your Excel sheets look amazing!
1. Changing The Cell Width to Fit Text
When you have a lot of text in a cell, the first step you can take is to adjust the width of the cell to fit the content. You can either do this manually or you use AutoFit to do it automatically.
How to change cell width manually to fit text
1. To change the width of a cell, hover your mouse over the column’s boundary, and it will turn into a double-headed arrow.
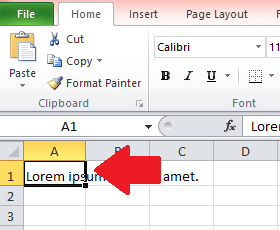
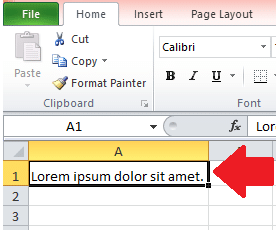
2. Double-click and drag the boundary to the right or left until the text fits comfortably within the selected column.
How to automatically adjust cell width using AutoFit
If you have a large table with several rows that contain text, you can use the “AutoFit” feature to adjust the row height automatically.
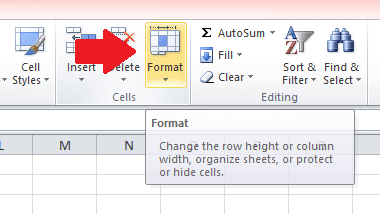
1. Select the row (or multiple rows by double-clicking while holding down the Shift key) you want to adjust and then, on the Home tab, click on the “Format” button in the “Cells” group.

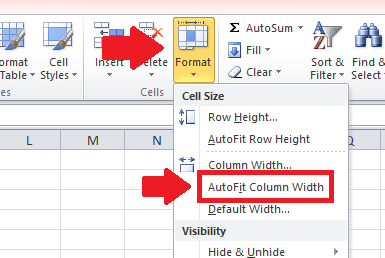
2. From the drop-down menu that opens, select “AutoFit Column Width,” and Excel will automatically adjust the row width to fit the text content. In a similar fashion, you can choose “AutoFit Row Height” to adjust the height of a cell.
By changing the cell size, you can ensure that your worksheet data fits within each cell neatly. However, sometimes adjusting the size of the cell isn’t enough to fit all the text inside.
In the next section, we’ll explore how to “wrap” the text to format cells and make your data fit comfortably within the selected cell.
2. Using The “Wrap Text” Feature to Fit Text
If you have a large amount of text that can’t fit into a single cell, you can use text wrapping to make the data fit correctly.
The “Wrap Text” feature allows you to display all cell content by breaking it into multiple lines. It can help you to present data in a more organized and readable format without having to adjust the column width or resize the cell.
How to use the “Wrap Text” feature
1. To use this feature, use the cursor to select the cell or cells you want to format clicking on them while holding down the Shift key.
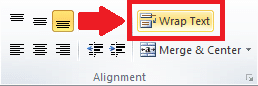
2. Next, click on the “Wrap Text” button in the “Home” tab.
3. Excel will automatically adjust the height of the cell to fit the text.
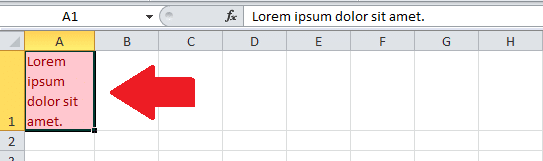
The “Wrap Text” feature in Excel allows you to display long or multi-line text in a single cell. By wrapping the text, you can make the content more readable and organized without having to adjust the column width.
Activating the features is as simple as selecting the cells group you want to format, going to the “Alignment” group, and clicking the “Wrap text” box. You can also adjust the text alignment and indentation to further improve the readability of the wrapped text.
Next, we’re going to illustrate how you can use the “Shrink to fit” feature to make the font of the text that has spilled over smaller so that it fits inside the cell.
3. Using The “Shrink to fit” Feature to Fit Text
Another solution to the spillover problem is to use the “Shrink to fit” feature, which automatically reduces the font size of the text so that it fits within the cell.
This section will guide you through the steps of using this feature in Microsoft Excel to ensure that your text is easily readable and fits neatly within your cells.
How to use the “Shrink to fit” feature
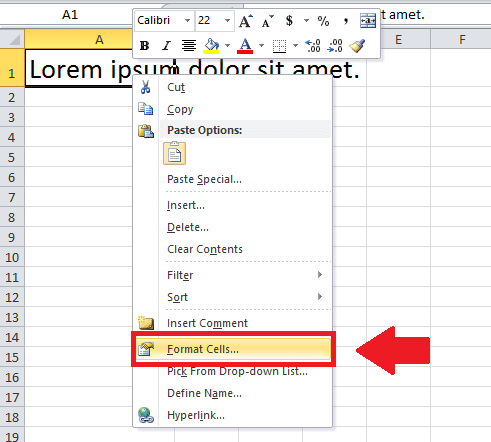
1. Right-click on the cell containing the text you want to shrink to fit the cell width.
2. In the drop-down menu, choose the “Format Cells” option.

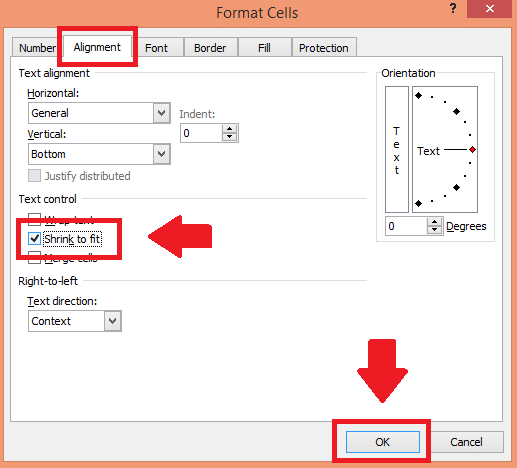
3. A new window will pop up. Go to the “Alignment” tab in the dialog window and check the “Shrink to fit” box before clicking the “OK” button.
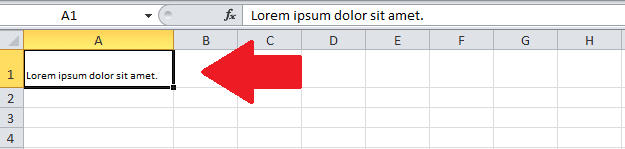
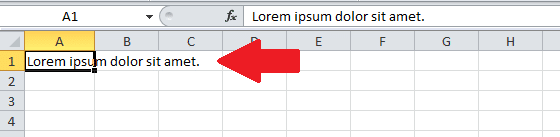
4. The text will instantly shrink down to fit the width of the cell. This is a great way to make sure the contents of a column header or row heading, for example, are visible.
The “Shrink to fit” feature is a simple yet powerful tool for managing text with ease. By following the steps outlined in this section, you can ensure that your text fits neatly within your cells.
In the next section, we will cover another useful feature called “Merge & Center,” which can be used to combine multiple cells into one and center the text within the new merged cell.
4. Merging Cells to Fit Text
Merging cells in Excel allows you to combine two or more adjacent cells into one cell. This can be helpful when you want to create a title or column heading for a table or when you want to combine multiple cells in an entire column with text or numbers into one cell.
How to merge cells to fit text
1. Open your Excel workbook and select the cells that you want to merge.
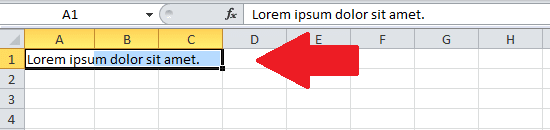
2. Go to the “Home” tab in the Excel ribbon and look for the “Merge & Center” button in the “Alignment” group of the ribbon
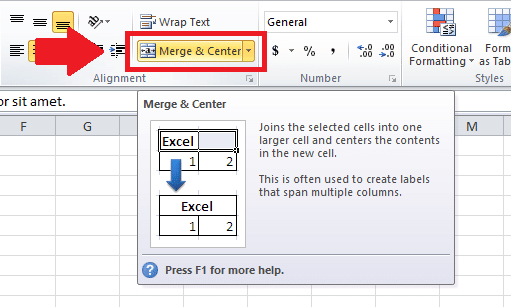
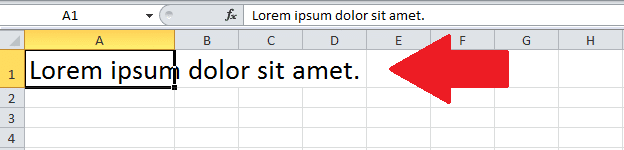
3. Click the Merge & Center button and Excel will merge the selected cells into one cell and center the content within that cell.
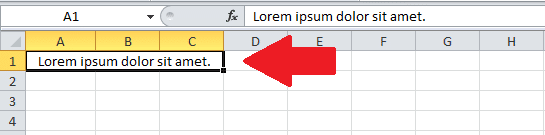
Merging cells in Excel is a simple and effective way to combine multiple cells into one. This can help to create more readable and organized tables or to combine data from different cells into a single cell.
By using the “Merge & Center” button, you can merge cells in Excel and preserve the formatting of the top-left cell.
Final Thoughts

Well done! You’ve successfully mastered the art of fitting text into Excel cells like a pro! Now you can adjust cell width manually or with Excel AutoFit and use the “Wrap Text,” “Shrink to fit” and “Merge & Center” features like a champ.
No longer will your data look like a crowded elevator on a Monday morning.
Remember, it’s important to ensure that your data is easily readable and accessible to others. By using these techniques, you can avoid having your text cut off or hidden, and make sure that your spreadsheets are app and user-friendly.
Be sure to experiment with these methods and find what works best for you. With a little practice, you’ll be an expert at making Excel cells fit text in any template!
To learn more about how to use Microsoft Excel workbooks, check out the tutorial below:


