Tired of living in a divided world where Microsoft Excel users are on one side and Google Sheets enthusiasts on the other?
Fear not, my friend! We have the solution to your problem. It’s time to learn how to convert Excel to Google Sheets and bring peace to the spreadsheet universe.
Now, you may be thinking, “Why bother?” Well, let me ask you this: Have you ever tried to collaborate on an Excel file with someone who only uses Google Sheets? It’s like trying to communicate with a person who speaks a completely different language.
By converting your Excel file to Google Sheets, you can finally bridge the gap between the two worlds and work together in harmony
In this article, we’ll show you step-by-step how to convert Microsoft Excel to Google Sheets using three simple methods. From simple uploads to importing Excel data, we’ve got you covered.
So, put on your thinking cap, and let’s get started!
Top 3 Methods to Convert Excel to Google Sheets
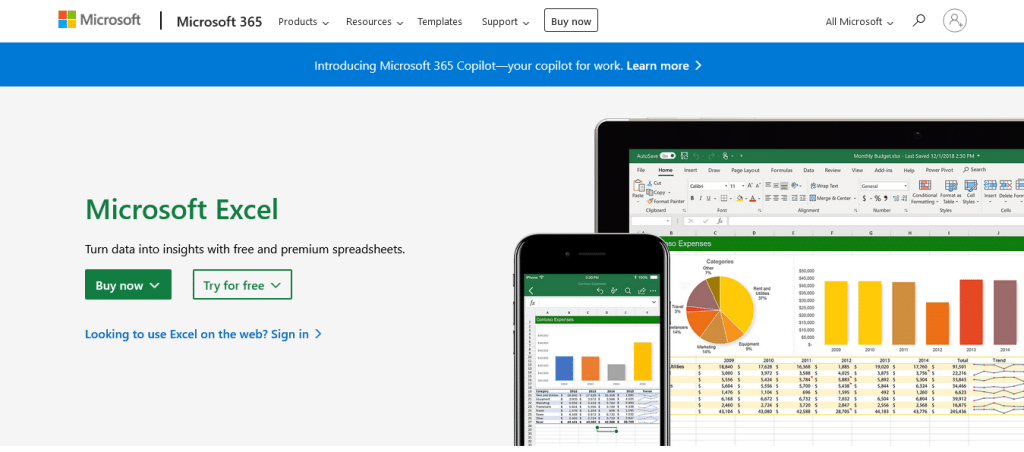
There are three main ways to convert Excel sheets to Google Sheets, and they all involve using Google Drive, which serves as your online storage and the platform where Google Sheets is accessible.
If you don’t already have a Google account, you will need to create one to use Google Drive and Google Sheets. Once you have an account and are logged in, you can begin the conversion process by following these steps.
Method 1: Upload the Excel File to Google Drive
To convert an Excel file to Google Sheets using Google Drive, follow these steps:
Step 1: Open your browser and navigate to the Google Drive homepage by typing drive.google.com in the location bar and log into your Google account if prompted

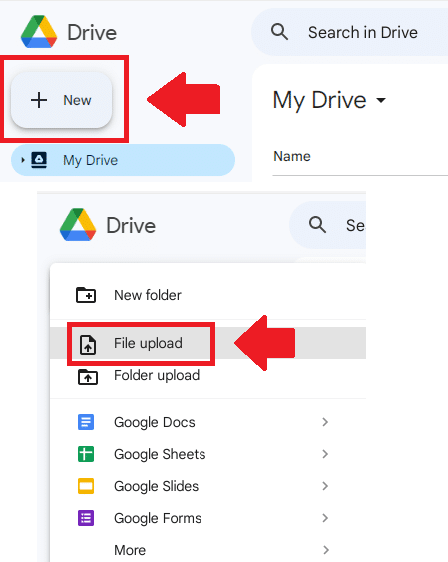
Step 2: Click on “New” in the top-left corner, then navigate to “File Upload” from the drop-down menu
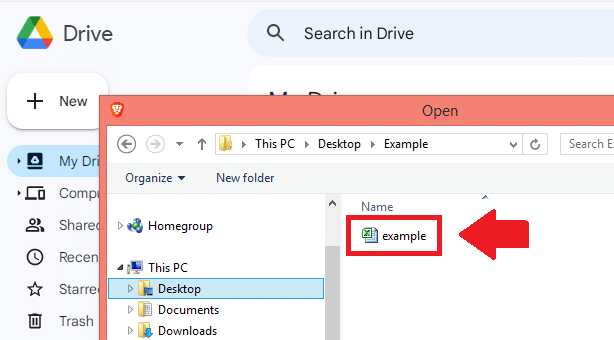
Step 4: Select the Excel file you want to upload from your computer and give it a few seconds to upload
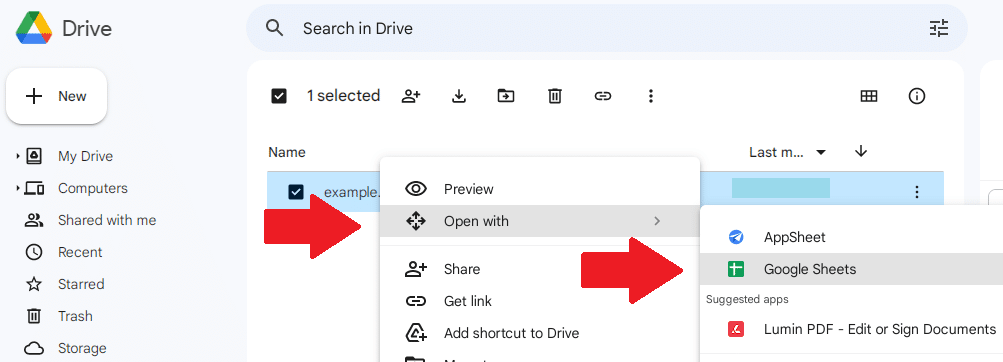
Step 5: Once uploaded, right-click on the file and select “Open with” > “Google Sheets” to convert and open it in Google Sheets
Method 2: Use the “Import” Function in Google Sheets
To directly convert an Excel file to Google Sheets, try this method:
Step 1: Open Google Sheets in your browser by visiting sheets.google.com

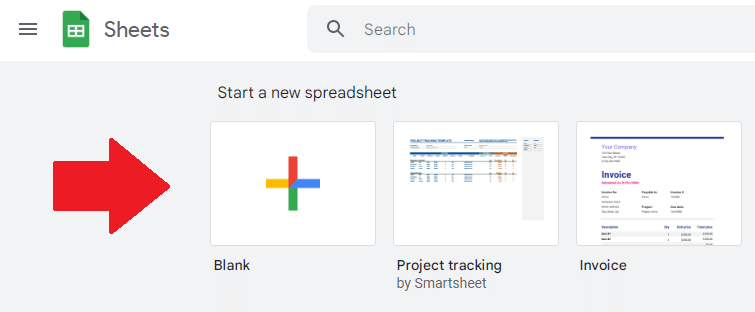
Step 2: Click on “Blank” to create a new spreadsheet
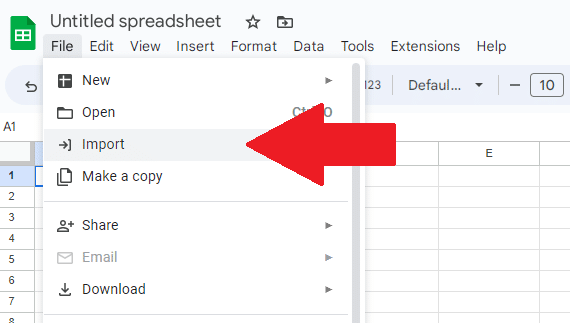
Step 3: From the menu bar at the top, select “File” > “Import”
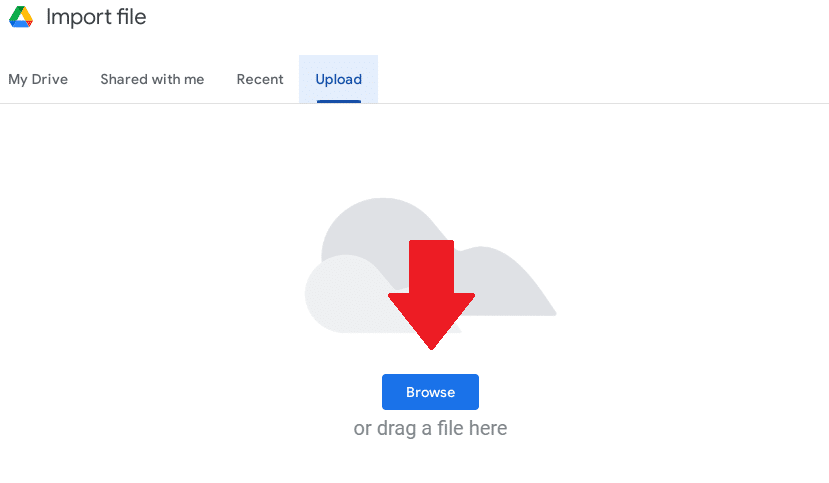
Step 4: In the Import file window, choose the Upload tab and click “Browse” to find and upload Excel files
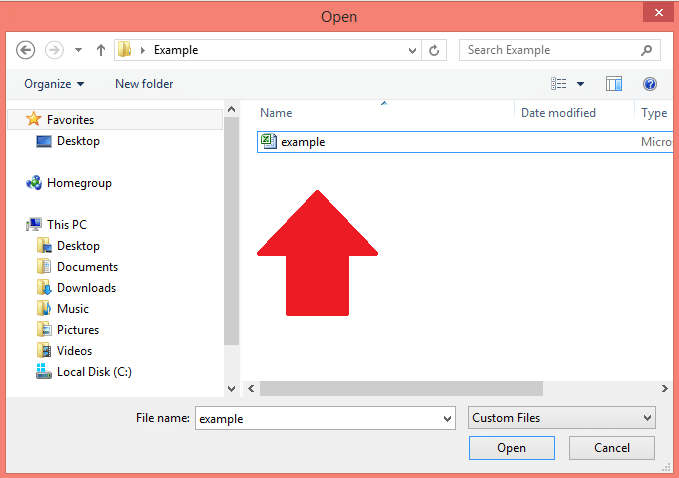
Step 5: Locate and upload the Excel click file from your computer. You can also drag and drop the file into the “Import file” window
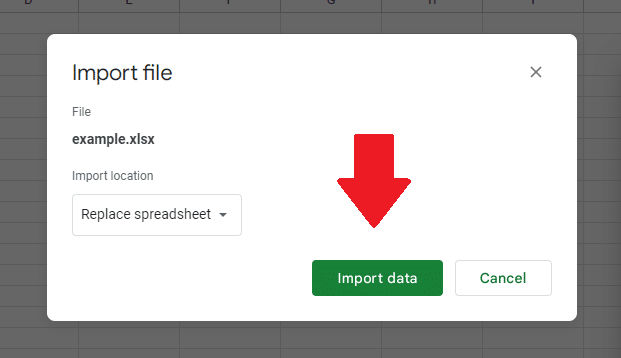
Step 6: Once uploaded, select “Import data” to import Excel data and incorporate it into your new Google Sheets file
Method 3: Using Microsoft Office Compatibility Mode
Another option for working with Excel files in Google Sheets is leveraging Google Sheets’ Microsoft Office Compatibility Mode, which maintains compatibility with different Office apps. Here’s how to use it:
Step 1: Upload your Excel file to Google Drive using the “New” > “File Upload” option as mentioned in the first method

Step 2: After uploading the .xlsx file or xls file, double-click it to open it within Google Sheets
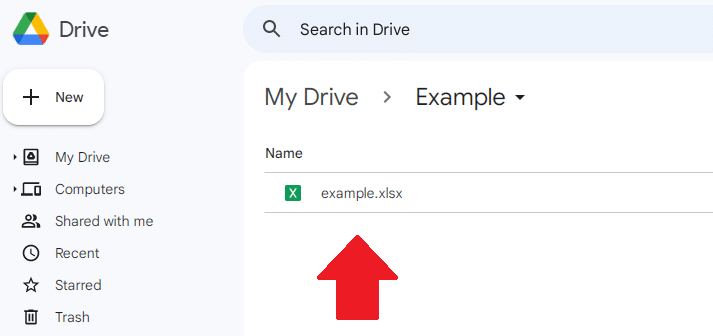
When the select file is opened in Google Sheets’ Office Compatibility Mode, you can view and edit the file without changing the file format.

Note: Some features and formatting may be limited in Compatibility Mode. To access the full range of Google Sheets tools and options, you may want to convert the csv file to Google Sheets format using the previously mentioned methods.
Now that you know the methods of converting Excel to Google Sheets, you may be wondering how to preserve formulas and formatting. Don’t worry, we’ve got you covered.
In the next section, we’ll show you how to maintain the integrity of your spreadsheets during the conversion process.
Keep reading to learn more!
Preserving Formatting and Formulas

Preserving formatting and formulas is crucial when converting Excel files to Google Sheets. After all, no one wants to spend hours recreating a spreadsheet that was lost during the conversion process!
The good news is that Google Sheets often does a good job maintaining the elements of Excel files; however, you may encounter some issues due to differences between the two platforms.
This section will guide you through handling common issues and addressing unsupported features.
Handling Common Issues
During the conversion process, some formatting or data may not transfer correctly. Here are some steps to resolve common problems:
- Row and column sizes: Adjust row heights and column widths manually in Google Sheets if they aren’t preserved during the conversion.
- Number formats: Reapply number formats in Google Sheets, such as currency, percentages, or dates, if they appear different from your original Excel file.
- Formulas: Check formulas for accuracy and ensure they reference the correct cells. Address any errors or inconsistencies by editing the formulas directly in Google Sheets.
Addressing Unsupported Features
Some Excel features might not be compatible with Google Sheets, which can cause conversion issues. To handle unsupported features:
- Conditional formatting: While Google Sheets supports basic conditional formatting, some complex rules may not transfer correctly. Review and recreate these rules using Google Sheets’ conditional formatting options and add-ons.
- PivotTables: Google Sheets also supports PivotTables, but some settings, such as custom formatting, might not transfer. Reconfigure your PivotTables in Google Sheets, if necessary.
- Charts and graphs: Check your charts and graphs to ensure they display correctly. Edit or recreate them in Google Sheets, if needed.
By addressing these common issues and unsupported features, you can ensure that your Excel spreadsheet is fully functional and accurate when converted to Google Sheets.
Now that you know how to preserve your spreadsheets, you’re ready to make the switch to Google Sheets and enjoy its benefits. The next section provides some additional tips to keep in mind during the transition.
Tips for a Smooth Transition
Are you ready to ditch Excel and hop on the Google Sheets train? Don’t worry, it’s not as tough as it may seem. There might be a few bumps in the road, but with a little bit of guidance, you’ll be cruising through Google Sheets like a pro.
In this section, we’ve got some tips and tricks to make your transition as smooth as butter, so you can take advantage of all the cool collaboration features Google Sheets has to offer. Let’s dive in!
- Backup in the right location: Before importing, save your Excel file in a familiar location on your computer, so you can easily locate it when you’re reading to upload it to your Google Workspace. This version of the file can also serve as a backup in case something goes wrong.
- Review your work: Review your Excel data for any formatting, formulas, or special features that may not be fully compatible with Google Sheets. Make adjustments as needed prior to importing.
- Organize data: Consider organizing your data into simple, clear tables when it is in Excel format. This will help reduce confusion and potential formatting discrepancies when converting to Google Sheets.
- Make navigation simple: If your Excel file has multiple sheets or tabs, be aware that Google Sheets will maintain the same structure. Make sure each sheet is easily navigable, with informative sheet names.
- Note any error messages: As you import and convert uploaded files, pay attention to any error messages or notifications. Errors may indicate issues with your original Excel file, such as unsupported features or improper formatting. Noting the error will also make it easier to Google a solution.
- Review your results: After the conversion is complete, review the resulting Google Sheet carefully. Check for any inconsistencies, formatting issues, or formula errors, and make corrections accordingly.
By keeping these tips in mind, you can ensure a smoother transition from Excel to Google Sheets, allowing you to take full advantage of the new format’s benefits, such as real-time collaboration and easy sharing.
Final Thoughts
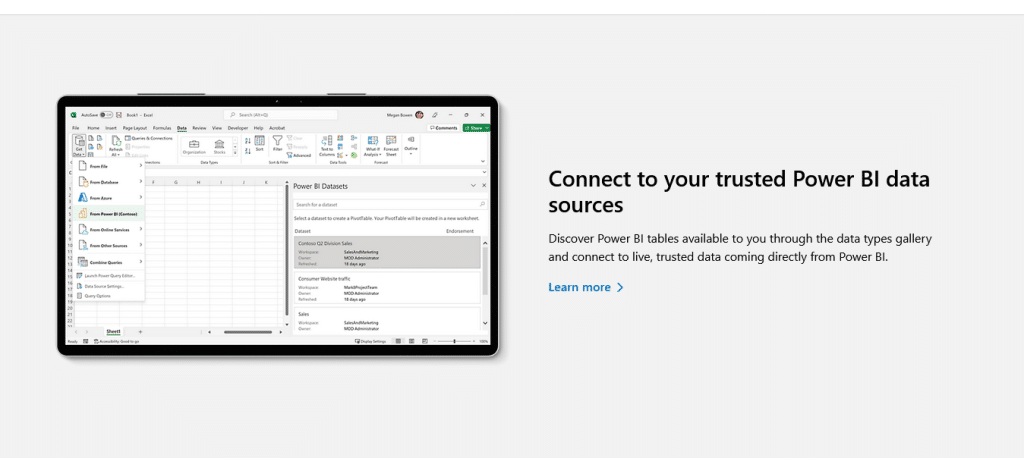
And that’s it! You now know how to use Google Sheets to convert Excel files. Who knew spreadsheet conversion could be so easy?
Just remember to always save a backup of your original Excel file before converting, and use the right methods to preserve your formulas and formatting. And don’t forget to take advantage of all the great features that Google Sheets has to offer to your workflow, like accessibility from anywhere with an internet connection.
So go forth and conquer those Excel spreadsheets with confidence, knowing that you have the skills to seamlessly convert them to Google Sheets spreadsheets. And who knows, maybe you’ll even become a spreadsheet wizard in the process!
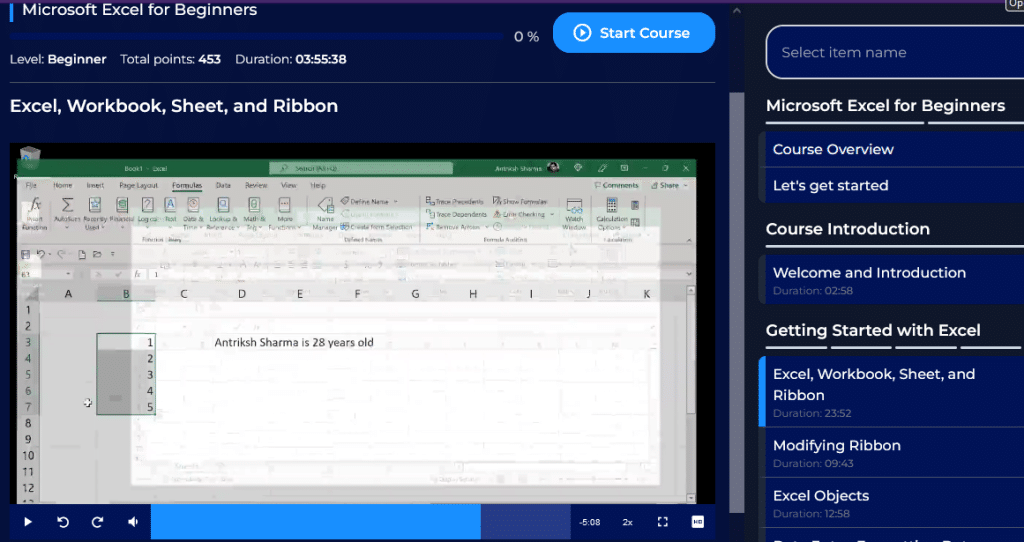
To learn how to use some of the features of Excel, check out the tutorial below:


