In the digital age, effective collaboration and seamless information sharing are essential for any organization’s success. SharePoint Online, Microsoft’s powerful cloud-based platform, is a game-changer in this regard.
One of the keys to unlocking its potential is understanding how to add a Content Editor Web Part. This versatile tool empowers you to enrich your SharePoint Online pages with custom content and dynamic elements.
To add a content editor web part, follow these steps:
- Open the SharePoint Online page you want to add the web part to.
- Click Edit.
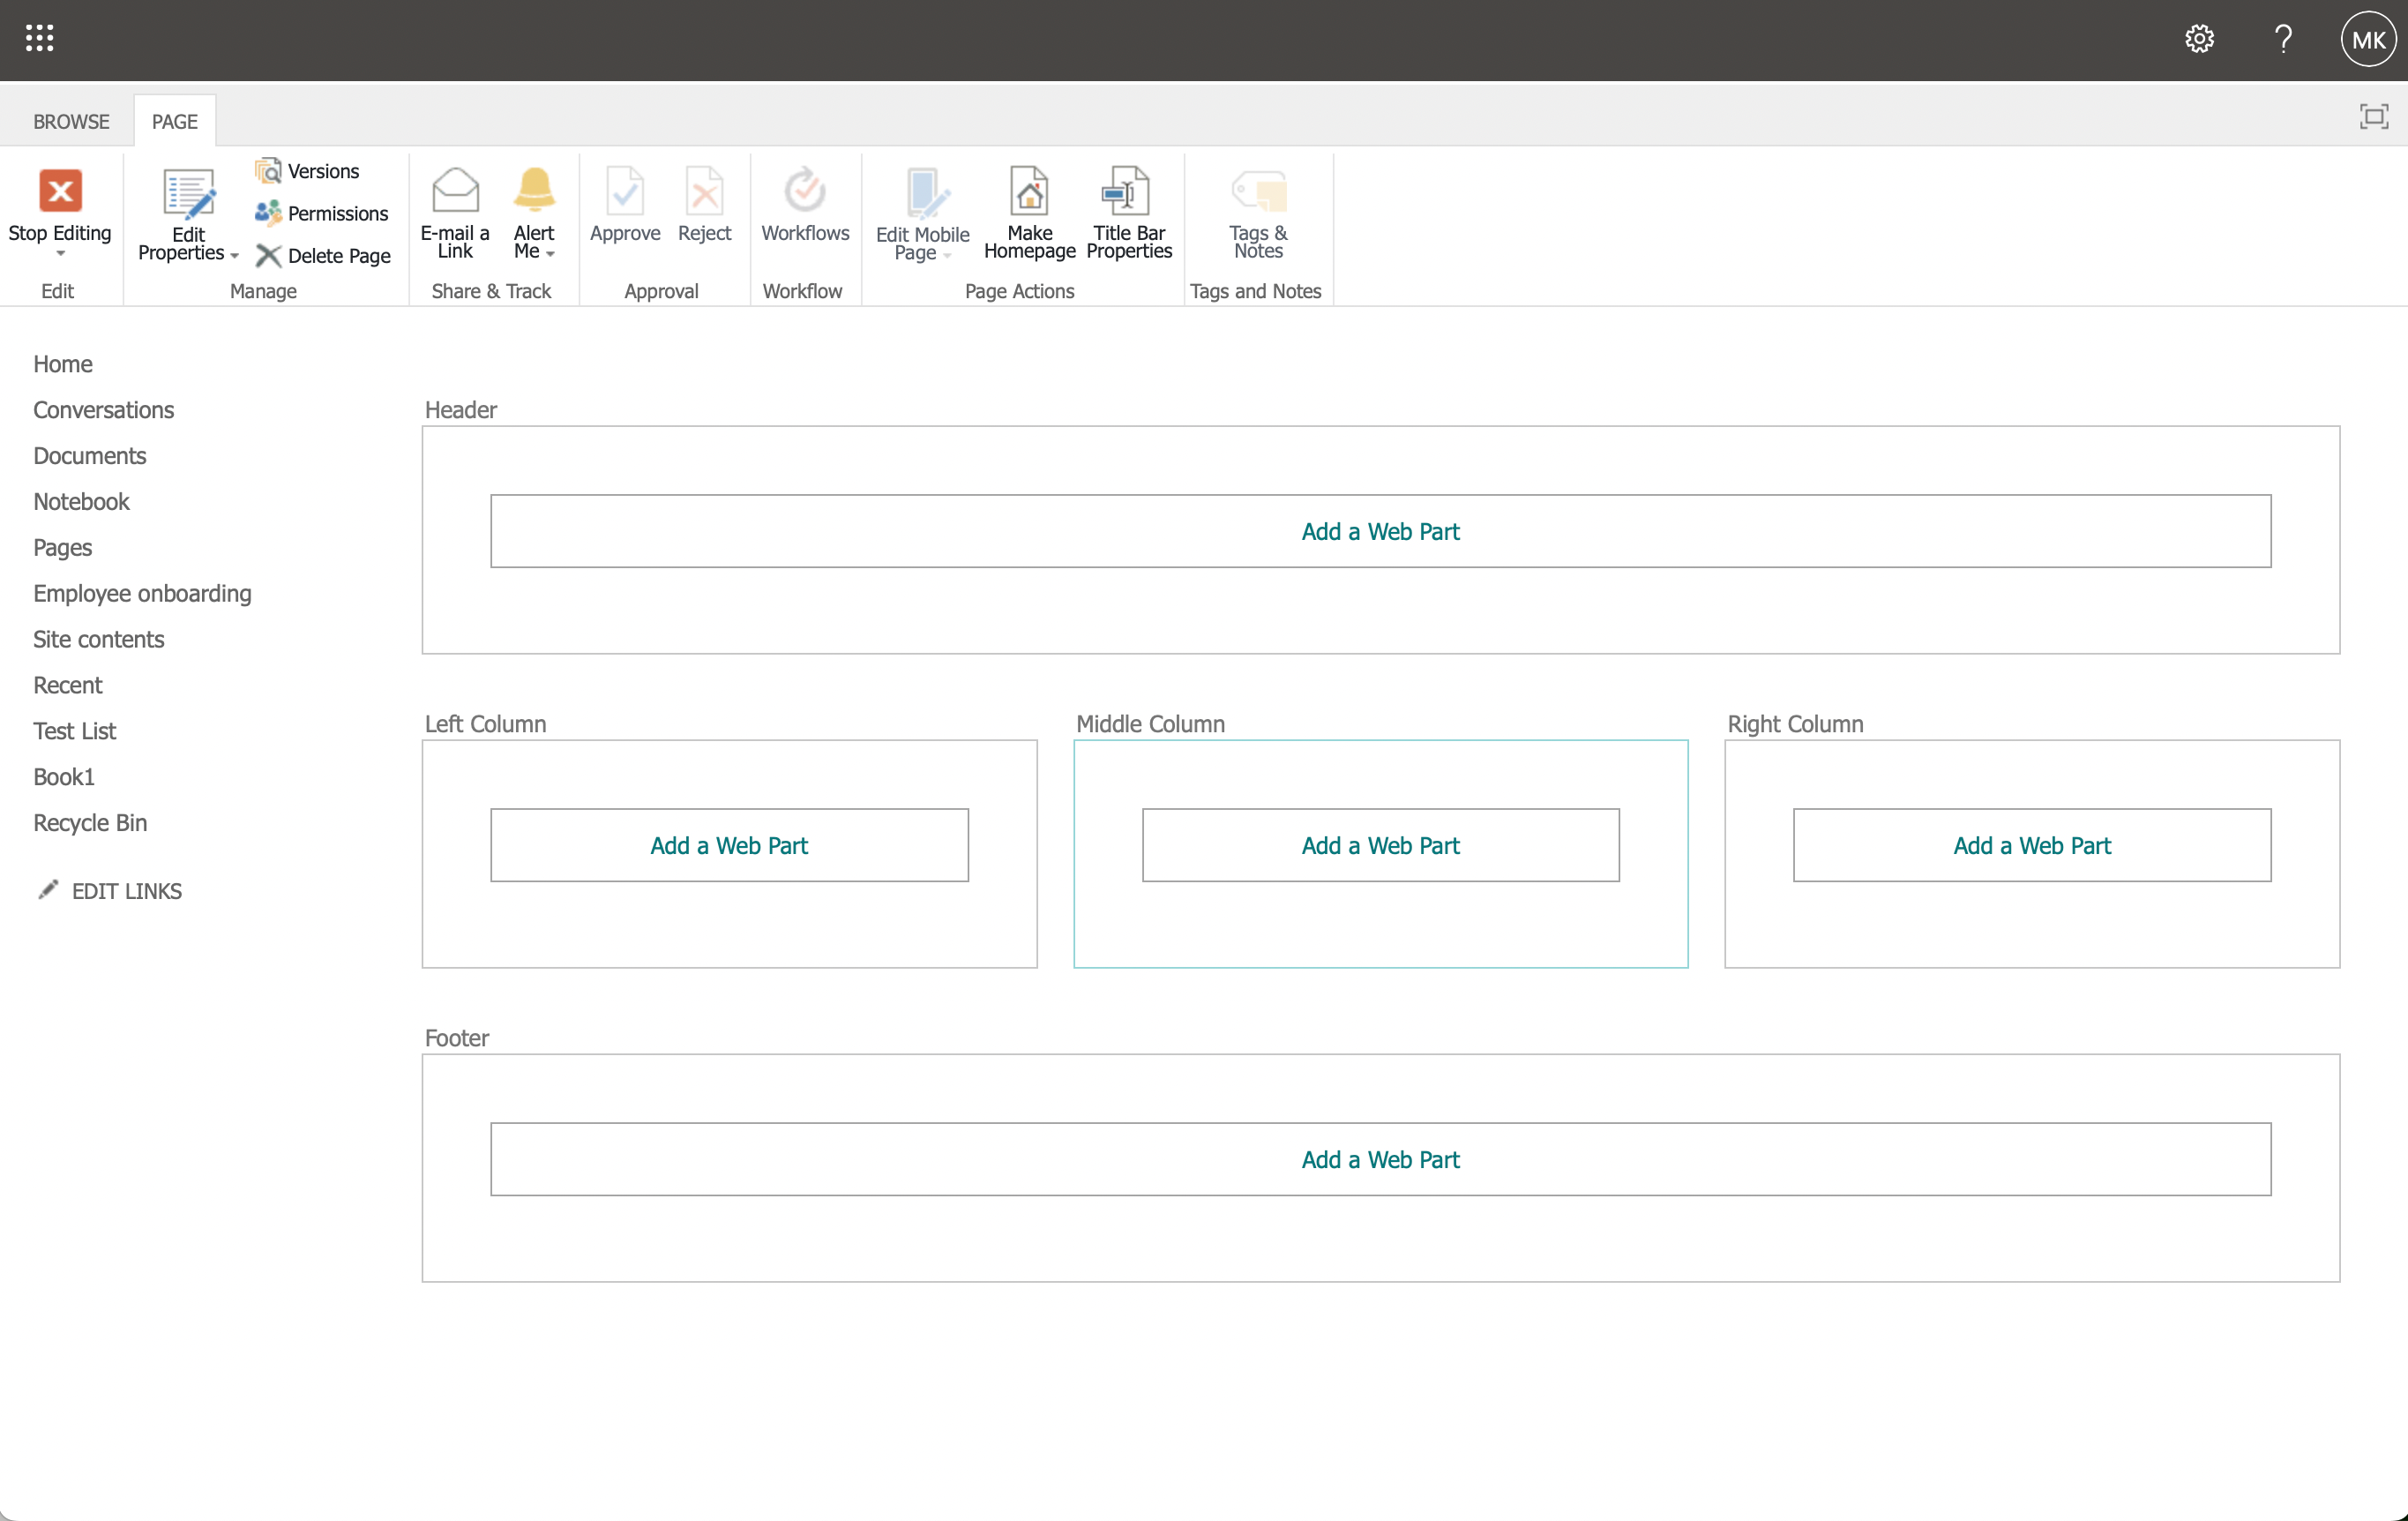
- Next, click on Add a Web Part from the ribbon menu.
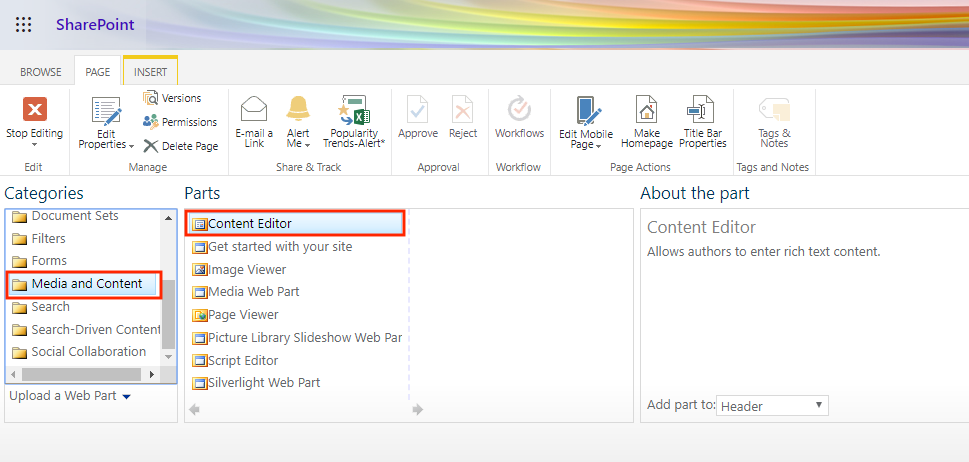
- A window pops up with multiple web part categories. Search for “Content Editor” in the search bar or scroll down the categories.
- Select Content Editor and click Add.
- Begin editing the content editor web part by adding HTML content or embedding scripts.
This article, will tell you everything you need to know about the content editor web part, how they can elevate your SharePoint experience, and how to add a content editor web part efficiently.
By the endyou will be able to harness the webpart’s potential and make your SharePoint pages truly shine.
Let’s dive in!

Understanding Content Editor Web Parts
Content Editor Web Parts are like virtual Swiss Army knives for your SharePoint Online pages. They are versatile containers that allow you to inject custom content, HTML, text, images, scripts, and more into your pages.
In a nutshell, Content Editor Web Parts are your go-to tools for personalizing and supercharging your SharePoint Online pages.
Benefits of Content Editor Web Parts

Content Editor Webparts offer several advantages that make them indispensable tools for SharePoint Online users:
- Content Enhancement: Easily add text, images, and multimedia elements to your SharePoint pages, making them more engaging and informative.
- Ease of Use: You don’t need to be a web development expert to use content editor webparts. They’re user-friendly and accessible to SharePoint users of all levels.
- Customization: You have the freedom to design your content exactly the way you want it. Style, format, arrange, and edit content elements to suit your needs.
- Dynamic Updates: These Webparts support dynamic content, making it simple to update information or data regularly without needing to edit the entire page.
- Enhanced Communication: Use the webparts to relay important messages, share reports, or even embed external content from websites or applications.
These benefits collectively contribute to a more productive, visually appealing, and engaging SharePoint Online environment.
How to Add a Content Editor Web Part in SharePoint Online

It’s time to roll up your sleeves and dive into the practical part. Here is how to add a Content Editor Web Part to your SharePoint Online page in a few simple steps:
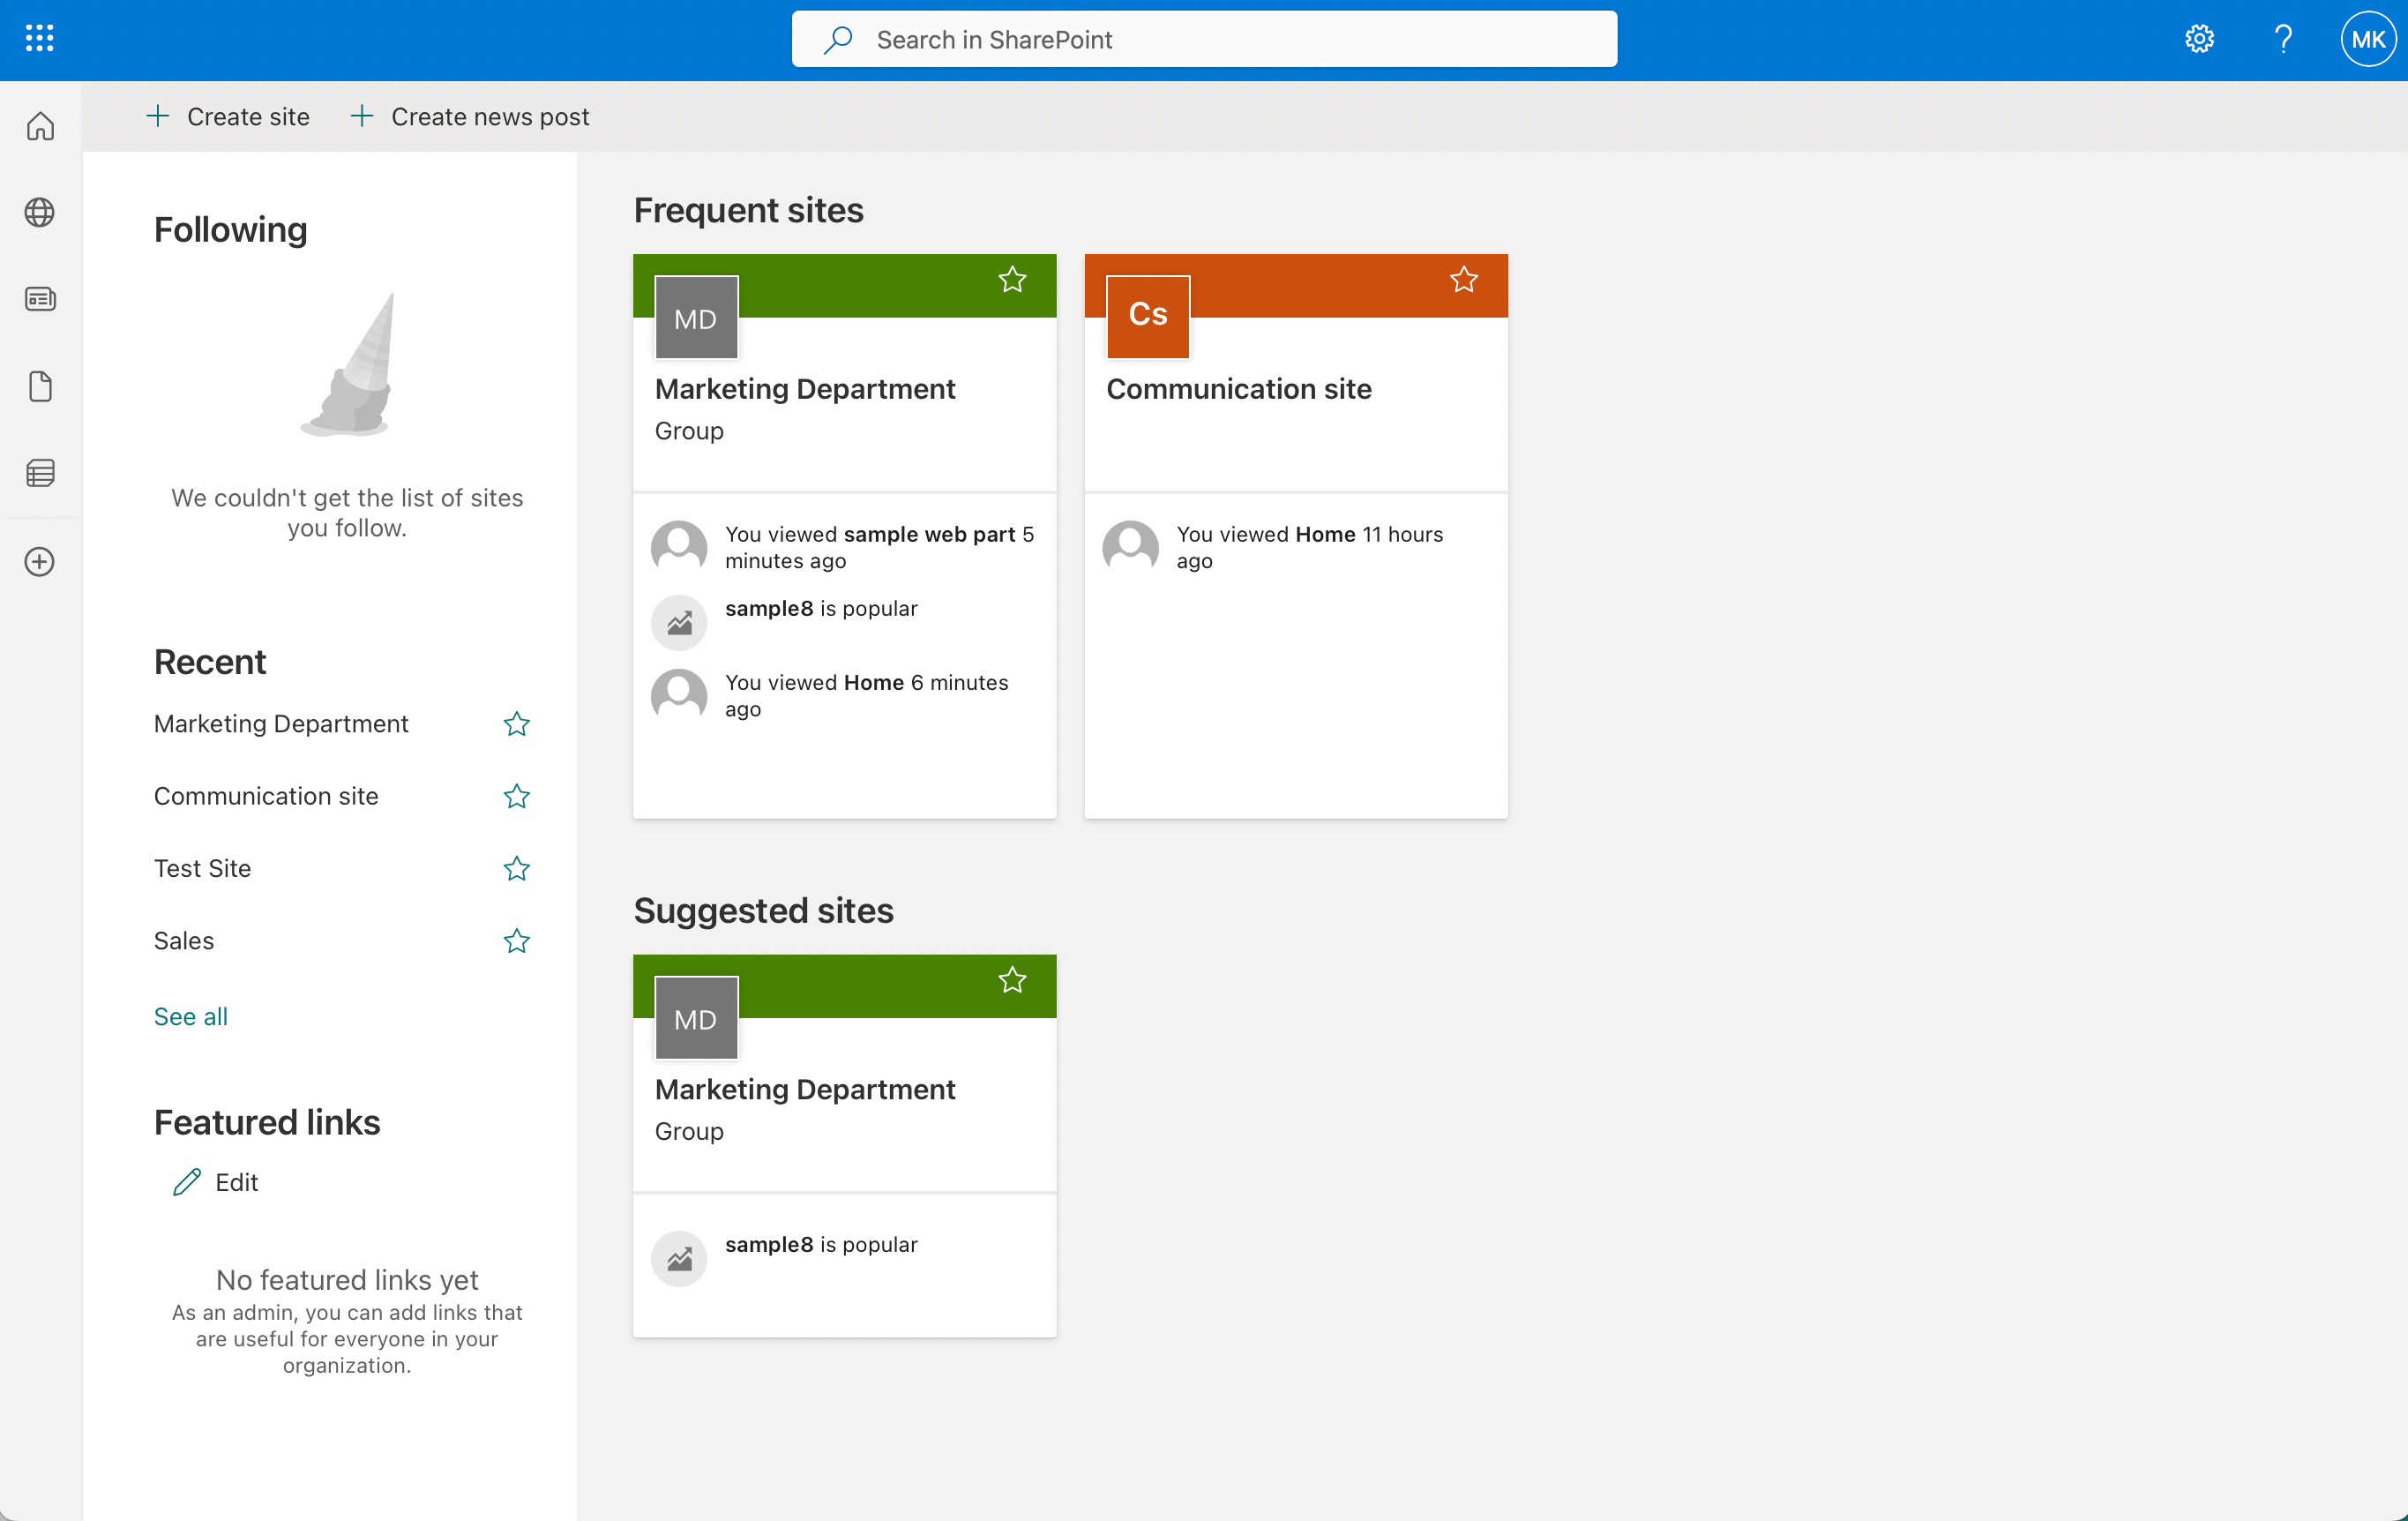
- Access Your SharePoint Site: Log in to your SharePoint Online account and navigate to the site where you want to add the Webpart.

- Select the Page: Choose the page you want to edit. It could be an existing one or a new page.
- To create a new page:
- Go to the SharePoint Online site where you want to add the new page.
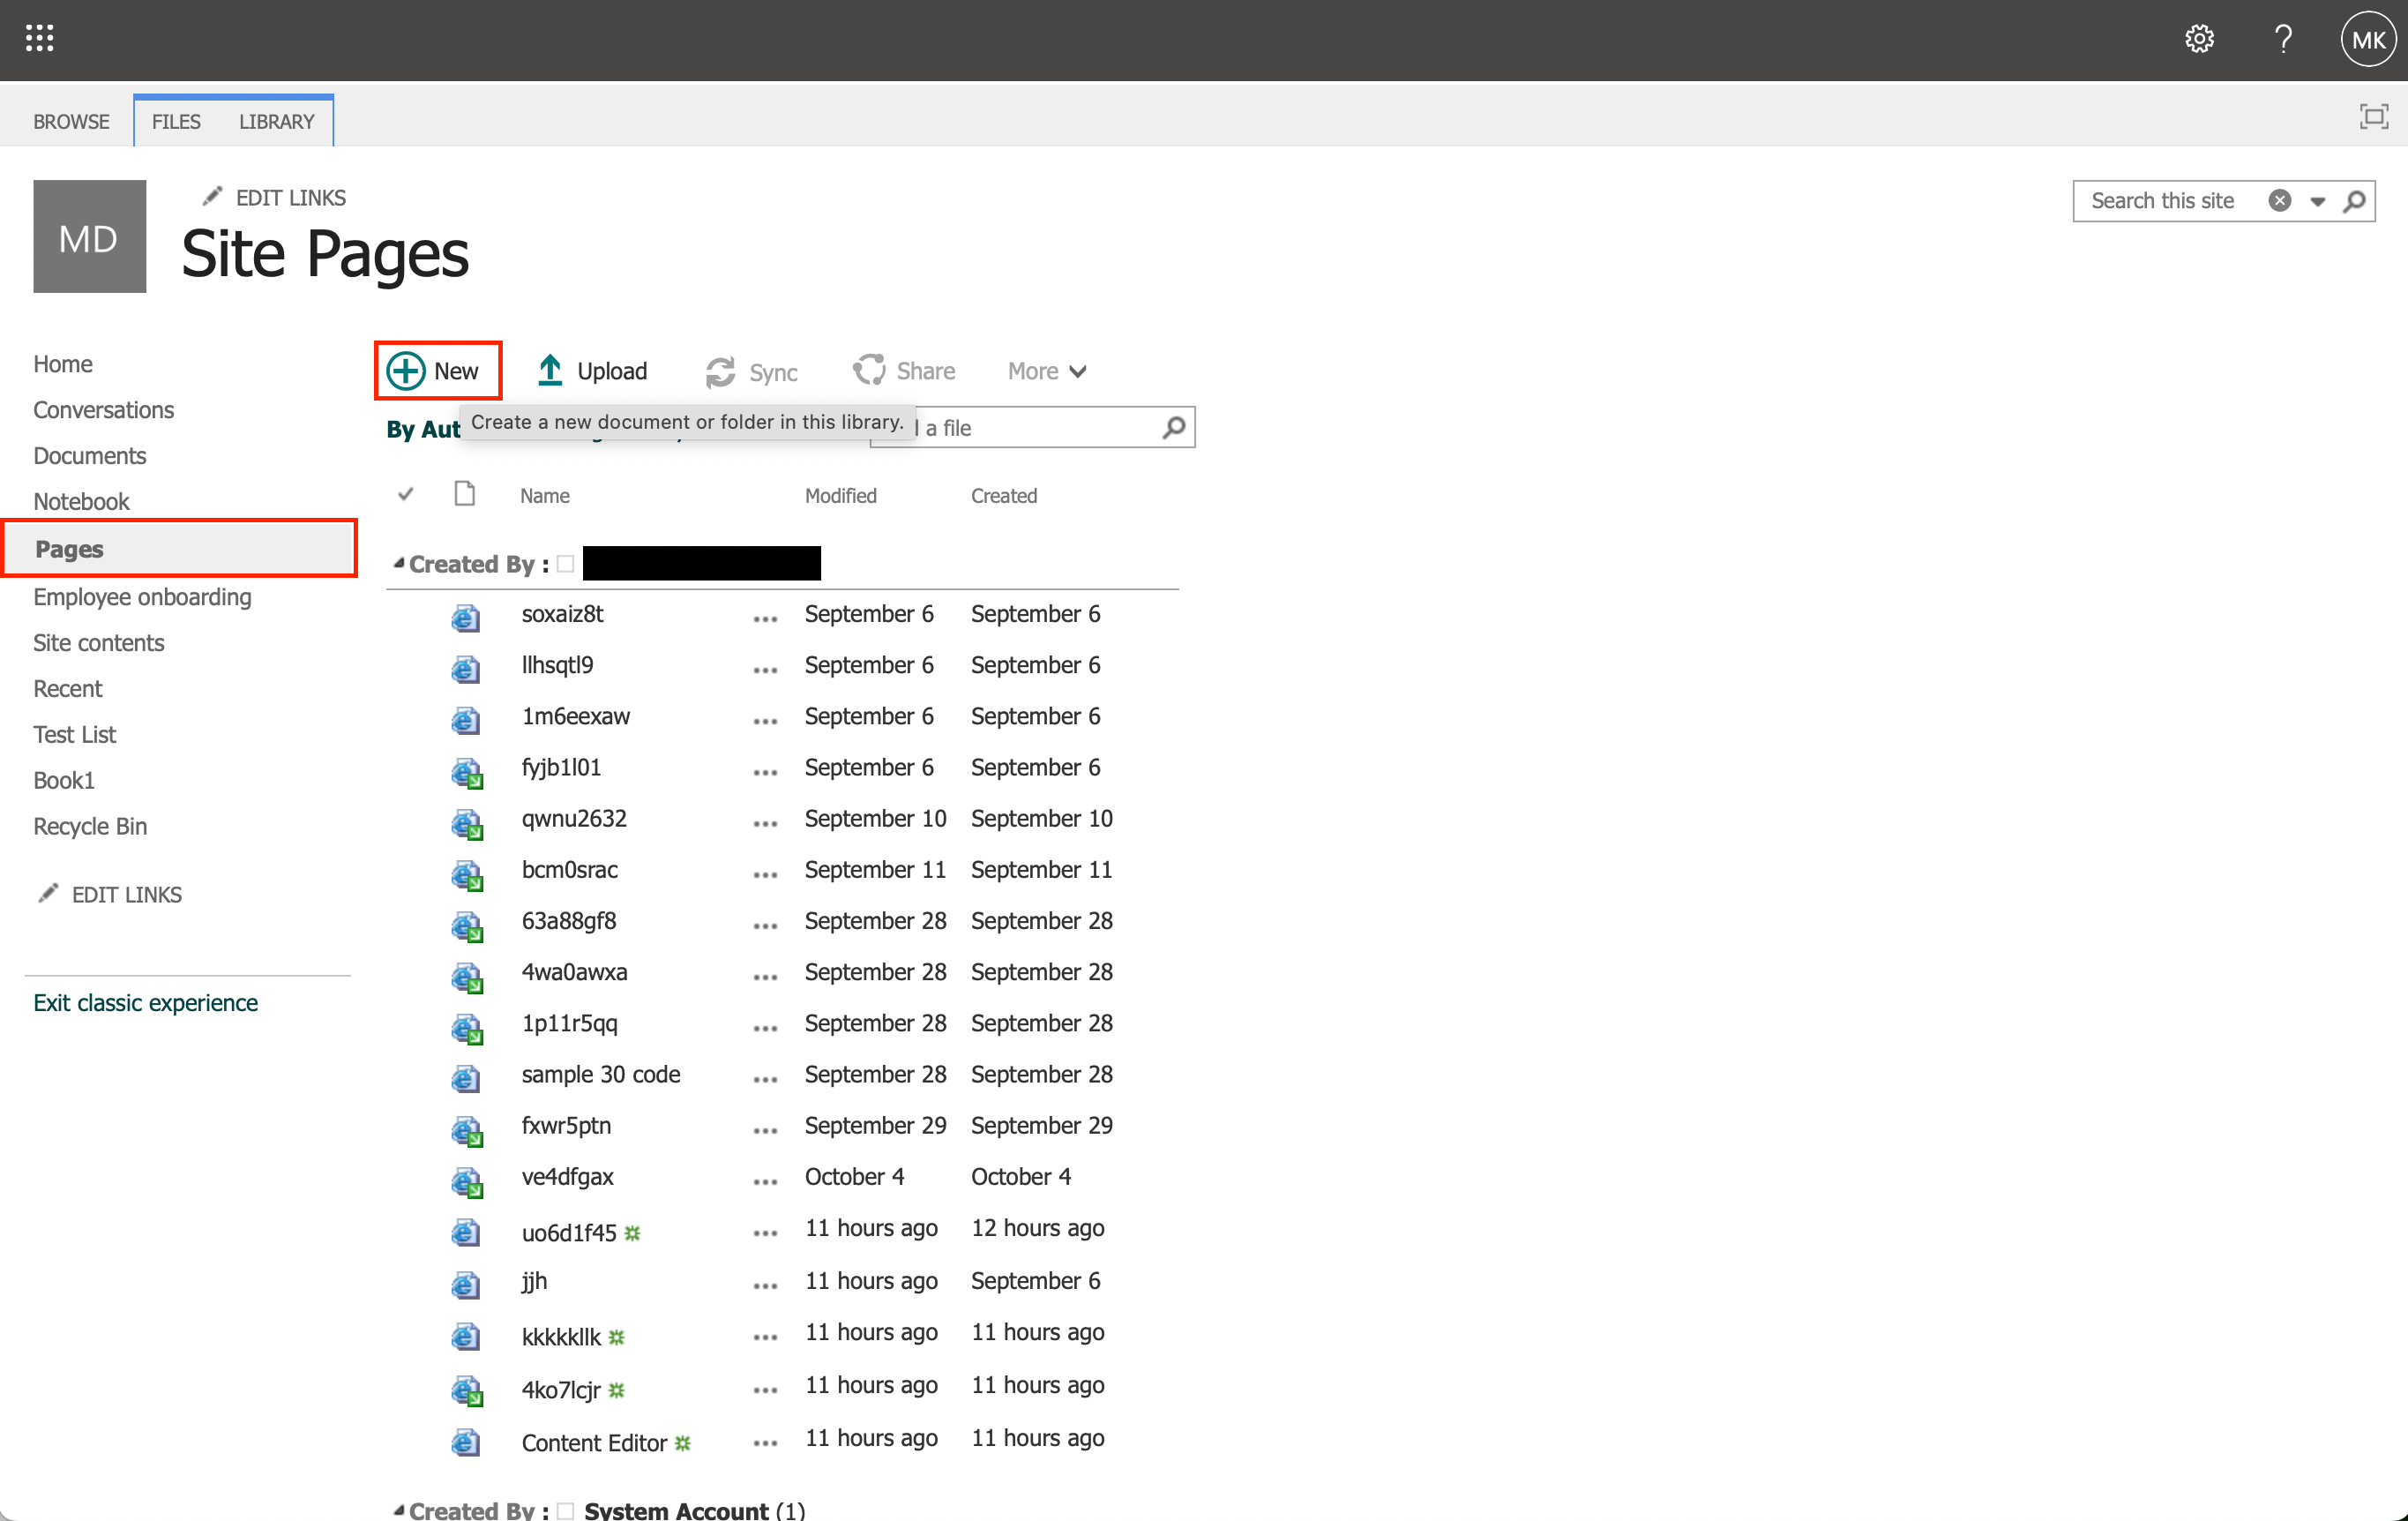
- Click on Site Contents in the left-hand menu, and then select Site Pages.
- Click on Return to Classic Sharepoint at the bottom of the left-hand menu.
- In the Site Pages, click on the + New button at the top and select Page from the dropdown menu. This will open a new page for you to start editing.
- Click on the area where it says Add a title and type in the desired title for your new page. This will also generate a unique URL for the page based on the title.

- Edit Page: Click on the Edit option, usually found at the top of the page, to enter the editing mode.
- Add Content Editor Web Part: Click on the + icon in the page to see a list of available web parts. Look for the content editor under Media and Contents and click Add. This will insert the web part in the desired location on the page.

- Customize Content: You can now add and format your content by clicking the Edit Web Part option on the right to access the Webpart’s built-in editor. You can also embed external content or scripts as needed.
- Publish the page: Once you are satisfied with the content and layout, click on the Publish button at the top-right corner. Your new page will now be accessible on your SharePoint Online site.
Following these simple steps will allow you to add a Content Editor Web Part and start enhancing your SharePoint Online pages. Remember that the Content Editor Web Part is only available for classic pages and not modern pages. For modern pages consider the modern script editor web part.
Final Thoughts

Adding the Content Editor Web Part to your SharePoint Online toolkit is the key to crafting dynamic and engaging web pages. With its user-friendly features, you’re just a few clicks away from unlocking a world of customization and content enrichment. So, get ready to take your SharePoint pages to the next level and captivate your audience with this versatile tool!
Frequently Asked Questions
How can I enable custom script in SharePoint Online?
To enable custom script in SharePoint Online, follow these steps:
- Sign in to the SharePoint Online Management Shell (PowerShell).
- Run the command Connect-SPOService followed by your SharePoint Online site URL.
- To enable custom script, run the command Set-SPOSite -Identity <SiteURL> -DenyAddAndCustomizePages 0. Replace <SiteURL> with your site URL.
- Note that it may take up to 24 hours for the change to take effect.
Alternatively you can enable custom scripts through the SharePoint Admin Center.
What are the steps to create a webpart in SharePoint Online?
Here’s a brief outline of the steps to create a web part in SharePoint Online:
- Go to the SharePoint page where you want to add the web part.
- Click on “Edit” and then click “+” to add a new web part.
- Select the desired web part you want to add from the available options.
- Configure the web part settings as needed.
- Save and publish the page.
Why is Media and Content web part missing?
If Media and Content web parts are missing, it’s possible that custom script is disabled in your SharePoint Online settings. Enabling custom script as described in the first question should resolve this issue. Alternatively, the web parts might have become hidden due to customization or changes made by a site administrator.
Not the answer you were looking for? Head over to the Microsoft community for more solutions. Sign in with your email and password, submit post and wait for a Microsoft expert or community member to provide a solution. Alternatively, you can browse related question feed default to find answers already given to community members.
What is the process to add text to a SharePoint page?
To add text to a SharePoint page, follow these steps:
- Navigate to the desired page and click on “Edit” in the top right corner.
- Click on the “+” button to add a new web part.
- Select the “Text” web part.
- Type in the desired text, and use the toolbar to format it as needed.
- Save and publish the page when you’re done.
How can I move web parts in SharePoint 2013?
To move web parts in SharePoint 2013, follow these steps:
- Edit the page by clicking on the gear icon, then selecting “Edit page.”
- Hover over the web part you want to move, and click the down arrow that appears.
- Select “Move” from the menu and choose the desired location for the web part.
- Save and publish the page once you have moved the web part.
Which web part is suitable for JavaScript in SharePoint Online?
For SharePoint Online modern pages, you can use the Modern Script Editor web part. This community-developed web part works similarly to the traditional Content Editor web part and allows you to insert JavaScript code directly into the page. If you are using classic pages, you would utilize the Content Editor web part for this purpose.


