Every flow that you create in Power Automate comes with a flow diagram. In this tutorial, we’ll discuss what flow diagrams are and the available options for your flows. We’ll also have a quick overview of the flow page in Power Automate.
A flow diagram lists all our steps in the flow from triggers, to conditions, to actions.
First, let’s have a quick rundown of the flow page.
Overview Of The Flow Detail Page
If we go to the My flows page, we’ll see the flows that we’ve created. I’ve made three of these just to make sure I’ve tested versions of them.
Let’s click one of the created flows from the list.
We’ll then see the summary details.
At the top, we have several available options. The Edit button allows us to edit our workflow. The Share button allows us to share our flow with other people. We can also save our work, or save our flow as something else by clicking Save As. If we want to make a change, we can delete it as well. The Run button is for running our flow. We can also send a copy to someone by clicking the Send a copy option.
To submit it as a template, we can use the Submit as template. If we’ve made a flow that we use a lot, we can submit it as a template for other people to use. We can also export it, turn it off, and turn it on. By clicking the Analytics, it will display the analytics of the flow as well.
Flow Diagrams In Power Automate
Let’s now try editing a flow by clicking the Edit button.
We’ll then see the Flow Diagram. This is a very simple flow as it only has one trigger and one action. However, these can get very complicated.
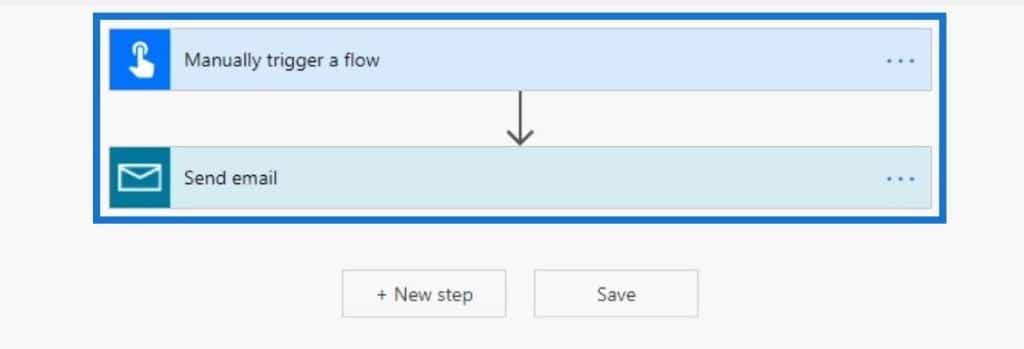
This also has one branch down. We can have branches that go off to several sub-branches. We can also have condition statements where if A happens, it will go into a certain branch and if B happens, it’ll go to another branch. We’ll be going through all of that later on. For now, this is how a flow diagram generally works.
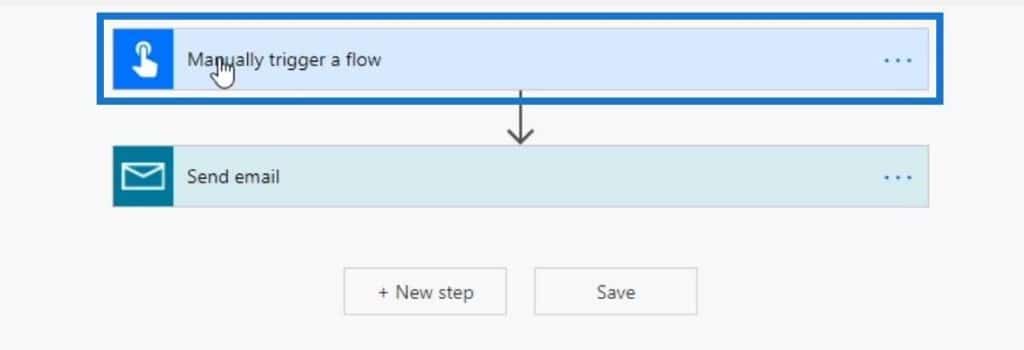
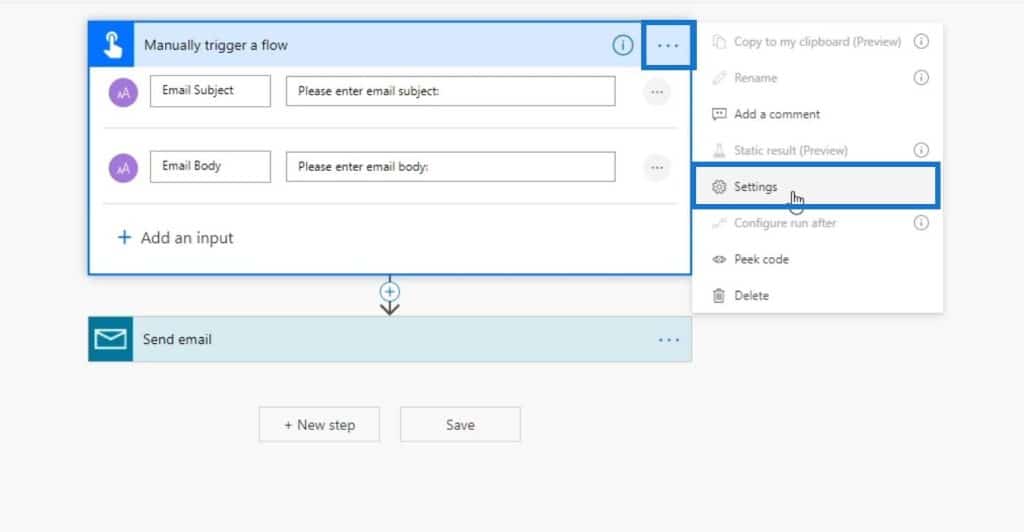
All these different actions or modules have settings. For example, if we click on this trigger, it will show us the options available for that trigger. Again, this trigger is a manual trigger. This means that we need someone to actually click a button for it to occur. It will then ask the user for input.
Flow Diagrams: Editing The Inputs
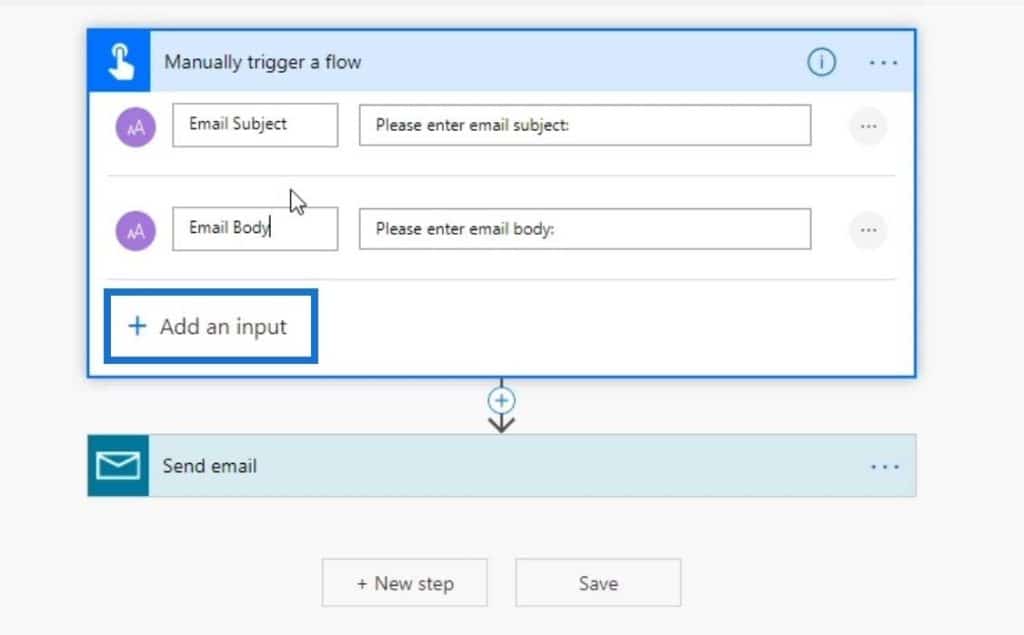
This is also where we can define the inputs that we want to get from the user. In this example, we’re asking the user to input an Email Subject and Email Body. We can also add another input by clicking the plus sign icon.
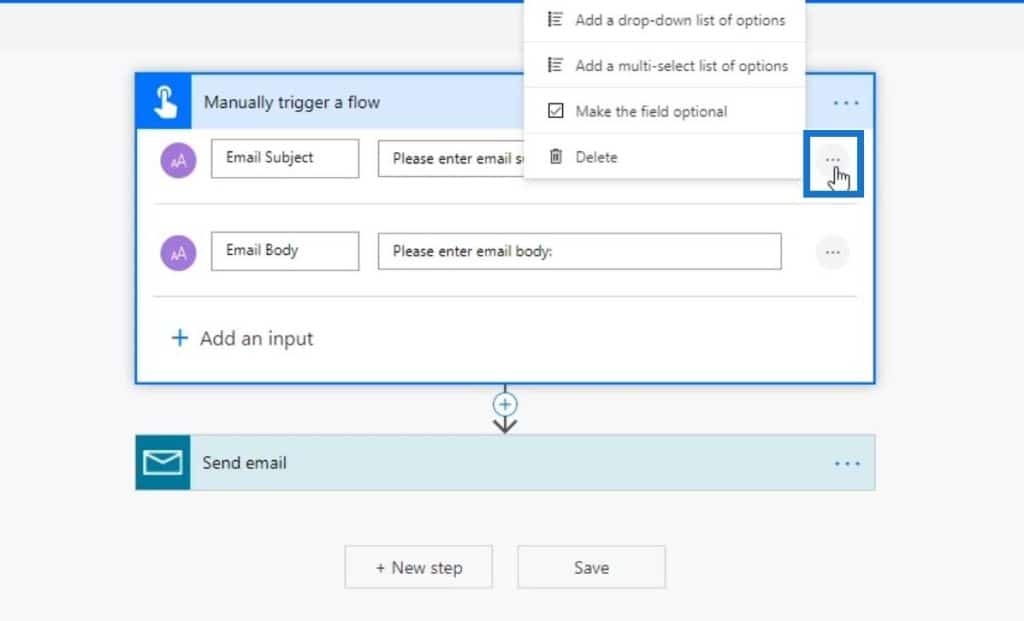
If we click these three dots, we’ll see that these inputs have their own settings. We’ll get into these later.
Flow Diagrams: Modifying Settings For The Trigger
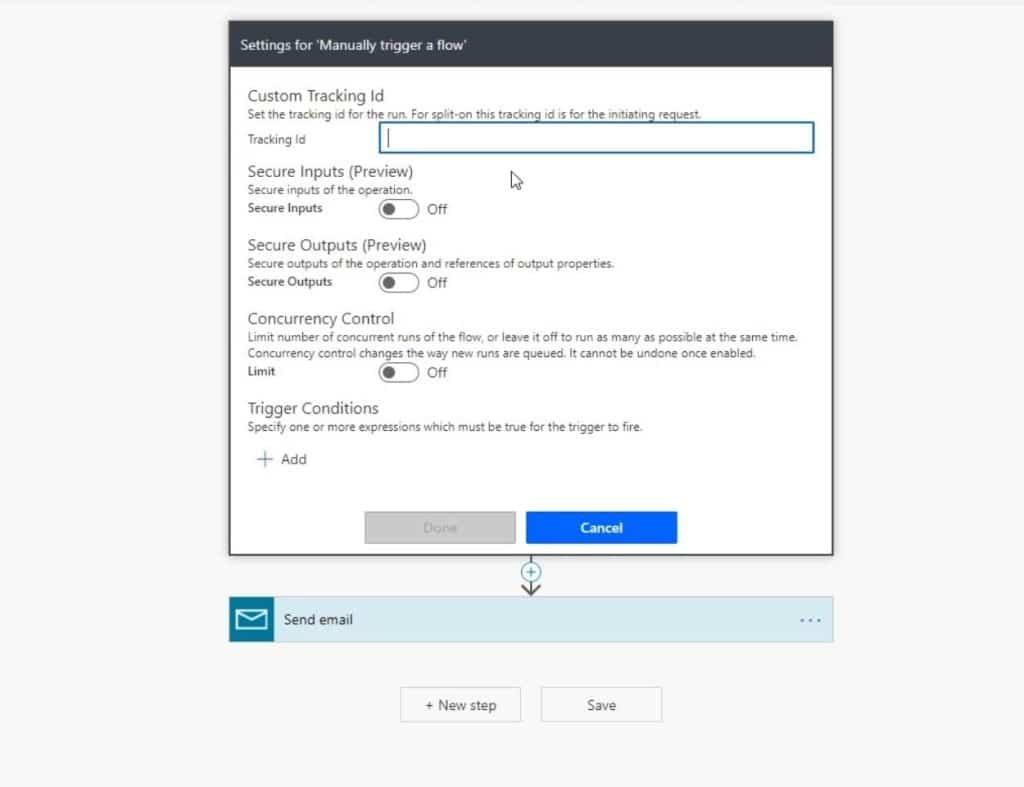
Aside from editing the settings of the inputs, we can also edit the overall setting of this trigger. Just click on the three dots and click Settings.
We can now modify the settings of this trigger. We’ll be able to add a tracking ID if we want to track how many of these buttons have been clicked.
Flow Diagrams: Conditions
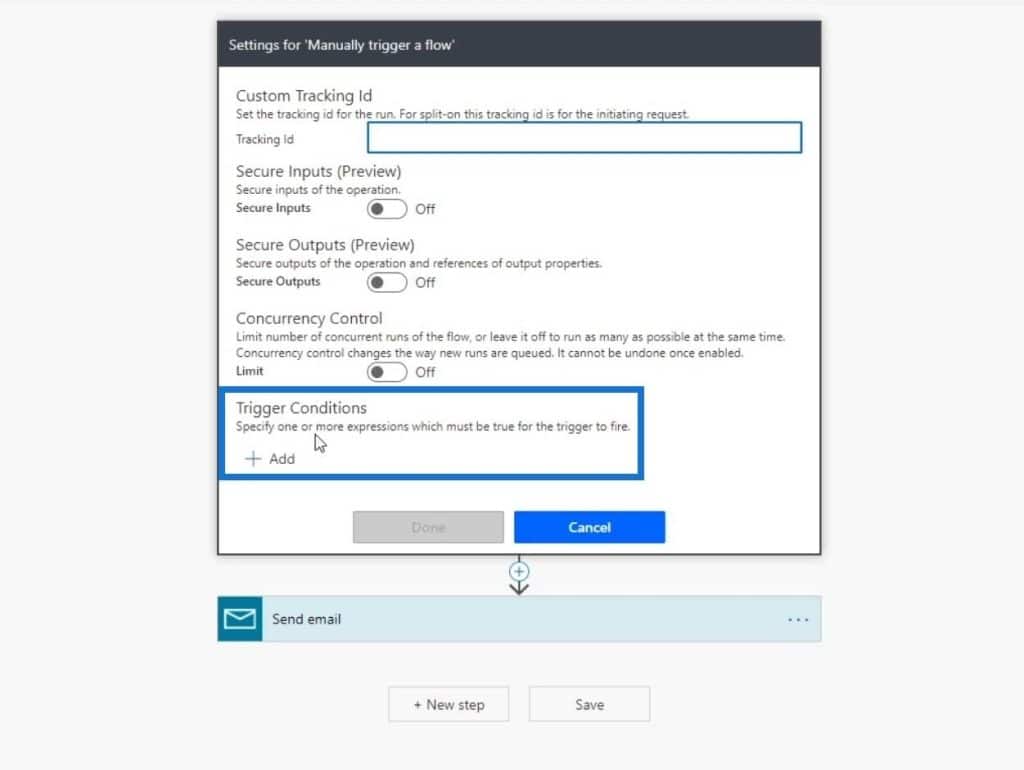
Another thing that I really like in Microsoft Flows is the Conditions. For example, we can create a condition where if a user clicks a button, we have to make sure that the user hasn’t clicked it in the last five minutes. That’s because we don’t want to spam people. Hence, we can make that a trigger condition where the trigger won’t actually be activated unless certain conditions are true.
Flow Diagrams: Actions
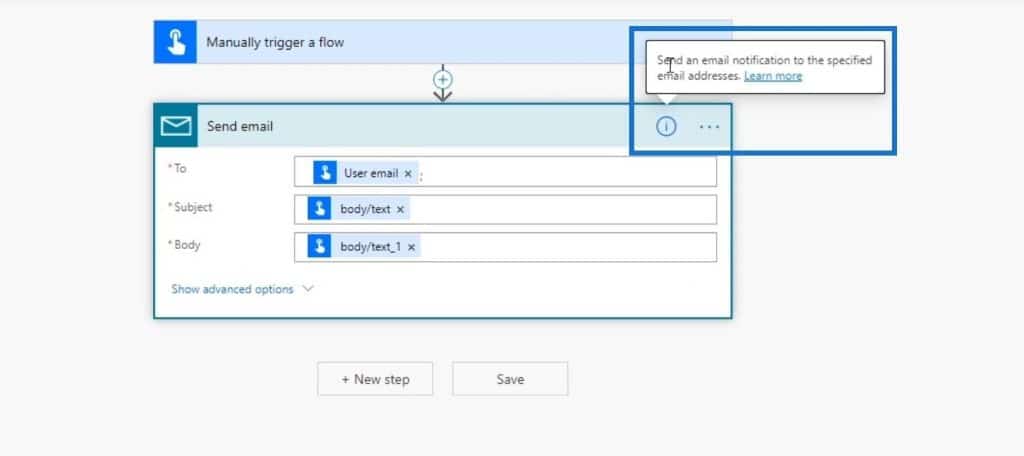
Let’s also check the Send Email action. This has its own properties as well. The Send Email action requires the following parameters: To, Subject, and Body.
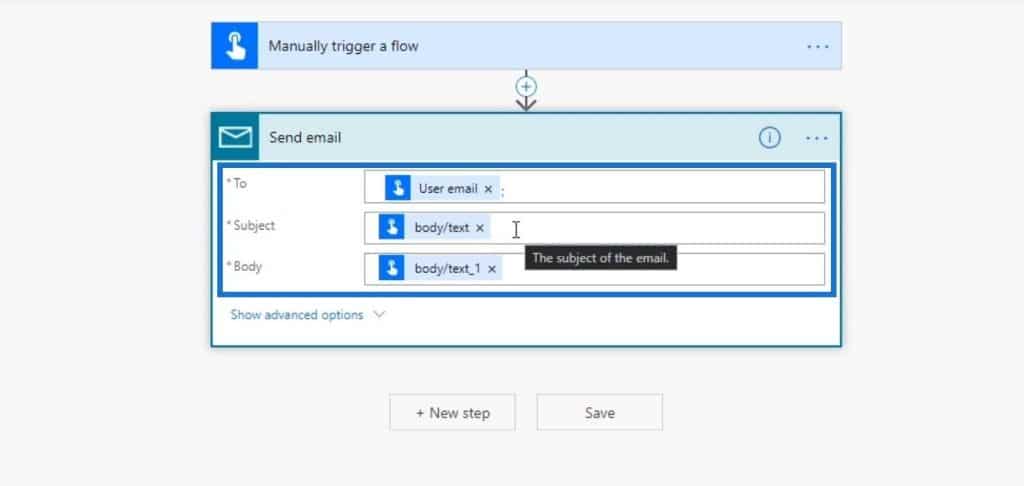
Additionally, we can see more options by clicking the Show advanced options. The Send Email action using the Mail connector has these properties available.
By clicking on this icon, we can also see some additional information. For example, we can see that this action sends an email notification to the specified email address.
***** Related Links *****
Using Power Automate To Refresh Data In Power BI
New Enterprise DNA Masterclasses: Power Apps and Power Automate
Power Apps: Getting Started With This Revolutionary Tool
Conclusion
That’s all for the Flow Diagrams in Power Automate. We’ve also discussed the different options that are available on the Flow Detail page.
The key thing to remember is that the Flow Diagram lays out how the created flow will actually function. It always starts with the trigger and ends with an action/s or condition/s. Keep in mind that the triggers and actions have properties and settings that you can edit.
All the best,
Henry


