Power Automate is a powerful tool that allows users to automate processes and tasks by creating workflows. One of the many things you can do with Power Automate is to add the current date to a filename. This can be useful if you want to keep track of when a file was created or modified, or if you want to ensure that each version of a file has a unique name.
In this blog, we’ll learn how to use Power Automate Desktop to add a date to a filename. I’ll show you how to set up a Power Automate Desktop flow that will enable adding dates to either the beginning or the end of an existing file name. You can watch the full video of this tutorial at the bottom of this blog.

Power Automate Add Date To Filename Overview
Before going into it, let me show you the question that I received on the Enterprise DNA forum that sparked my interest for this tutorial.
We can accomplish this in a couple of different ways using our Power Automate Desktop.
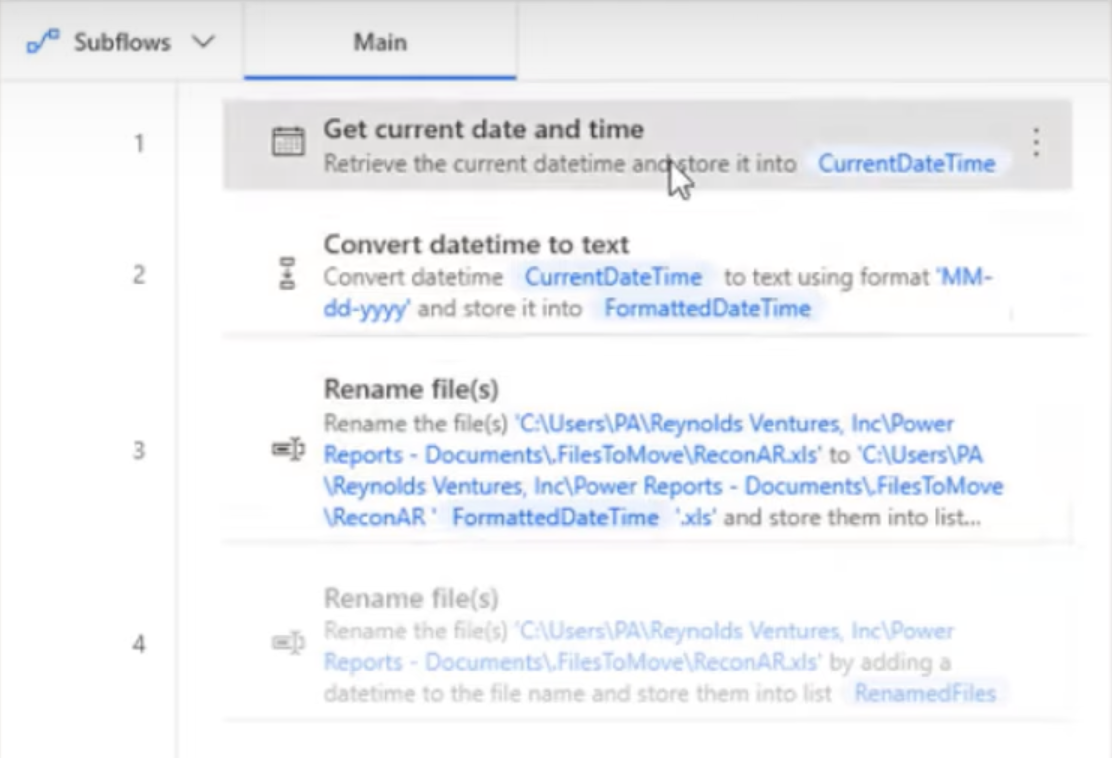
This is the way we had the steps set up in our original flow when we change the name of a current file. We can do it in three different steps.
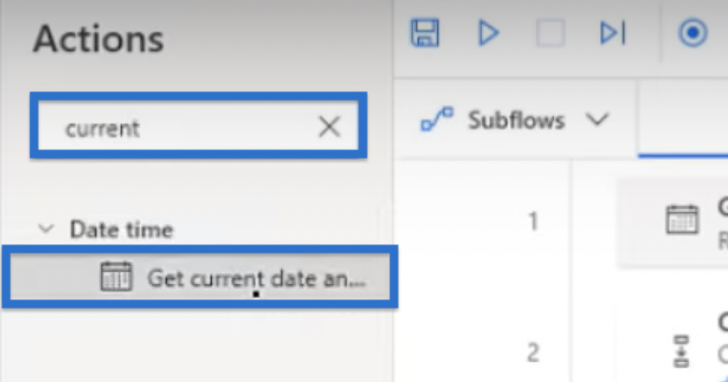
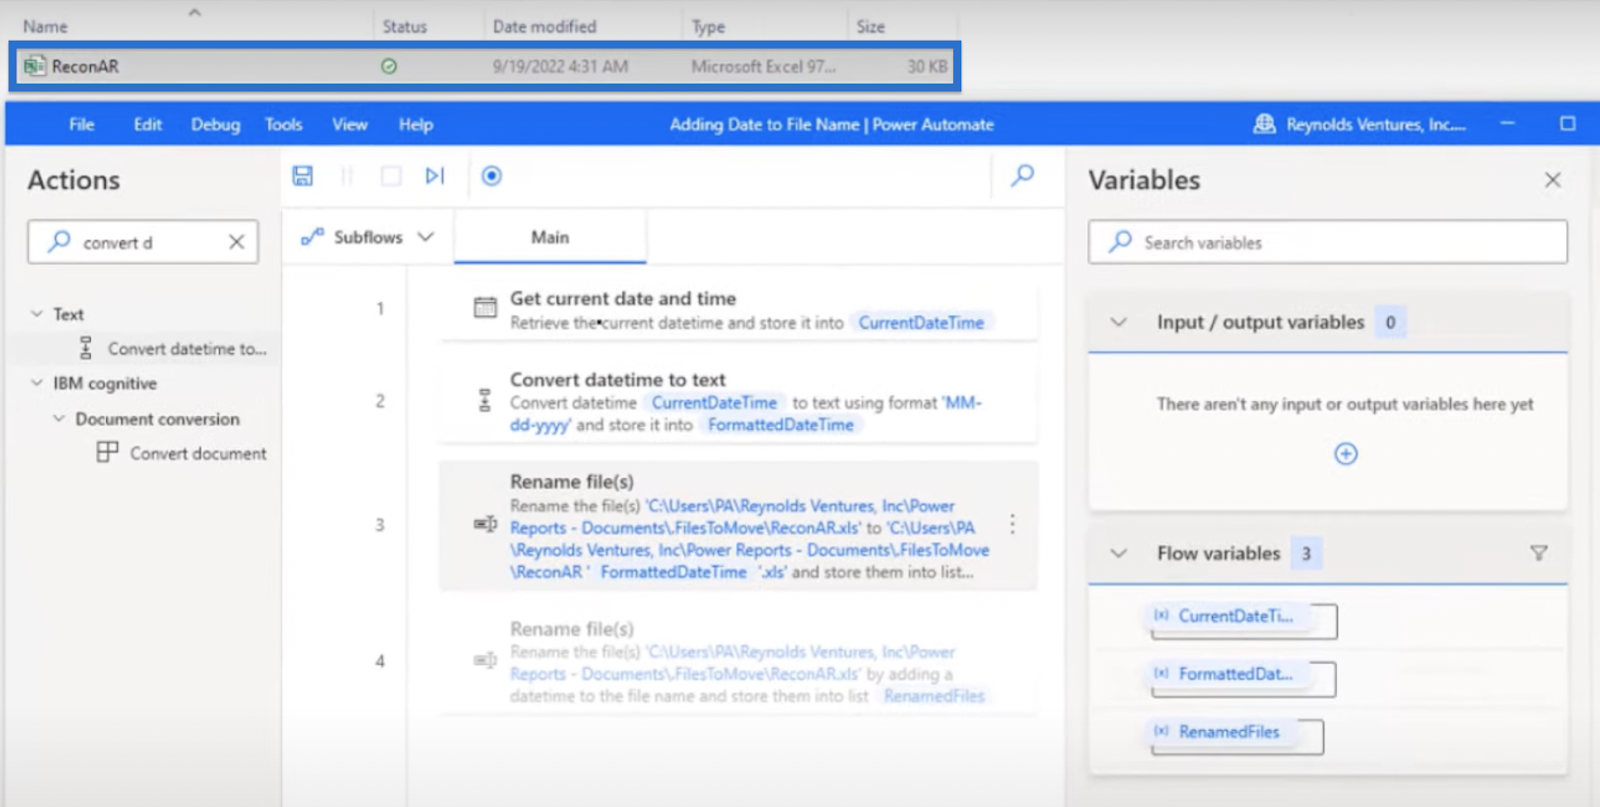
Getting Current Date and Time
Type current in the Actions section and double click Get current date and time.
A dialogue box will open.

The Retrieve parameter dropdown gives us two options—Current date and time and Current date only. In this case, we didn’t want to add the time so we’ll choose Current date only. But depending on our requirements, we can also pick the other option.

We also have the option to choose a Time zone.


Click the Save button.
Converting Datetime to Text
Type Convert datetime to text in the Actions section. Double-click on it.
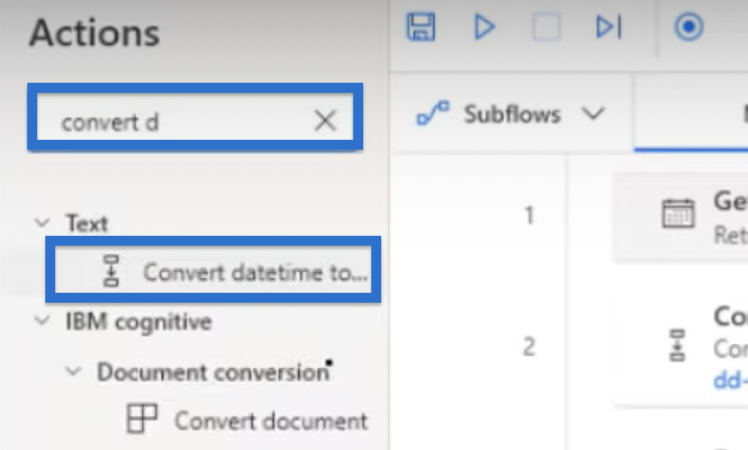
In this case, we want to turn our %CurrentDateTime to a Custom format of MM-dd-yyy.

It will also show us an example below the Custom Format menu.

Once satisfied with the parameters, click ??Save.
Renaming File
Once we have the current DateTime set up the way that we want it to be, all we have to do is to rename the file.
Click Rename file.

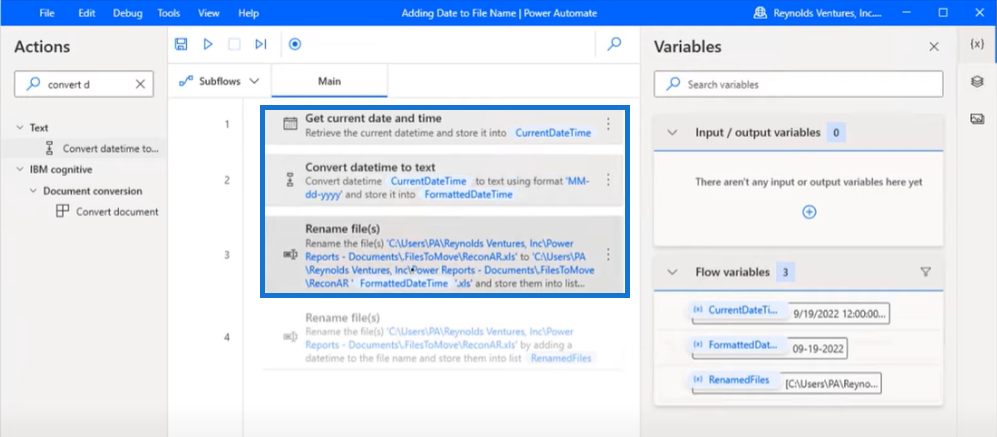
This will show the actual file name that we wanted to rename. In this example, it says ReconAR.xls.

In the Rename scheme, choose Set new name.

In the New file name, copy the link from File to rename. Place the cursor in between ReconAR and the dot. Click (x) and choose the FormattedDateTime variable from the previous step. This will add %FormattedDateTime% after ReconAR in the file name.

Notice that we added a space between ReconAR and %FormattedDateTime%. We did that by clicking on the space bar. This way, the date won’t be added right after the name of the file.

If file exists, we’d want to overwrite it. Then, click Save.

Running Power Automate Add Date To Filename Flow
Let’s try running our flow using our ReconAR file example running in the background.
Click the Run button and we’ll see that it only takes around five seconds for the date to be added to the file name.

We can now see the renamed file. It added the space, date, and the .xls extension.


Quick-Step For Power Automate Add Date To Filename
What we did earlier was the long method of setting up the flow. But as I dig into this flow, I learned one quick step to perform this instead of having to do all three.
Let’s start by manually renaming the file back to ReconAR.

Then, disable all the first three steps. We can do this by clicking the first step and pressing the Shift key down to the last.
Right-click on the third step, and choose Disable action.

Right-click on Step 4 and choose Enable action.

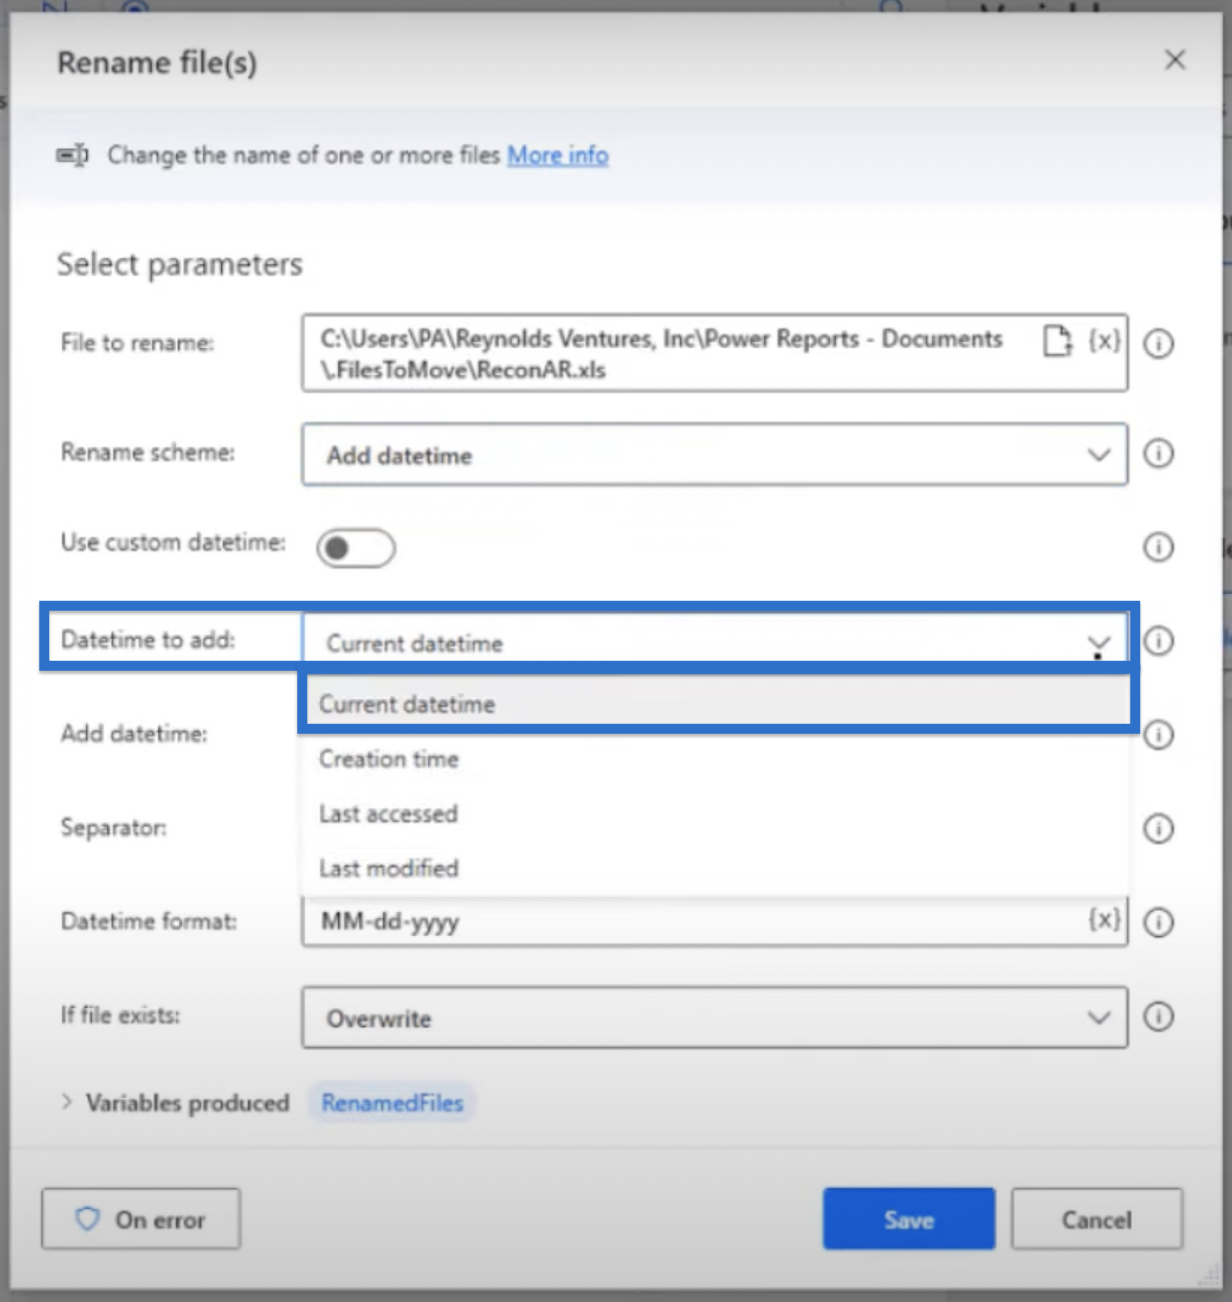
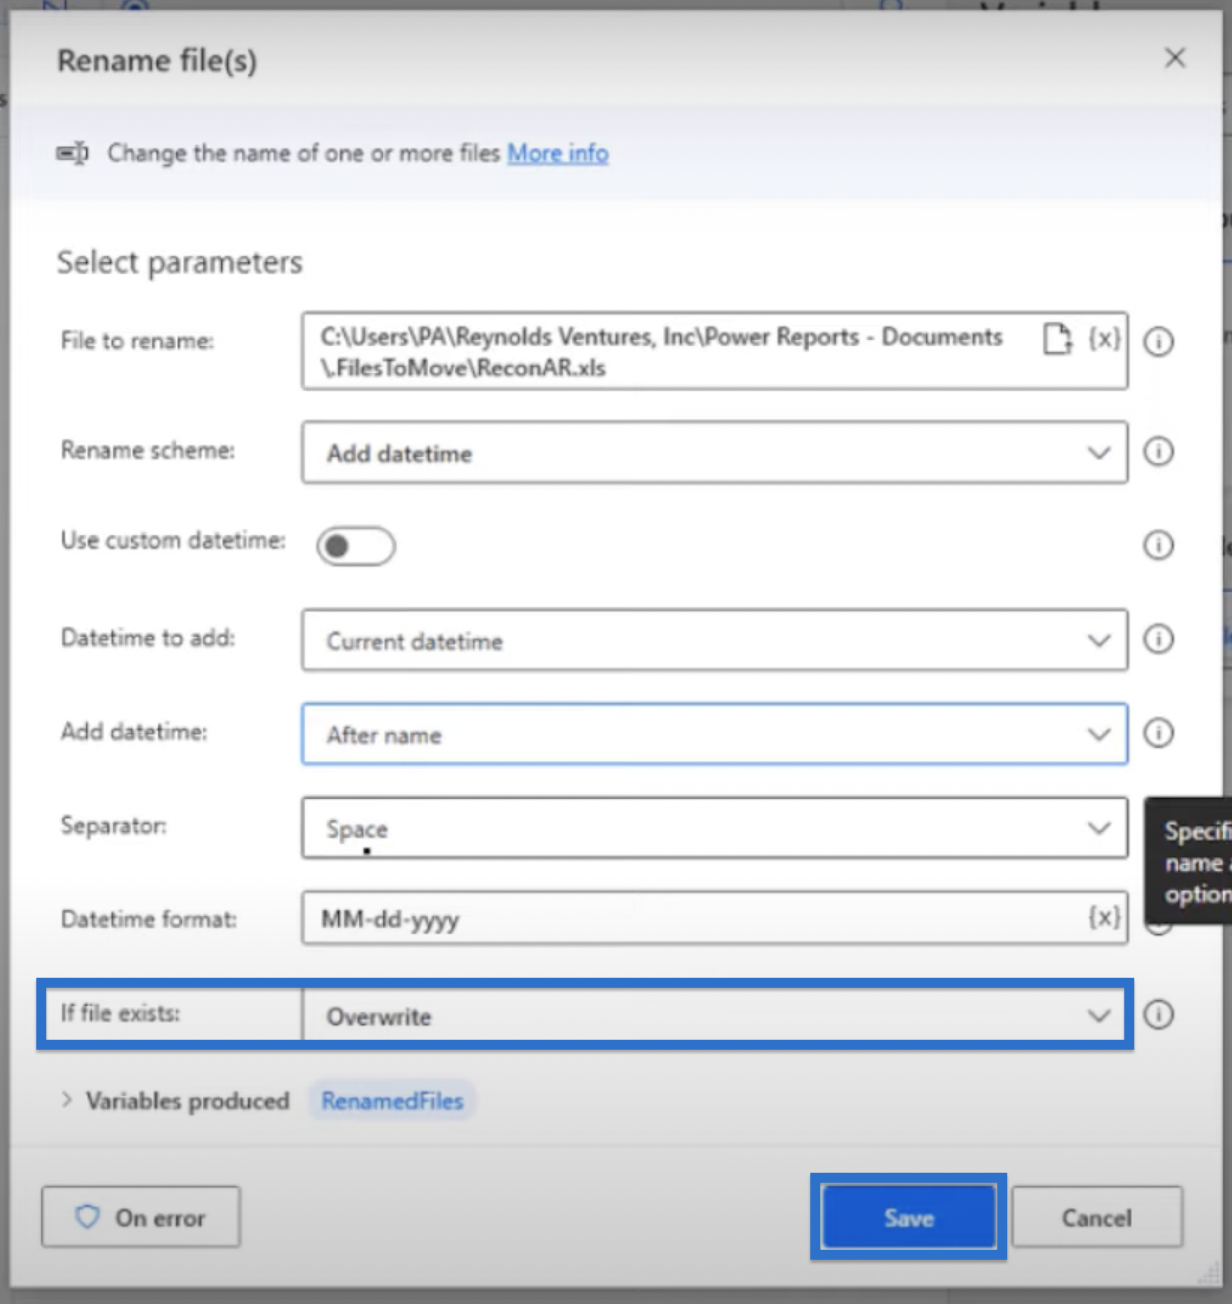
The quicker and easier way to do this in just one step is by using the Rename file(s) step. Click Rename file(s) to open the dialogue box. This will show the same file in the background—ReconAR.xls.

We also have different options for the Rename scheme. In this case, we will select Add datetime.

In the Datetime to add, we can choose which datetime to add in the file name. In this case, we want to add Current datetime.
We also intend to add it After name.

And then, choose Space as the Separator. This way, we don’t have to manually add it to the step above.
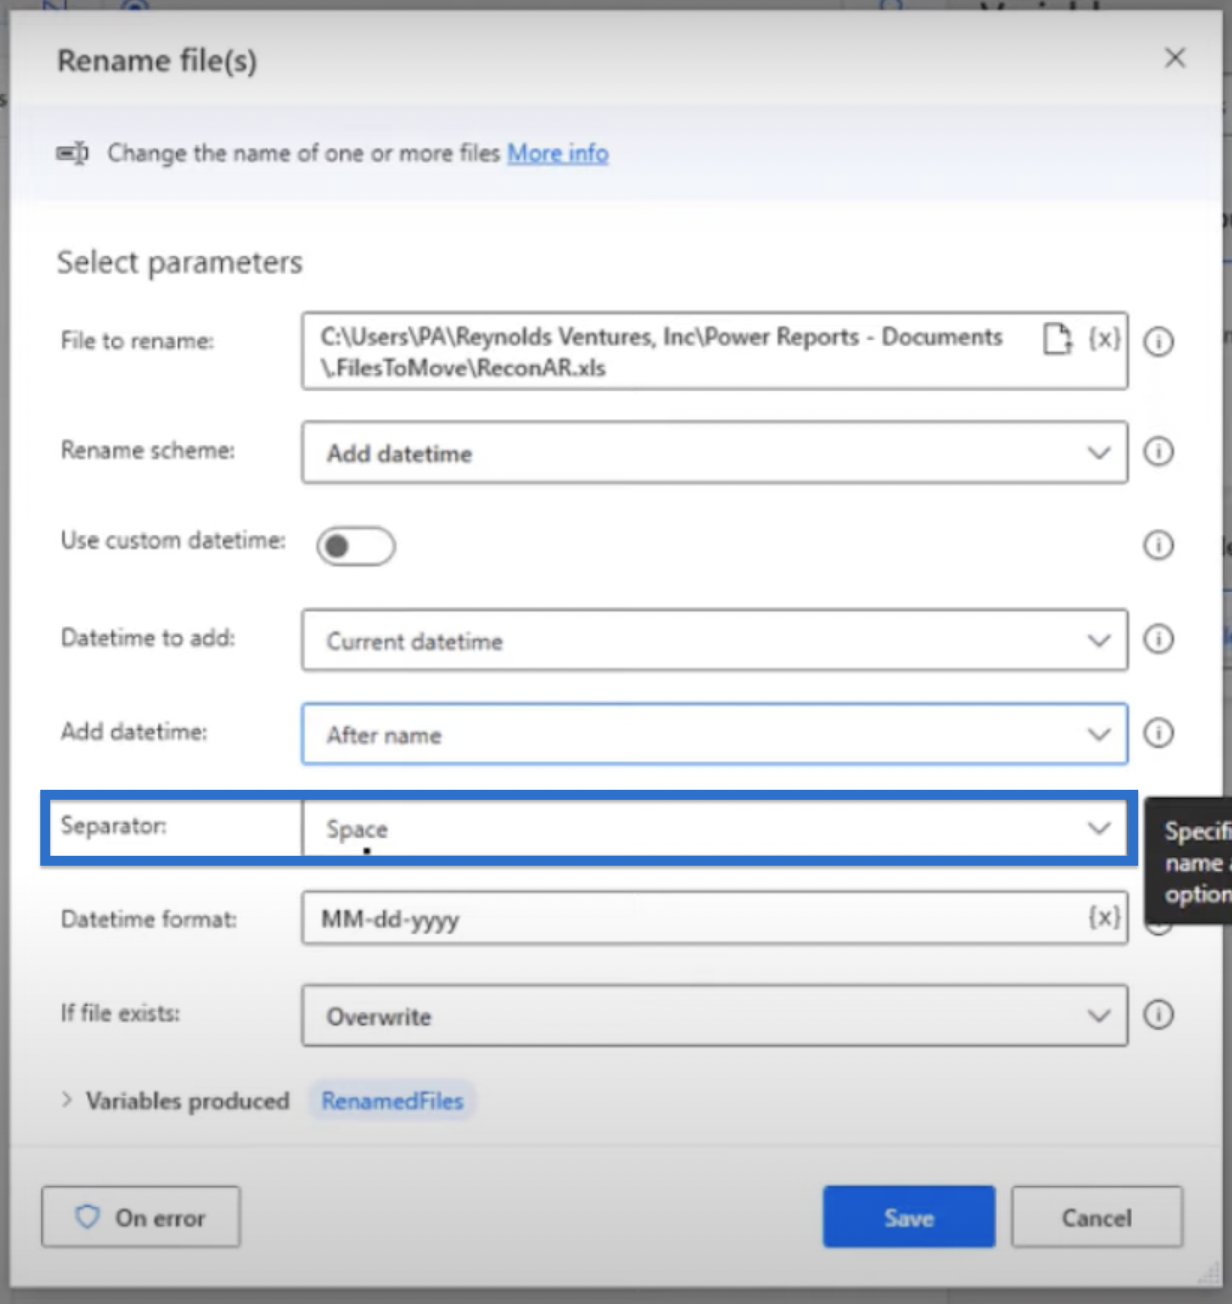
We can customize the Datetime format by typing our own preferences. In our case, we want to use MM-dd-yyyy.

If file exists, choose Overwrite and click Save.
Click the Run button and see how, in one step, we can accomplish what we just did in the previous three steps.
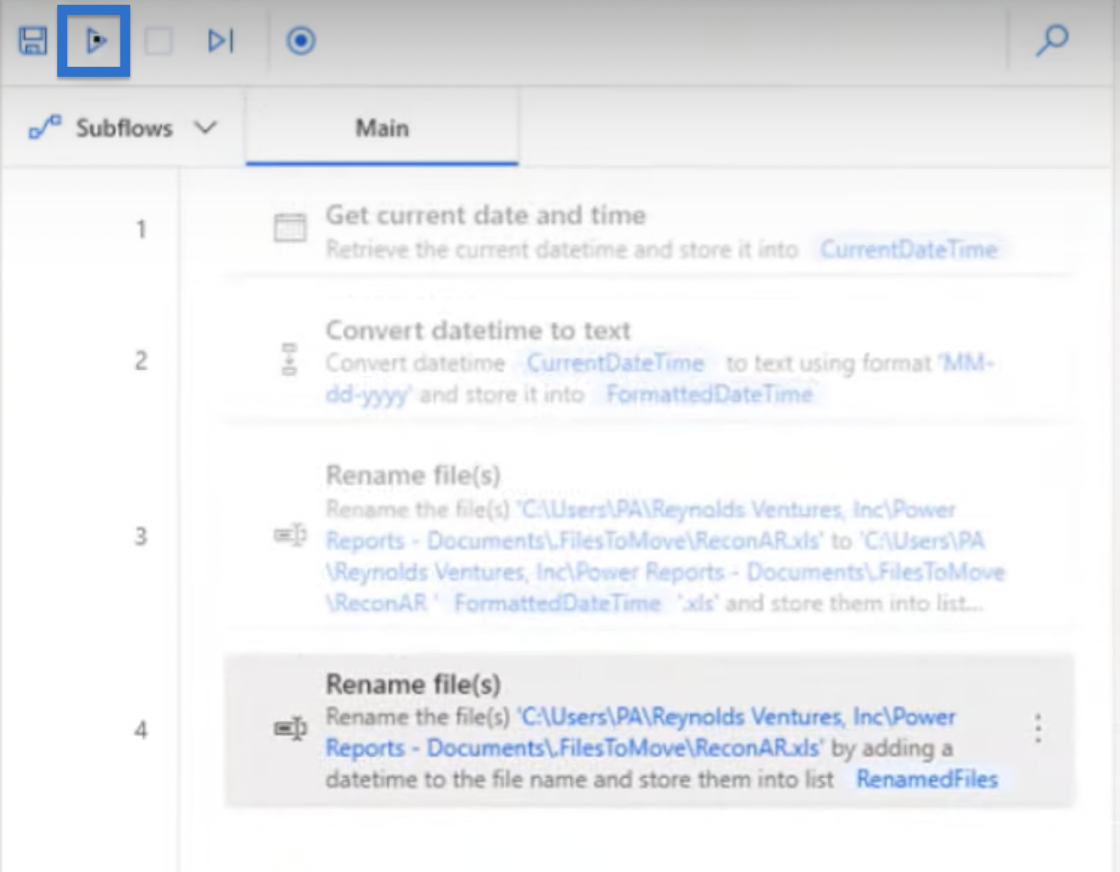
It takes 2-3 seconds to run, and then we’ll have our datetime added to our file name.

It’s an XLS file, but it doesn’t have that extension. So if we want to have that .xls, all we have to do is just type that into the end of the file name.
***** Related links *****
Power Automate UI Flows: Creation And Setup
Power Automate Connectors: Number, Text, And Date Time
Schedule A Desktop Flow To Run In Power Automate
Conclusion
In this blog, we learned how to add a date to a file name using Power Automate Desktop flow. We went through the three different steps to set up and change the name of our current file, by getting the current date and time, converting datetime to text, and renaming file(s). This blog also presented a quick alternative on how to do the above-mentioned three steps in one quick go.
Adding a date to a filename is a useful and efficient way to organize and track your files. This can be especially helpful for keeping track of versions or for ensuring that you are working with the most up-to-date information.
All the best,
Jarrett Moore