If you’re wondering how to apply the short date format in Excel, you’re lucky because it’s super simple and incredibly useful.
It allows you to present dates in a neat way. Plus, when you’re dealing with users from different countries, it keeps things consistent and avoids any date confusion.
To apply the Short Date Format in Excel, you can:
- Select the cells with the dates you want to format.
- Go to the “Home” tab.
- Expand the Number Format drop-down list in the Number group.
- Choose “Short Date”
That’s it! The dates will now be displayed in the short-date format. Easy peasy!
Want to see how it’s done?
Scroll down to see a step-by-step example, of what short date format is all about and how you can apply it in Excel to work like a pro!

What is Short Date Format?
In Excel, dates are stored as serial numbers, representing the number of days that have passed since January 1, 1900.
You can change the date format in different ways instead of displaying the serial number or the date value.
Excel provides a variety of date formats to display dates and times, including short date, long date, and custom date formats.

The Short Date Format is a type of date representation that focuses on displaying essential information while effectively conserving space.
It usually consists of the day, month, and year in a condensed form, which is ideal for situations where only the critical date details are necessary.
In Excel, the short date format typically appears as “mm-dd-yy”. You can change the date format and apply a custom short date format.
However, this format doesn’t include the day of the week names or full month names.
For example, the short date format for August 01, 2023 (which is in long date format), could be displayed as “08/01/23” or “01-08-23” depending on your regional settings.
How to Apply Short Date Format in Excel
When working with dates in Excel, you may need to apply a short date format to make your spreadsheet more readable and consistent.
The short date format typically displays the date as m/d/yyyy, where m is the month, d is the day, and y is the year. In the English (U.S.) locale, the default short date format is shown as m/d/yyyy.

To apply a short-date format in Excel, you can use one of the following methods:
- Using the Number Format Menu
- Using the Format Cells Dialog Box
- Using Context Menu
- Using the TEXT Function
1.) Using the Number Format Menu
You can use the Number Format Menu to apply short-date formats.
To do that, follow the steps listed below:
Select the cells containing the dates you want to format.
1) Let’s say that you want to change the date format of cell B1. Then, as the first step you have to select cell B1.

2) Then, go to the Home tab on the Excel toolbar.

3) Go to the “Number” group and click on the drop-down menu for Number Format.

When you expand the drop-down list, you’ll see the list of number formats.
4) Choose “Short Date” from the drop-down menu.
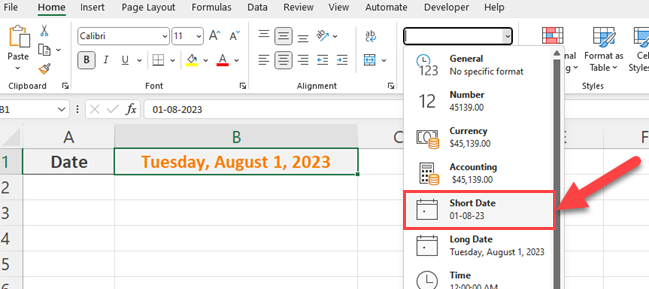
As soon as you select the “Short Date” format option, Excel changes the date format to a short date format.

It is important to note that by using this method, you’ll get only the default date formats.
How to Change Default Date Format
To change your default format, you must update your regional settings in the Control Panel or System Preferences.
Follow the steps below to change the default date format.
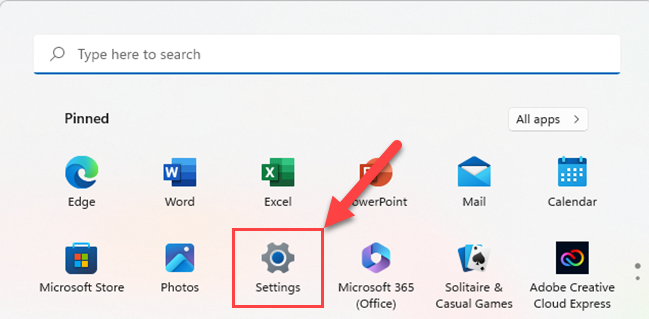
1) Go to Settings on your PC.
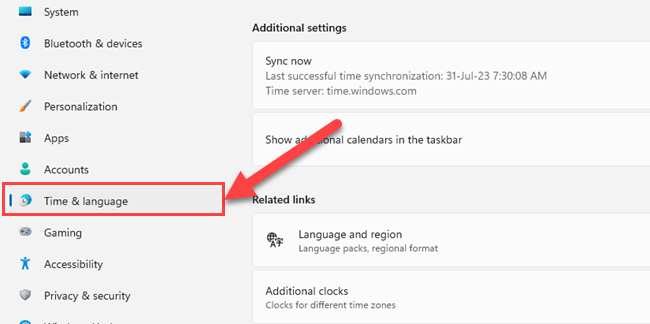
2) Select “Time & Language”.
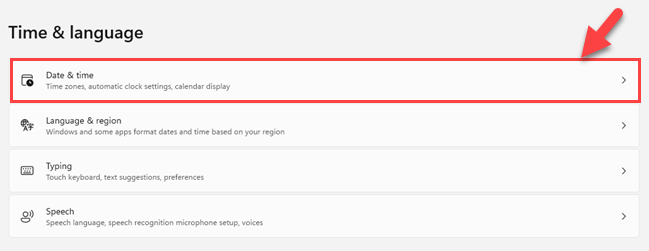
3) Expand the Date and Time.
4) Select “Language and Region”.

5) Change the “Regional Format”.

If you want to change the short date format without changing the settings of your PC, you can apply one of the below methods.
2) Using the Format Cells Dialog Box
Another way to apply the short date format is by using the Format Cells dialog box.
You can use the steps listed below to apply the short date using the Format Cells dialog:
1) Start by selecting the cells with the dates you want to change.
Let’s say that you want to change the date format of cell B1. Then, as the first step you have to select cell B1.

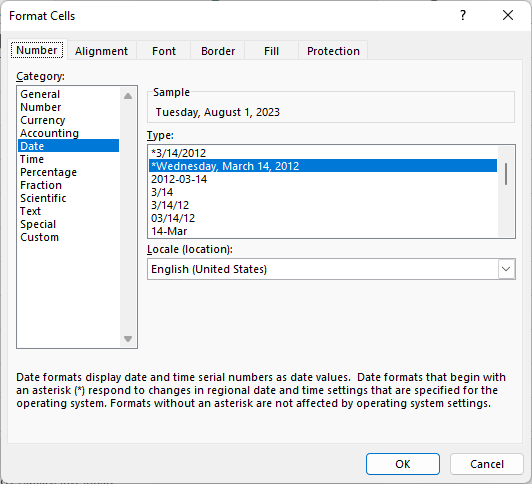
2) Press Ctrl+1 (Command+1 on Mac) to open the Format Cells window using the Keyboard shortcut.
3) Using The Context Menu
An alternative to applying short date format using the Format Cells dialog box is to use the context menu.
Follow the steps below to apply short date format using the context menu:
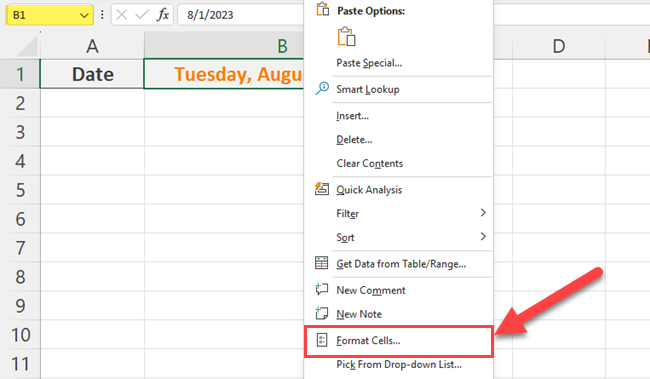
1) Right-click on the selected cell and select Format Cells from the Context Menu.
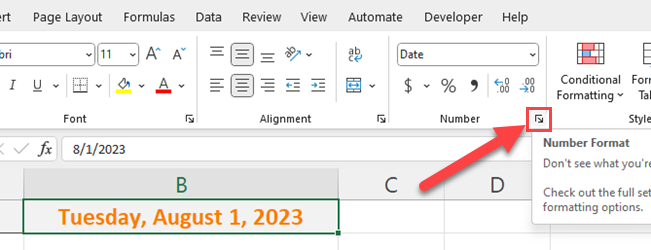
2) Expand the “Number” Group of the Home tab.
3) Go to the Date category of the “Number” tab.
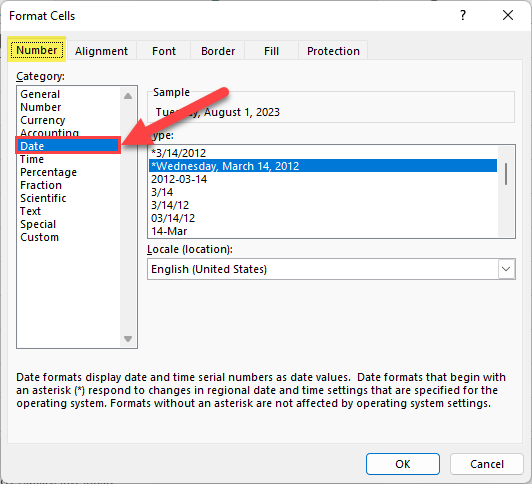
4) Select the desired short date format.
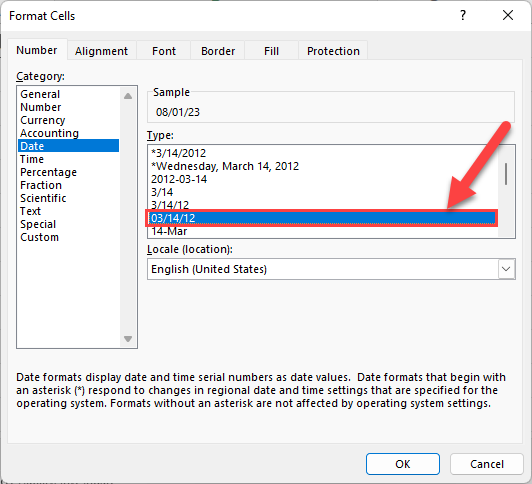
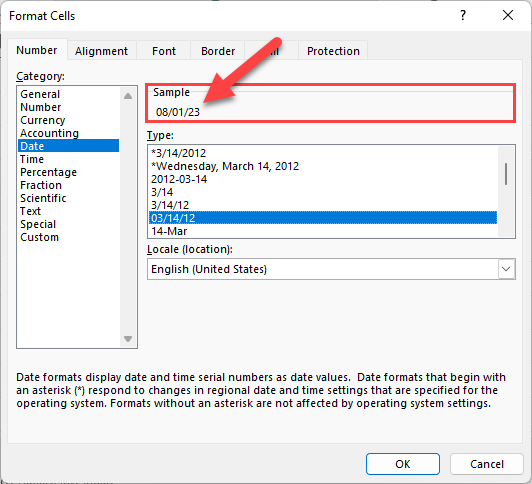
5) When you select the relevant short date format for the selected cell, Excel displays a preview in the sample box.
6) Click the OK button.
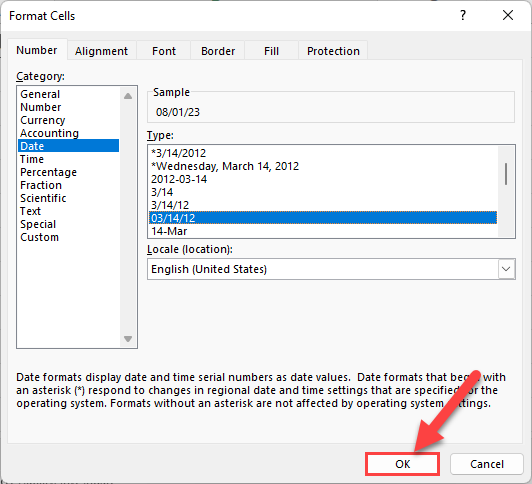
Now, you’ll see that the selected cell’s date is changed to a short date format.

4) Using The TEXT Function
The TEXT function helps you to change the format of dates within the formulas.
To convert a date to a short date format using the TEXT function, you can use the following syntax:
=TEXT(date_cell, "m/d/yyyy")Replace “date_cell” with the reference to the cell containing the date you want to format.

In Excel, the TEXT function usually changes numbers and dates into text string, which can’t be used for calculations.
But here’s a cool thing: when you apply short date format using the TEXT function, it still keeps the date’s power!
You can use it for date calculations like before. So, you get a nice short date and all the math magic you need. It’s like having the best of both worlds!
How to Use a Custom Short Date
Microsoft Excel offers a variety of options to customize date formats, catering to users’ unique preferences.

Here’s a quick breakdown of the custom date format codes:
- d: Displays the day as a number without a leading zero (1-31).
- dd: Displays the day as a number with a leading zero (01-31).
- ddd: Displays the abbreviated day name (Sun-Sat).
- dddd: Displays the full-day name (Sunday-Saturday).
- m: Displays the month as a number without a leading zero (1-12).
- mm: Displays the month as a number with a leading zero (01-12).
- mmm: Displays the abbreviated month name (Jan-Dec).
- mmmm: Displays the full month name (January-December).
- yy: Displays the year as a two-digit number (00-99).
- yyyy: Displays the year as a four-digit number (0000-9999).
Let’s say that you want to use a custom short-date format. In that case, you have to follow the below steps after opening the Format Cells window.
1) Go to the “Custom” category in the “Number” tab.
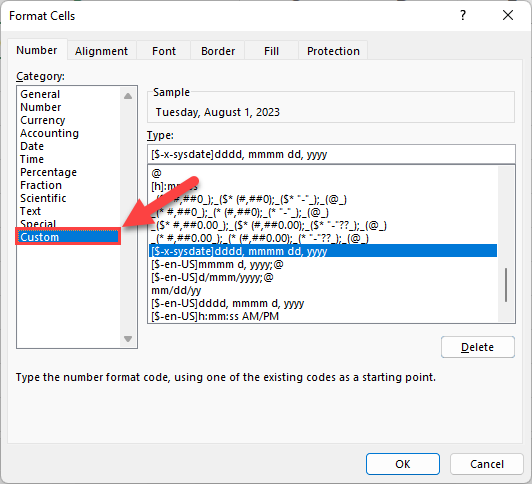
2) In the “Type” box, type the short date format that you want.
Assume that you type “mm-dd-yy” in the Type box.
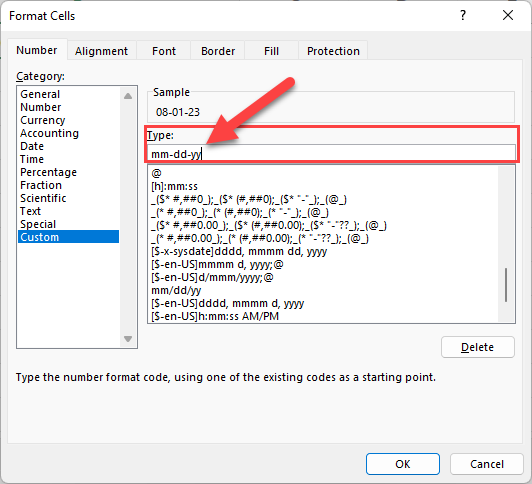
3) After you type the short date format, click the OK button.
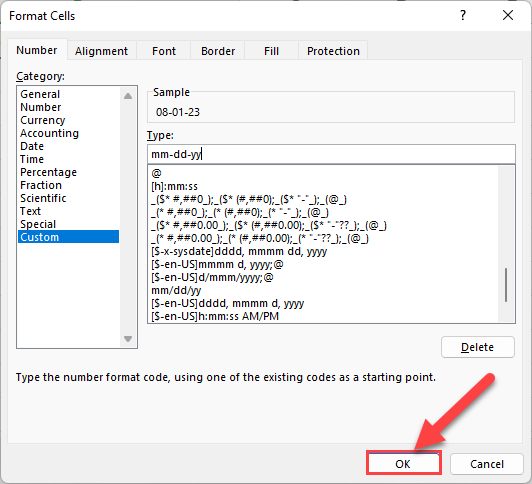
Now, Excel displays the selected cell’s date as follows.

Remember to thoroughly test your custom date formats to ensure they meet your needs and accurately depict the information you intended.
Customizing date formats in Microsoft Excel opens up a world of possibilities for organizing your data, enhancing readability, and showcasing your spreadsheets.
Learn more about changing data formats by watching the following video:
Final Thoughts
Using the short-date format is very helpful. It makes data look clear and easy to understand, especially when there are many dates. It also keeps things consistent for people from different places with different date formats.
Short dates save space, make sorting and filtering easier, and help with calculations. They also make it simple to share data between Excel and other software without any problems.
Applying short-date formats in Excel is very easy. You can use Number Format options, the Format Cells Dialog box, or the TEXT function to format dates.
Frequently Asked Questions
In this section, you’ll find some frequently asked questions you may have when working with short-date format in Excel.

How can I display a short date in Excel?
To display a short date in Excel, select the cells containing the dates you want to format.
Right-click and choose “Format Cells.”
In the “Number” tab, select “Date” in the “Category” section and choose the short date format you prefer. Click “OK” to apply the format.
What formula do I use to change the date format in Excel?
You can use the TEXT function to change the date format in Excel.
The syntax is =TEXT(value, format_text).
For example, if you have a date in cell A1 and want to format it as dd/mm/yyyy, use the formula =TEXT(A1, “dd/mm/yyyy”).
Why is my date format not changing in Excel?
If your date format is not changing in Excel, it could be due to the cell containing text instead of a date value.
To fix this, you can use the DATEVALUE function to convert the text into a date value and then apply the desired date format.
How can I change the date format to dd/mm/yyyy?
Select the cells containing the dates you want to change, right-click and choose “Format Cells.”
In the “Number” tab, select “Custom” in the “Category” section, and type the dd/mm/yyyy in the Type box. Click “OK” to apply the new date format.
What’s the cause of Excel showing ‘####’ instead of date?
Excel shows ‘####’ instead of a date when the column width is too narrow to display the date properly.
To fix this, double-click the column header’s border to auto-fit the column width, or manually adjust the column width.
How do I change the date format for an entire column in Excel?
To change the date format for an entire column, click on the column header to select the whole column.
Then, right-click and choose “Format Cells.” In the “Number” tab, select “Date” in the “Category” list and choose the desired date format. Click “OK” to apply the format to the entire column.


