Recently, I had a session at the Enterprise DNA summit and one of the requests in the comments was a tutorial on how to schedule a Power automate desktop flow to run. You can watch the full video of this tutorial at the bottom of this blog.
So for today, I’ll go over how to schedule a Power Automate desktop flow to run inside Power Automate online. Let’s go to the Power Automate online and get one of the flows scheduled. All we have to do is basically just type in flow.microsoft.com and it will take you to this homepage. This is what it would look like if you were already signed in.

Since I already have some of these flows set up, I’m going to click on the My flows link in the left side.

Different Kinds Of Flows
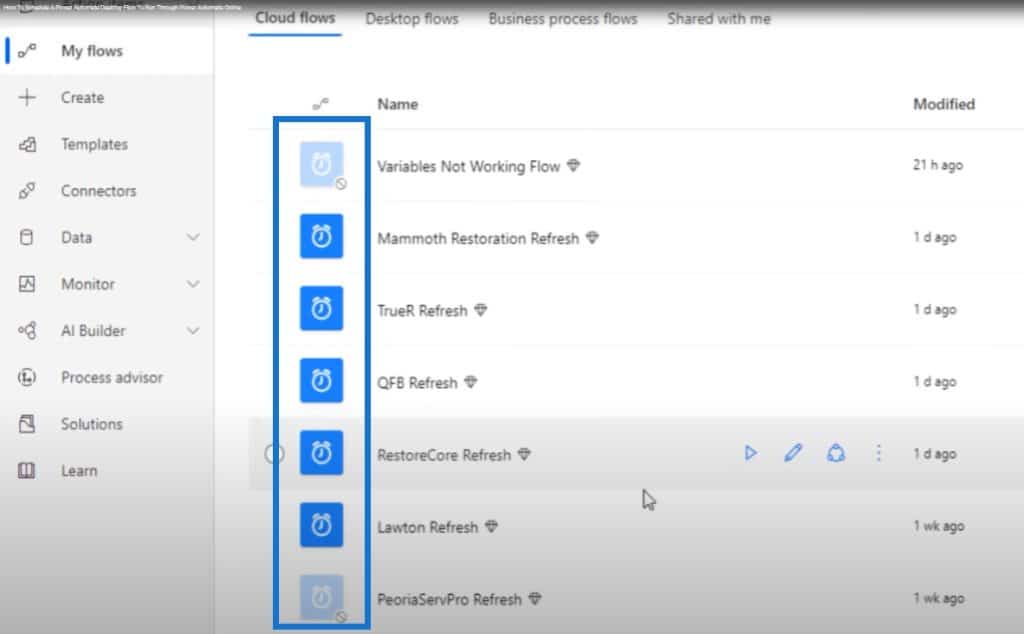
When we click on the My Flows link, this is what appears on the screen. There are four tabs at the top.

Cloud flows could be any flow that we’ve created through flow.microsoft.com. You can check out our Power Automate Masterclass course from our Enterprise DNA expert, Henry Habib, for more on this topic. Typically, most of Henry’s flows would be under cloud flows.
Most of the flows under here are flows that I already set up that trigger or run those desktop flows on a schedule.
There’s also a Desktop flows tab, and a Business process flows tab. And then there’s another tab for Shared with me. If another user within your organization has shared a flow with you, it would appear in this tab.
All About Cloud Flows
But for today, I’m just going to concentrate on the cloud flows. In my situation, I schedule these desktop flows to run during the night so that when I wake up in the morning, I have the Power BI refresh schedule turned on.
These flows are downloading the data that I need to import into Power BI desktop. These refresh already have the updated data when they’re scheduled to run in the morning,
On the Cloud flows tab, you can see the highlighted clock icon which lets us know that this is a scheduled flow. The grayed out clock icons are current flows that I don’t have turned on. I have them set up, but they’re not scheduled to run so I have them turned off.
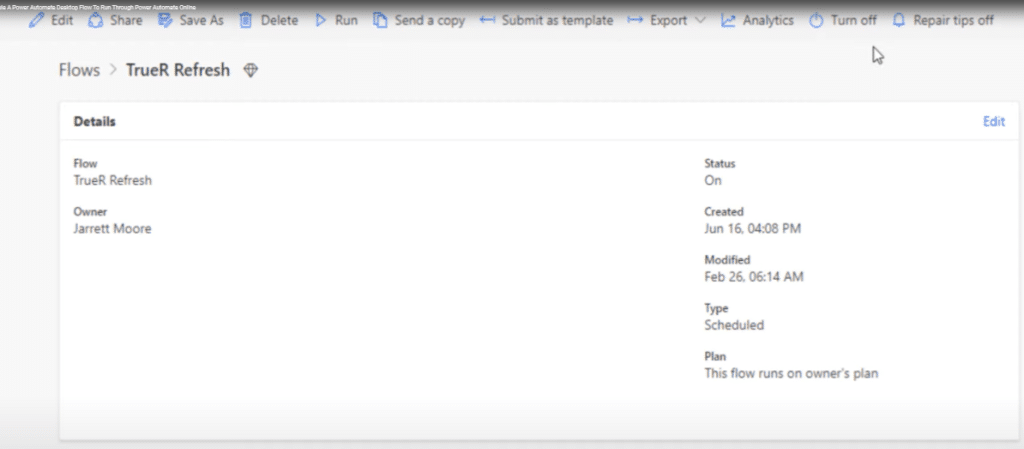
If you want to see one of these flows, just click on the link of the flow. This will give you the name and the key metrics of the flow. On the top, there are different things that you can do such as Edit, Share, Save As, Delete, etc.
What To Do With A Failed Power Automate Desktop Flow
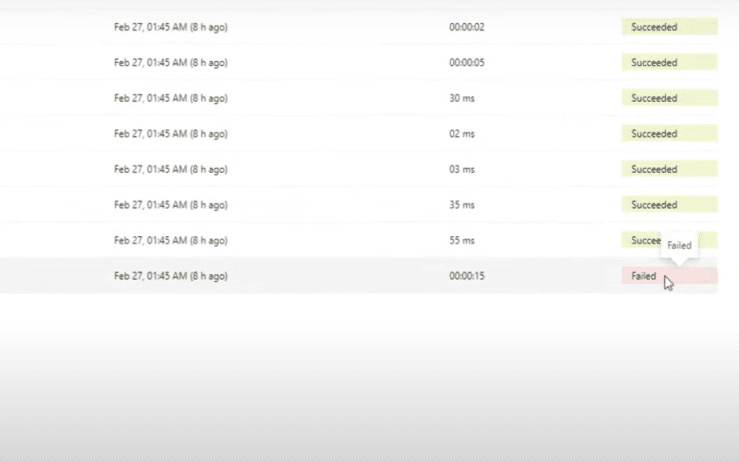
And then at the bottom, it gives you a 28-day run history. As you can see, on February 27th at 1:45 this morning, this flow failed.

We can click on the date link and it will show us that the message that timeout has expired.

We can go over here and click on Run a flow built with Power Automate desktop, and then scroll down the page.
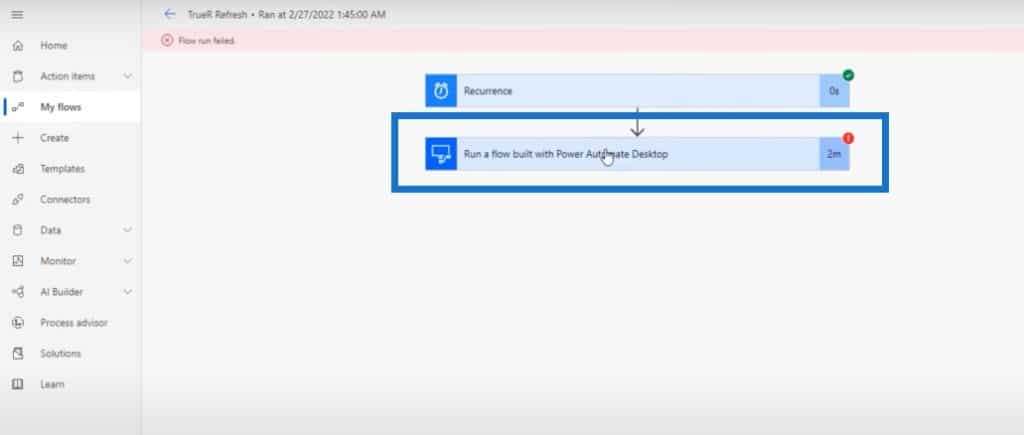
Click on See run details.

This action will open up a new page where we can see the step-by-step processes and determine which steps proceeded and where it failed. We can see that on the right hand side of the screen, everything was good until this point.
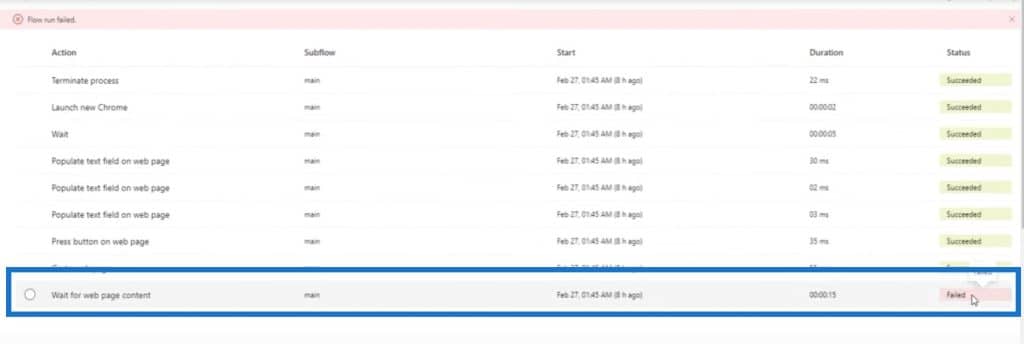
What I really like about this feature is that when you click over on the left side, it shows you a picture of what the screen looked like when the flow failed.

You can use this feature to investigate and see the finer details on why your flow may have failed, and the reasons why.
Other Things To Do In The Main Screen
Let’s go back to the main screen. Some other cool things that we can do from this page is run the flow, edit the flow, and share the flow with another member inside of our organization using these buttons.

And then by clicking on the three dots on the side, a shortcut menu gives us different options to choose from.

So this is what the main screen looks like once you actually have some cloud flows set up. In my case, most of these are triggering desktop flows.
Creating A New Power Automate Desktop Flow
Let’s create another one of these cloud flows by going to the top button that says New flow.
There will be a menu where we can choose from different types of flows: Automated cloud flow, Instant cloud flow, Scheduled cloud flow, Desktop flow, or a Business process flow.

For this example, we’re clicking on a scheduled cloud flow. We’ll give this flow a name (Test123), starting date (2/27/22), and time (11:30PM). We can also have the flow repeat every day, week, or month. In this case, we’ll use it on a daily basis.
This new flow is going to start on February 27th at 1130 at night, and it will repeat every night, moving forward until we tell it to stop.
We’ll click on the Create button at the bottom to go to the next step in this process.

When you do run a scheduled cloud flow based on your desktop flows, your computer should not be asleep. It has to be on during this time. If you did this and your machine was asleep, you would see the next day that it failed.
Once we click on the Create button, it automatically brings up the Recurrence step. Click on Edit, and then click on Show advanced options.

From there, select your time zone.

For At these hours, we’re going to select what hour we wanted this flow to run, and for At these minutes, we can just type in the minutes. Then we’ll click on New step.

If we want to run this flow multiple times, obviously we’d have to change frequency at the top. We can also separate these numbers by commas so that the flow will run at different times throughout the day.
Once you click on New step, this screen comes up.

When we click on Desktop flows button, it will give us two options: Run a flow built with Power Automate for desktop or Run a flow built with Selenium IDE.

In this case, the first option is what we’re using today. This screen will then pop up.

After we click on Desktop flow, let’s scroll down to the Enterprise DNA example.

When we click on Run mode, we’ll get two options: attended and unattended.

If you go to the Power Automate homepage and look at the prices, there is an extreme difference between attended and unattended.
We’ll be using attended flows, which means that we have to be signed in in order for the flow to run. You can run them unattended, but the price difference between the two is huge.
All we have to do is go to the bottom and click Save. We’ll see this message that says Your flow is ready to go. We recommend you test it.
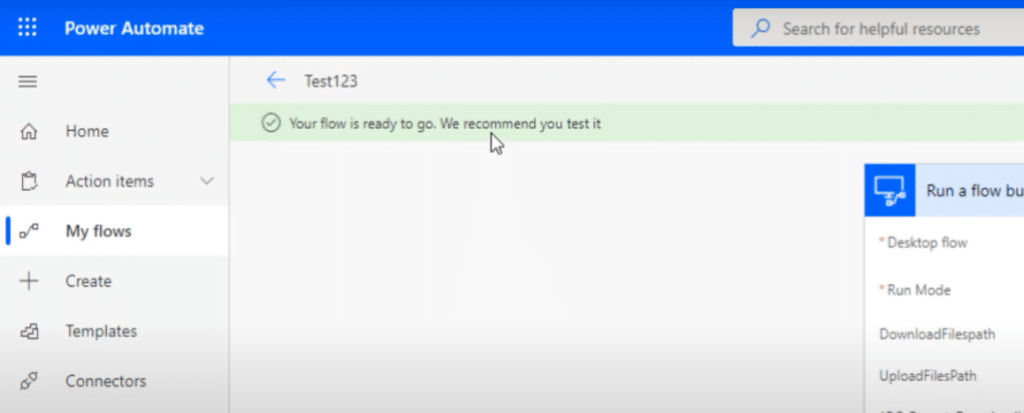
We can go to the upper right of the screen and click on Flow checker to do this.

***** Related Links *****
HTTP Request In Power Automate – An Introduction
Microsoft Flow HTTP Trigger | A Power Automate Tutorial
Approval Workflow Setup And Testing In Power Automate
Conclusion
These are really the only two steps that you need in order to set up a desktop flow: Recurrence and Run a flow built with Power Automate for desktop. It’s not really that hard to get these flows set up and going once you get the hang of it.
If you enjoyed the content covered in this particular tutorial, please subscribe to the Enterprise DNA TV channel. We have a huge amount of content coming out all the time from myself and a range of content creators, all dedicated to improving the way that you use Power BI and the Power Platform.
Jarrett
[youtube https://www.youtube.com/watch?v=SIXVpmJoC8U?rel=0&w=784&h=441]


