
When you’ve got loads of info in Excel, you want to organize it neatly for easy handling. One smart trick is using line breaks inside cells.
It lets you tidy up long text without messing up your sheet by merging cells or adjusting columns.
Basically, line breaks let you split text neatly inside a single cell, which helps keep your Excel sheets looking nice and neat.

To insert a new line in Excel, you can follow the below steps:
- Select the cell where you want to enter the new line.
- Press F2 to activate the Edit mode.
- Keep the cursor where you like to insert line break.
- Press the Enter and Alt keys together.
Read on for detailed screenshots, and we’ll show you some simple techniques to start a new line within cells.
Applying these methods to your spreadsheet workflow will ensure that your data remains well-structured and professionally presented.
Let’s get into it.

The Basics of New Line in Excel
When working with Excel, sometimes you may need to insert a new line or a line break within a cell to format your data effectively.
In Excel, a “new line” refers to inserting a line break or moving the text cursor to a new line within a cell’s content. This allows you to write or display multiple lines of text within a single cell.

This can help improve readability and organization in your spreadsheet.
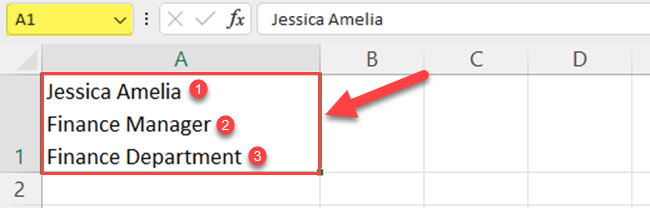
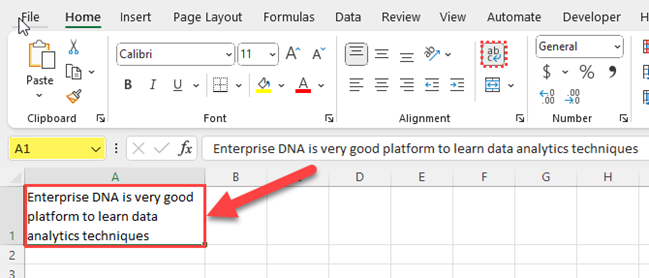
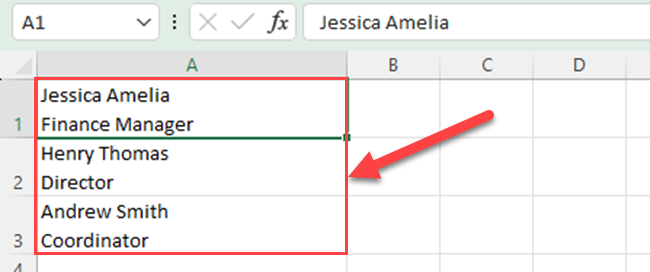
In the above image, there are three separate lines in cell A1. The first line is for the name, the second line is for the position and the last line is for the department. Displaying the data using the New Line function helps to identify data easily.
Different Methods for New Lines in Excel
We have established that adding a new line within an Excel cell is sometimes necessary to improve readability or to better organize your data.
Now, we’ll show you that there are several methods to achieve this.
In this next section, we’ll discuss some of the most commonly used methods for inserting line breaks in Excel cells.
The most common methods to add a line break in your Excel worksheet are as follows.
- Use the Excel Keyboard Shortcut
- Use the Excel Wrap Text feature
- Use the Excel CHAR function
- Use the Excel Find and Replace dialog box
Let’s discuss each method in detail.
How to Use Keyboard Shortcut to insert a new line in Excel?
The quickest way to insert a new line in a cell is by using a keyboard shortcut.
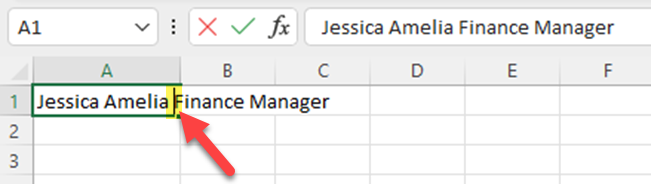
In the following example, both the name – “Jessica Amelia” and her position, “Finance Manager,” are within the same cell, A1.
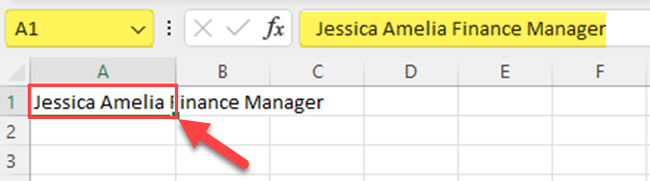
Now, let’s say that you want to take her position to the next line of the same cell.
Follow the below simple steps:
Step 1
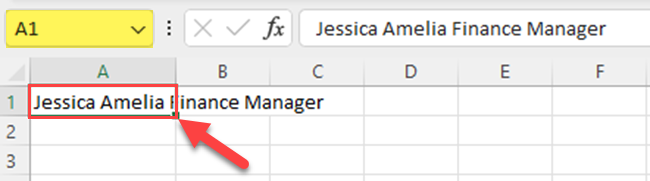
Select the cell where you want to enter the new line. In this case, you have to select cell A1.
Step 2
Press F2 to activate the Edit mode. If the function keys are locked, press the key combination of Fn and F2.

Then, you’ll see the cursor at the end of the selected cell’s text strings.
Step 3
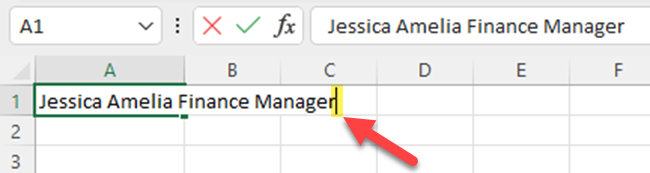
Move the cursor to the place where you like to insert a line break.
In this example, you need to position the cursor just before the letter “F” in the position “Finance Manager.”
Step 4
Press the Enter and Alt keys together.
If you are using a Mac, you can achieve the same result by pressing Control+Option+Return.
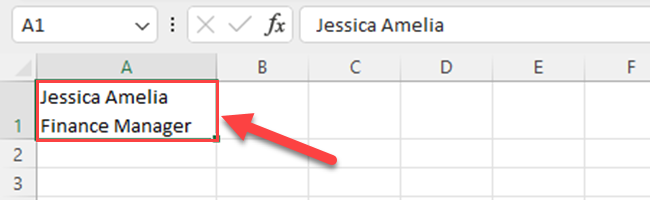
As soon as you use the above shortcut, Excel moves the text string on the right side of the cursor to the second line.
How to Use Wrap Text to Insert Multiple Lines in Excel?
The Wrap Text feature is a helpful tool that allows you to conveniently manage text data in your spreadsheet cells.
By utilizing this feature, you can ensure that your text data is presented in a neat, organized manner within the cells.
In the below example, the statement in cell A1 is not fitting to the cell.

Now, you have to do the text wrapping and show the sentence in multiple lines in the same cell.
To use the Wrap Text feature, follow the below steps:
Step 1
Select the cell in which you want to apply the Wrap Text. In this example, you have to select cell A1.

Step 2
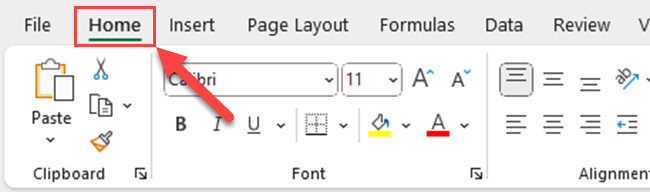
Go to the Home tab on the ribbon.
Step 3
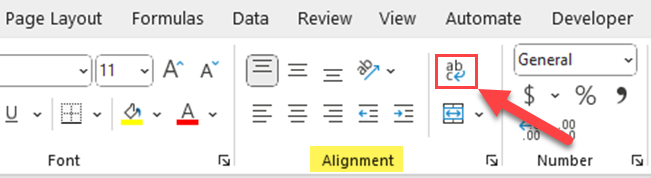
Go to the Alignment group and click the Wrap Text button.
Now, Excel automatically adjusts the text to fit within the cell boundaries, breaking lines for better readability.

There is another way to activate the Wrap Text feature. We’ll use this same example in that way.
Step 1
Select the cell in which you want to apply the Wrap Text. In this example, you have to select cell A1.
Step 2
Simply press Ctrl + 1 to open the Format Cells dialog box.

Step 3
Go to the Alignment tab.
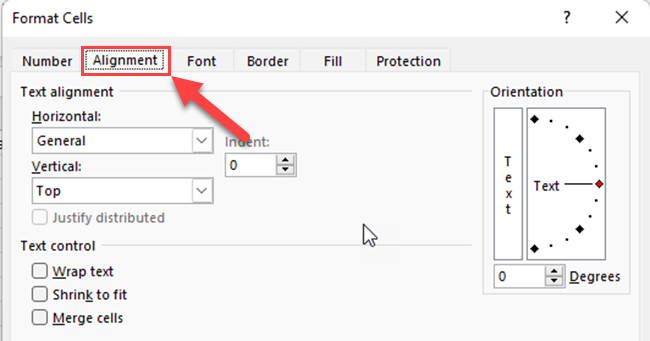
Step 4
Select the Wrap Text checkbox of the Text Control section, and click “OK.”
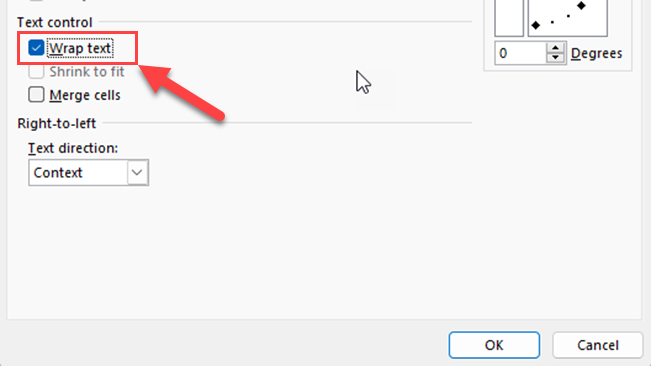
Then, you’ll see the text of the selected cell is automatically formatted with line breaks.

When using the Wrap Text feature, keep in mind that resizing your column width or row height may affect the appearance of the text within the cell.
To maintain optimal text formatting, you may need to adjust the size of your cells accordingly.
In summary, the Wrap Text feature in Excel is a valuable tool for managing and organizing text data within your spreadsheet.
By making use of this feature, you can ensure that your text is presented in a clear, readable format, ultimately enhancing the overall presentation of your spreadsheet.
How to Use Excel CHAR Function to Add Line Breaks?
In Excel, the CHAR function is a valuable tool for manipulating text data, especially when you need to insert new lines or work with special characters.
The CHAR function returns a character when given a valid character code.
For example, CHAR(10) returns a line break that can be used to add a new line to text in a formula.
When working with Excel, you’ll often encounter different character codes for line breaks based on the operating system.
In Windows, the code is represented as CHAR(10), whereas on Mac, it’s CHAR(13). Using these character codes, you can create new lines within cells and improve the readability of your data.
You can easily combine CHAR(10) with many Excel functions and formulas.
CHAR(10) with the Concatenate Operator (&)
One way to make use of the CHAR function when inserting new lines is by combining it with the concatenate operator (&) or the CONCAT function.
If you want to combine two text strings and insert a new line between them, you can do so with the following formula:
="First String" & CHAR(10) & "Second String"
In the below example, I want to combine the name and the position into cell B4 as two lines.
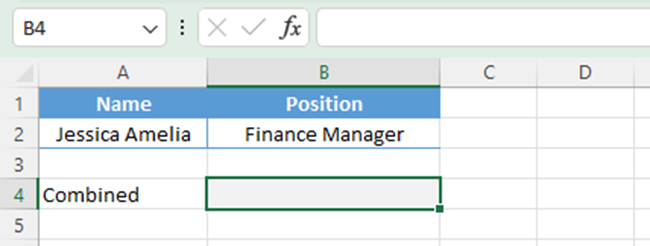
To combine cells with a line break, you can use the below formula:
=A2&CHAR(10)&B2
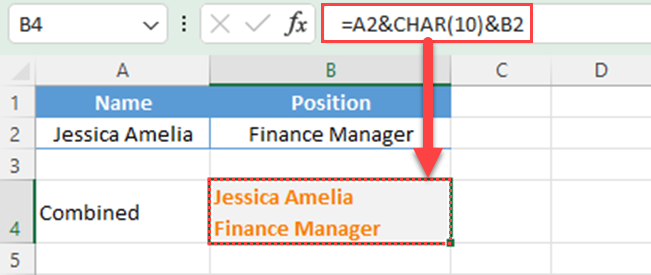
Remember to enable the “Wrap Text” option under the Home tab in Excel when working with line breaks, as it ensures the new lines are displayed correctly within cells.
CHAR(10) with the TEXTJOIN Function
Alternatively, you can use the TEXTJOIN function to achieve similar results.
The TEXTJOIN function combines text from multiple cells using a specified delimiter.
To insert a new line as the delimiter, simply use the CHAR function within the TEXTJOIN formula:
=TEXTJOIN(CHAR(10),TRUE,range)
In the below example, I want to combine the name and the position into cell B4 as two lines.
To combine cells with a line break, you can use the below formula:
=TEXTJOIN(CHAR(10),TRUE,A2:B2)
Don’t forget to turn on “Wrap Text” in Excel. This way, your text will look right when you add line breaks in cells.
In conclusion, the CHAR function, particularly with character codes like CHAR(10) (For Windows users) and CHAR(13) (For Mac users), provides a convenient method for inserting new lines and managing text data in Excel.
Whether you’re using the concatenate operator, CONCATENATE function, CONCAT function, or the TEXTJOIN function to merge data, mastering the use of CHAR will enhance your spreadsheet formatting and data manipulation capabilities.
Additional Method: F2 and Enter
If you are more interested in using an approach that allows you to insert line breaks without the need for a formula follow these simple steps below:
Press F2 to edit the cell contents directly and position your cursor at the desired line break location. Then, press Alt+Enter (Windows) or Control+Option+Return (Mac) to create the new line.
How to Use Find and Replace Feature to insert a new line in Excel?
When you’ve got a long list of entries and need to add line breaks to each one, doing it one by one can be a real hassle.
But here’s a handy trick: You can use Excel’s Find and Replace feature to add those line breaks in a snap!
In the below example, you have a list of names and job titles separated by commas.
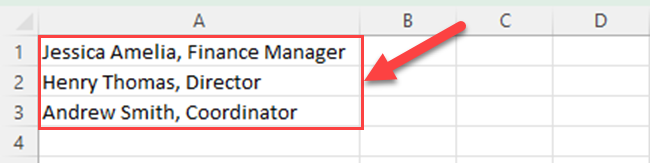
Next, you have to take the job titles to the next line of each cell.
To do that, follow the below steps:
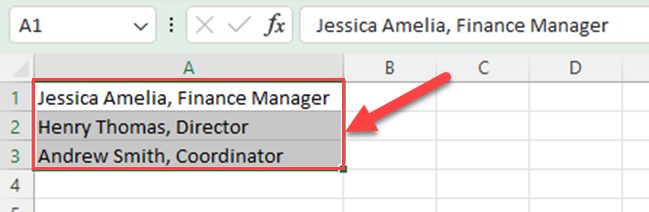
Step 1
Select the cells that you want to add line breaks. In this example, you have to select cells A1 to A3.
Step 2
Press Ctrl + H to open the Find and Replace dialog box. Now, you’ll see the Replace tab of the Find and Replace dialog box.
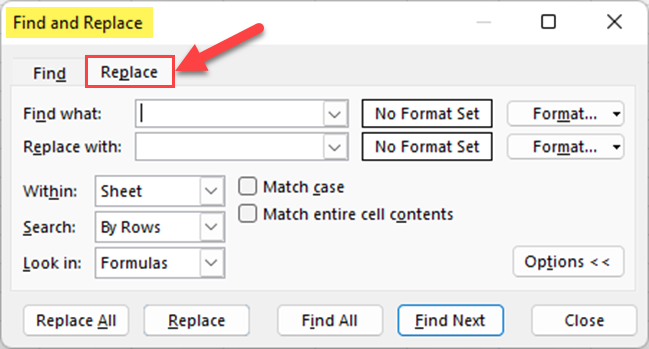
Step 3
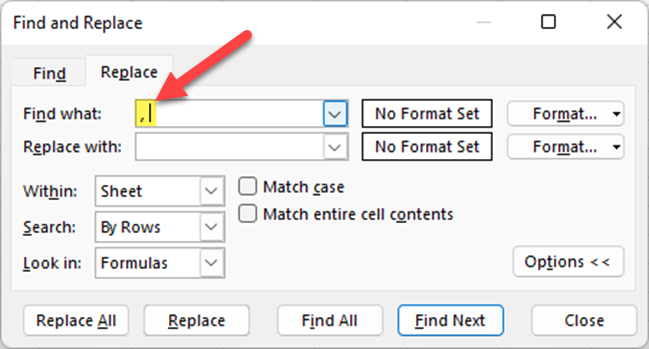
Enter a comma and a space character in the “Find what” box.
Step 4
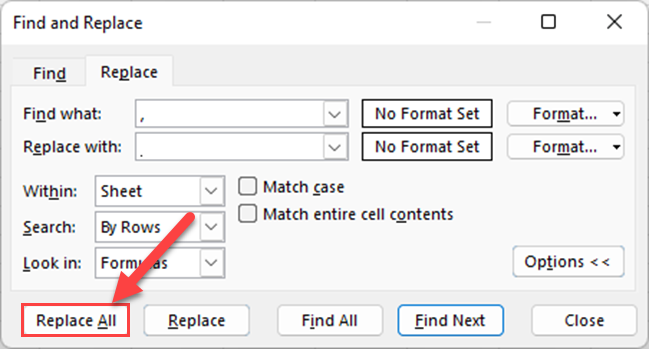
Keep your cursor in the “Replace with:” box and Press Ctrl + J to insert a carriage return. You’ll see a tiny dot in the “Replace with:” box.

Step 5
Click the “Replace All” button.
Now, any commas followed by space characters will be replaced with line breaks in all the cells.
Don’t forget to enable Wrap Text to the selected cells.
Final Thoughts
Now, you know how to insert a line break or multiple lines in an Excel worksheet cell. There are various other methods such as VBA code, Power Query Etc.
In this article, we have discussed very simple methods that you can use to insert a line break. You can use this knowledge to remove line breaks as well. So, whether you’re adding or removing line breaks, you’ve got a useful Excel skill in your toolbox.
If you like to learn how you can split multiline cells into multiple rows in Power BI, watch the below video.
Frequently Asked Questions
How to start a new line within a cell?
To start a new line within a cell in Excel, double-click the cell where you want to insert a line break, place the cursor in the desired location, and press Alt + Enter. This will create a new line within the cell.
What is the shortcut for inserting a new line?
The shortcut for inserting a new line in a cell is holding the Alt key while pressing Enter (Alt + Enter).
This will create a line break in the cell.
How to create a new line in a formula?
To create a new line within a formula in Excel, you can use the CHAR(10) function. This function will return a line break character.
For example, to concatenate two text strings with a new line in between, use the formula: =A1 & CHAR(10) & B1.
How to use newline in Excel 365?
The process to insert a new line in Excel 365 is the same as other versions of Excel. Double-click the cell where you want to insert the line break, place the cursor at the desired location, and press Alt + Enter.
This will create a new line within the cell.
Why doesn’t a new line work in a cell?
If the new line is not working in a cell, it could be due to the cell’s format or the Wrap Text feature being disabled.
To enable that, select the cell(s) where you want to see the line breaks, go to the Home tab on the ribbon, locate the Alignment section, and click on the Wrap Text button.
How to apply a new line in the CONCATENATE formula?
To apply a new line in the CONCATENATE formula, use the CHAR(10) function that represents a line break.
Incorporate this function in the CONCATENATE formula like this: =CONCATENATE(A1, CHAR(10), B1).
This will join the content of cells A1 and B1 with a new line in between.


