
Power Query is an incredibly useful tool for Excel users looking to import, connect to, and shape external data. The process of adding the tool to Excel depends on which version you are using.
Users of Excel 2016 or higher do not have to add Power Query to Excel. It comes built-in as the Get & Transform Data” feature in the Data tab. Users with Excel 2013 and 2010 should download and install the Microsoft Power Query add-in.
You will use the Power Query tool to import data from Excel tables, CSV files, databases, and many more options. From there, the powerful features let you edit, transform, and analyze the data.

How to Install Power Query Add-In to Excel 2010 or 2013
Note that Mac users will need to have at least Excel 2016 as Power Query isn’t available for previous versions of Excel on the Mac OS. Windows users can use the free add-in from Excel 2000.
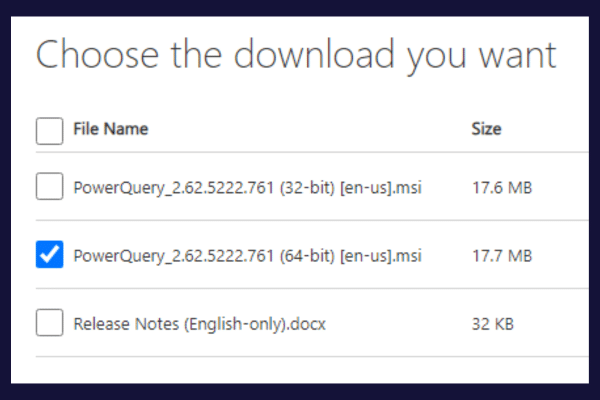
Before you download the add-in, you need to know whether you have the 32-bit or 64-bit installation of Excel. The download page will ask which you have.
The picture below shows the 64-bit option selected.
There is a minor difference in finding this information between 2010 and 2013. With both versions, expand the File menu and click on the “Help” option. The 32-bit/64-bit information is under either:
“About Microsoft Excel” in Excel 2010
“About Excel” in Excel 2013
The installation process for the add-in is essentially the same for both versions. To install the Power Query add-in, follow these steps:
Close Excel.
Go to the official Microsoft download page.
Click the “Download” button.
Choose the correct version (32-bit or 64-bit) based on your Excel installation.
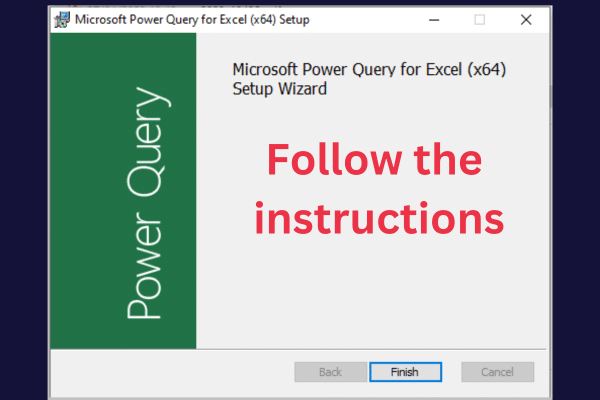
Run the downloaded file and follow the setup wizard instructions.
If Excel shows an error message during the installation, check that you have the latest updates for your version.

When the installation is complete, you must enable the add-in within Excel to see the Power Query tab.
Open Excel.
Choose File -> Options.
Click “Add-Ins” in the left pane.
Select “COM Add-ins” in the drop-down menu at the bottom of the window.
Check the box next to “Microsoft Power Query for Excel” and click “OK.”
Power Query is now available under its own tab in the Excel ribbon!
Excel Power Query For Excel 2016 And Later Versions
In Excel 2016 and later versions, Power Query is now part of the Excel ribbon. To access it, follow these steps:
Open Excel and create a new document or load an existing one.
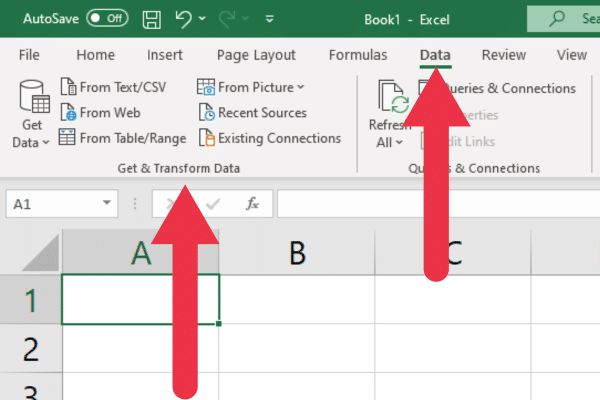
Go to the “Data” tab.
Use the buttons in the “Get & Transform Data” group to access the Power Query tools.
How to Find Power Query Tools in The Data Tab
The “Get & Transform Data” section under the Data tab provides buttons to access a range of tools and features that are part of Power Query in Excel.
Here is a description of the seven buttons and features.
1. Get Data
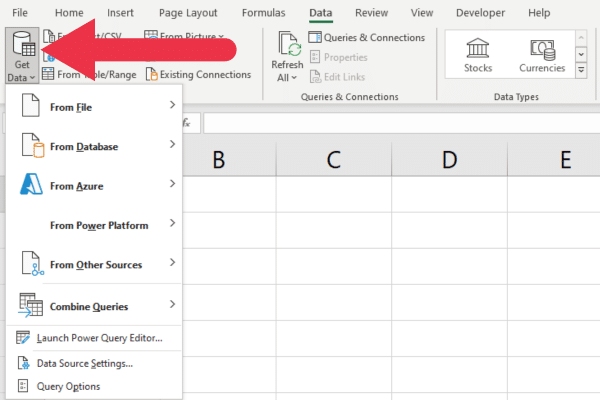
This feature allows you to connect to and import data from external data sources. Some of the most commonly used options are:
From File: import from Excel workbooks, CSV, text, XML, or JSON files.
From Database: import from SQL Server, Access, Oracle, and more.
From Azure: import from Azure SQL Database, Azure Blob Storage, and others.
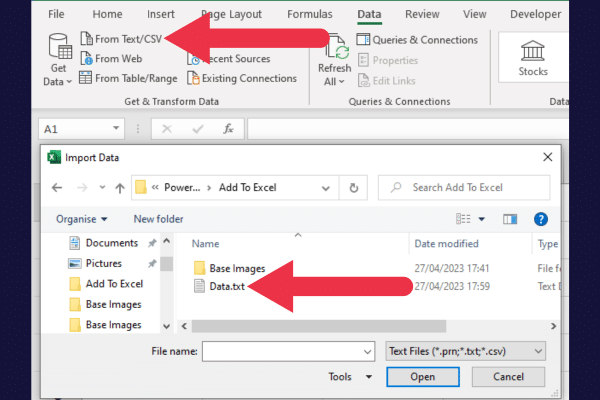
2. From Text/CSV
The “From Text/CSV” button allows you to connect to and import data from a text file or CSV (Comma Separated Values) file. It opens an Import Data dialog box for you to select the file.
You can access the same TXT or CSV file using Get Data drop-down. The “From Text/CSV” button provides a shortcut.
The picture below shows the shortcut in use. The window will also show a preview of the data contained in a file.
3. From Web
This is another shortcut to a feature available under the “Get Data” drop-down. The “From Web” button allows you to connect to and import data from web pages using their URLs.
4. From Table/Range
This button allows you to convert a selected range of cells or an existing table in your Excel workbook into a Power Query query.
When you select a range and click on this button, the Power Query Editor will automatically open. This Editor is covered in a later section.
5. From Picture
Although the “From Picture” feature is grouped within the Power Query section, it’s actually not part of Power Query.
It’s a separate feature that allows you to capture data from a printed or handwritten table using your device’s camera and convert it into a digital table in Excel.
It uses Optical Character Recognition (OCR) technology to recognize and extract text and numbers from the image.

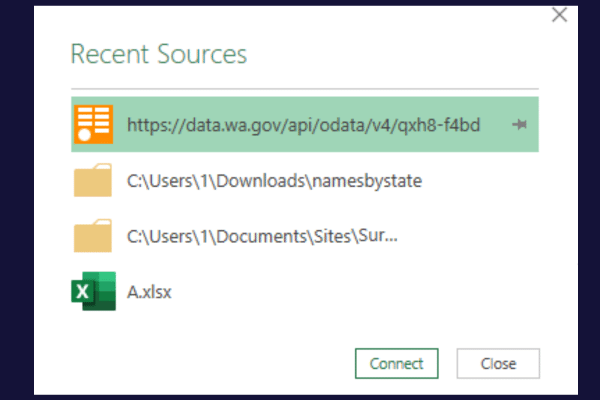
6. Recent Sources
This button provides quick access to data sources that you have recently connected to and imported data from in Excel. It acts as a valuable time-saver for your data queries.
When you click on the “Recent Sources” button, a drop-down menu will display a list of your recently used data sources such as online connections and Excel files.
7. Existing Connections
This is another time-saver. It gives you a list of all the data connections that have been previously established in your current workbook.
How to Add Power Query Connectors to Excel
There may be some advanced Power Query features or connectors that are only available in specific editions of Excel, such as Excel 2016 Professional Plus or Excel for Microsoft Office 365.
For example, the SharePoint connector that lets you connect to SharePoint folders is only available in enterprise subscriptions.
If you have a home or business subscription, you will not see the option in the list of connectors.
The excerpt below of Microsoft’s availability list shows that SharePoint and PDF connections aren’t available in every edition.
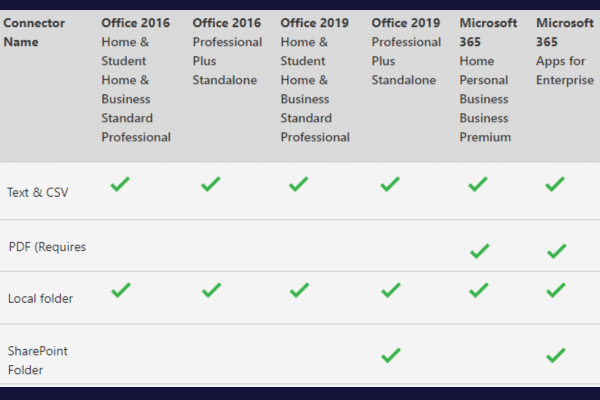
If you are missing connectors and sources that you need, consider upgrading to a higher edition. This will enable the missing options.
How to Add Power Query Permissions to Excel
There might be certain connectors or functionalities that require additional permissions or settings, such as organization-specific data sources.
If you encounter issues connecting to specific data sources or using certain features, it might be due to permissions or settings at the organizational level. In such cases, you can consult with your organization’s IT administrator or support team for assistance.
If they provide additional permissions to your Windows account, you should restart Excel to access the elevated privileges.
How to Access The Power Query Editor
The Power Query Editor is where you’ll spend most of your time working with Power Query. It is a graphical interface in which you can create, modify, and manage your queries.
The editor also provides a visual representation of your query structure and supports several different views.
There are several ways to access the editor. You will often set up a connection or import a file, which launches the Editor.
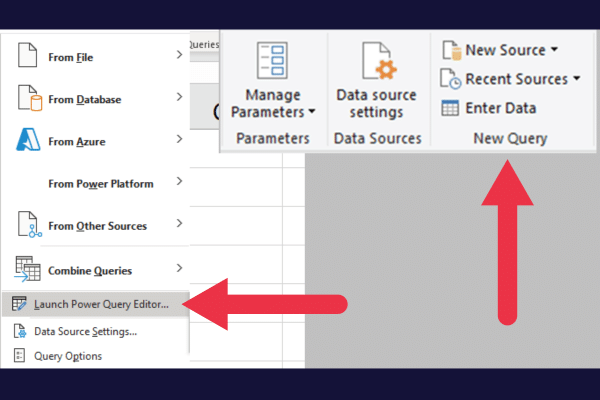
Alternatively, you can open the Editor as a blank query and set up your connection from within it. Here is how to do so within the Get & Transform Data group:
Go to the Data tab.
Click “Get Data” in the “Get & Transform Data” group.
Choose “Launch Power Query Editor”.
Use the options on the right of the ribbon to access your data.
The “New Query” group of options is at the far right of the ribbon. From here, you can import a file, connect to a database, and even enter data manually.
Ribbon And Tabs
The Ribbon in the Power Query Editor contains several tabs with options organized in groups for easy access.
These tabs serve different purposes, providing tools and functions that you’ll need while working with Power Query. The four tabs are:
Home
Transform
Add Column
View
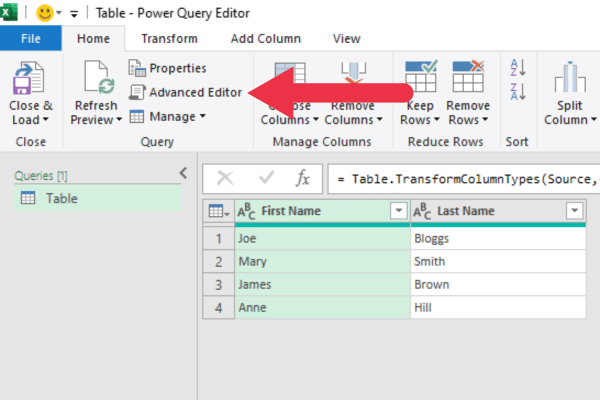
This picture shows the tabs at the top of the window. The data preview beneath the ribbon shows the contents of an Excel table. The Queries pane is on the left.

Data Preview Pane
The data preview pane doesn’t just show your data. You can change a column header and a data type in this window.

The formula bar at the top of the pane shows the special code behind the database query.
Advanced Editor
For more complex operations or customization, Power Query offers the Advanced Editor. This editor allows you to directly edit the M code, which is the underlying language of Power Query.
By making changes to the M code, you can fine-tune your queries and gain additional functionality that may not be available through the graphical interface.
To access the Advanced Editor:
Go to the Home tab in the Power Query Editor.
Click on “Advanced Editor” in the Query group.
If you want to explore some aspects of the code, here are some tutorials:
Here’s a video walkthrough of using each expression.
2 Ways to Customize Power Query
You can customize your Power Query experience by:
adjusting query settings
managing global and privacy options
1. How to Adjust Query Settings
To access the query settings:
Open the Power Query Editor.
View the settings in the right-hand side pane.
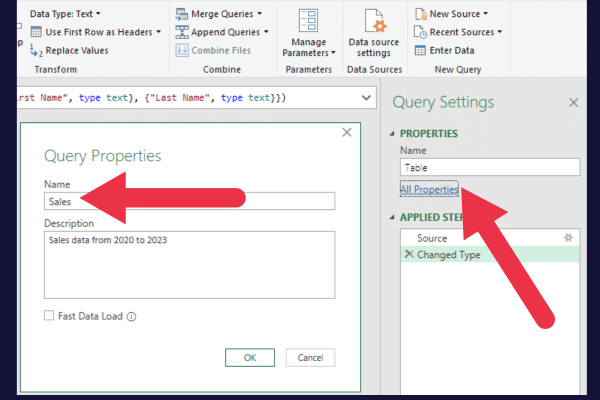
Click the “All Properties” link.
Changes the details in the pop-up box as required.
You can modify several aspects of your Microsoft query, such as:
Name: rename your query to something more descriptive.
Description: add a description to provide more context.
Load settings: choose whether to load data to the data model or as a connection only.
In the picture below, I am changing the name of “table” to the more informative “sales” and adding a description.
2. How to Adjust Global Options
Power Query also allows you to customize the overall experience. To access these options, follow these steps:
In Excel, go to the Data tab.
Click on the Get Data drop-down menu.
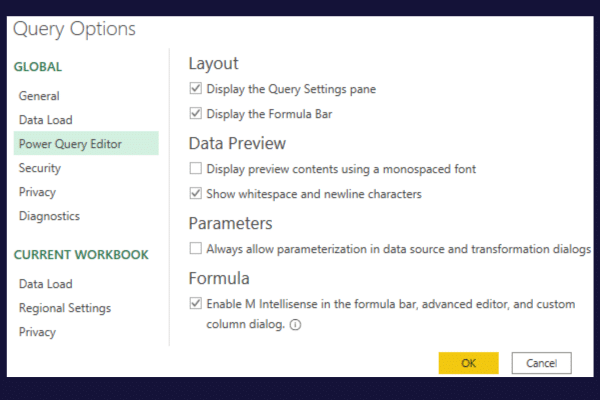
Select Query Options at the bottom.
This opens the Query Options dialog box. You can change the layout and behavior of the Power Query Editor here by ticking or clearing a check box.
3. How to Adjust Security And Privacy Options
The Query Options include a security and privacy section.
The security section lets you control certificate checks and web warnings if your queries are reaching out to an online external data source.
In the Privacy section, you can configure how Power Query handles and protects sensitive data.
How to Add Other Tools to Enhance Power Query
There are other add-ins and tools you can use to extend the functionality of Power Query. Here are three popular options:
1. Power Pivot
Power Pivot is a powerful data modeling and analysis tool built into newer versions of Excel that work well with Power Query.
It allows you to:
create complex data models.
manage relationships between tables.
perform advanced calculations using Data Analysis Expressions (DAX).
If you’re using Excel for Microsoft 365, Excel 2016, or Excel 2019, follow these steps to enable Power Pivot for your pivot tables:
Go to the File tab.
Select Options to open the Excel Options dialog box.
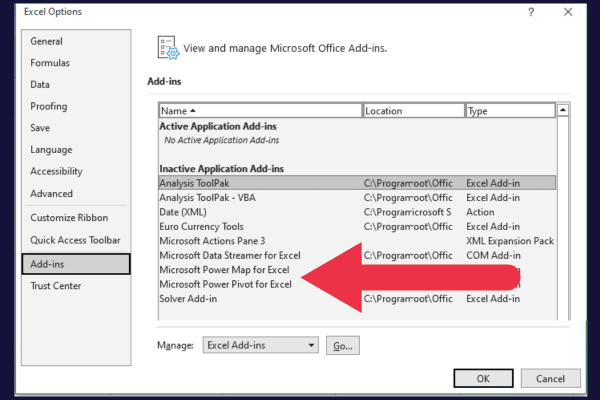
Click on the “Add-Ins” category on the left pane.
Select “COM Add-ins” from the drop-down menu at the bottom and click “Go.”
Find “Microsoft Power Pivot for Excel” in the list and check the box next to it.
Click “OK” to enable Power Pivot.
After enabling Power Pivot, a new “Power Pivot” tab will appear in Excel’s ribbon. Your next step is to learn how to work with a pivot table using the Power Pivot window.
This picture shows both Power Pivot and Power Map in the add-ins window:
2. Power Map (3D Maps)
Power Map, also known as 3D Maps, is a data visualization tool for Excel that lets you create interactive 3D geospatial visualizations using your data. It’s a great way to visualize geographical data from Power Query.
If you’re using Excel for Microsoft 365, Excel 2016, or Excel 2019, follow these steps to enable Power Map:
Go to the “Insert” tab.
Click on the “3D Map” button in the “Tours” group.
If asked to enable the Data Analysis add-ins, click “Enable.”
The 3D Maps window will open, where you can:
visualize your geospatial data in three dimensions
create interactive tours
customize the appearance of your maps.
3. Power BI
Power BI is a suite of business analytics tools that can help you analyze and visualize data.
This is not an add-in for Excel. Instead, it’s a separate standalone application called Power BI Desktop. It can be installed on Windows 10 or later and requires a 64-bit OS.
Excel Mac users can use the Power BI service, which is a cloud-based version of Power BI that runs in your web browser.
Our Final Word or Two
You have now learned how to add or access the Power Query tool in your Excel worksheet. This tool lets you conduct complex business analysis with a few clicks.
You may feel a little overwhelmed by all the features on the transform tab and in the editor. Try to create a new database query or execute a data load from text files to practice transforming data sets.
You’ll soon be on your way to harnessing the power of Power Query.


