
We’ve all been there. You have a long list of people to contact, and you want to give each of them a personalized touch, but the thought of manually typing out hundreds or even thousands of emails is making your head spin. Mail merge to the rescue!
To mail merge from Excel to Outlook, start by preparing your Excel spreadsheet with the required data, ensuring details like name, email, etc. has its own column. Open Outlook and compose a new email. Click on the “Mailings” tab, then “Start Mail Merge,” and select “Email messages.” Click “Select Recipients” and “Use an Existing List,” then navigate to and select your Excel file. Adjust the settings as needed, and click “OK” to send your personalized emails.
That’s the abridged version of the process. In today’s article, we’ll show how to use Microsoft Excel, Word, and Outlook to perform a mail merge. We’ll create a mailing list via Excel, use Microsoft Word to compose a message, and then perform mail merge for Outlook.

Whether you’re new to mail merge or simply need a refresher, this guide is designed to help you navigate the process.
Let’s get started!
What is Mail Merge?

Mail merge is a feature from Microsoft that simplifies mass email communication. It lets you send personalized messages to a list of people by placeholding messages with specific data fields, such as names or addresses, from your spreadsheet.
From sending personalized content and ads or important updates to many recipients, using mail merge can save a lot of time and effort since you no longer need to customize the messages one by one.
Here’s a quick summary of how to use mail merge from Excel to Outlook:
Organize your contact information in an Excel file based on general location and other factors
Draft a message in Word and set up personalizations
Use Outlook to process and send the mail merge document
Let’s go over each part in the next three sections!

Part 1. Prepare Your Excel Worksheet for Mail Merge
Before you start mail merge, you have t make sure your Excel spreadsheet is properly prepared.
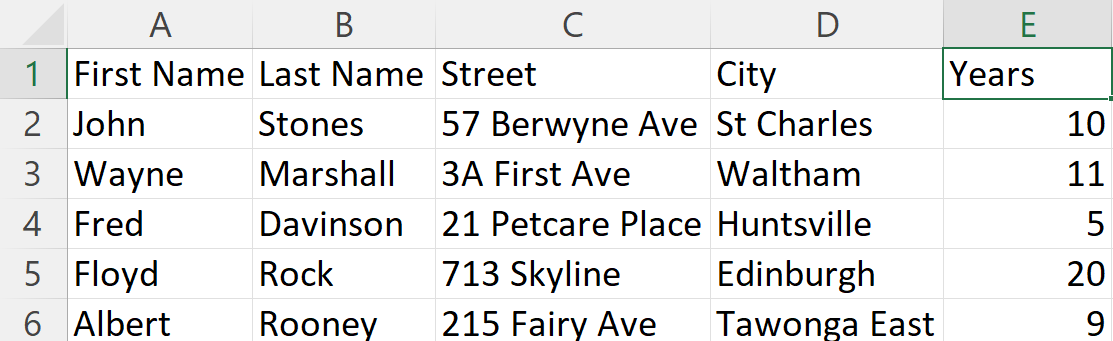
Organize your data into separate columns with appropriate mailing labels as headers for each type of data, such as:
First and last names
Email addresses
Company name
Street name
City name
Postal codes
Double-check your data for accuracy and consistency, as errors can lead to problems in the mail merge process. Moreover, ensure the separate columns in the worksheet match the fields that will be used.
Here’s an example of an Excel spreadsheet we’ll use for mail merge:
Once your spreadsheet is ready, we can now create the mail merge document using Word.
Part 2. Setting Up Word Document for Mail Merge
Now that your spreadsheet is ready, the mail merging process begins by creating customized email content in Word.
After you link your Excel data to your email message, you can preview personalized emails and finish the mail merge.
Here’s how to do it:
1. Creating an Email Template
Having a well-designed email template is crucial when planning to send bulk email messages using mail merge from Excel to Outlook.
To create a stellar email template, do the following:
Focus on drafting the content of your email
Prioritize clarity and conciseness
Clearly state the purpose of the email
Ensure that the tone is appropriate for your audience.
Proofread your content for errors and make any necessary revisions.
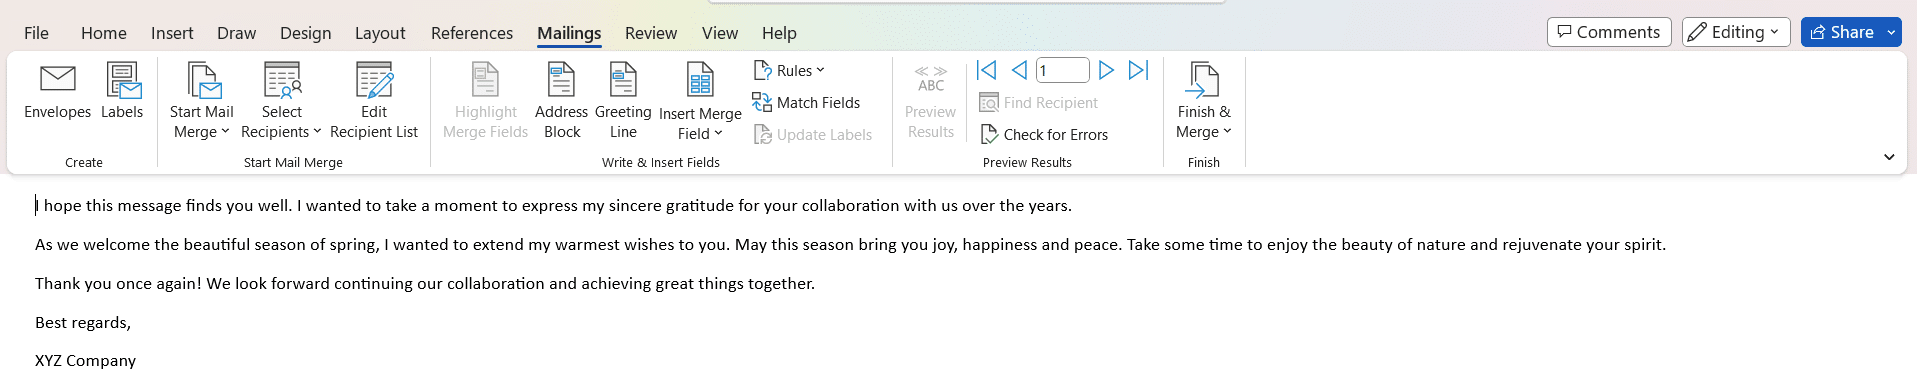
Here’s what our Microsoft Word document email template looks like:
2. Select Merge Type
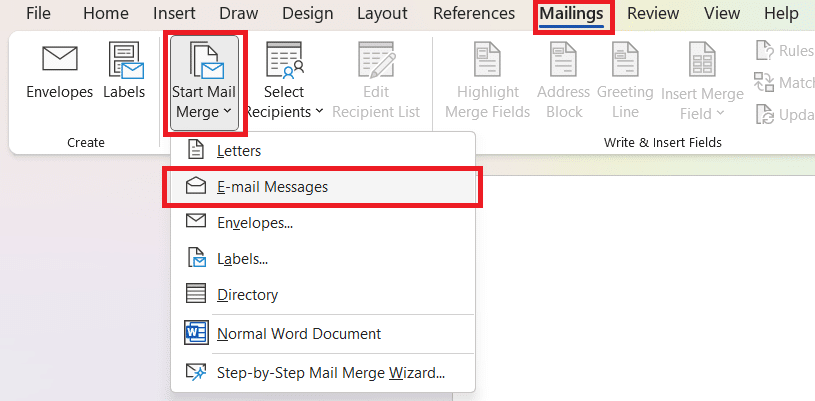
Open Microsoft Word and create a new document. Then, go to the Mailings tab and select Start Mail Merge.
After that, choose the Merge Type. Your options include letters, emails, envelopes, and more. For this example, we chose E-mail messages.
3. Connect Excel Sheet to Word
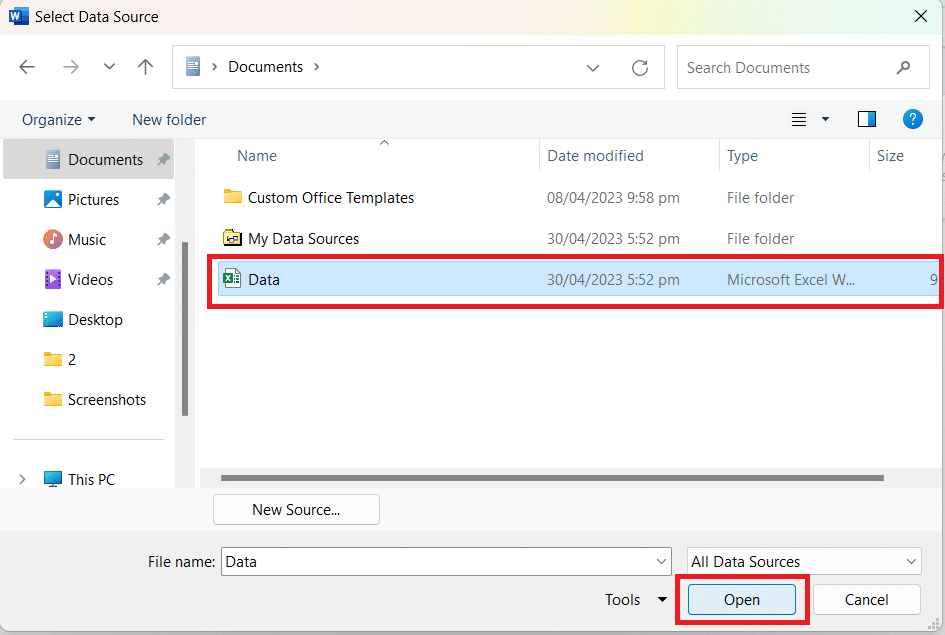
Next, connect your Excel file as a data source by clicking Select Recipients > Use an Existing List.
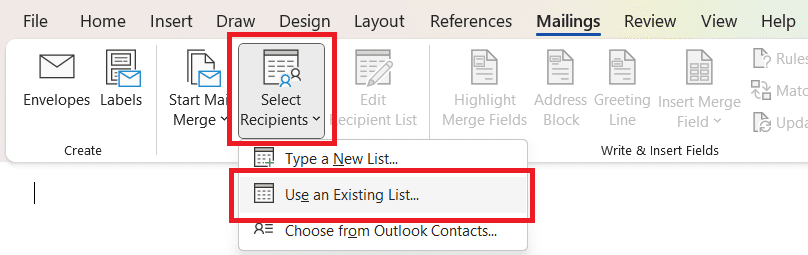
Search for the Excel file containing your mailing list. Select it and click Open.

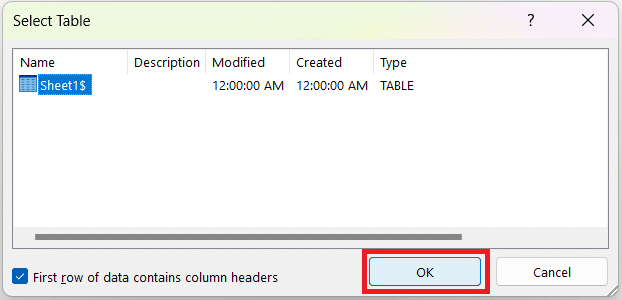
Ensure your desired worksheet is selected and click OK.
After linking your data source, you can insert merge fields into the document wherever you want personalized data to appear.
4. Tweak Recipient list
Want to make changes to the recipient list that you have imported? Choose Edit Recipient List.

Here, you can check/uncheck boxes to include/remove recipients. You can also Sort, Filter, Find duplicates, Find recipients, and Validate addresses.
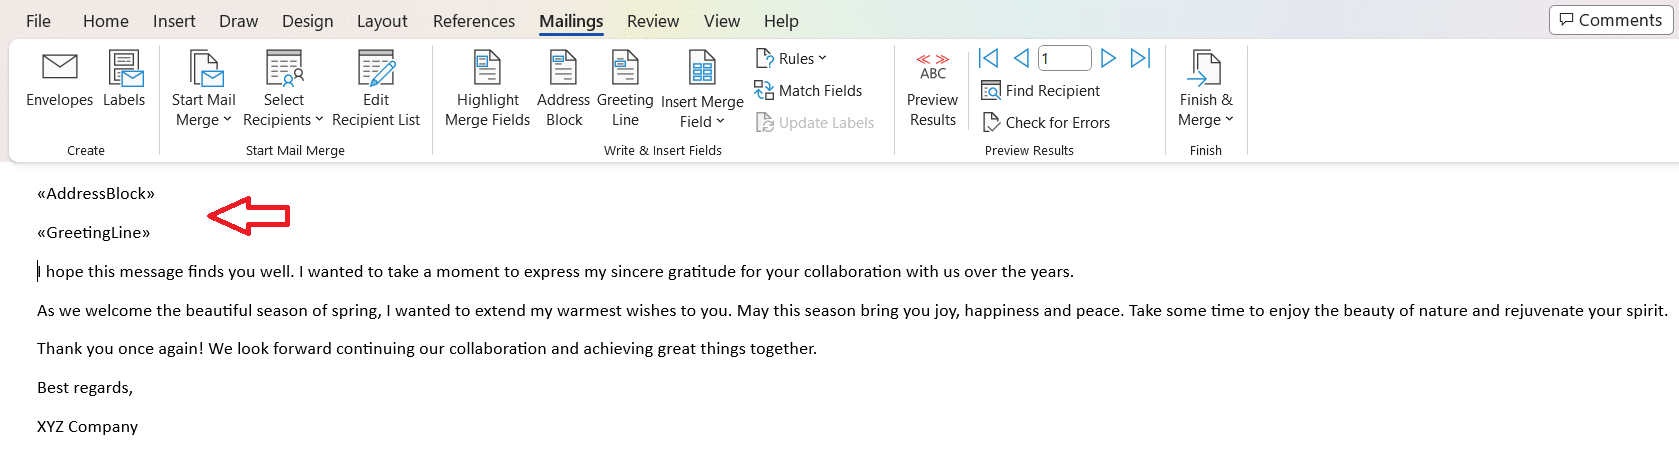
5. Insert Address Block & Greeting Line
Now, we’ll show you how to add placeholders for the address block and greeting line.
Select Address Block or Greeting Line in the Write & Insert Fields group.

Confirm the format you want to use and check the preview to make sure it looks OK. Then, click OK.
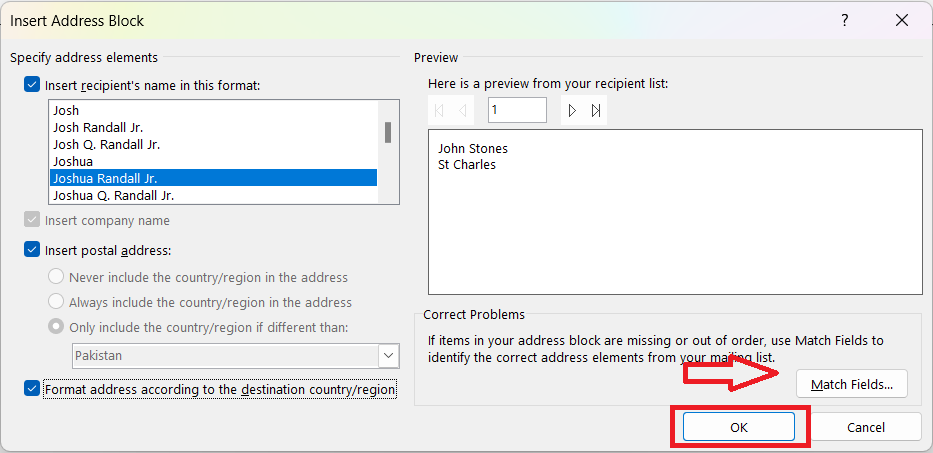
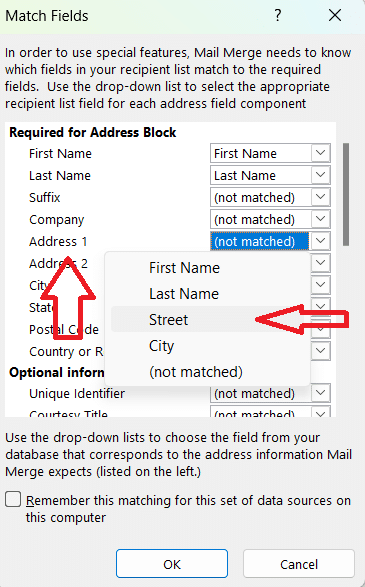
Note: If the information isn’t complete, click Match Fields. Then, match the given options with the column from your Excel worksheet. In our case, we’ll match Address 1 with the Street column.
Merge field placeholders will look like this once added:
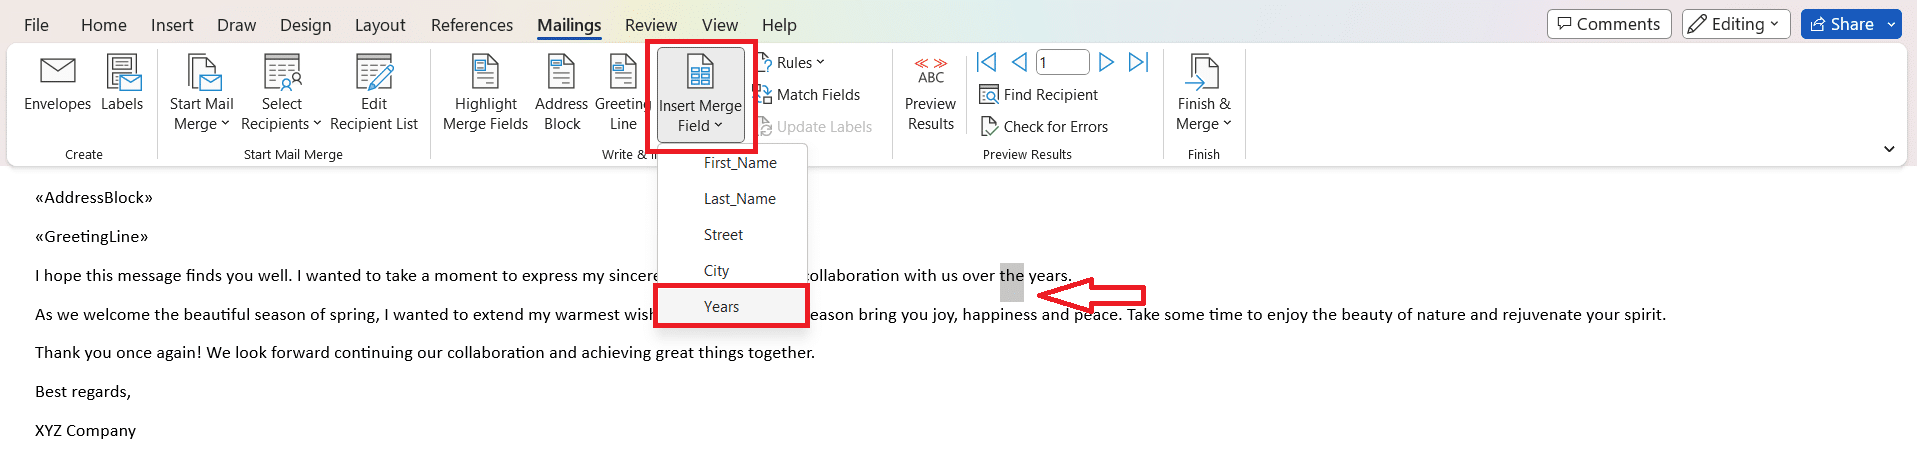
6. Inserting Merge Fields – Advanced Personalization
Next, you’ll need to add merge fields to personalize the email for each recipient. For our example, we’ll include the years each client has been with us for a personal touch.
First, select the word/space where you wish to insert the info. Then, go to Mailings and click Insert Merge Field.
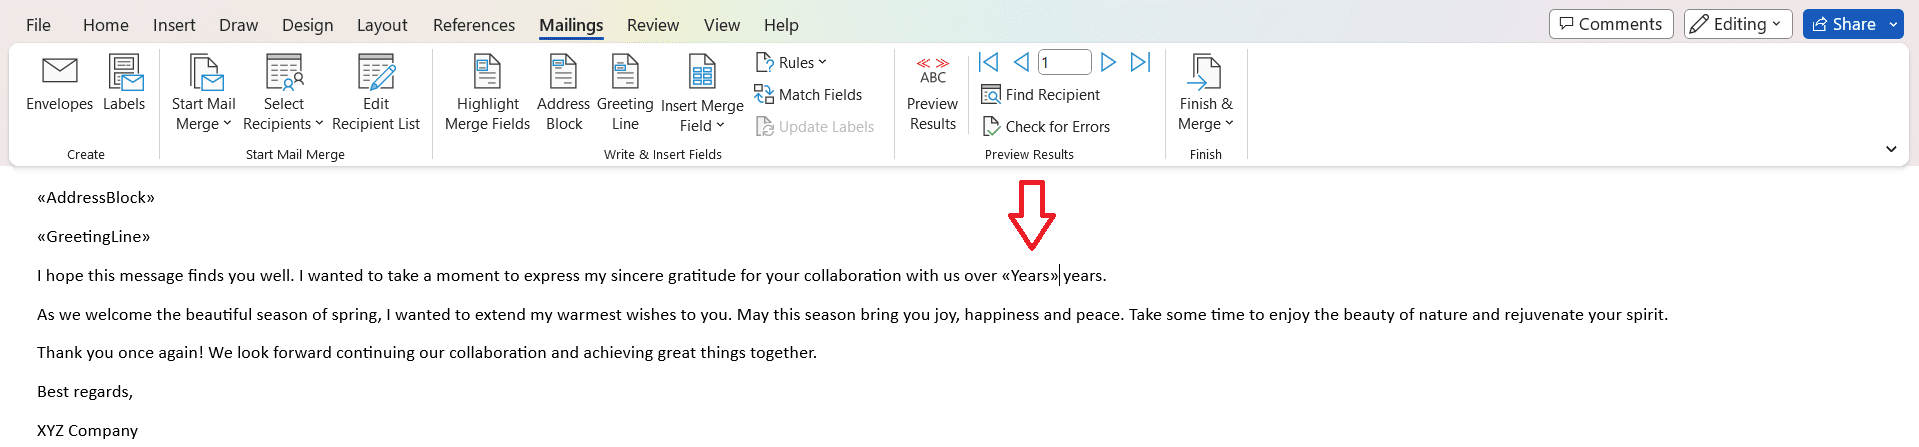
From the list of available fields, select those that correspond with the data in your Excel spreadsheet. We are choosing Years for the mail merge recipients.
Here’s the result:
7. Formatting and Customizing Template
With the content and merge fields in place, it’s time to format and customize your email template.
Consider the following aspects:
Font type and text size: Choose a legible font and size that is easy to read. For example, if you’re using mail merge to send tailored ads based on past activity, then use a font type and color that matches your brand.
Paragraph formatting: Use appropriate spacing, indentation, and alignment to present your information clearly.
Bullet points and tables: Use bullet points for lists and tables to present data, like product details or pricing, in an organized manner.
Images: If, for example, your ad serving is based on activity, then use relevant images. However; ensure they are correctly sized and do not distract from the email content.
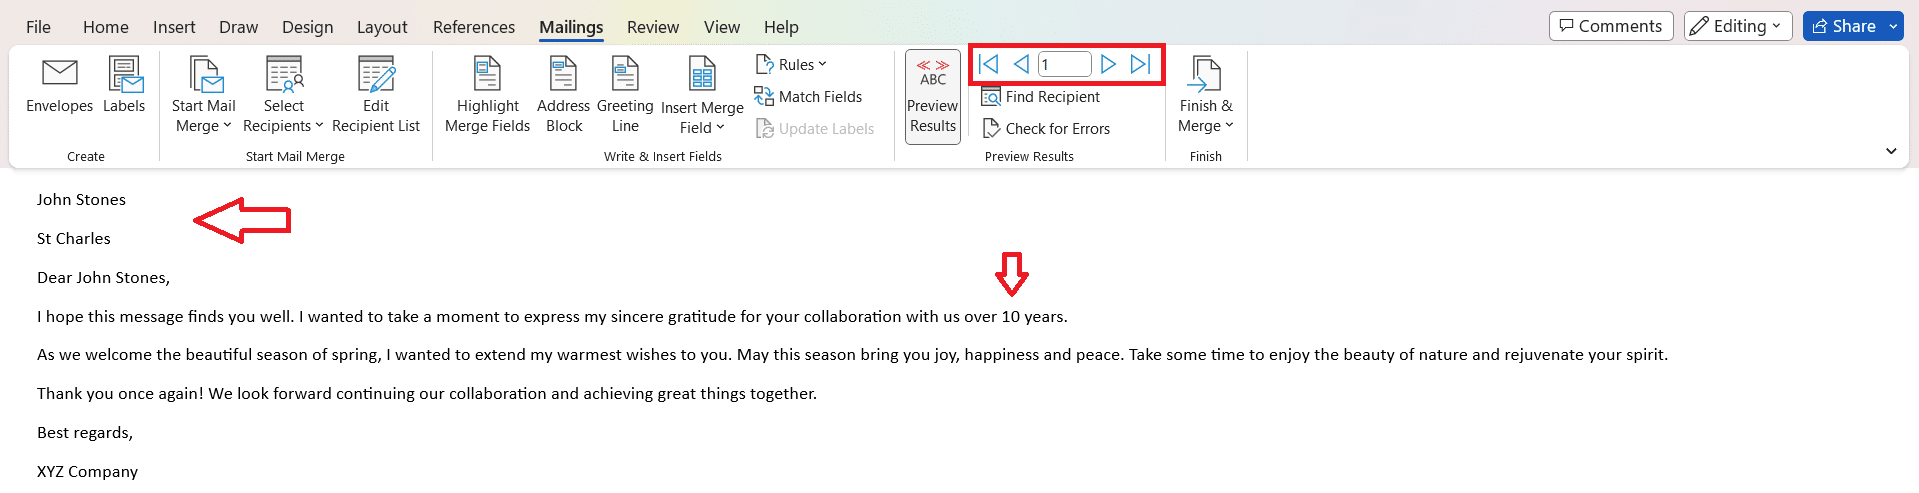
8. Preview Results
Before sending your merged emails, take the time to preview the message and proofread it and make any adjustments necessary.
Click Preview Results in the Mailings tab.
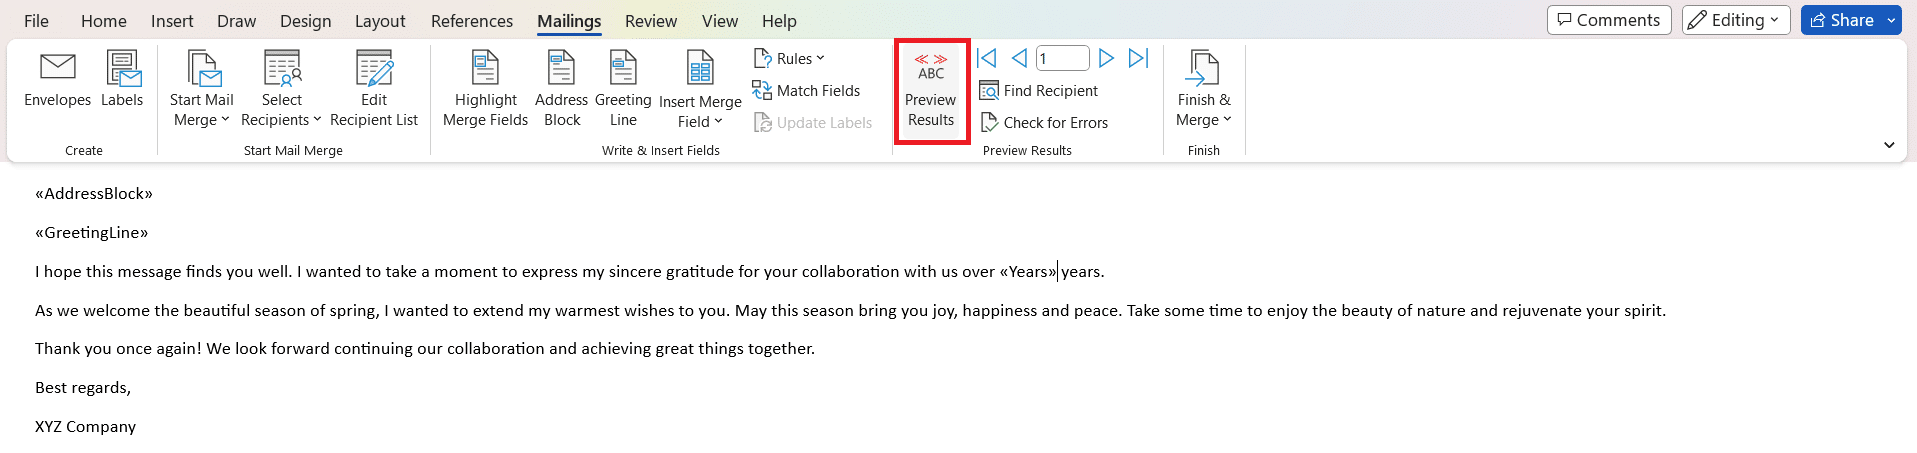
Use the arrows to browse through different recipients. This allows you to see how the merge will appear for each individual and make any necessary adjustments.
Once you’ve completed every step in this section, your personalized email message is ready to send!
In the next section, we take a look at the final step and how you can move your email to Outlook for processing. Let’s go!

Part 3. Finishing the Mail Merge
If you’re satisfied with your message, it’s time to complete the mail merge in Word.
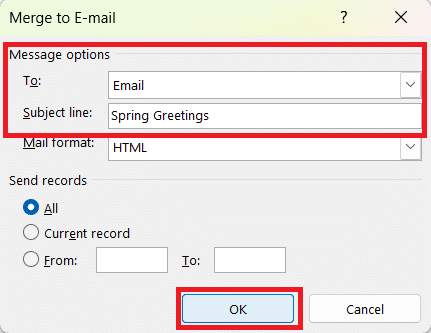
Click Finish & Merge > Send E-mail Messages in the Mailings tab.
A new dialog box will appear. Add your worksheet’s column that contains email addresses in the To field, insert a Subject line, and then click OK.
Open Outlook and go to the Outbox folder. Here, you’ll see that your emails are being sent. Be patient as this may take some time depending on your settings and the number of recipients.
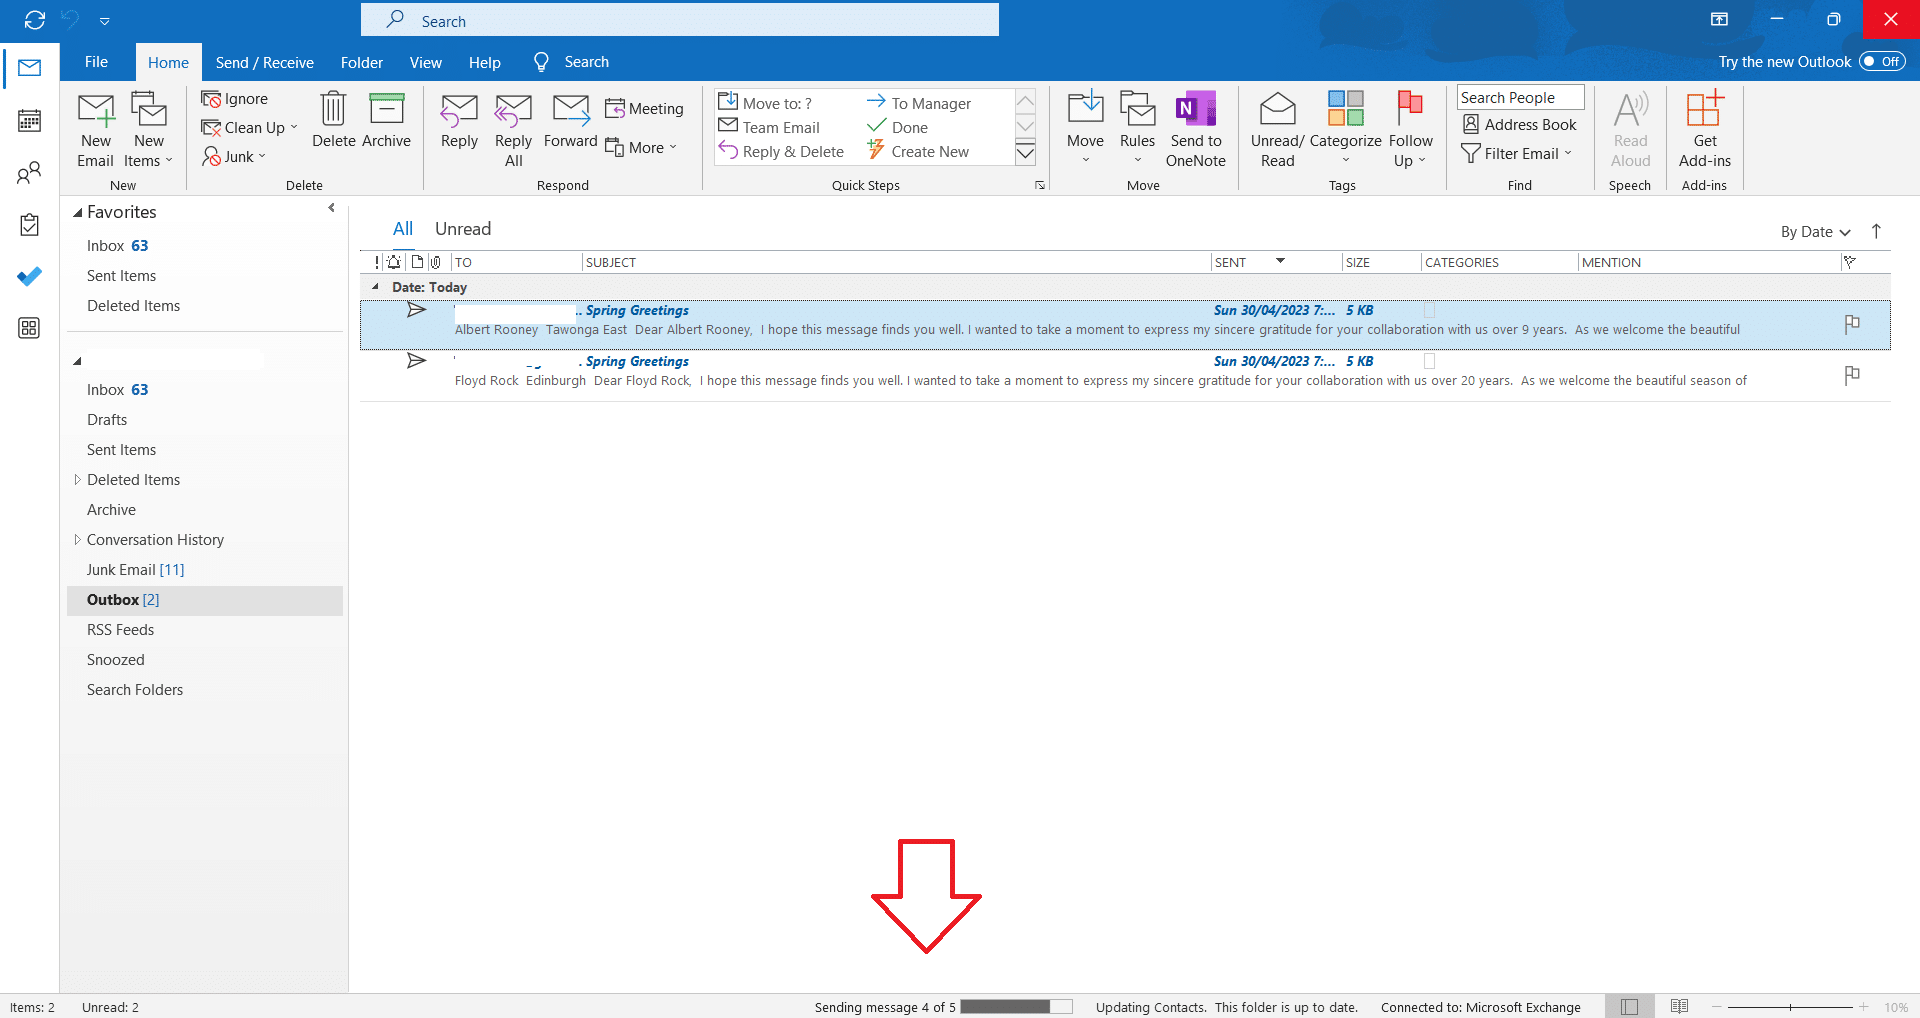
And that’s it! You’ve successfully sent out bulk emails containing a personalized message for each recipient!
In the next section, we take a look at some advanced techniques that’ll have you mail merging like a pro.
Advanced Mail Merge Techniques

Alright, you’ve got the basics down and can now send out those nifty personalized emails. Great job! But let’s kick it up a notch.
In this section, we’re going to delve into some next-level stuff. We’re talking about conditional formatting and adding attachments,
1. Conditional Formatting
Conditional formatting enables you to tailor your mail merge messages based on specific criteria in your data.
To use conditional formatting in your mail merge:
Create an IF statement in your Word document, where the mail merge is set up. The statement should follow this format: { IF <> = “Value” “Text If True” “Text If False” }
Replace <> with the appropriate field from your Excel data, Value with the criteria you want to match, and Text If True and Text If False with the content you want to display based on the condition.
Update your IF statement for all relevant fields and adjust the content of the email accordingly.
This technique will help you create more effective mail merge messages, which will feel more personalized and relevant to the recipients.
2. Mail Merge for Attachments
Outlook does not have built-in support for attachments in the mail merge. Follow these steps to add attachments to mail merge:
Install a third-party add-in for Outlook (like Mail Merge Toolkit) that supports attachments during mail merge.
Configure the add-in with the required settings, including specifying the attachment file as a field in your Excel data.
Proceed with your regular mail merge process, and the add-in will ensure that the appropriate attachment is sent with each email based on your specified criteria.
Including attachments that are relevant to individual recipients will make your messages more attractive and useful.

In the final section, we’ll look at some common issues when working with mail merge and how you can troubleshoot them.
Troubleshooting Common Issues in Mail Merge
You’re now a mail merge pro and you’re breezing through it all when – bam! – you hit a snag.
This next section will help you navigate any potholes in the mail merge journey and covers how to deal with errors and resolve data mismatches.
1. Dealing with Errors
When you encounter errors during the mail merge process, here are some tips to help you address them:
Check your software versions: Ensure that you are using the same version of Microsoft Outlook and Microsoft Word. Compatibility issues may arise if they differ.
Disable add-ins: Run both Word and Outlook in safe mode to disable add-ins to ensure they don’t interfere with the mail merge feature.
2. Resolving Data Mismatch
Issues with data mismatch often occur during mail merge. It is essential to address them to generate valid emails. Here are some solutions for common data mismatch problems:
Double-check your data: Ensure your Excel spreadsheet is correctly formatted and all the necessary information is available.
Connect and edit the mailing list: You can connect to your data source and modify the recipient list. For more information, visit Microsoft Support.
Preview mail merge results: Always preview the merged emails before sending them. Make changes as needed before finalizing the mail merge.
By addressing errors and resolving data mismatch issues, you can ensure a smooth mail merge process from Excel to Outlook.
Final Thoughts

This article showed you how to send personalized emails in bulk using mail merge. And the whole process is split into three parts:
Preparing Excel worksheet
Setting up Word document
Finishing the process in Outlook
You’ve navigated the ins and outs of mail merging and even tackled some of the most common hiccups along the way and use cookies and data.
Mastering mail merge is all about practice and patience. It’s a powerful tool that can save you loads of time, boost your productivity, and enhance the quality of your messages, especially when you need to send out personalized emails to a large group.
So, the next time you’re faced with a daunting list of emails to send, you’ll be ready to handle it like a pro. Keep exploring, keep learning, and most importantly, keep making your life easier with these handy tech tools. Happy mail merging!
If you’d like to learn more useful Outlook skills, like how to add ChatGPT to Outlook, check out the playlist below:


