
It’s time for your well-deserved yearly vacation, and you want to completely switch off from work. But you still need to manage your communication while being away from the office.
What do you do? You use Outlook’s “Out of Office” feature to send automatic replies to emails.
To set up out-of-office automatic replies on your Outlook mobile application:

- Open the Outlook mobile app on your device.
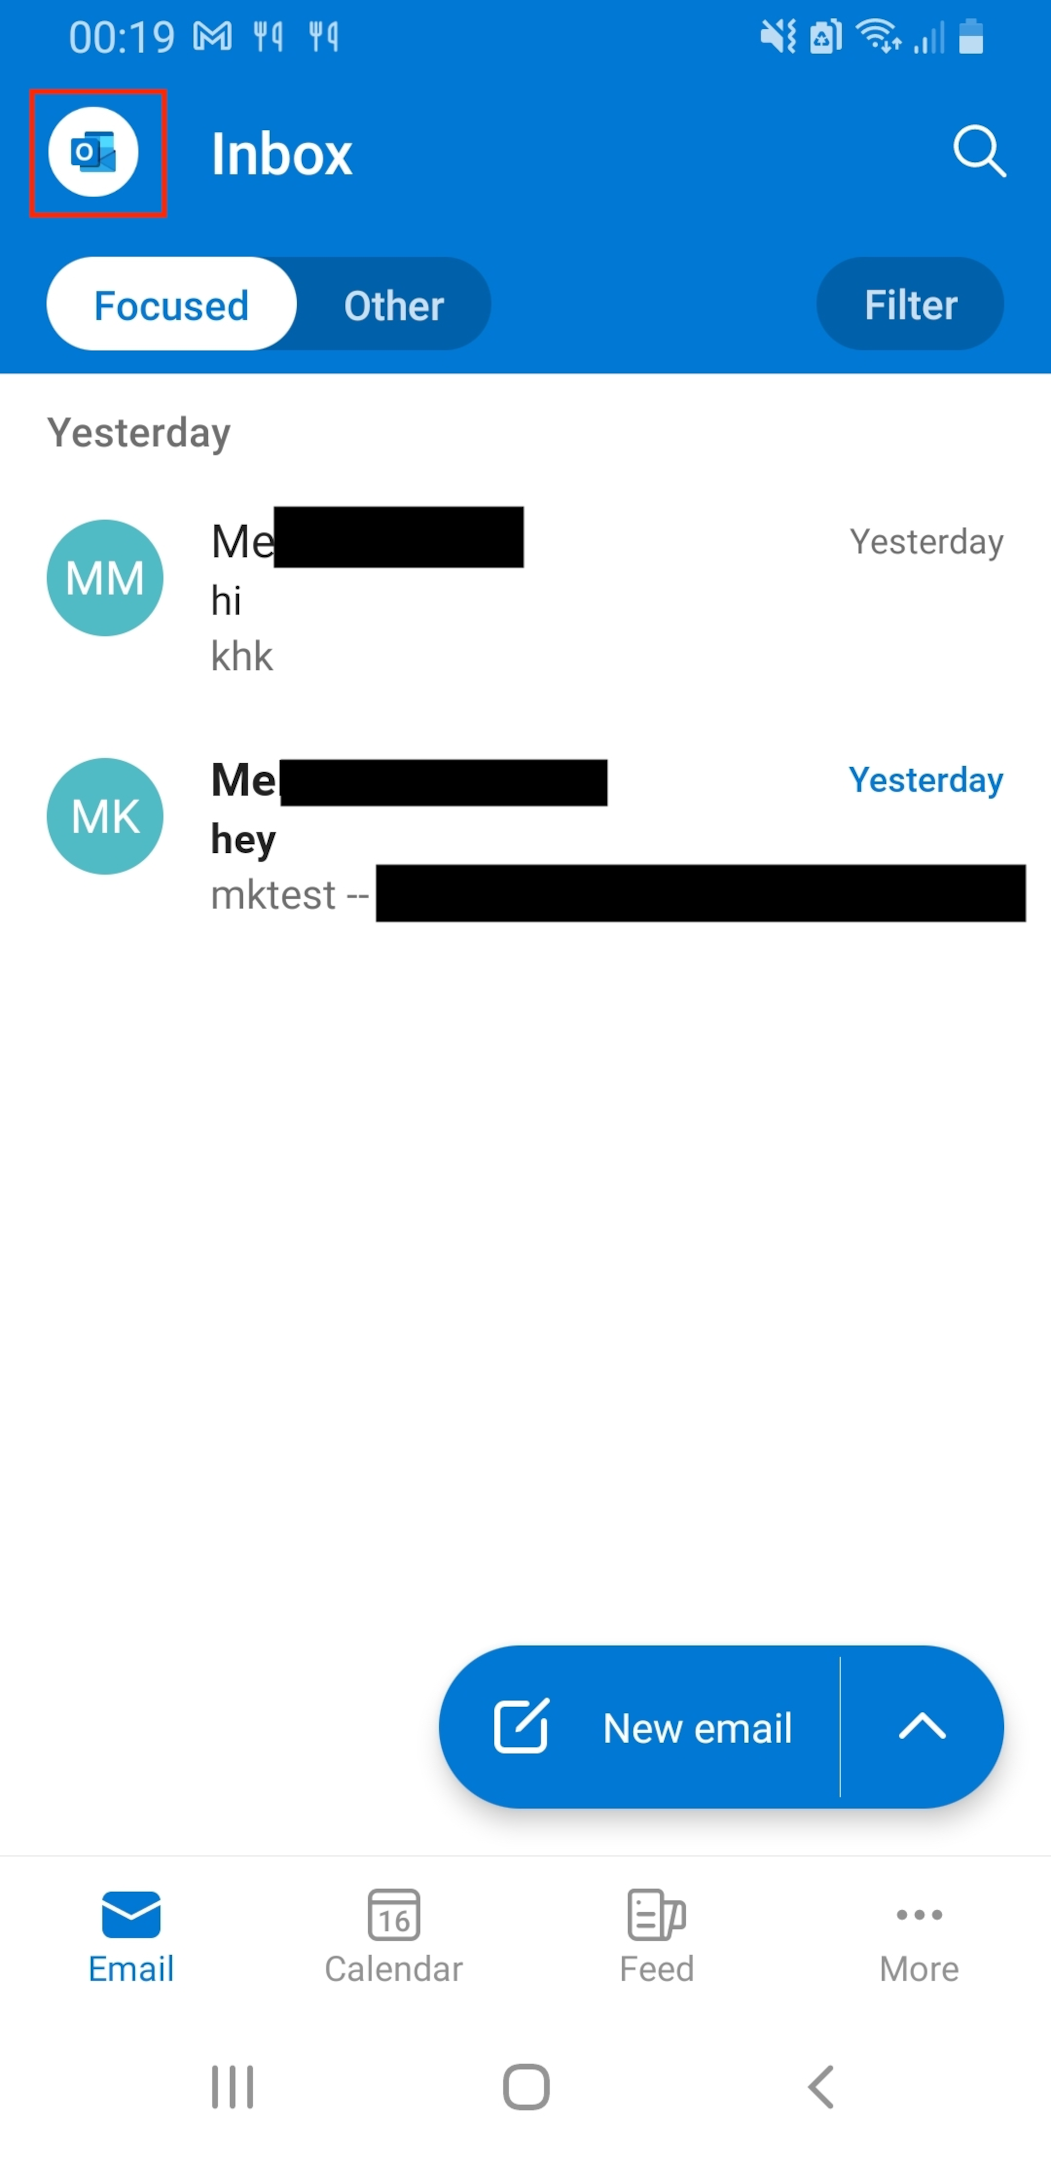
- Tap on the upper left corner to view the menu options.
- In the lower-left corner, tap the Settings (gear) icon.
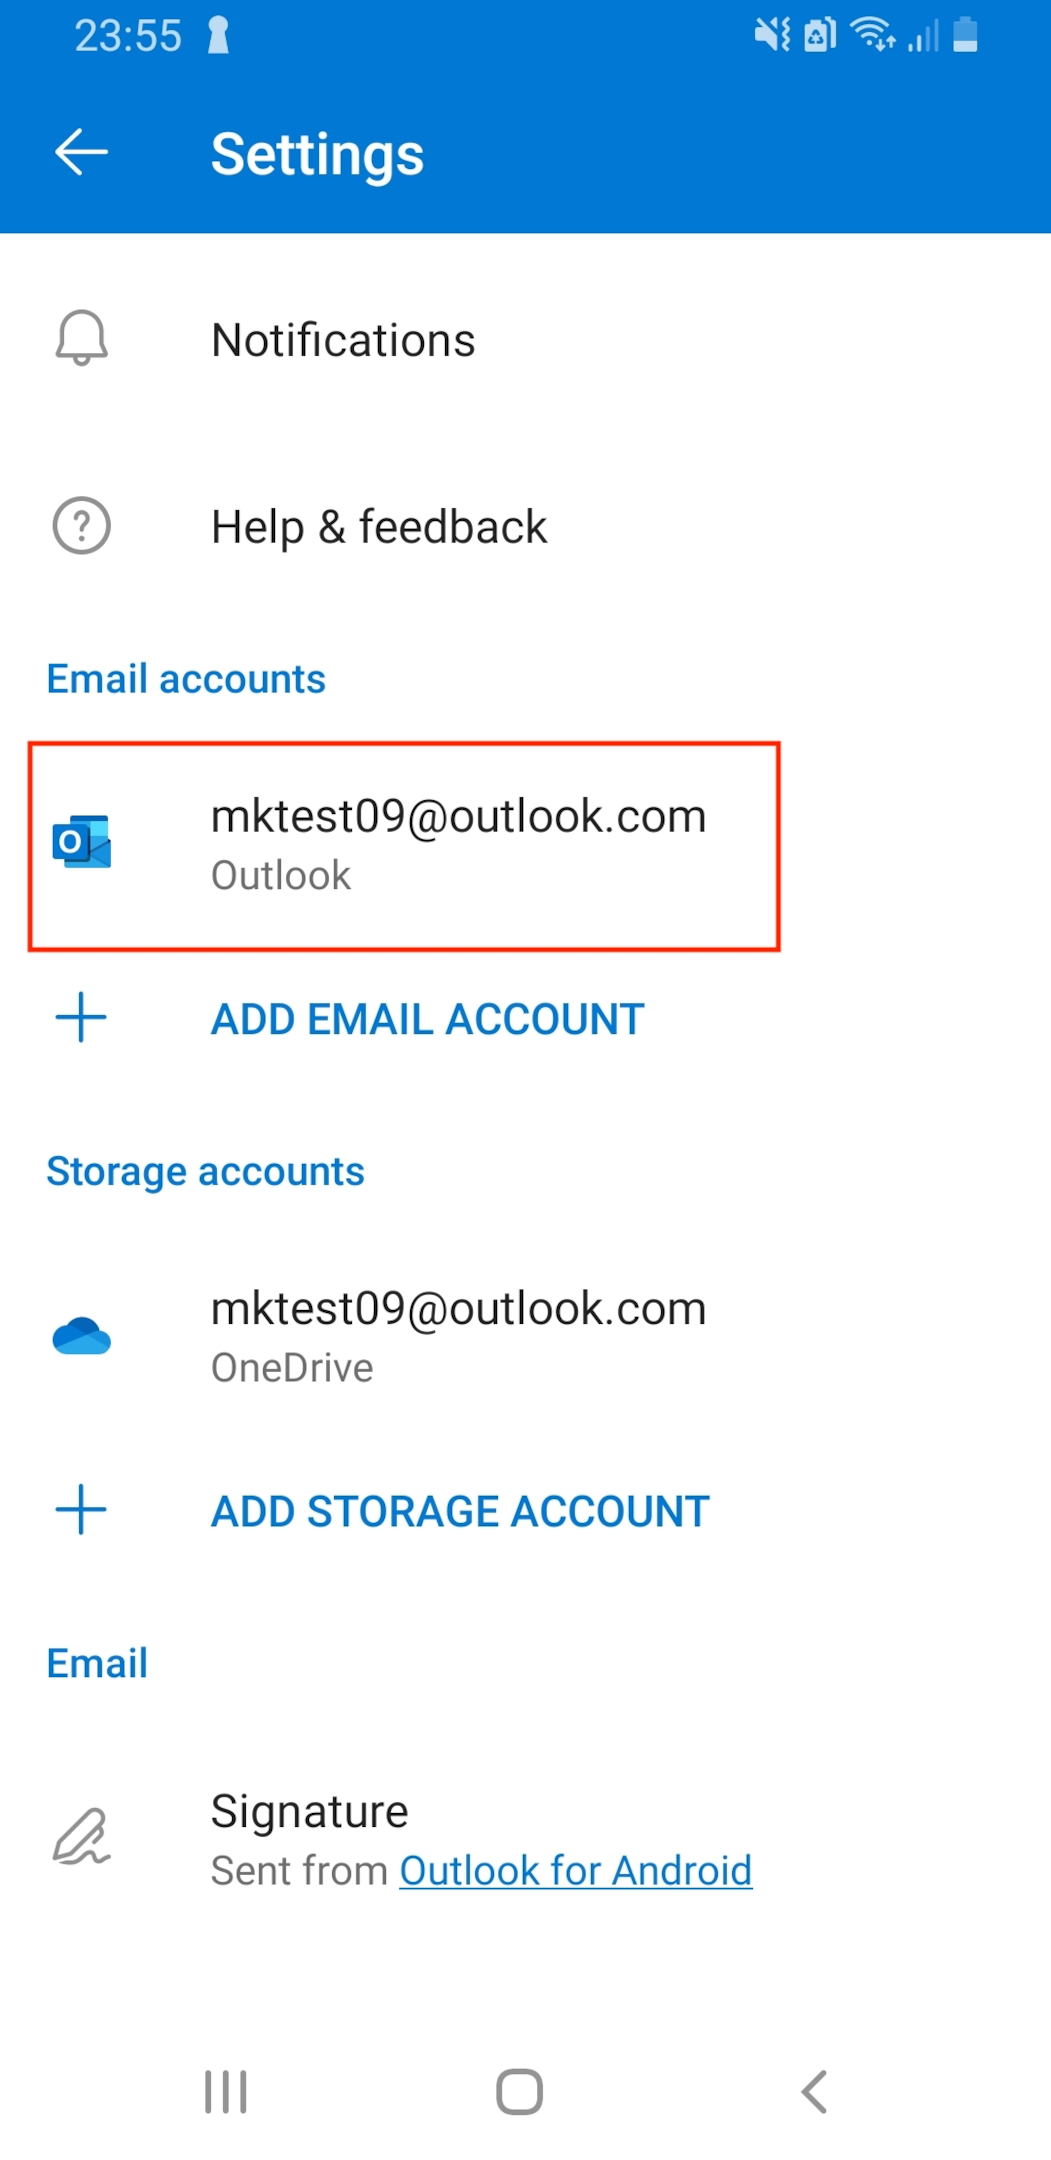
- Under Accounts, select your Office 365 Account.
- Click Automatic Replies.
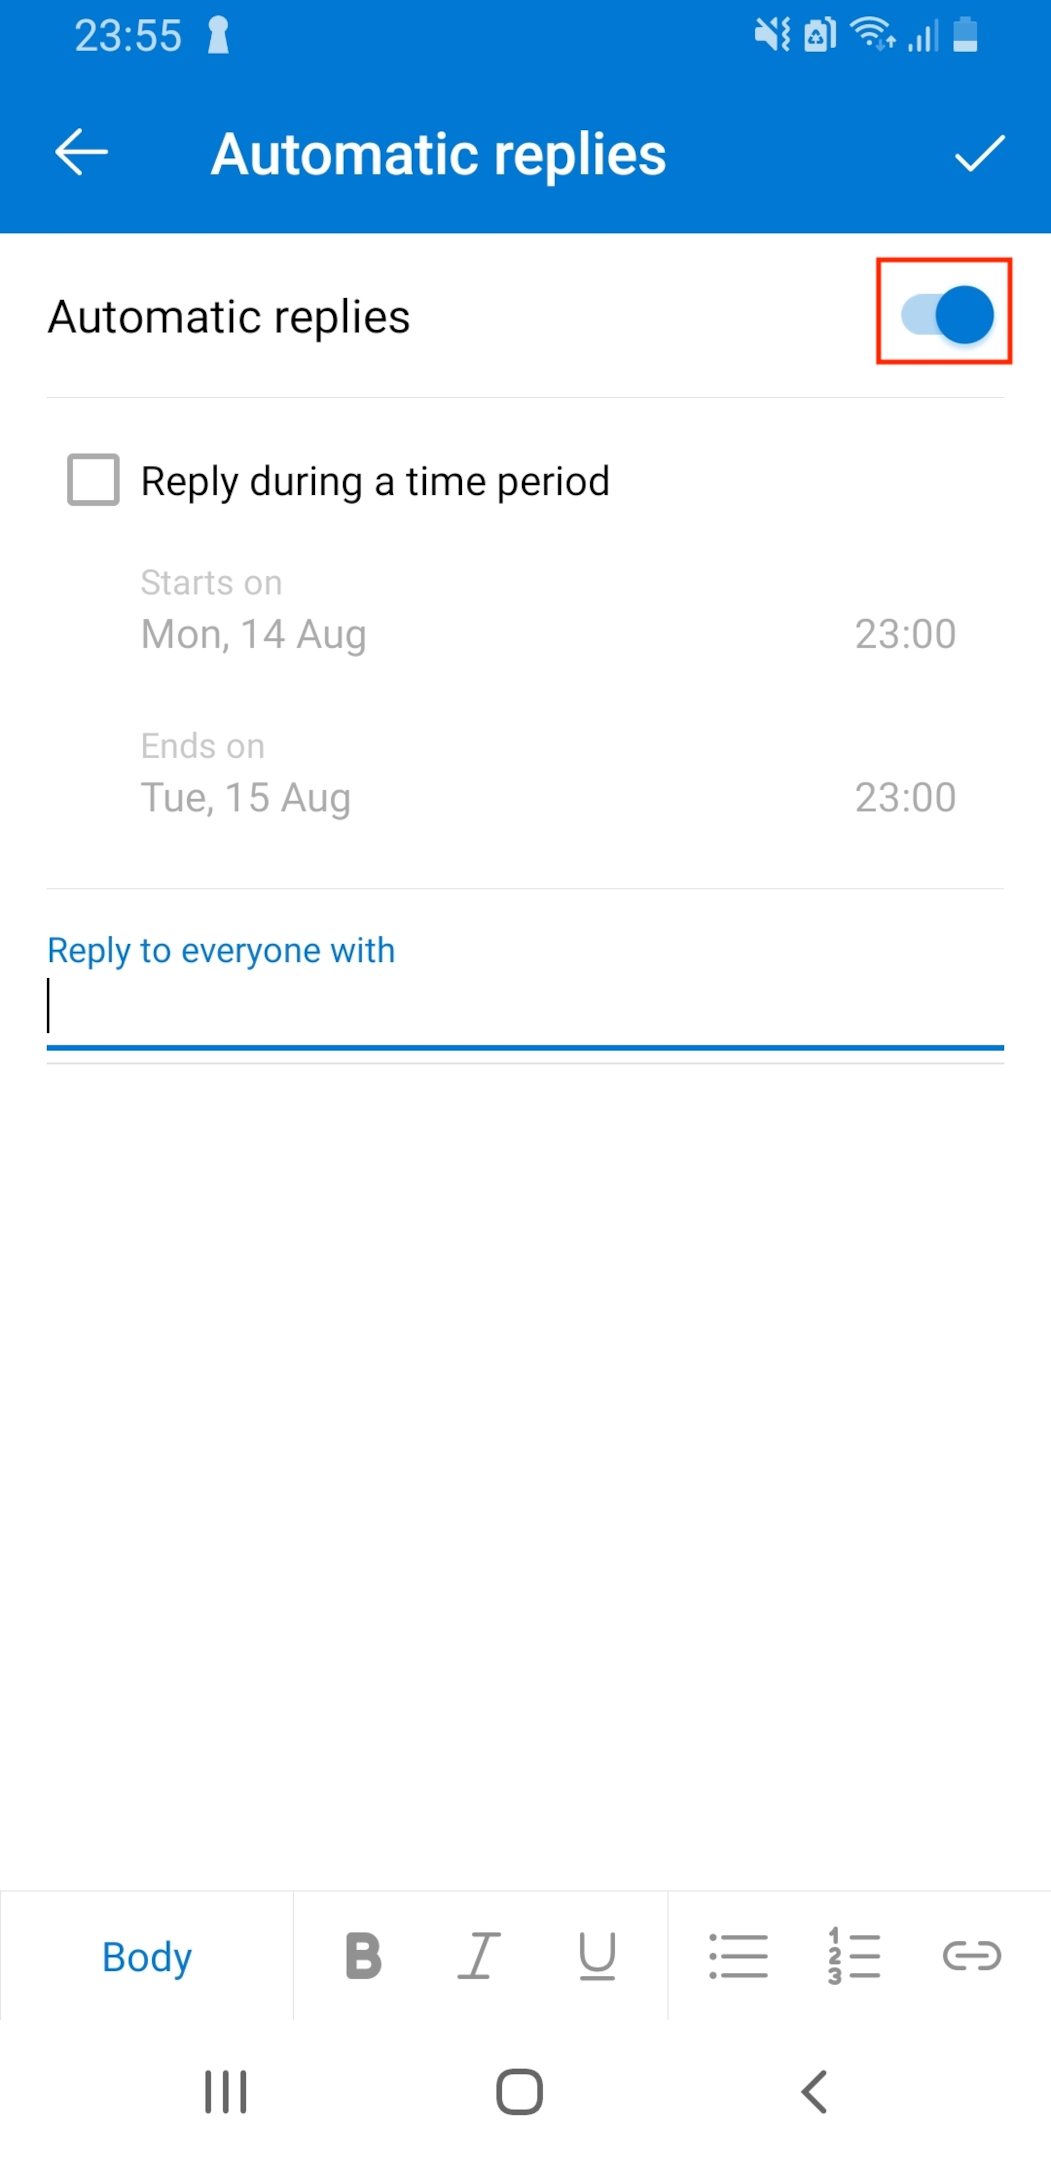
- Toggle the slider to enable automatic replies.
But wait, there’s more to it.
This article will give you a clear step-by-step guide to how you can set your “Out of Office” response on your mobile device and will give you useful customization tips to help you optimize your automatic replies.
Let’s dive in!
Setting Up Out of Office on Outlook App

The Outlook app is available for both Android and iOS devices and supports various email account types such as Microsoft 365, Exchange, Exchange (Hybrid), and Outlook.com accounts.
The process of activating automatic replies is generally simple and can be done with a few quick taps in the app’s Outlook settings menu.
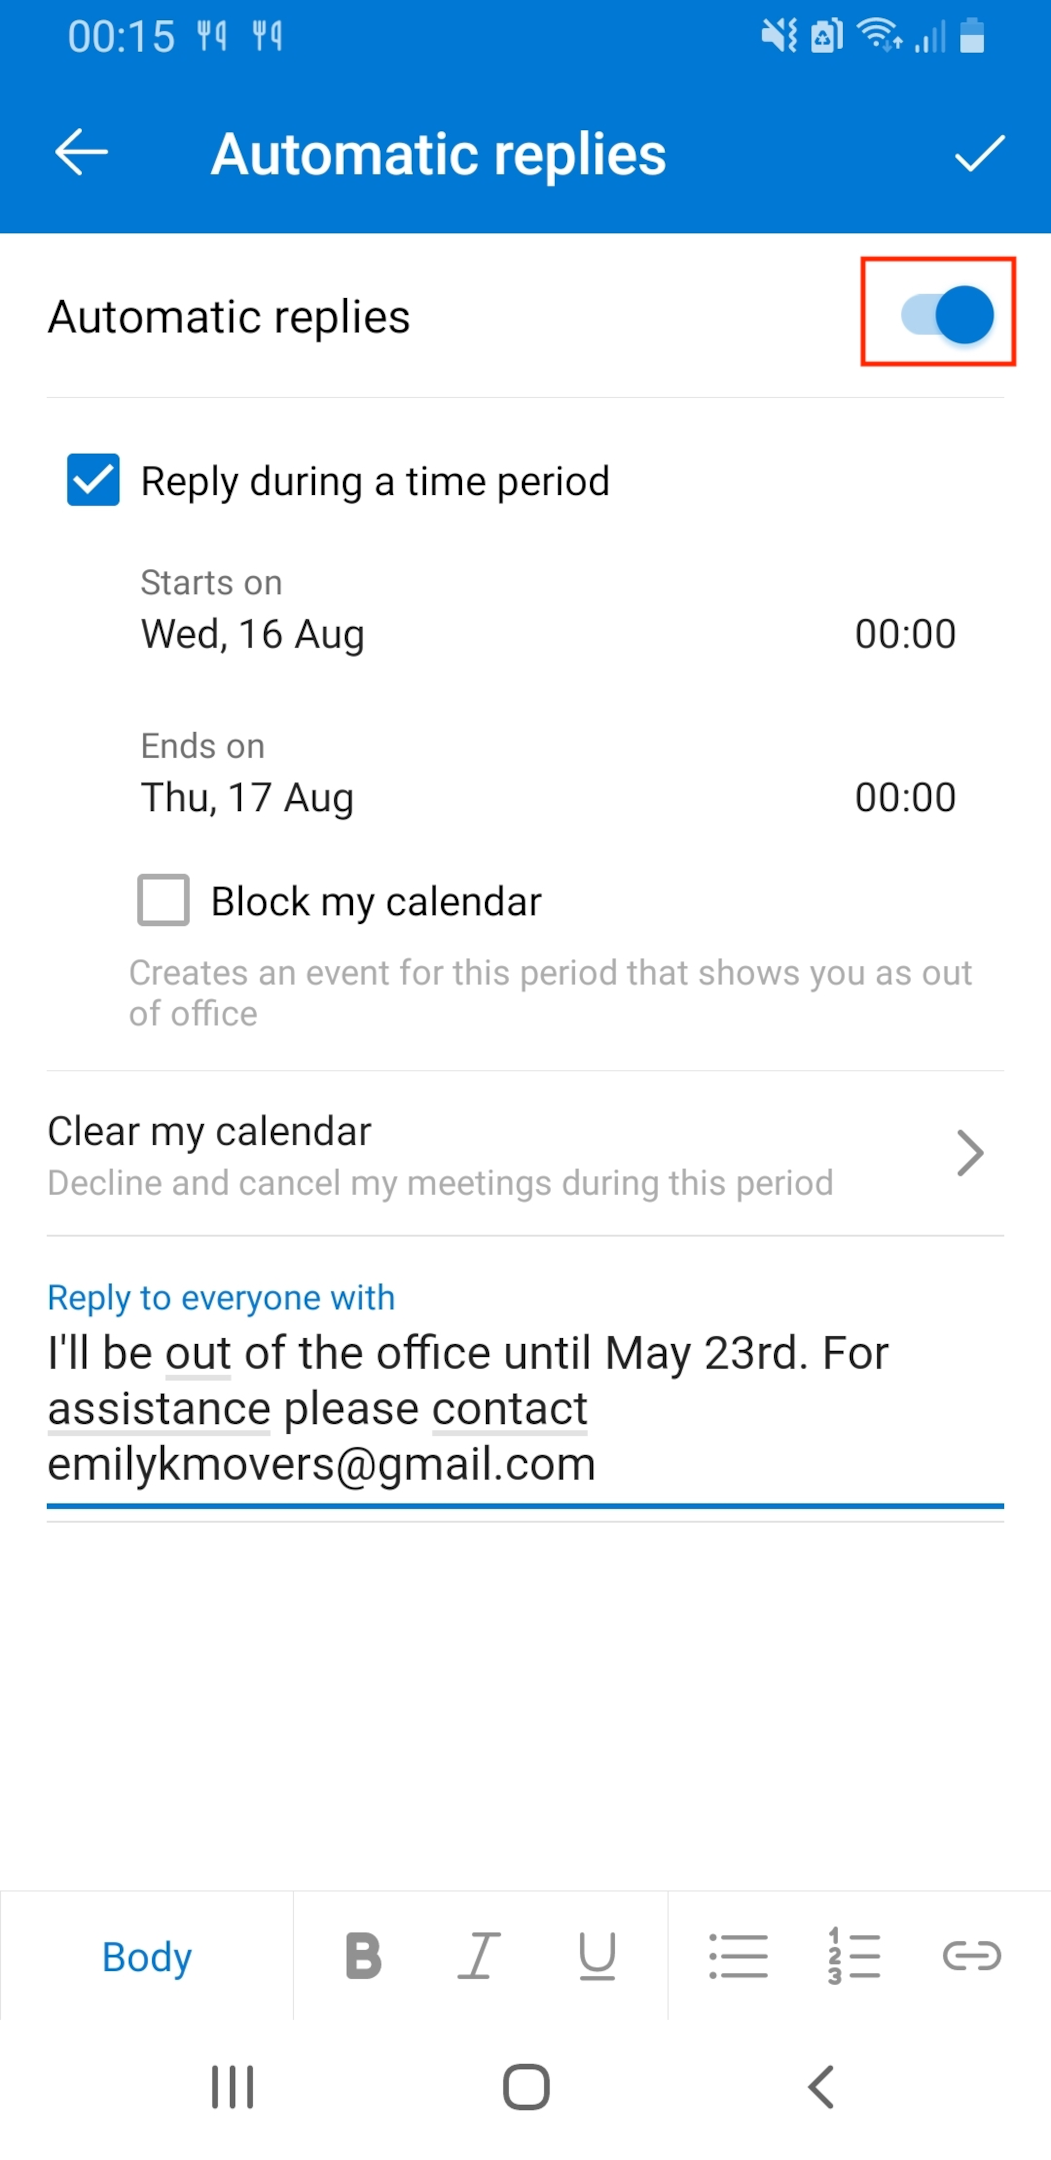
To enable the “Out of Office” feature on your mobile Outlook app:

1. Open the Outlook mobile app on your device.
2. Tap on the top-left corner to view the menu options.
3. In the lower-left corner, tap the Settings (gear) icon.

4. Under Accounts, select your Office 365 Account.
5. Click Automatic Replies.
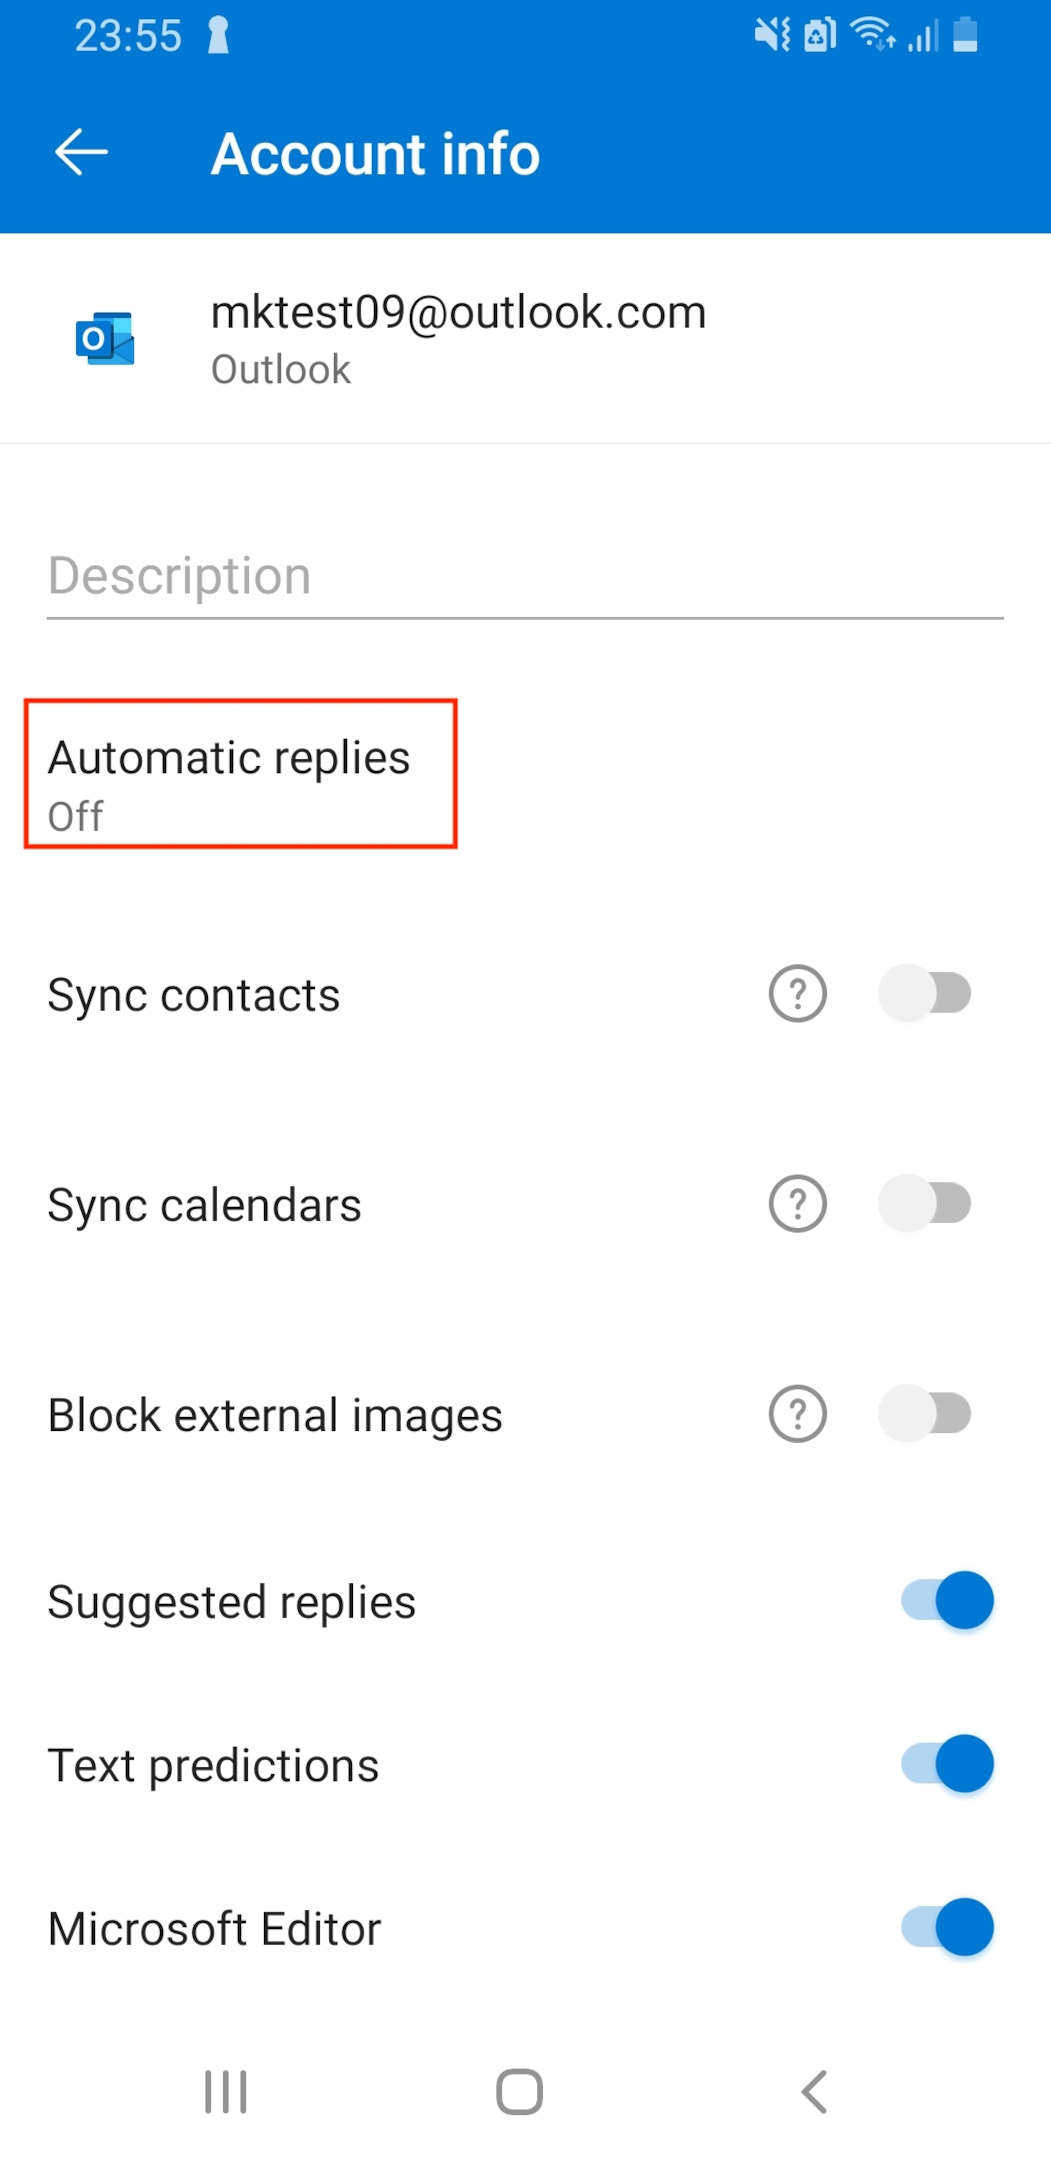
6. Toggle the slider to enable automatic replies.
Once you have set “Out of Office” replies, you can customize your out-of-office message and settings.
Customizing “Out of Office” Settings
When setting up automatic out-of-office replies in Outlook, you may want to customize the reply. This section will cover some of those customizations.
1. Customizing Reply Time Frame Settings
Unfortunately, no vacation lasts forever, but that is a good thing for your professional contacts who need you back in action.
To ensure that they don’t continue to get automatic replies after you are back in the office, you can determine a defined time frame for your “Out of Office” replies.
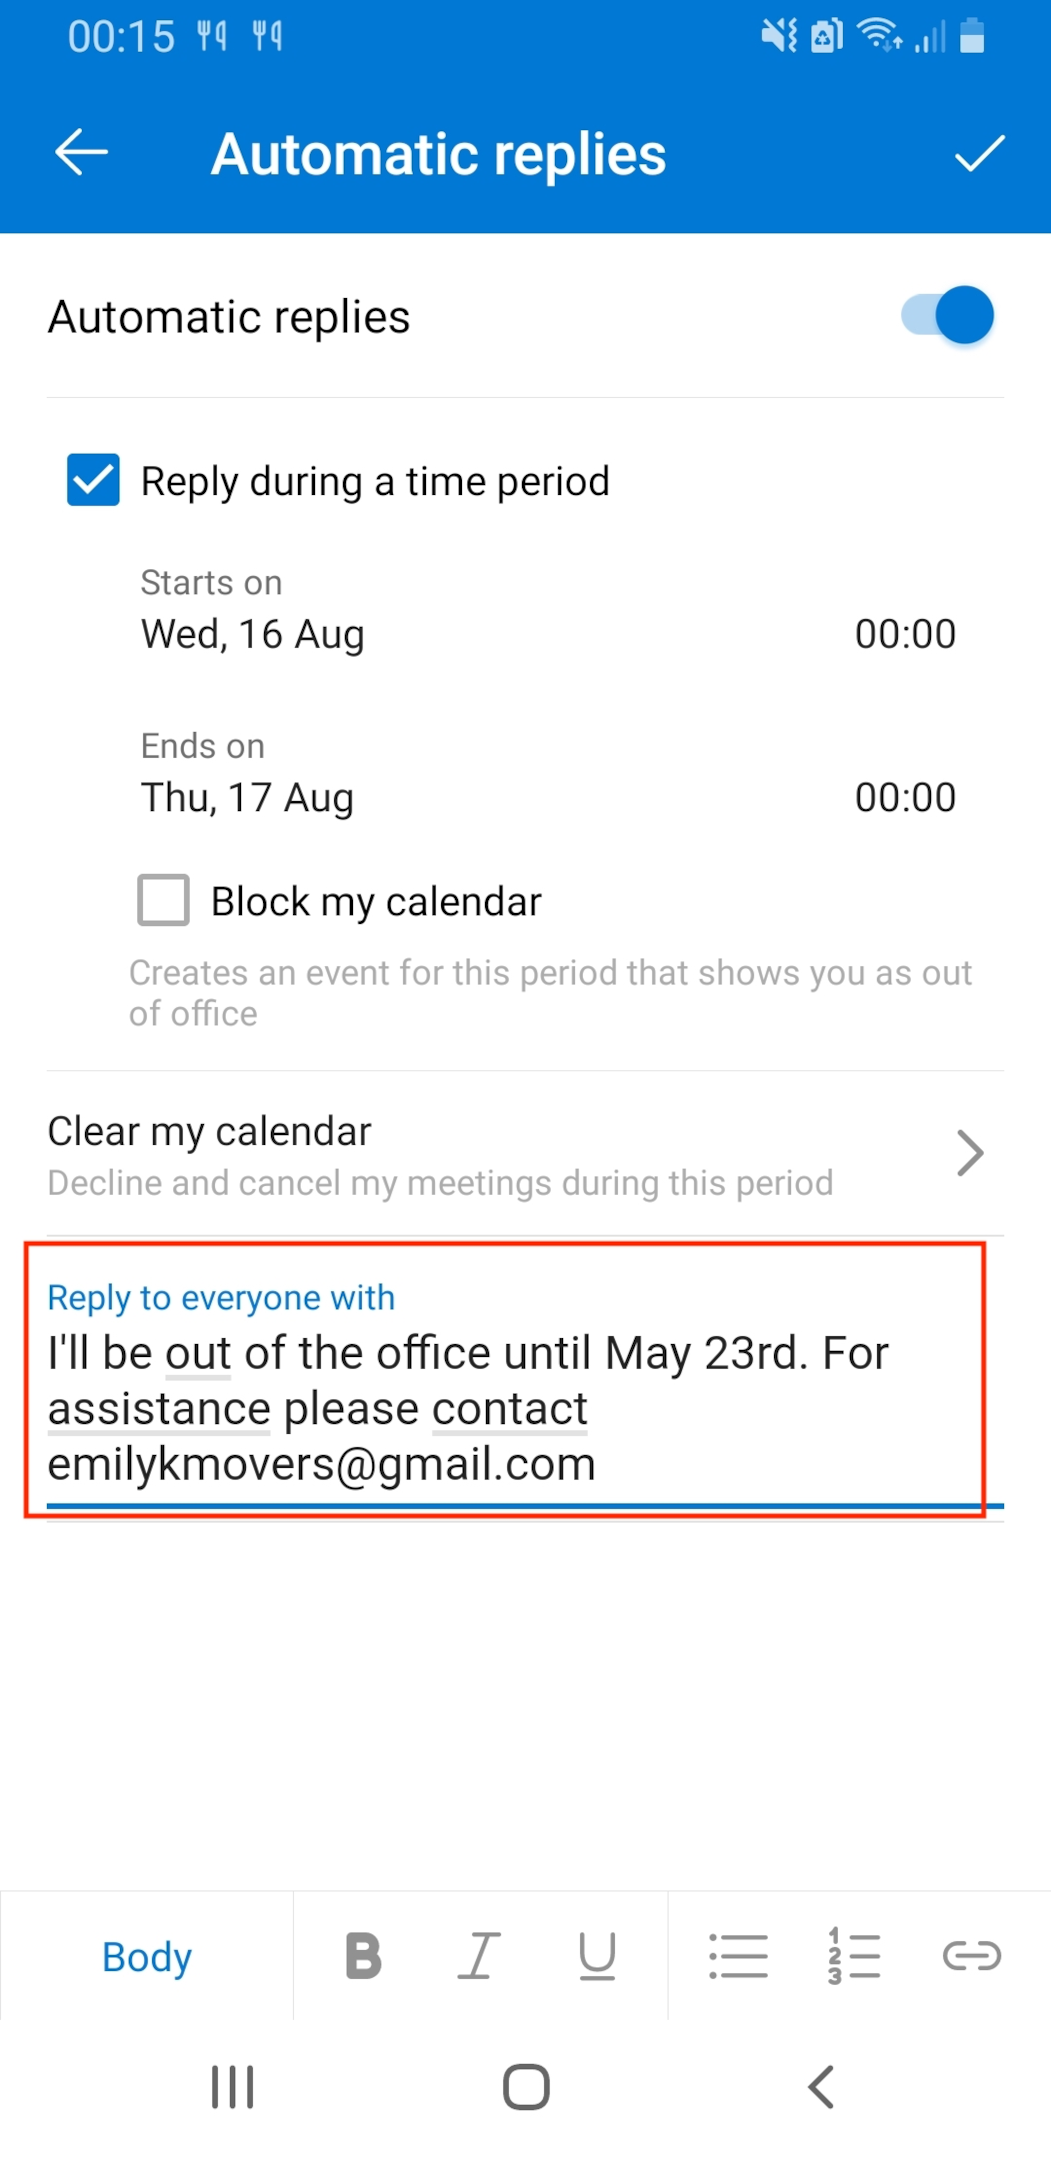
To create a time frame for your “Out of Office” replies:
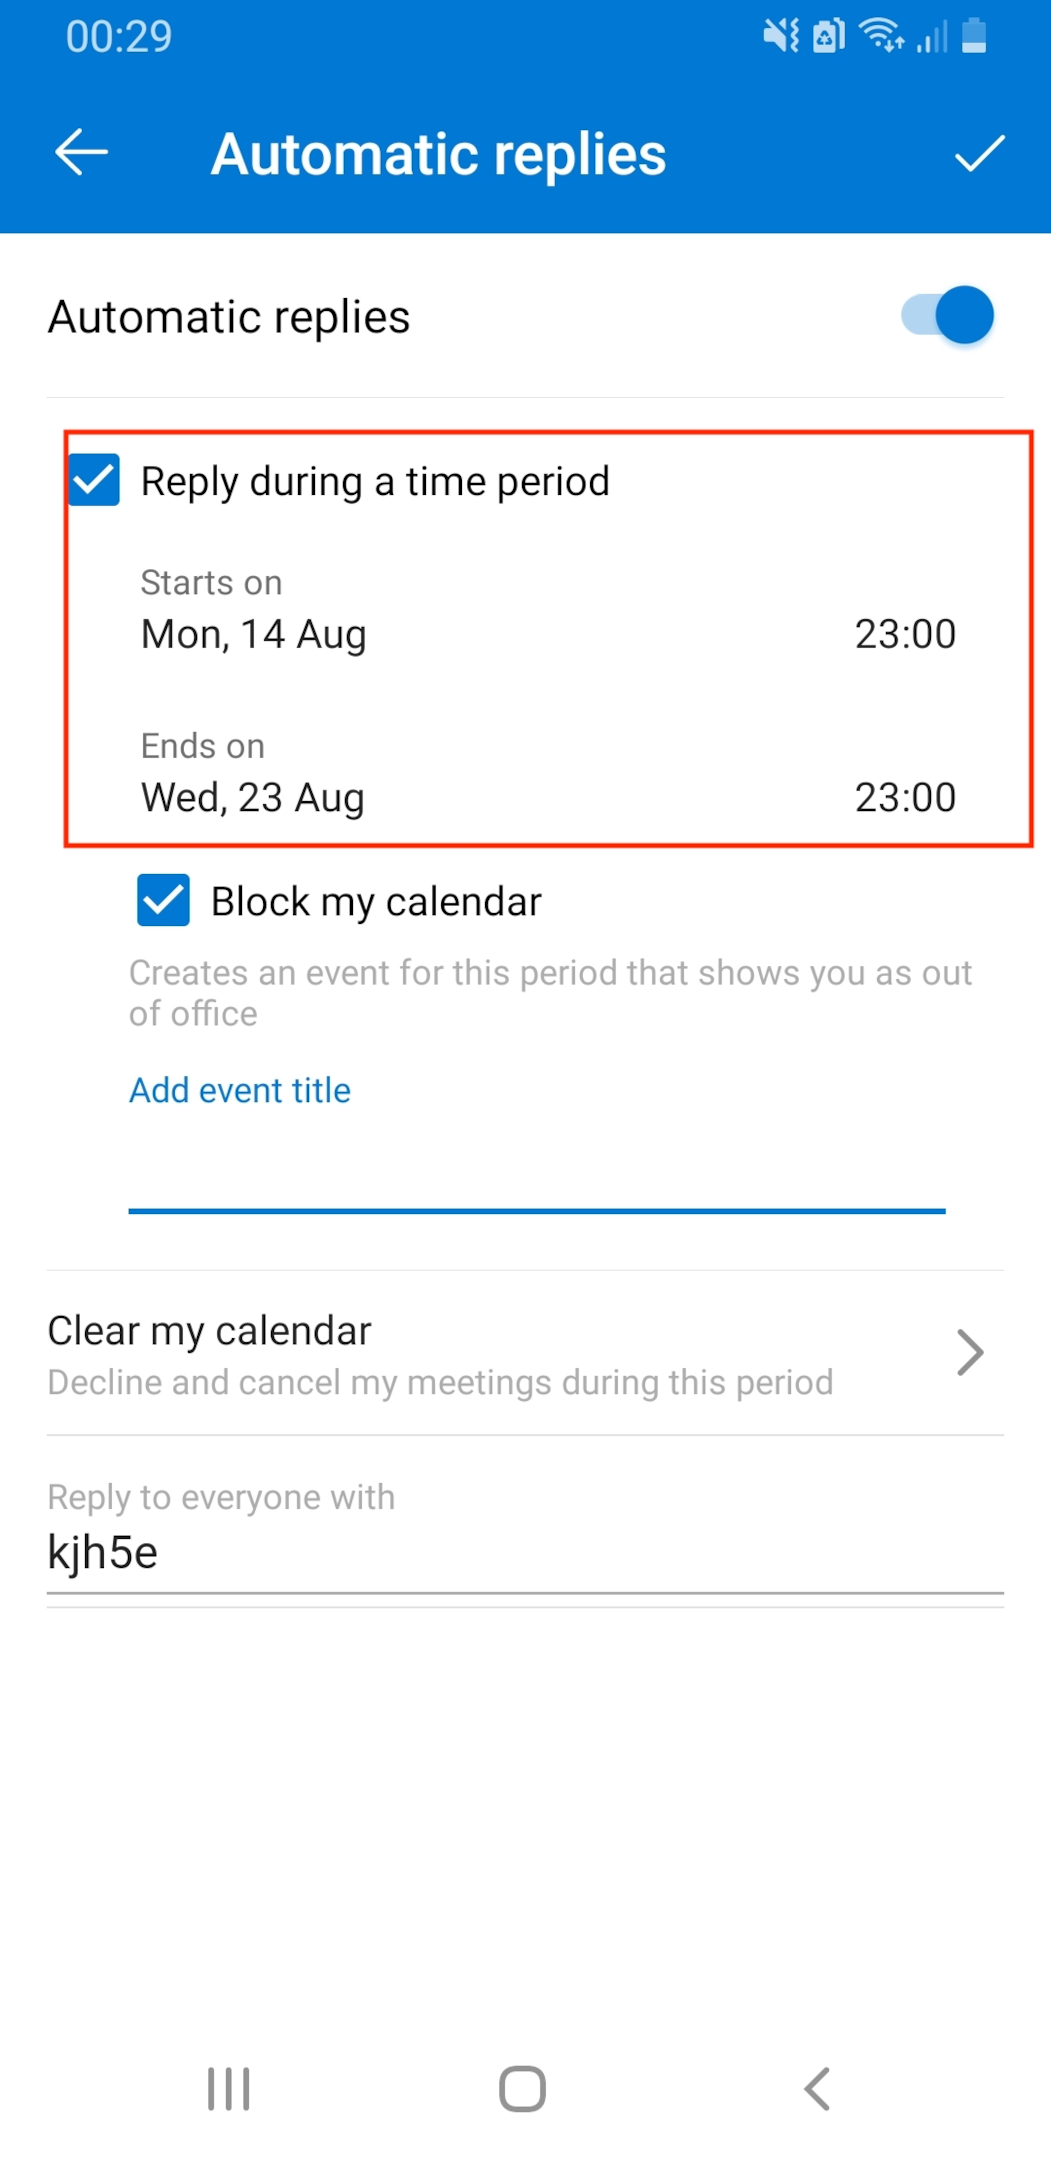
- In the Automatic Replies window, check the “Reply during a time period” option.
- Click on the Start time field and select the desired start date and time from the calendar.
- Click on the End time field and choose the desired end date and time.
- Click the checkmark in the top-right corner.
Your automatic replies will now only be sent within the time frame you have created.
2. How to Choose Your “Out of Office” Reply Recipient
If you are using a personal Outlook or Microsoft 365 account, your “Out of Office” reply will be sent to everyone who emails you.
However, if your business account is tied to your organization, you will be given the option to only send your “Out of Office” reply to people outside your organization.
To do this:

- In the Automatic Replies window, check the “Send replies outside your organization” option.
- Click the checkmark in the top right corner to save your settings.
If you do not check this checkbox, your “Out of Office” reply will be sent to only those within your organization.
3. Providing Alternative Contacts
There is no setting in the automatic reply settings that allows you to provide an alternative contact for anyone who may contact you when you are not available.
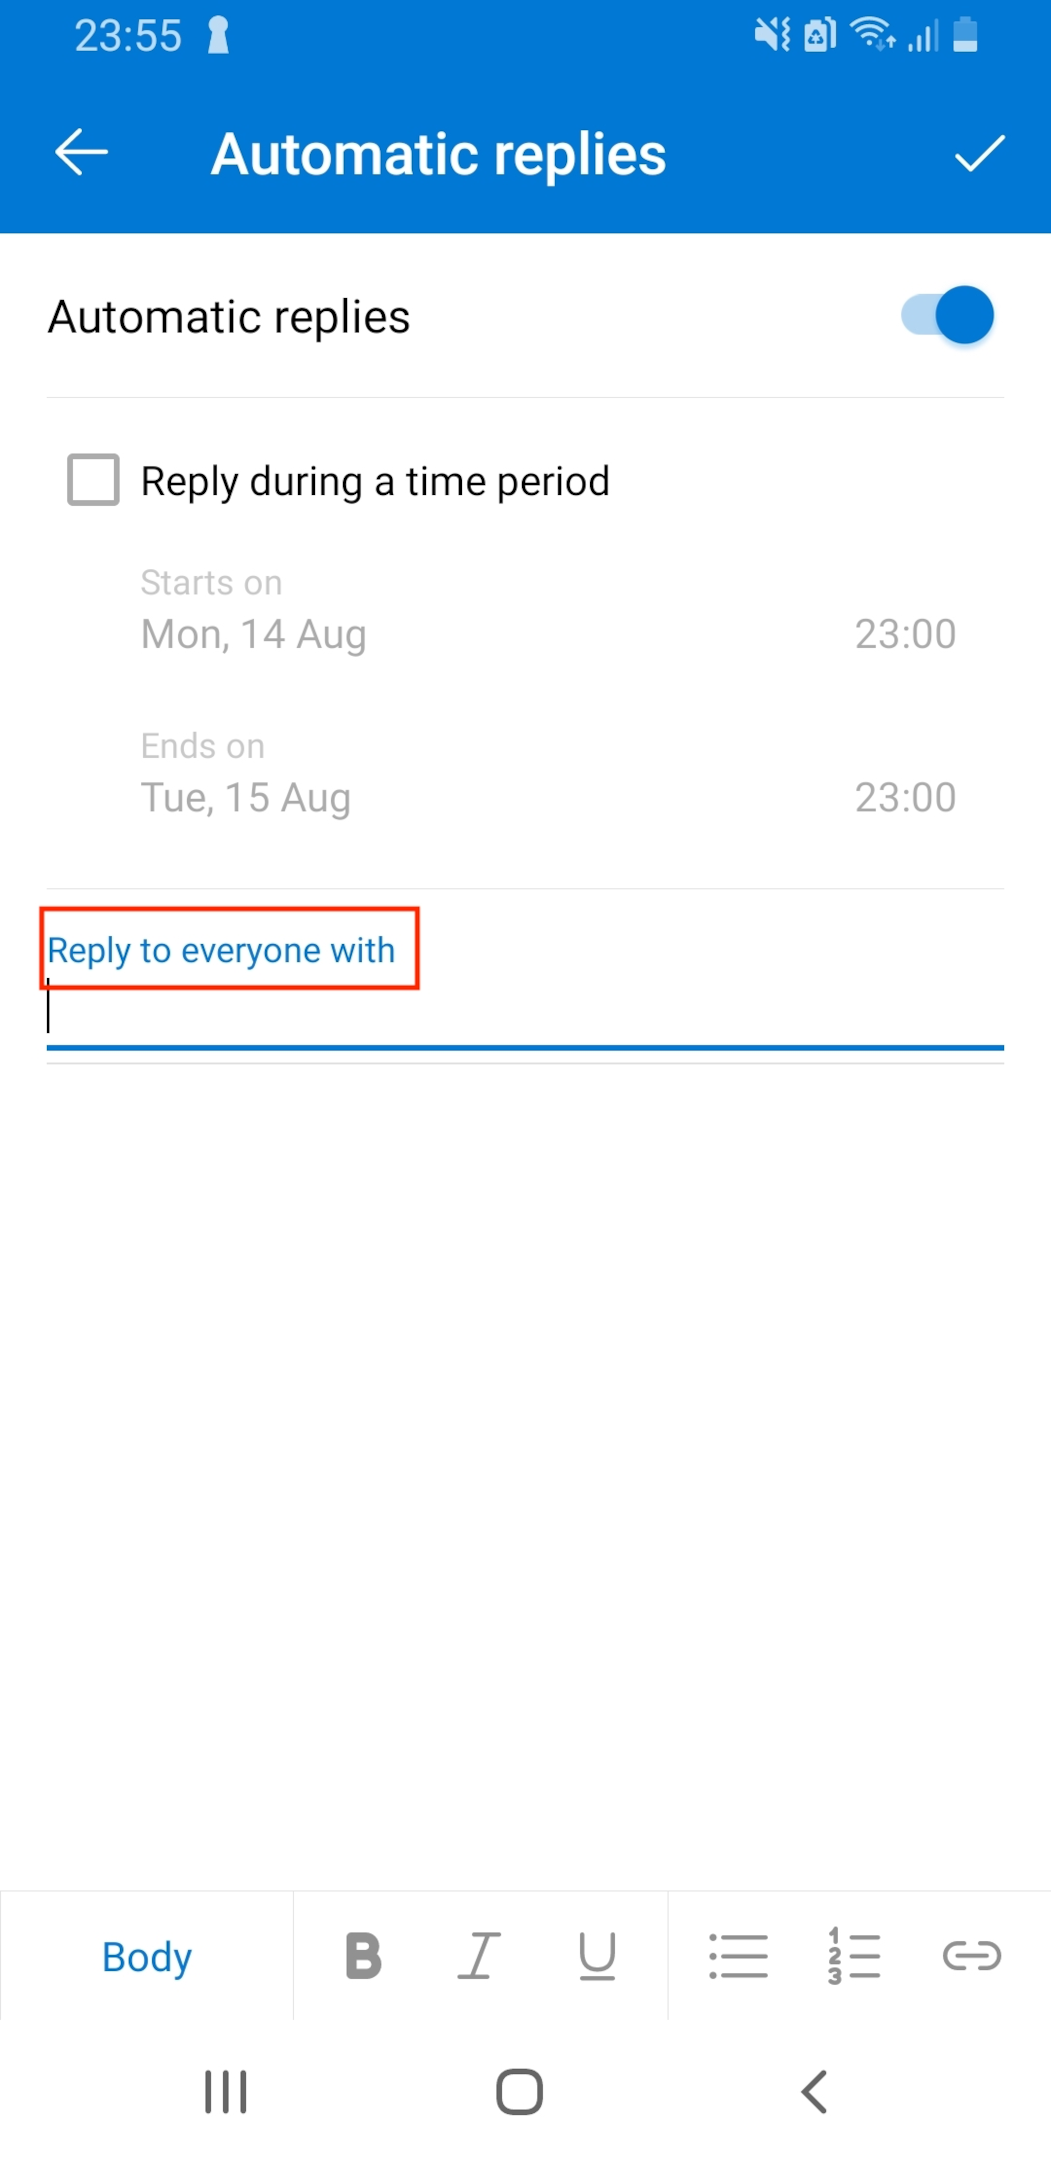
If you would like to provide an alternate contact, your best bet would be to direct the recipients to an alternative contact within the custom automatic reply you craft.
You can write your custom message in the space provided in the Automatic Replies window.
4. Managing Calendar and Invitations
As well as letting you set up automatic replies, Outlook also lets you manage any calendar appointments or invitations you may have during the time you won’t be in the office.
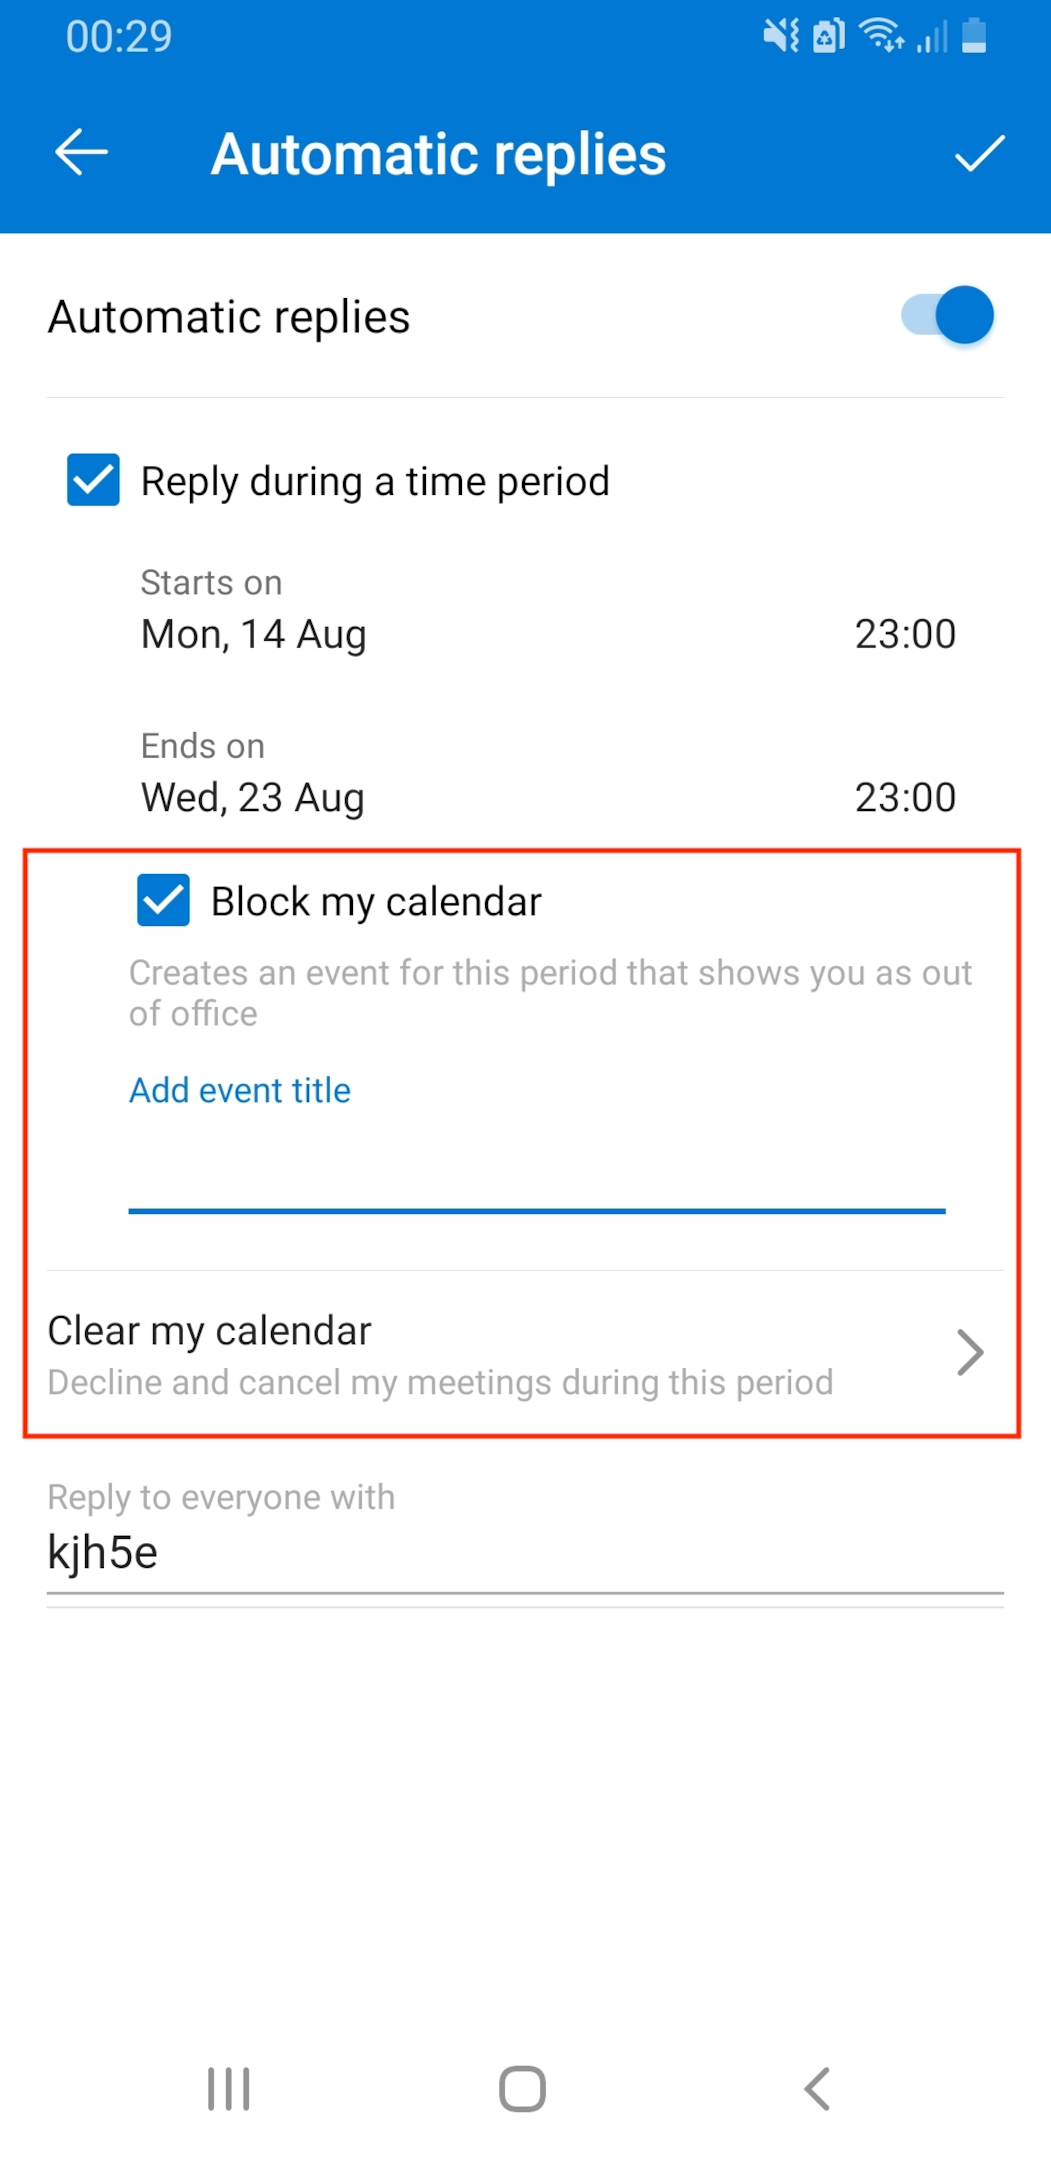
To block your calendar for this period:
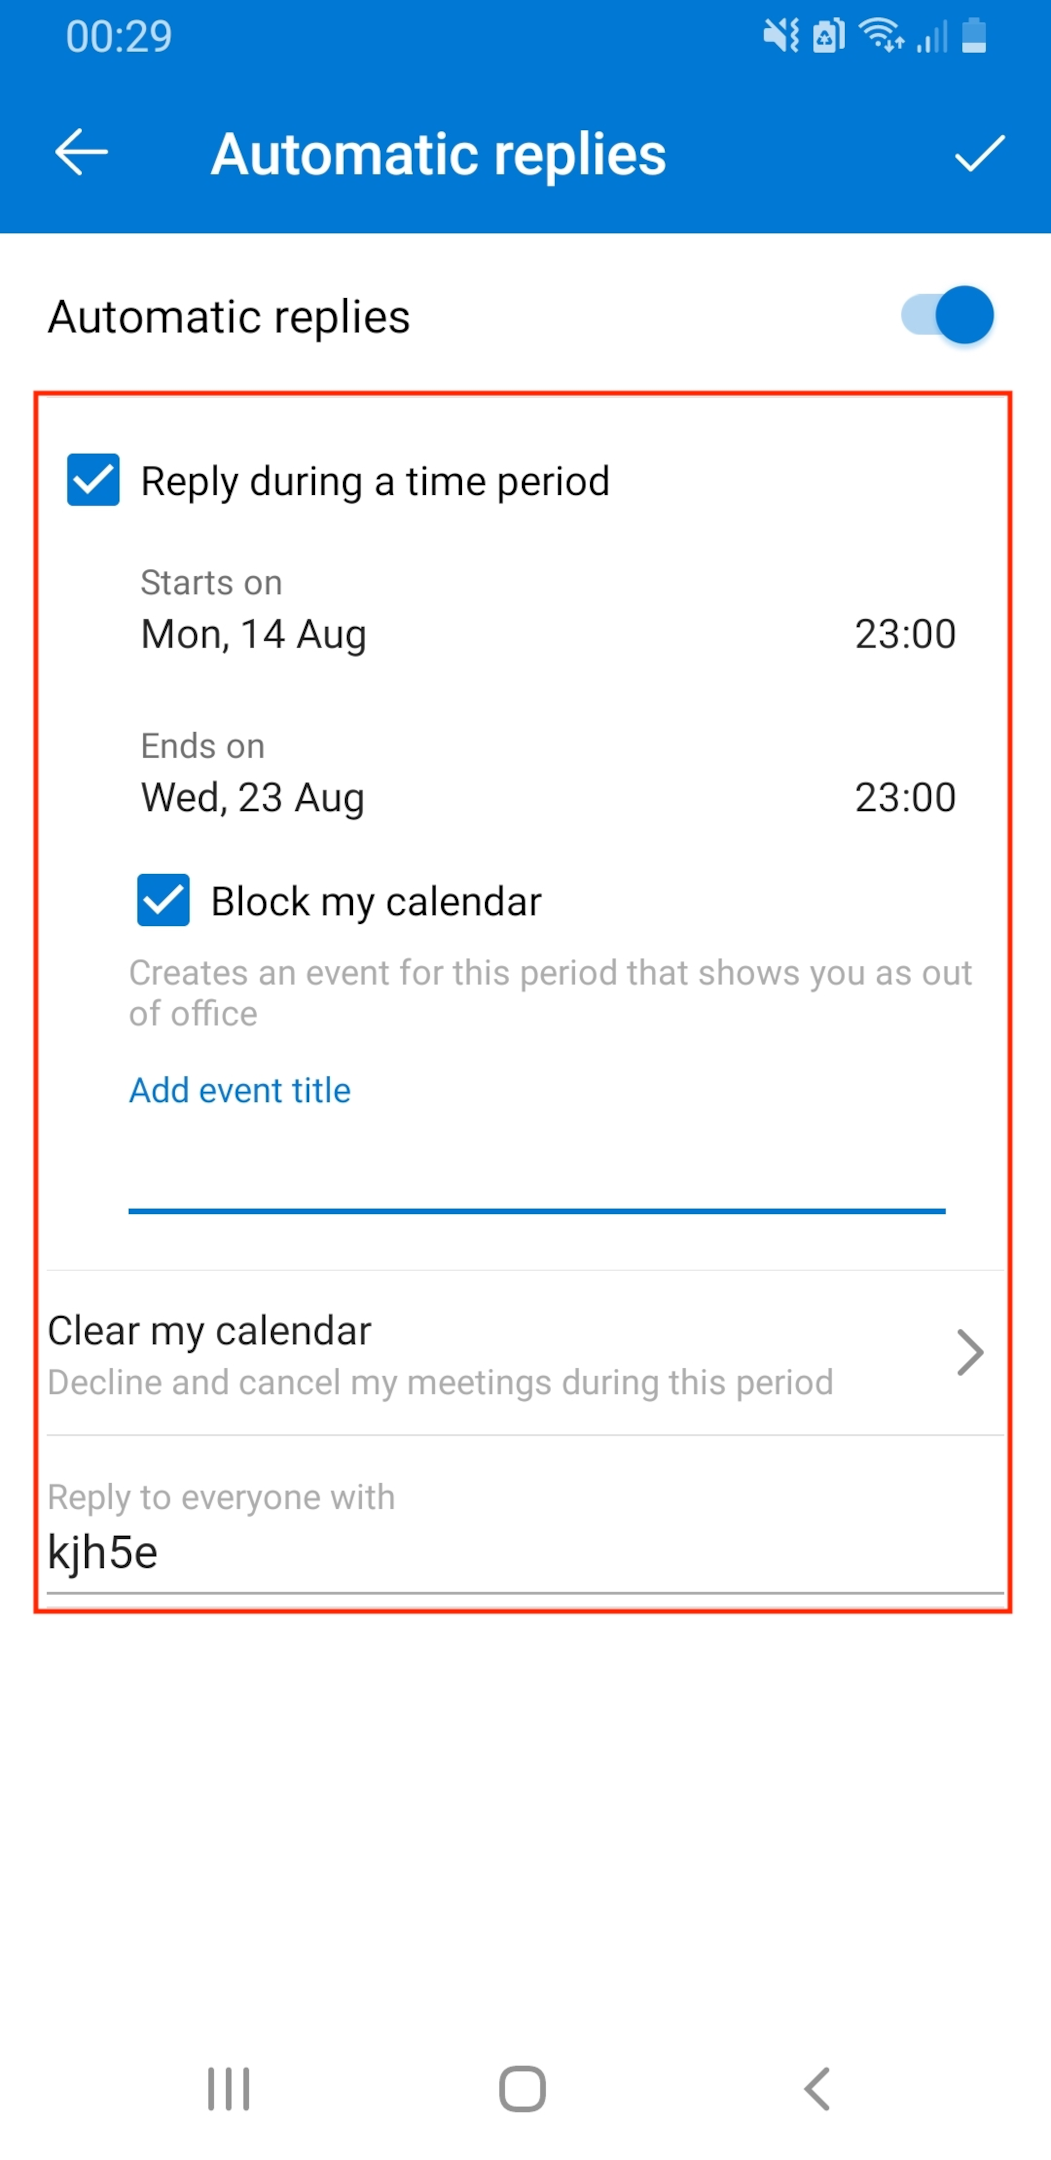
- In the Automatic Replies window, check the “Block my calendar” option.
- Add an appropriate event title for this period.
- Click the checkmark in the top right corner to save your settings.

To clear your calendar for this period:
- In the Automatic Replies window, select the “Clear my calendar” option.
- Select the appointments and meetings you wish to withdraw from.
- Click the checkmark in the top right corner of the Automatic Replies window to save your settings.
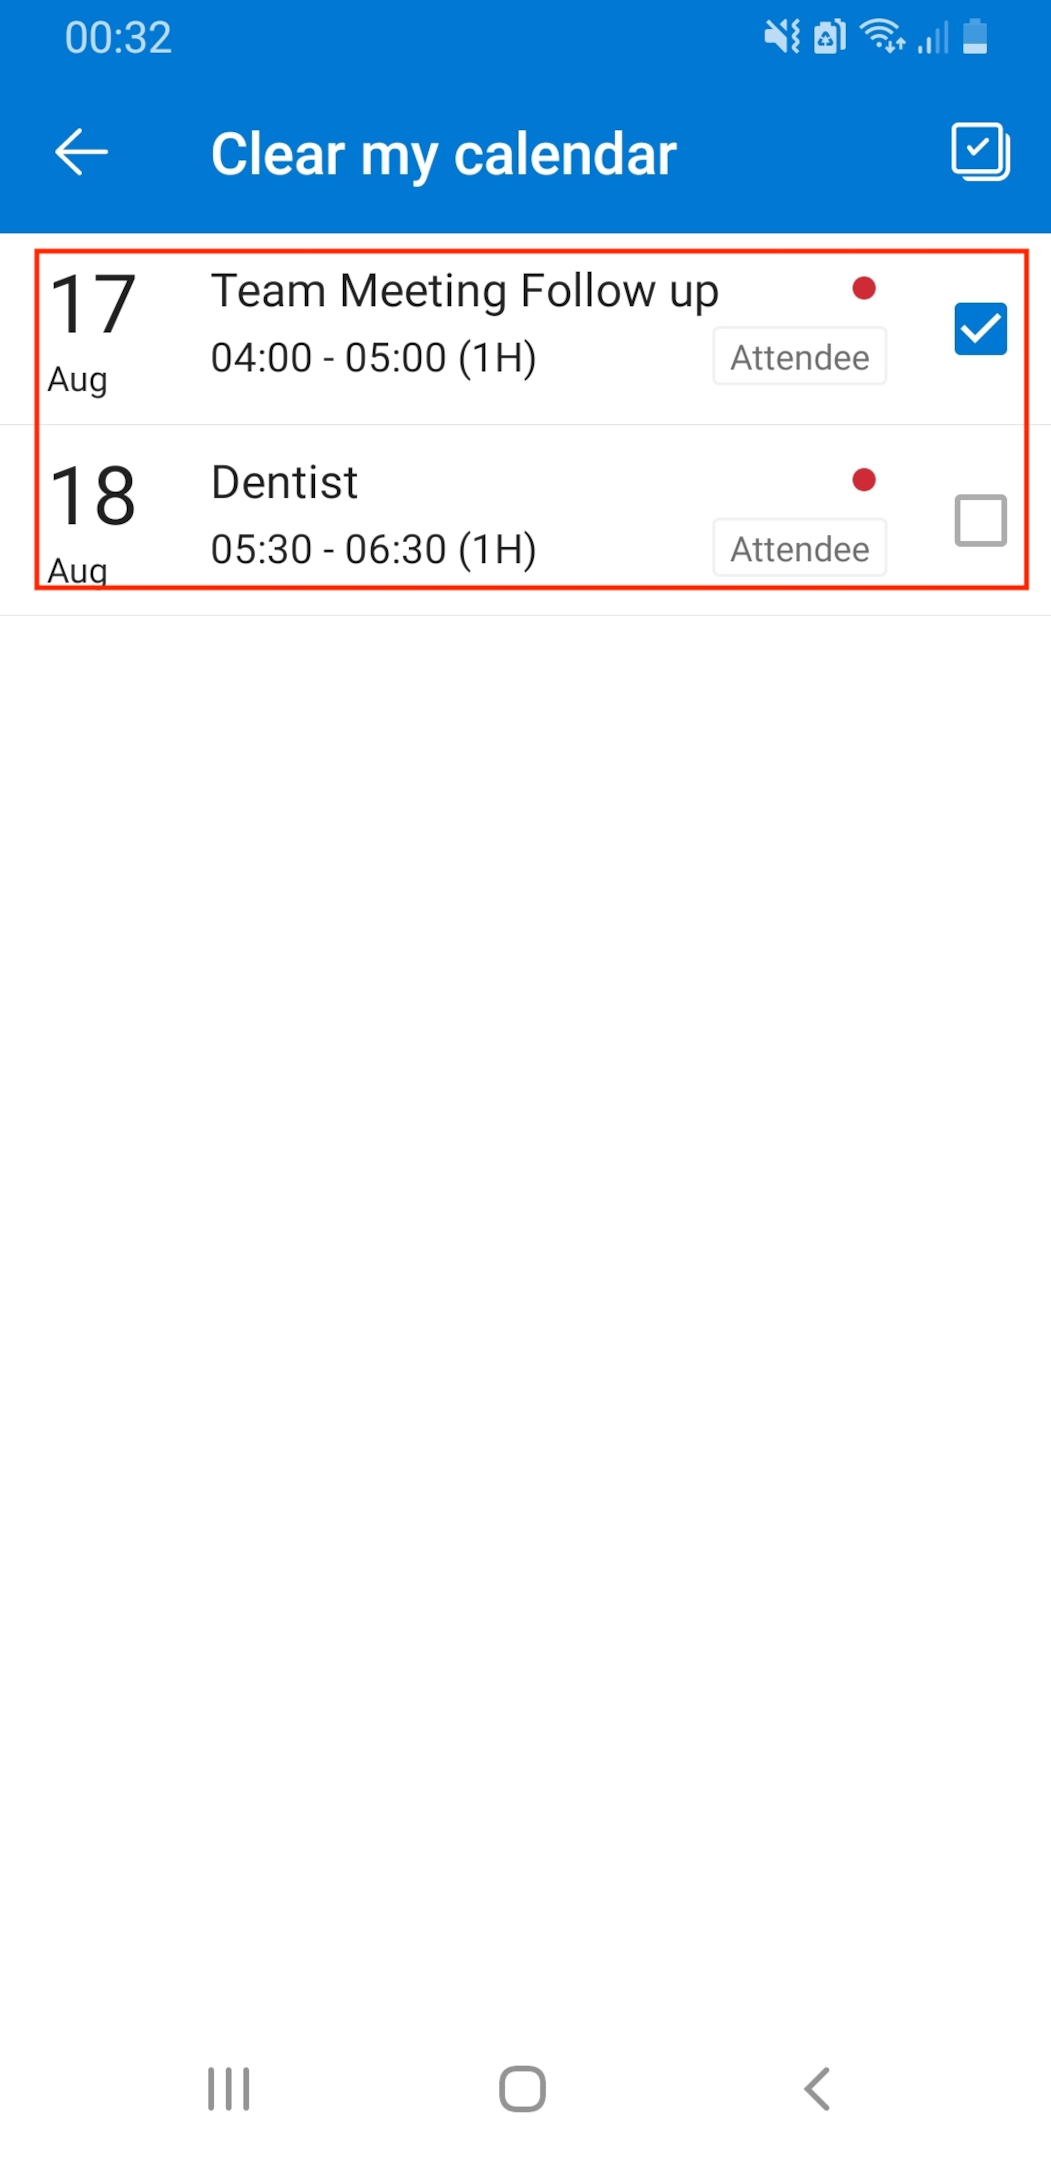
By doing this, you will be declining any invitation or event selected and the host will get an email alerting them of that.
5. Disabling Out of Office
If you find yourself needing to disable the “Out of Office” feature before the end of your chosen timeframe, or because you did not specify a timeframe, the steps you need to take are very simple.
- Open the Outlook mobile app on your device.
- Tap on the upper left corner to view the menu options.
- In the lower-left corner, tap the Settings (gear) icon.
- Under Accounts, select your Office 365 Account.
- Click Automatic Replies.
- Toggle the slider to disable automatic replies.
It’s that simple. Use all the above customization tools to ensure that your “Out of Office” automatic replies work perfectly for you and your needs.
Alternative: Use Rules to Create “Out of Office” Reply in Outlook

If for whatever reason you can’t access the Automatic replies option, Outlook has provided another way to create an “Out of Office” reply.
This is a 2 step process.
1. Create your “Out of Office” template:
- Create a new email message.
- Write your “Out of Office” reply and header.
- Click File in the menu bar.
- Click Save As and name your template.
- Select Outlook Template in the Save as type drop-down menu.
2. Create a new “Out of Office” rule:
- Click on the File tab in the menu bar.
- Select Manage Rules & Alerts.
- Click on the E-mail Rules tab and select New Rule.
- Click Apply rule on messages I receive under the Start from a blank rule, then click Next.
- If you want your reply to go to everyone that emails you, leave Step 1 and Step 2 and click Next again.
- For Step 1: Select action(s) under ‘What do you want to do with this message’, select reply using a specific template.
- For Step 2, click the underlined text for a specific template.
- Select User Templates in File System in the Look In box at the top of the Select a Reply Template box.
- Select the template you wrote and select Open and Next.
- Add any exceptions your need, and click Next.
- Name your rule then select Finish.
Be aware that to have this rule send out your template while you are away, Outlook must be left running for that whole duration.
Final Thoughts

Mastering the art of setting up your “Out of Office” notifications within the Outlook app is a valuable skill that ensures seamless communication even when you’re away.
By efficiently configuring your automatic replies, specifying the duration of your absence, and providing an alternative contact, you not only maintain professionalism but also empower your colleagues and contacts to navigate your absence with ease.
This feature-rich functionality of the Outlook app not only enhances your personal productivity but also contributes to the overall efficiency of your team and organization, underscoring its significance in the modern professional landscape.
If you’d like to learn more about how to use Outlook to supercharge your work, check out the video below:
Frequently Asked Questions
How to set an “Out of Office” message in the Outlook app?
To set an Out of Office message in the Outlook app, follow these steps:

- Open the Outlook app.
- Tap on the hamburger menu (?) and then on the settings gear (??).
- Go to ‘Mail’ and then ‘Automatic replies’.
- Enable the ‘Turn on automatic replies’ toggle.
- Set the date and time for the message if desired.
- Write your custom message and save your changes.
How do I set up “Out of Office” on an iPhone Outlook app?
On the iPhone Outlook app, follow these steps to set an “Out of Office” message:
- Open the Outlook app and tap on your profile icon.
- Tap ‘Settings’ (??) and then your account.
- Enable ‘Automatic Replies’ and set the desired message and time frame.
How can I manage “Out of Office” in the Outlook calendar?
Adding an “Out of Office” event to your Outlook calendar is simple:
- Go to your Outlook calendar.
- Create a new event and select ‘Out of Office’ as the availability.
- Set the date and time range for your absence.
- Add a title and any additional information, if desired.
Your calendar will show that you are out of the office during this time period.
How do I enable “Out of Office” in the Teams app?
To enable “Out of Office” in the Microsoft Teams app:
- Open the Teams app and click on your profile picture.
- Click on ‘Set status message’.
- Set your custom message and enable the ‘Show when people message me’ toggle.
- Choose the time frame for the message display.
What are some “Out of Office” message examples?
Here are a few examples of “Out of Office” messages you could use:
- “I am currently out of the office, returning on [date]. Your email is important to me, and I will respond as soon as possible upon my return.”
- “Thank you for your message. I am currently on vacation and will be back on [date]. I will respond to your email at my earliest convenience.”
- “I am away from the office for a conference and will return on [date]. If your message is urgent, please contact [alternative contact]. Otherwise, I will respond as soon as possible.”
How do I enable “Out of Office” on Outlook desktop app?
To enable “Out of Office” on Outlook desktop app:
- Open your Outlook mail.
- Click on Tools in the menu bar.
- Click on Automatic Replies.
- Customize your office automatic reply.


