In this tutorial, we’ll talk about Power Automate Switch control, which is under the advanced built-in connectors. There are times when we have multiple possible values that come with different workflows. We can do that using nested Condition actions, but it might get too complicated once the number of possible values becomes higher. It’s much better to have the conditions side by side and parse them individually. In that case, we’ll use the Switch action.
Switch control in Power Automate can deal with multiple cases of possible alternatives which have different actions or blocks of statements.
Creating A Power Automate Flow
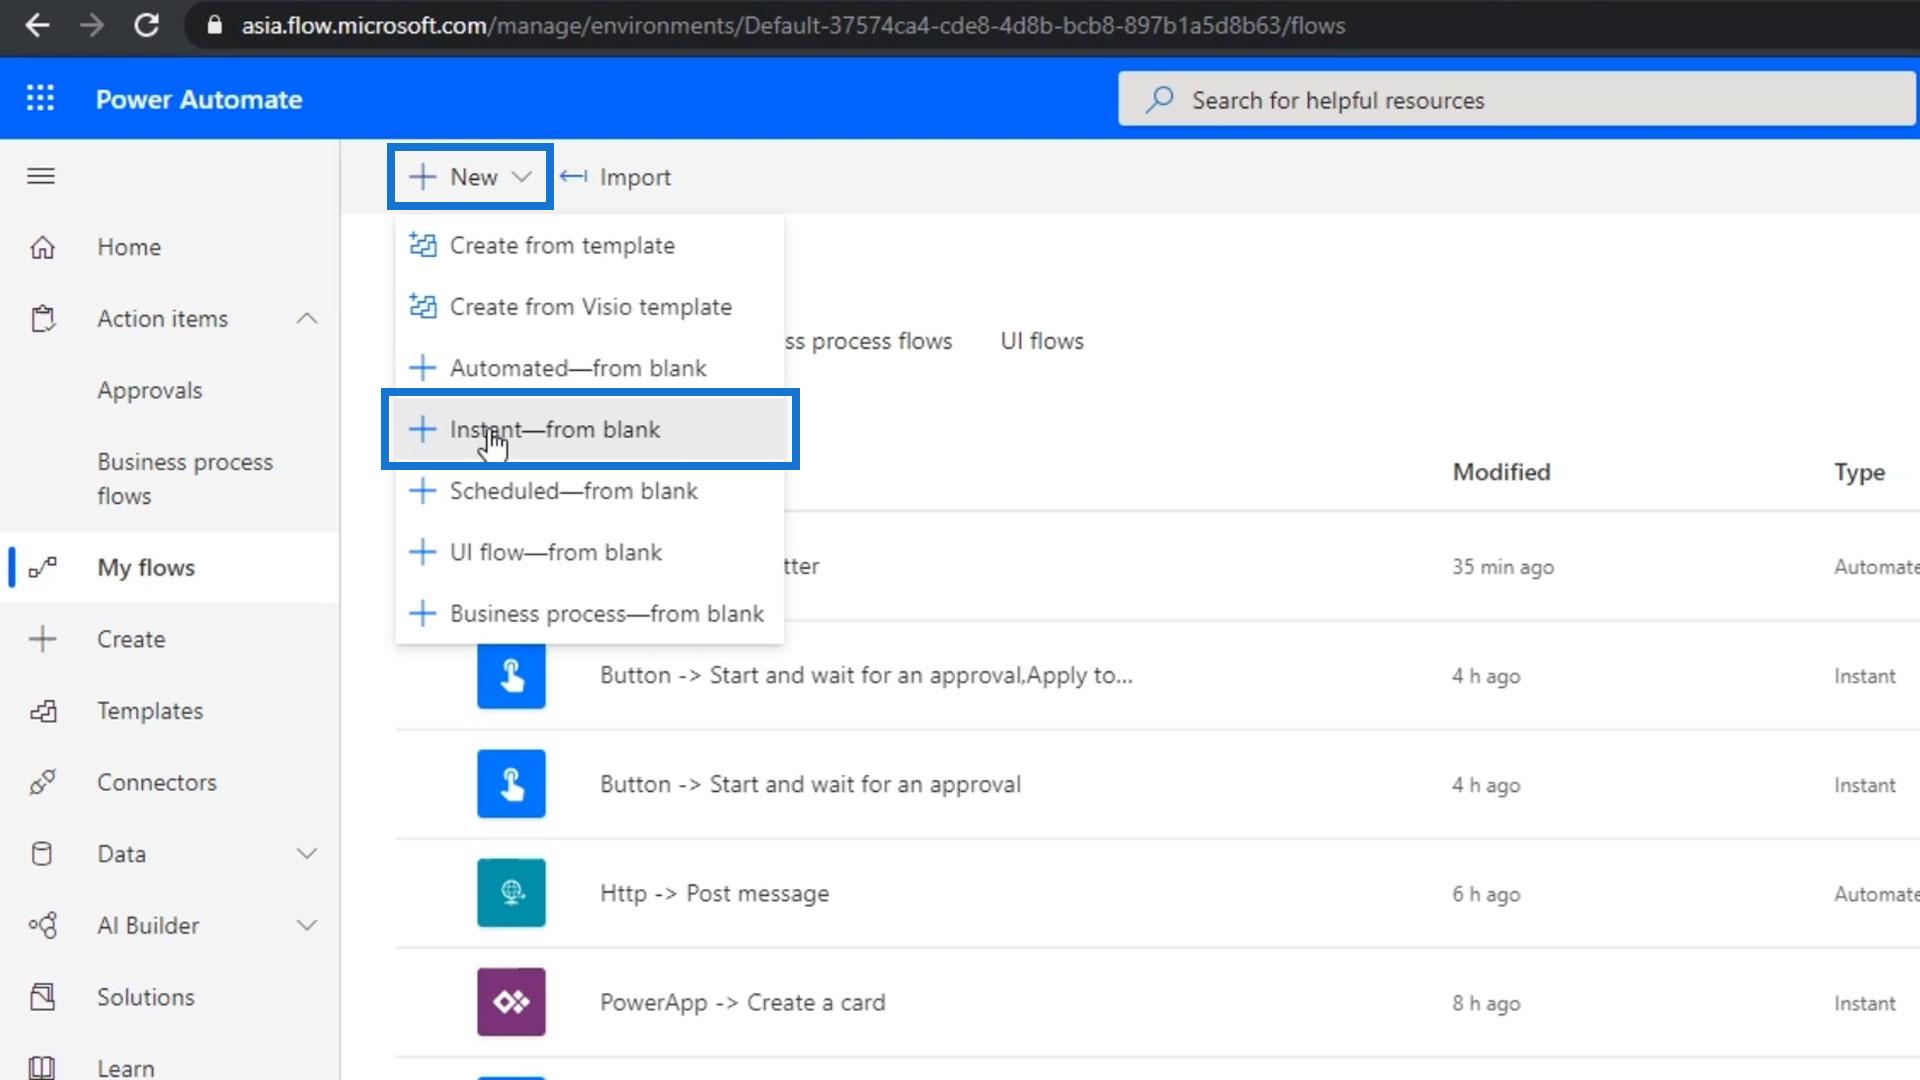
First, let’s create a new instant flow.

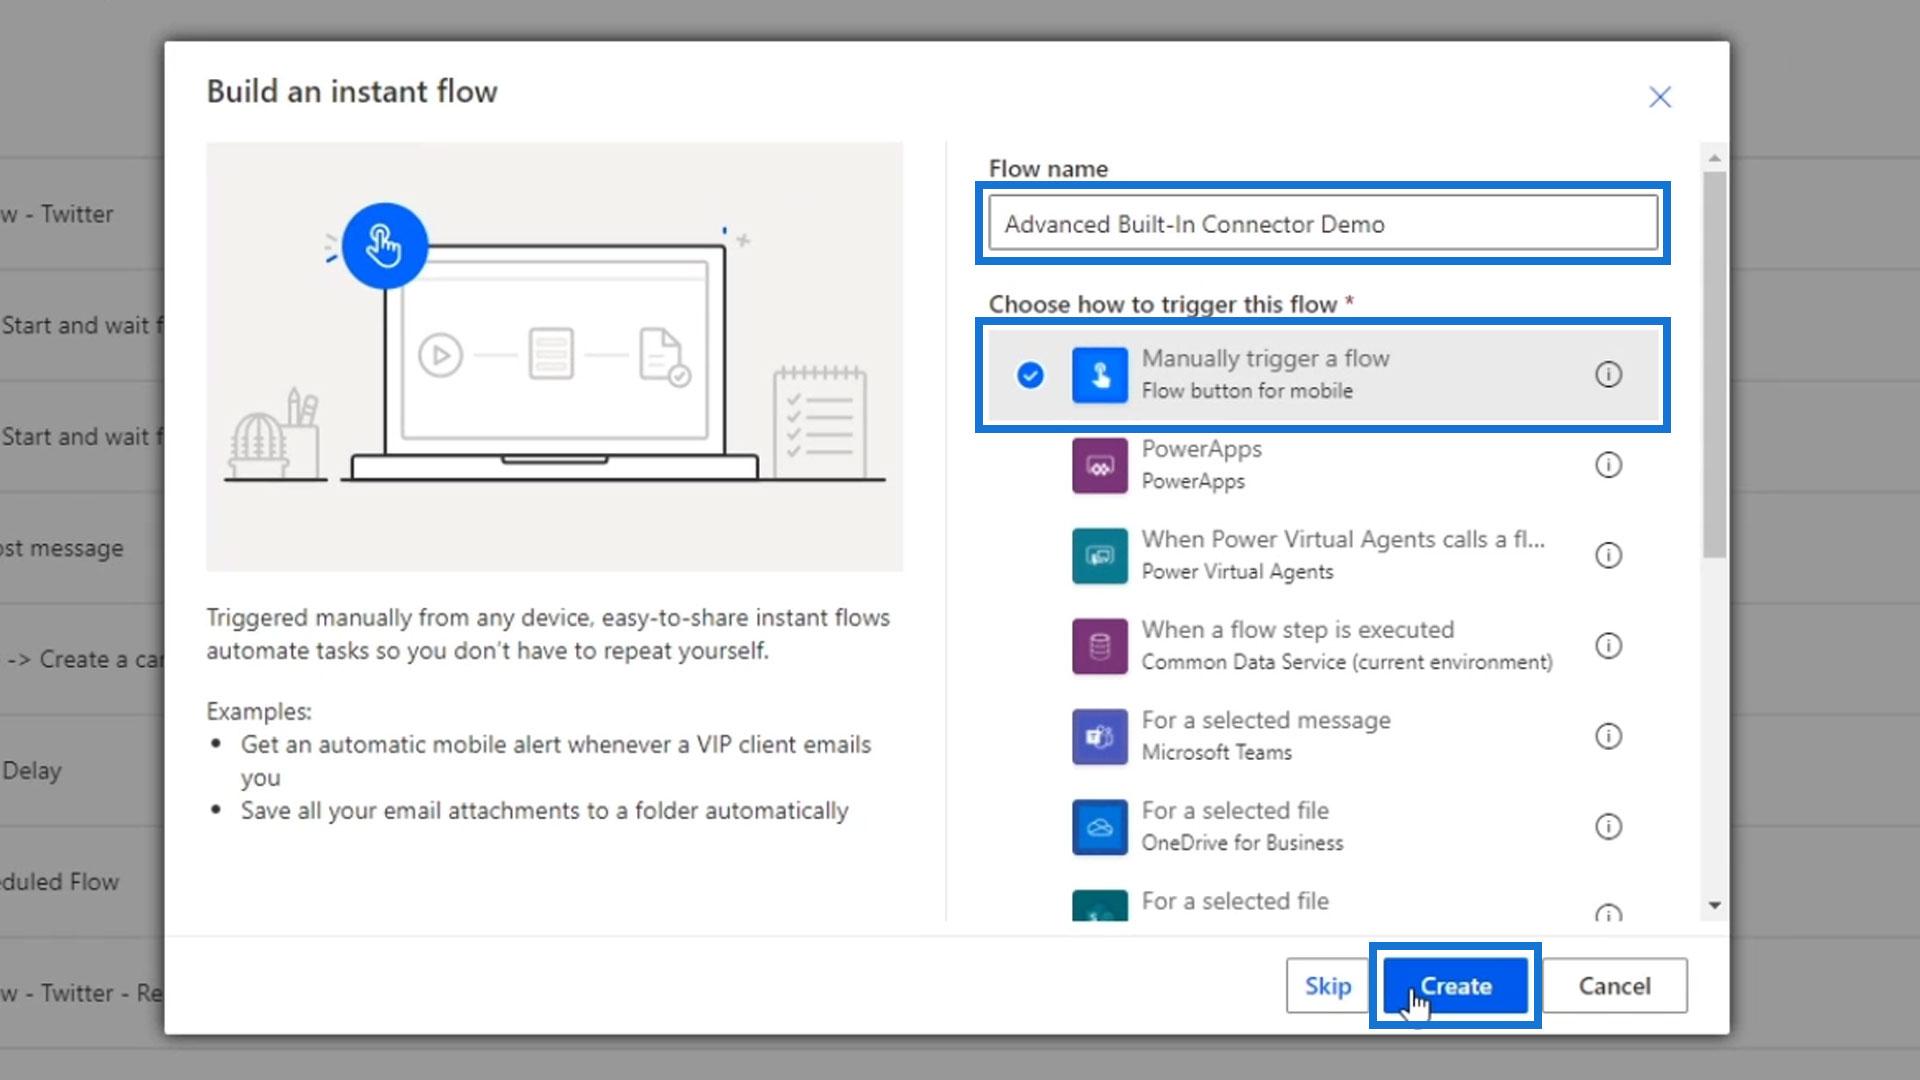
Let’s set the name to “Advanced Built-in Connector Demo”. We’re going to create a flow that’s manually triggered. So choose the “Manually trigger a flow” option, then click the Create button.
After that, click the New step button.

Let’s check out the Built-in connectors that are available.

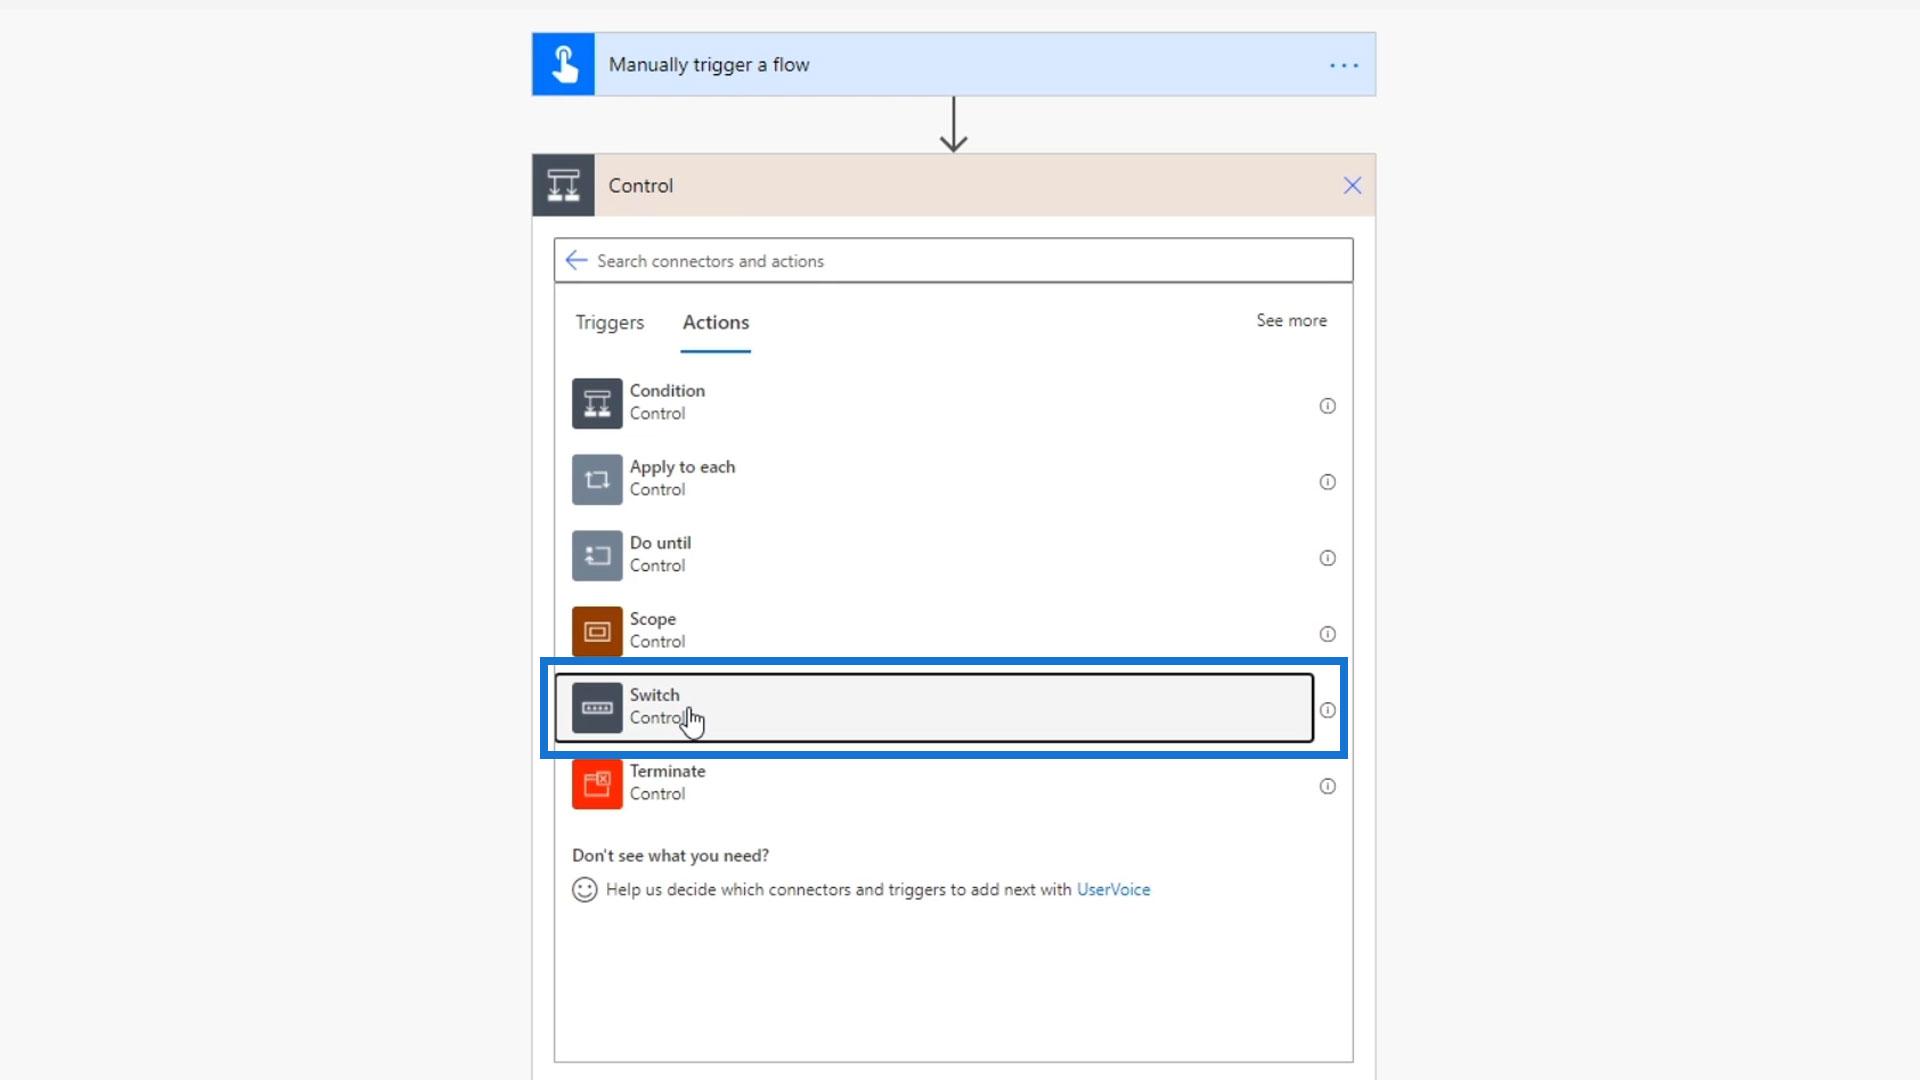
Click the Control connector.
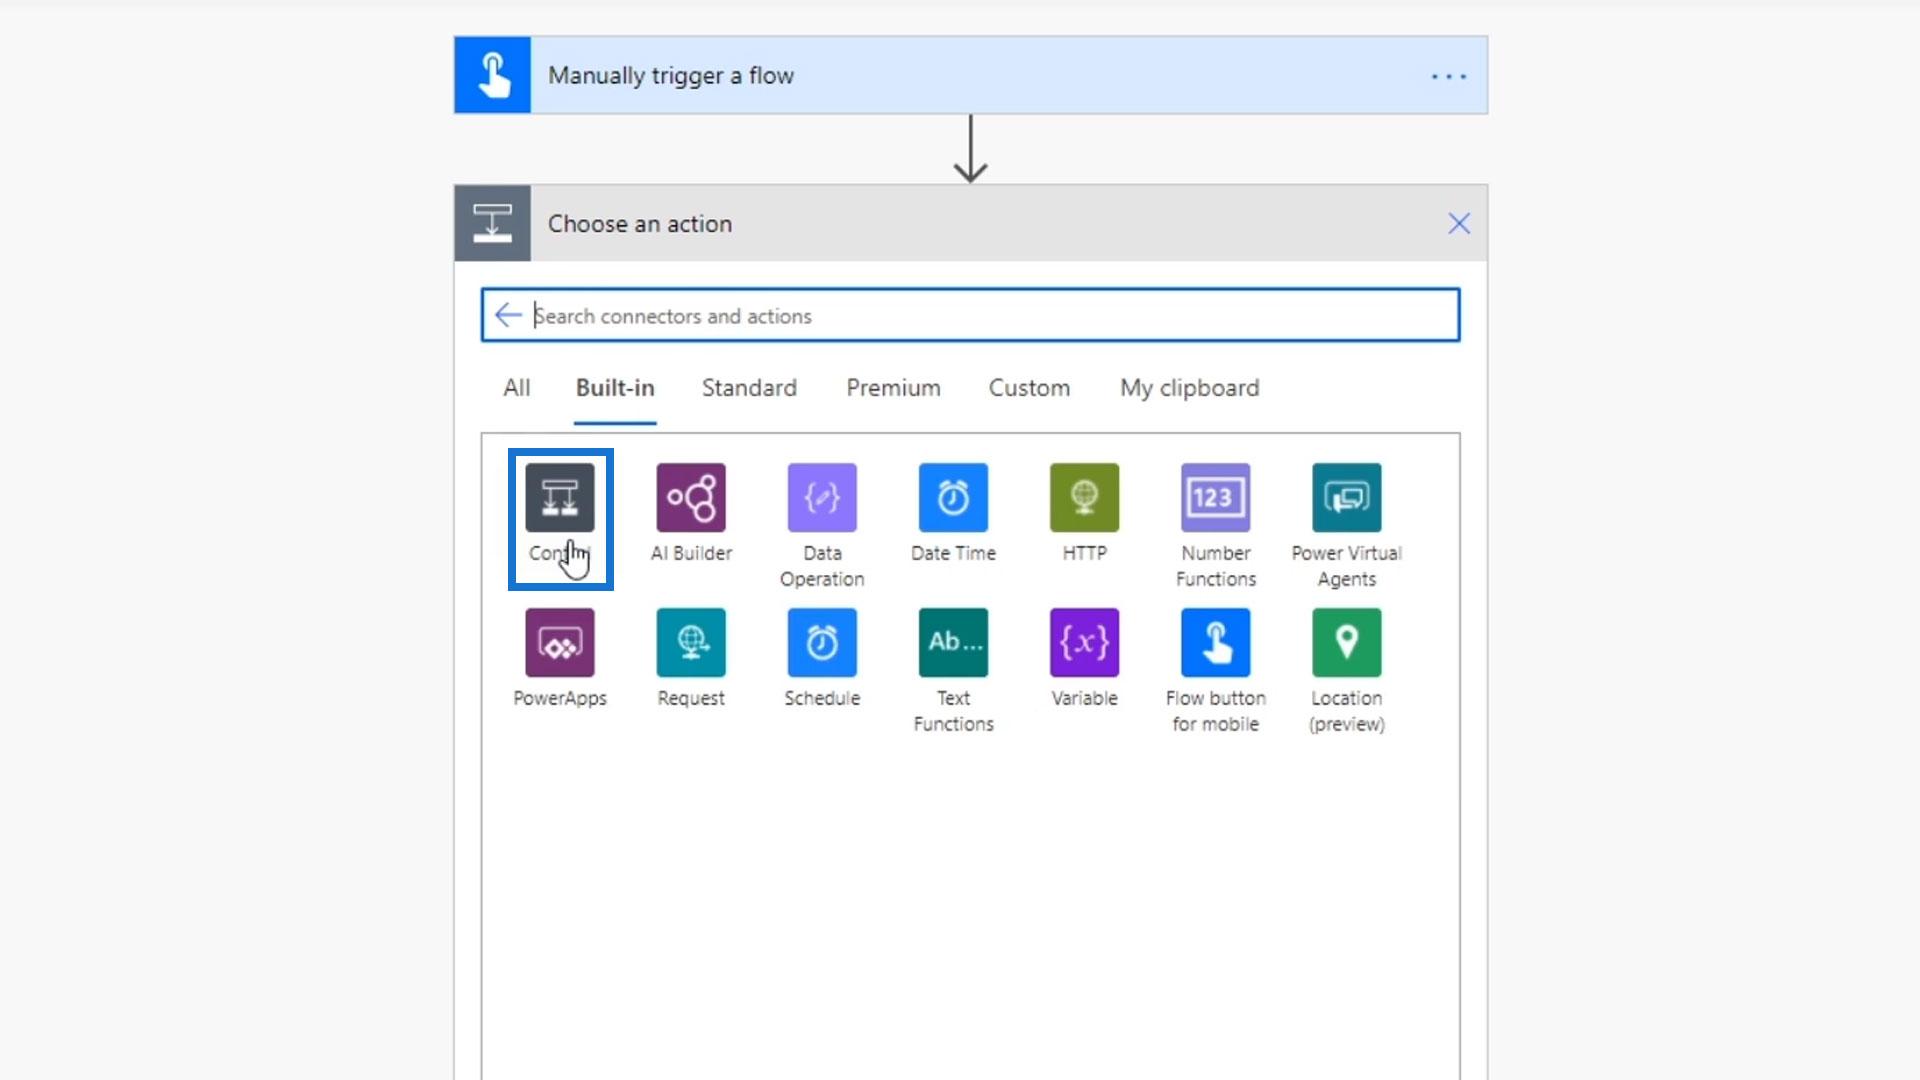
The control connector has six different actions. We’ve already discussed Condition control in one of our tutorials. Again, this controls splits up the flow based on whether a condition is true or false.
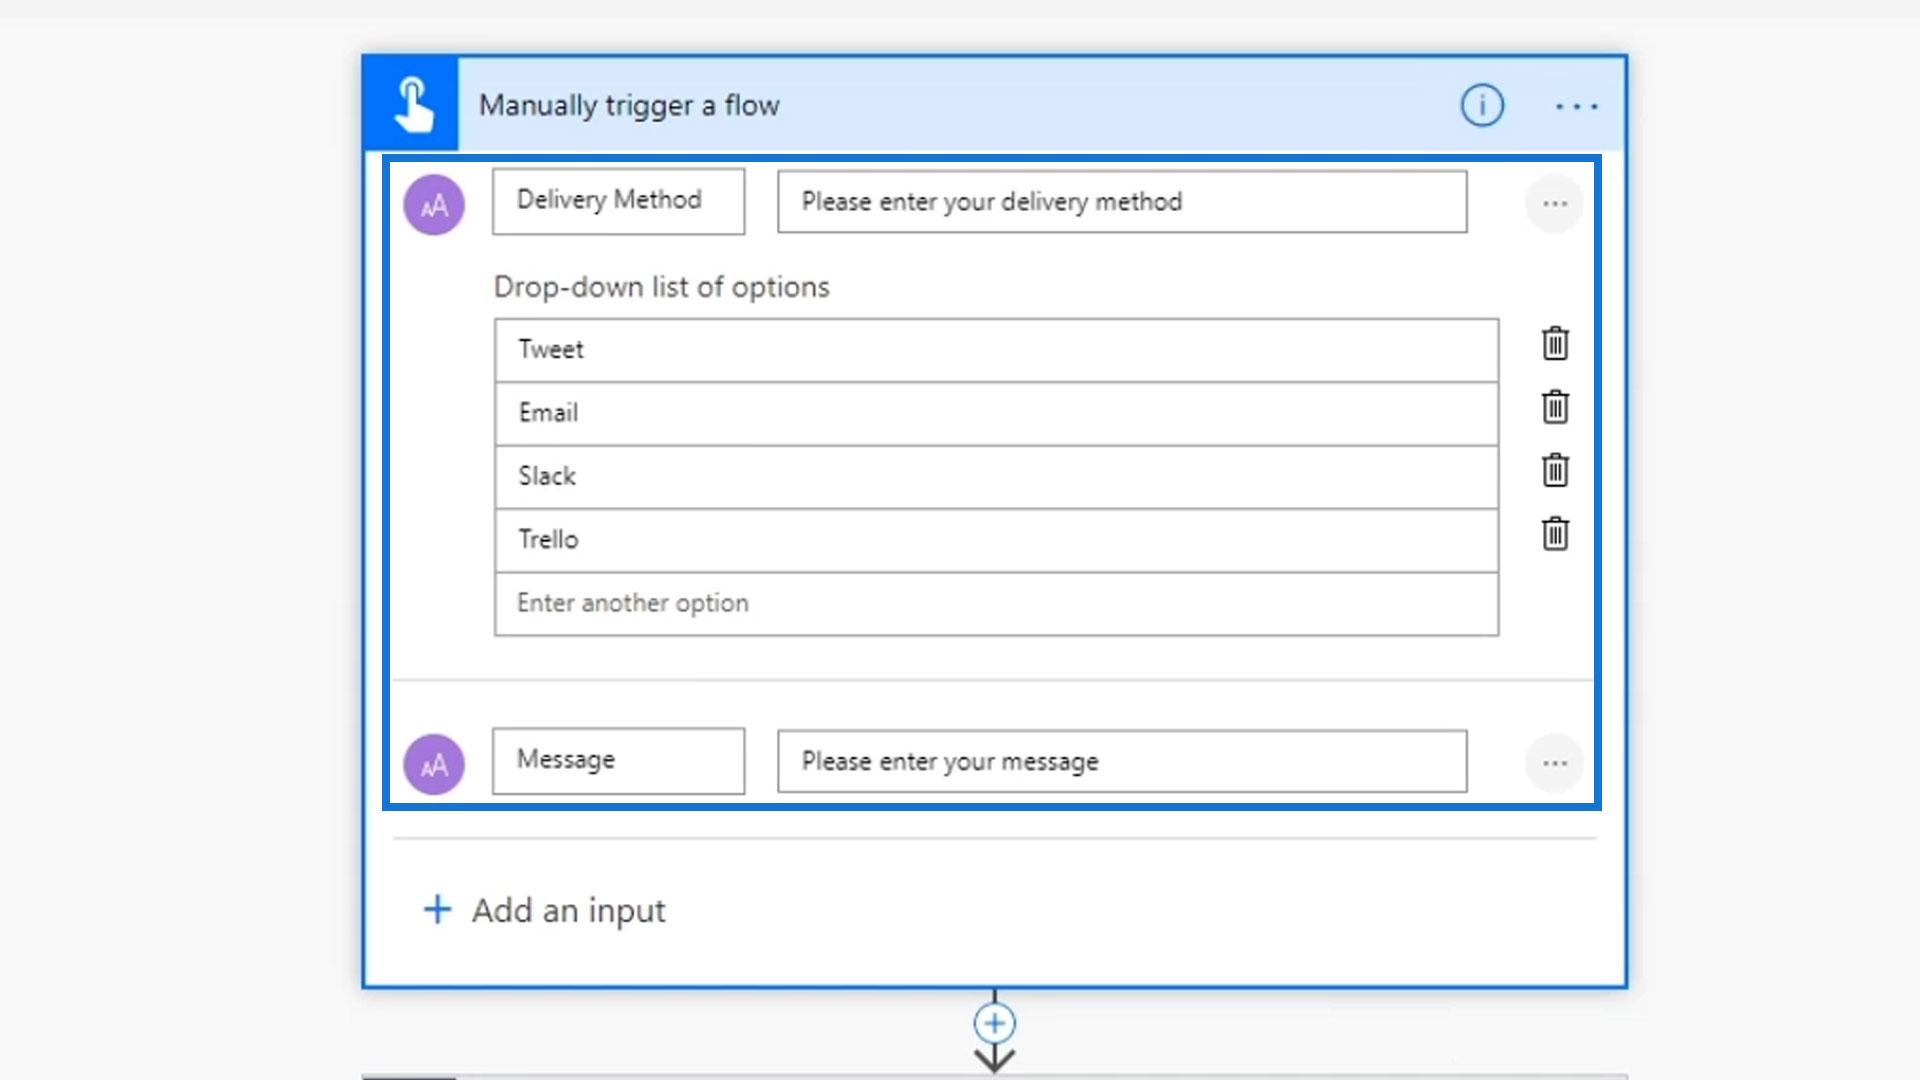
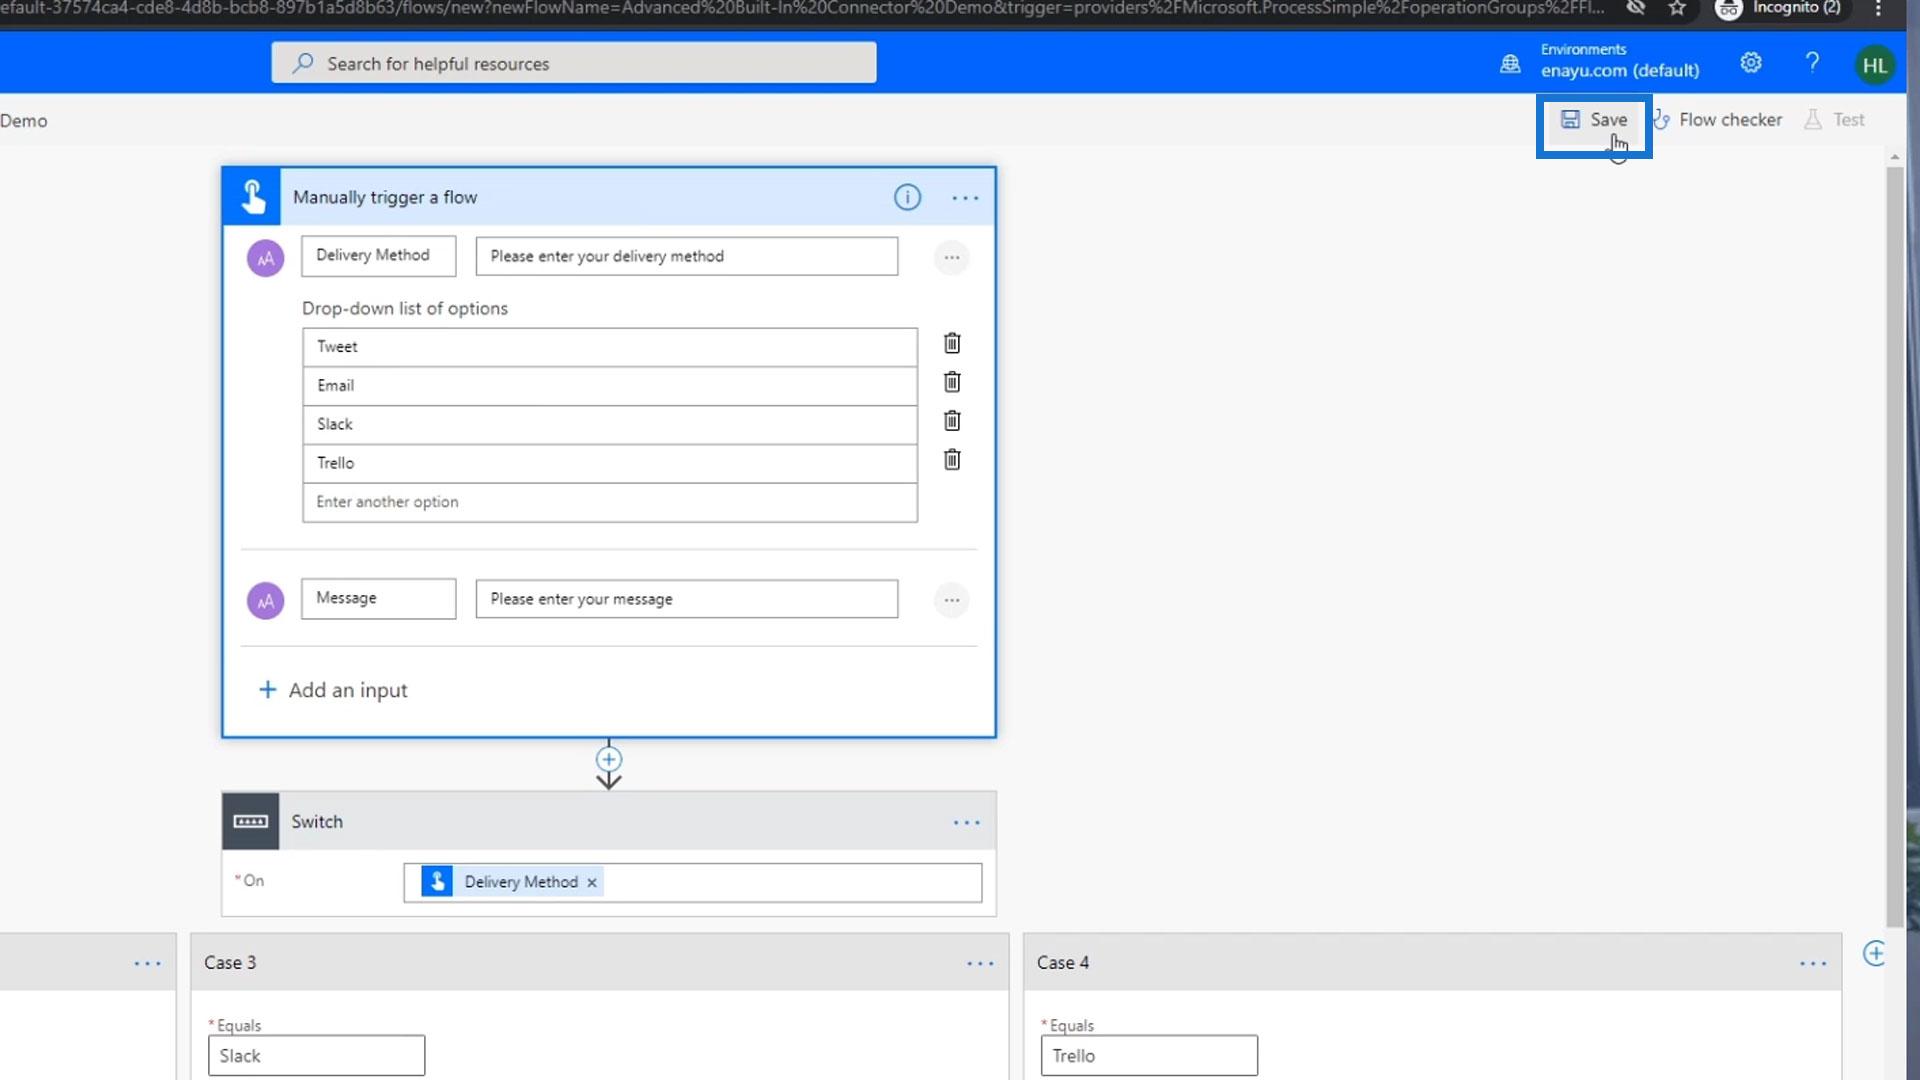
Let’s add some inputs in our flow where the user can enter a delivery method and message via Text input. Let’s also give them multiple choices to choose from using a dropdown list.
For this flow, if the chosen delivery method is Tweet, then we need to execute a Tweet action. If it’s Email, then we need to perform an Email action. Same goes for all the other options. If we’ll be using the Condition control to perform the process, then we’ll create a nested condition that looks just like this one.


It’s basically an IF statement under another IF statement, which could be cumbersome. Therefore, we need the Switch control to simplify the process.
Using Switch Control In Power Automate
For this example, let’s choose the Switch control.
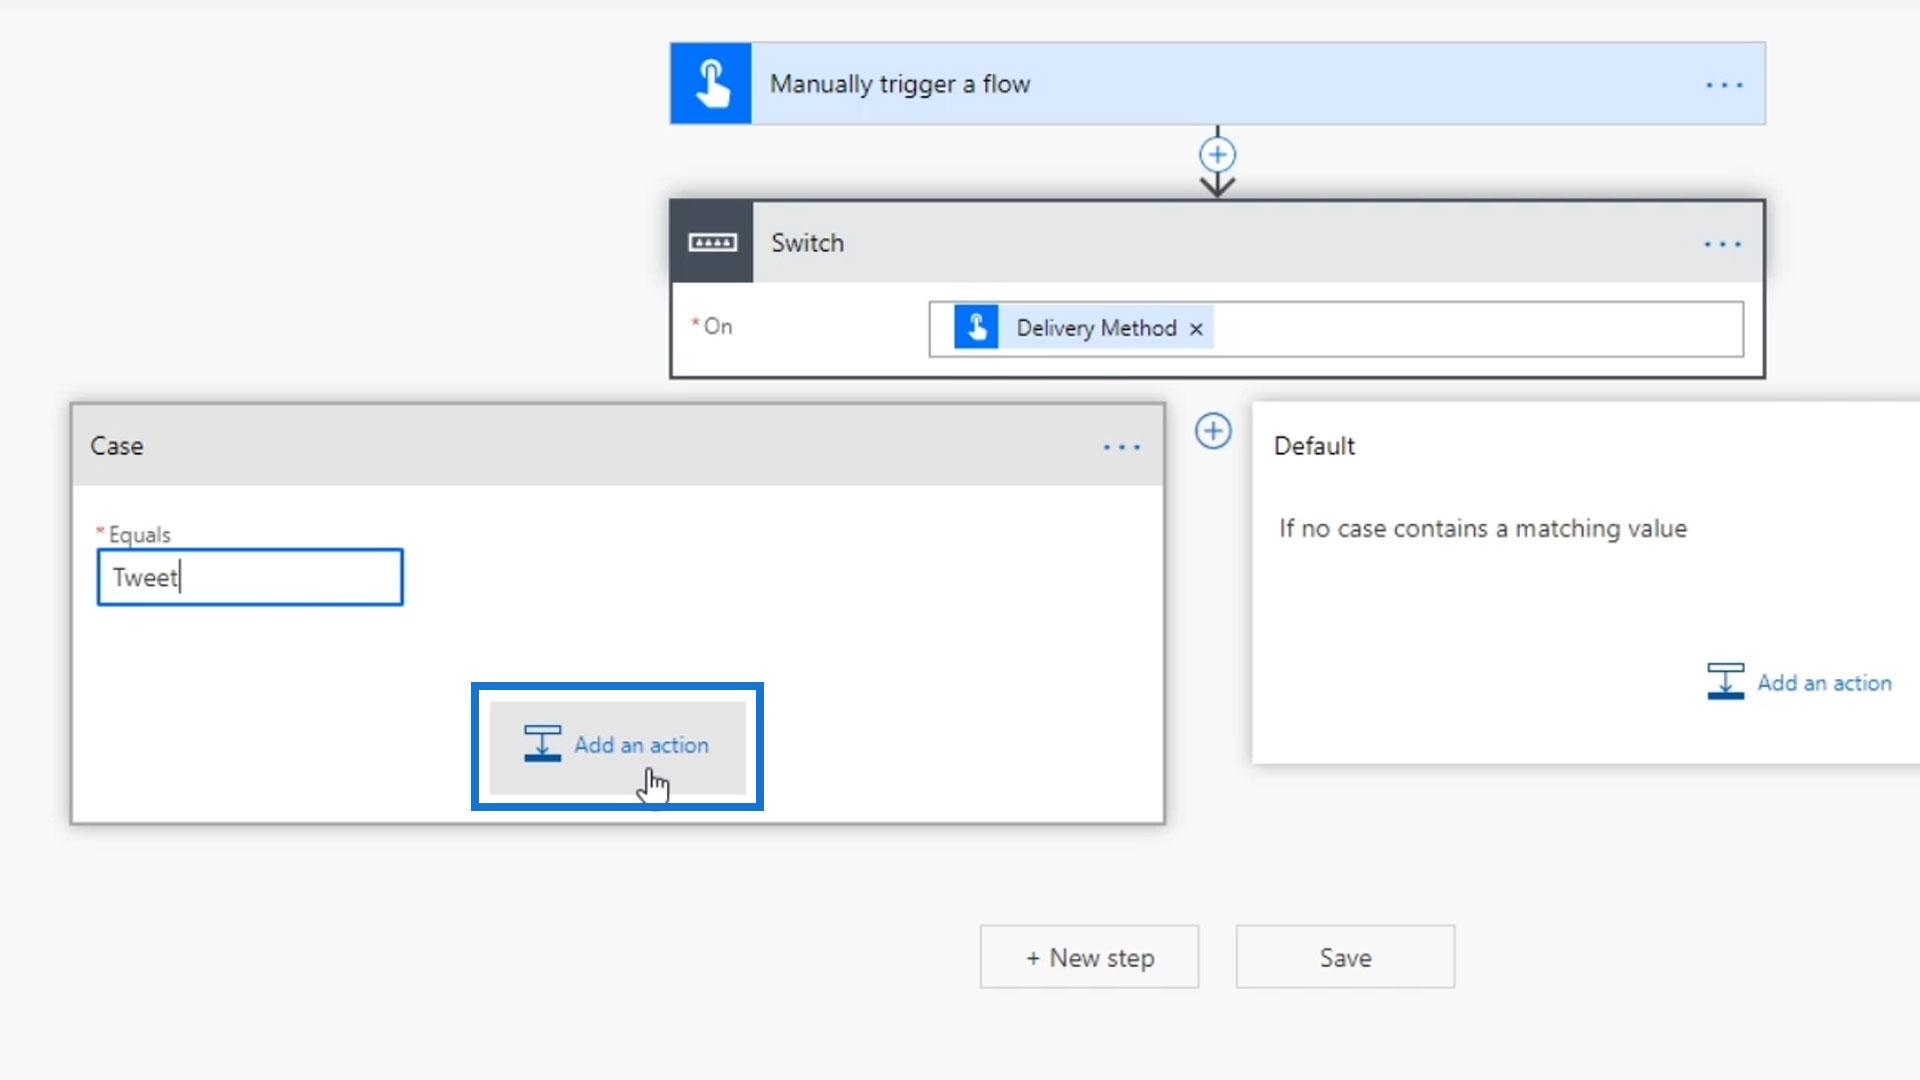
What’s nice about Switch control is that we only need to choose one variable that we want to test. For the On field, choose the Delivery Method variable.

1. Adding The First Switch Case
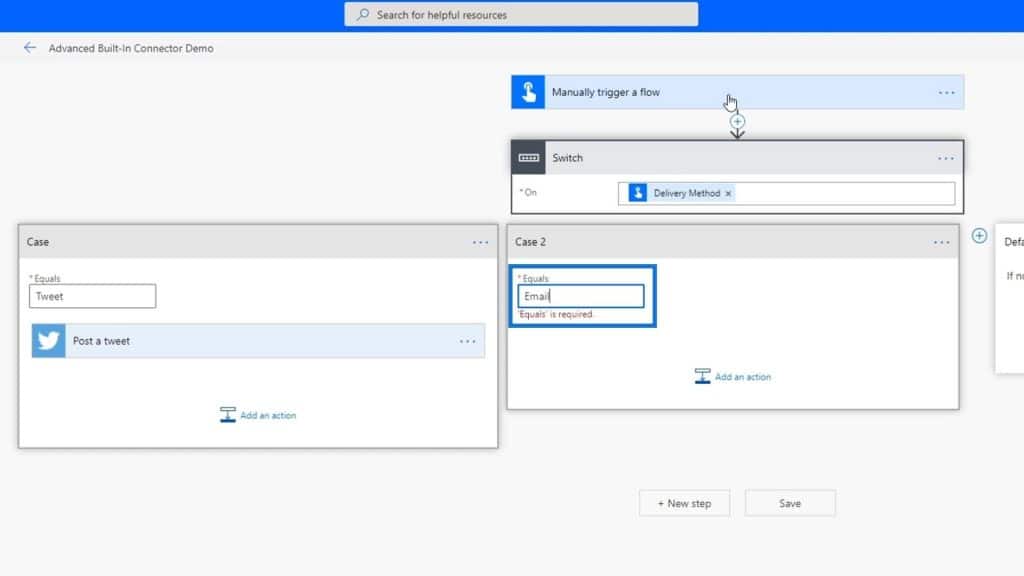
Under the Case section, we can set the multiple routes for each delivery method. Let’s put in the first choice which is “Tweet”.

Then click the Add an action button.
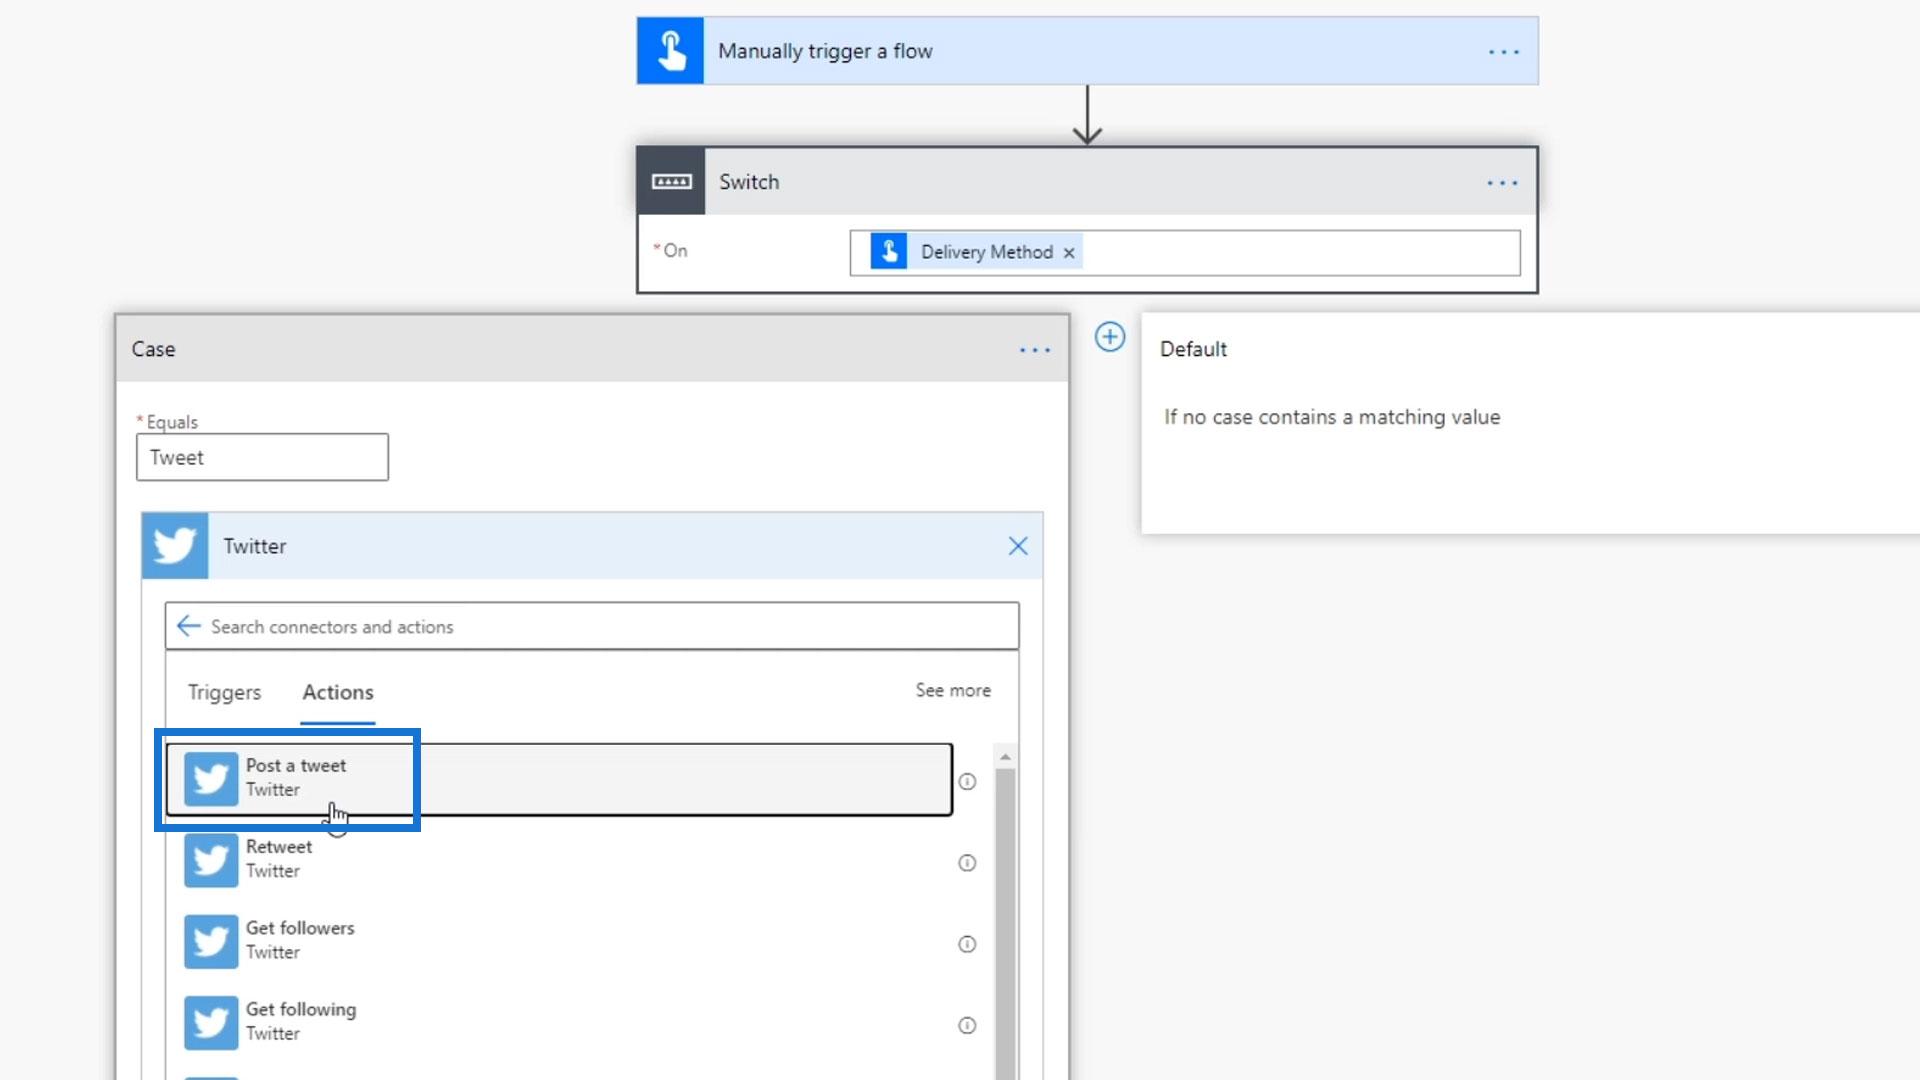
Search and select the Twitter connector.

Choose Post a tweet.
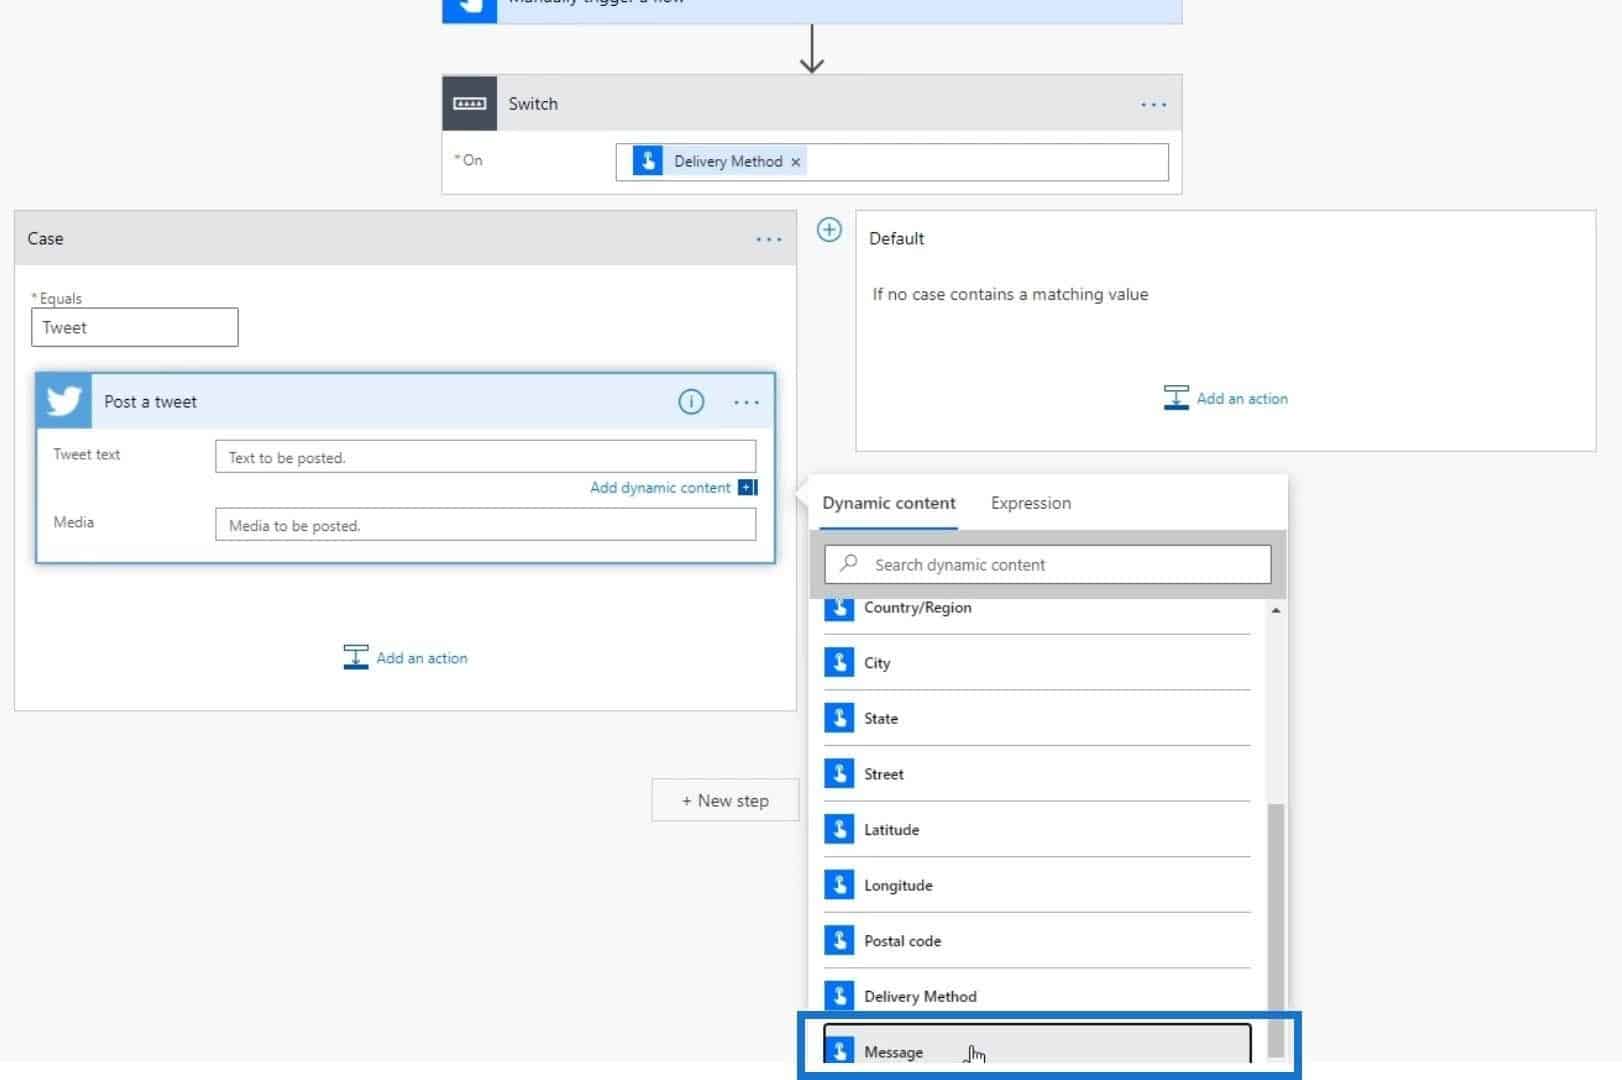
For the Tweet text field, choose Message.
2. Adding The Other Switch Cases
To add another Switch case, click this icon beside the first case.

Let’s type the second option which is “Email”.
Click the Add an action button.

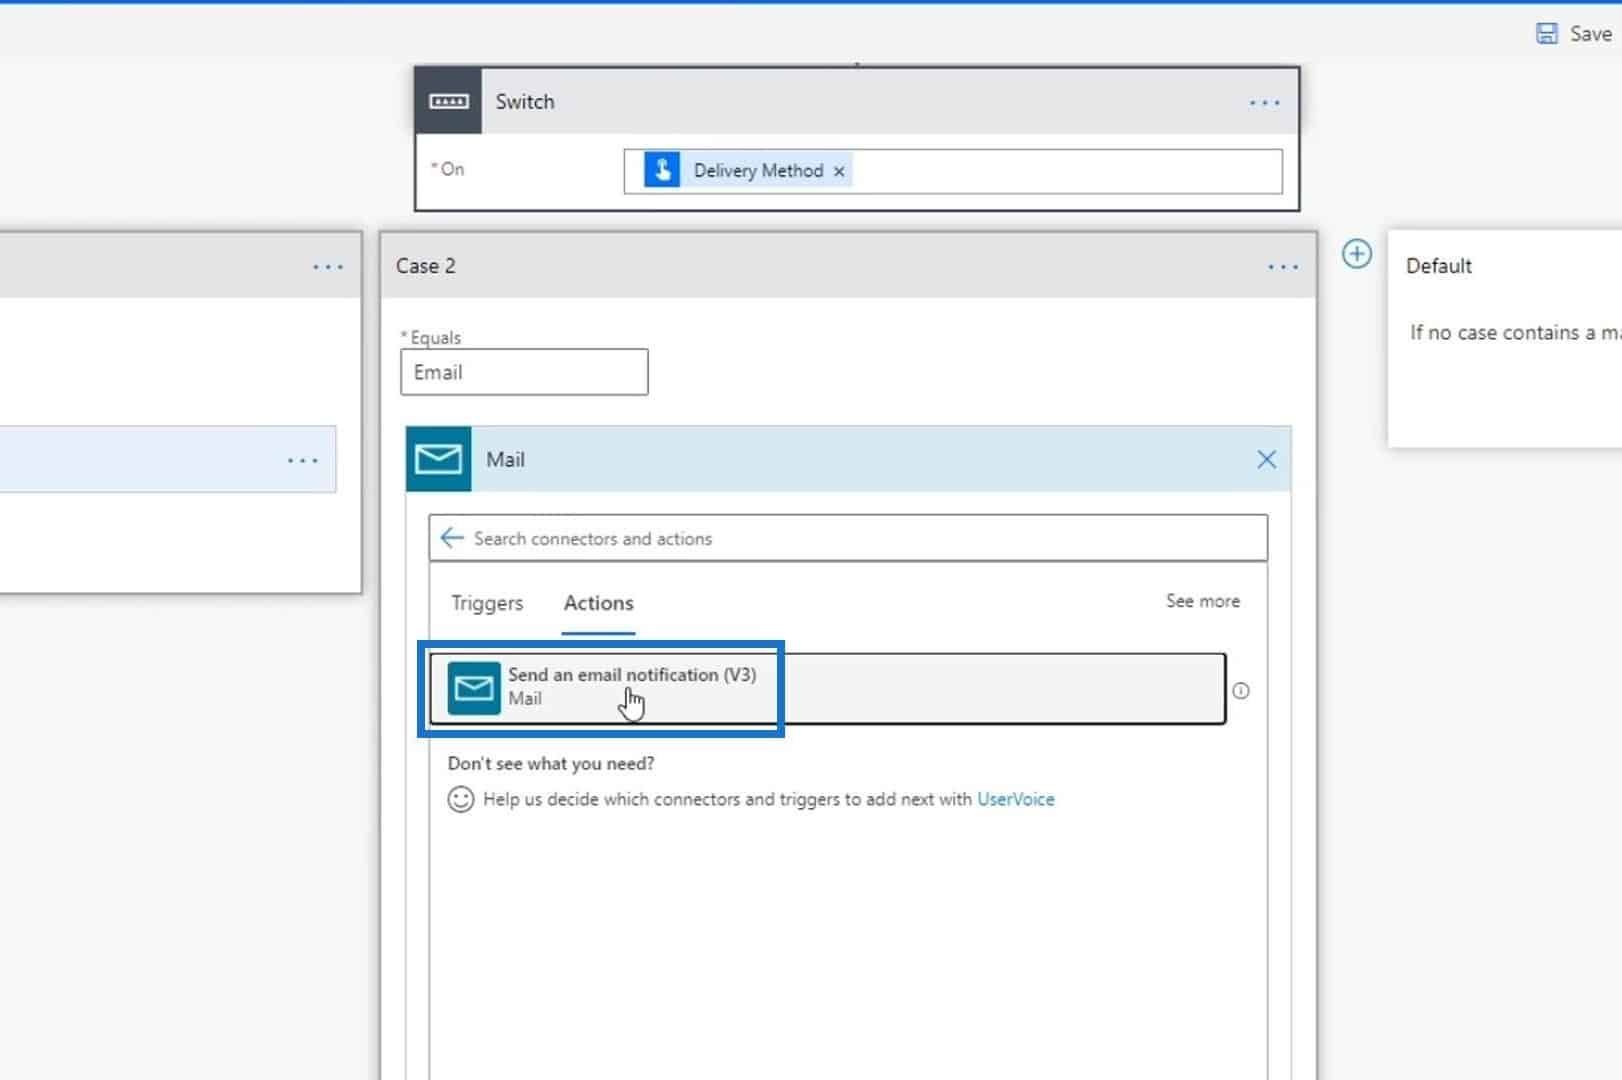
Search and select the Mail connector.
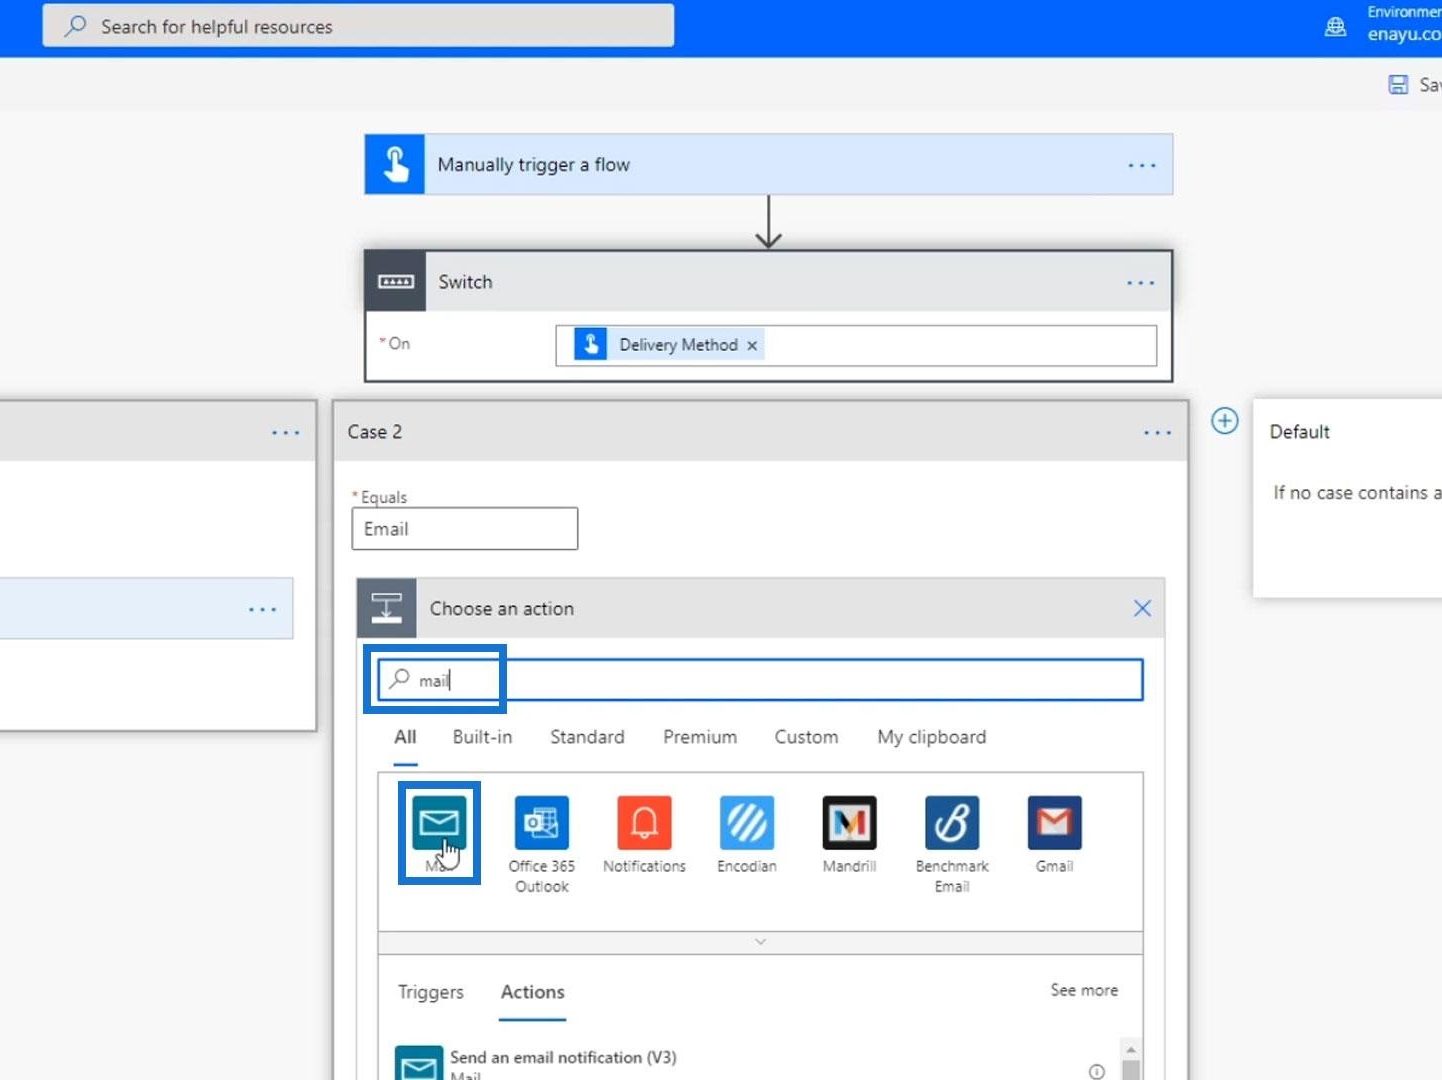
Then choose the Send an email notification (v3) action.
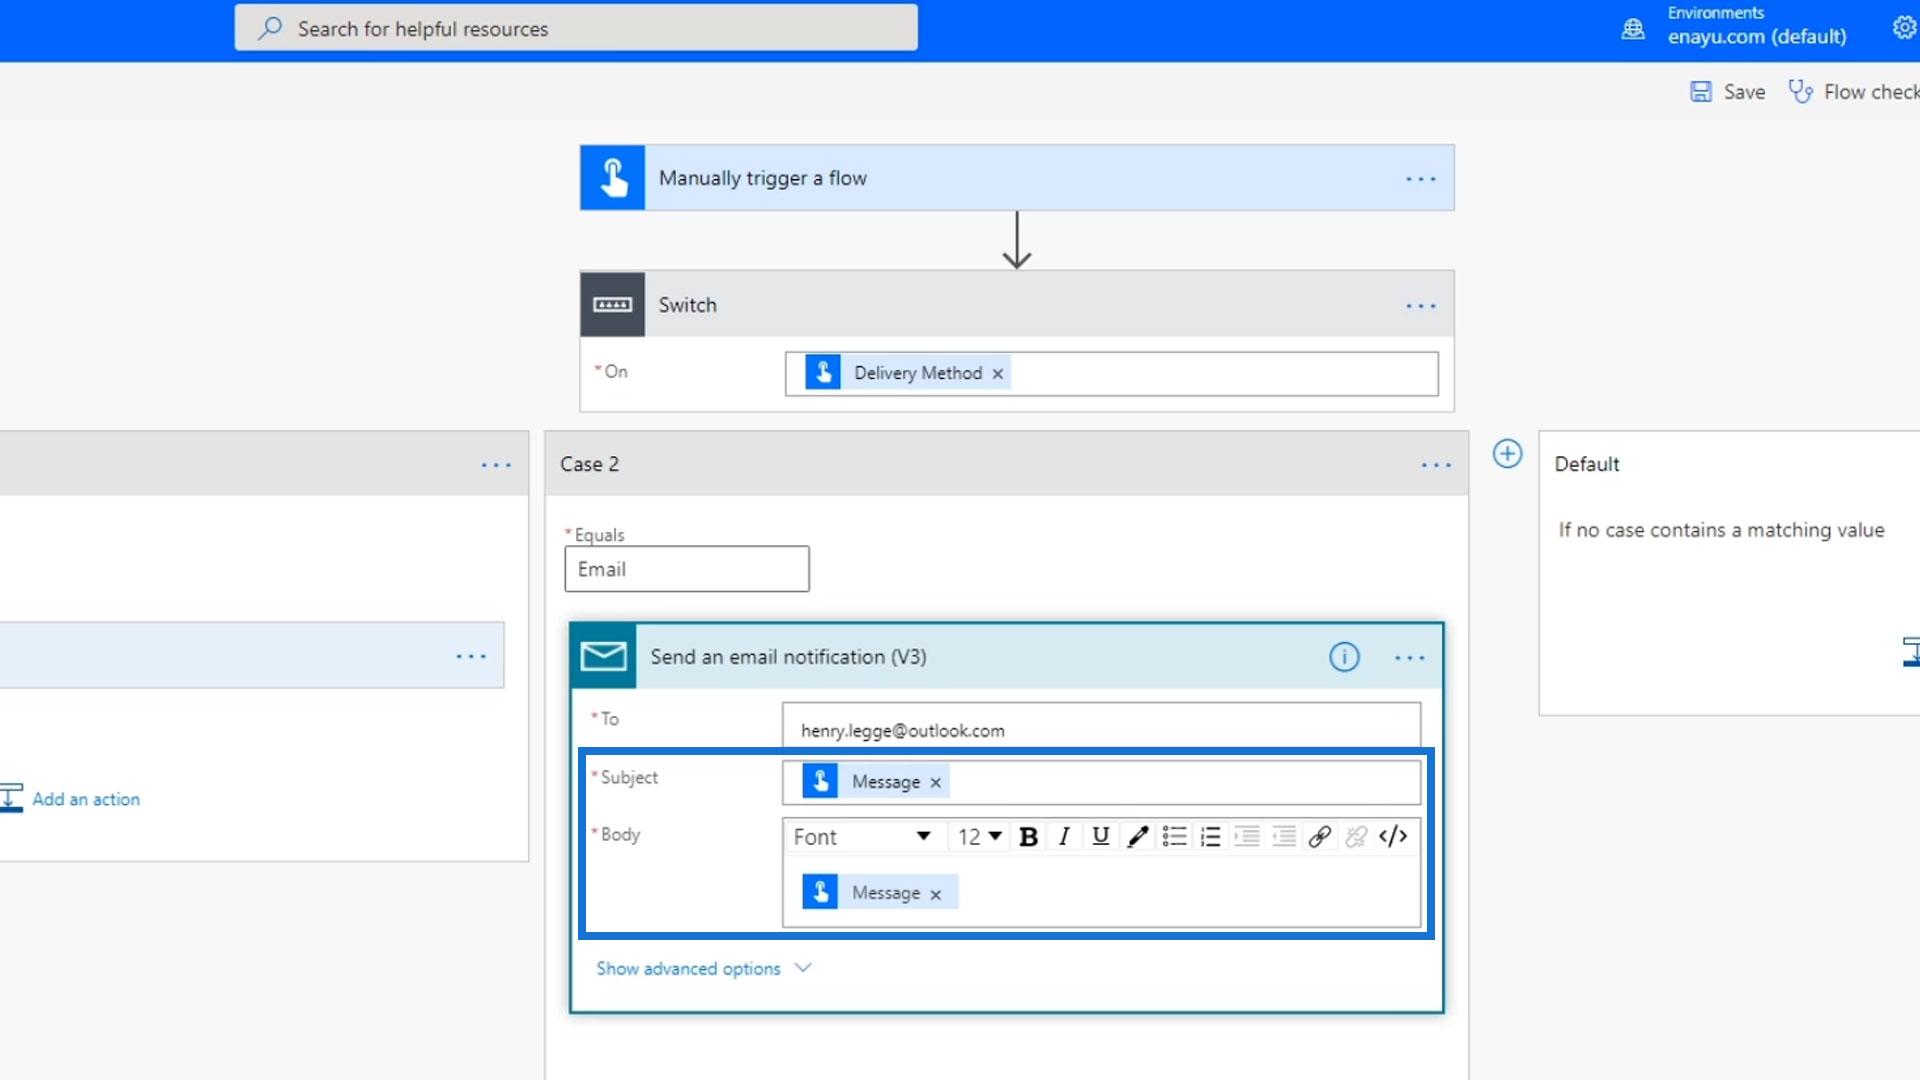
Set the email address to where you want the notification to be sent. Choose the Message variable for both the Subject and Body fields.
Add the third case for the Slack option then set the channel name to Tutorial. Use the Message variable for the Message Text field.


After that, add the fourth case (Trello). Set the Board Id to Tasks and the Parent List Id to Issues. Just use the Message variable for both the Card Name and Card Description fields.
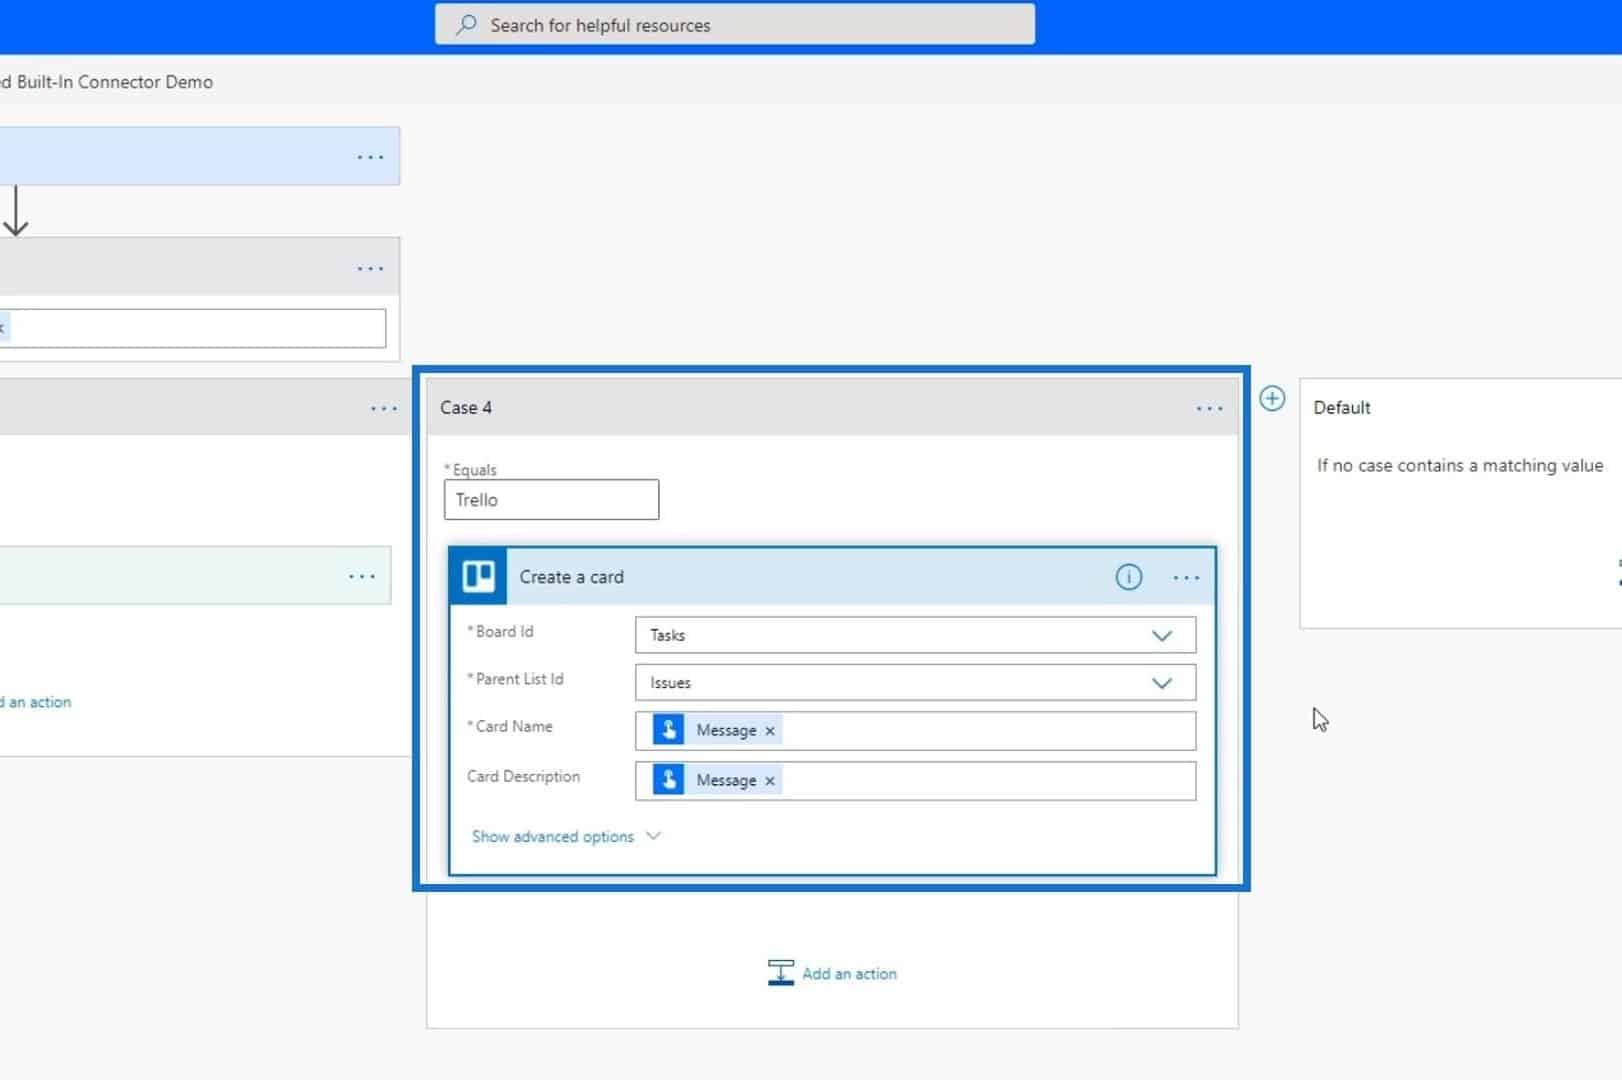
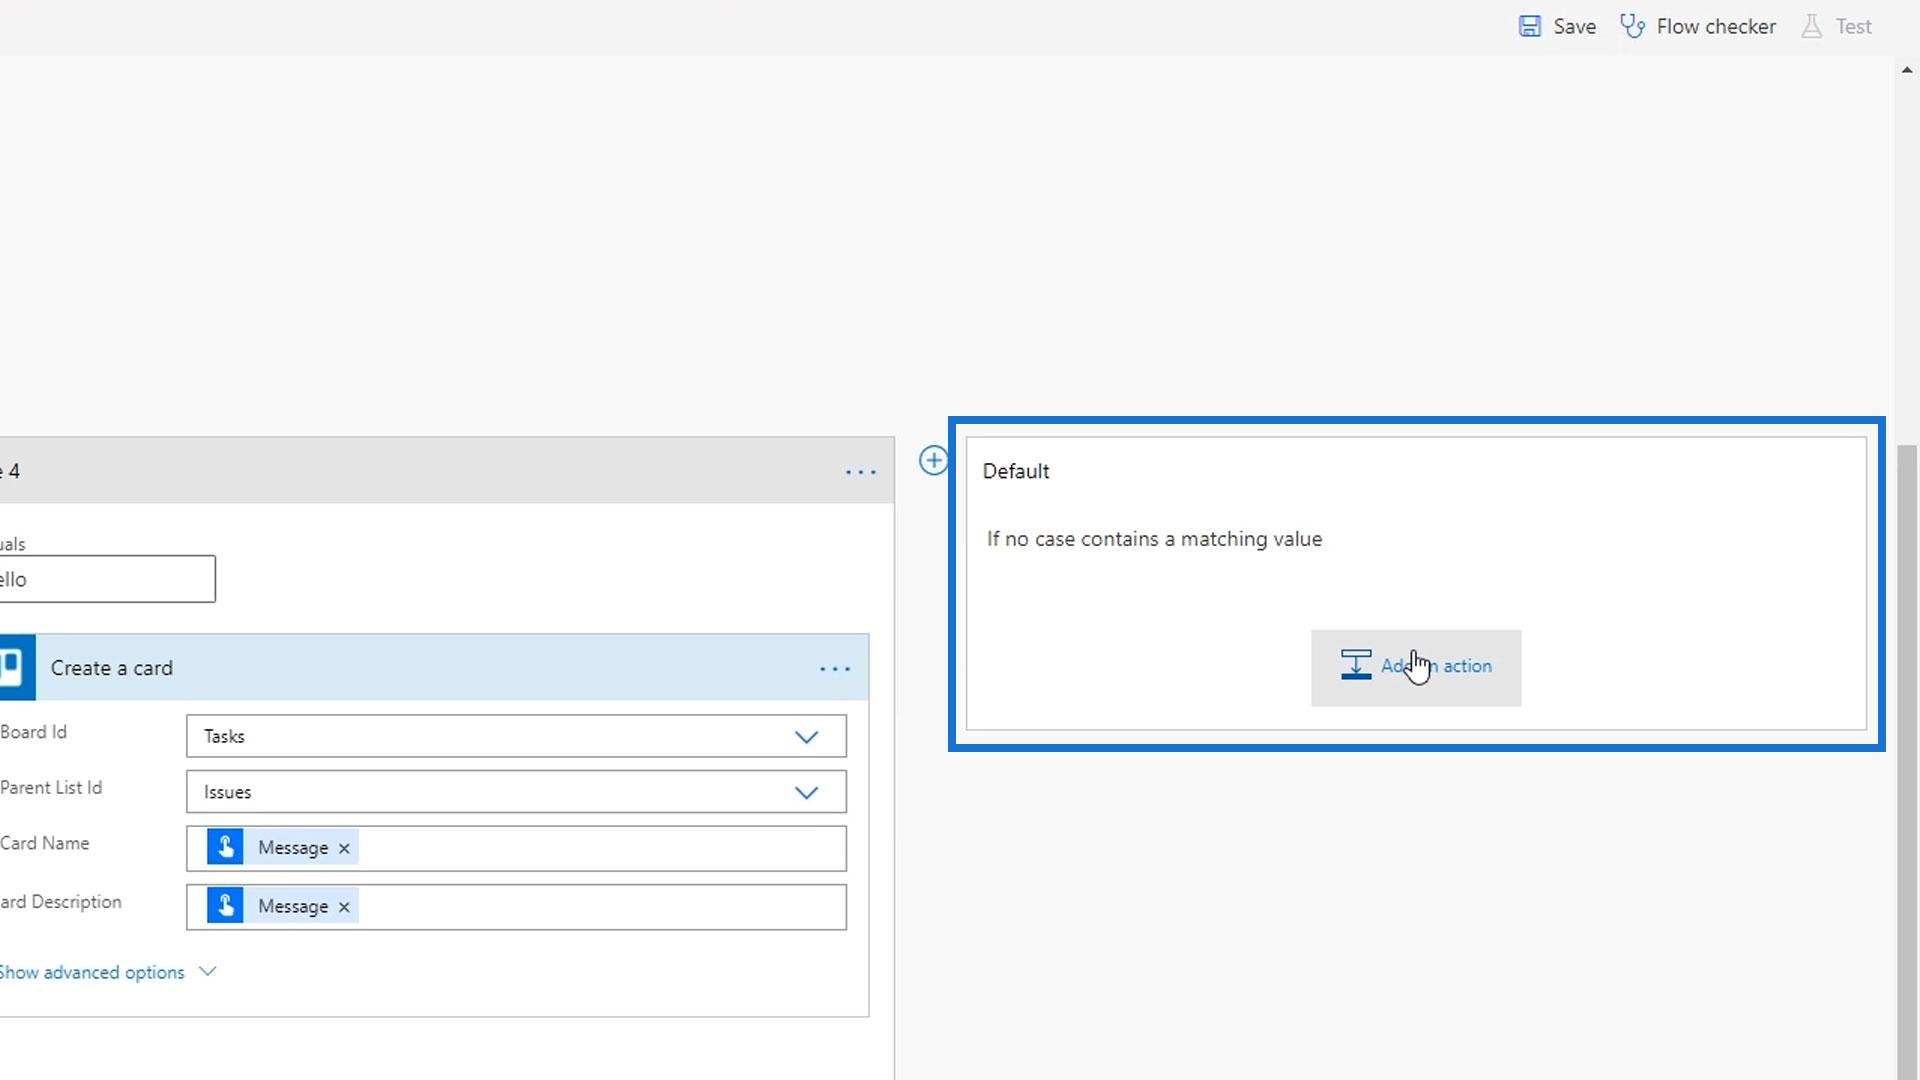
The Default card is where we can set another action in case none of the available delivery methods matches the one that was entered by the user. But in this example, we won’t be needing that as we are forcing the user to only choose from the four options.
Lastly, click Save.
Testing Switch Control In Power Automate
Let’s now try out our flow. First, click Test.

Choose the I’ll perform the trigger action option, then click the Test button.

After that, click the Continue button.

This is how the form would look like. Choose Slack as the delivery method. Then type “HEY EVERYONE! IT’S A-ME MARIO!”. Click the Run flow button and let’s see it in action as well.
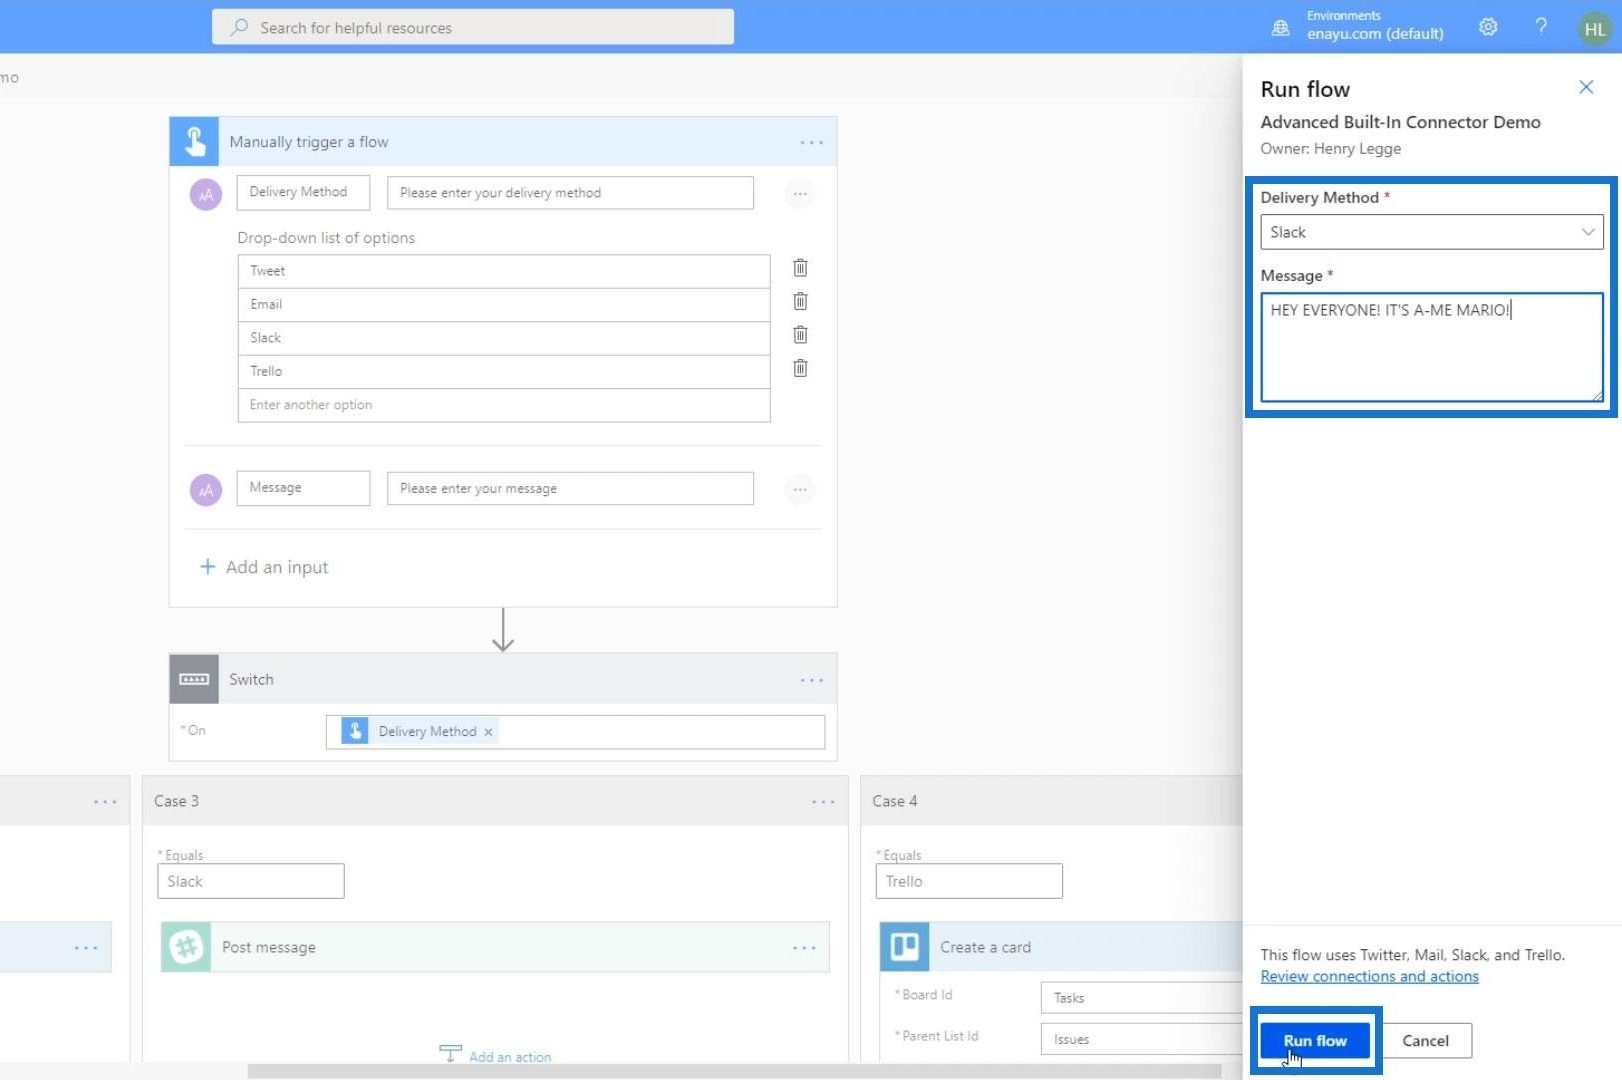
Click Done.

We can now see that among the four cases, only Case 3 was activated. And we can identify that via the green check marks.
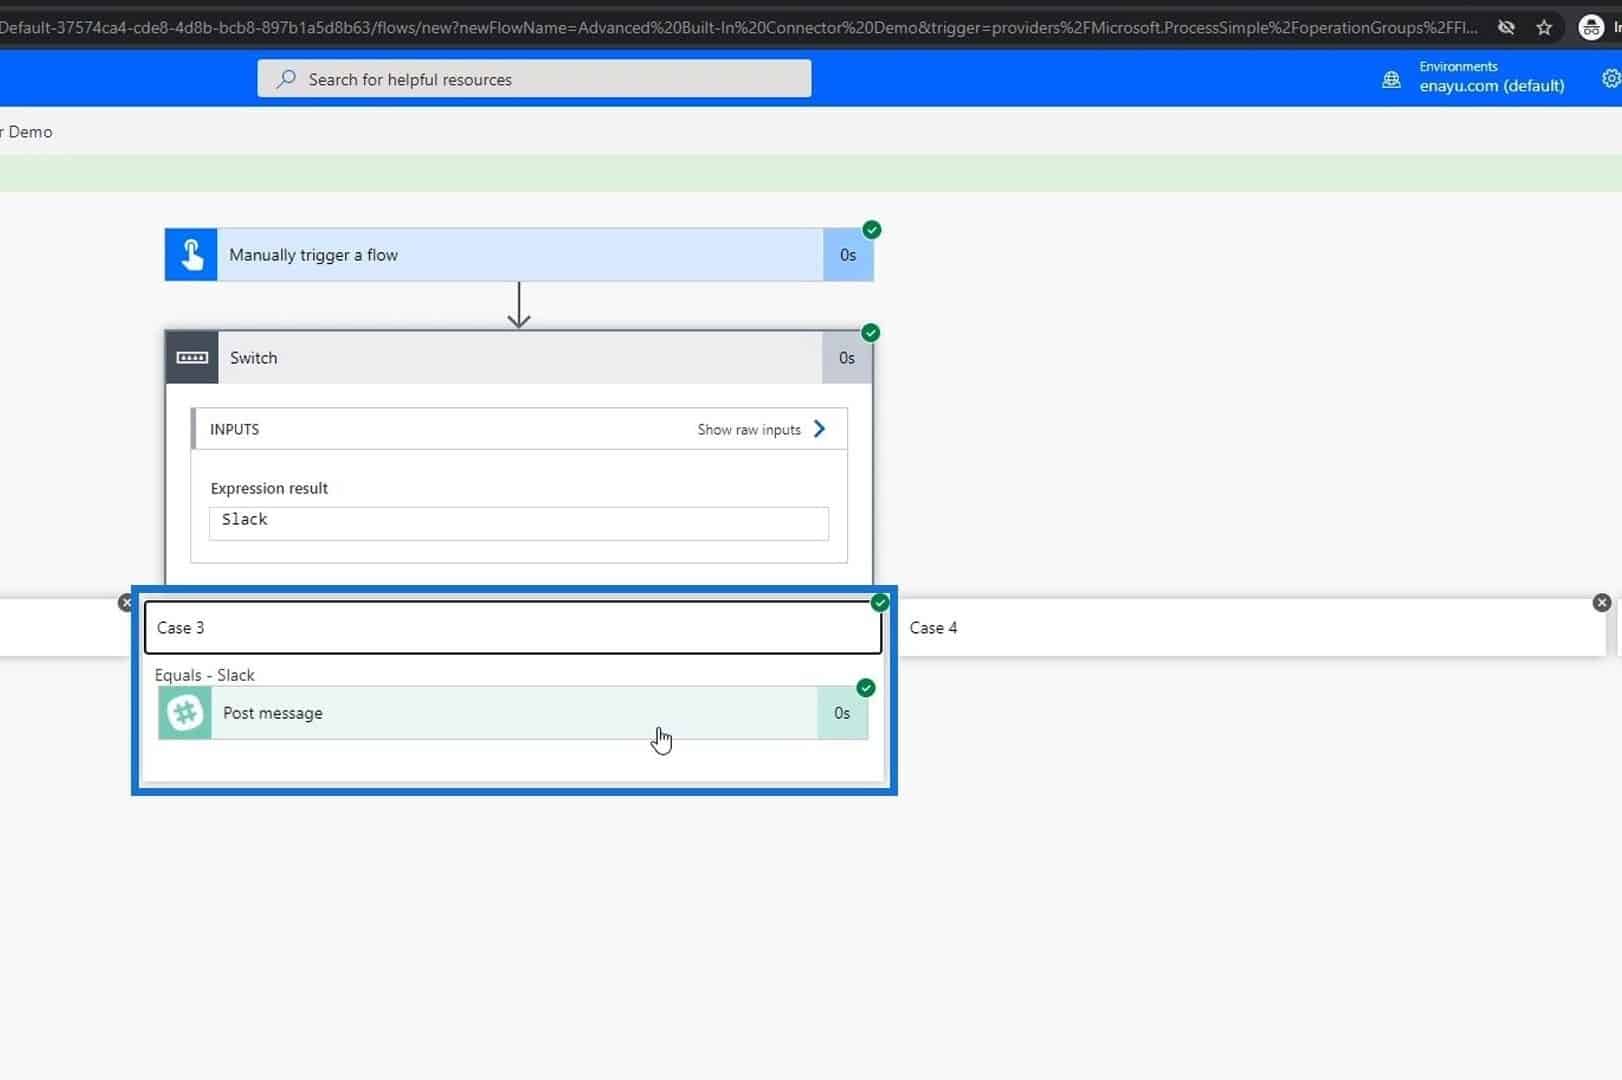
When we check our Slack, we’ll see the newly-posted message.

And that’s how simple the Switch control works in Power Automate.
Conclusion
To recap, we’re able to create a flow with Switch control and differentiate it from Condition control. The latter splits the flow between “Yes” or “No” conditions and adds a condition over another depending on the number of options.
On the other hand, Switch control lets users do multiple stacked conditions within a single line. It’s very similar to any other switch-case statements that you see in Python and other programming languages.
Therefore, if the argument on your flow is just between a simple “yes” or “no” condition, then you can use the Condition control. But if you have multiple options, it’s better to use Switch cases rather than stacked conditions. Hopefully, you were able to understand the proper usage of those two built-in connectors.
All the best,
Henry
***** Related Links *****
Microsoft Flow Tutorial – Instant Vs. Automated Flow
Power Automate Actions | A Deep Dive Tutorial
Power Automate Dynamic Content Overview
***** Related Course Modules *****
Microsoft Power Automate Masterclass
Power Apps Masterclass
Power Platform
***** Related Forum Post Links *****
SWITCH For Multiple Expressions
Help With Switch Function
Switch Statement
For more Switch action support queries to review see here….