
Looking to shift cells down in your Excel spreadsheet, but unsure how? You’re in the right place.
To shift cells down in Excel, you can use the “Shift Cells Down” option in the “Insert Cells” dialog box. First, select the cells you want to shift down, right-click, and select “Insert.” In the “Insert Cells” dialog box, choose the “Shift Cells Down” option and click “OK.” The selected cells will then be shifted down, making room for new data.
There are 5 great methods we will run through today and we’ll provide you with a comprehensive step-by-step guide for each one.

Using Excel can be quite personal, so feel free to select the method that works best for you.
Let’s dive into the world of Exce!

5 Method to Shift Cells Down in Excel
In this section, we will go over 5 methods to shift cells down in Excel.
The 5 methods are:
By Inserting Cells
By Dragging and Dropping
By Cutting and Inserting Cut Cells
By Row Insertion
Using VBA
1. How to Shift Cells Down by Inserting Cells
You can shift cells down in Excel by inserting new cells.
There are 2 methods to insert new cells in Excel:

Using the Context Menu
Using the Ribbon
Method 1: How to Insert New Cells Using The Context Menu
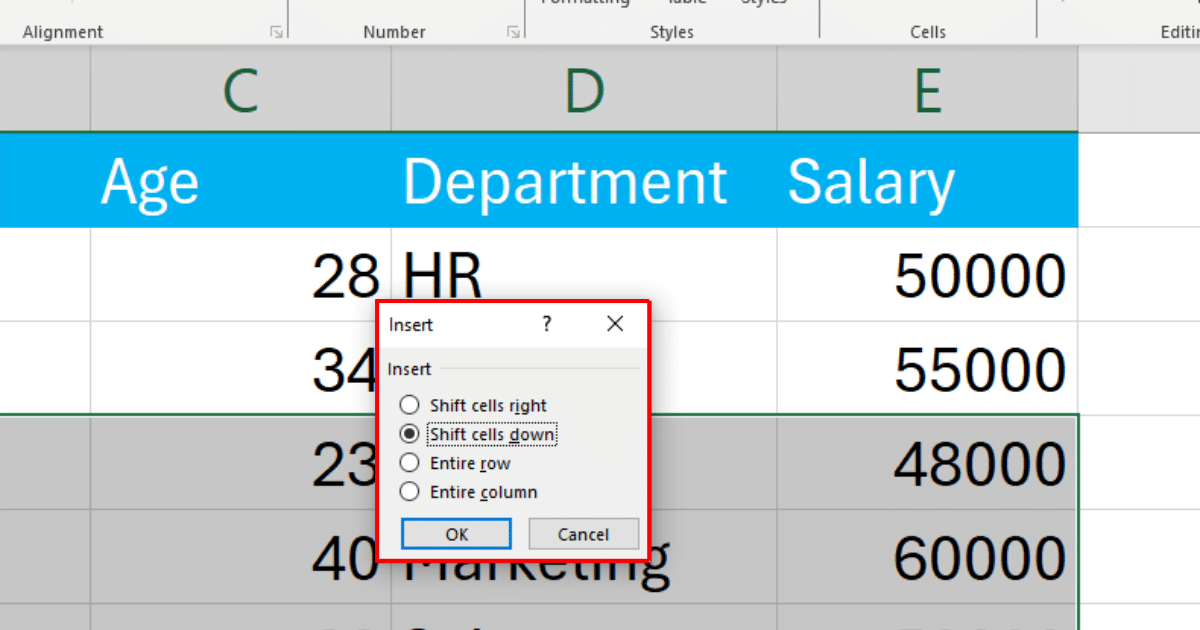
To insert new cells using the context menu, start by clicking on the cell or select the range of cells above which you want to insert new cells.
Right-click on the selected cell or range of cells. Choose Insert from the context menu that appears.
You can also press CTRL + Shift + +, which is a shortcut for opening the insert dialog box.
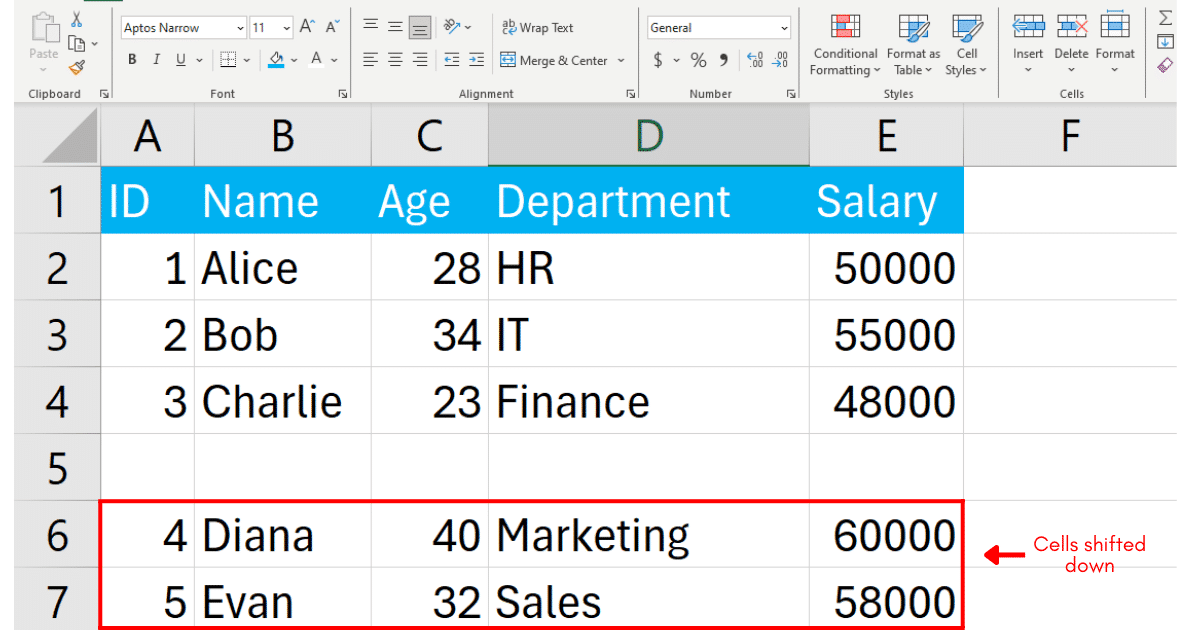
In the dialog box, you’ll see several options: Shift cells down, Shift cells right, Entire row, or Entire column.
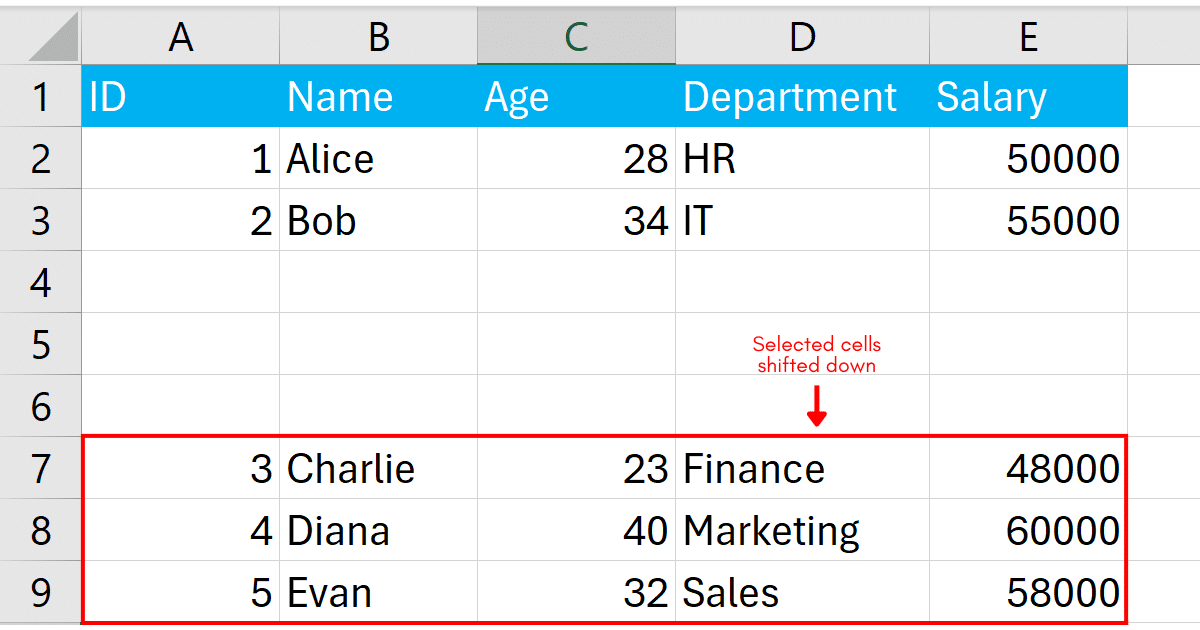
Select Shift cells down and click OK.
The selected cells will move down, making space for the new cells.
Method 2: How to Insert New Cells Using The Ribbon
Highlight the cell or range of cells where you want to insert new cells. This is similar to the first step in the context menu method.
Navigate to the Home tab on the Ribbon. In the Cells group, click on the Insert dropdown menu.
Select Insert Cells… from the dropdown menu.
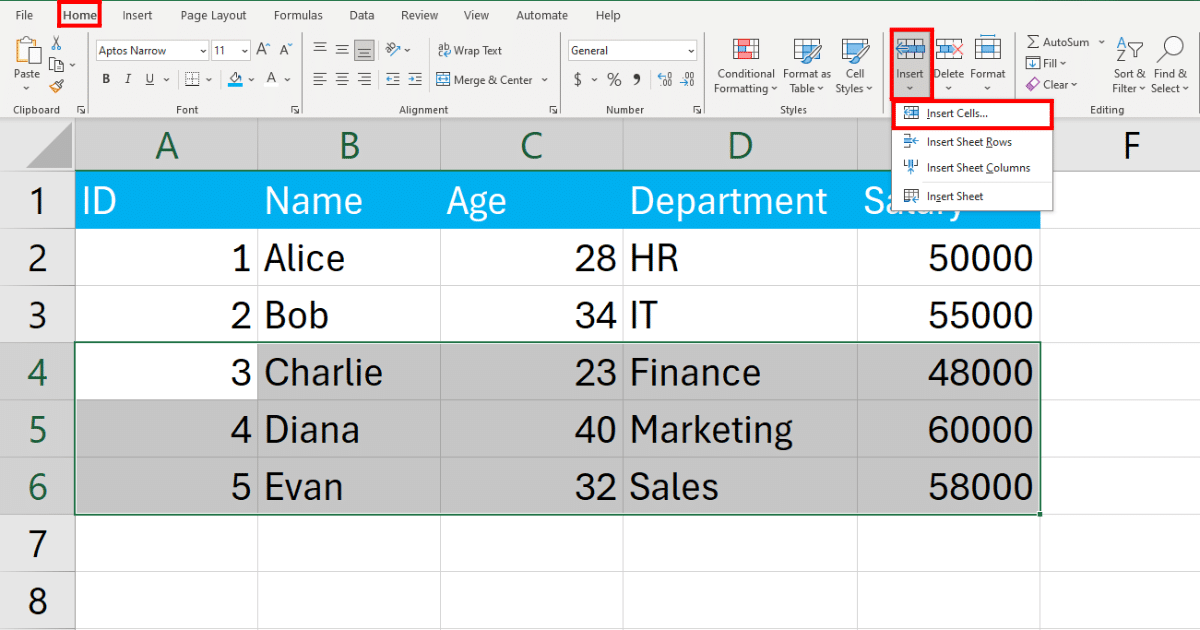
The same dialog box will appear as in the context menu method.
Choose Shift cells down, click OK, and Excell will shift the cells down.
2. How to Shift Cells Down By Dragging And Dropping
Shifting cells down by dragging and dropping in Excel is a less conventional method but can be very efficient for quickly rearranging your data.
Follow the steps below to shift cells down with this method:
Step 1: Select the Cells You Want to Shift Down
Click and drag to select the cell or range of cells you want to move. Alternatively, click on a single cell if you’re moving one cell.
Step 2: Activate the Drag-and-Drop Feature
Position your cursor over the border of the selected cells until it changes to a four-sided arrow cursor (this indicates that you can move the cells).

Step 3: Hold Down the Shift Key
Before you start dragging, hold down the Shift key on your keyboard. This is crucial for ensuring that Excel shifts cells down rather than overwriting them.
Step 4: Drag the Cells to Their New Location
While holding down the Shift key, click and drag the selected cells to their new location. As you drag, you’ll see a thick insertion line that shows where the cells will be inserted.
Release the mouse button to drop the cells in the new location.
The selected cells will be shifted and a series of blank cells will appear aboe the selected range.
3. How to Shift Cells Down By Cutting And Inserting Cut Cells
Shifting cells down by cutting and inserting cut cells in Excel is a powerful method for reorganizing your spreadsheet without losing any data.
Follow the steps below to shift cells down using this method:
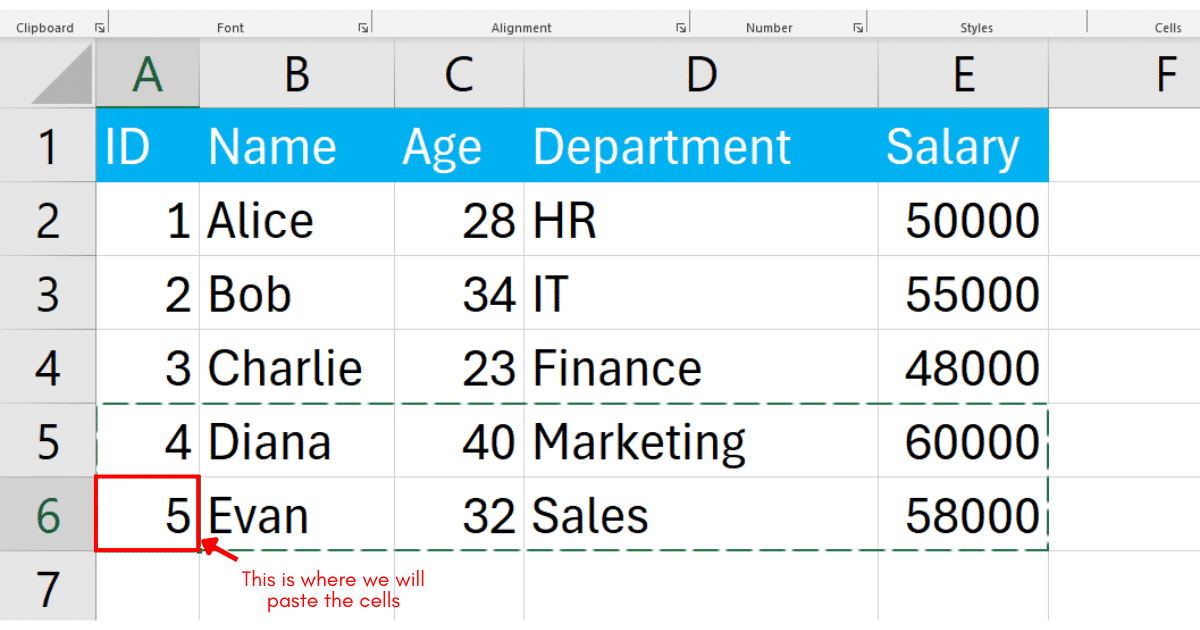
Step 1: Select And Cut The Cells
Highlight the cell or cell range that you want to move. You can do this by clicking and dragging over the cells or clicking on a single cell if you’re moving one cell.
Right-click on the highlighted cells and choose Cut, or use the keyboard shortcut Ctrl + X.
Step 2: Select the Destination
Click on the cell where you want to insert the cut cells.
If you’re inserting multiple cells, select the cell that corresponds to the top-left corner of where you want the cut cells to go.
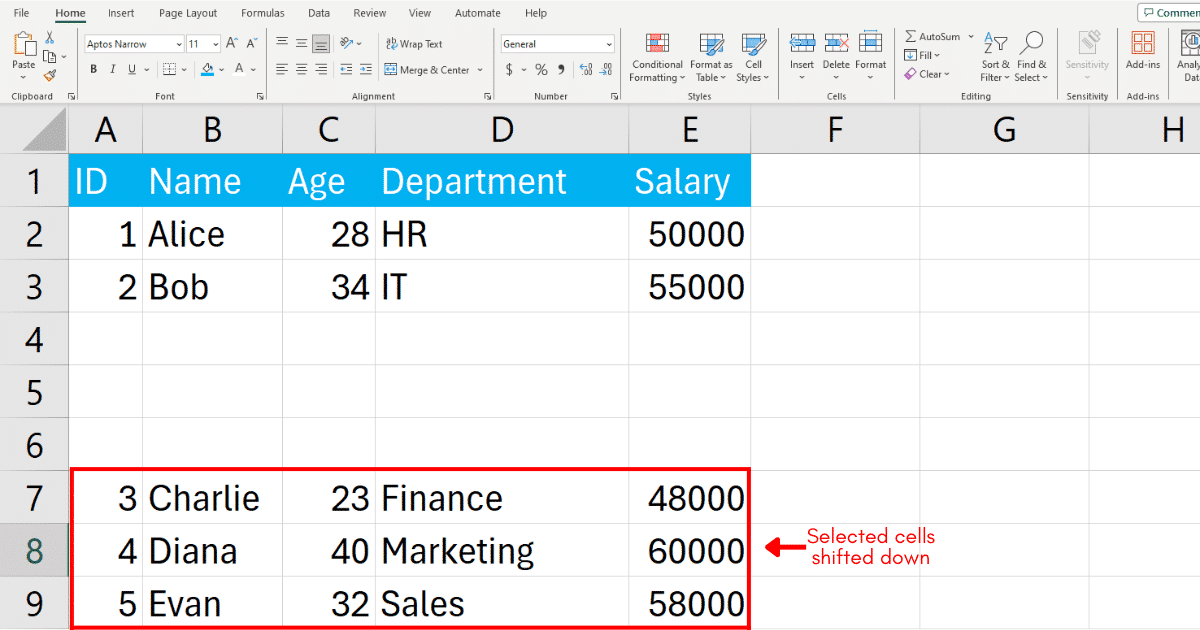
Step 3: Insert the Cut Cells
Right-click on the selected destination cell or cells.
From the context menu, choose Paste.
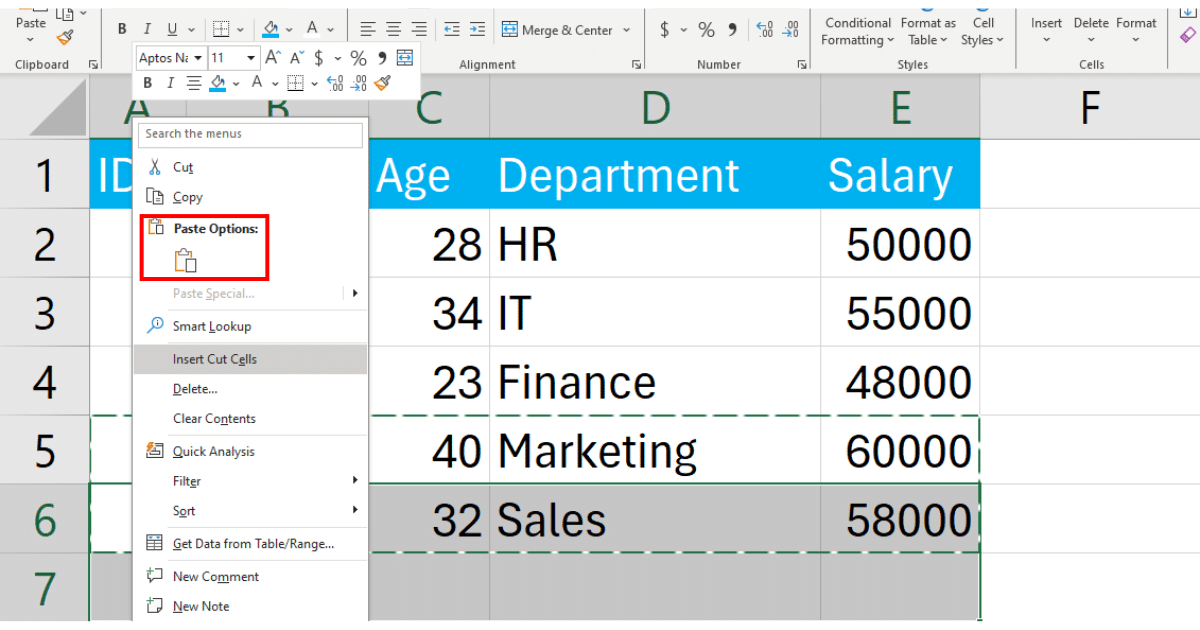
Excel will automatically shift the existing cells down to accommodate the inserted cells. The cells you cut will now be inserted into the new location.
4. How to Shift Cells Down By Row Insertion
You can shift cells down by inserting new cells as well.
This method adds entirely new rows to your spreadsheet, which automatically shifts existing rows and their contents downward.
To shift cells down using this method, follow the steps given below:
Step 1: Select the Row Below Where You Want the New Row
Click on the row number to the left of the spreadsheet. This highlights the entire row.
If you want to insert multiple rows, click and drag to select the same number of rows below where you want the new rows to be inserted.
For example, to insert three new rows, select three rows starting from where you want the new rows to appear.
Step 2: Insert the New Row
Right-click on the selected row number(s) and choose Insert rows from the context menu.

Excel will insert the same number of new rows above the selected row(s) and cells will be shifted down.
5. How to Shift Cells Down Using VBA
You can also shift cells down using VBA. This method is useful when you are automating a particular action in Excel.
Follow the steps below to shift cells down using this method:
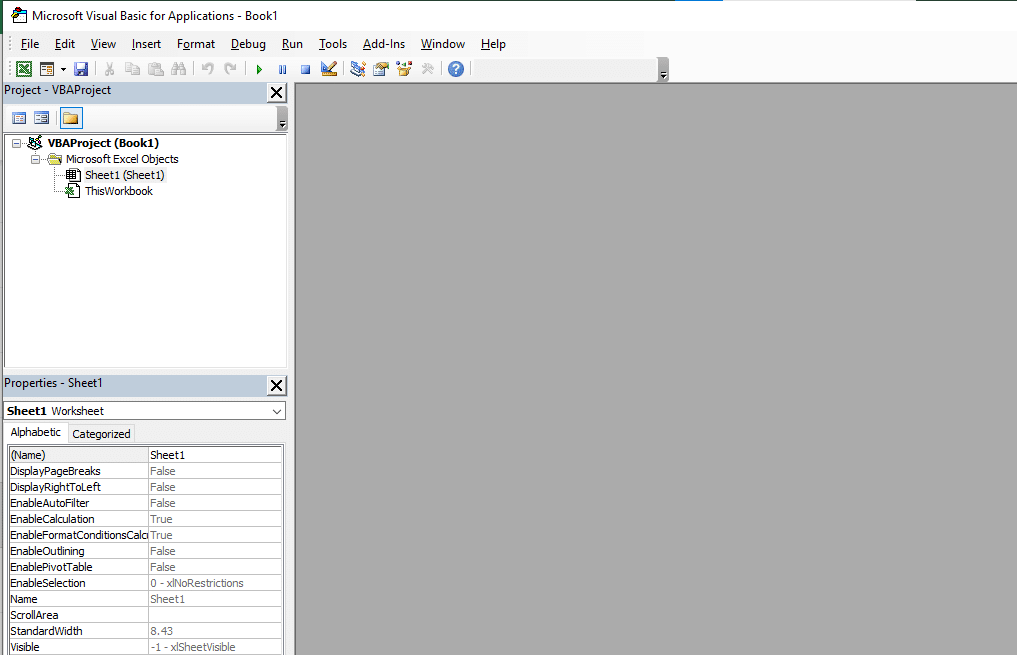
Step 1: Open The VBA Editor
Press Alt + F11 to open the VBA editor.
Step 2: Insert a New Module
Click Insert, and then select Module.
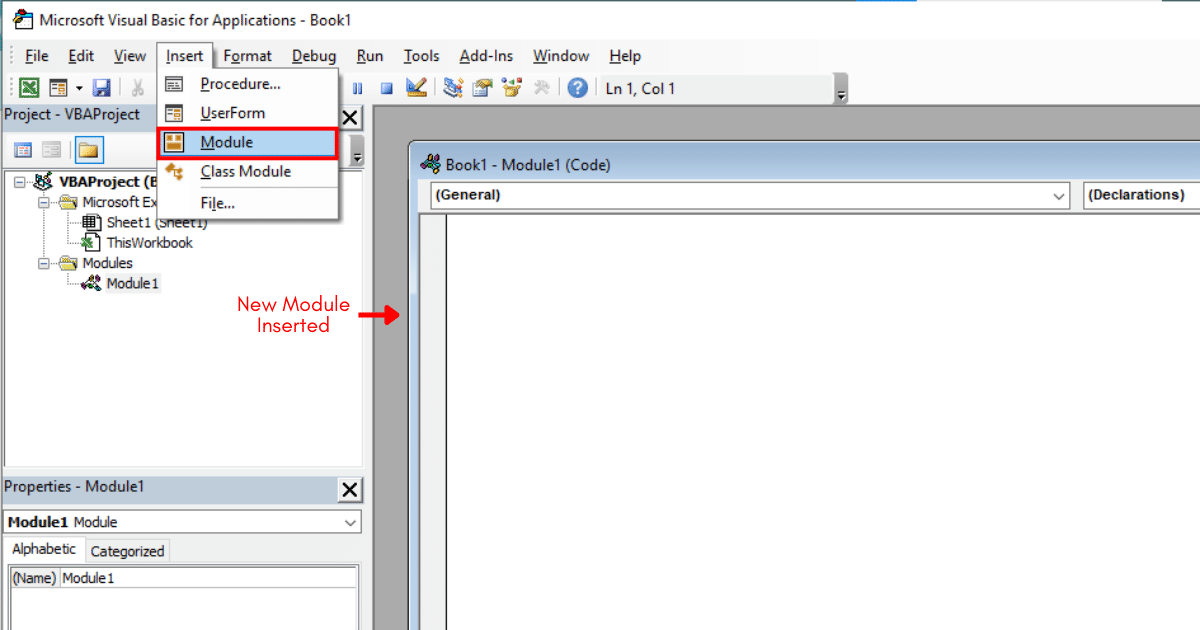
Excel will insert a new module where you can write your code.
Step 3: Writing VBA Script
You can either shift one cell or a range of cells down.
To shift one cell down using VBA, you can use the following script:
Sub ShiftCellsDown()
Range("A6").Insert Shift:=xlDown
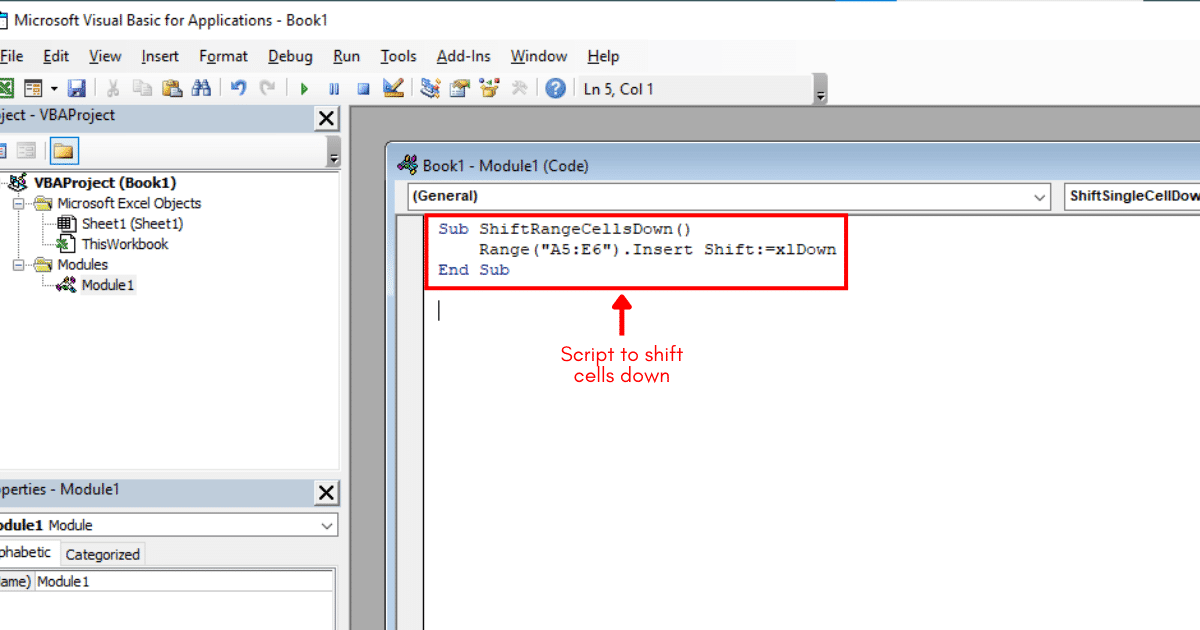
End SubTo shift a range of cells down, you can use the following script:
Sub ShiftRangeCellsDown()
    Range("A5:E6").Insert Shift:=xlDown
End Sub
Write any of the above script in the VBA Editor. You can change the cell reference according to your requirements.
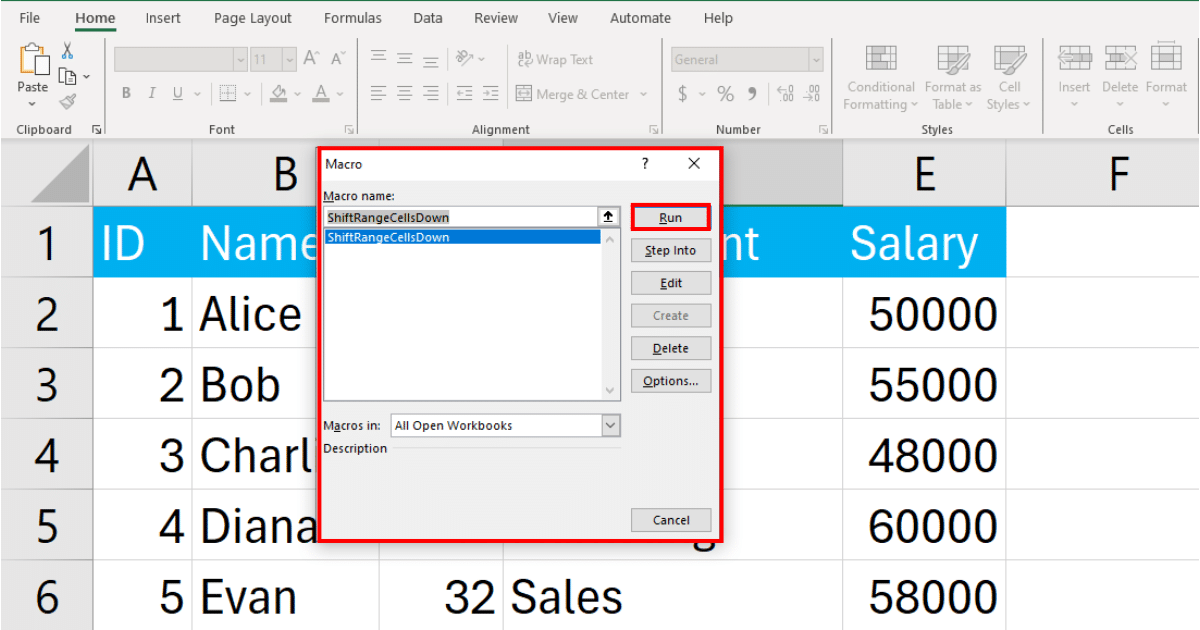
Step 4: Run The Script
Press Alt + F8 and a dialog box with VBA scripts will open up. Select the script you created and click Run.
When you run the script, Excel will automatically shift the range of cells down.
Learn how to use conditional logic in Excel using Power Query by watching the following video:
Final Thoughts
Mastering how to shift cells down in Excel improves your ability to manage and organize data efficiently.
By understanding this skill, you unlock a new level of flexibility and precision in your work. It’s essential, especially when you’re dealing with large datasets where accuracy and clarity are paramount.
Moreover, embracing this functionality can significantly boost your productivity.
In a world where data is king, being adept at efficiently manipulating it makes you a more competent and resourceful professional.
Frequently Asked Questions
In this section, you will find some frequently asked questions you may have when shifting cells down in Excel.
How to shift cells down using a formula in Excel?
In Excel, you can’t directly shift cells down with a formula in the traditional sense.
However, you can use formulas like INDEX, OFFSET, or dynamic array formulas to reference or rearrange data in a new range, effectively simulating the shifting of cells down.
How to shift cells down in VBA?
In VBA, you can easily shift cells down using the Range.Insert method.
This method is applicable for both rows and columns.
How to shift cells down without overwriting?
To shift cells down without overwriting, you can use the Insert Cells dialog box in Excel. Select the cells you want to move, right-click, and choose “Insert.”
In the dialog box that appears, select “Shift cells down” and click “OK.”
How to move data from one cell to another in Excel?
To move data from one cell to another in Excel, you can simply cut and paste the cell content. Select the cell with the data you want to move, press Ctrl + X to cut, then select the destination cell and press Ctrl + V to paste.
How to insert blank rows between data in Excel?
To insert blank rows between existing data in Excel, you can use the “Insert Cells” dialog box as described above. Alternatively, you can use the “Insert” command on the Home tab, and then choose “Insert Sheet Rows” or the paste cells option.
This will insert a blank row between each existing row in the selected range.


