In this blog post, we’ll learn how to create an HTTP request with Power Automate. HTTP requests are used to transfer data, but it should not be your first solution. Your first solution should always be to look for a connector for your application. You can watch the full video of this tutorial at the bottom of this blog.
Power Automate And Connectors
A connector is the Power Automate’s way to communicate with another application. Power Automate already has thousands of connectors available to you. For example, if you need to automate something that is related to a Microsoft application (Teams, SharePoint, OneDrive) or other applications that have connectors (Dropbox, SAP), then you should always use the connector approach, and not the HTTP request approach.
Making And Receiving an HTTP Request
If there isn’t a connector for it though, then you can use HTTP. HTTP requests are used by Power Automate to communicate with another application that doesn’t have a connector but might have what’s called a REST API.
So basically, the application developer has exposed the application so that people can make requests to it, and it can then return data according to those requests. An example is an internally built CRM software for a client. They definitely don’t want to make a connector for Power Automate, so they allow HTTP requests from various sources that can ping the CRM software for a list customers. That list of customers will then be returned by that HTTP request.
Desktop Flows
If there are no HTTP requests, then you have to use something called desktop flows. Desktop flows are very powerful because they allow you to automate almost anything. They are very similar to an Excel macro where you can record, do some action, and then repeat it. They are used if people want to automate things that are only in their desktop, like moving files around in their desktop or opening up an application.
How An HTTP Request Workflow Works
Let’s go into an HTTP workflow and see how it works. I have my Power Automate open, as well as the actual tutorial for the REST API.
As an HTTP request example, I’m going to use a website that has an API where I can tell the API to give me a list of users. Below is the list of emails or customers that we have in our company.
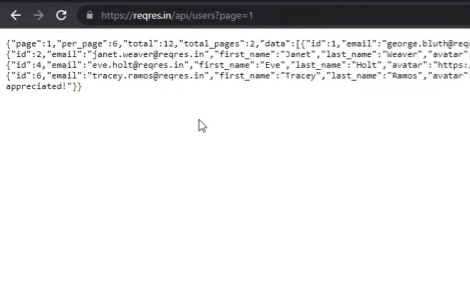
Again, this is an API that this application developer has actually given me access to. I made an HTTP request over here and it retuned to me the actual JSON. I can copy that JSON into what is called a Pretty Print.
I just clicked on Make Pretty so we can see what it actually looks like.
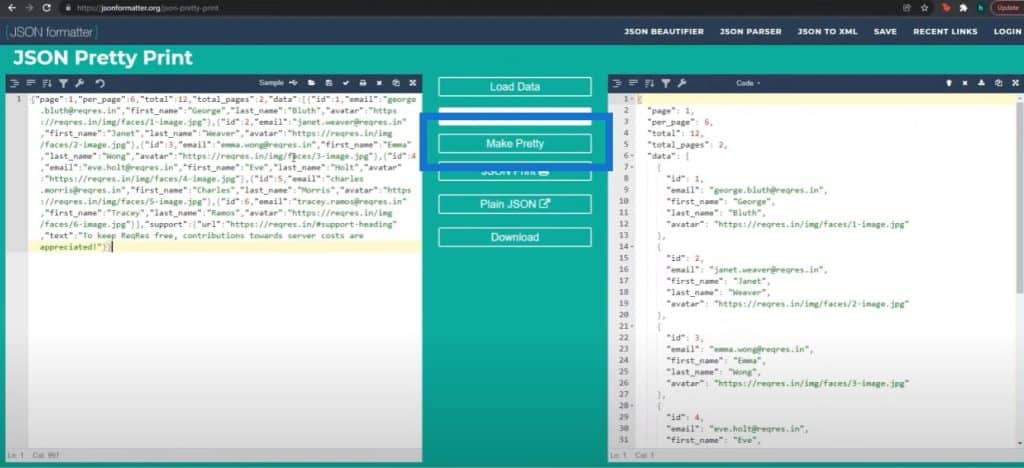
We can see on the right hand side that we’re given page per page, how many customers there are, total, total of pages, as well as each ID.
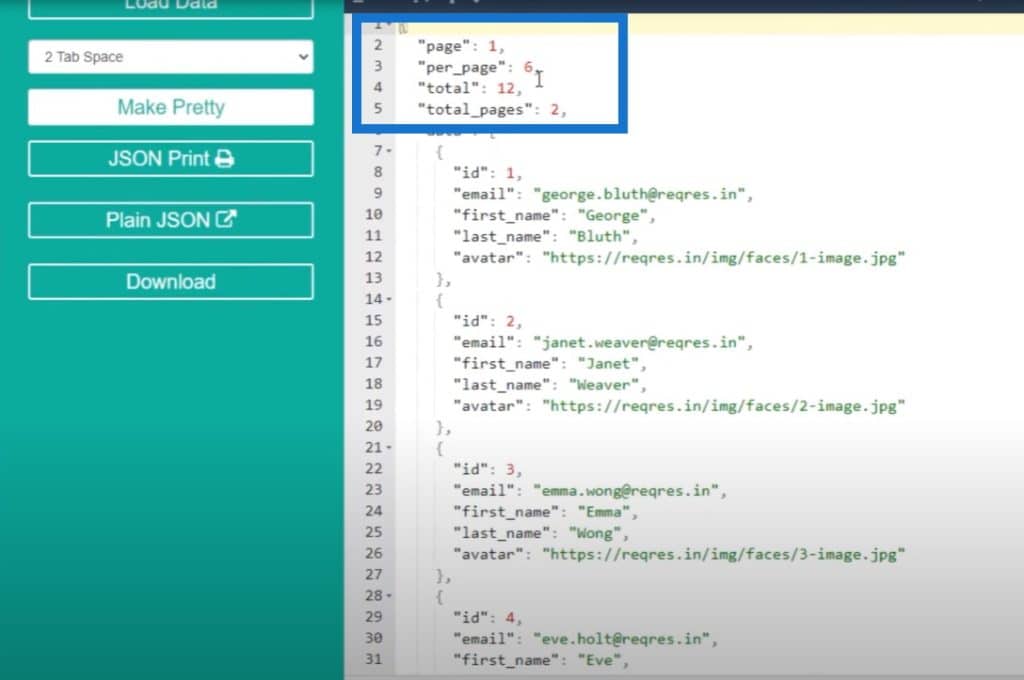
For each ID, we get their email, first name, last name and avatar. That’s a lot of information for six customers from this API that we’ve created.
Starting A Flow In An HTTP Request
We want to have a flow that runs every morning. This flow should be able to send us this list of customers in page one.
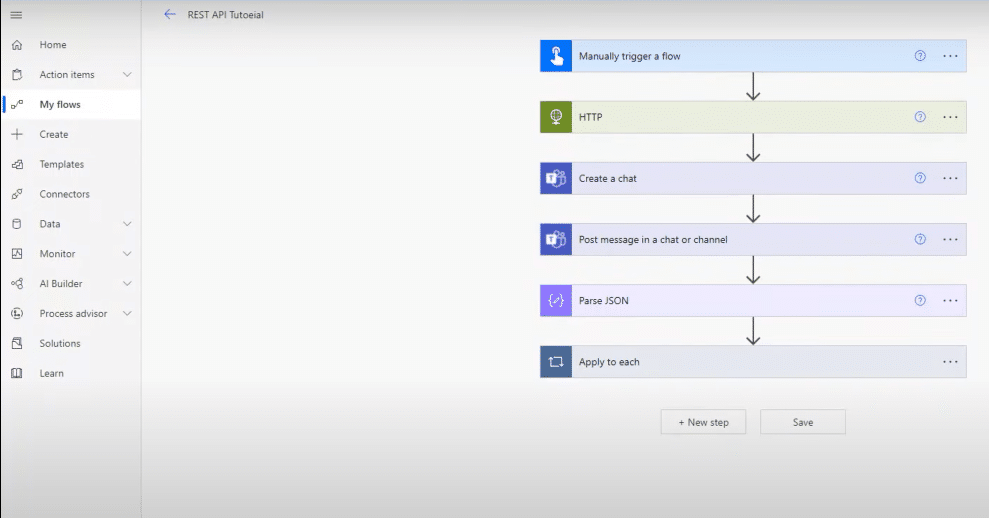
First, I start off by making a manual trigger to the flow. This flow will only run when I click a button, but we can also change it so that the flow is reoccurring and runs every morning.
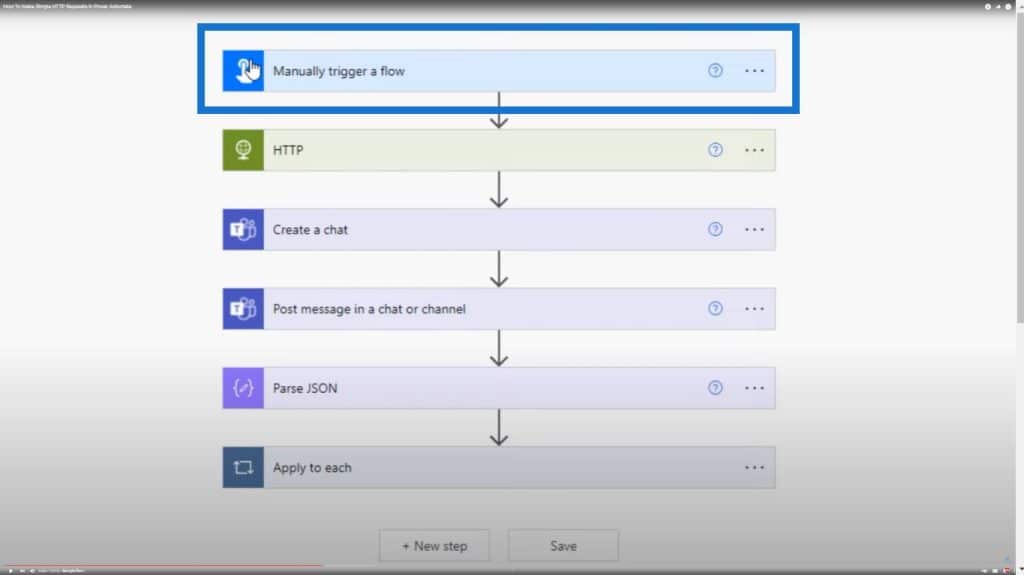
We then have the HTTP connector where we implement the method. There are two methods that are applicable to APIs: GET and POST. There’s also PATCH and DELETE but those are rarely used.

If you want to get information from an API, it’s usually either through GET or POST. If you are interested in learning what the difference is between GET and POST are, then I really recommend that you search online about RESTful APIs.
At this point, our application developer has told us that he’s going to make APIs that accept GET requests. This is why we’ll use GET as the method and then the URI on page one.

We also have the option to give this API a body. We can tell the API, for example, that we only want customers that begin with the letter F. We can add in arguments or parameters to our HTTP request, then the API takes it in. For now though, we’re keeping it simple and we’re not going to have any body queries.
Once we’ve made this request, we can output it. I’ve created a chat to Brad Pitt, who is the manager of my company with the title of Test because we’re just testing this out. Then we’re going to post the body (the output of this HTTP request) to this conversation.

Note that this is dynamic content. We can see the connector in the dynamic content, which returns us the body.
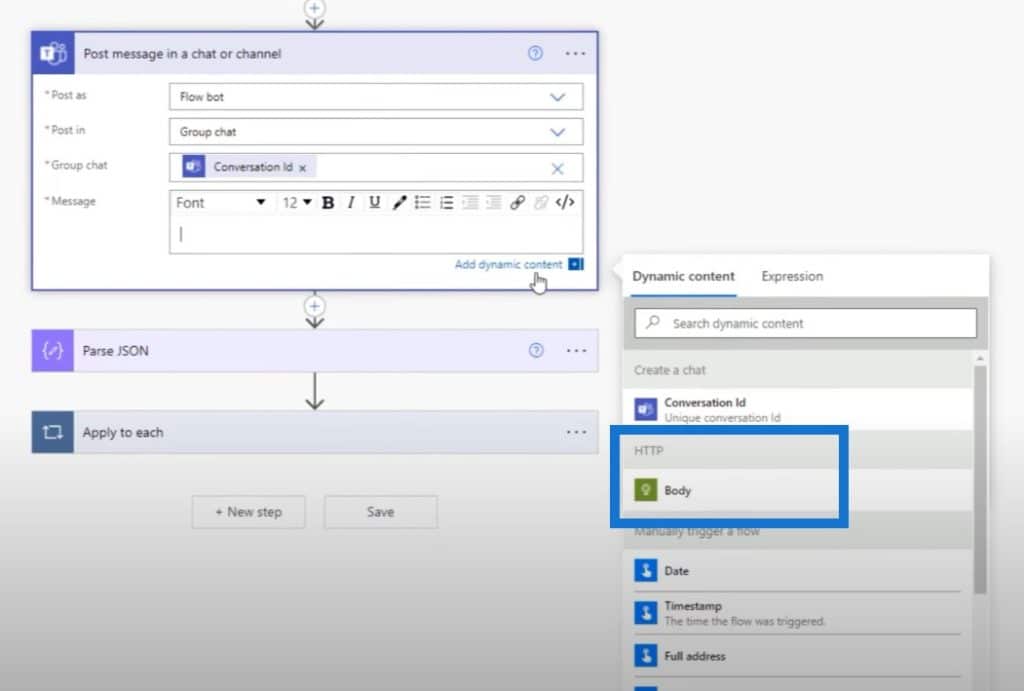
This will return a bunch of mumbo jumbo – it’s basically a JSON file that is not really readable. It’s great that Brad Pitt got it, but he won’t be able to understand it or know what it means.
Parsing The JASON File
The next step is to parse through that JSON file. The Parse JSON connector gives you back a JSON object, which is a way to cycle through these customers a lot easier. I’ve given this connector the body (which is the output of the HTTP request), and then this connector will give me back access to things like ID, email, first name, and last name.

So instead of us having to go through the code and parse it, Power Automate does this process for us with this really cool connector.
Using The Apply To Each Connector
We’ll use the Apply to each connector because for each customer that we receive in that body, we want to output the name, last name, and email. In the image below, we have an apply to each control connector where we post a message to Brad Pitt. We post as flow bot and the recipient is Brad Pitt. We also have access to their first name, last name, avatar, URL tech text, email.

We would not have access to these actual elements if we did not turn this Parse JSON connection on. This connector is very important because we can actually output the first name, last name, and so on and so forth.
Over in the message part, we’ll output the first name, last name, and email.

That is our entire flow. Again, it’s mainly a triggered HTTP request where we have a GET request to the URL. The return we get will then be outputted to a team’s chat. We then parse through that JSON file and then we send a message for each customer containing their first name, last name, and email.
Implementing The Workflow
Let’s watch this workflow in action by clicking on Save, then Test. At this point, the entire process is about making the HTTP request, actually returning that request, and sending it out on Teams.
We can see that a message was sent out just now containing the actual list of customers. Then we can see for each customer, we get their first name, last name, as well as their email too.
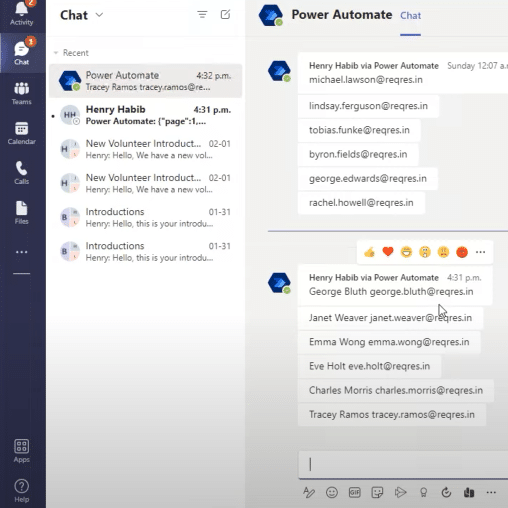
We get six customers and this corresponds exactly to what we have over in our JSON.

And obviously we also received the actual full JSON message, but this one is hard to read.

I see a lot of people making HTTP requests all the time and getting the data back to them. It’s worth parsing through the data, especially if the receipt of the data is in JSON form so that you can make sense out of it and turn it into something you can use.
***** Related Links *****
HTTP Request In Power Automate – An Introduction
Microsoft Flow HTTP Trigger | A Power Automate Tutorial
Approval Workflow Setup And Testing In Power Automate
Conclusion
This is an example of how to make an HTTP request, send out a request, and receive the data. But one thing I do want to specify is that you can also make HTTP requests do anything.
For example, as an application developer, we can make an HTTP endpoint that creates a new customer in the CRM software. We can make a flow so that whenever someone adds in a customer to SharePoint, the flow gets triggered. Then the information is passed to an HTTP request with the properties. That’s how you can transfer information from SharePoint to your third party application that accepts API requests.
If you enjoyed the content covered in this particular tutorial, please subscribe to the Enterprise DNA TV channel. We have a huge amount of content coming out all the time from myself and a range of content creators, all dedicated to improving the way that you use Power BI and the Power Platform.
Henry


