
Ready to take your Excel functionality to the next level and add the developer tab?
You’ll note that it’s not displayed by default, so you need to enable it, don’t worry, it’s super easy.
To add the Developer tab in Excel, you need to:

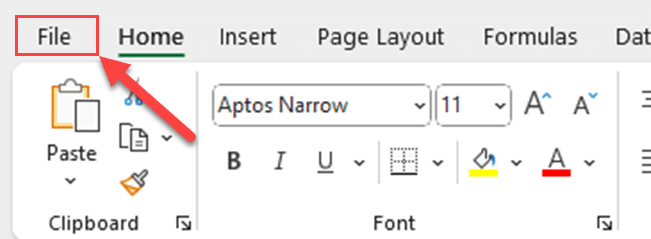
Click on the File tab and choose “Options”.
In the Excel Options dialog box, click on “Customize Ribbon”.
Under the “Main Tabs” list, check the “Developer” checkbox.
Click OK to save your changes and close the Excel Options dialog box.

After you enable the Excel Developer tab, you can access its powerful tools and features to enhance your Excel experience.
This article will guide you through the process of adding the Developer tab to Excel 2016, 2019, and 365.
Let’s get started!
How to Enable the Developer Tab in Excel 2016, 2019, and 365
To add the Developer tab in Excel, you’ll need to access the Excel Options dialog box. Follow the steps below to do so:
Step 1
Open Excel 2016, 2019, or 365 and click on the File tab in the upper-left corner of the screen.

Step 2
In the File tab, click on Options to open the Excel Options dialog box.
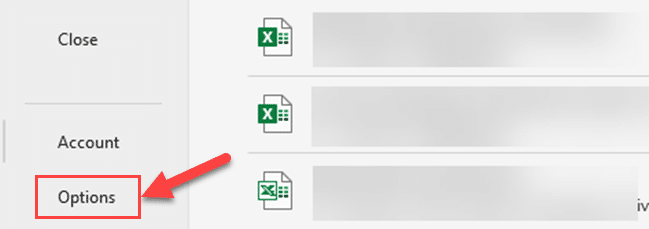
Now that you have accessed the Excel Options dialog box, you can proceed to enable the Developer tab.
Customizing the Ribbon to Enable the Developer Tab
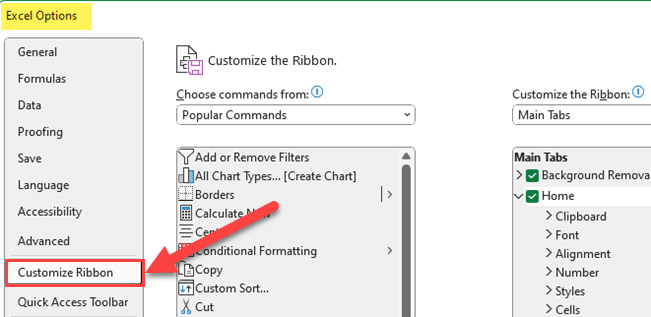
In the Excel Options dialog box, you will find a list of items in the left pane. Click on the “Customize Ribbon” option to open the Customize Ribbon section.
Here’s how you can do it:
Step 1
In the left pane, click on Customize Ribbon.
Step 2
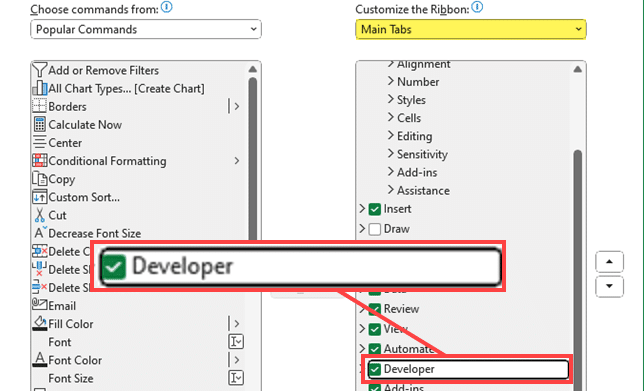
In the right pane, you’ll see two main lists: Choose commands from and Main Tabs.
Now, let’s move on to the next section and check the “Developer” checkbox.
Checking the Developer Tab Checkbox
Step 1
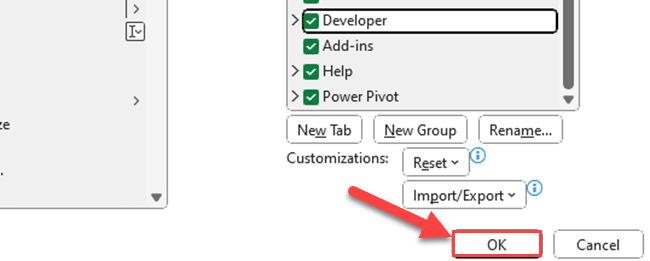
In the Main Tabs list, you will find the “Developer” checkbox. Check this box to enable the Developer tab.
Step 2
If you cannot find the Developer checkbox, expand the “Main Tabs” list and look for the “Developer” option. Click the box next to it to enable the tab.
Note: The “Developer” checkbox may be listed under the “Custom Tabs” section if it’s not included in the “Main Tabs” list.

Step 3
After enabling the Developer tab, click OK to save your changes and close the Excel Options dialog box.
You have now successfully added the Developer tab to your Excel ribbon.
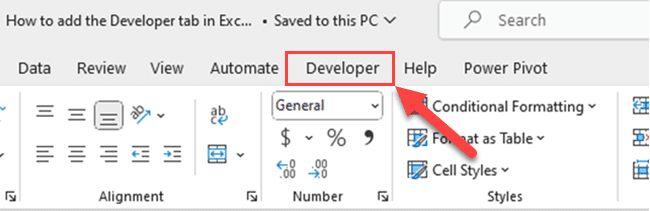
This tab includes various groups such as Code, Add-Ins, XML, Controls, and others, each containing specific commands and tools to enhance your Excel experience.
In the next section, we’ll discuss how you can use the Developer tab to record a macro.
Using the Developer Tab to Record a Macro
The Developer tab in Excel provides you with access to various advanced tools and features, such as macros. Macros are a powerful way to automate tasks in Excel by recording a series of actions and then running them with a single click.
To record a macro using the Developer tab in Excel, follow the steps below:
Step 1
Click on the Developer tab in the Excel ribbon.
Step 2
In the Code group, click on the Record Macro button.
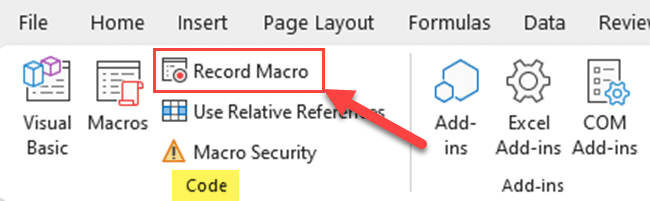
The Record Macro dialog box will appear.
Step 3
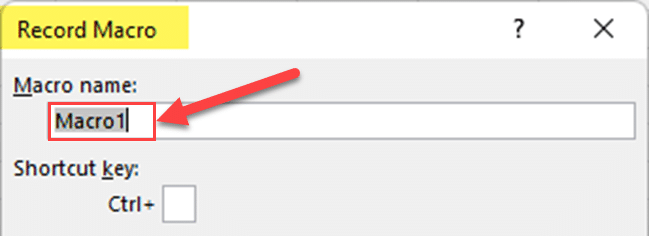
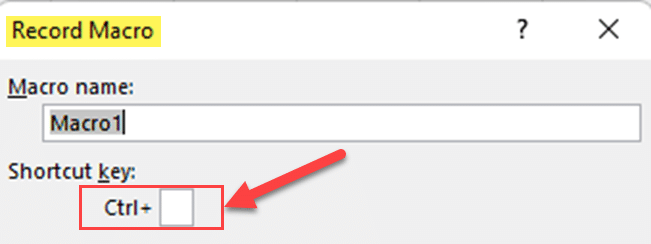
In the Record Macro dialog box, enter a name for your macro in the Macro name field.
Step 4
Optionally, you can assign a Shortcut key or a Description to your macro. If you want to use a shortcut key, make sure it doesn’t conflict with an existing Excel shortcut.
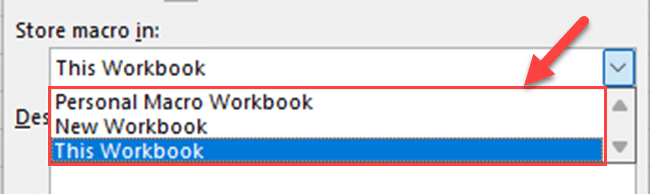
Step 5
Choose where to store the macro. You can store the macro in the current workbook or in your Personal Macro Workbook. Select the appropriate option from the Store macro in drop-down list.
Step 6
Click OK to start recording your macro. Excel will now record all the actions you perform until you stop the recording.

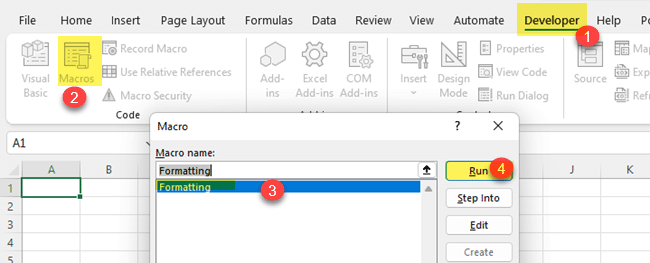
Now that the macro is recorded, you can run it anytime by clicking on the Developer tab, then clicking on Macros and selecting the macro you want to run.
Keep in mind that macros can be very powerful and have the potential to cause unintended changes to your data. Always review your recorded macros carefully and test them on a copy of your data before using them on your original files.
In the next section, we’ll discuss how you can use the Developer tab to insert controls into your Excel worksheet.
Using the Developer Tab to Insert Controls
The Developer tab in Excel is a powerful tool that allows you to insert various controls, such as buttons, checkboxes, and list boxes, into your worksheets. These interactive controls can enhance the functionality and interactivity of your Excel workbooks.
To insert interactive tools, follow these steps:
Step 1
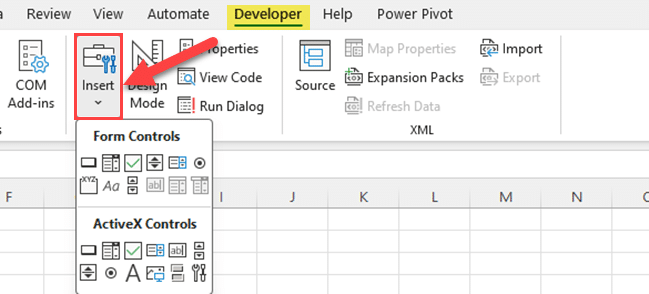
Click on the Developer tab.
Step 2
In the Controls group, click on the Insert button. A drop-down menu will appear with a list of available controls.
After adding a control, you can customize its properties to fit your needs. To do this, right-click on the control and select Format Control. This will open a window where you can adjust various settings, such as the control’s name, caption, font, background color, and behavior.

Remember that while controls can be a powerful tool, they also come with some security risks. Always be cautious when using Form controls and ActiveX controls, especially if you’re working with sensitive data or sharing your spreadsheets with others.
Here’s a brief overview of some of the commonly used controls:
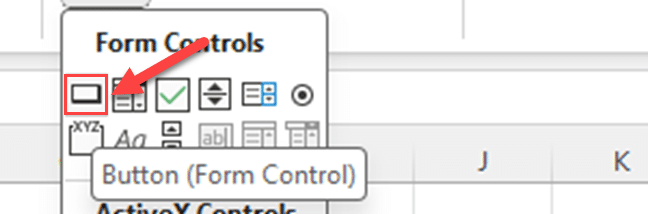
Button (Form Control): A button control allows you to trigger specific actions or macros when clicked. To insert a button, click on the “Insert” button in the “Controls” group and select the “Button (Form Control)” option from the drop-down menu. Then, click and drag to draw the button on your worksheet. When the “Assign Macro” dialog box appears, you can choose an existing macro to assign to the button or record a new one.
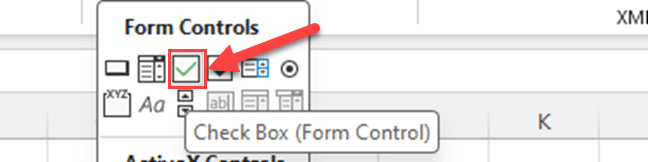
Checkbox: A checkbox is a type of form control that can be used to create interactive checkboxes in your worksheet. To insert a checkbox, click on the “Insert” button in the “Controls” group and select the “Checkbox (Form Control)” option from the drop-down menu. Then, click and drag to draw the checkbox on your worksheet. You can customize the checkbox by changing its properties, such as its label, size, and font.
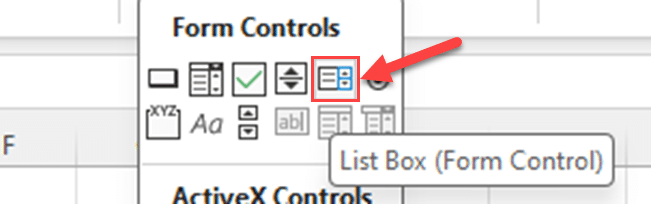
List Box: A list box is a form control that allows you to create a drop-down list of options in your worksheet. To insert a list box, click on the “Insert” button in the “Controls” group and select the “List Box (Form Control)” option from the drop-down menu. Then, click and drag to draw the list box on your worksheet. You can customize the list box by adding items to the list, changing its properties, and defining its linked cell.
Spin Button: A spin button is a form control that can be used to increment or decrement a value in a cell. To insert that, click on the “Insert” button in the “Controls” group and select the “Spin Button (Form Control)” option from the drop-down menu. Then, click and drag to draw the spin button on your worksheet. You can customize the spin button by changing its properties, such as its minimum and maximum values, and its linked cell.

Using these controls, you can create interactive and user-friendly Excel workbooks that provide an enhanced user experience.
In the next section, we’ll discuss how you can use the Developer tab to work with XML data in Excel.
Using the Developer Tab to Work with XML Data
The Developer tab in Excel provides advanced functionality for working with XML data, allowing you to import, export, and manage XML files more efficiently.
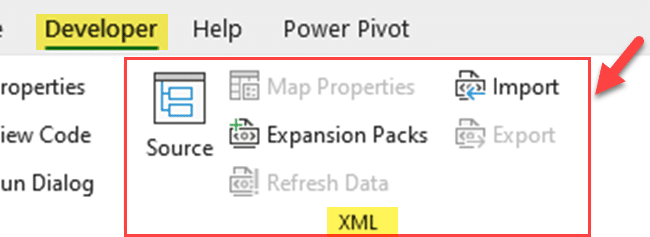
Here are some of the key XML commands available in the XML group:
Source: Use this command to import XML data from an external XML file or export your worksheet data to an XML file.
XML Maps: This command allows you to manage and manipulate XML maps in your workbook. You can add, remove, or edit XML maps as needed.
XML Schema: Use this command to create, modify, or validate an XML schema. An XML schema is a formal description of the structure and rules of an XML document.
In the next section, we’ll discuss how you can use the Developer tab to create custom functions in Excel.
Using the Developer Tab to Create Custom Functions
The Developer tab in Excel is a powerful tool that allows you to create custom functions, also known as user-defined functions (UDFs). These functions can be used to perform complex calculations or automate tasks in your worksheets.
To create a custom function, follow these steps:
Step 1
Go to the Developer tab.
Step 2
In the Code group, click on the Visual Basic button to open the Visual Basic for Applications (VBA) editor.

Step 3
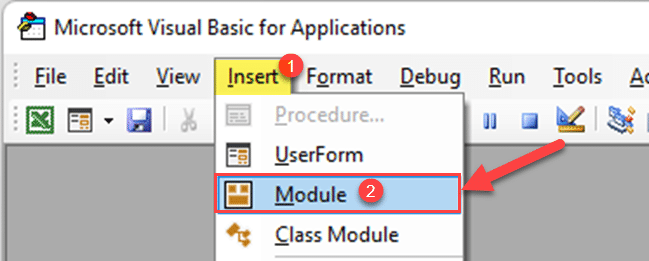
In the VBA editor, go to Insert > Module to create a new module where you can write your custom function.
Step 4
Write the code for your custom function in the module. The function must start with the word Function, followed by the function name, and any input parameters in parentheses. For example, to create a custom function called MyFunction that takes two input parameters x and y, you would write: Function MyFunction(x, y) As Double
Step 5
After writing the code, close the VBA editor and return to your worksheet.
Step 6
You can now use your custom function in the same way as built-in functions. For example, you can enter =MyFunction(A1, B1) in a cell to calculate the result using the values in cells A1 and B1.
By using the Developer tab in Excel to create custom functions, you can extend the capabilities of Excel and tailor it to your specific needs. These functions can be used to perform a wide range of tasks, from simple calculations to complex data analysis.
Remember that custom functions are written in VBA, which means they can be quite powerful but also require a good understanding of programming concepts. If you’re new to VBA, start with simple functions and gradually work your way up to more complex tasks.
In the next section, we’ll discuss how you can use the Developer tab to work with add-ins in Excel.
Using the Developer Tab to Work with Add-ins
The Developer tab in Excel is a powerful tool that allows you to work with add-ins. Add-ins are software programs that can be installed in Excel to extend its functionality and provide additional features.
To access the Developer tab and work with add-ins, follow these steps:
Step 1
Go to the Developer tab.
Step 2
In the Add-ins group, click on the Excel Add-ins button to open the Add-Ins dialog box.

Step 3
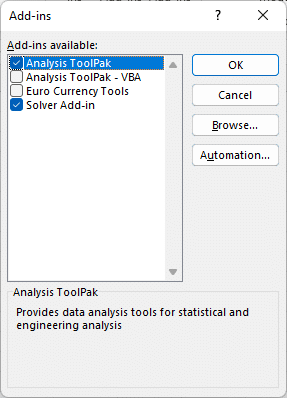
In the Add-Ins dialog box, you can see a list of available add-ins. Check the box next to the add-ins you want to use, then click OK to install them.
You can now access the features of the installed add-ins through the Developer tab. For example, some add-ins may provide additional buttons or commands in the ribbon, or they may add new functions that you can use in your worksheets.
By using the Developer tab in Excel to work with add-ins, you can enhance the capabilities of Excel and streamline your workflow. Add-ins can provide a wide range of features, from data analysis tools to custom formatting options, so there’s likely an add-in that can help you with your specific needs.
In the next section, we’ll discuss how you can use the Developer tab to add and manage references in Excel.
Using the Developer Tab to Add and Manage References
The Developer tab in Excel is a powerful tool that allows you to add and manage references. References are links to external files or libraries that provide additional functionality to your Excel workbook.
To work with references, follow these steps:
Go to the Developer tab in the Excel ribbon to access the Developer ribbon.
In the Code group, click on the Visual Basic button to open the Visual Basic for Applications (VBA) editor.
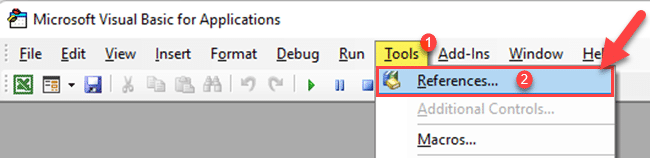
In the VBA editor, go to Tools > References to open the References dialog box.
In the References dialog box, you can see a list of available references. Check the box next to the references you want to use, then click OK to add them to your project.
By using the Developer tab in Excel to add and manage references, you can extend the capabilities of your Excel workbook and streamline your workflow. References provide access to a wide range of external files and libraries, from custom functions and macros to specialized data analysis tools, so there’s likely a reference that can help you with your specific needs.
In the next section, we’ll discuss how you can use the Developer tab to run and debug VBA code in Excel.
Using the Developer Tab to Run and Debug VBA Code
The Developer tab in Excel is a powerful tool that allows you to run and debug VBA code. VBA is a programming language that is used to automate tasks and customize the behavior of Excel.
To work with VBA codes, follow these steps:
Go to the Developer tab in the Excel ribbon.
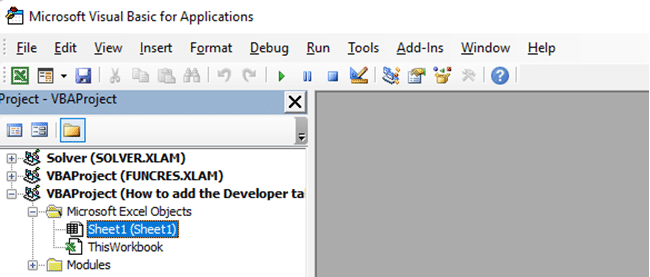
In the Code group, click on the Visual Basic button to open the Visual Basic Editor.
Final Thoughts

The Developer tab in Excel is like a secret weapon that unlocks the full potential of this powerful spreadsheet software.
By adding the Developer tab, you gain access to advanced features and tools that let you take control of your spreadsheets like never before.
Whether you’re a beginner or an experienced user, the Developer tab empowers you to automate tasks, customize your Excel experience, and work with a wider range of data sources.
So, if you want to supercharge your Excel skills and make your work more efficient, don’t hesitate to add the Developer tab. It’s a game-changer that will elevate your Excel game to new heights!
Want to learn more about integrating AI, Excel, Power BI, and Python? Check out the video below:
Frequently Asked Questions
How do I enable the Developer tab in Excel 2016?
To enable the Developer tab in Excel 2016, click on File > Options > Customize Ribbon. Then, in the right column, check the box for Developer and click OK.
What is the use of the Developer tab in Excel?
The Developer tab in Excel is used for creating, running, and managing macros, which are a series of commands and functions that automate tasks in a spreadsheet. It’s also used for working with controls, ActiveX objects, XML data, and more advanced features that are helpful for software developers and power users.
How do I get the Developer tab in Excel for Mac?
To get the Developer tab in Excel for Mac, click on Excel > Preferences > Ribbon & Toolbar. Then, check the box for Developer in the list of tabs and click OK.
Where is the Developer tab in Excel 2013?
In Excel 2013, the Developer tab is not displayed by default. To enable it, click on File > Options > Customize Ribbon, then check the box for Developer in the right column and click OK.
How do I show the Developer tab in Excel 2010?
To show the Developer tab in Excel 2010, click on File > Options > Customize Ribbon. In the right column, check the box for Developer and click OK.
What is the shortcut to the Developer tab in Excel?
There is no direct keyboard shortcut to the Developer tab in Excel. However, after enabling it, you can use keyboard shortcuts to access its features, such as pressing Alt+F11 to open the Visual Basic for Applications editor.


