
Power Query, an invaluable self-service data preparation tool in the Power BI family, (well, that’s what we like to say). It enables you to manipulate and transform data from diverse sources into a more suitable format for analysis.
One of the key features and one of our favorite features that can substantially enhance the functionality of Power Query is the implementation of custom column if statements.
You can use the if… then… else… statement in Power Query to create conditional logic. This statement allows you to evaluate an expression and return a value based on whether the result of the evaluation is true or false.


As you delve deeper into the topic, you will learn about the syntax and structure of IF statements in Power Query, including how to apply conditions and logical operators for more advanced use cases.
This knowledge will give you greater control and flexibility over the data transformation process.
Let’s dive in!
What is The Syntax of the Power Query If Statement?
The If statement allows you to test a condition and return different results depending on whether the condition is true or false.

The basic syntax for an If statement in Power Query is as follows:
if [condition] then [value_if_true] else [value_if_false]How to Use Custom Column Using If Statement
To use a custom column using an if statement in Power Query, you can follow the steps listed below:

1) Load the data from your source into Power BI.
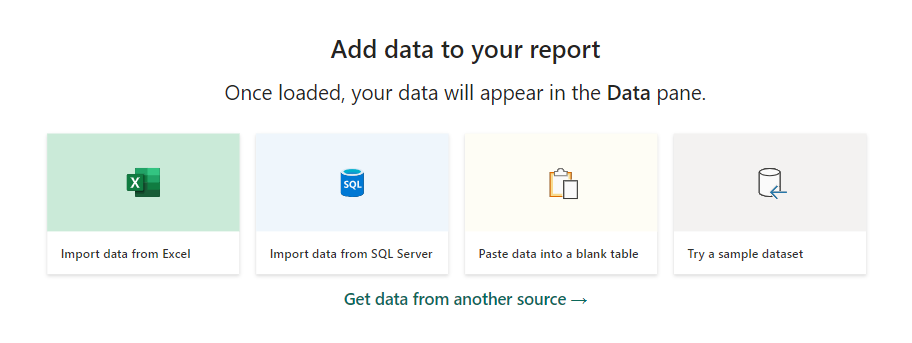
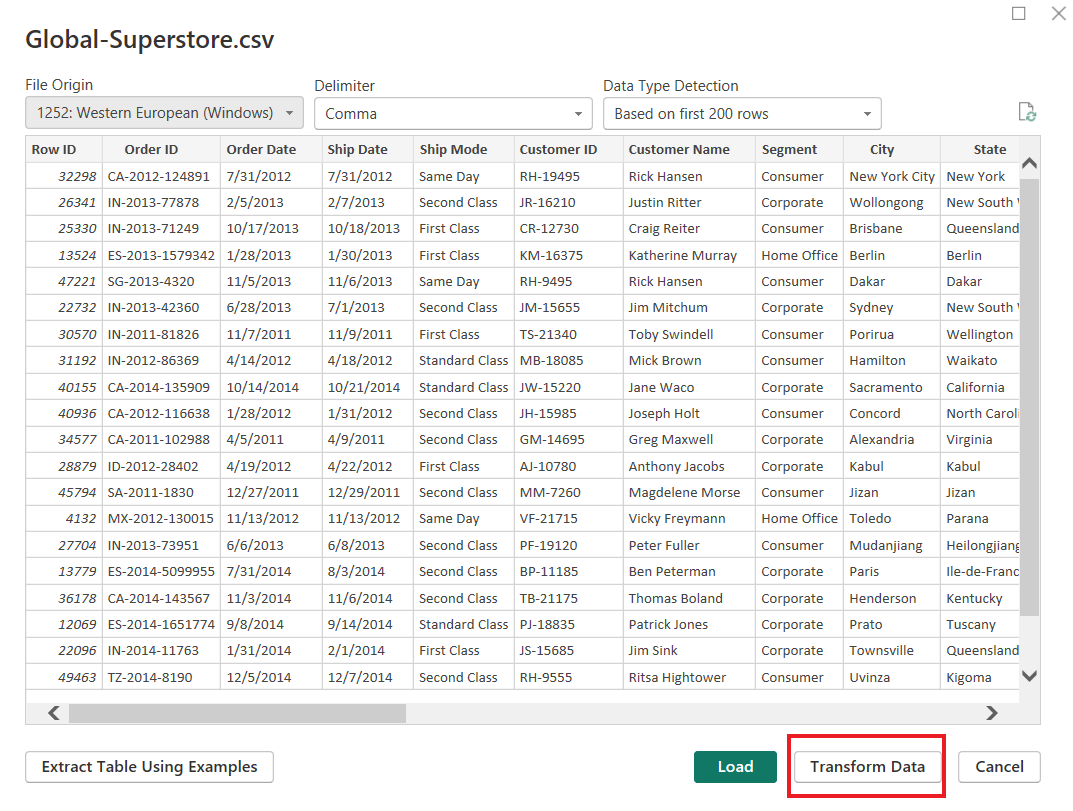
2) Once your data has been imported, you can load data in Power BI or transform it using the Power Query editor. Click on the Transform Data button.
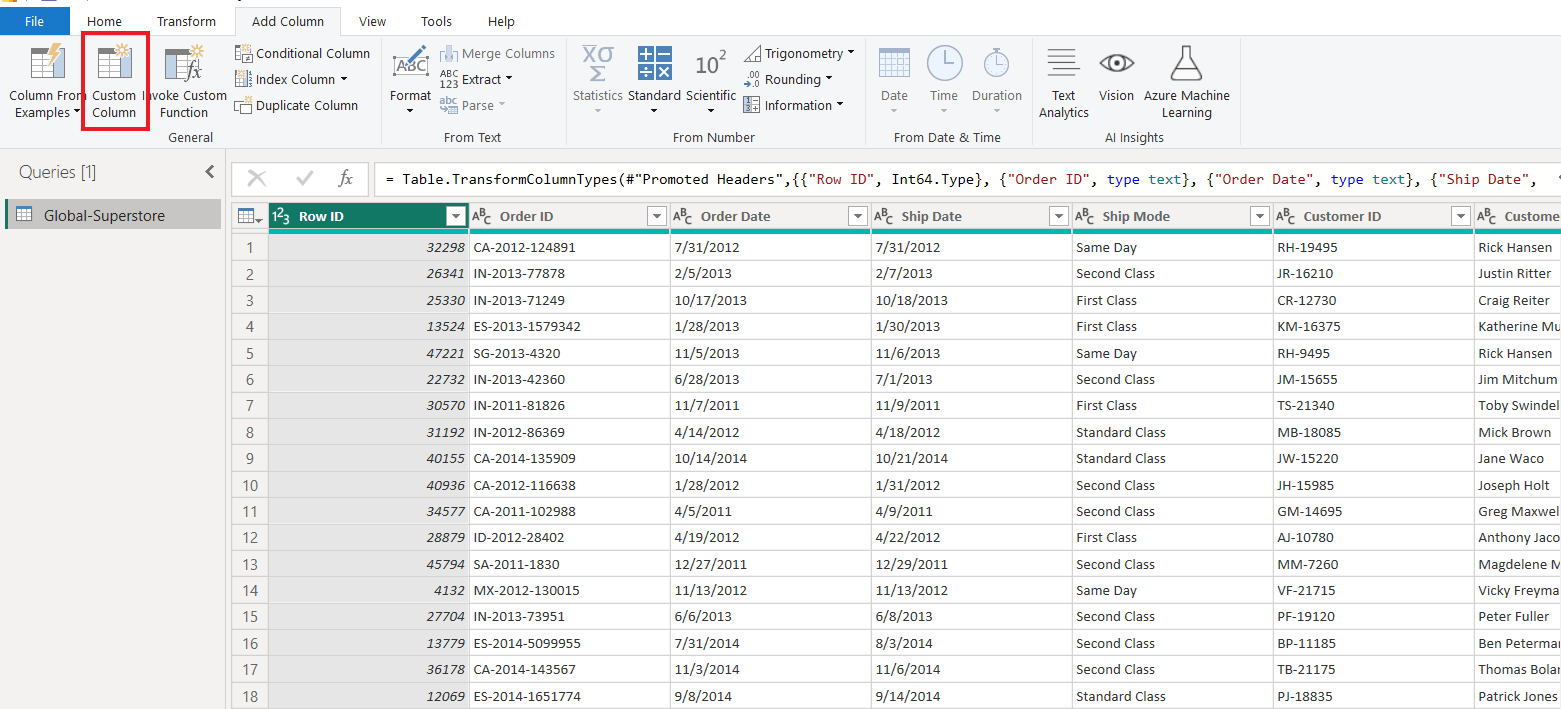
3) In the Power Query Editor, go to the Add Column from the menu on the top.

4) Click on the Custom Column option from the menu provided at the top of the editor.
5) The “Custom Column” dialog box will appear, and you can create the formula for your custom column using the If statement.

Let’s say you want to create a custom column that calculates a 2.5% bonus for all sales over $2,500. You can write the following formula in Power Query’s formula builder:
if [Sales] > 2500 then [Sales] * 0.025 else 0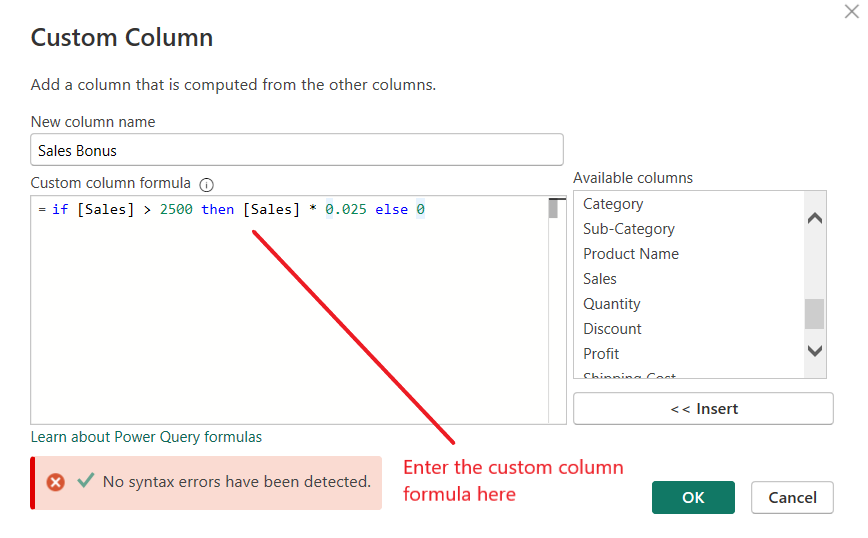
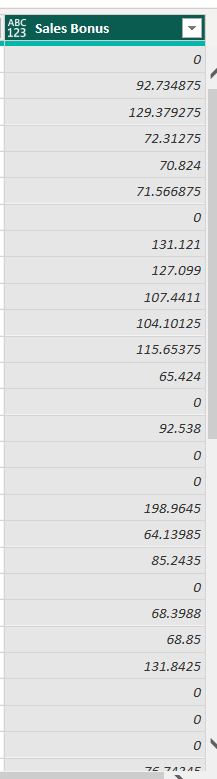
6) Click OK to execute and create a new custom column.
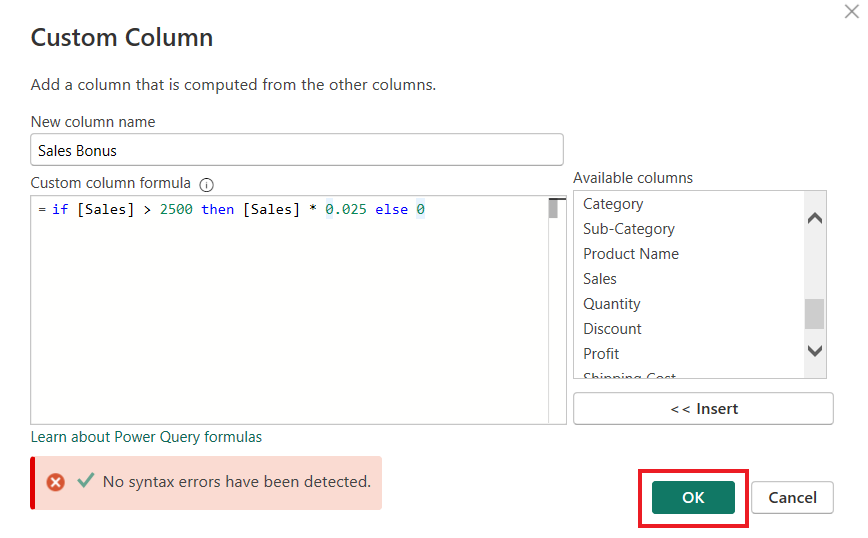
The If statement above tests if the Sales value is greater than 2500. If true, the custom column value equals 2.5% of the Sales value; otherwise, it will be 0.
Remember to be careful with the syntax and formatting when working with Power Query, as it works on case sensitive m code.
How to Set Up a Conditional Logic in Power Query
Conditional columns in Power Query allow you to create a new column in your dataset based on specific logic.
This is particularly useful when you want to categorize data, calculate new values, or simply add new information to your dataset.
Essentially, conditional columns evaluate one or more conditions using true and false values, with the resulting outcome forming the new column data.
To set up a conditional column, you’ll need to be familiar with the Power Query syntax:
IF(condition, value_if_true, value_if_false)
In this syntax:
- condition is the logical test you want to evaluate your data such as [Sales]>2500, in the previous example
- value_if_true is the value to return if the condition is true
- value_if_false is the value to return if the condition is false (optional)
The following example demonstrates setting up conditional logic in Power Query.

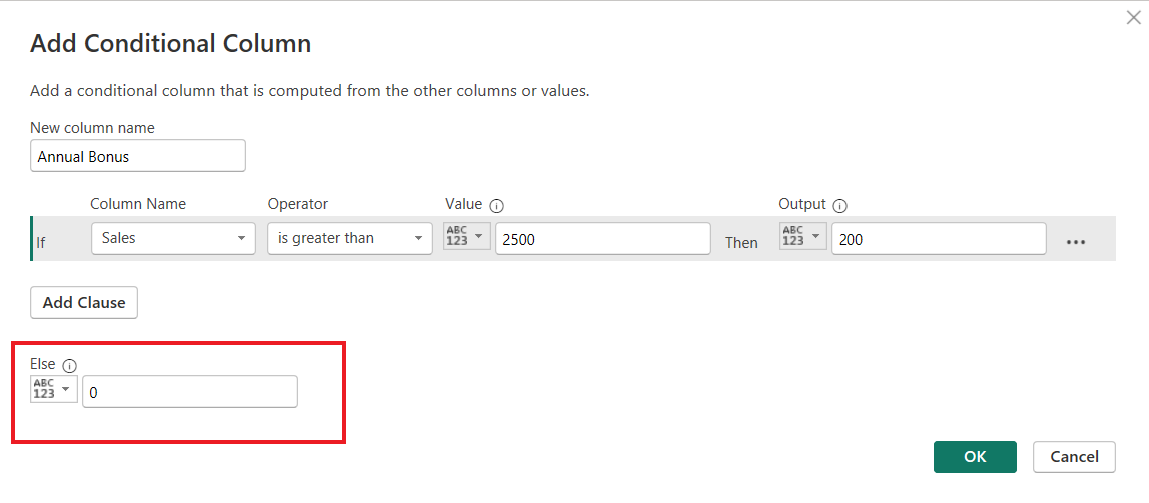
Let’s use the power query if statement for filtering the sales over $2500 and awarding them an annual bonus of $200 in a new conditional column.
To create a conditional column in Power Query, follow these steps:
1) Open your query in Power Query Editor and select the ‘Add Column’ tab.
2) Click on the ‘Conditional Column’ option in the General group.

The Add Conditional Column dialog box will open.
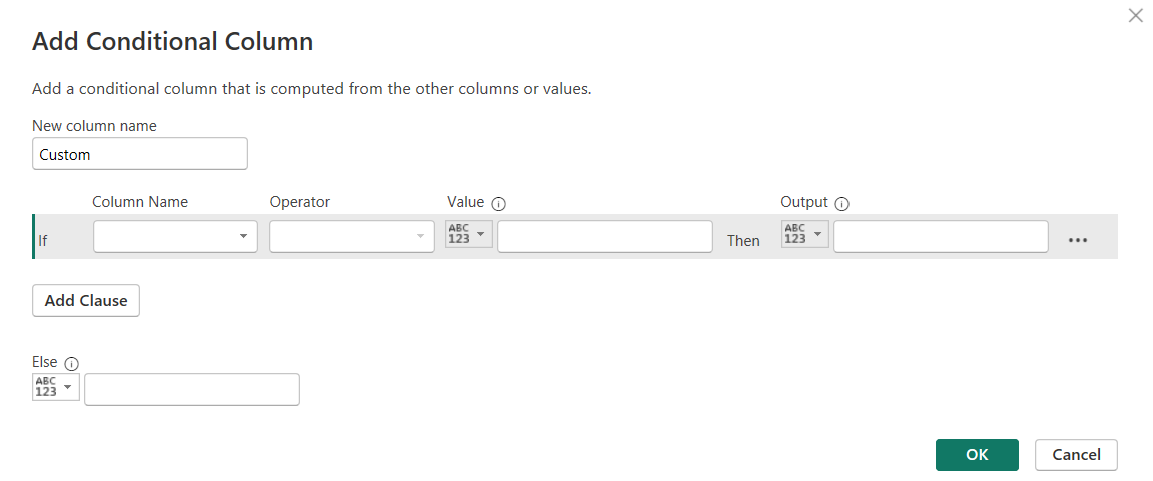
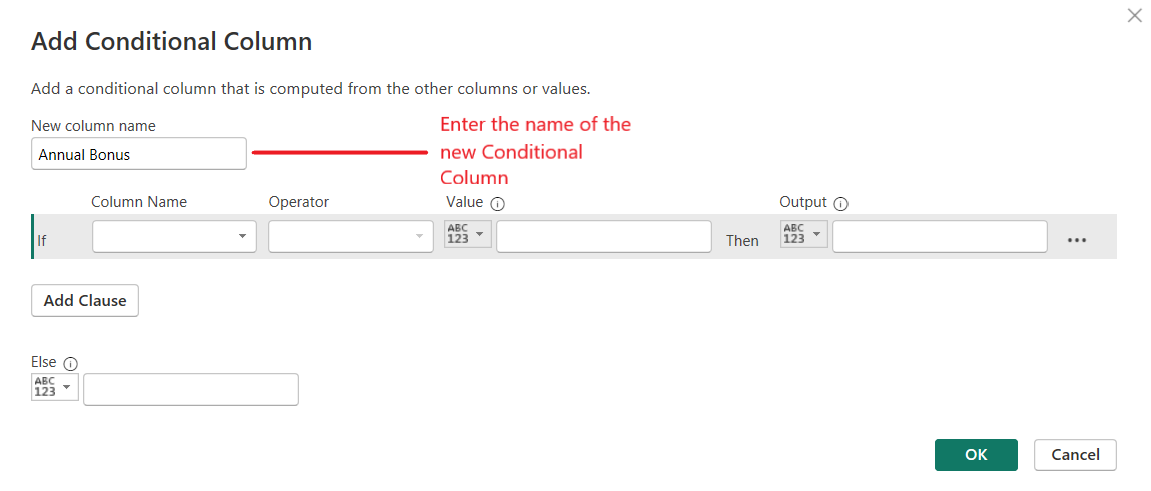
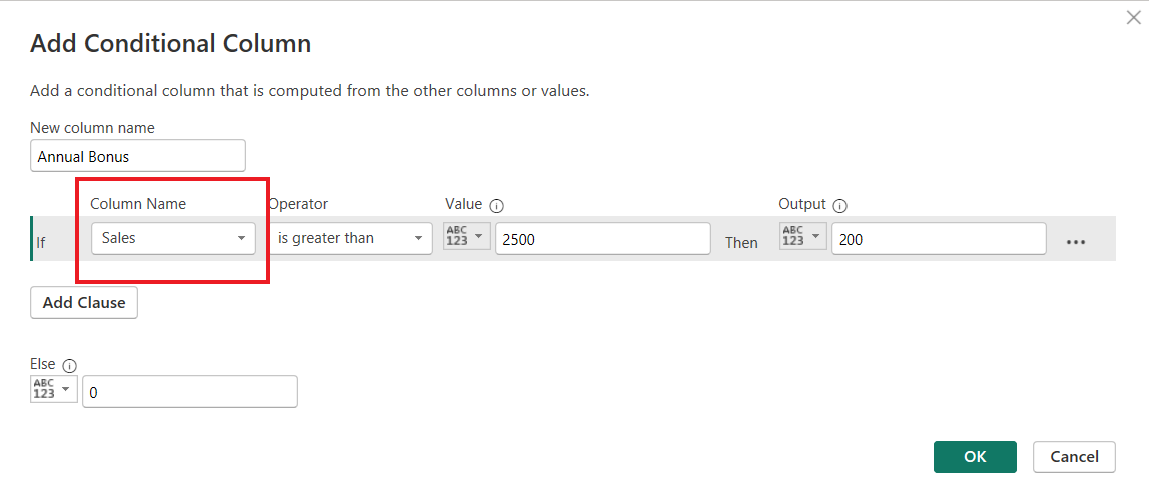
3) In the ‘Add Conditional Column’ dialog box, provide a name for your new column.
4) Set up your condition(s) using the available dropdown menus and input fields.
Choose the desired column for the IF condition from the Column Name dropdown.
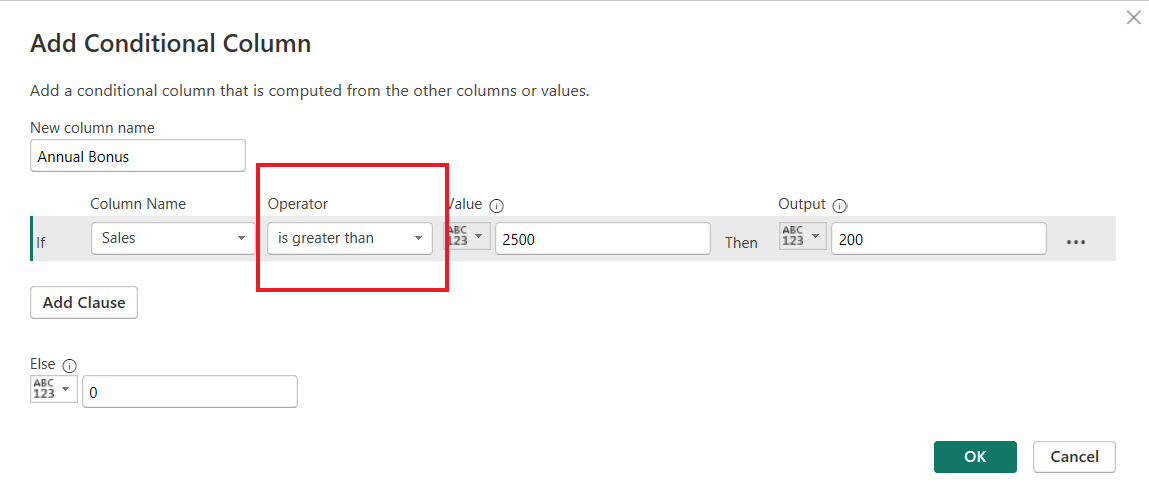
5) Select the required comparison operator (e.g., equals, greater than, less than, etc.)
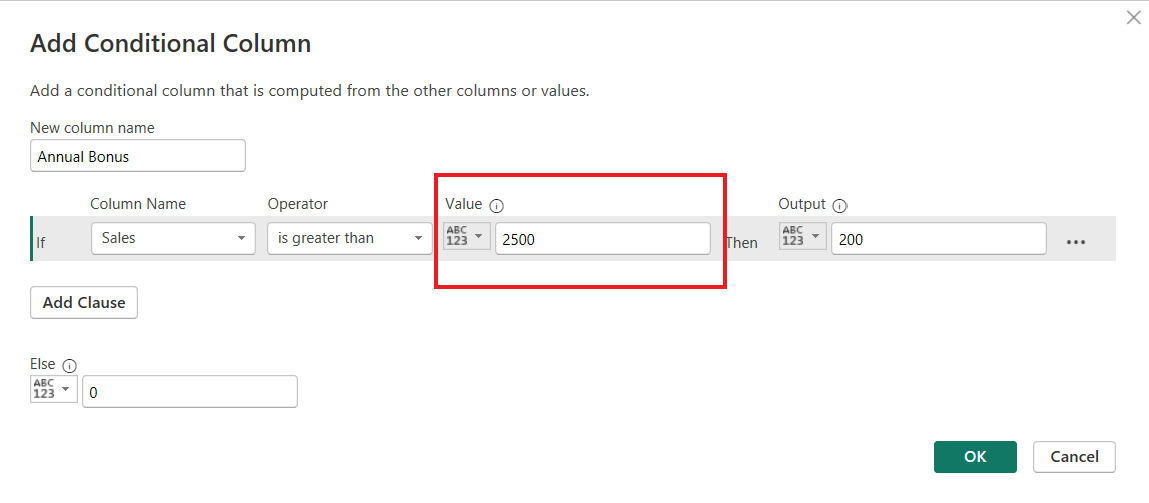
6) Specify the value or condition to compare against
7) Enter the output if the condition is true under the Output field.
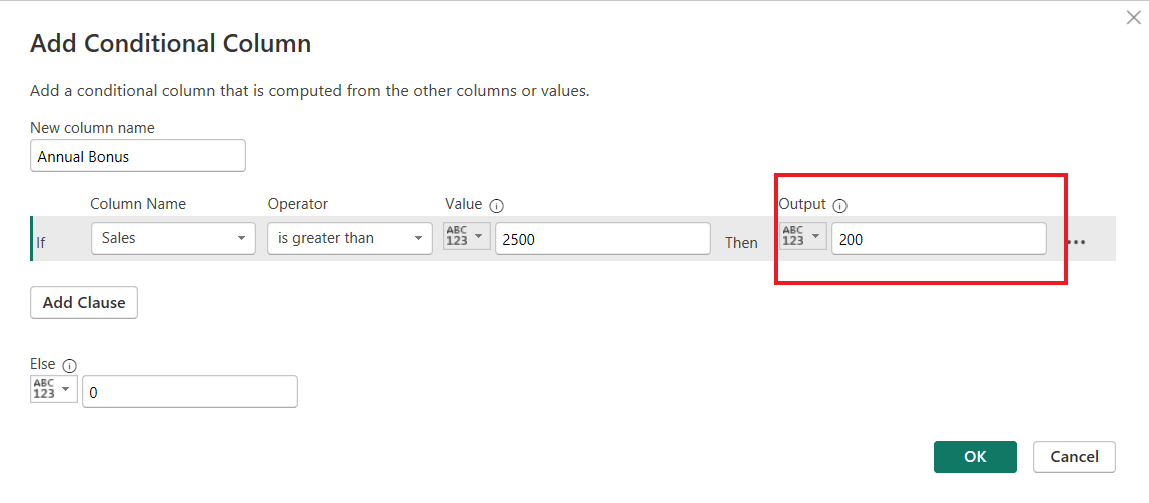
8) Enter the output if the IF statement condition is false under the Else statement.
9) Click ‘OK’ to create your new conditional column.
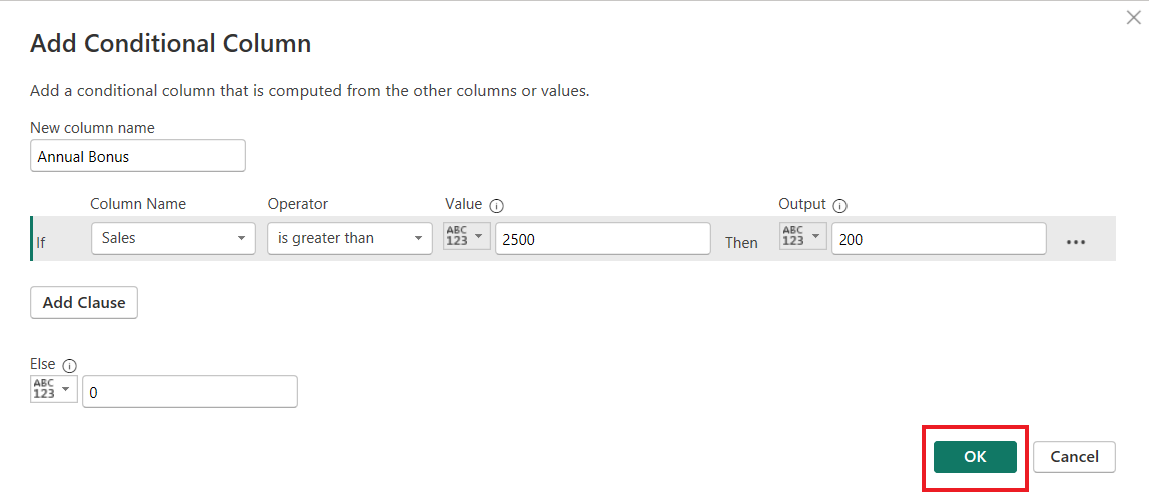
The new conditional column will be added to your data set.

Keep in mind that you can also use more advanced logic with nested IF statements or multiple conditions in your expression.
Working with Nested If Statements in Power Query
When working with Power Query’s custom columns, it’s common to encounter scenarios that require more complex decision-making.

Nested If statements provide a way to handle multiple conditions and apply different actions based on those conditions.
How to Create Nested If Statements
To create nested If statements, you first define an initial If statement and within that statement, incorporate additional If statements as needed.
Remember to close each If statement with a matching “else” clause for seamless execution.
Here’s a basic example of a Nested IF statement:

= if [Column1] > 50 then "Above 50"
  else if [Column1] > 30 then "Between 30 and 50"
  else "Below 30"
This expression will check if the Column1 value is above 50; if so, it will output “Above 50.” If not, it proceeds to the next condition and checks if the value is above 30.
If it meets that condition, it outputs “Between 30 and 50.” If neither condition is met, it outputs “Below 30.”
How to Apply Functions in Nested If Statements
You can further enhance nested If statements by applying Power Query functions within the conditions. This allows you to manipulate data based on the specified criteria and provide a more informative output.
For instance, consider a case where you want to apply different text transformations based on the initial character of a value in Column2.
You can use nested If statements along with text functions like Text.Upper, Text.Lower, and Text.Proper.
Here’s an example:
= if Text.StartsWith([Column2], "A") then Text.Upper([Column2])
  else if Text.StartsWith([Column2], "B") then Text.Lower([Column2])
  else Text.Proper([Column2])
In this example, if the first character in Column2 is “A,” the output will transform the entire text into uppercase.
If the first character is “B,” the output will transform the text into lowercase.
If neither condition is met, the output will capitalize the first letter of each word using the Text.Proper function.
Power Query Editor: Column Management
In this section, we will discuss how to manage columns in Power Query Editor by adding custom columns and conditional columns.
By leveraging these features, you can manipulate and transform your data to suit your needs.

How to Add Custom Columns
Adding custom columns in Power Query Editor allows you to create new columns using the Power Query M formula language.
This gives you more flexibility and control over your data compared to using built-in columns.
To add a custom column, follow these steps:
1) Import data into your Power BI.
2) Launch Power Query Editor by selecting Transform Data in Power BI Desktop.
3) In the Power Query Editor window, navigate to the Add Column tab on the ribbon.
4) Select Custom Column.
The Custom Column window will appear.
5) Enter your desired column name and write a formula using the Power Query M formula language.
6) Click OK to add your custom column.
How to Add Conditional Columns
Conditional columns allow you to create new columns based on specified conditions using the if/then/else logic.
This is particularly useful when you want to categorize or filter data based on certain criteria.
To add a conditional column, follow these steps:
1) Launch Power Query Editor by selecting Transform Data from the Home tab in Power BI Desktop.
2) In the Power Query Editor window, navigate to the Add Column tab on the ribbon.
3) Select Conditional Column. The Add Conditional Column dialog box will appear.
4) Enter your desired column name, the condition, and specify the output value when the condition is met.
You can also develop Nested IF statements by adding as many conditions as necessary with different output values.
5) Click OK to add your conditional column.
Real-World Examples
In this section, we will look at some real-world examples of power query if statements that will help you better understand correct use cases.

1) Data Analysis and Insights
In your data analysis process, you may often require the use of an IF statement in a Power Query custom column to perform conditional operations.
This allows you to perform comparisons using comparison operators and logical operators while analyzing your data.
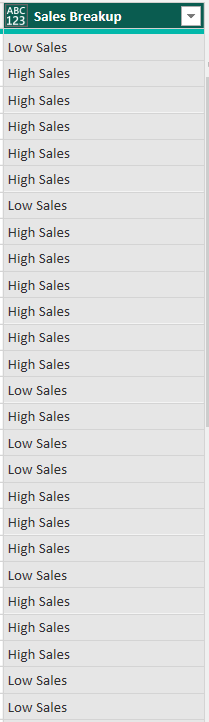
For instance, let’s assume your example file contains sales data, and you want to classify it based on a condition: if the sales amount is greater than 2500 USD, you want to label it “High Sales,” and if not, label it “Low Sales”:
= if [Sales] > 25000 then "High Sales" else "Low Sales"Create a new Custom and apply the above formula.
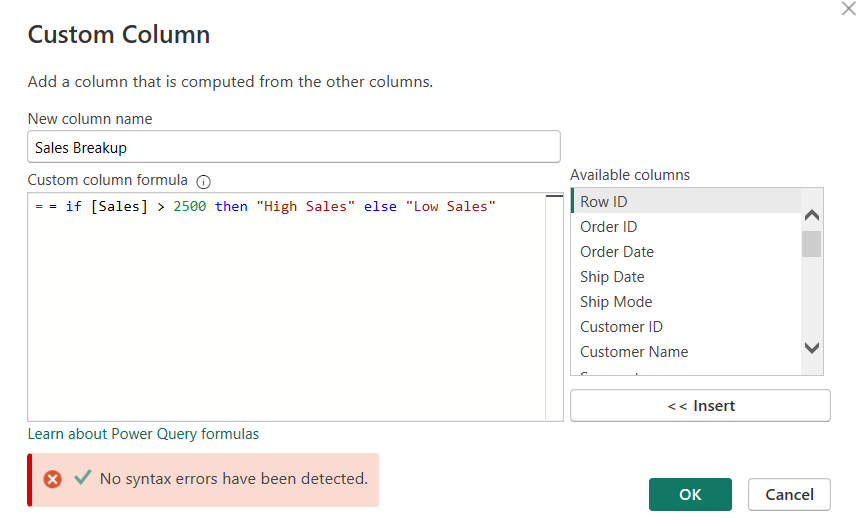
By using an IF statement in a custom column like this, you can effectively categorize your data and gain valuable insights into your sales performance.
2) Creating Pivot Tables
Following the analysis, you might want to create a pivot table to summarize the findings. In this case, you can utilize the custom column with IF statements in Power Query as a new measure or calculated field within the pivot table.
For example, you could create a Pivot Table report to track sales performance in different regions.
First, use the custom column to label the sales data as “High Sales” or “Low Sales” as described in the previous section.

Select the custom column and click OK.
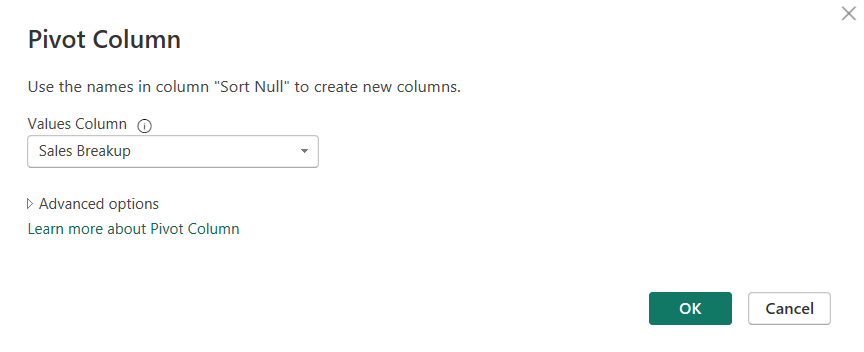
Your pivot table will display the aggregated sales by region and classification, allowing you to easily identify trends and make data-driven decisions.
Advanced Conditional Logic
In this section, we will look at some advanced conditional logic statements. The if statement is highly flexible and allows you to embed more complex logic into the statements.

1) Using AND, OR, and NOT Statements
In Power Query, you can use AND, OR, and NOT statements to enhance your conditional logic.
The IF function can be combined with these logical operators to handle multiple conditions for a custom column.
For example, to create a column that categorizes orders based on quantity and price:
if [Quantity] > 10 and [Price] > 100 then "High Value"
else if [Quantity] > 10 or [Price] > 100 then "Medium Value"
else "Low Value"
In this example, we used AND to check for two conditions simultaneously, and OR to satisfy either one of two conditions.
2) Dealing with Blanks and Nulls
When working with Power Query, you may encounter situations where your data contains blanks or null values.
To handle these, you can use conditional logic to customize the handling of such rows.
For example, to create a column that checks for blank or null values and displays a default value:
if [Column1] = null or Text.Trim([Column1]) = "" then "Default Value"
else [Column1]
In this case, we used the null keyword and the Text.Trim() function to check for blank values. By applying these techniques, you can ensure your data is clean and handles special cases effectively.
Learn more about OpenAI’s code interpreter to enhance your Data Analysis and BI reports by watching the following video:
Final Thoughts
In this article, you have learned about utilizing Power Query’s custom column and IF statement features.
By incorporating conditional columns, you are now equipped to handle complex data transformations with ease and efficiency. Power Query enables you to carry out custom calculations based on multiple conditions using logical operators such as AND, OR, and NOT, which greatly enhances your data analysis capabilities.
When working with Power Query, remember to adhere to its specific syntax and functionality. This will enable you to streamline your workflow while maintaining accuracy and consistency throughout your data processing tasks.
As you continue to gain experience, you will find that using the power of conditional logic and custom columns will be an invaluable tool for analyzing and understanding your data sets.
Frequently Asked Questions
In this section, you’ll find some frequently asked questions you may have when working with the power query custom column if statement.

How do you write an if statement in the Power Query custom column?
To write an if statement in the Power Query custom column, you can use the “if…then…else” syntax. Here’s a concise example:
- In Power Query Editor, select the column where you want the custom column to be added.
- Click on “Add Column” and choose “Custom Column” from the menu.
- In the Custom Column dialog box, enter your if statement, like:
if [Column1] > 10 then "High" else "Low". This will create a new custom column with values “High” for rows where Column1 is greater than 10, and “Low” for rows where it is not.
How do you add a column with if function in Power Query?
To add a column with an if function in Power Query, follow these steps:
- In Power Query Editor, select the table or query to which you want to add the column.
- Click on “Add Column” and choose “Custom Column” from the menu.
- In the Custom Column dialog box, use the if function syntax, like:
if [Column1] > 10 then "High" else "Low"This will create a new column with the calculated values based on the condition specified in the if function.
How do I change the formula in a custom column in Power Query?
To change the formula in a custom column in Power Query, follow these steps:
- In Power Query Editor, locate the custom column you want to modify in the query settings pane on the right.
- Right-click on the custom column header and select “Replace Values.”
- In the formula bar, edit the formula to your desired expression and press Enter to apply the changes. The custom column will be updated with the new formula results.
How do I add an if condition in Power Query?
To add an if condition in Power Query, you can use the “if…then…else” syntax within a step in the Power Query Editor:
- Select the column or step where you want to apply the if condition.
- In the formula bar, use the if function, like:
if [Column1] > 10 then "High" else "Low"This will evaluate the condition and return “High” if the value in Column1 is greater than 10, otherwise, it will return “Low.”
- Press Enter to apply the if condition and create a new step with the results based on the condition.
What is the Power Query if and conditions?
In Power Query, the “if” function is used to create conditional expressions.
It allows you to apply different actions based on a specified condition.
The “if” function follows the syntax:
if condition then value_if_true else value_if_falseYou can use “if” along with other logical functions like “and” to create more complex conditions by combining multiple criteria within a single statement.
For example:
if [Column1] > 10 and [Column2] = "Yes" then "High" else "Low"This would return “High” only when both conditions are met for the respective rows in Column1 and Column2.


