For today’s blog, I want to share my favorite feature inside the Power Query Editor, by far, which is the Column from Examples Power BI. You can watch the full video of this tutorial at the bottom of this blog.
When I look at my data sets now, I always think about how I can expand on them, add interesting information that’s going to help streamline what I want to evaluate or showcase in my reports, and clean up my reports, making them informative and digestible. All of these things can be easily achieved using the Column from Examples feature in Power Query.
I’ve got a really simple model here that I’m going to demonstrate this on. And to do this, you need to get to the Power Query Editor first by clicking on Transform data.

There’s obviously a lot of functionality that you can get from the query editor by right-clicking, using the ribbon, and a whole lot of options. But today, I want to explore the coolest feature in here – the Column from Examples. It has some built-in machine learning capabilities that Microsoft has recently embedded into the product.

I’m just going to run through a couple of examples just to show you how you can quickly use this feature and create lots of interesting columns and additional dimensions.
How To Use Column From Examples Power BI Query Feature
The Column from Examples feature is in the Add Column ribbon. You simply click on it and it brings you into this Add Column From Examples section.
For instance, I want to take the first four letters of each customer name and make them capital, which is going to be the code for each customer, accordingly. Instead of having to write out all that crazy logic in a formula, I can literally just start typing it out like so.
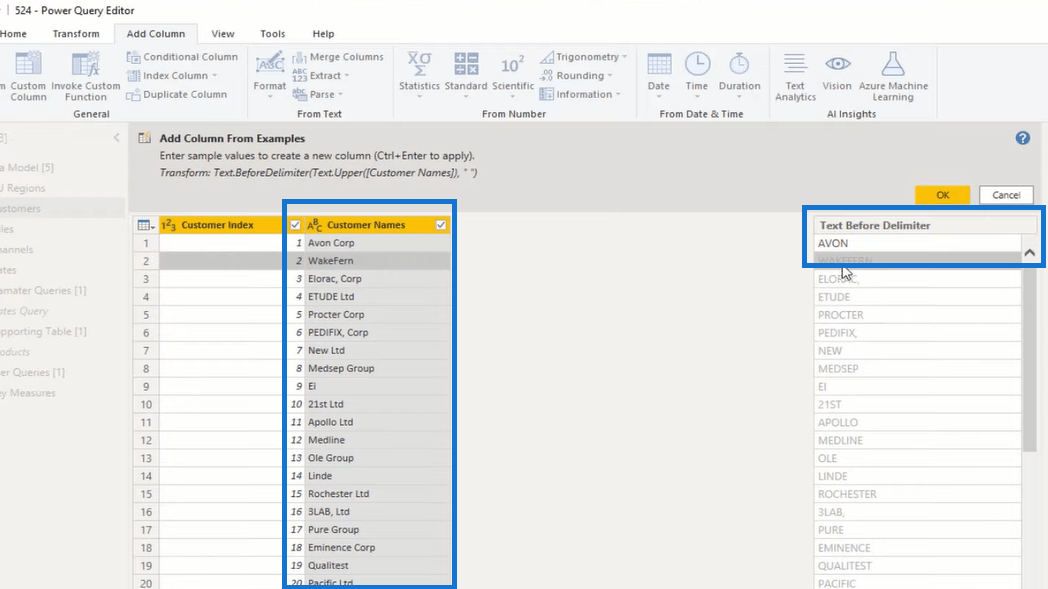
As you can see, it has not yet picked up the idea. It just grabs all the letters of the first name for the rest of the customers. But after I did the second one, you’ll notice that it now works out for me that I want only the first four letters or characters of the customer name.
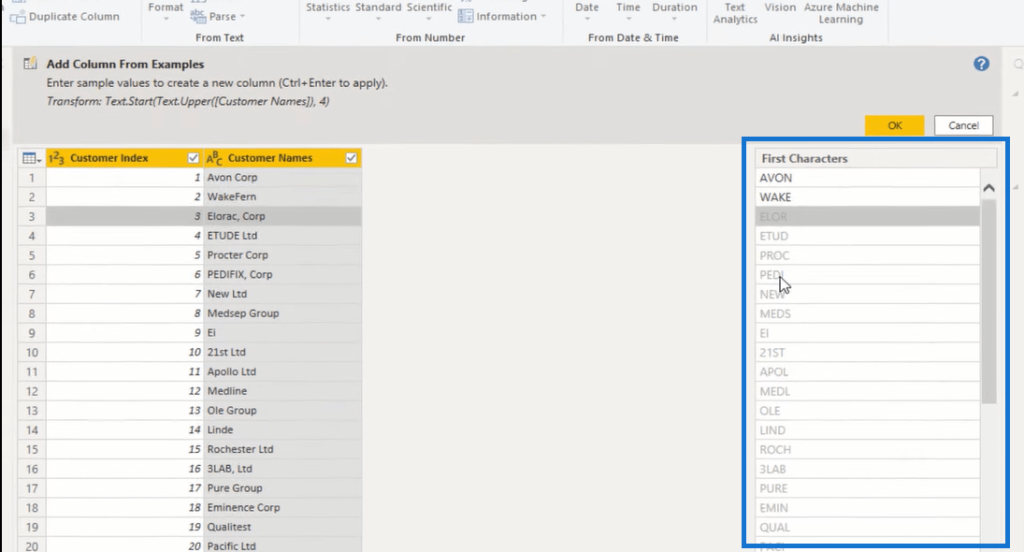
And just like that, I can change the column name to Customer Code, and I now have an additional dimension to my data set, which didn’t appear before.

From here, you can make more changes, if any. For example, you want to change the code, EI, you can just right-click on it and go to Replace Values.
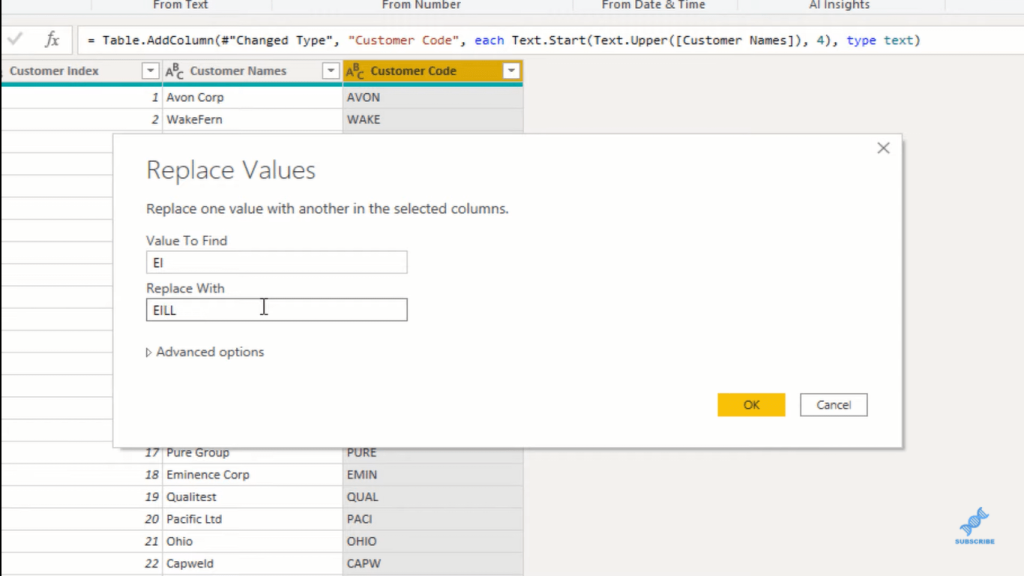
I can do the same with other columns. It quickly identifies for me the rest of the item codes.
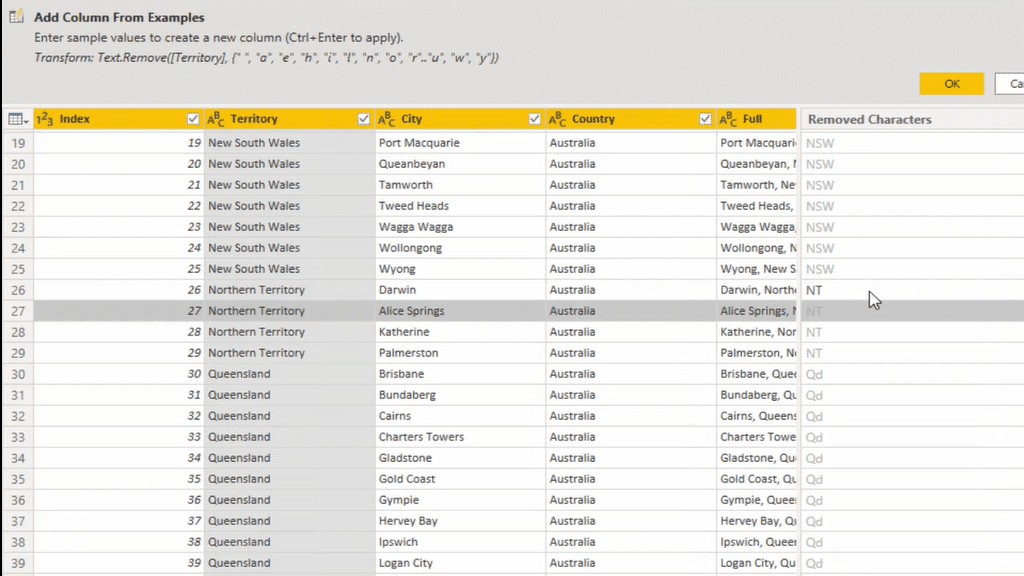
Furthermore, if I wanted to create a bar chart or a donut chart, etc. I don’t have to use the full name. I can just use the abbreviated code that I created in the new column.
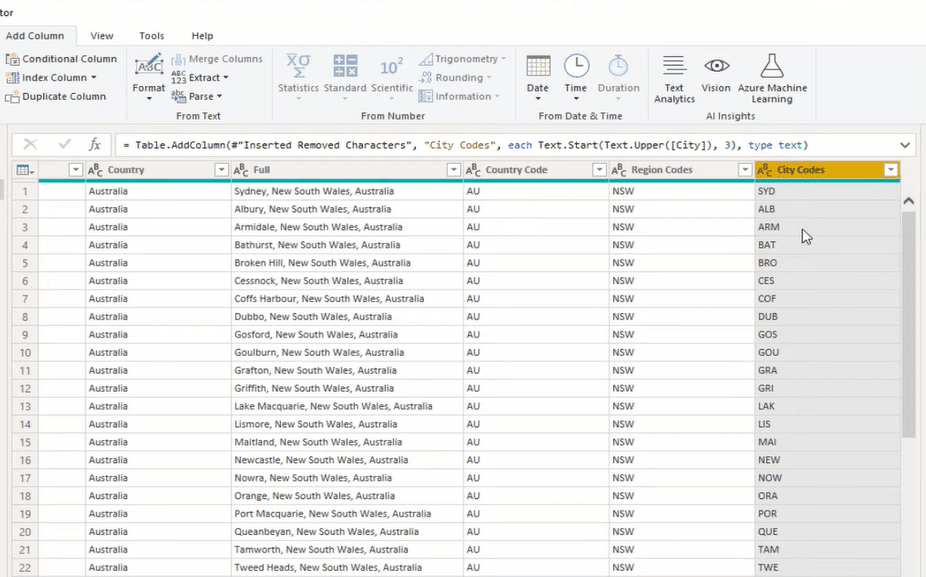
These are the things that I constantly look for in my lookup tables. I’m always looking for these opportunities to make things more concise for my consumer when I create my visualizations. Let’s say I want to create some city codes. The Column from Examples feature could quickly give me the codes for all these different cities. Instead of having these long names in my charts, I can now have an abbreviated code fast.
***** Related Links *****
How The Query Editor Works In Power BI
M Code In Power Query Custom Columns | Power BI
Power BI Unpivot Columns – Power Query Tutorial
Conclusion
These are just examples of what you can actually do with this amazing feature. I definitely recommend that you try and play around with it. It is by far my favorite feature inside Power Query. I use it a lot these days instead of writing out complex logic. I just get a lot of it done very quickly using this feature, as I’m optimizing my tables for my model.
This, to me, is the fastest way to do this. Think about the formula that you would have to write to try and figure that out or the logic that you need to create to achieve this. Just by typing it out, you’ll be able to get that additional dimension that you could use.
All the best!
Sam


