
I’m going to show you how to create a delimited list using the Power Query.
I came across this question in the Enterprise DNA Forum where a member wanted to create a list of products that each distinct customer bought. This can be easily done via the Power Query. You may watch the full video of this tutorial at the bottom of this blog.

How to Create a Delimited List
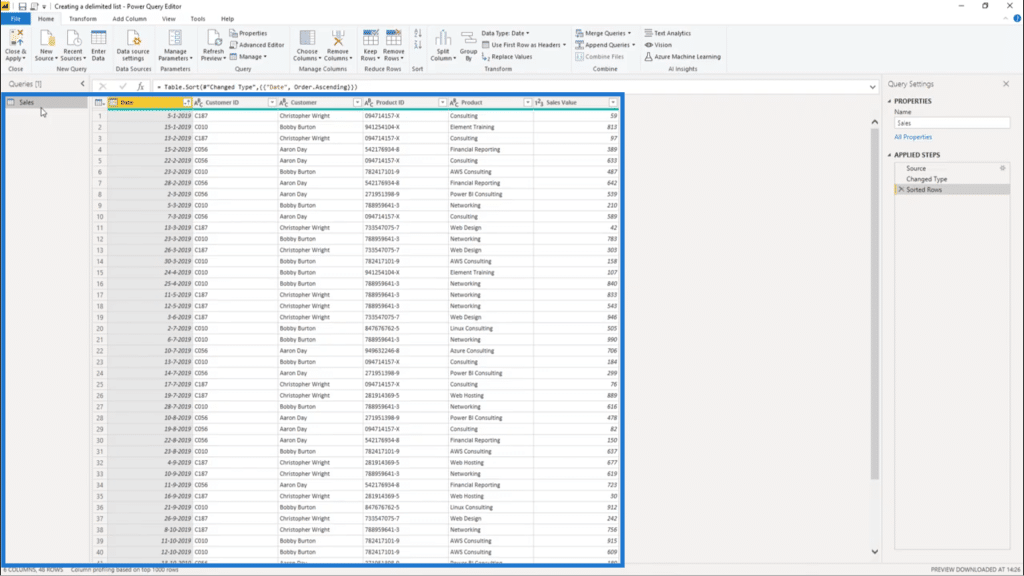
In the Power Query, the only table available is the Sales table.
I’m going to reference that by doing a right click on the table name in the right pane and selecting Reference.
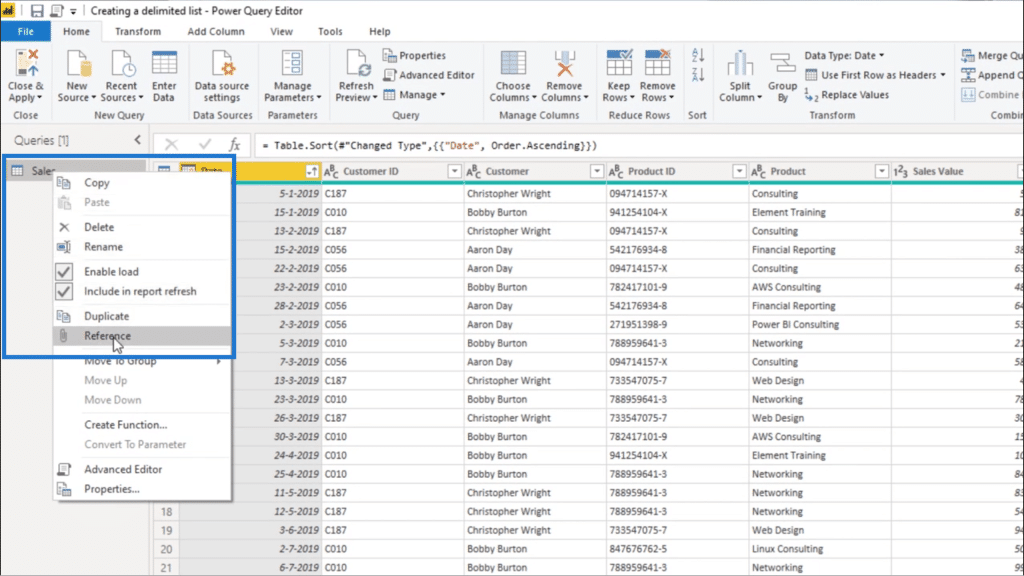
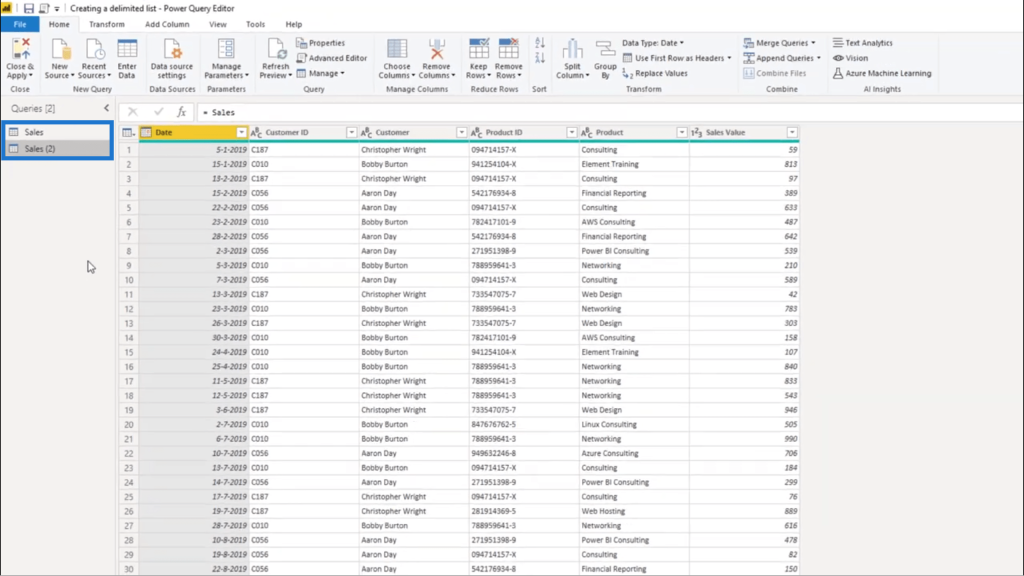
Referencing the Sales table will give me an exact copy of the original table.
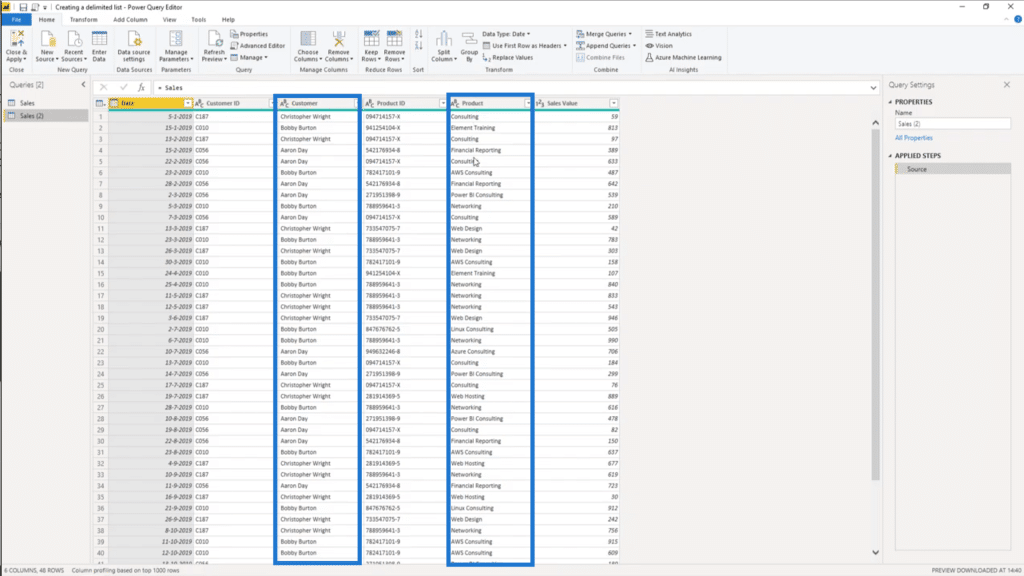
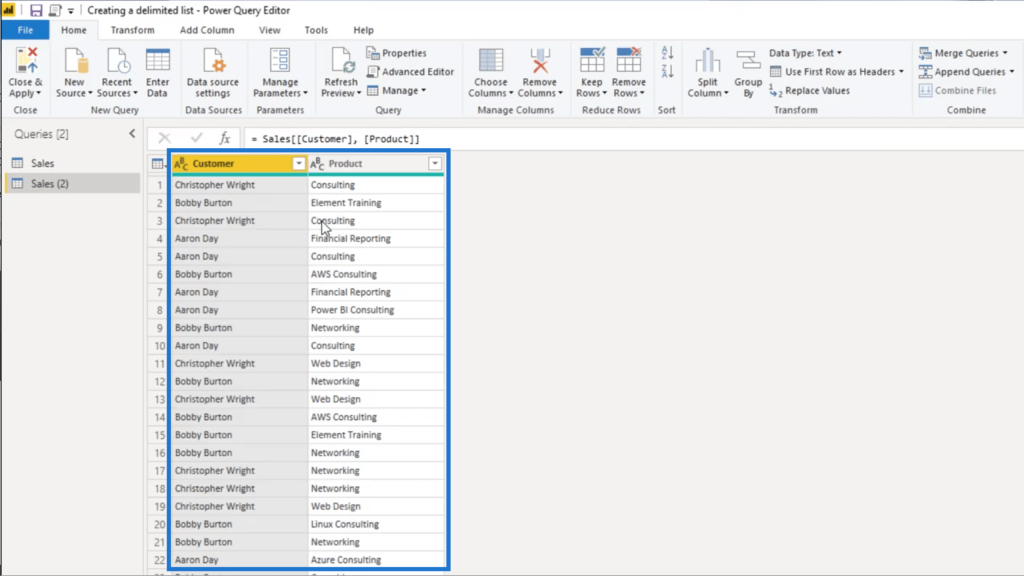
From this duplicate, I only need the Customer column and the Product column.
So I’m going to reference those two tables in square brackets in my measure.
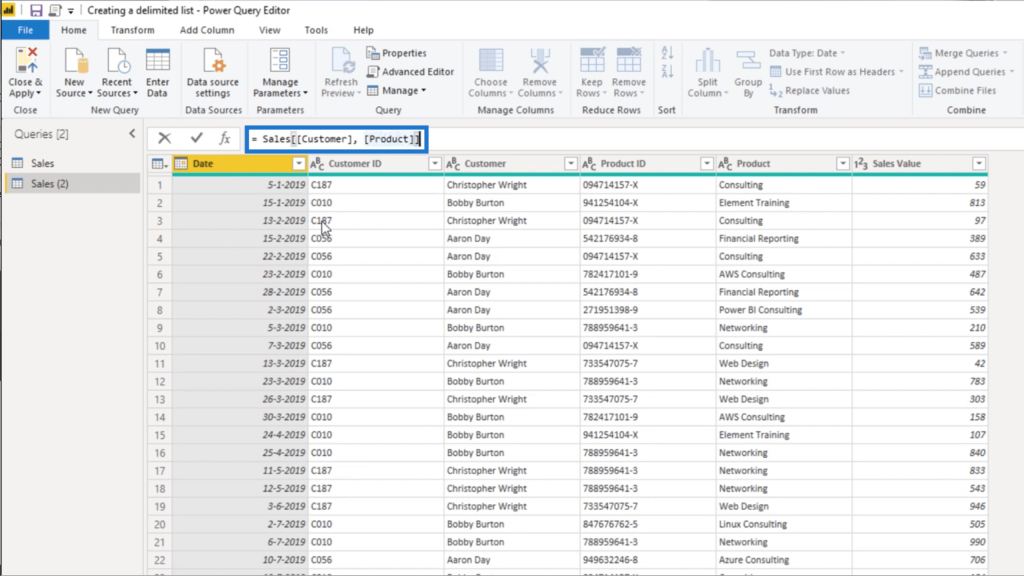
Once I press enter, I’ll end up with a table that only contains those two columns.
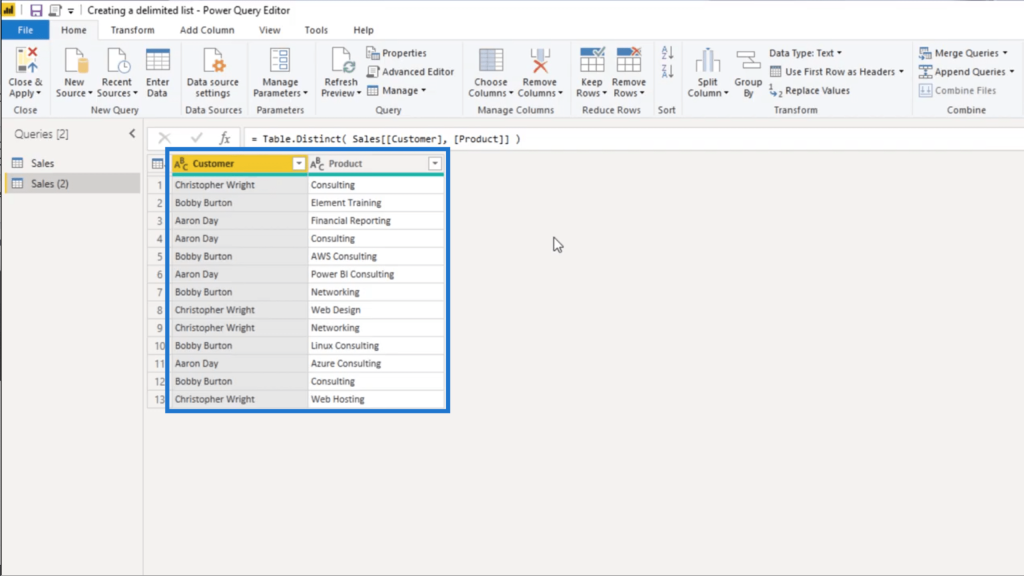
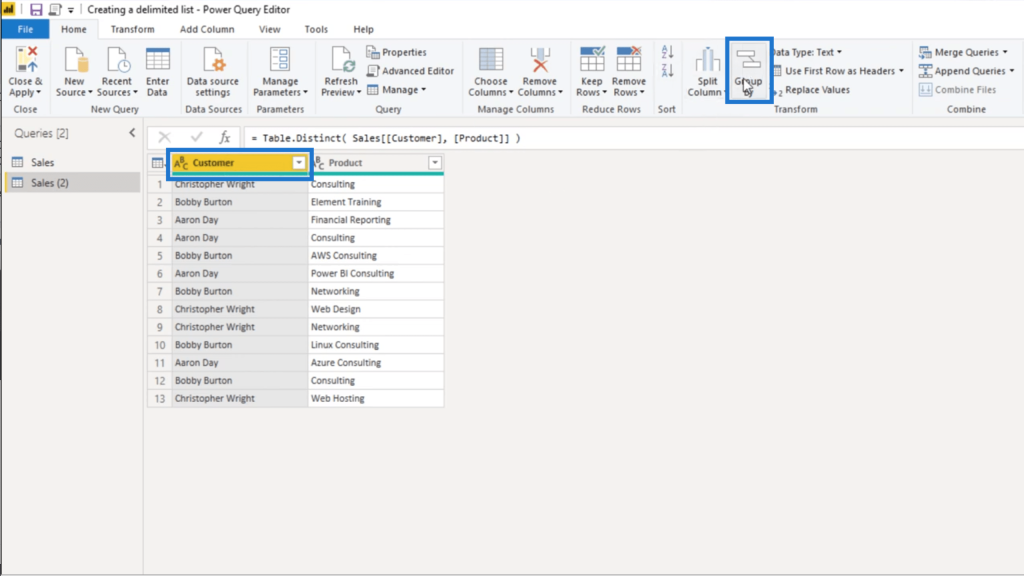
Since there are duplicate values in these columns, I’m going to add Table. Distinct to my measure. This means that I only want distinct values to show up on my table.

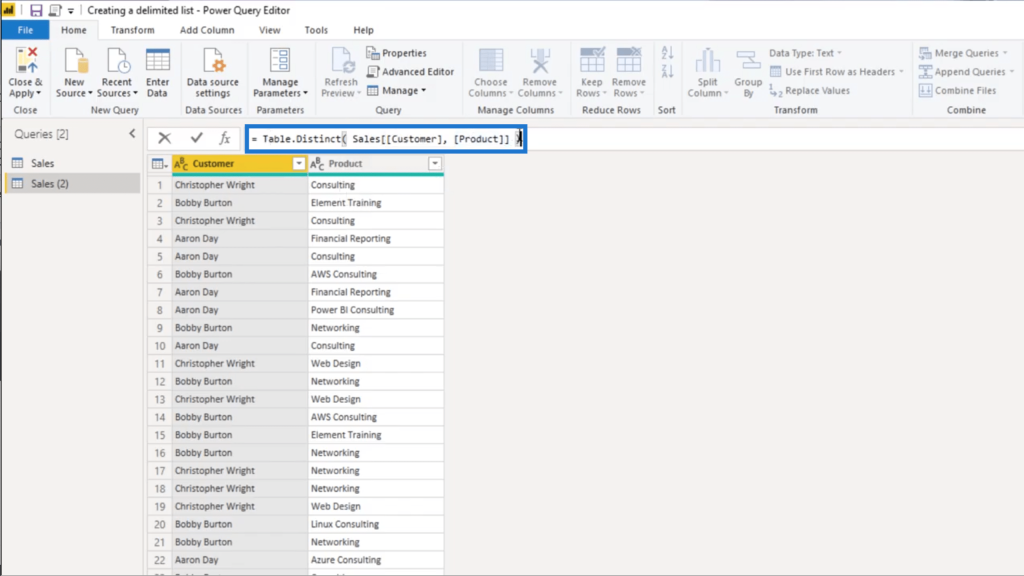
This leaves me with a much smaller table that only shows a distinct combination of each customer and product.
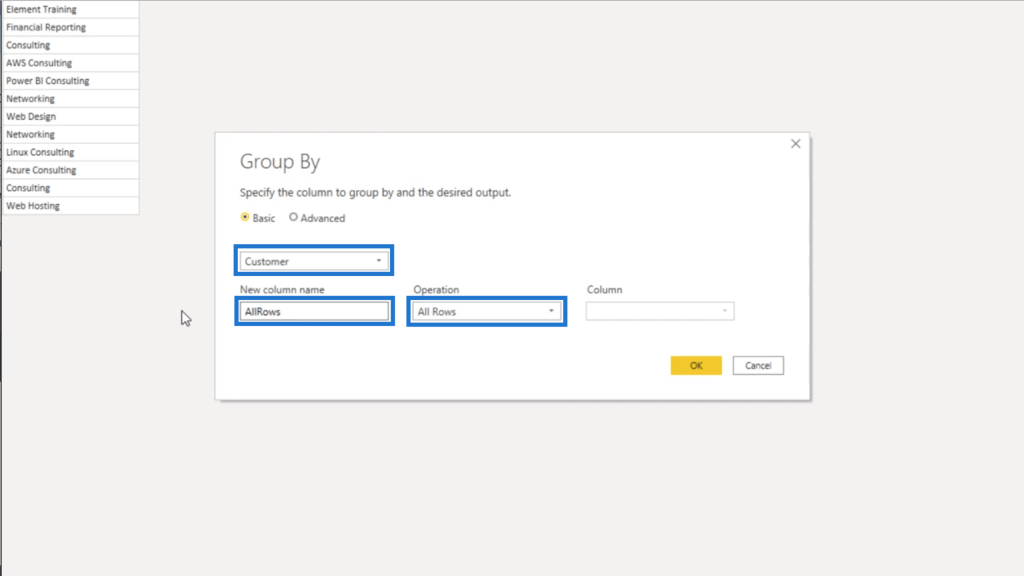
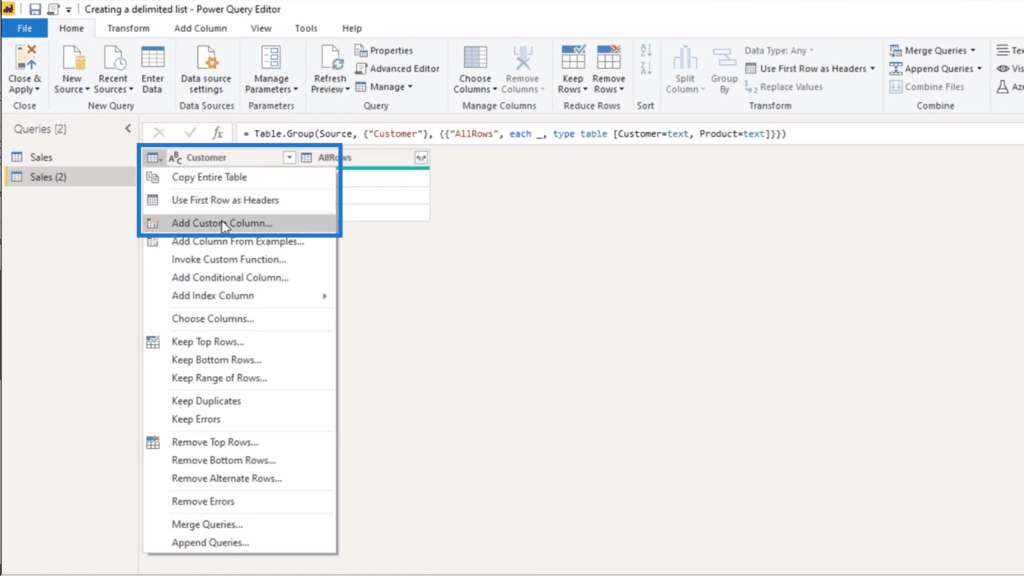
To create a list of products by customer, I’m going to click on the Customer column to highlight it, then click on Group by under the Home ribbon.
Since I highlighted the Customer column, that’s going to show up in the dropdown table automatically. I’m going to select All Rows under Operation, then I’m going to name this new column AllRows.
Once I press OK, I’ll end up with this nested table.
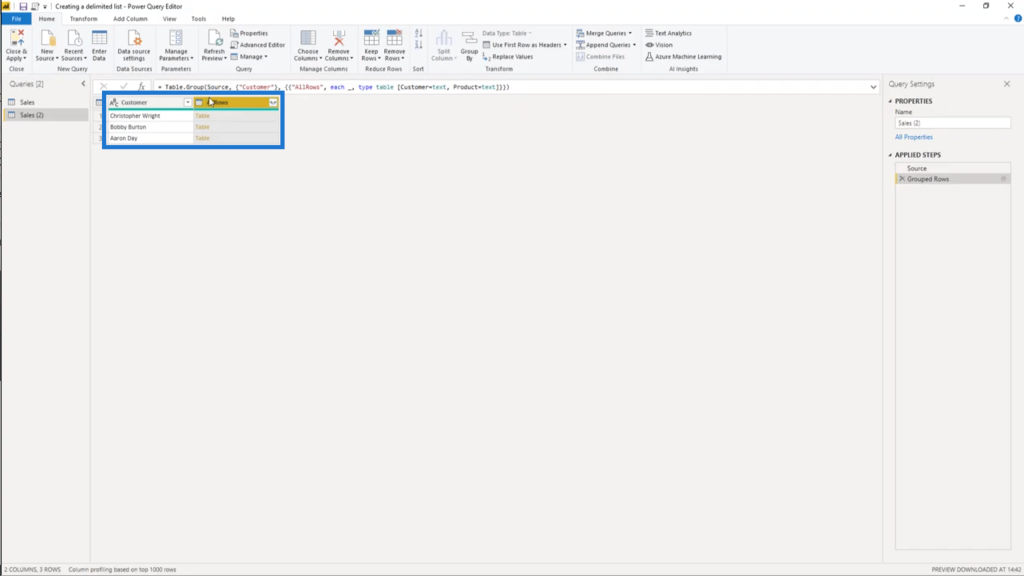
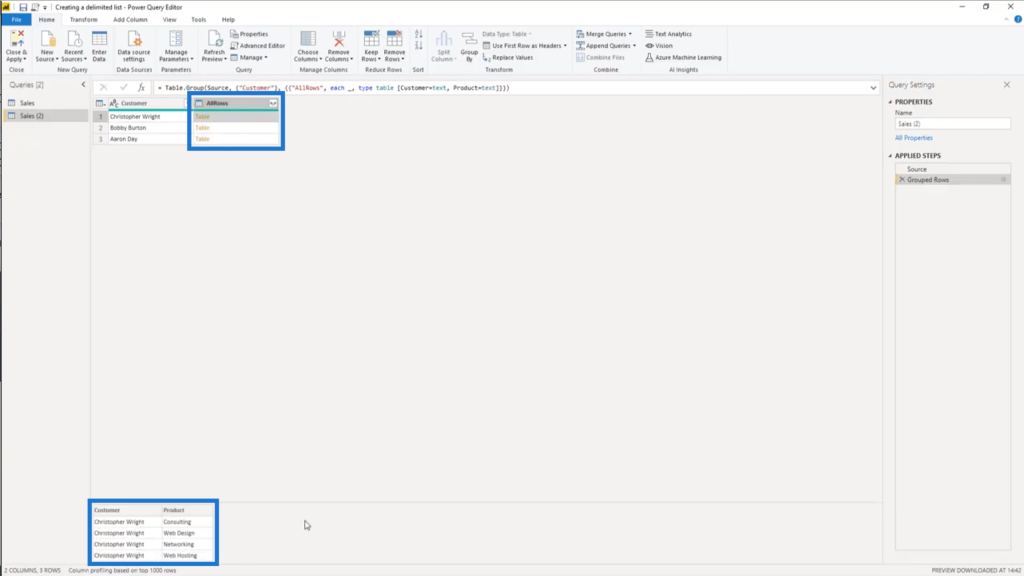
A nested table means that I have a table within a table. So if I click on any of the white spaces under the AllRows column (and not on the table object itself), I can see a preview of the table being referenced.
Now that I have a limited table for my unique customers, I’m going to extract the values from the product column.
So I’ll add a custom column.
I’ll rename this custom column to Products.
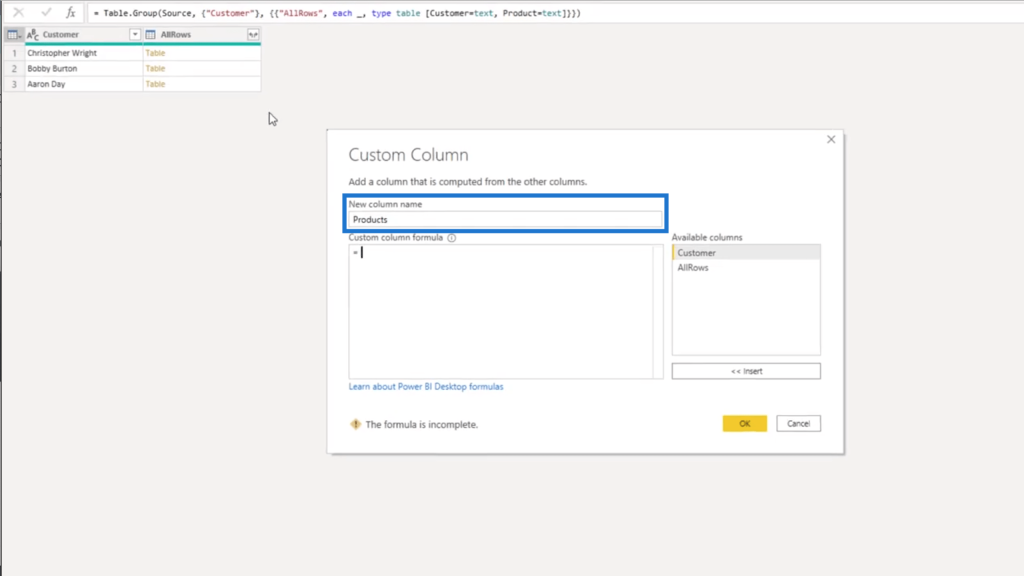
Next, I’m going to reference the AllRows column by choosing it on the list of available columns on the right. By doing this, the nested table will automatically show up in my custom column formula.
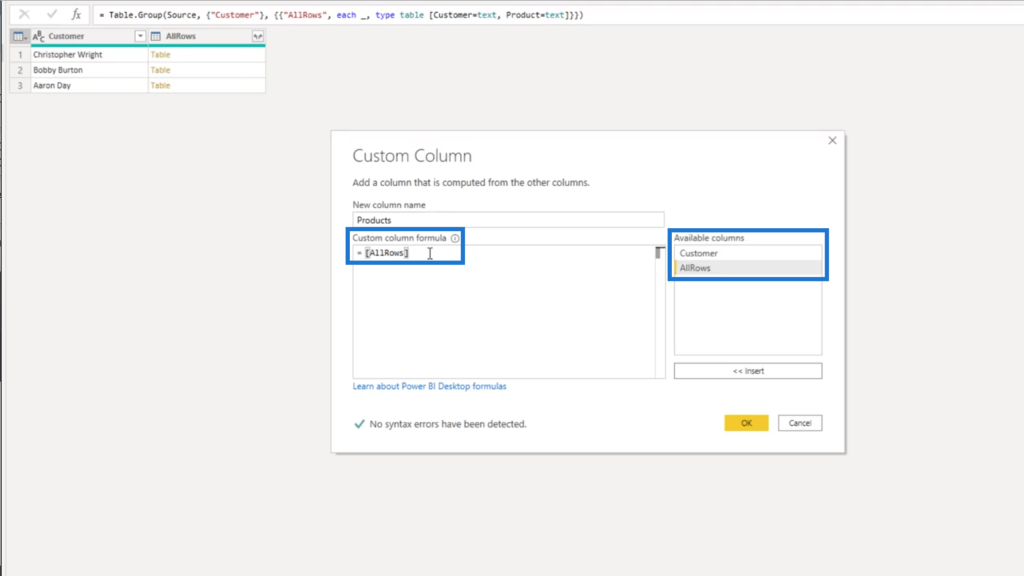
Since I only need my Product column from that nested table, I’m going to add that inside square brackets.
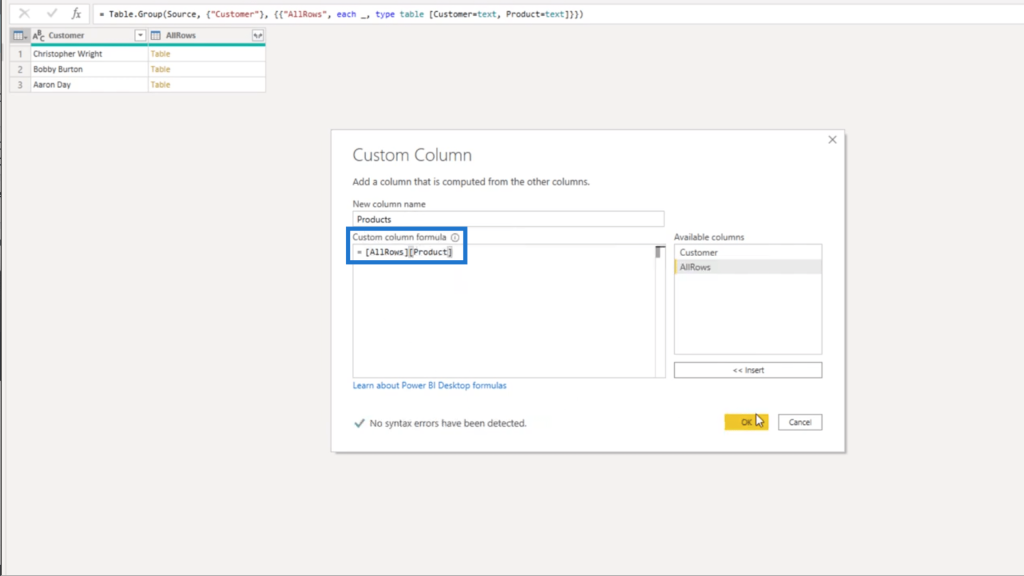
Once I press OK, the column will show up as a list object in my table. It shows up as a list object and not as a table object because I only chose a single column here.
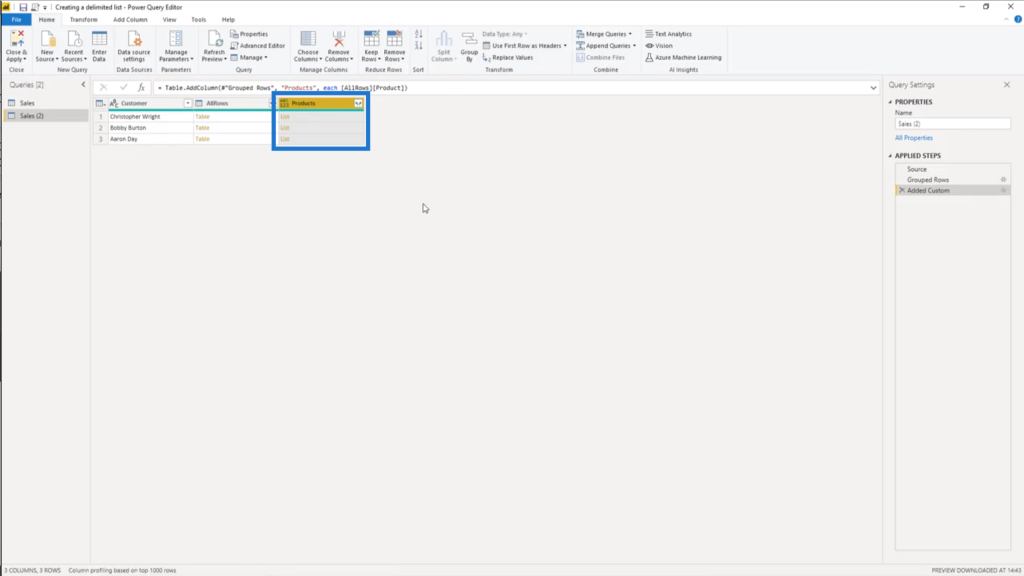
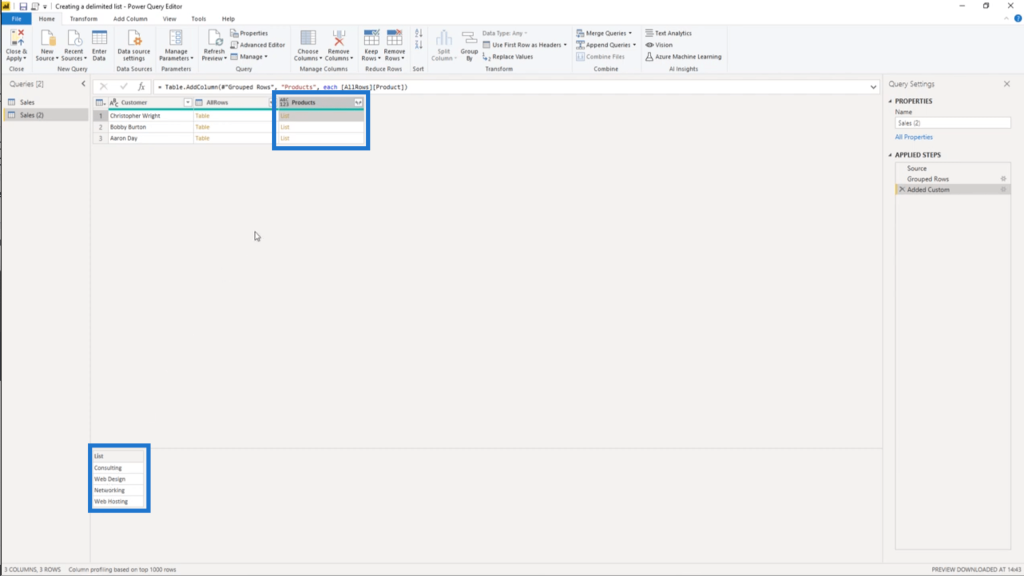
As with the AllRows column earlier, if I click on any of the white spaces in the Products column, I’ll see a preview of the product list at the bottom.
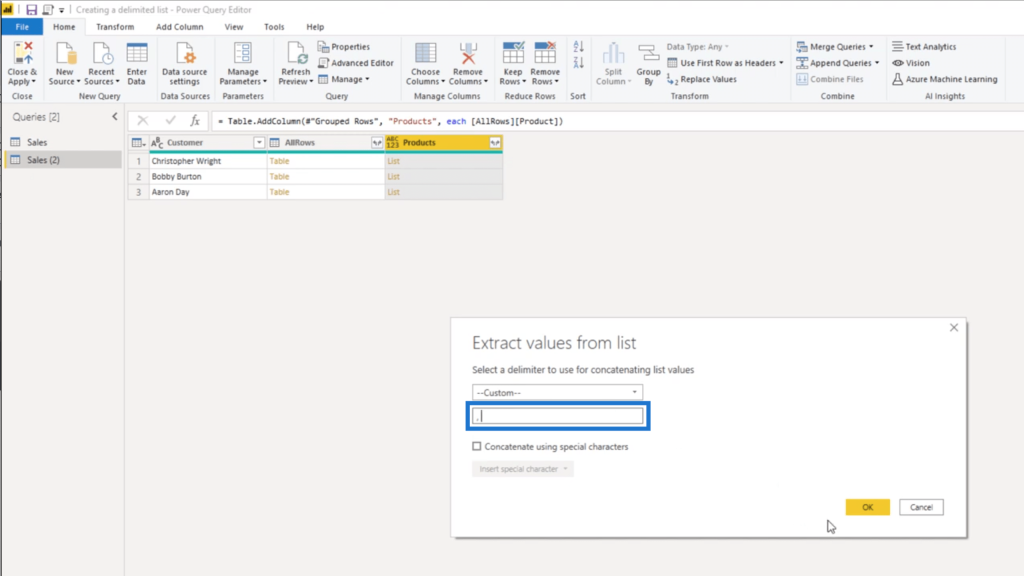
Now, look at the column name for the Products column. If I click on these sideward arrows, I get two options.
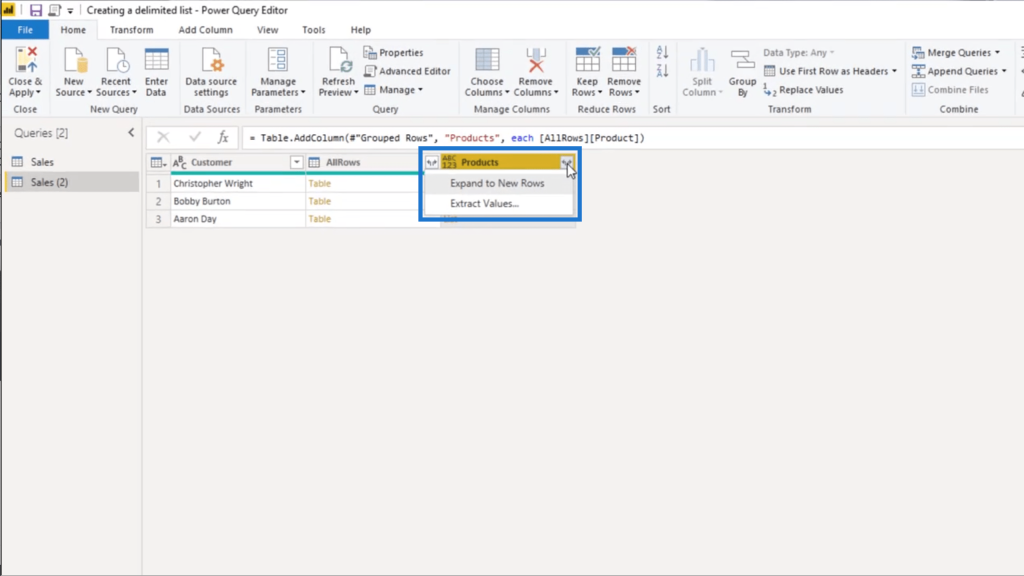
The first option says Expand to New Rows. This will only get me back to where I started because it will only add a new record on my table for each product on my list, and I don’t want to do that.
So I’m going to select Extract Values. This is where I can select a delimiter. I’m going to select Custom in this scenario.

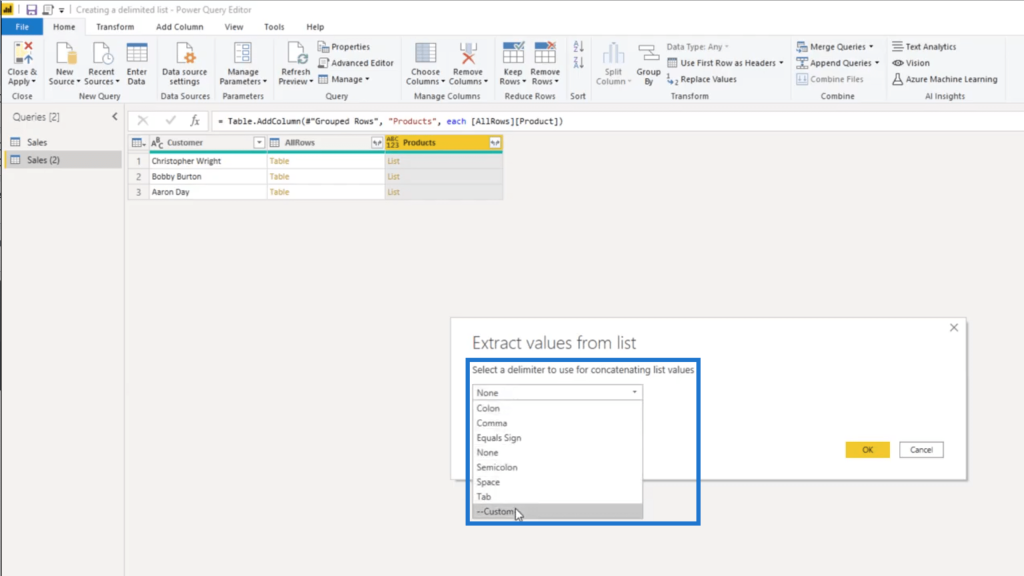
I’ll just enter a comma and a space as my custom delimiter.
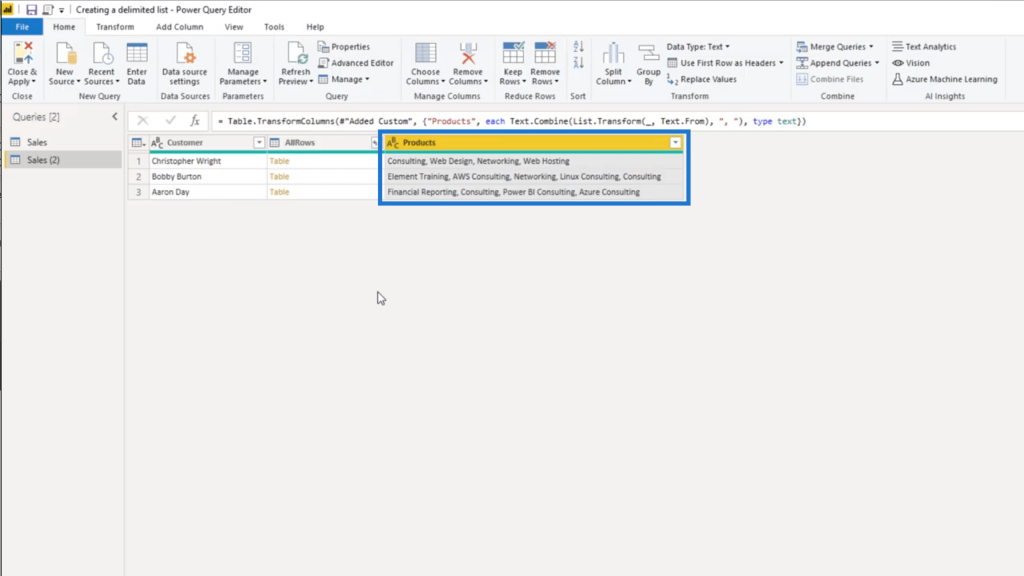
Once I press OK, I’ll have a list of products bought by each customer.
***** Related Links *****
3 Ways To Combine Values Using DAX Inside Power BI
Power BI Customer Segmentation: Showcasing Group Movement Through Time
Power BI Query Parameters: Optimizing Tables
Conclusion
A delimited list is a great way of displaying values in a straightforward manner. The key here is knowing what type of delimiter to use to make sure the values are displayed properly.
This only shows how flexible you can be within Power BI, especially when you’re using the Power Query.
All the best,
Melissa


