In this tutorial, we’ll learn how to set up an in Power Automate. There are times when flows can’t be fully automated and might require some user intervention.

Approvals are very useful because we can automate some part of the flow, and split the part that needs user intervention into its own separate flow.
For example, there could be a flow for an expense request. It will be processed through regular channels. However, someone still needs to look at it just to make sure that the amount makes sense. If it’s over a thousand dollars, the request should undergo approval before the flow continues.
In our discussion, we’ll have a different example. We’ll use this sample flow that sends out email when a new tweet is posted.

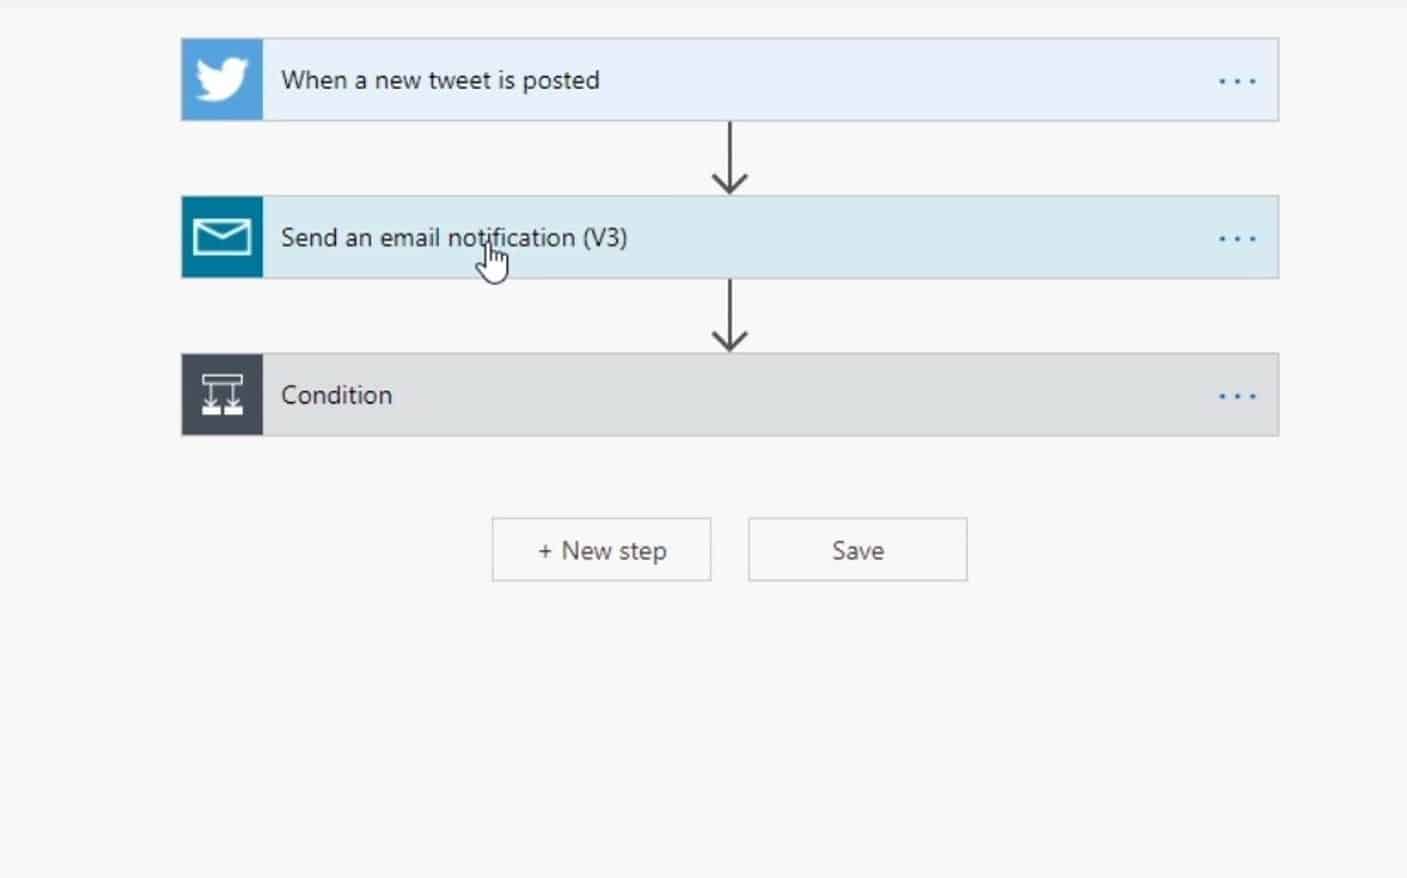
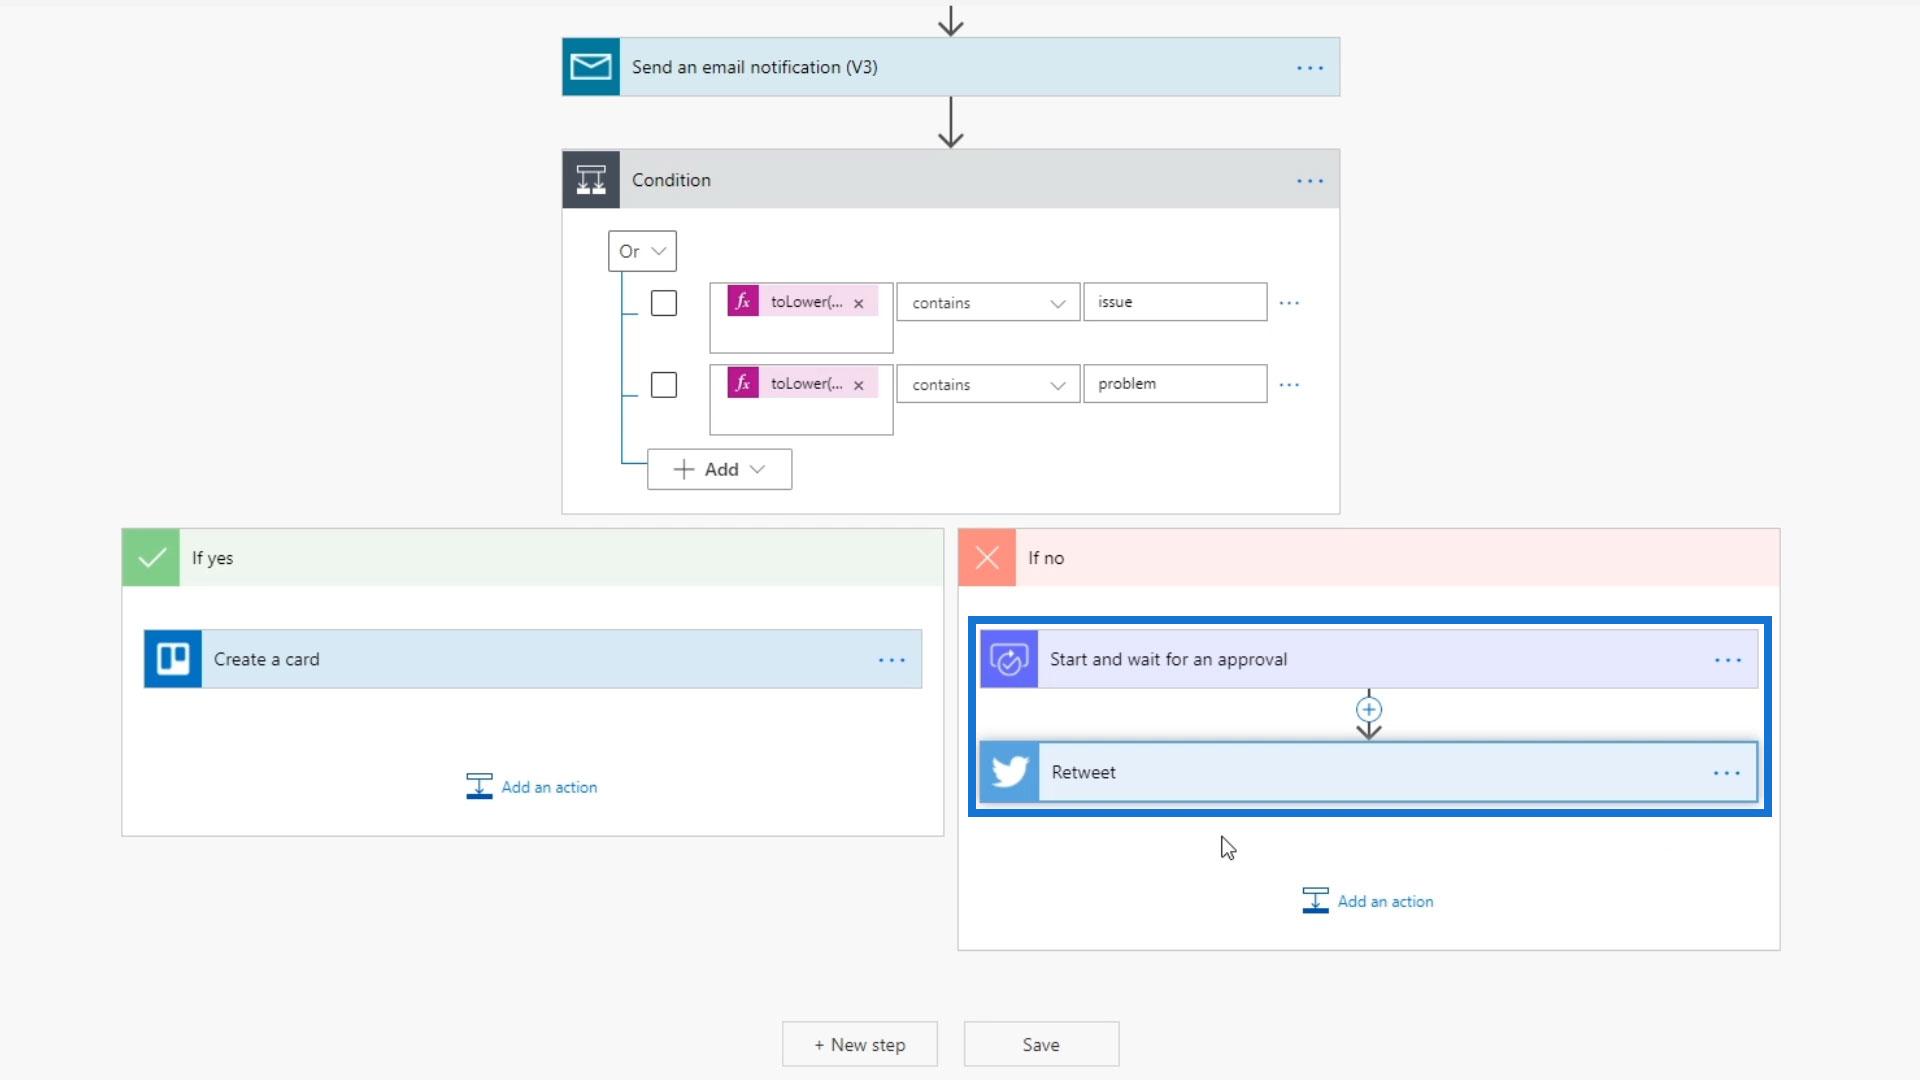
Then there’s a condition where if the item includes an issue or problem, it creates a Trello card. Otherwise, it retweets the tweet.
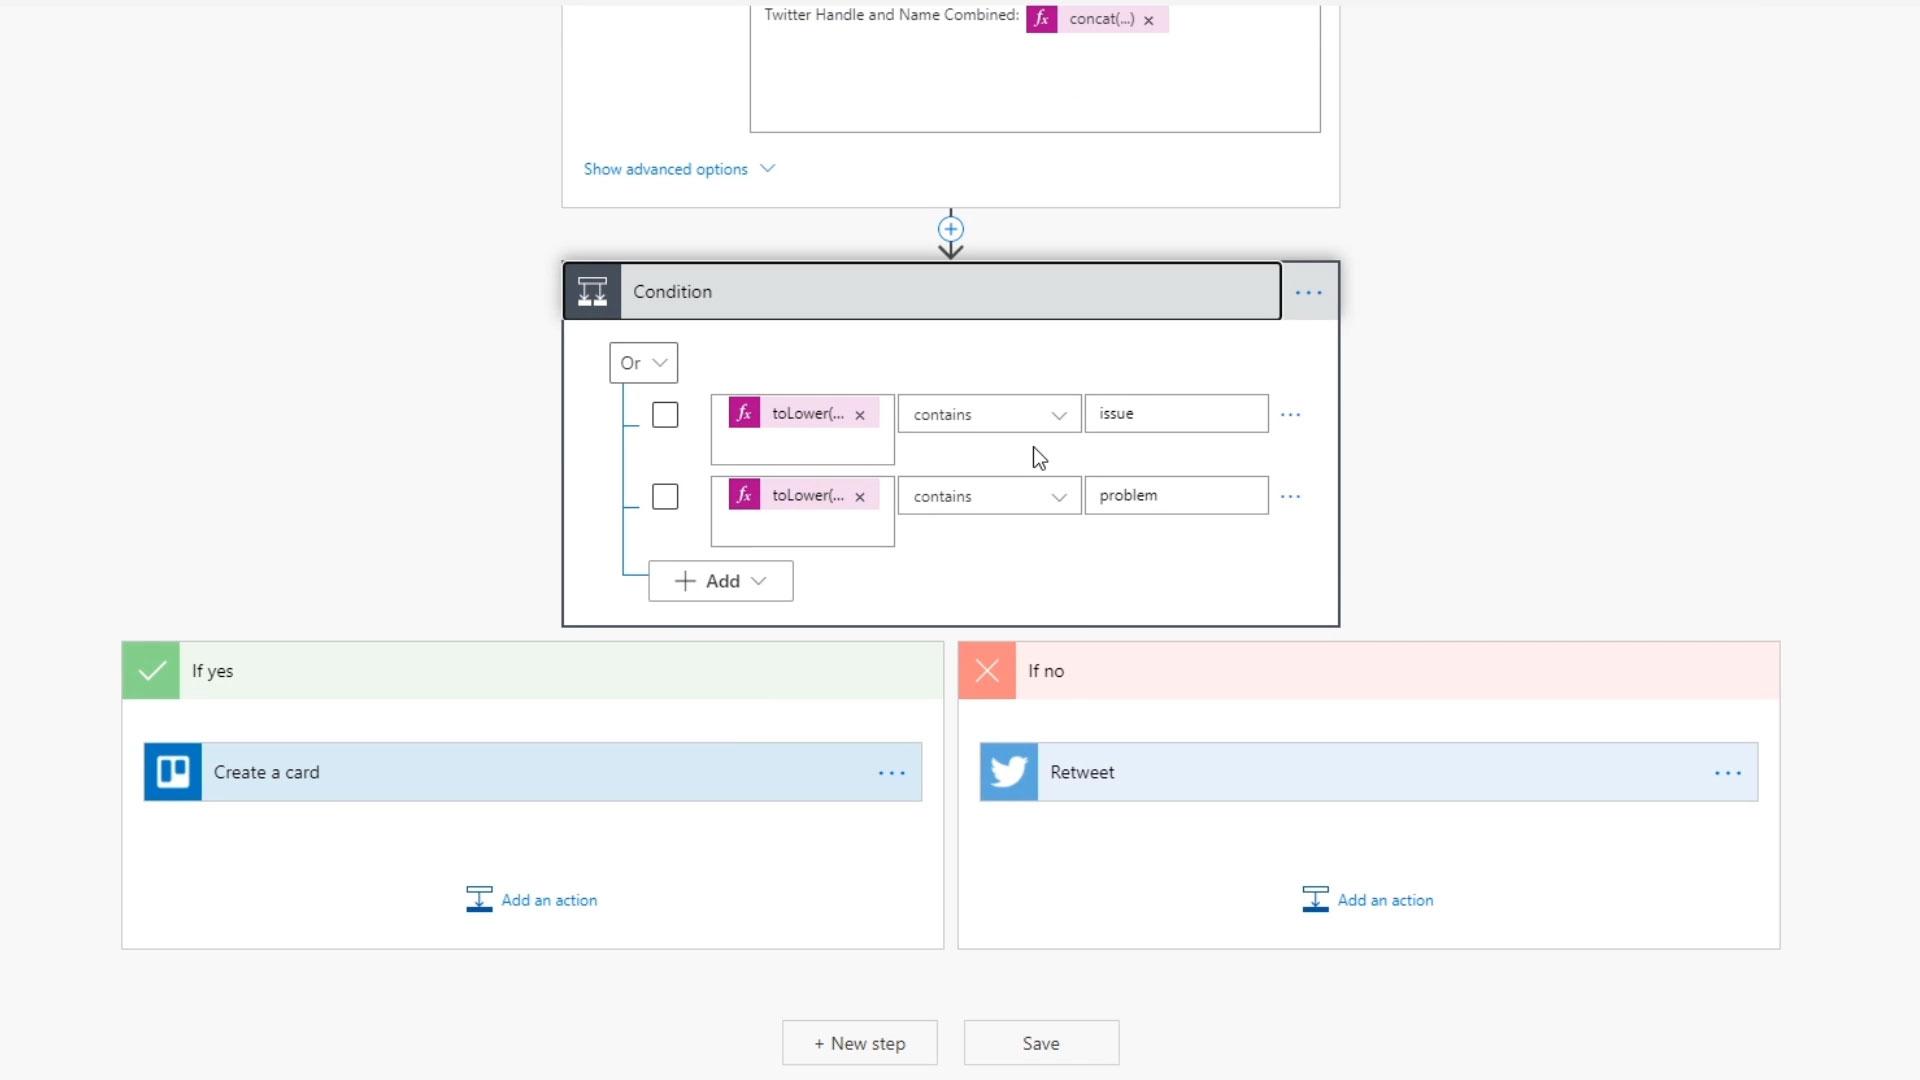
However, we might not want to retweet it until an actual human being approves it. Hence, we’ll put an approval right before it gets to the retweet step. The automated flow will actually pause when it gets to that point, and will continue once the user approves it.
Creating An Approval Workflow In Power Automate
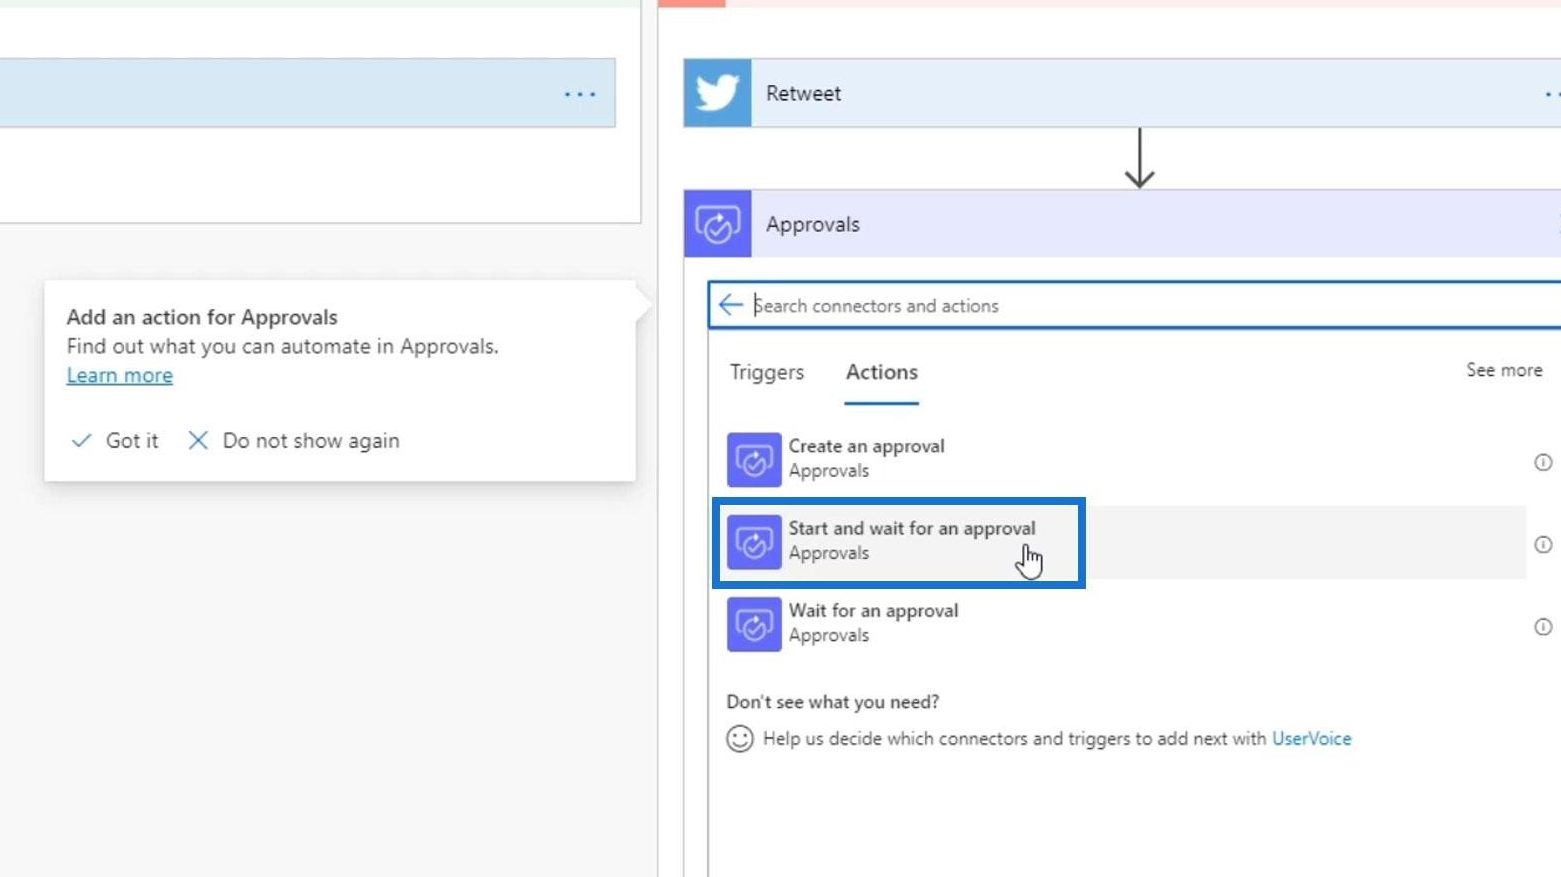
Let’s now create an approval workflow. First, we need to add an action.
Then, simply type in “approval” and click the Approvals connector that will show up.
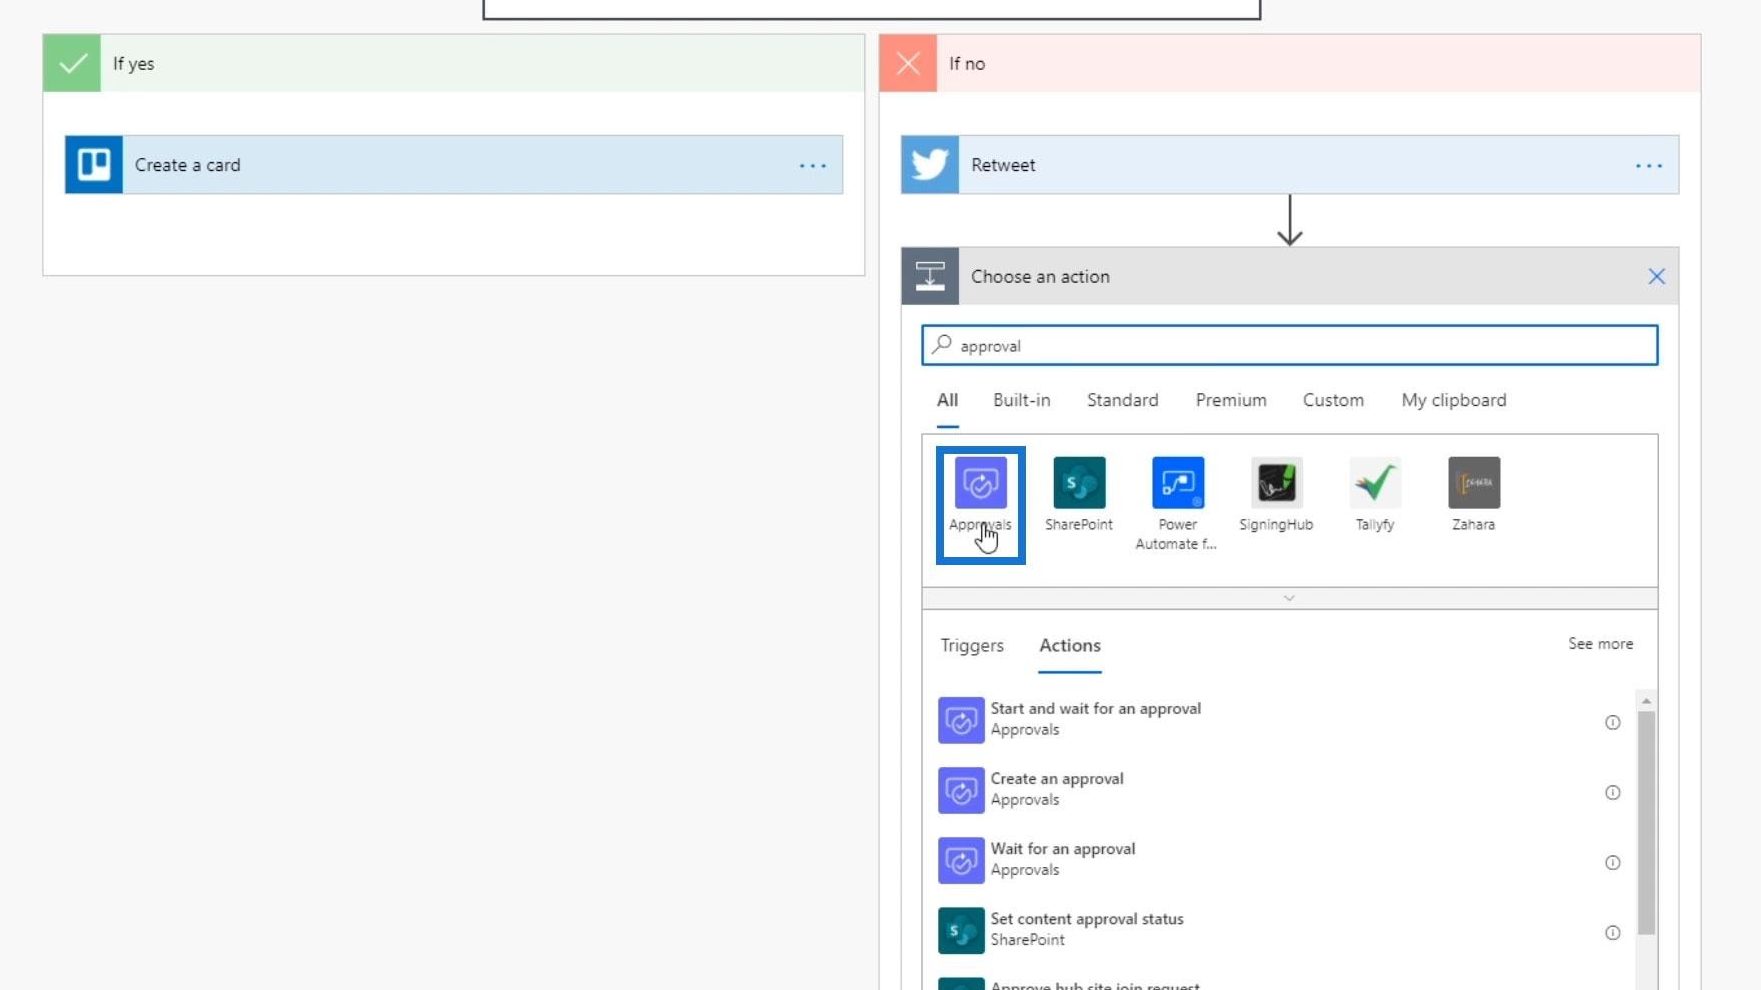
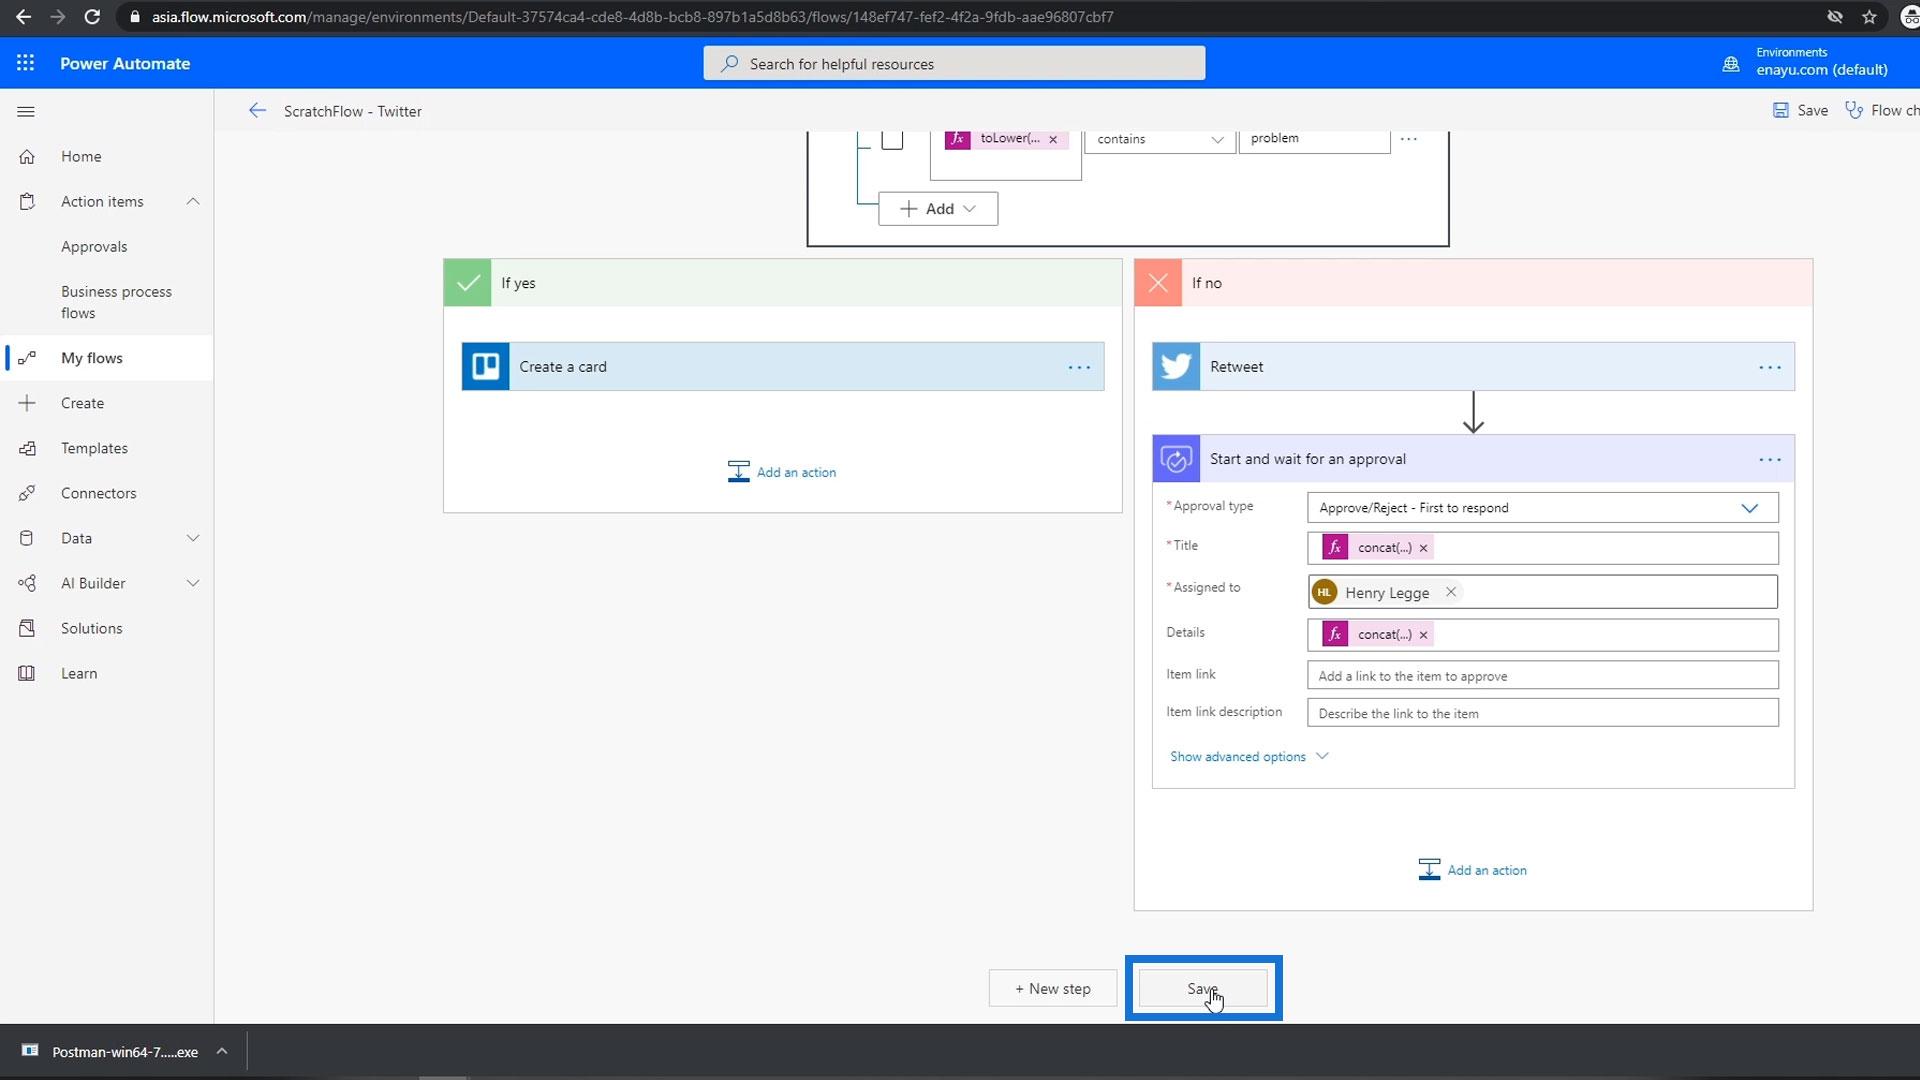
There are three different actions for this connector. You can either create an approval, wait for an approval, or combine those two things together (Start and wait for an approval). We’ll choose the second option because we want to both start and wait for an approval to go through.
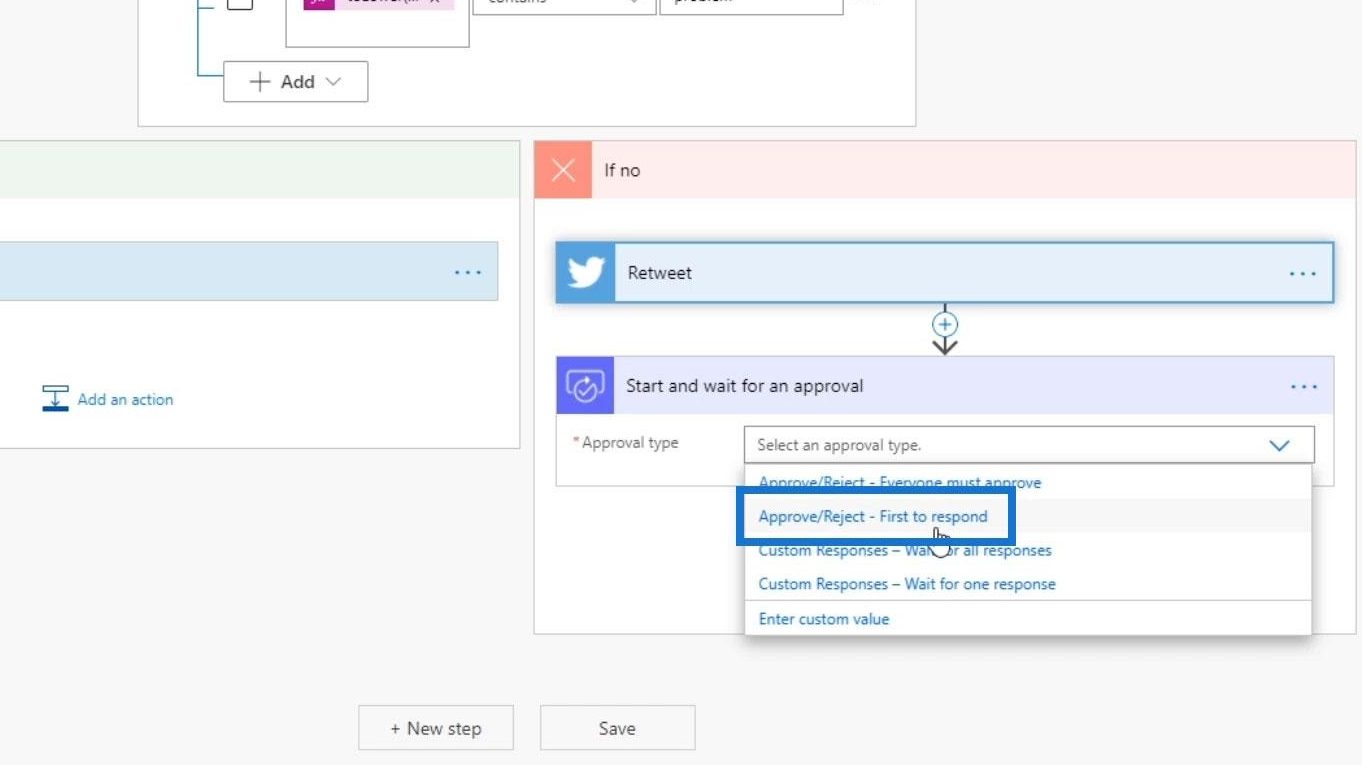
There are four available approval options for this action. Let’s choose the First to respond option.

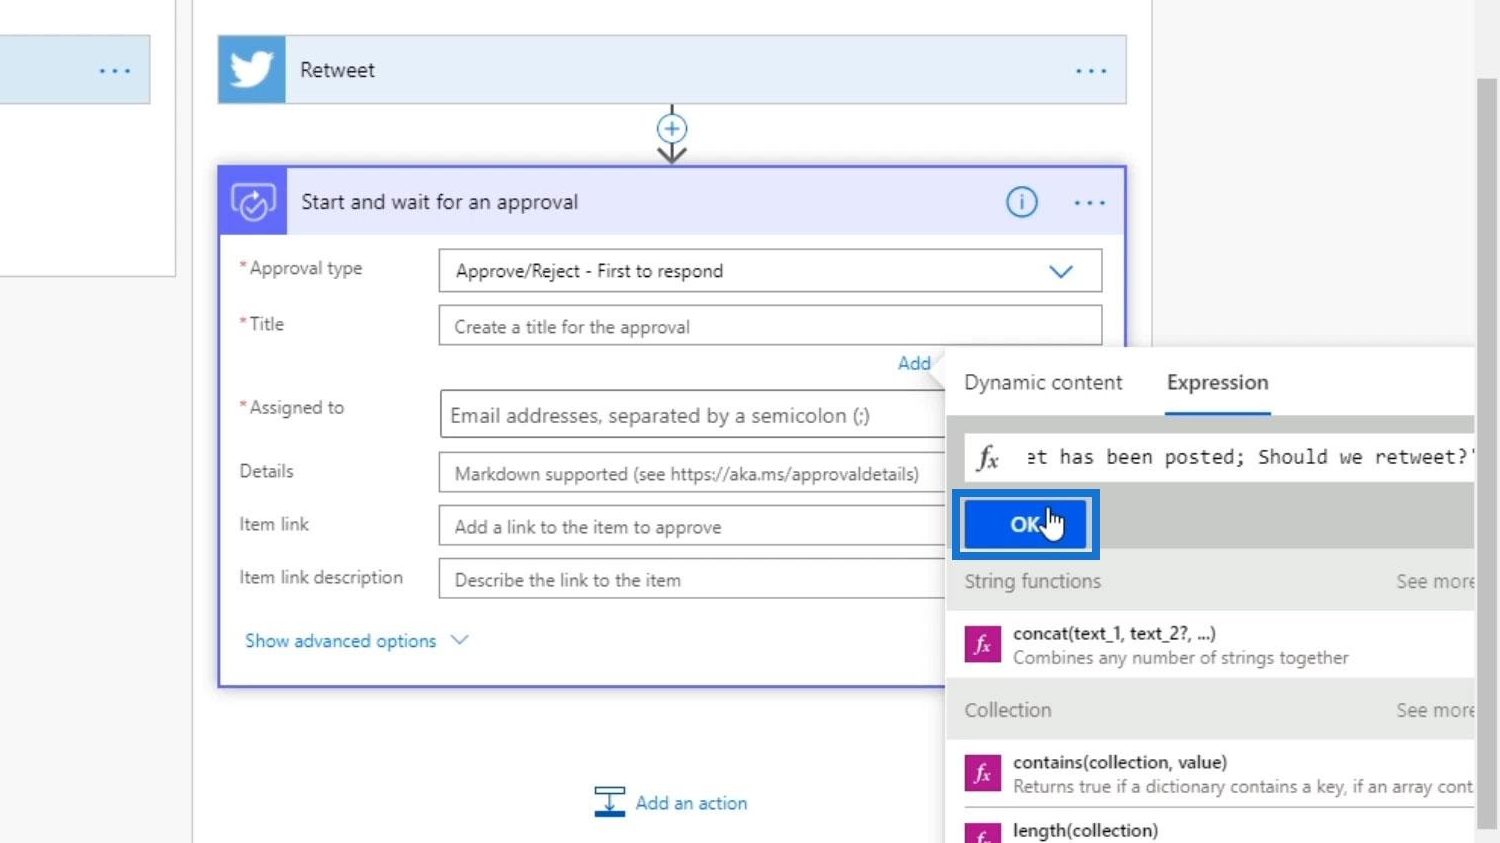
In the Title field, we need to specify what we want the approver to know before they approve. So, let’s put it in a concatenate expression saying “New Tweet has been posted; Should we retweet?”. Then click the OK button.
I’m going to copy and paste the email address that I used for this organization. Make sure you use valid emails.

We can also assign multiple people. We can have 20 reviewers and only one of them needs to actually approve them.
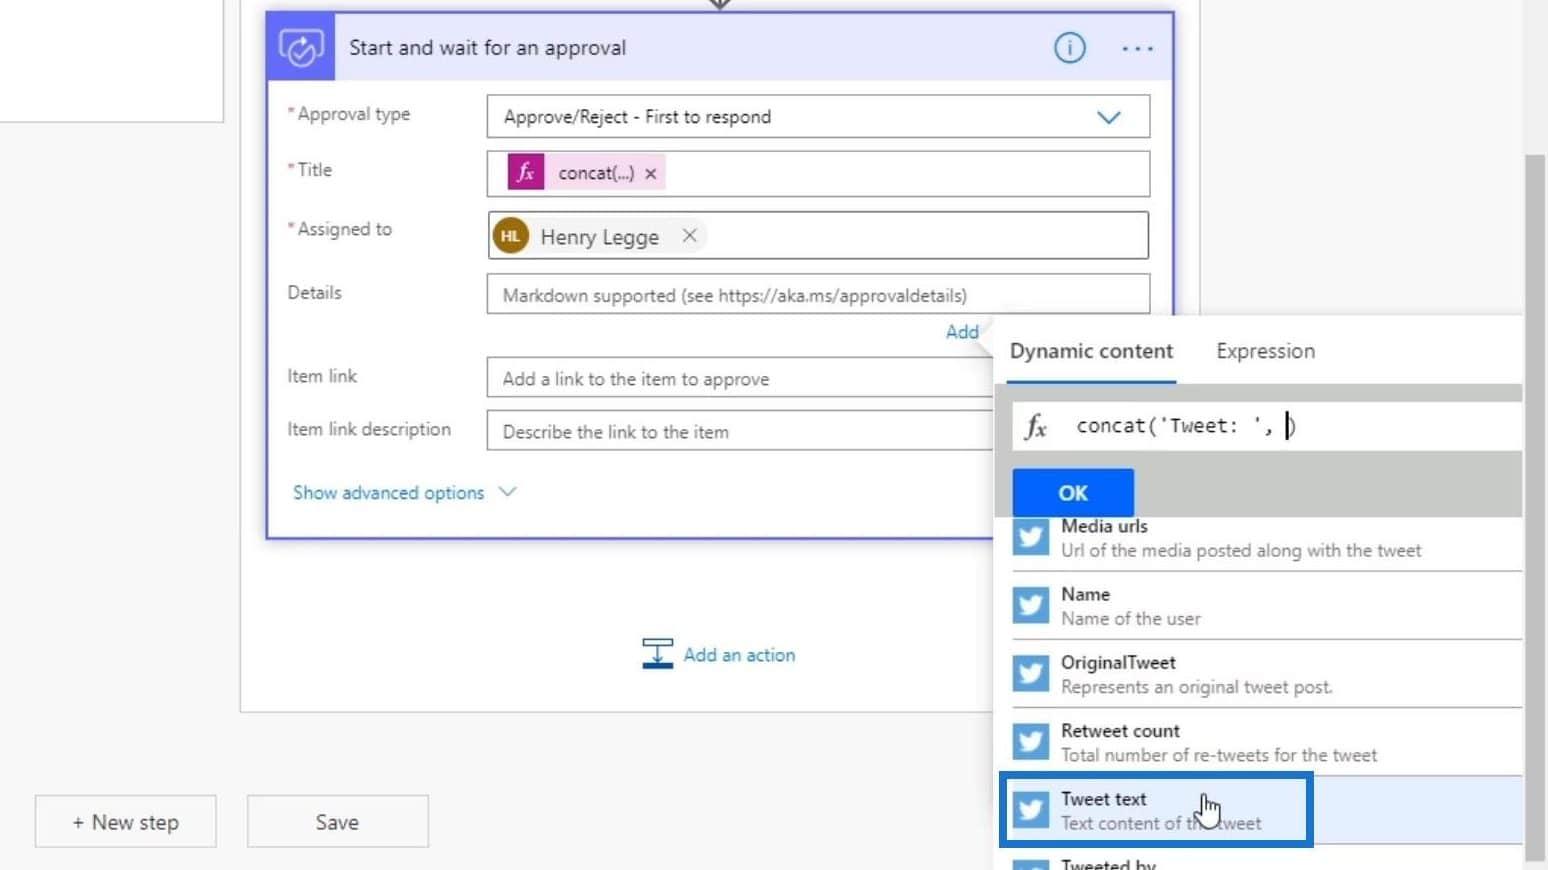
For the Details field, we just need the Tweet text and the name of the user as well. So, let’s click the Expressions tab and use a concat expression. Type in “Tweet:” and make sure to add comma (,) right after that.
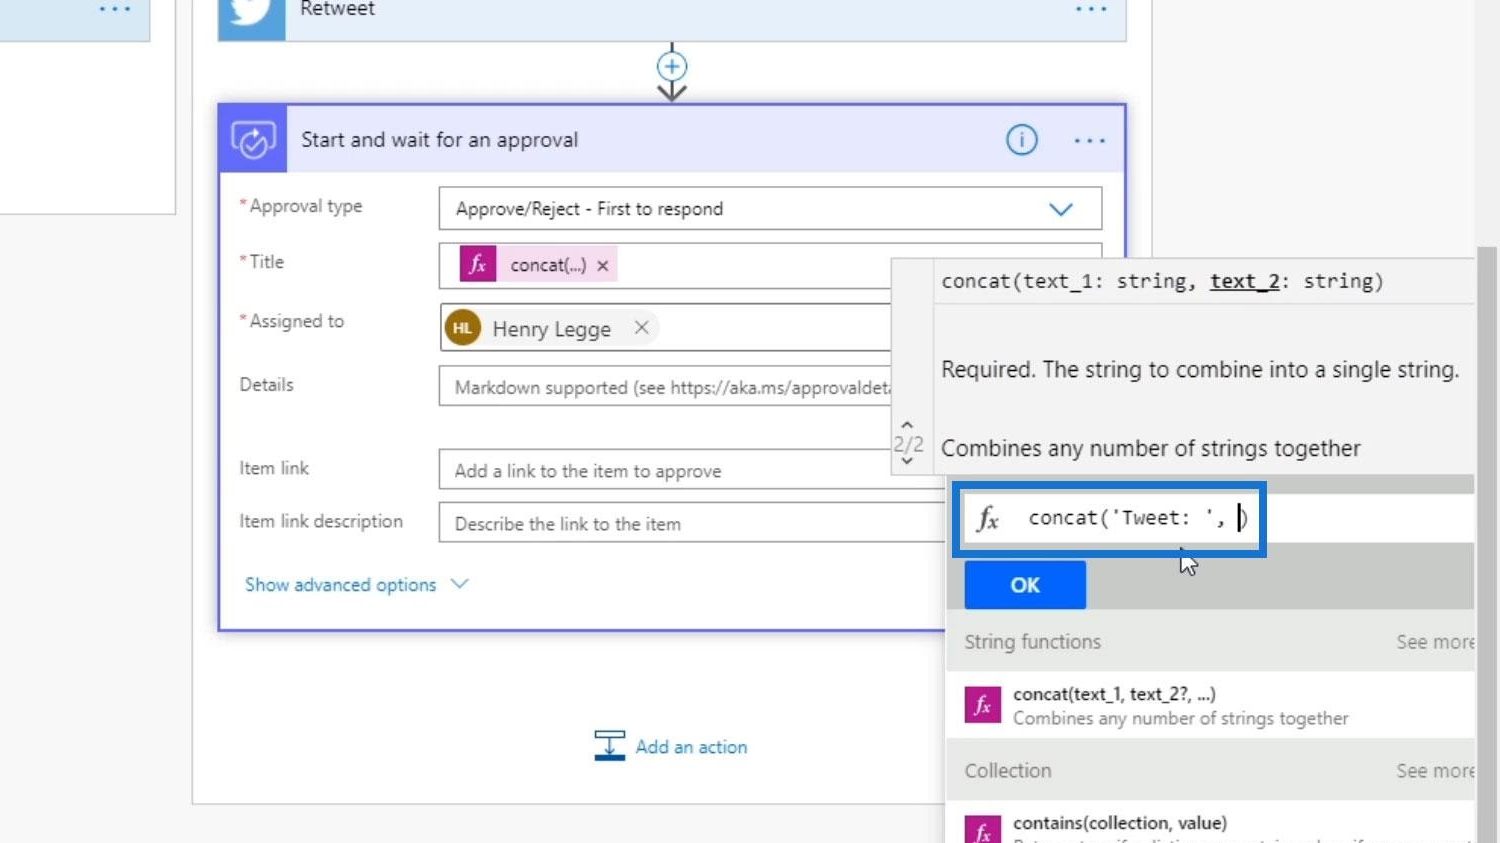
Then click the Dynamic content tab and choose “Tweet text”.
Let’s also add space.
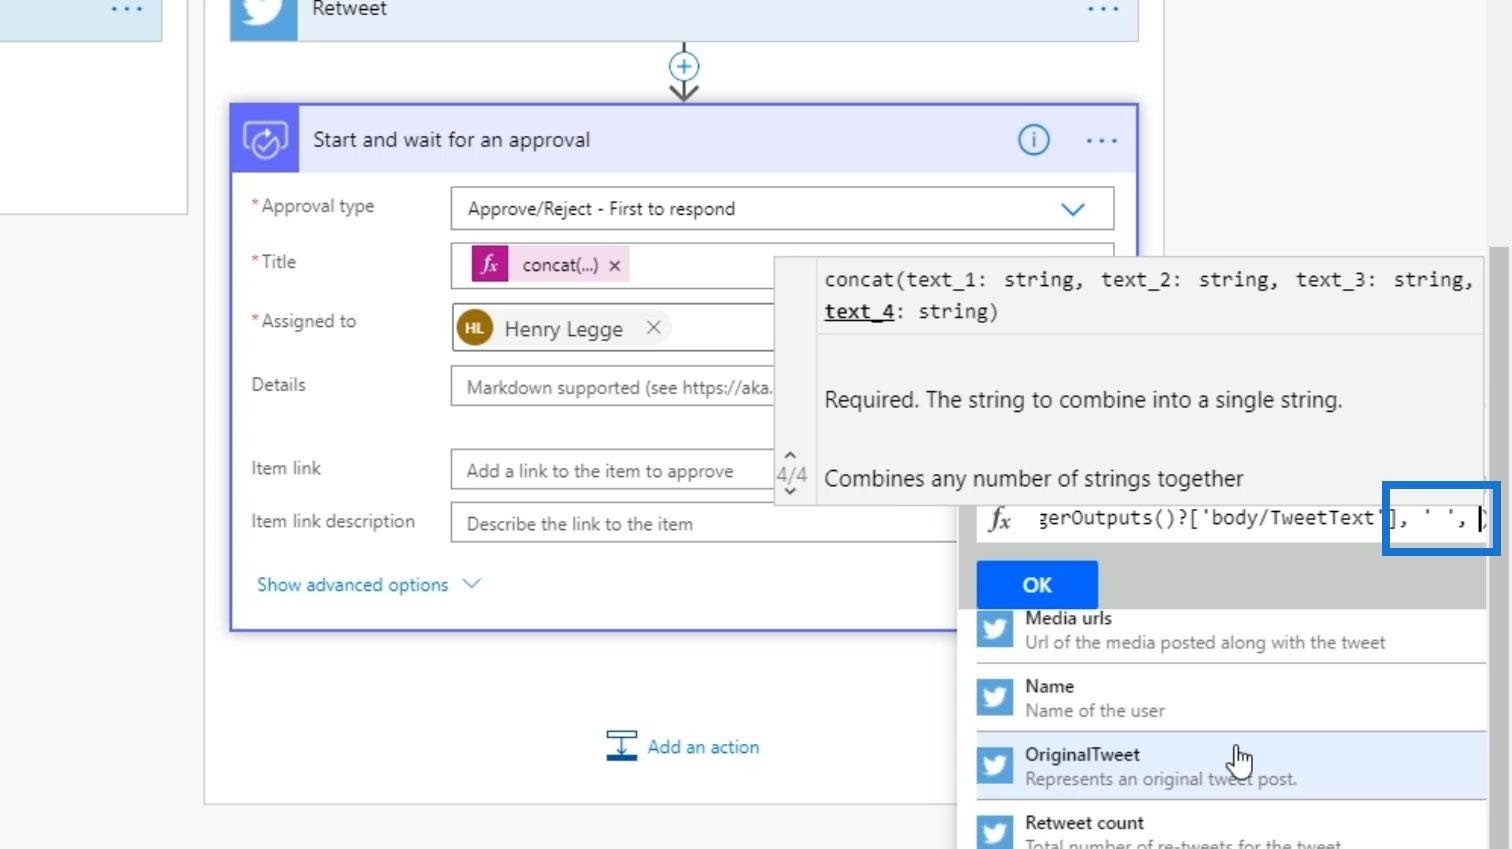
After that, type in “Name: ”. Again, make sure to add a comma right after that.
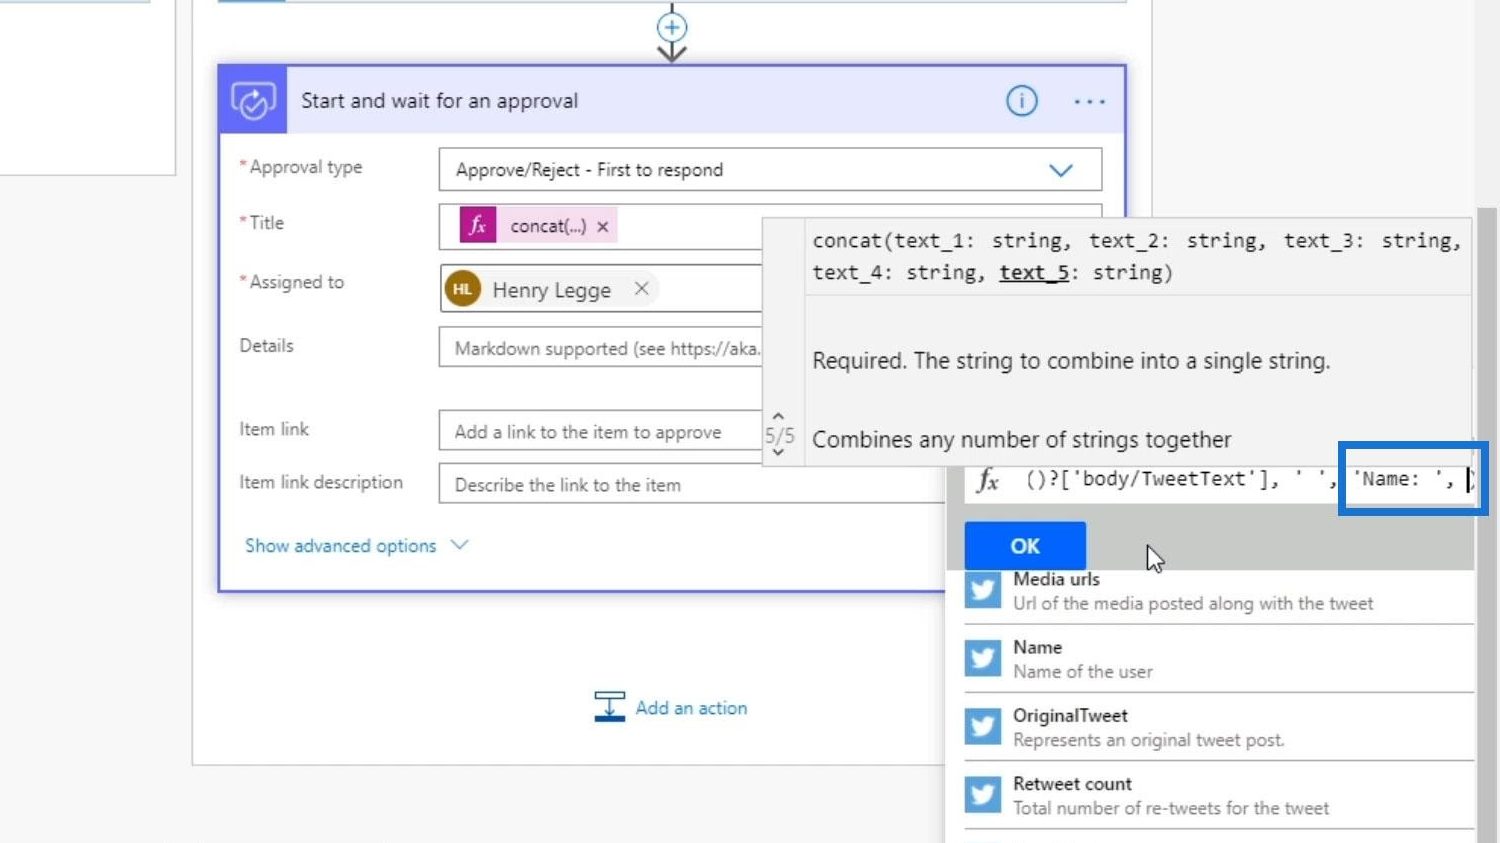
Then click “Name” within the Dynamic content tab.

Lastly, click OK.
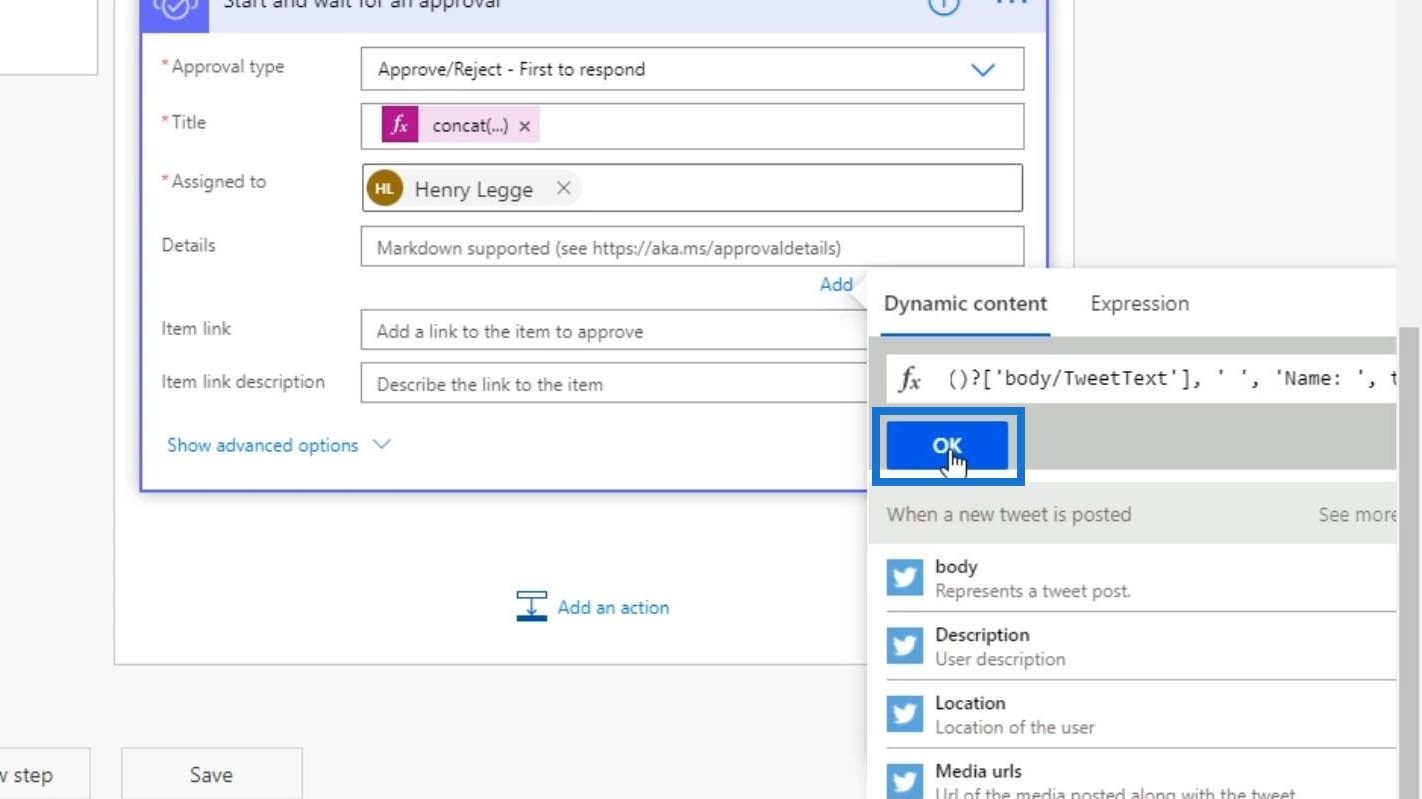
We can put an item link as well if we want to link them to the actual tweet, but we’re going to skip that. For now, let’s just save this action by clicking Save.
Setting Up The Condition For The Approval Workflow
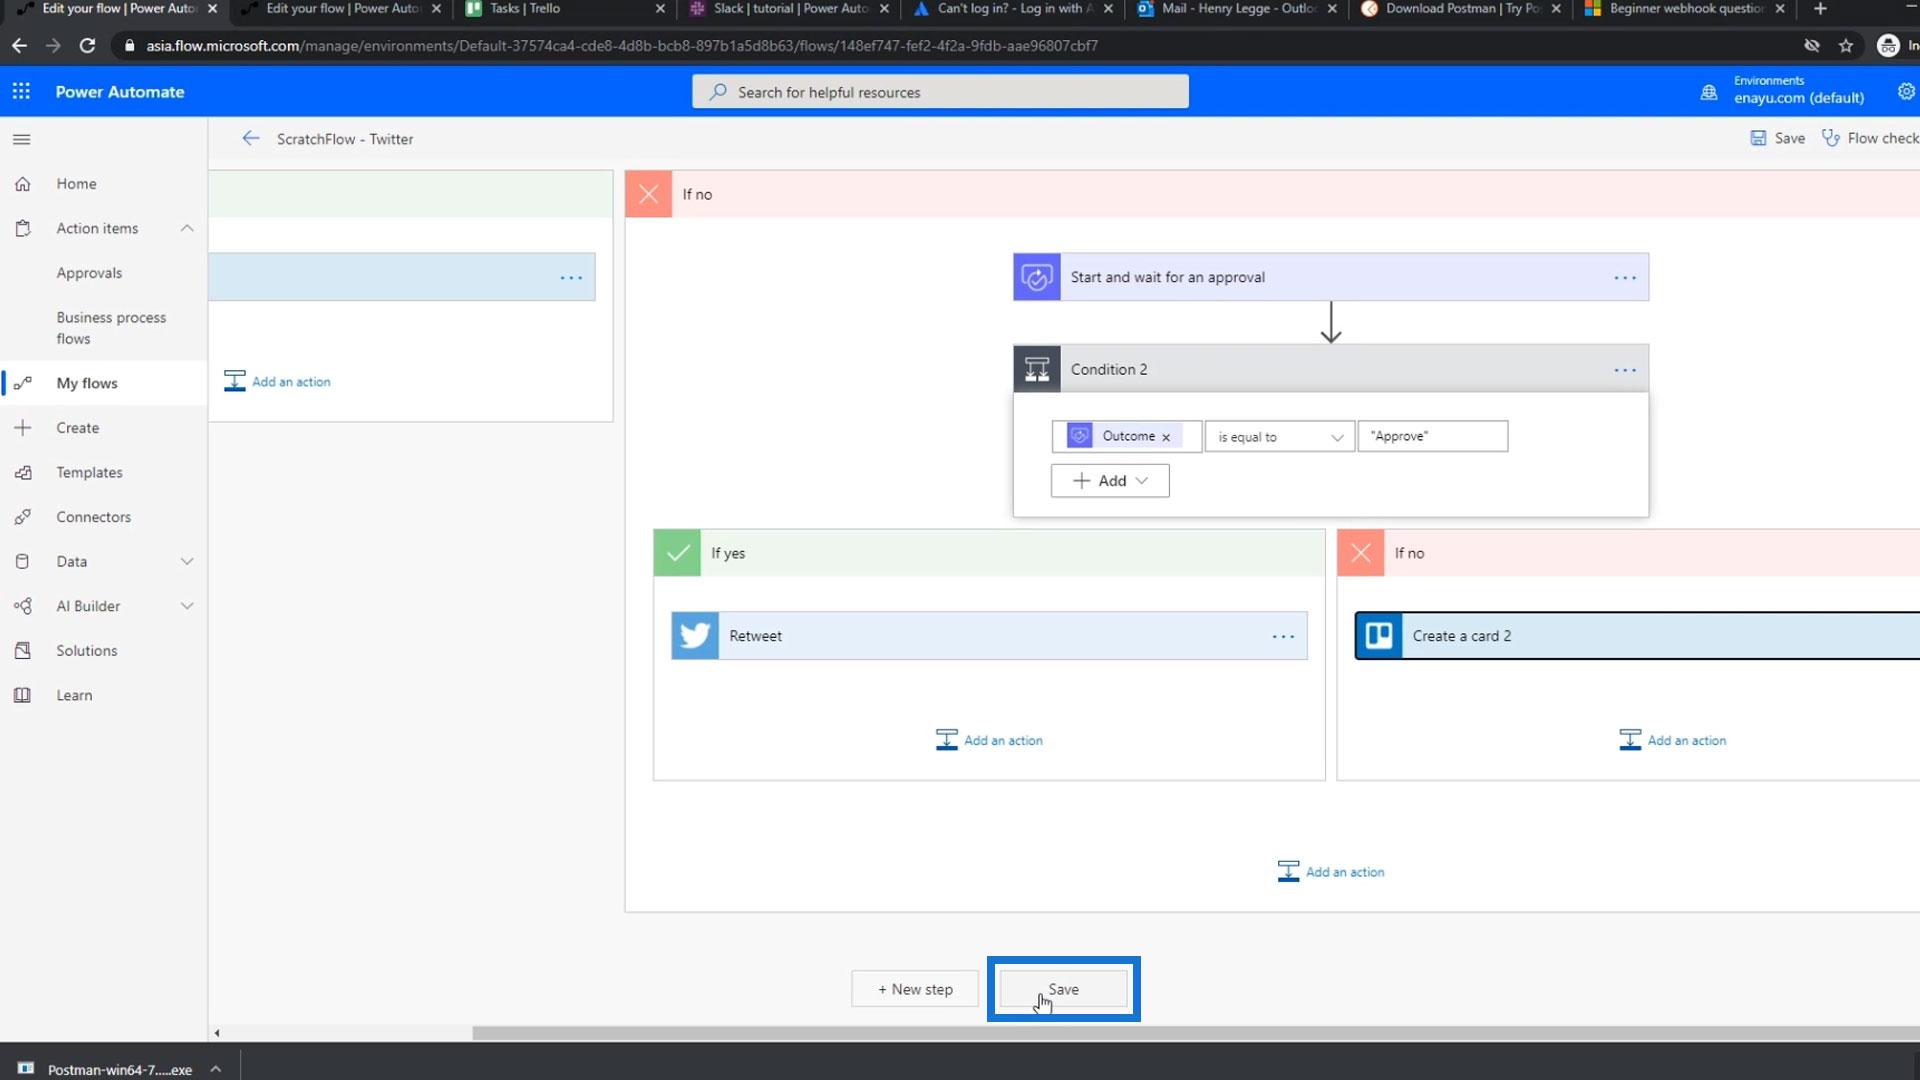
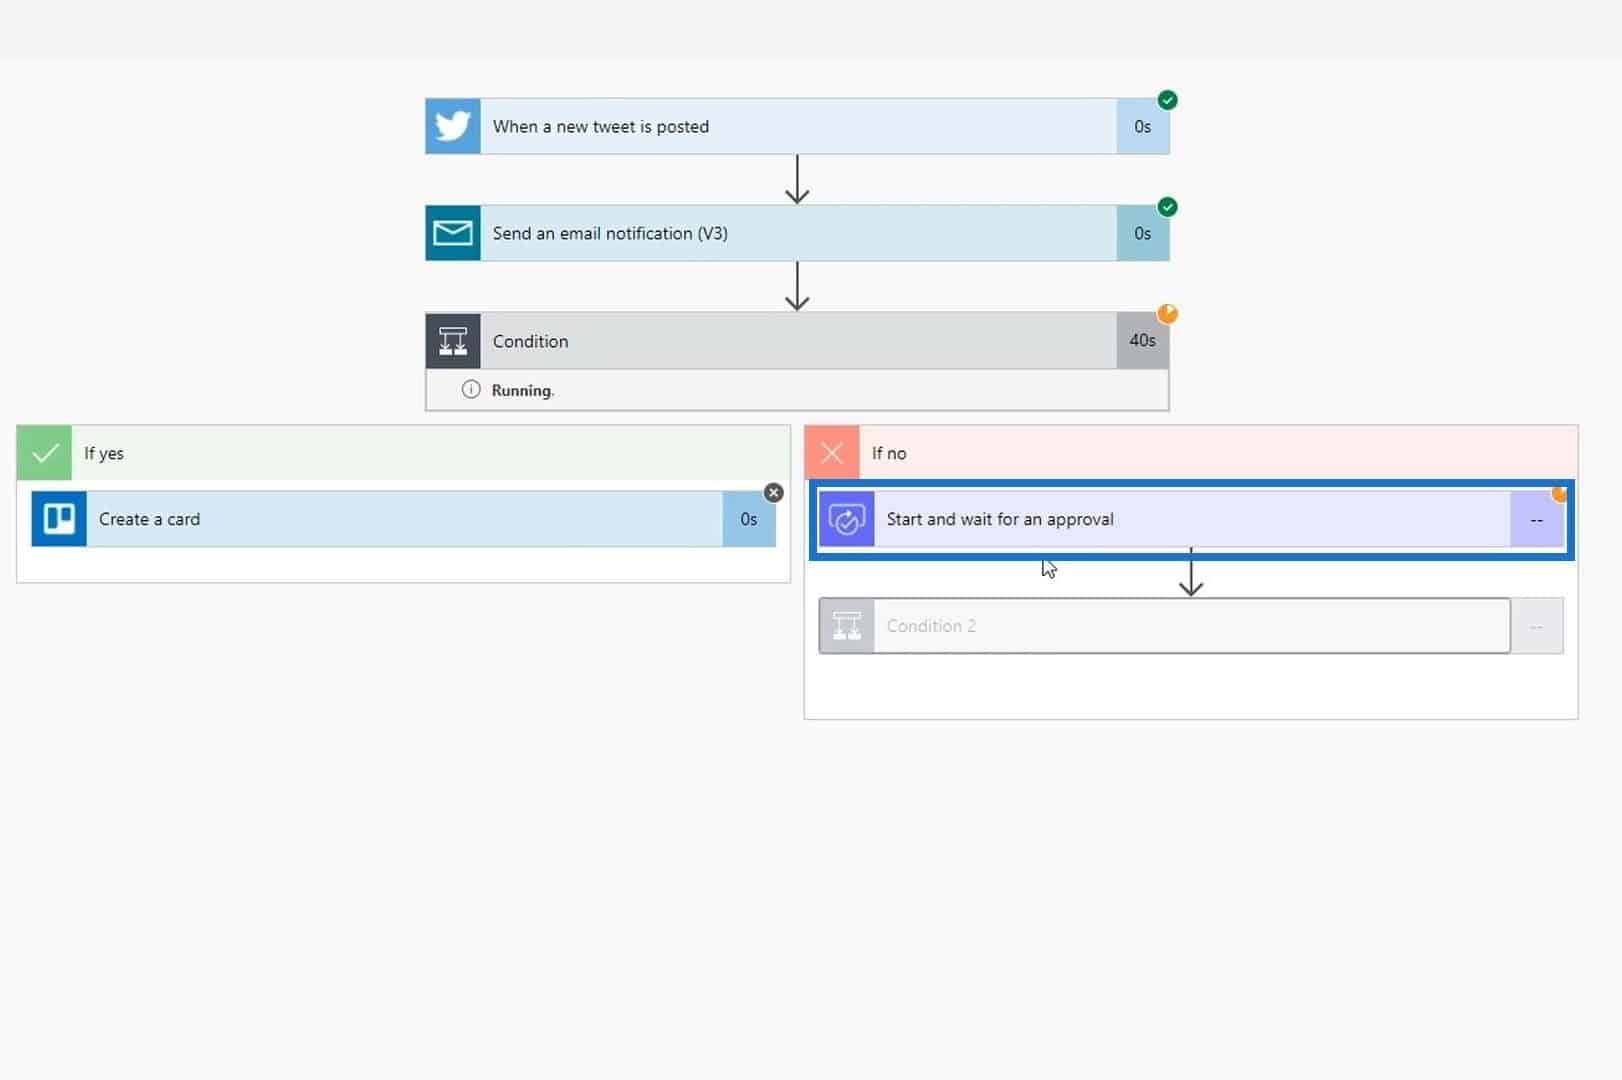
We want the retweet to actually happen after the approval. So, we need to switch the order of the two actions. Move the Retweet action below the “Start and wait for an approval” action.
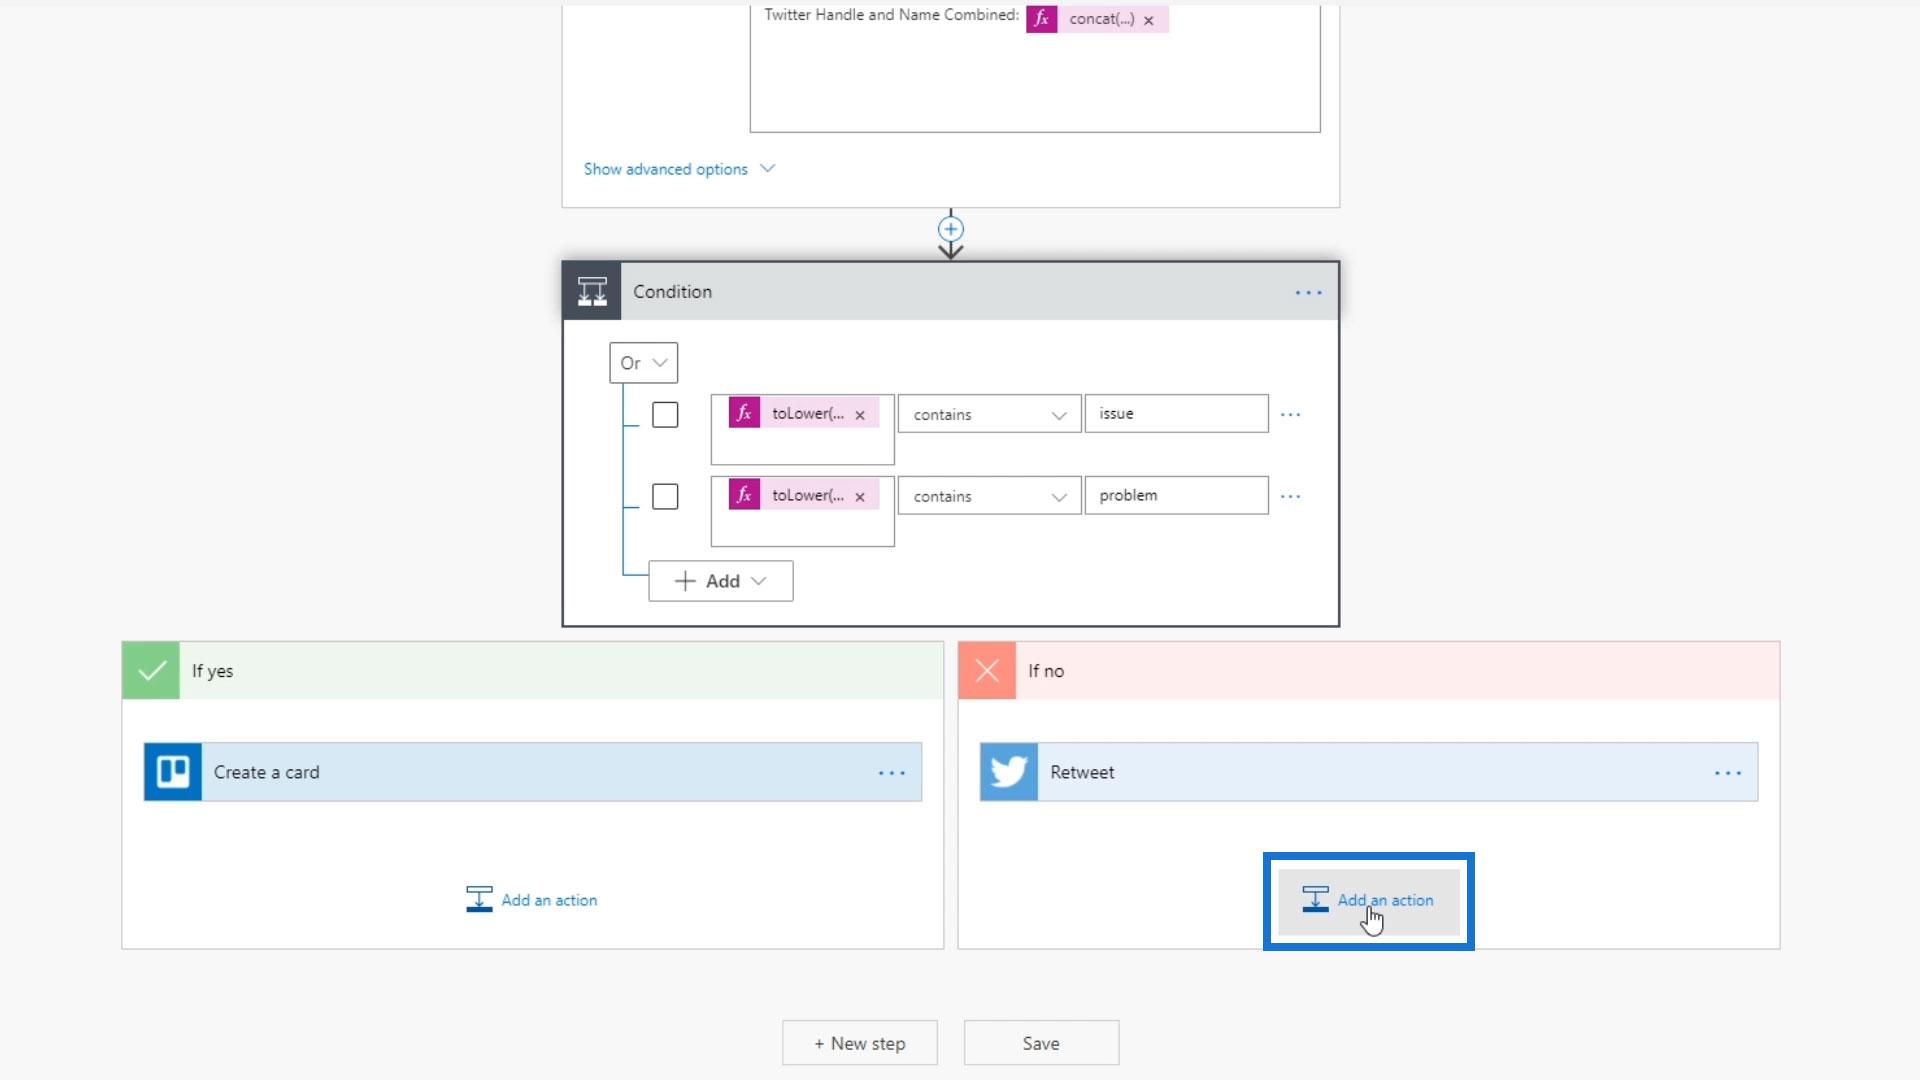
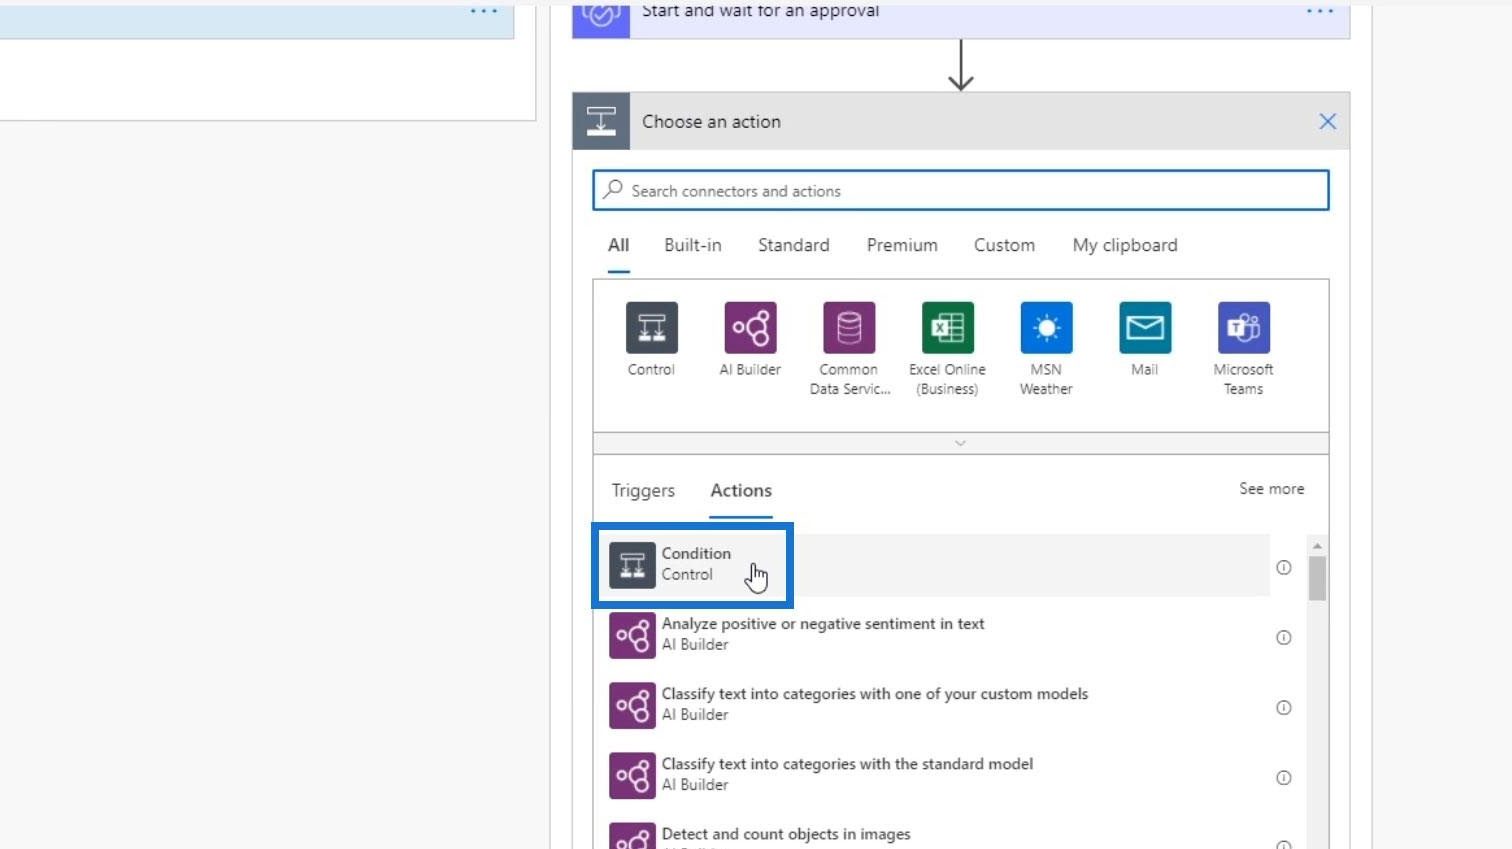
We also need separate routes or separate flows to happen based on whether the user approves the tweet or rejects it. So, click the plus button and choose “Add an action”.
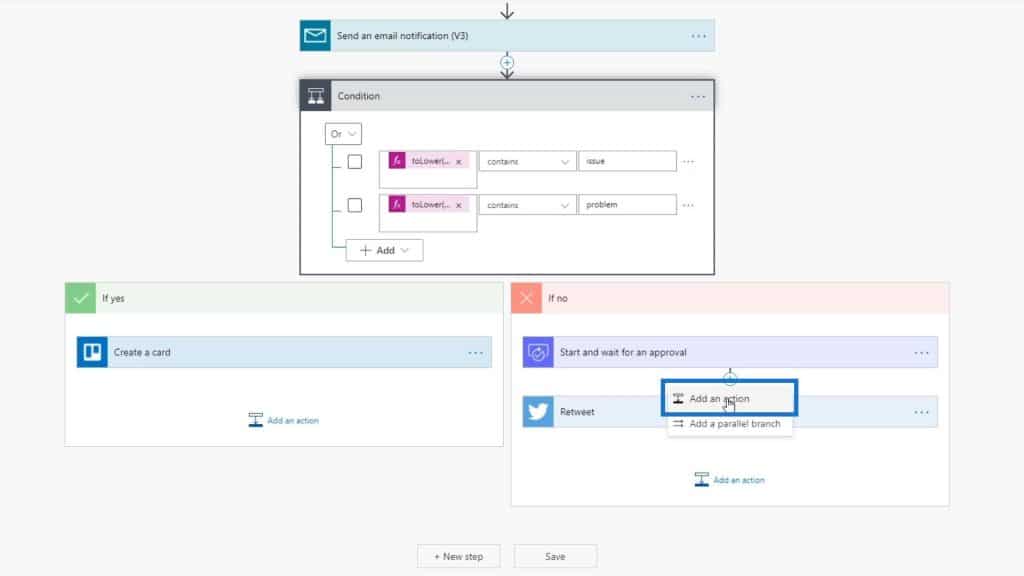
Our action should be a condition. So, click the Condition control.
The condition is if the outcome is equal to “Approve”.
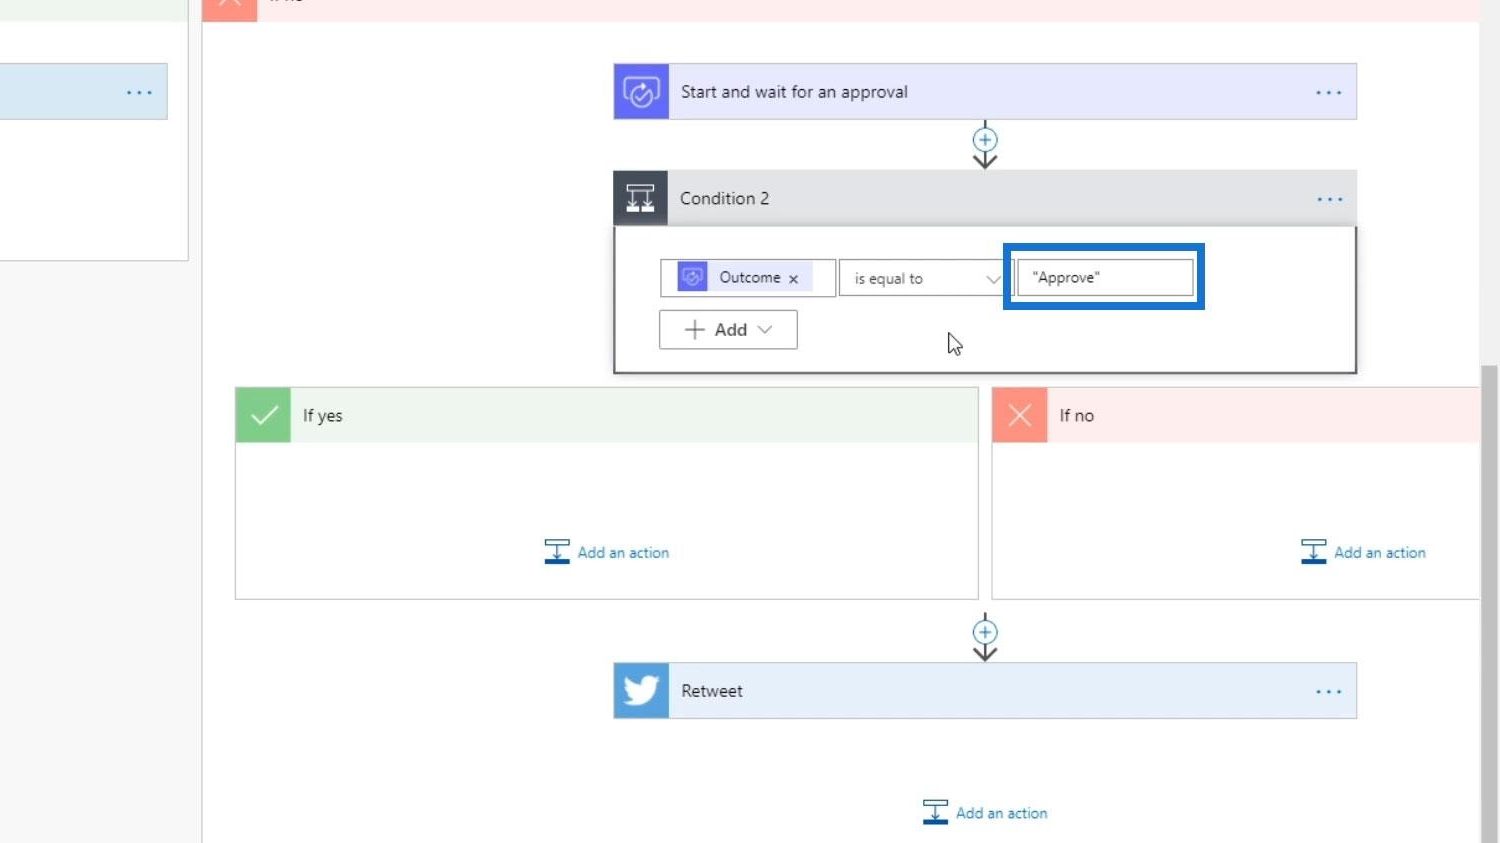
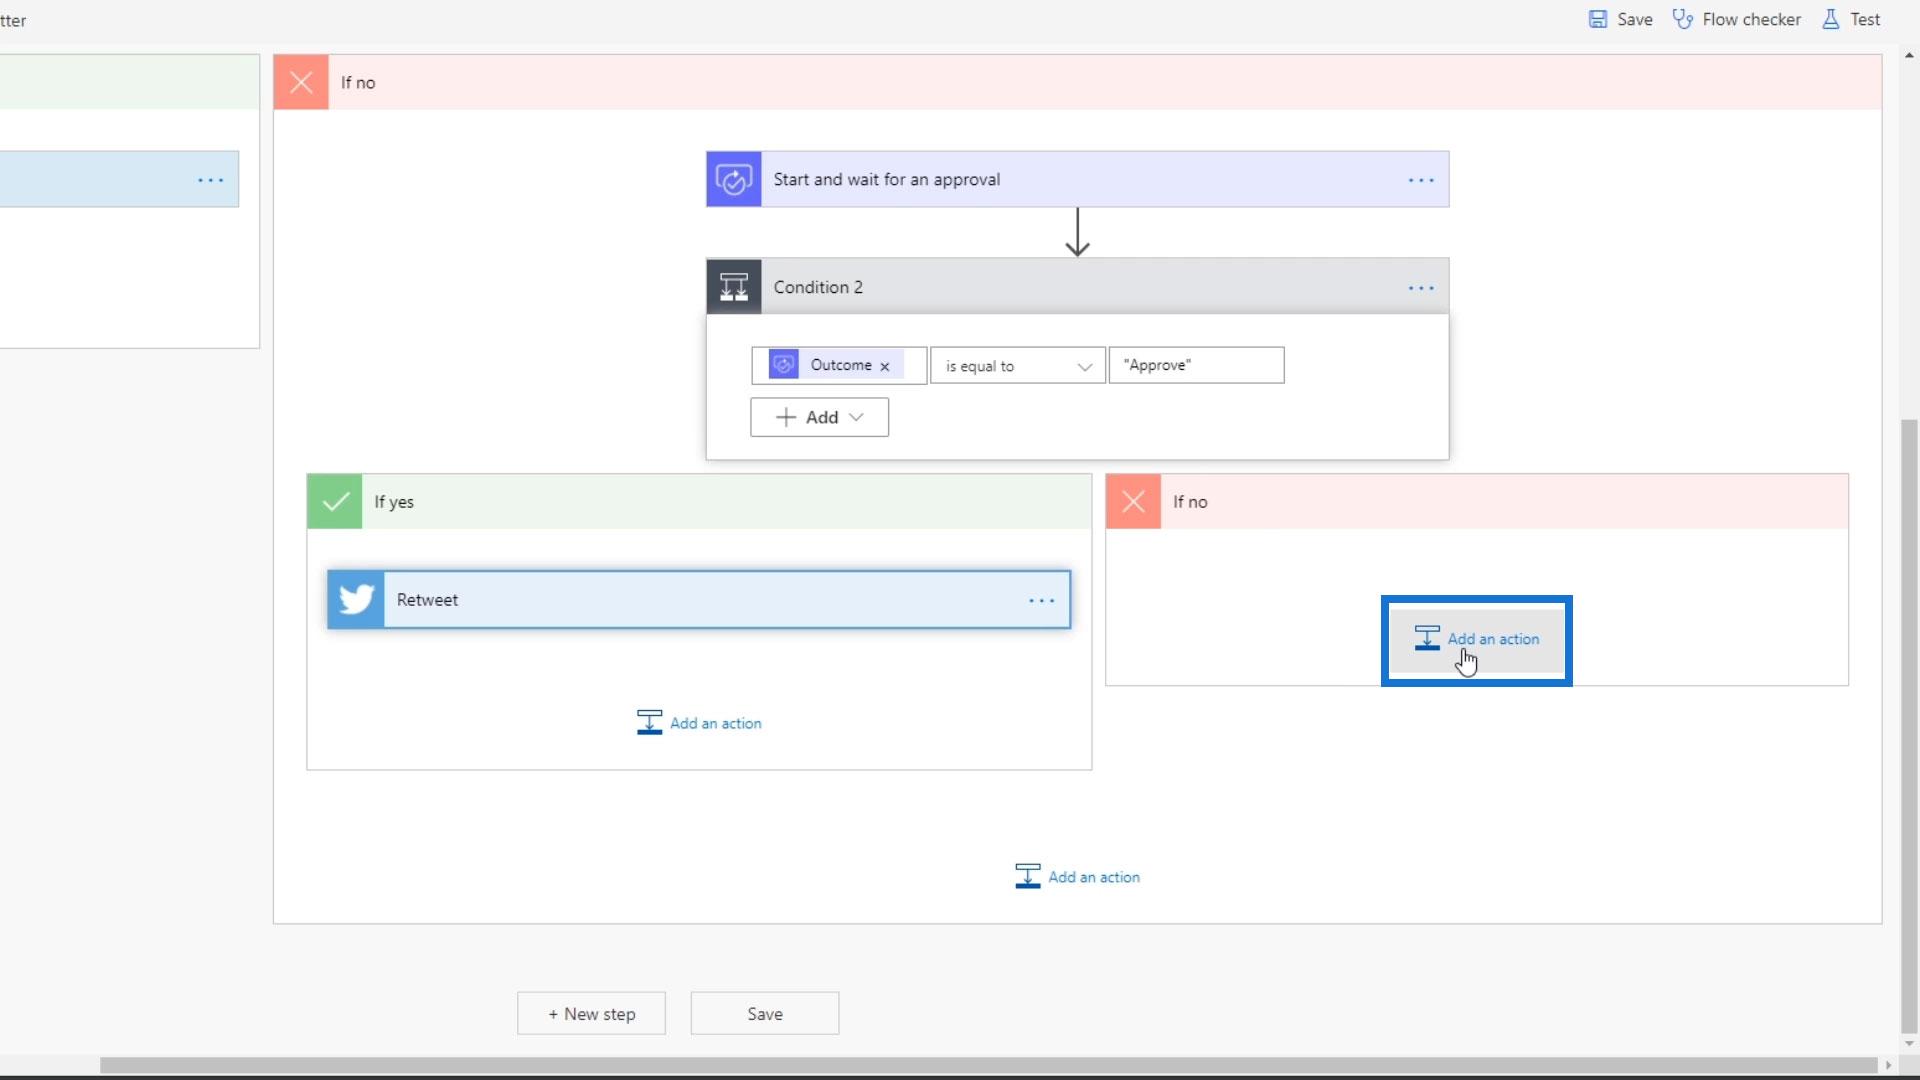
If the condition is true, then it should be retweeted. Therefore, let’s move the Retweet action inside the “If yes” path.

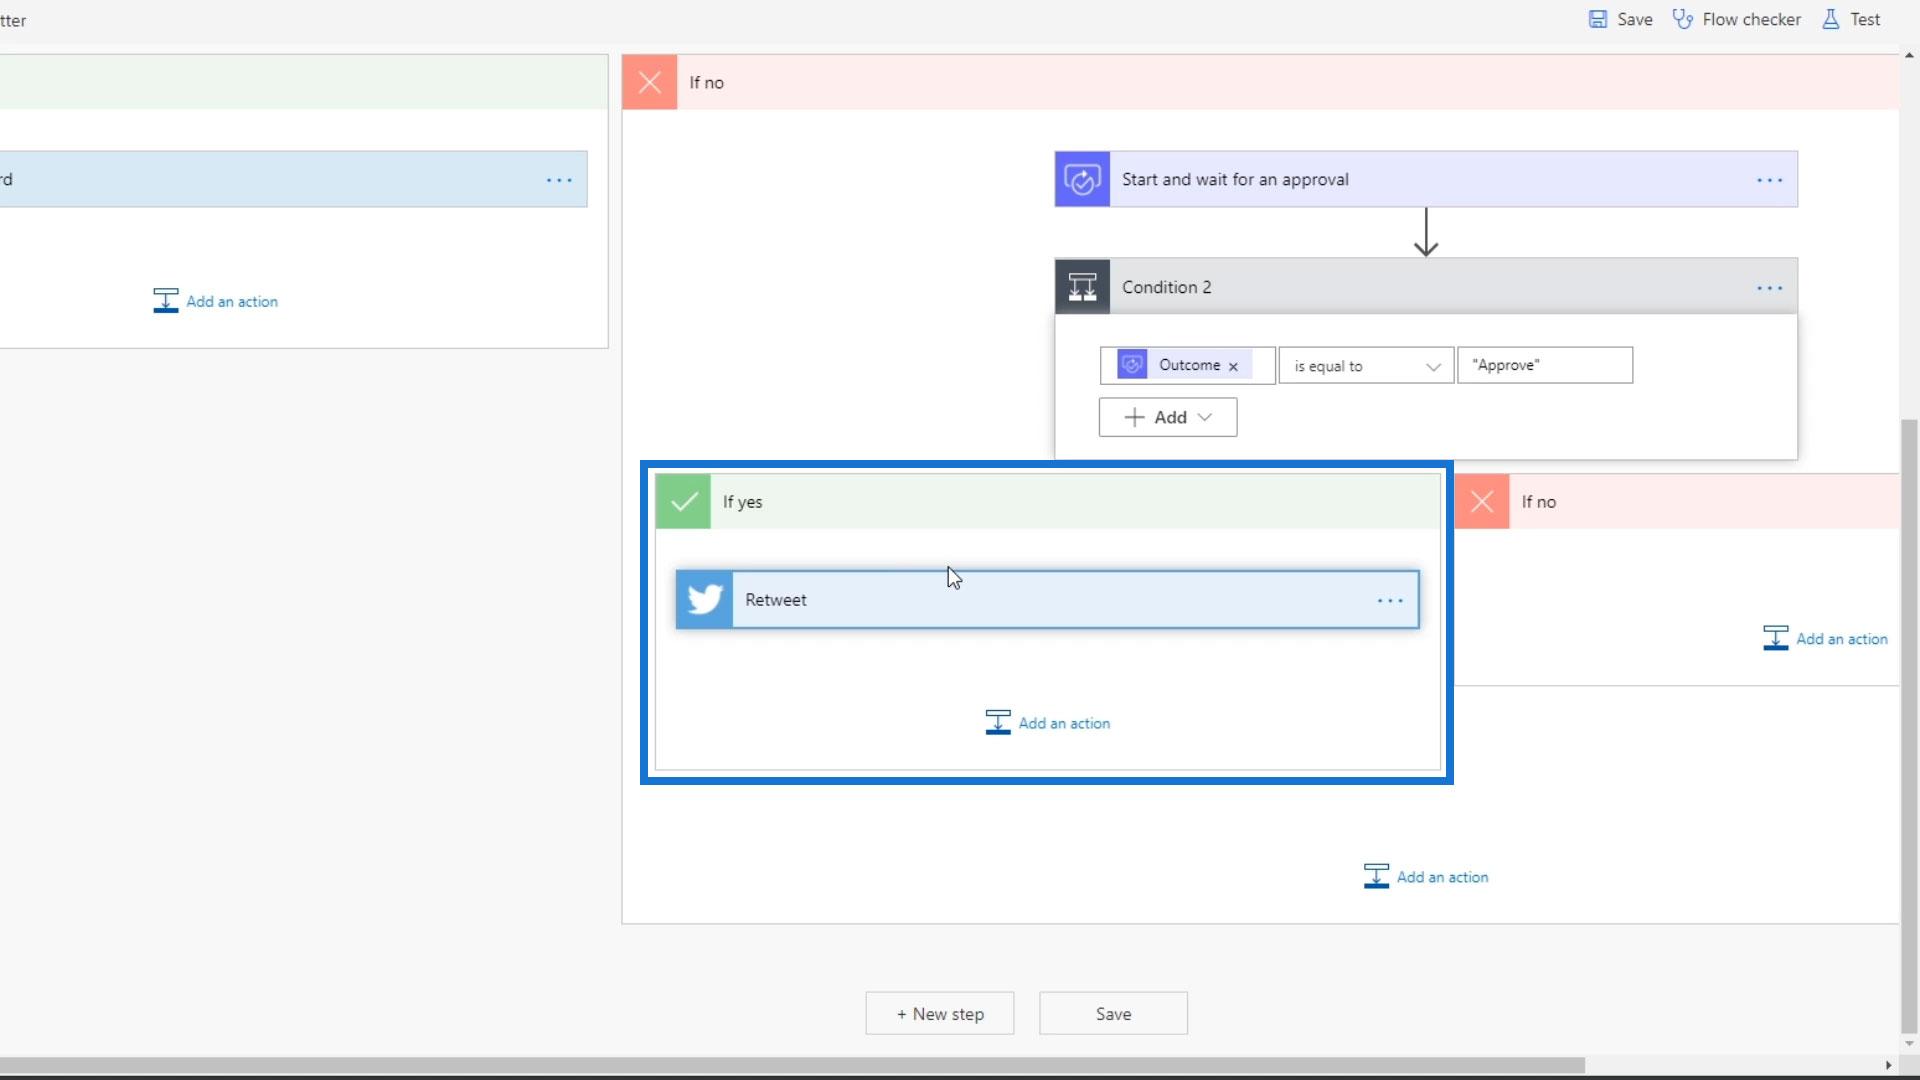
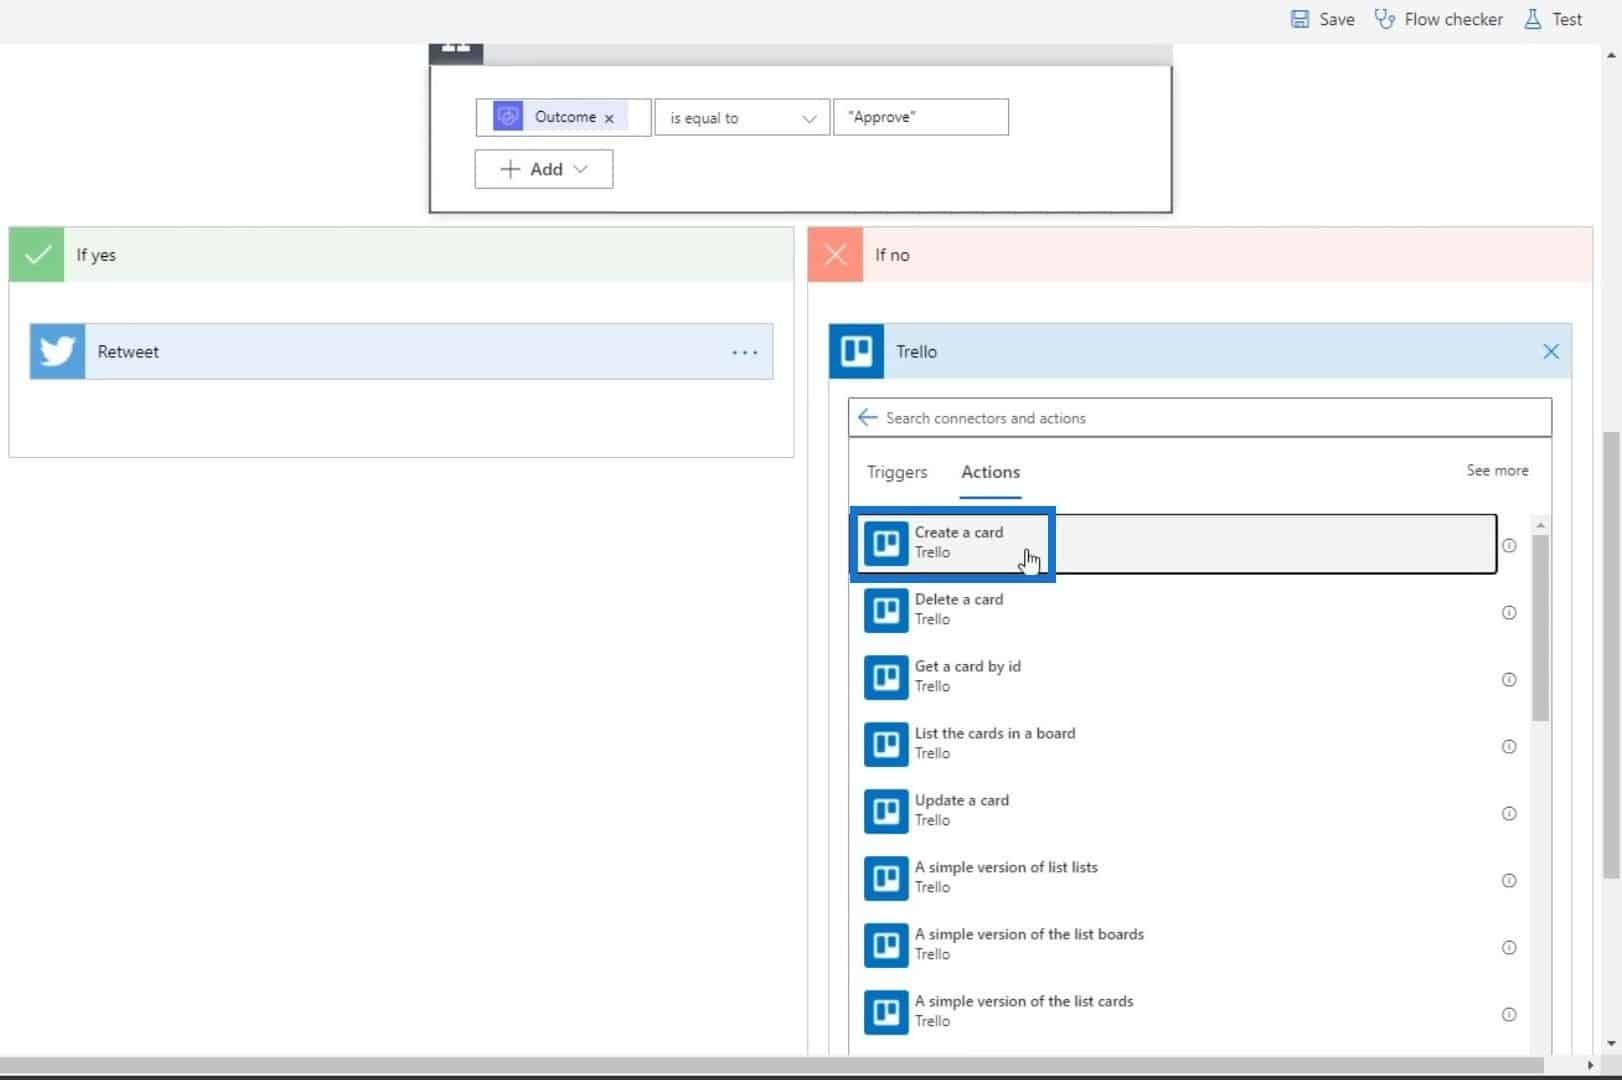
If it’s not approved, we want a record for that. So, let’s add an action within the “If no” path.
Search and click “Trello”.
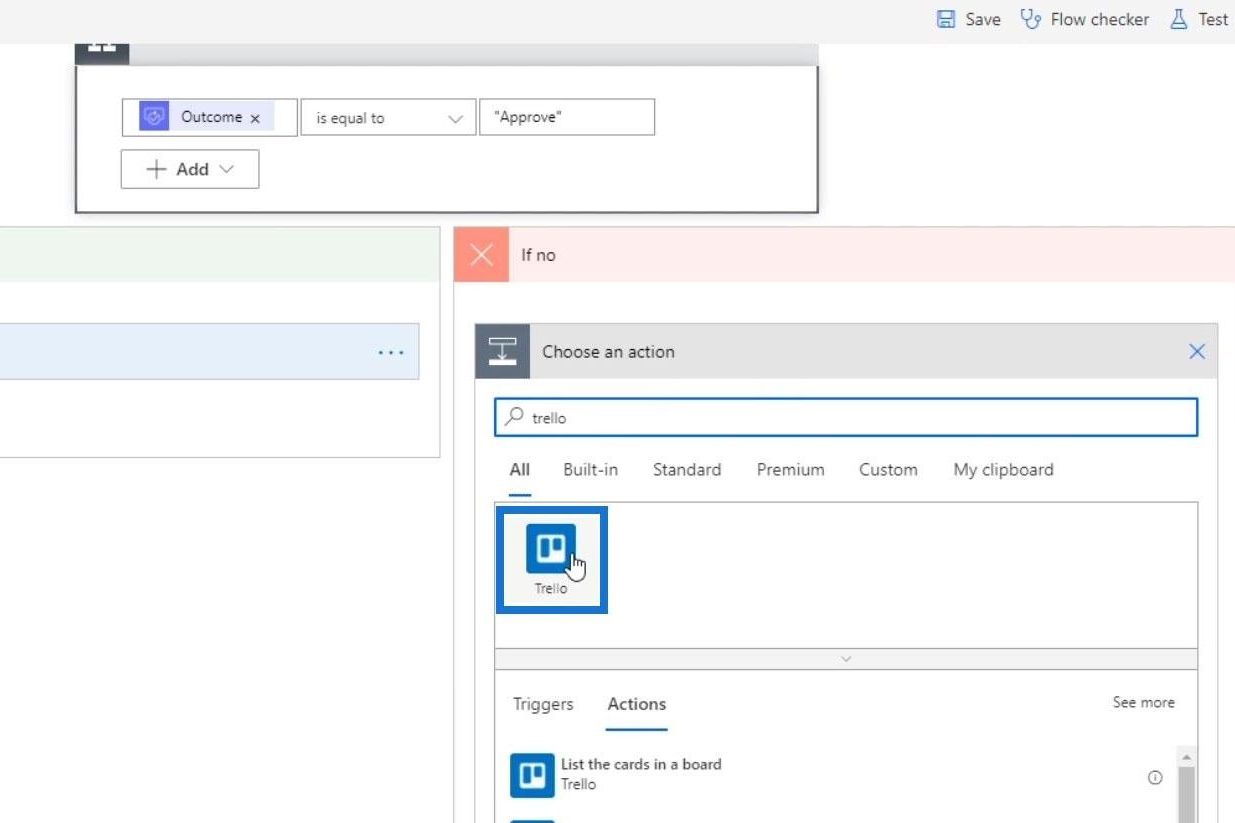
Then choose “Create a card”.
Choose Tasks for the Board Id field and Issues for the Parent List Id.
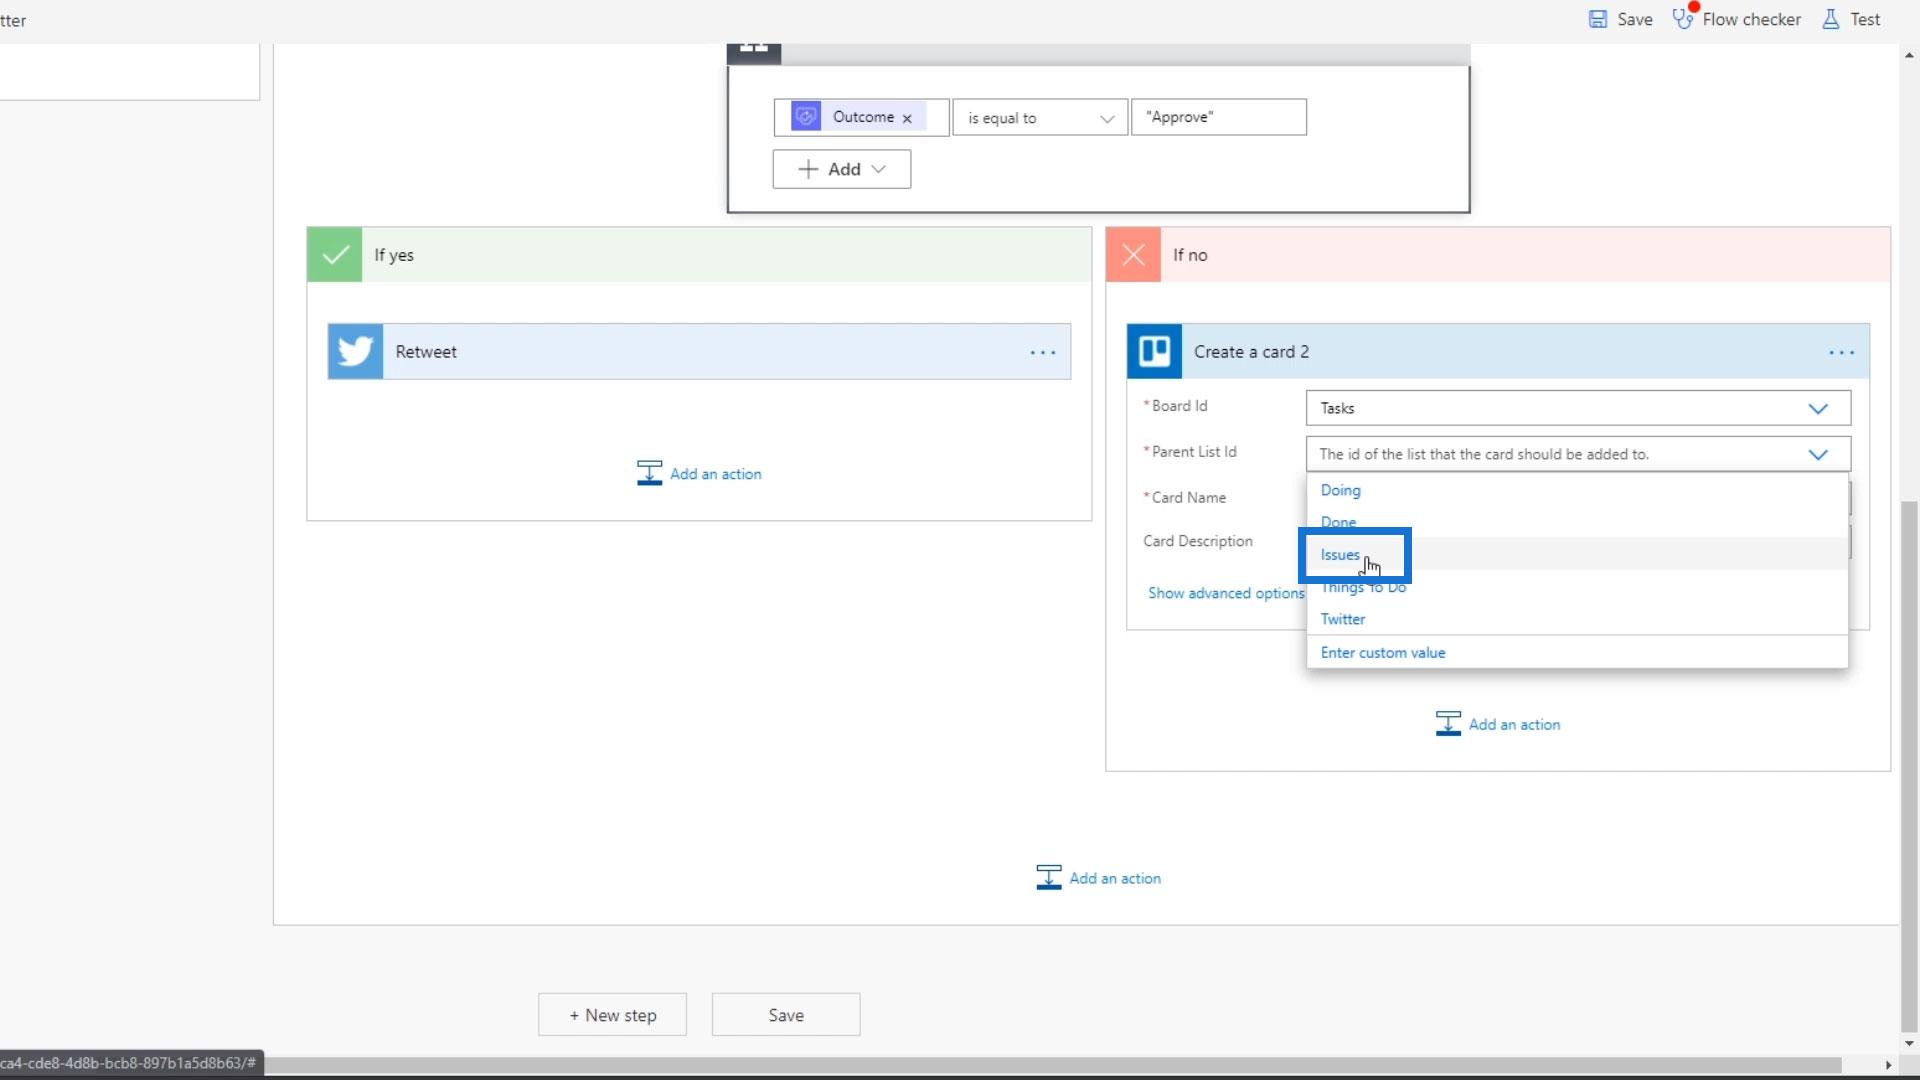
For the Card name field, type “Tweet has been rejected”.
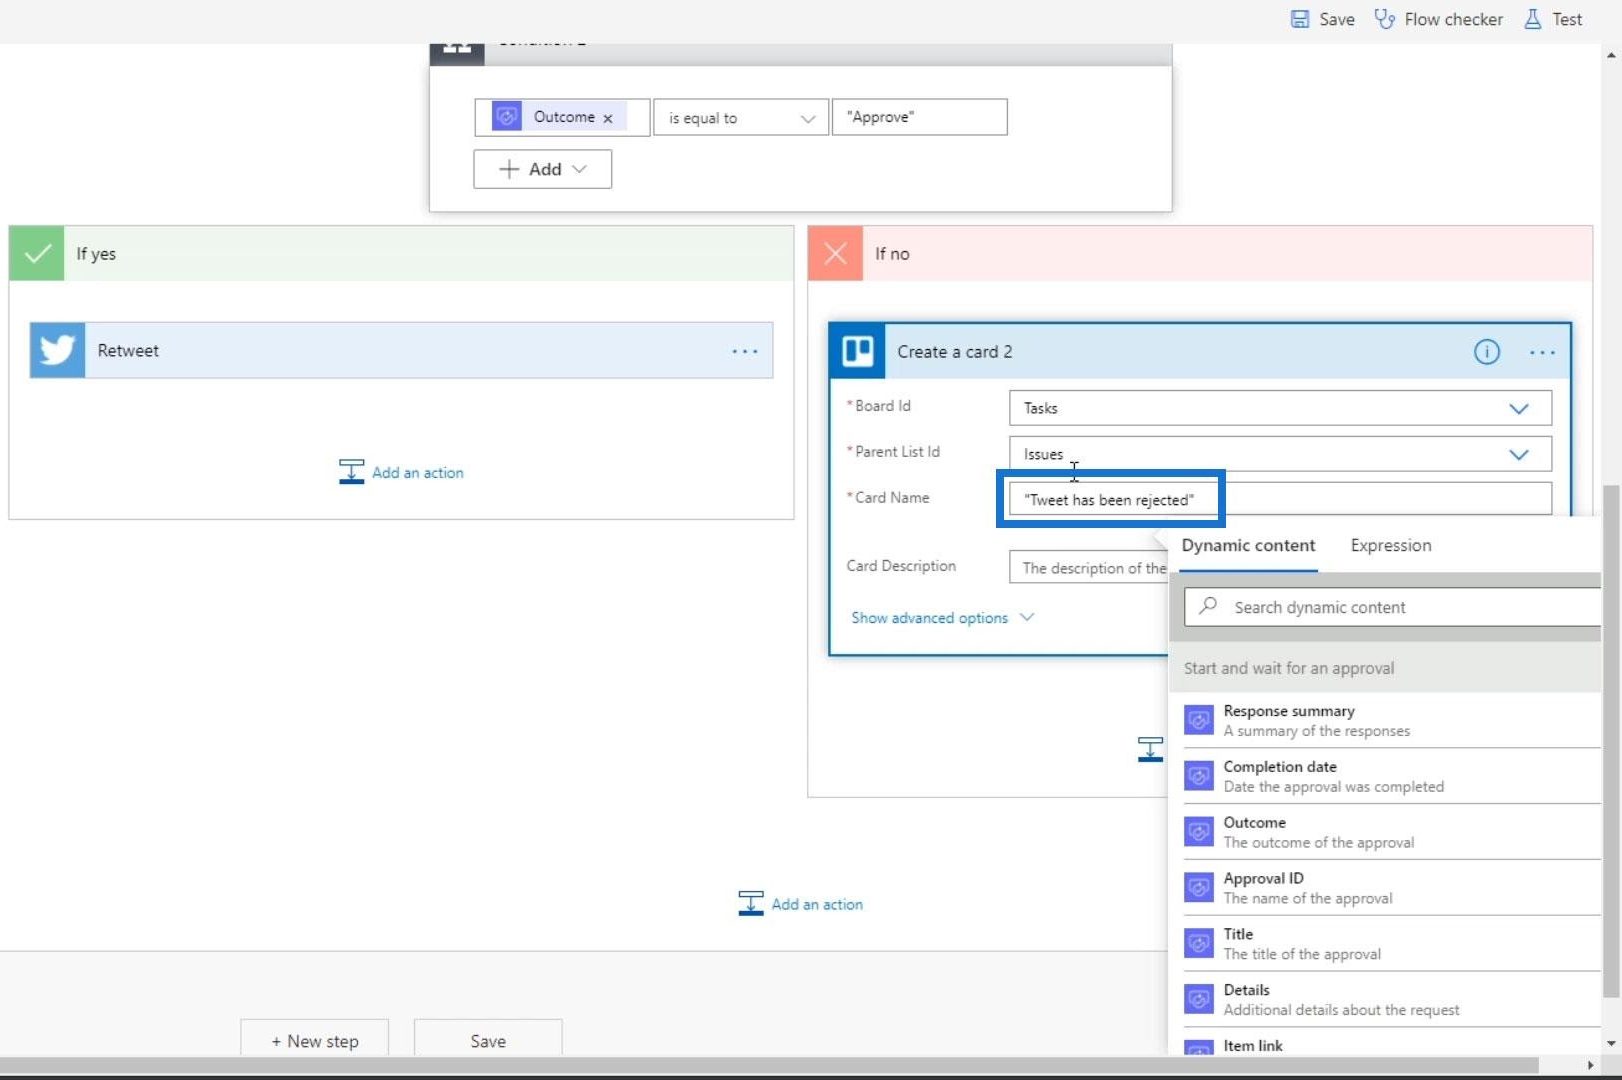
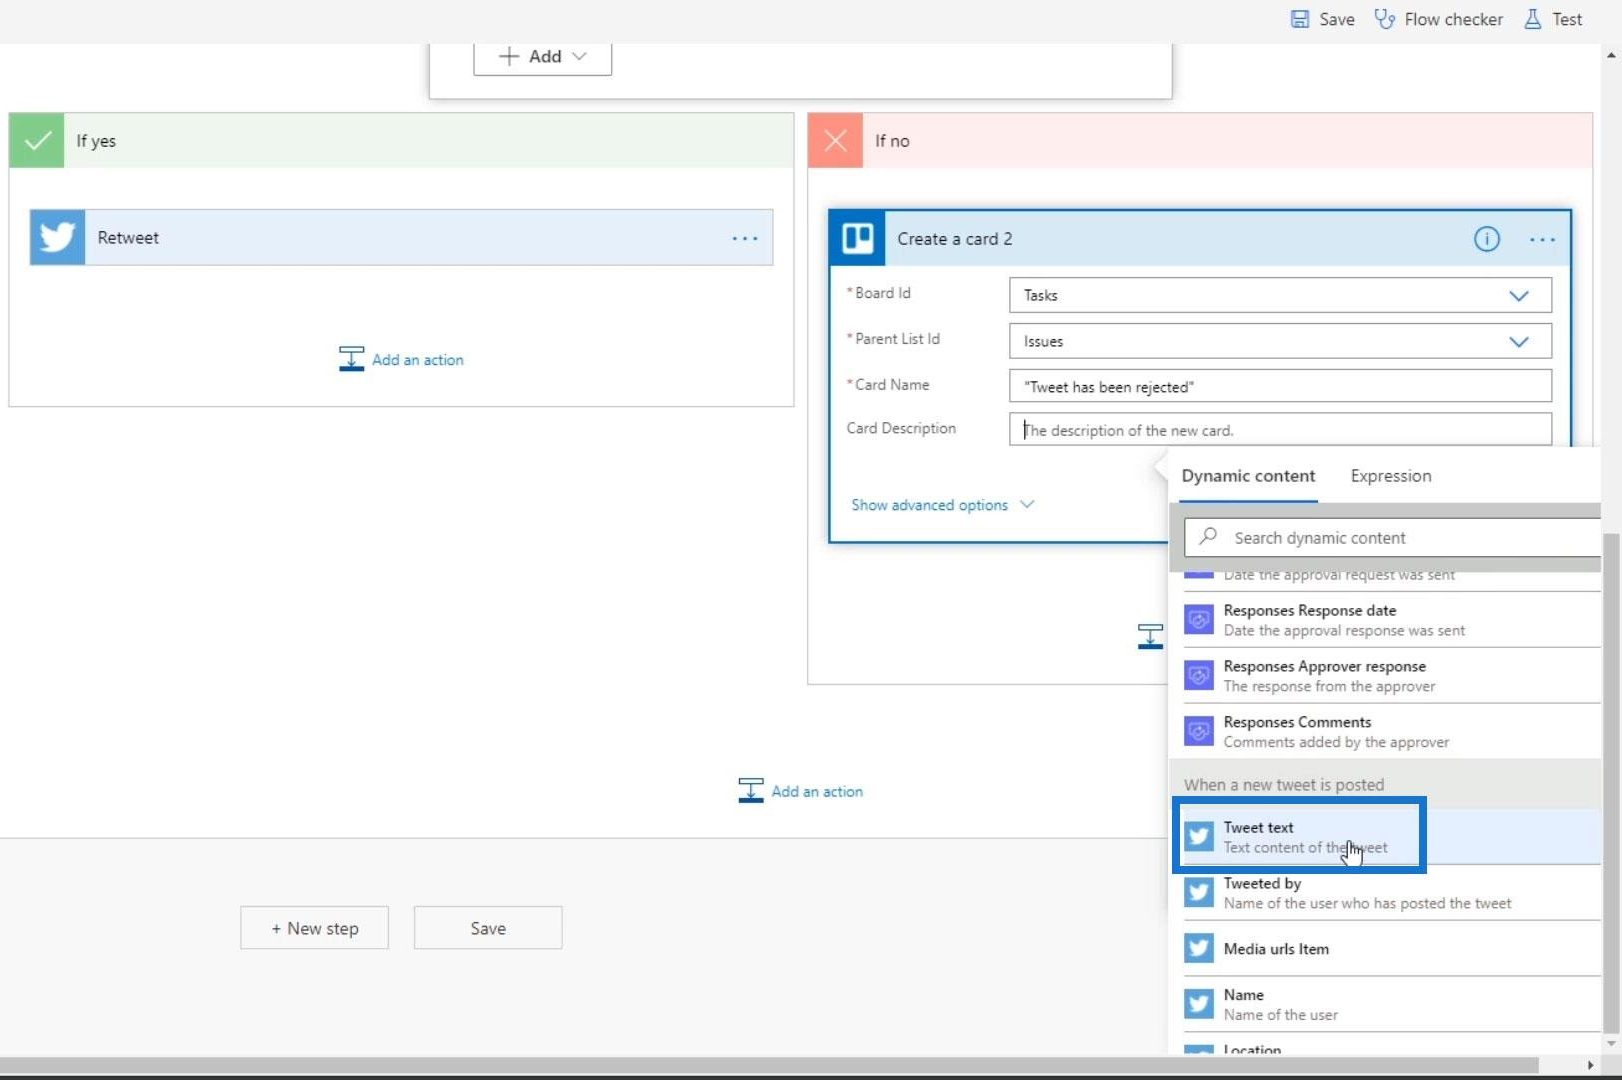
As for the Description field, choose “Tweet text” within the Dynamic content tab.
Then click Save.
Testing The Workflow
Let’s now test the approval process. First, click Test.

Select “I’ll perform the trigger action” and click the Test button.
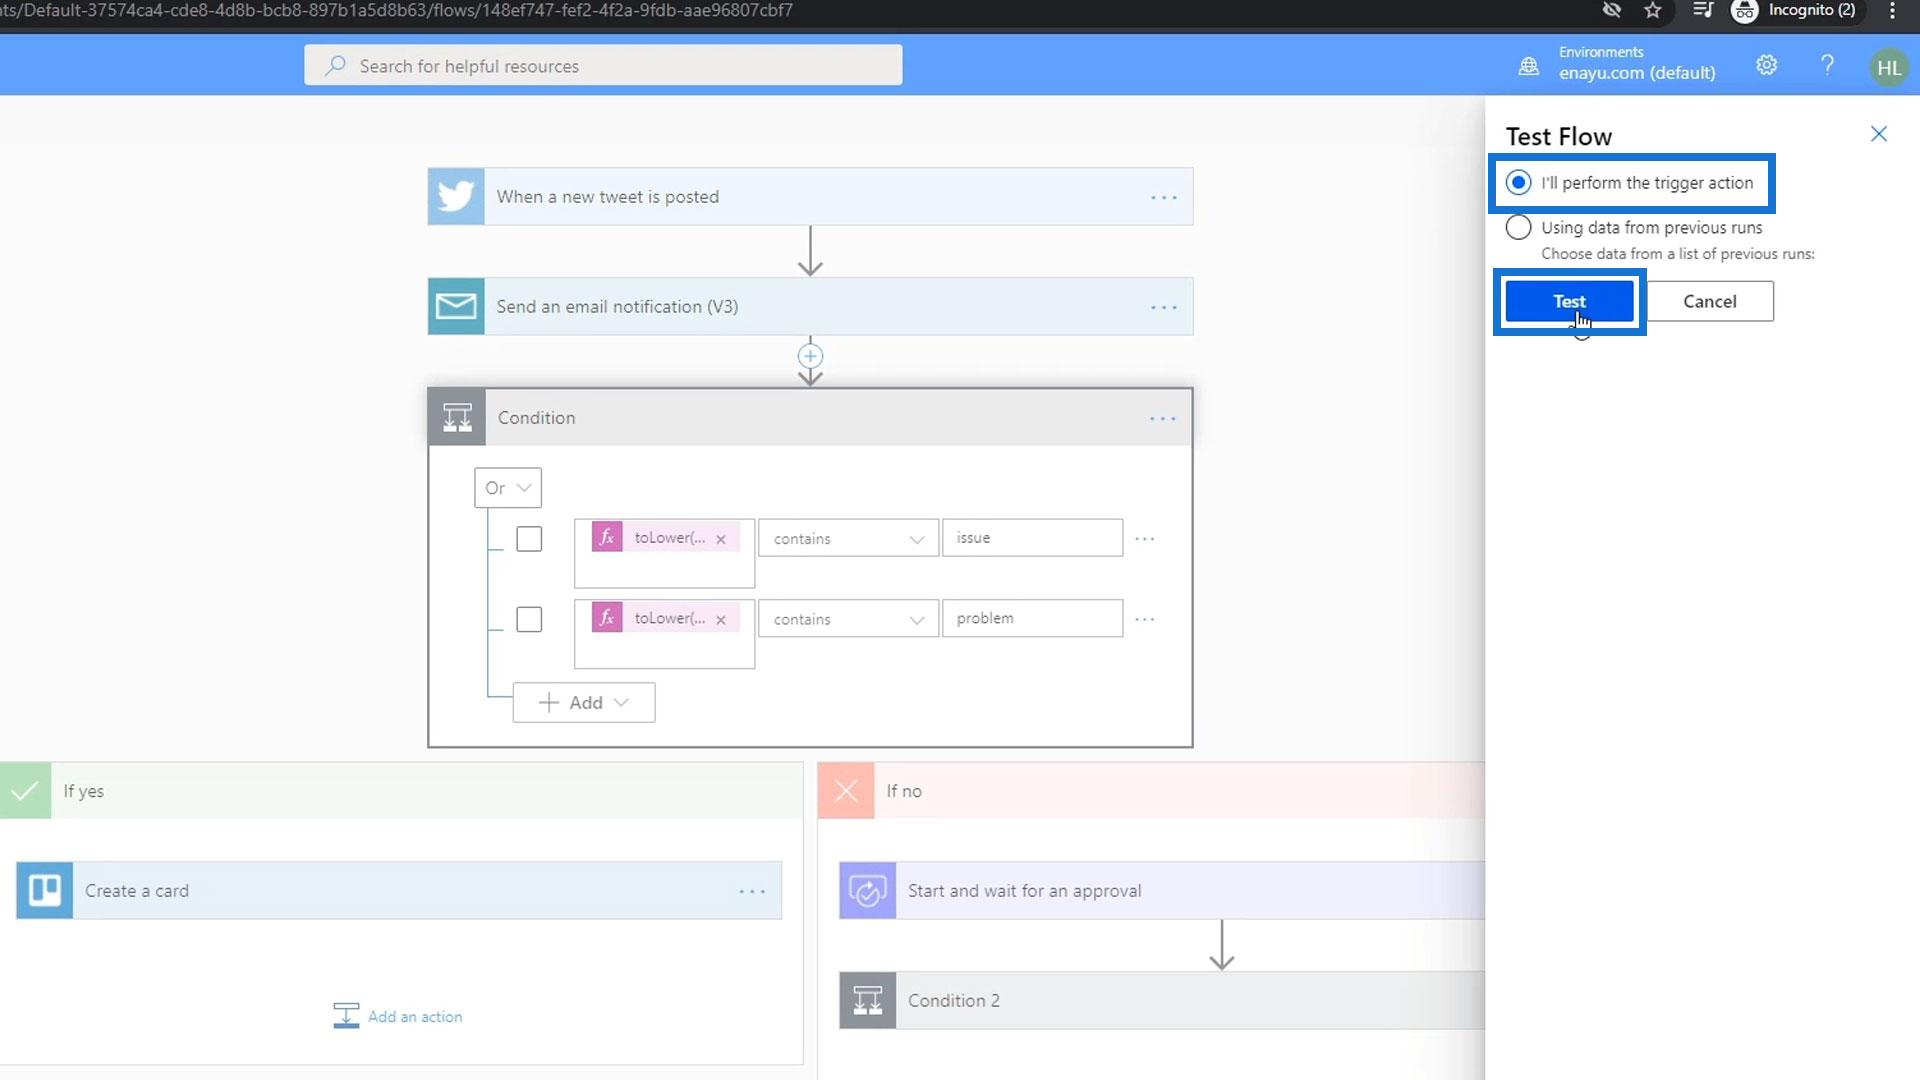
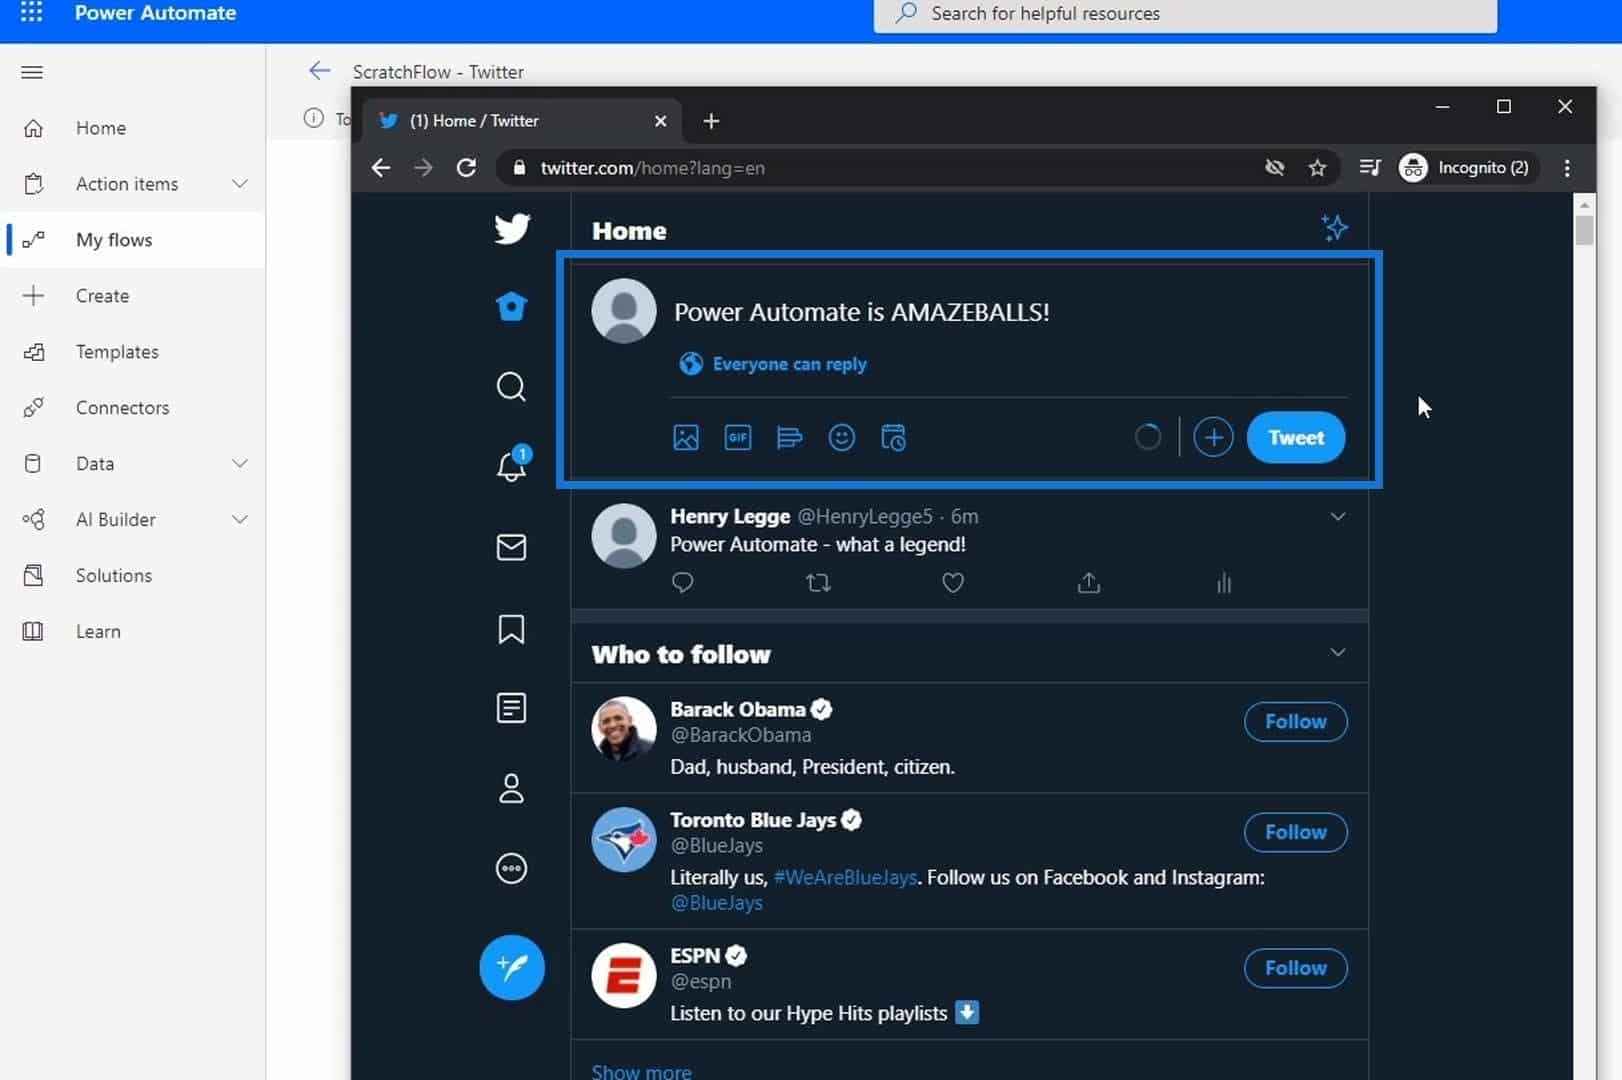
Let’s open Twitter and tweet “Power Automate is AMAZEBALLS!”.
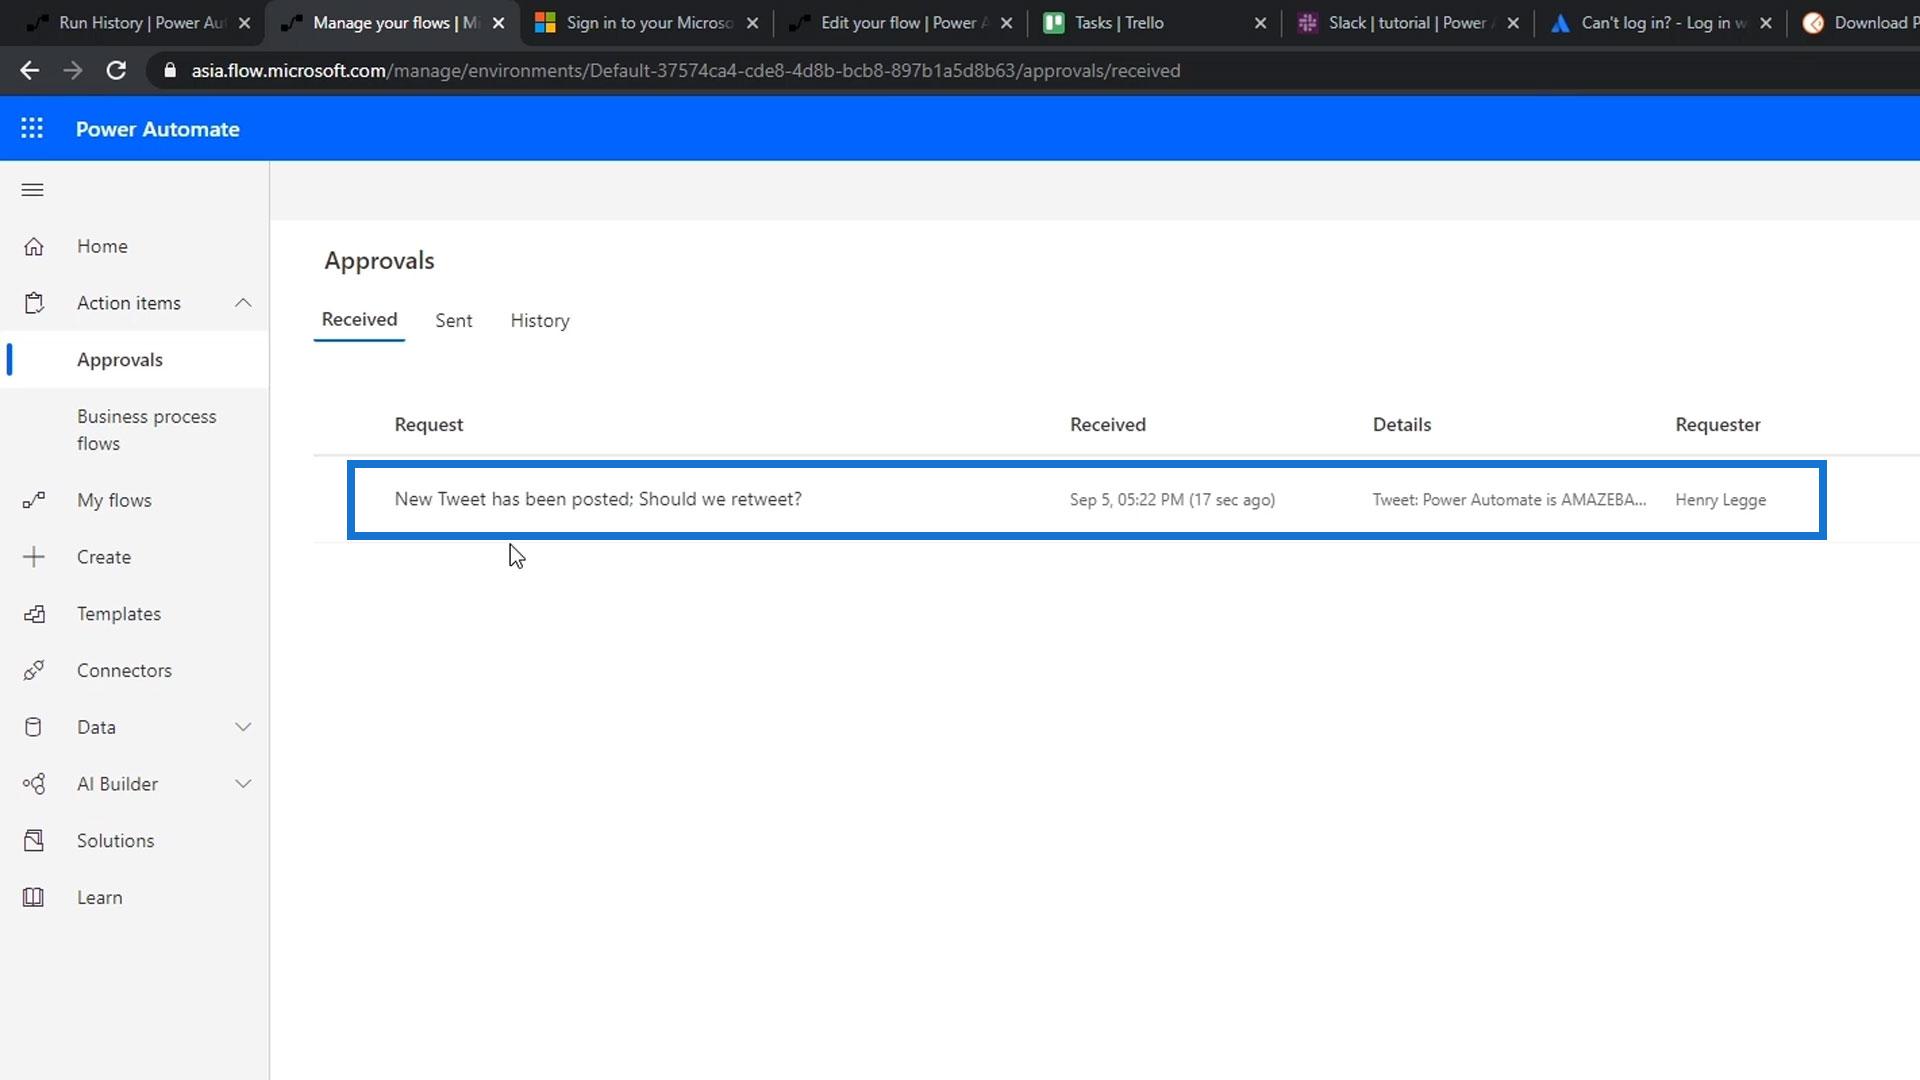
Again, this usually takes a few moments because it’s constantly querying Twitter. After the flow runs successfully, go to Approvals.
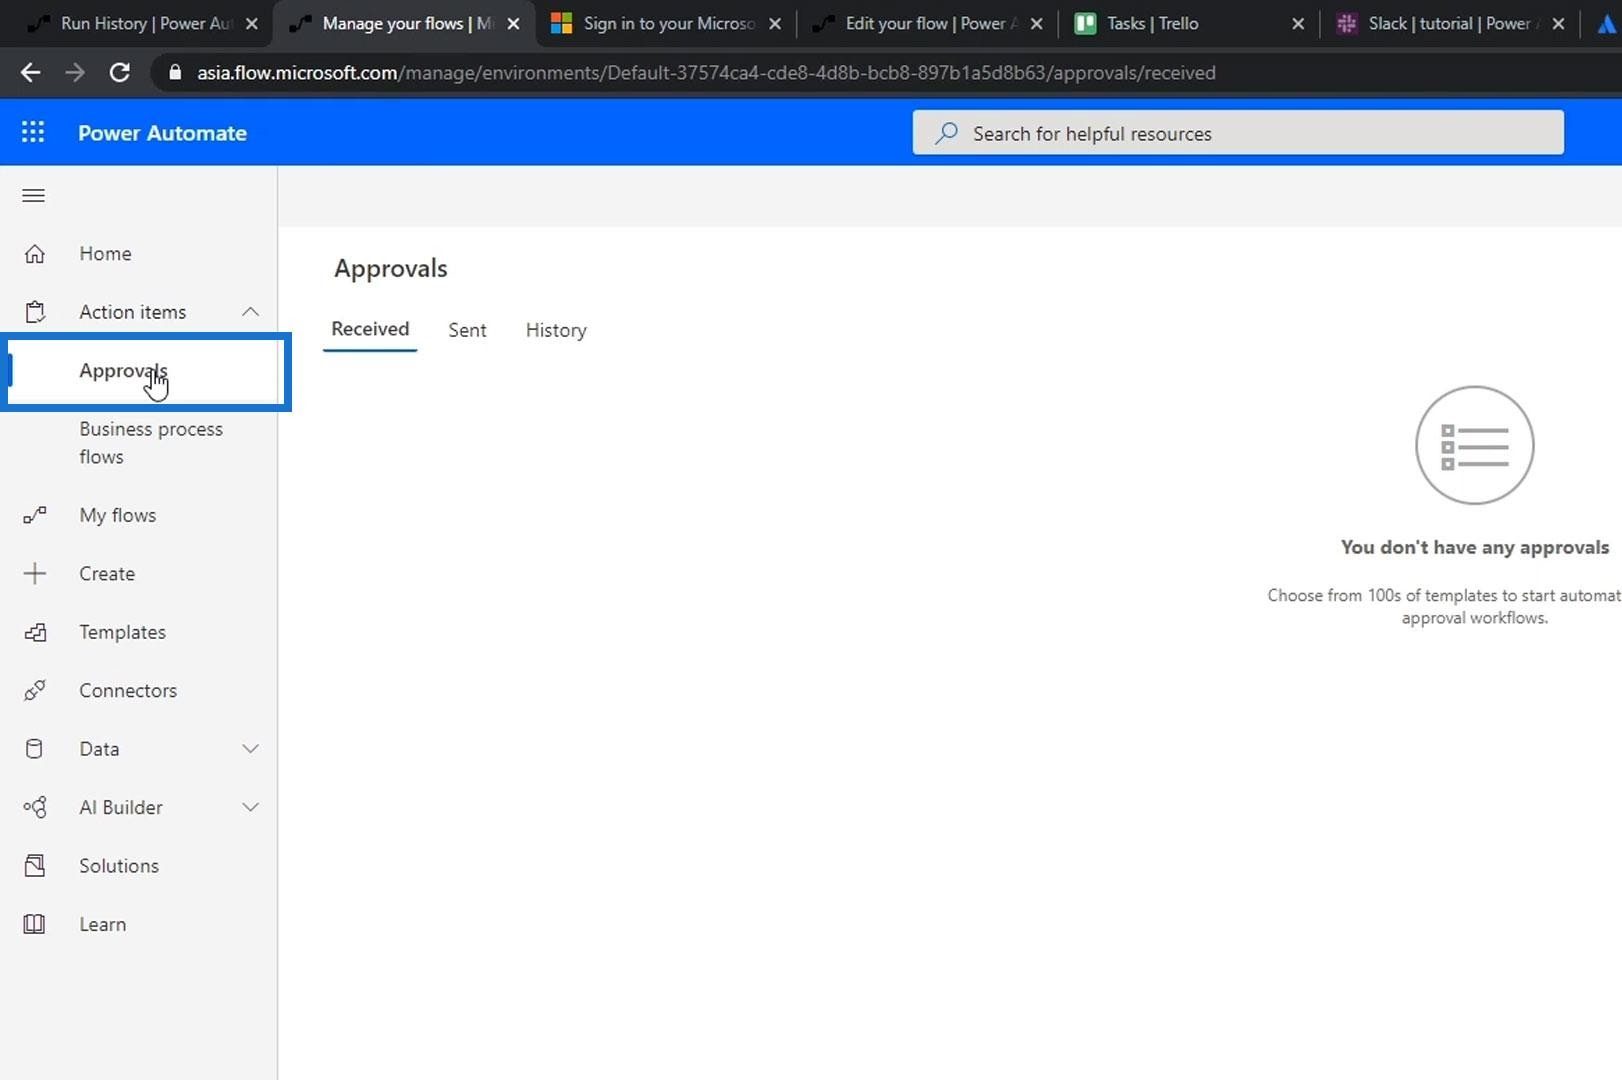
We’ll then see that there’s a new approval request.
Analyzing The Approval Workflow
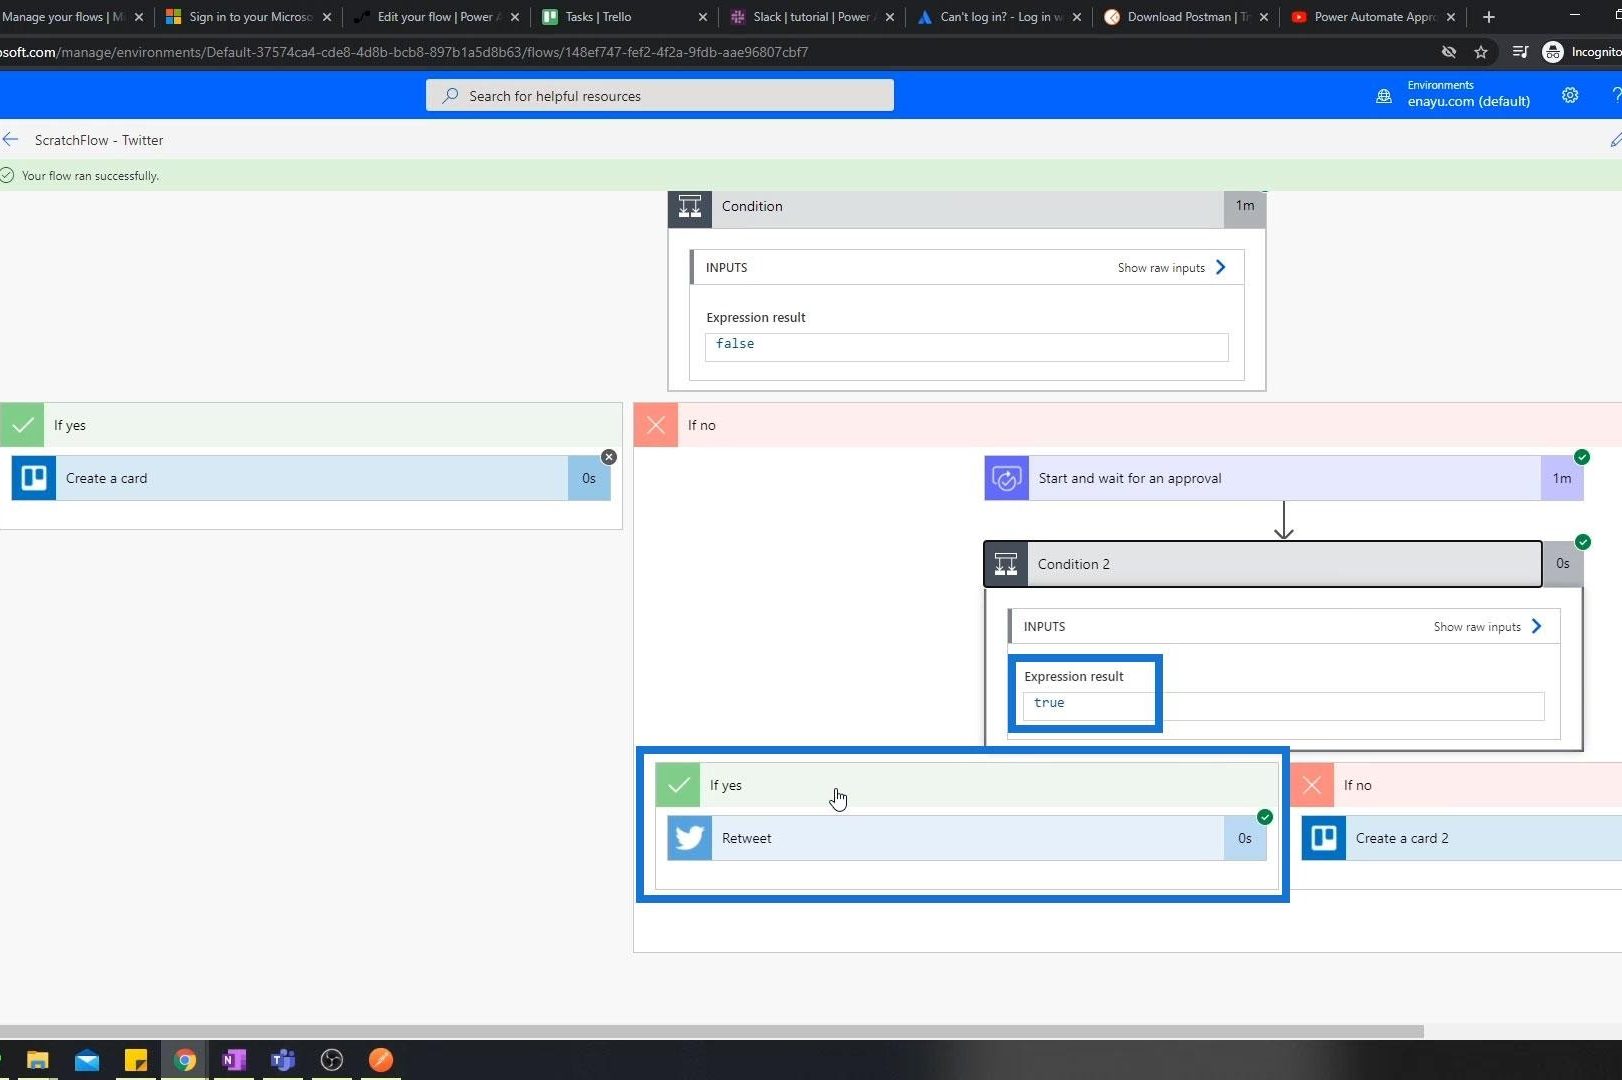
Let’s now analyze how our flow worked. The process has gone through the condition.
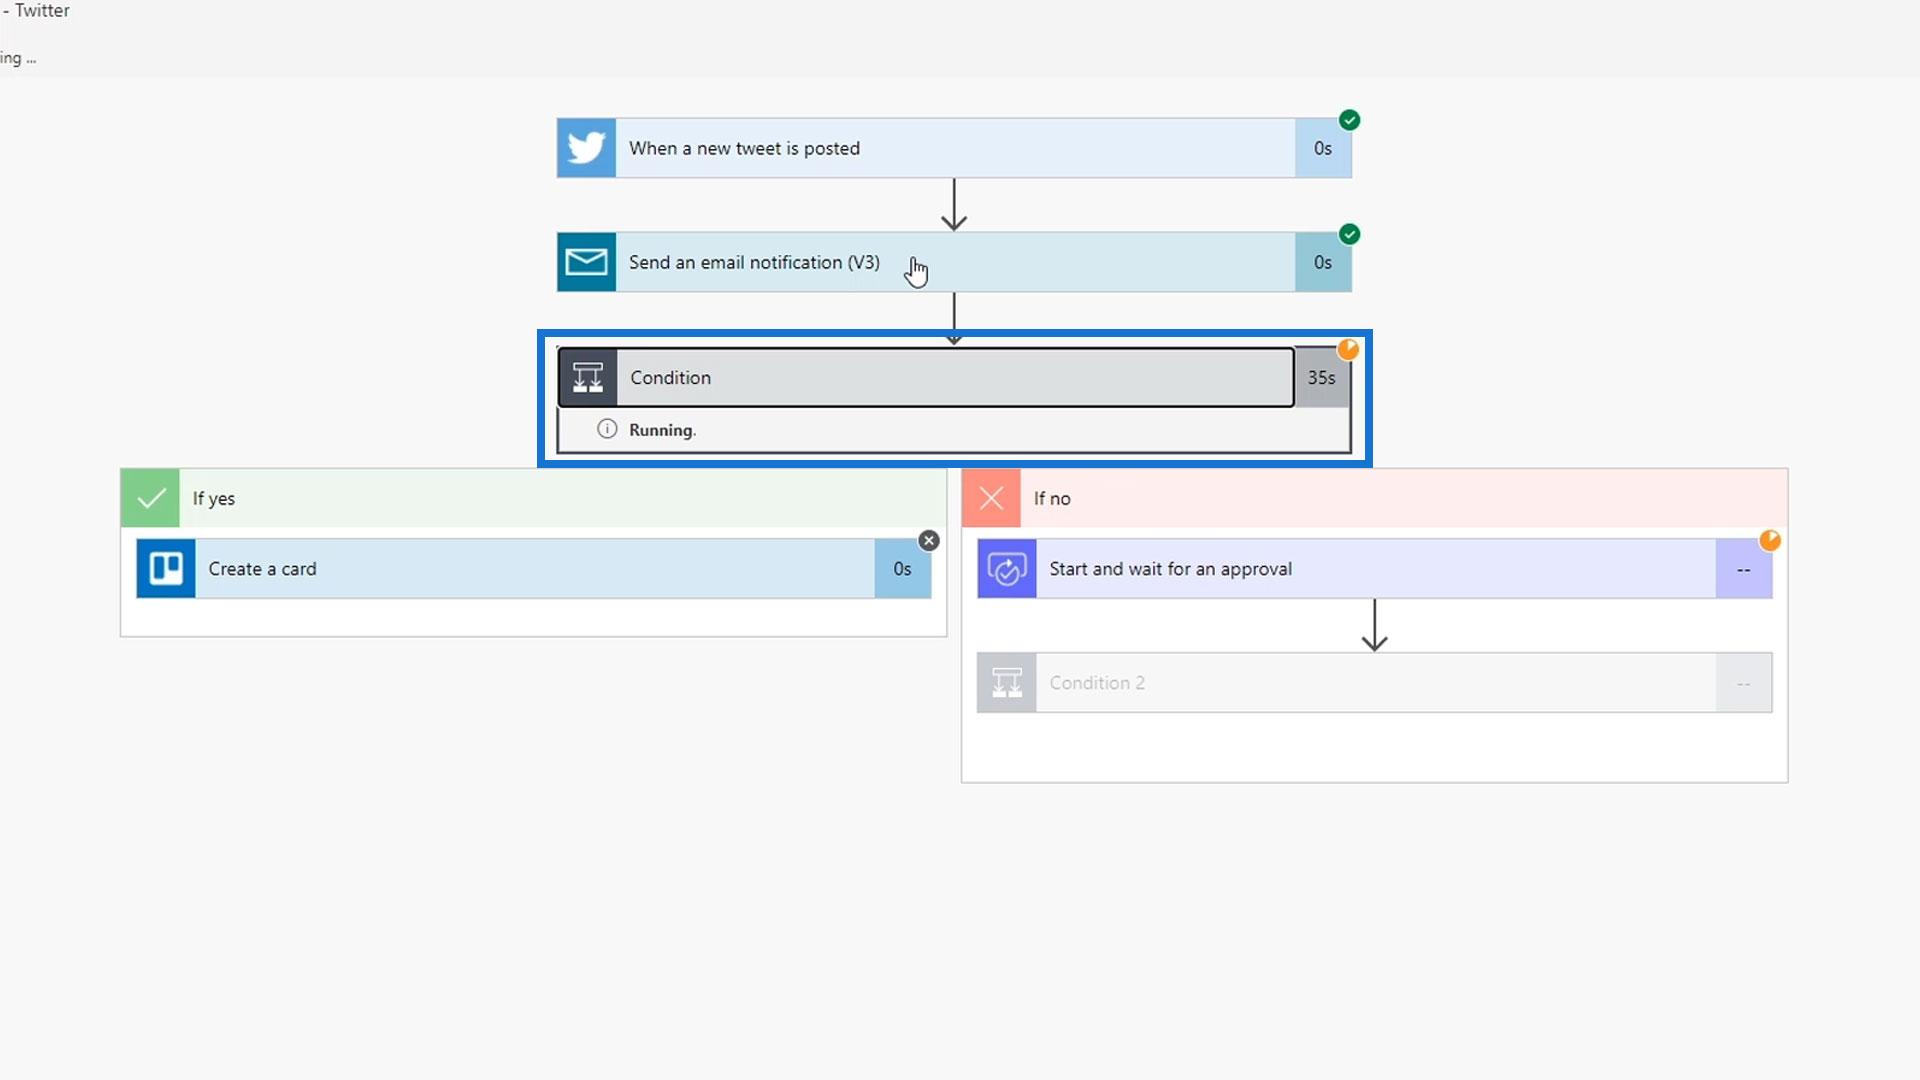
The tweet doesn’t have the word “Issue”. That’s why a Trello card wasn’t created yet. Instead, it waited for an approval.
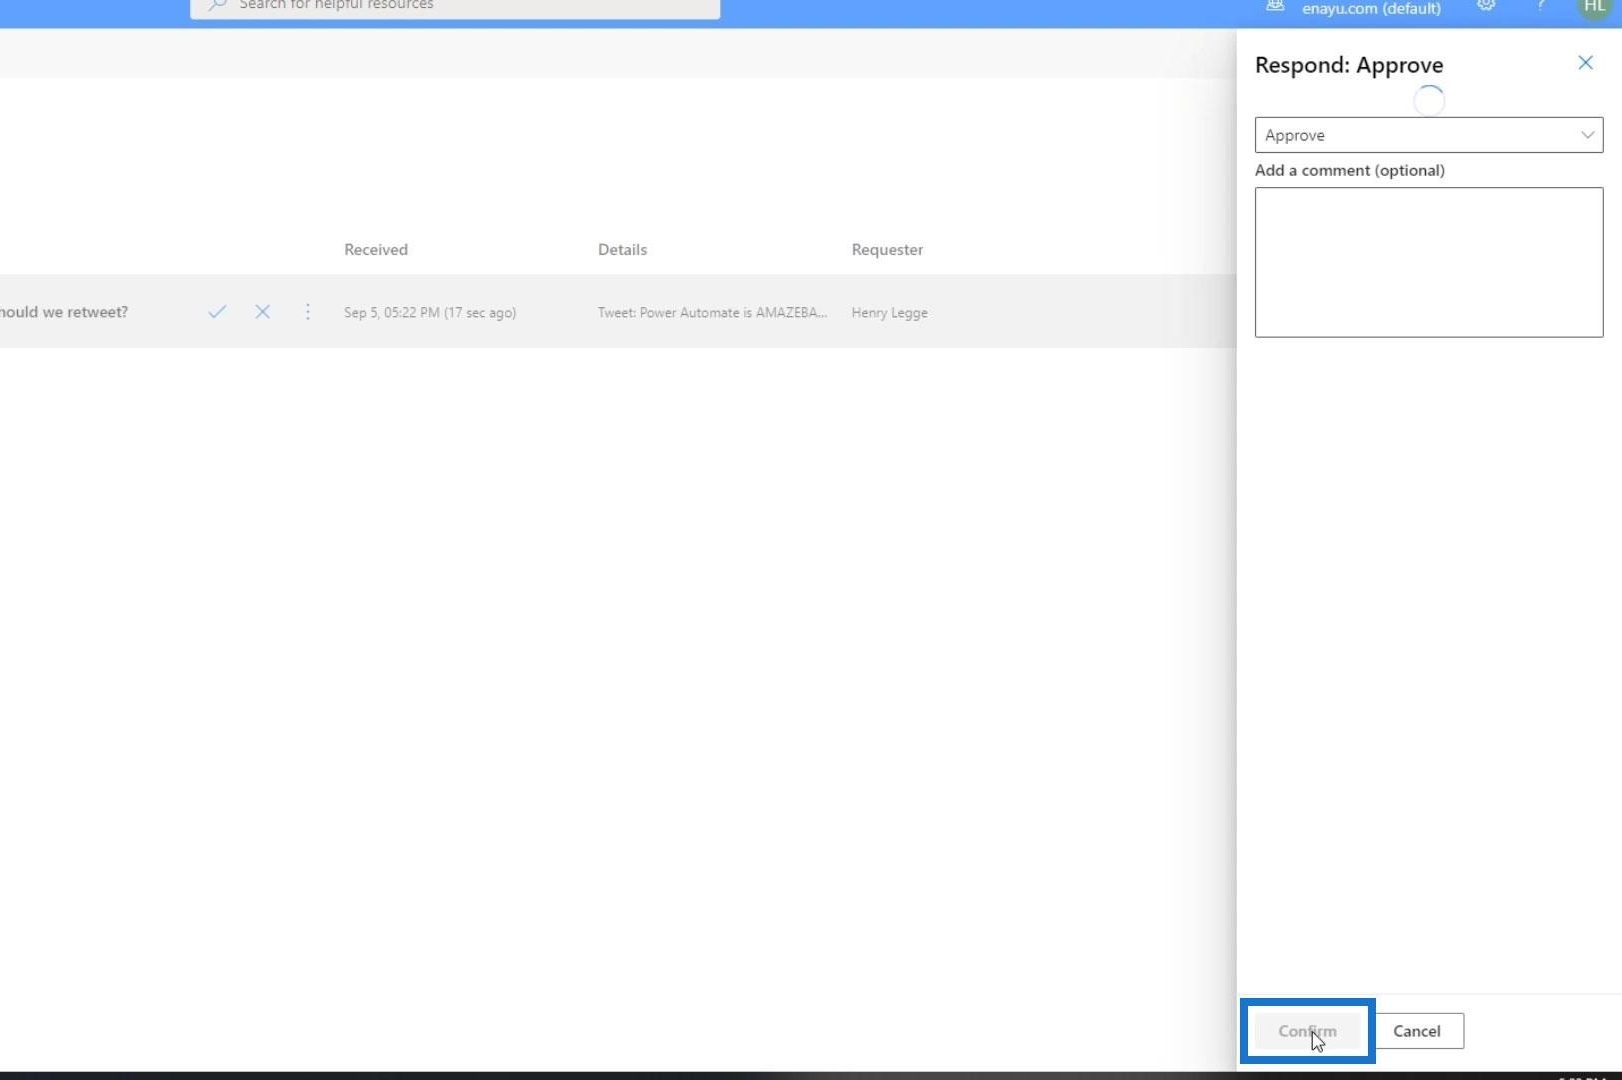
We’ll then get a notification through email, phone, and this dashboard. From here, we can choose whether to approve it or not. Let’s take a look and click the request.

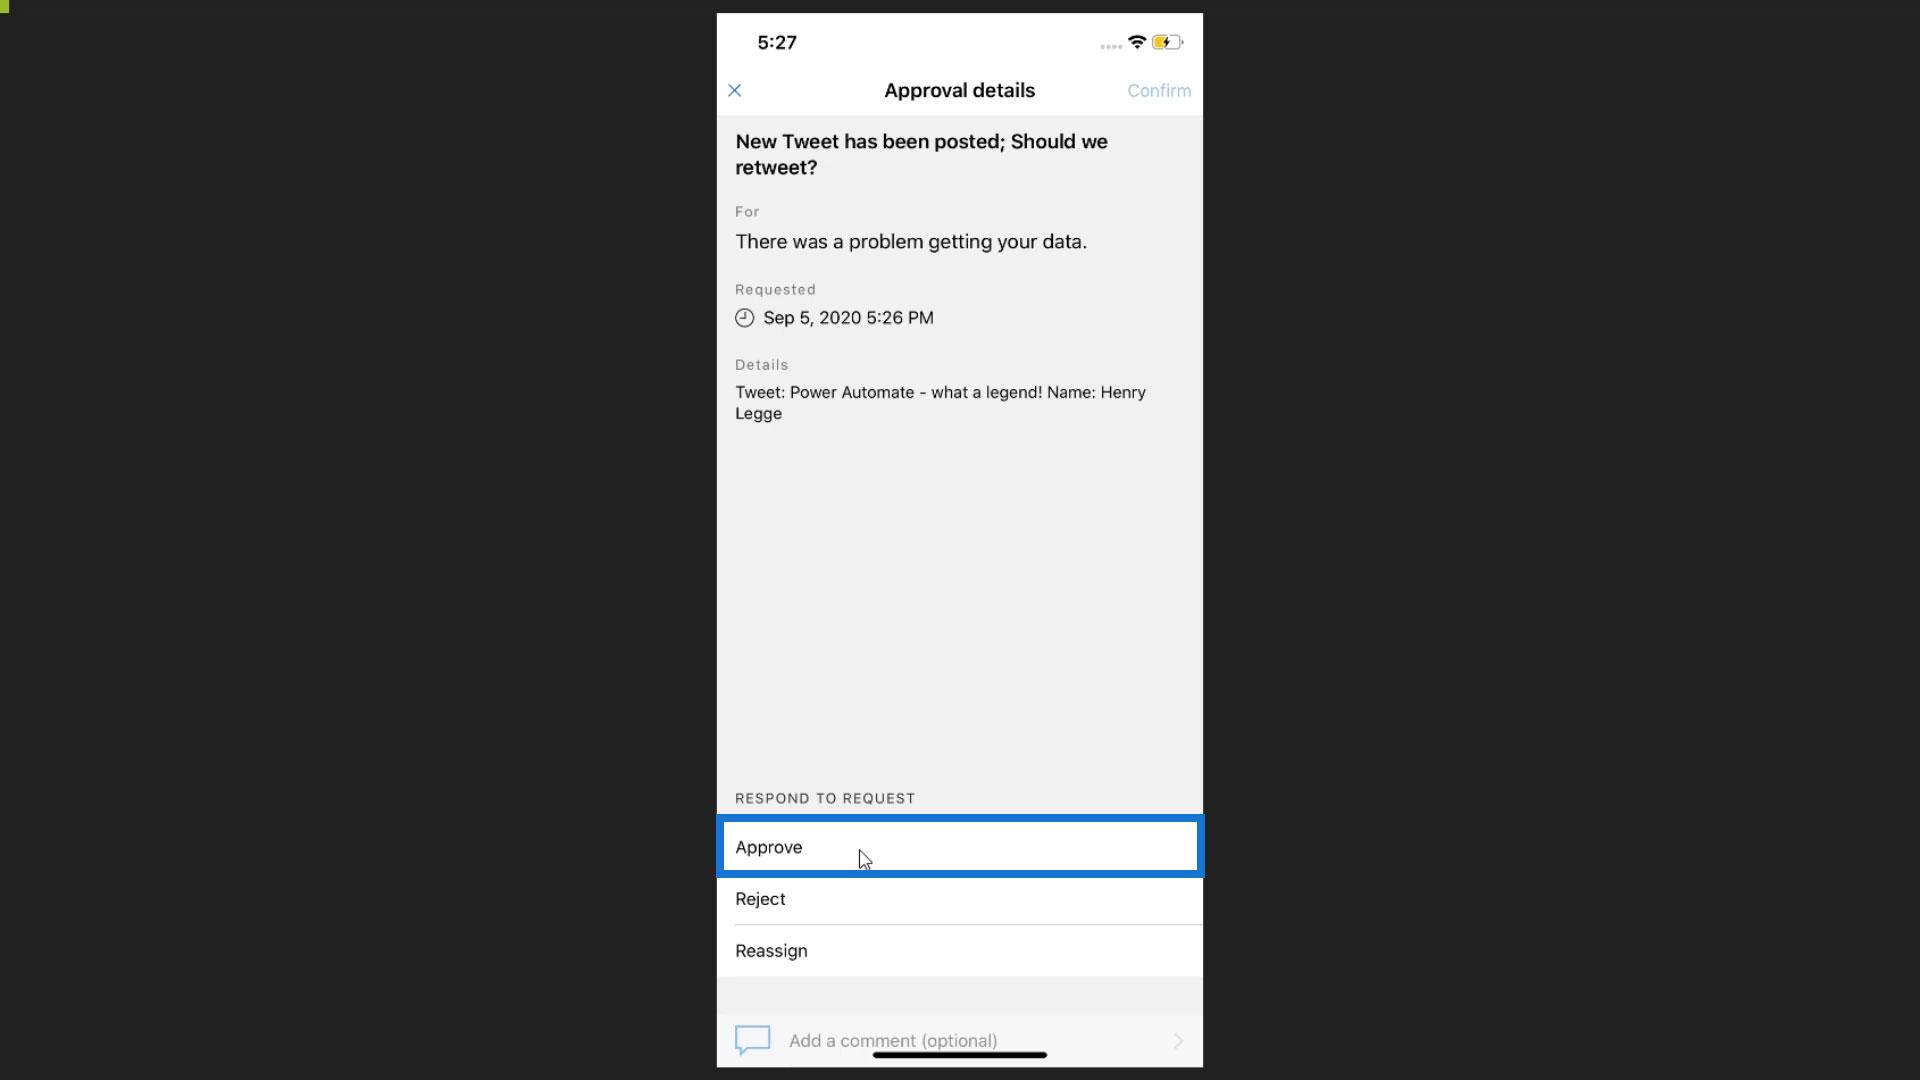
As we can see, it contains all the arguments that we required such as the tweet text and the name of the person who tweeted it.
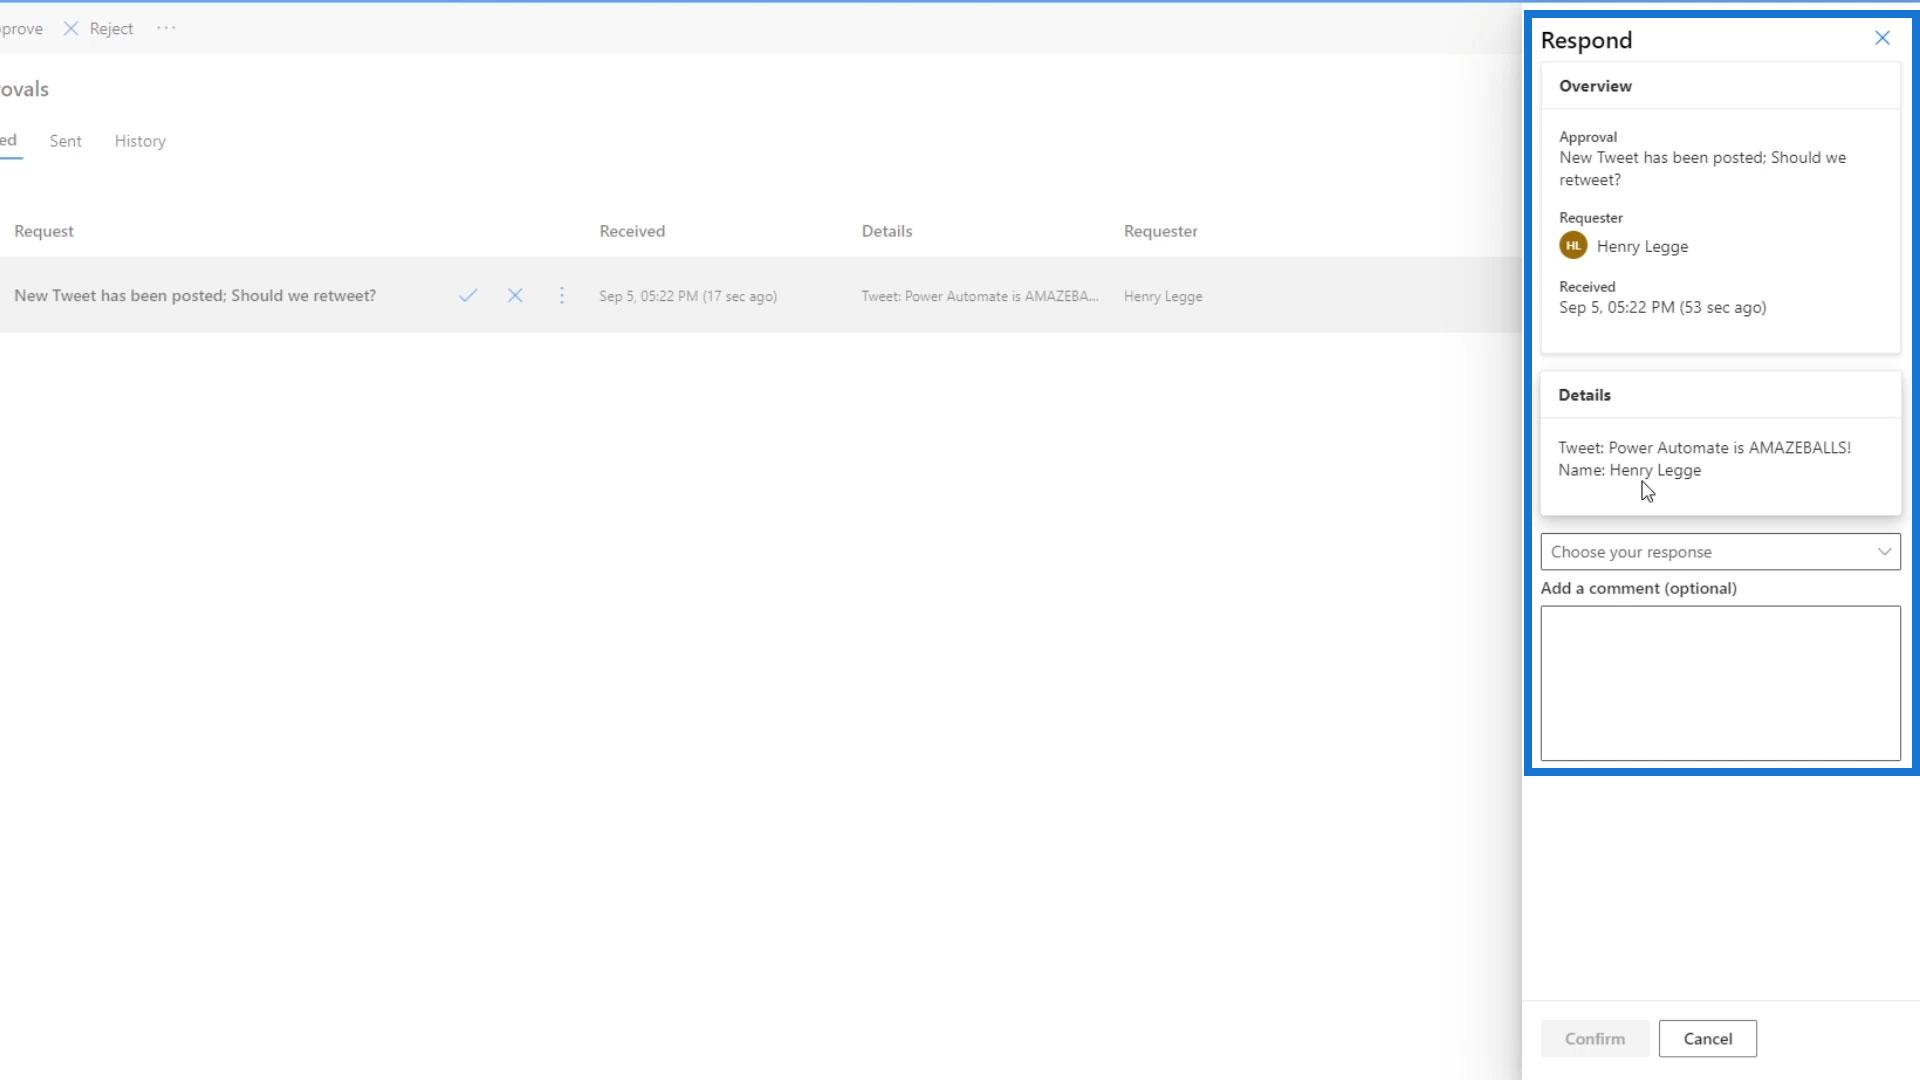
Because of that, let’s approve the tweet.

Then, click the Confirm button.
Let’s now go back to our flow. As we can see, the condition was true. Therefore, the action (Retweet) within the “If yes” path was executed.
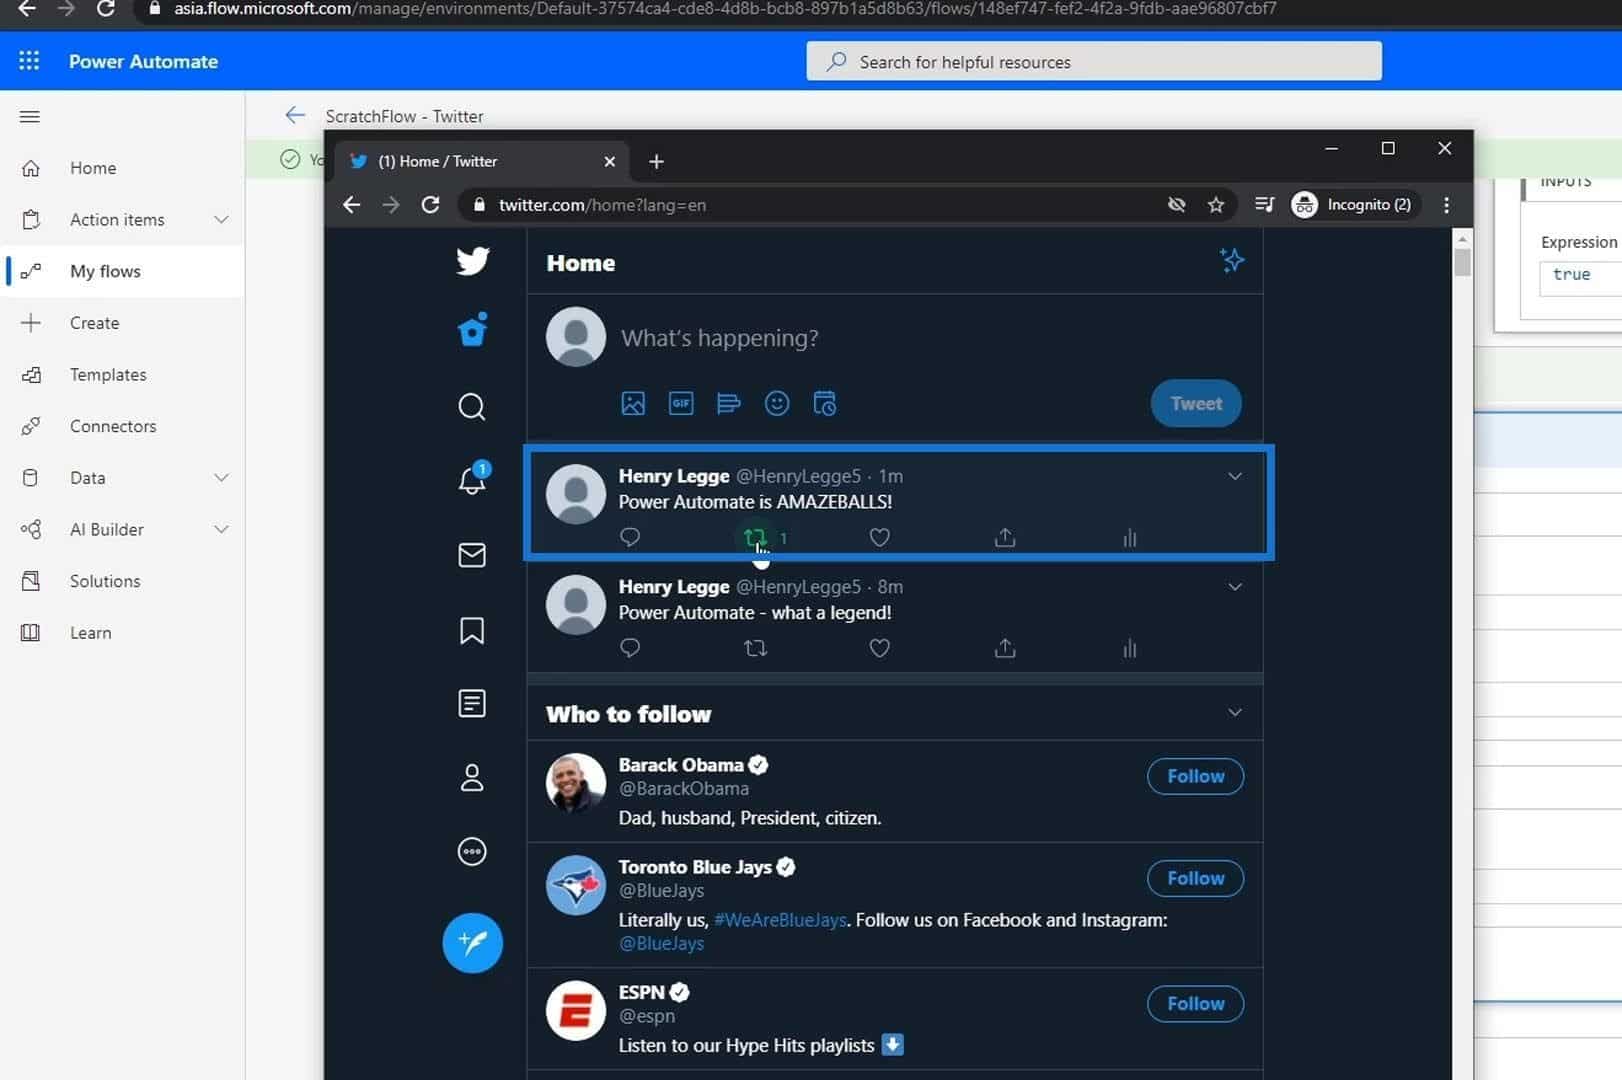
Once we check our Twitter, we’ll see that the tweet was already retweeted.

Approvals On Phone
Let’s now see how these approvals look on mobile phones. For this example, I just went through the same test process for the flow we had created. Then a notification came up after a newly-posted tweet.
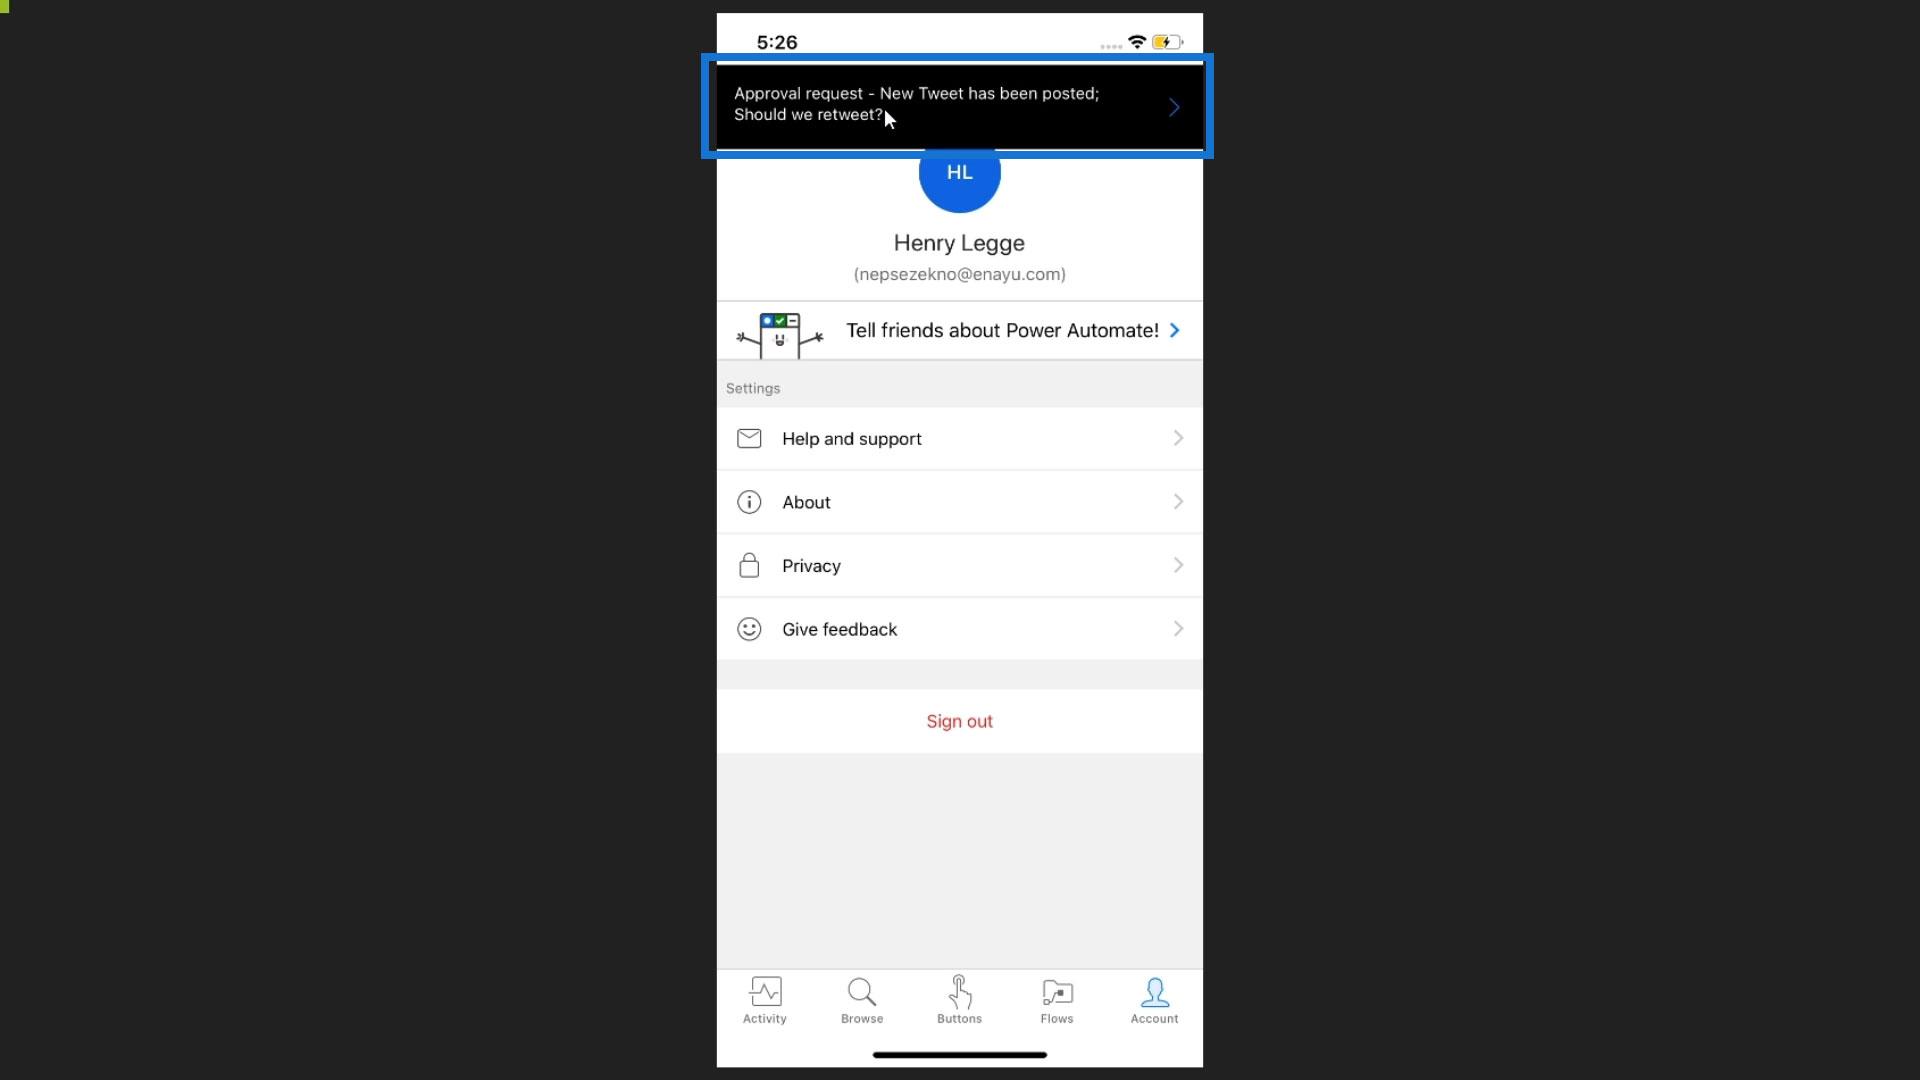
Once we click that, we’ll be redirected to the Approvals page which contains all the approvals that we currently have. Then, we can simply approve, reject, or click the approval.
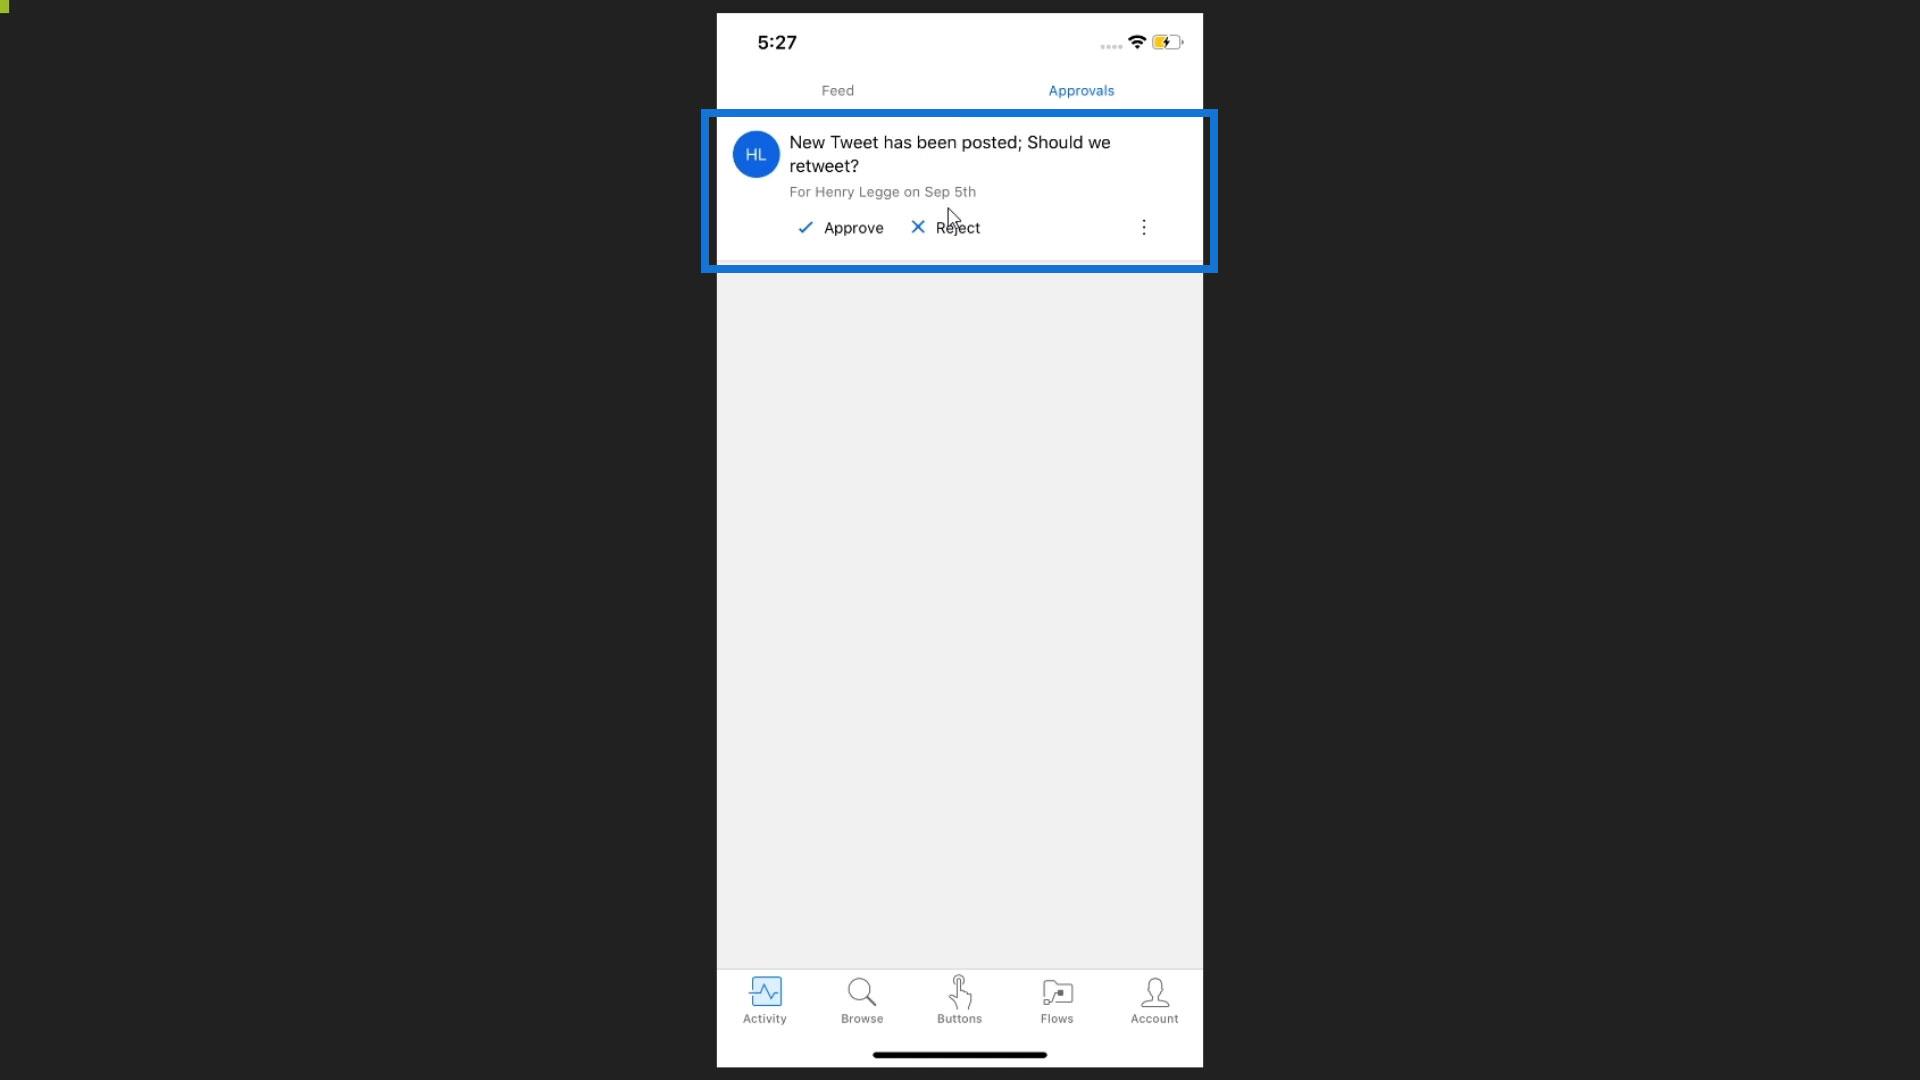
When we click the approval, we’ll see its details in another page.

Since the tweet meets our condition/standard, let’s click Approve.
And that’s how you can manage approvals in Power Automate mobile app.
***** Related Links *****
Power Automate Actions | A Deep Dive Tutorial
Microsoft Flows: Editing And Tracking In Power Automate
Power Automate Trigger Conditions – An Introduction
Conclusion
We’ve successfully created an approval workflow in Power Automate. Keep in mind that flows don’t need to be fully automated, and you don’t have to worry about being uncertain of what might happen in your flows. You can just include user intervention into your flows and make them more customized and logical.
If you’re a consultant and you’re going to deploy Power Automate into a company, a lot of these approval processes and tools are built-in for you. This makes the user experience in Power Automate so much better, especially when users can do everything from both their desktop and phone.
All the best,
Henry