In this tutorial, let’s talk about versioning and version history in SharePoint. Versioning is a powerful tool in SharePoint. If we have all our files in SharePoint, we can edit the files on our desktop application or online.
With document versioning in SharePoint, you can easily track and manage changes on items and data.
If we think about the normal business process, once someone creates a document, there can be many edits made through the process. Without SharePoint, what people do is they version their files based on the title of the file like version1, version2, version-final, and so on and so forth.
The issue is that sometimes, we might send a file to 2 managers and each of them makes edits irrespective to each other. So, when they will send it back to us, we need to consolidate those edits. This is why a lot of teams are moving their file management system directly to SharePoint. This is because of the efficiency of SharePoint versioning.
Editing A File For Document Versioning In SharePoint
Let’s open up a file in SharePoint.
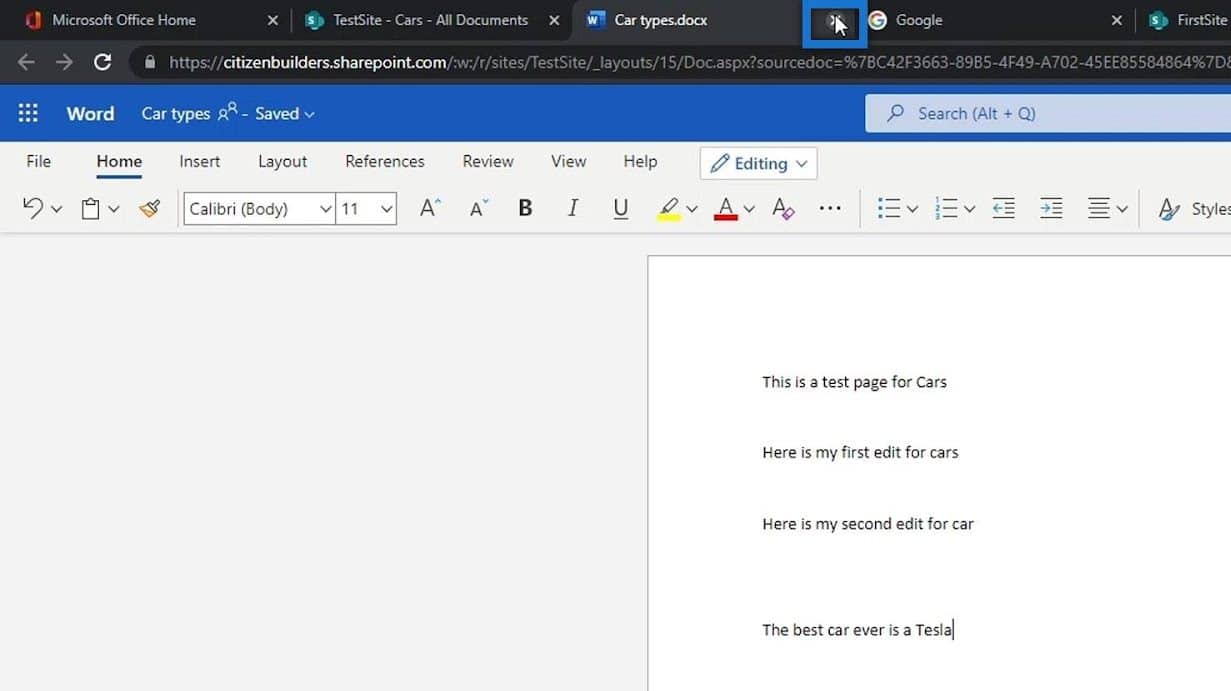
Let’s make an edit. For this example, I’ll add a sentence here saying “The best car ever is Tesla”. Again, one of the nice things in SharePoint is that two people can work on the same office file at the same time.
After that, close the file.

Document Versioning In SharePoint
Let’s say for example we realized that we don’t really want to make that edit or changes and we want to revert that file to its previous version. We’ll be able to do that easily by just clicking the ellipsis beside the file.
Click Version history.
We can then see the different versions of this file when they were saved, and the people who modified it. This is very helpful because we don’t need to save and send a new version to other people every time we need to make some changes to the file. It all gets stored in the file that we’re editing inside the SharePoint site.
Let’s now revert the changes that we’ve made earlier to the file. We know that the recent version is when we made the changes to the file. So, we should look for the version before that. In this case, let’s click version 5.
It’ll ask us to open it up on our desktop Word app. Let’s click the Open Word button.
Then, it’ll ask us to sign in. Again, we need to use the account that we’re using in SharePoint.
After signing in, we can now see the version of the file without the edits or changes that we recently did.
Restoring Versions In SharePoint
We can also see at the top that we can make this version as the latest version by clicking the Restore button.
Let’s just close this file for now.
We can also restore that version by clicking on the little dropdown arrow beside it.
Then, click Restore.
After that, click the OK button on the popup box.
Now, a version was added on the list which is version 7. What we’ve done is we made a version that’s exactly the same as version 5, which is the version that we want to restore.
Let’s now close the Version history.
Then, let’s open this file again.
Now, we’ll see that the changes we’ve made earlier are gone.
***** Related Links *****
SharePoint Tutorial: Creating A New Site
SharePoint Document Library | Beginners Tutorial
Microsoft SharePoint Sites: A Brief Overview
Conclusion
To summarize, we’ve learned that multiple people can edit a file at the same time. We also learned that versioning in SharePoint allows users to track all the changes that people have made to one file using the Version history. This enables users to better manage documents. There’s no need to make a version and then send it to our manager, then another version every time we make changes.
Moreover, we’re able to learn how to restore versions of documents and file changes. It’s especially helpful when several people work together on a project, or when information goes through several stages of development and review.
All the best,
Henry


