For today’s tutorial, I’m going to show how you can automate the process of sorting one column by another column inside Power BI and SSAS or SQL server analysis services. You can watch the full video of this tutorial at the bottom of this blog.

In this example, we have the Dates table with several columns. Some columns are the integer part, which we’re going to hide; and some columns are the string part, which we’re going to show to the end-user.
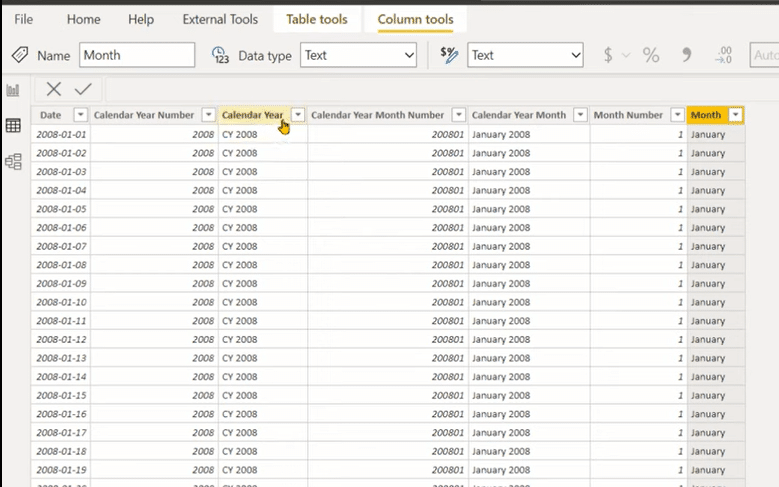
So, we have the Calendar Year, Calendar Year Month, and Month columns. What we want to do is automate the sorting of these three columns by their integer part. I’ll sort the Calendar Year by the Calendar Year Number, Calendar Year Month by the Calendar Year Month Number, as well as Month by the Month Number.
But we will not do that one by one. We’ll run a script that will automatically sort that for this particular table. In case you have multiple columns for multiple tables, you can use that script on those sets of tables.
We’re going to use Tabular Editor for writing that C# code, but for now, Tabular Editor doesn’t have an IntelliSense for the C# language. To make it easier, we’ll use Visual Studio (VS), where we have the IntelliSense for C# language and you can also use VS code.
Sorting Columns In Power BI And SSAS Using C#
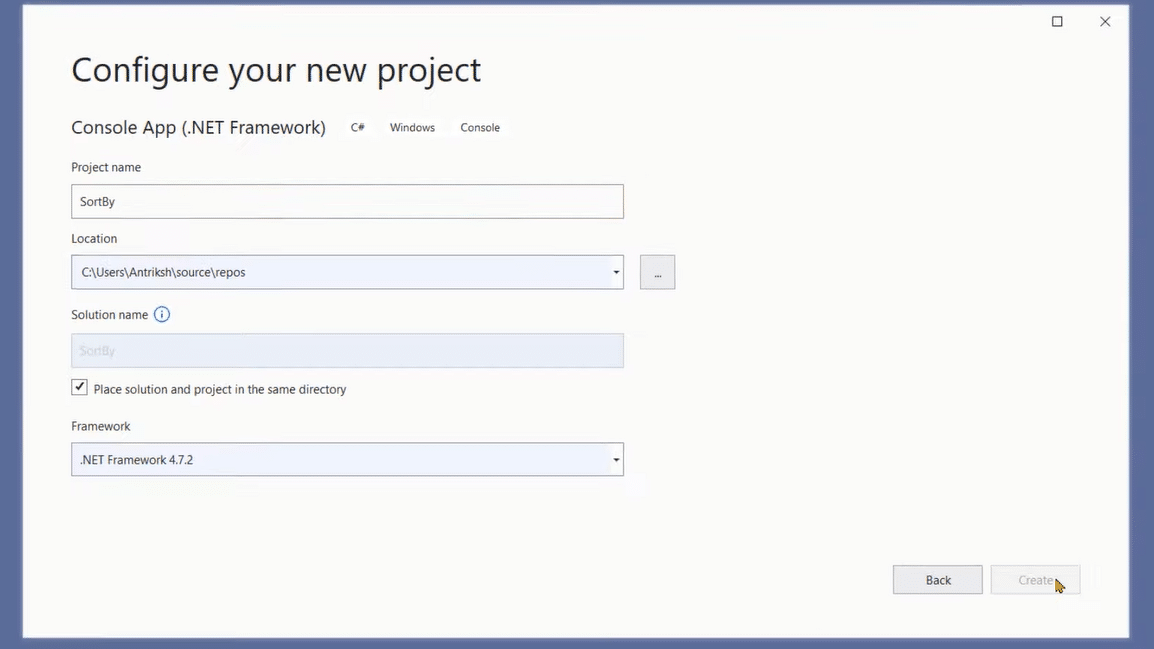
First, we need to create a new project inside Visual Studio, which will be the Console App (.Net Framework) for the C# language. Let’s select that click on Next.

Then, we can provide any name to the project. I’m going to call this SortBy, and click on Create.
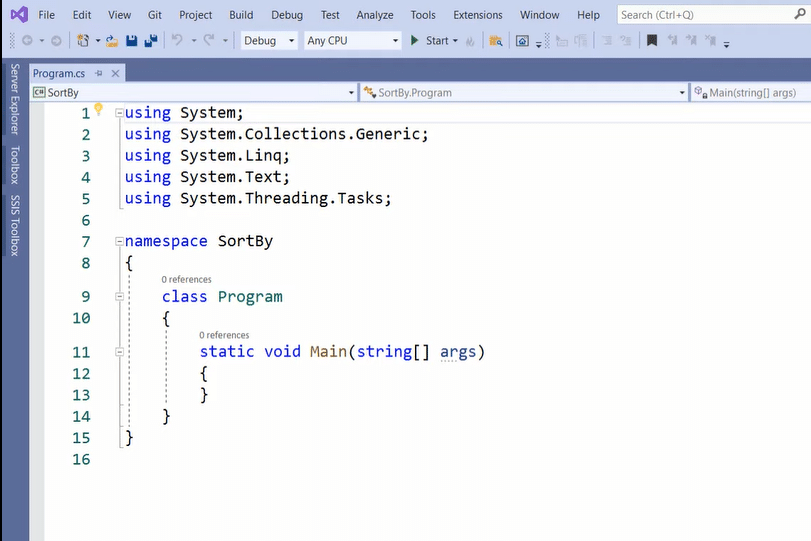
Now, you can see that we have the code. Once the code works, we are simply going to copy and paste it inside Tabular Editor.
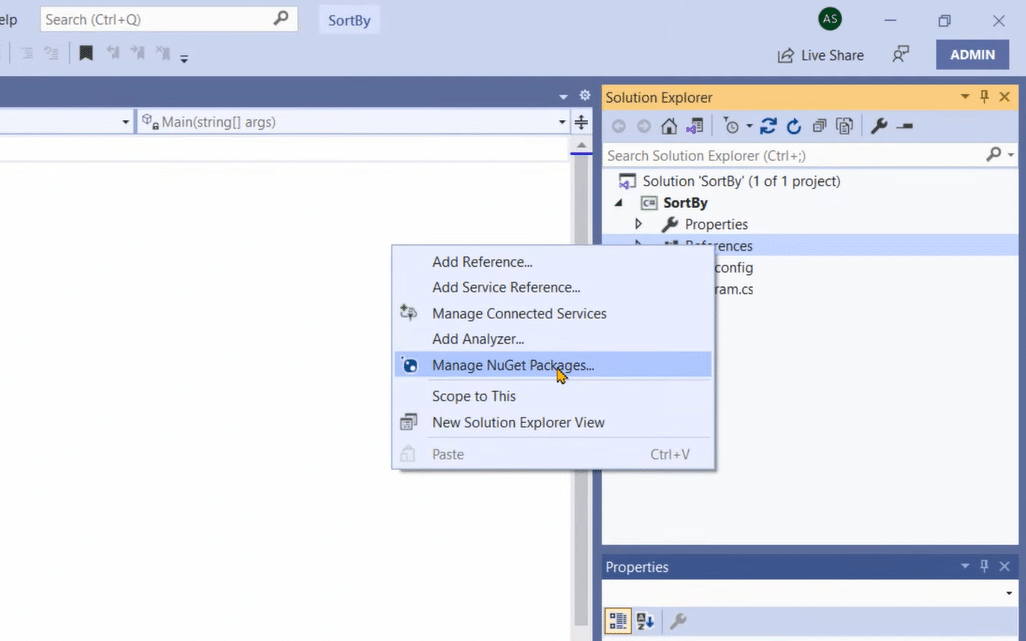
But, for the code to work inside Visual Studio, we need to set a reference to a library. And for that, we can simply click on the References and choose the option of Manage NuGet Packages inside the browser option.
Inside the browse option, we need to write analysis services. And then, in the options that are available, we need to select the second one and click on Install. It’ll begin the installation and it’ll take a few seconds for the installation to complete.
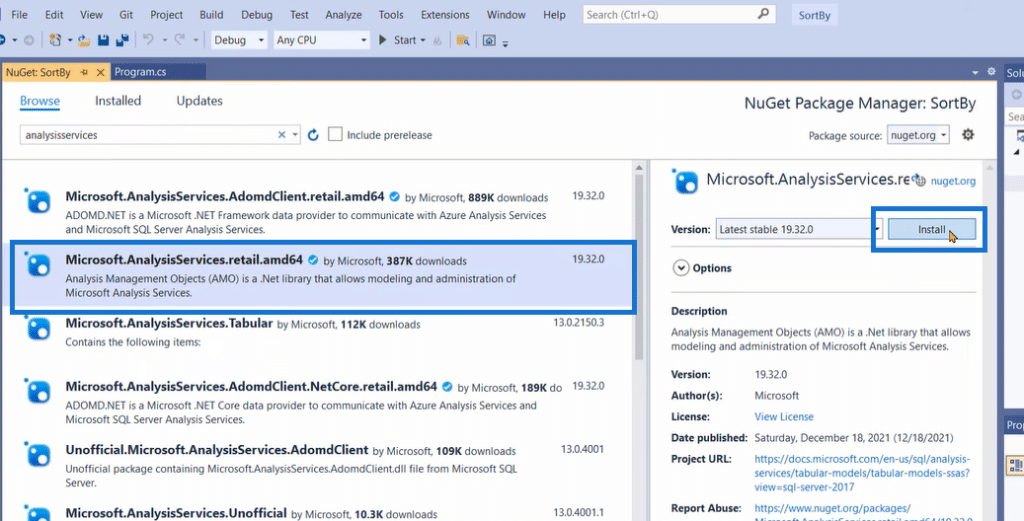
Next, we need to write within the code, Using Microsoft.AnalysisServices.Tabular and then write a semicolon. We are going to create a server object, so we can simply write Server, and the name of the server object will be Server itself, and we are going to write New Server.
So basically, we are creating a new object inside the memory. And to connect that server to the Power BI file, we are going to use a method of the server object. So, let’s write server.Connect, and here we’ll provide the port number on which the AnalysisServices inside Power BI is listening.
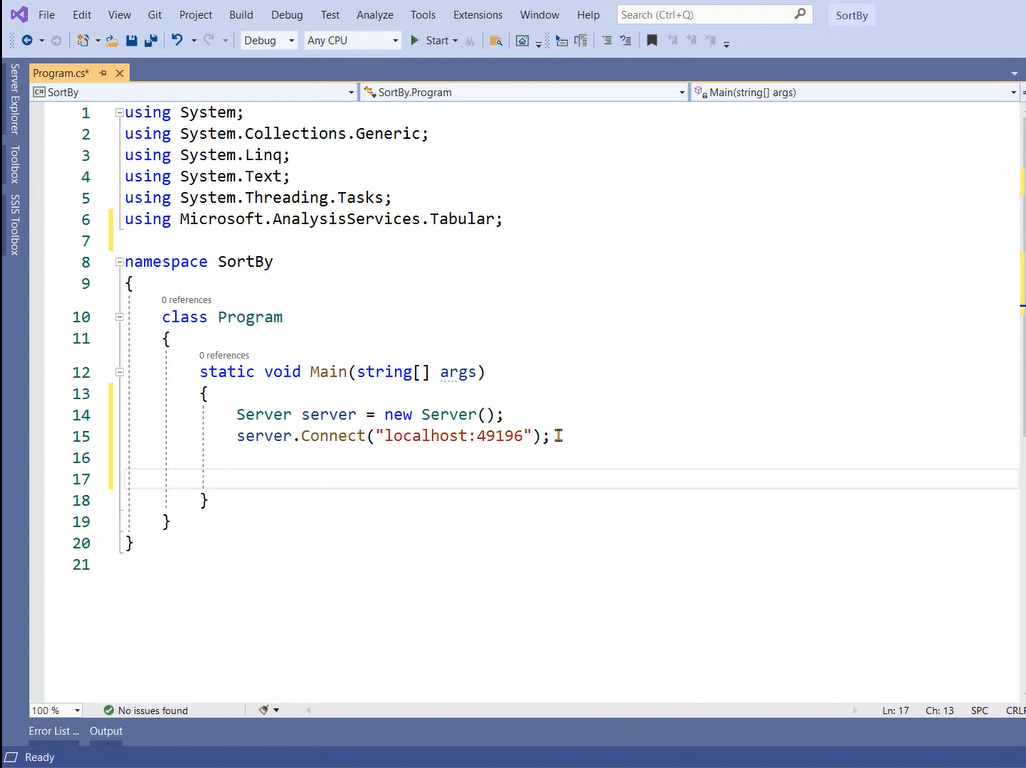
To find that port number, we go to External Tools, click on DAX Studio, and at the bottom part, we’ll find the local host. That is the code number on which SQL server analysis services that we have inside Power BI are listening to the changes that we are sending through Power BI or any other external tool.

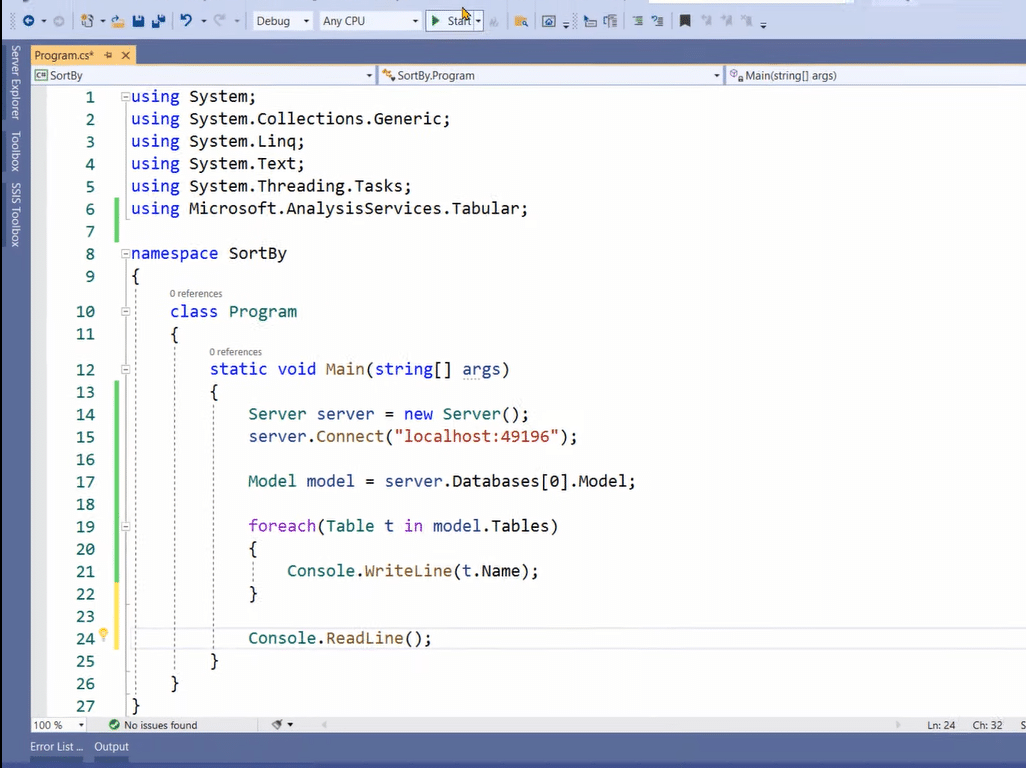
The server is one thing, but a server can have multiple models as well in the case of SSAS. But right now, in Power BI, we only have one model. So, we’re going to declare that model. We write here Model is equal to (=) server.Databases, and we’ll access the very first database inside that server so we’ll write .Model.
Now let’s test if that part of the code is working or not. To do that, we’ll simply print the list of all tables that we have inside that data model. So, we’ll type in here, for each (Table t in model.Tables), open bracket, and press enter.
After that, we type in Console.WriteLine (t.Name). To make sure that the window doesn’t automatically close once it prints the name of the tables, we’ll write that Console.ReadLine, open and close parenthesis, and a semicolon. Now, all we need to do is click on the Start option and wait for it to execute.
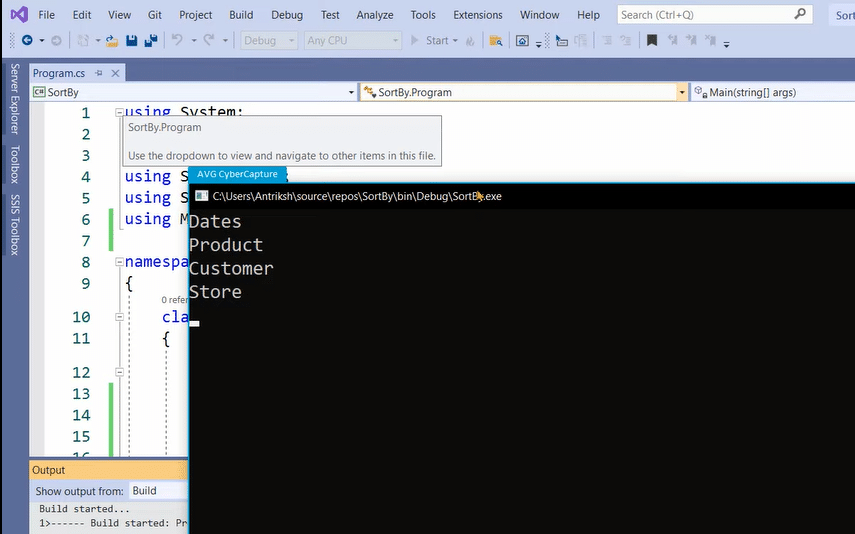
You can see that we are able to print the name of the tables that we have inside the data model. We have the Dates, Product, Customer, and Store. That confirms that the setup we have created is working.
So now, we can actually get into the meat of the code and start creating the code that will help us in sorting that column by the integer counterpart.
Let’s get rid of everything that we have created from the ForEach part. We are going to keep the server and the model as it is. Let’s declare a variable that will hold the name of the table that we want to iterate on. I’ll name it as DatesTable, and the name of the table will be basically Dates.
Next, we’ll have foreach var t in model.Tables, then we are going to use a where clause, so we can say where T goes to t.Name should be equal to DatesTable. If we are currently iterating on the DatesTable, we are going to initiate another loop over all the columns of that DatesTable. So for that, we can write foreach var c in t.Columns.
To test if we are iterating only over the DatesTable and we have the access to all the columns of the DatesTable, we can simply print Console.WriteLine, and we are going to say c.Name.
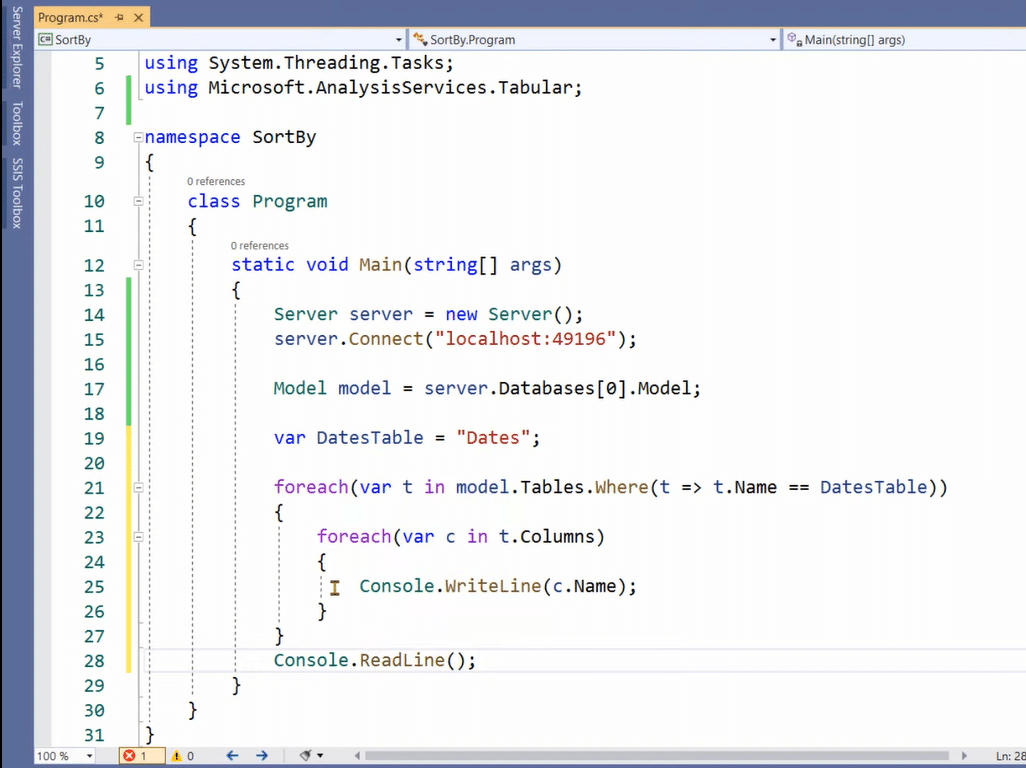
If I press F5, you can see that we get access to the columns.
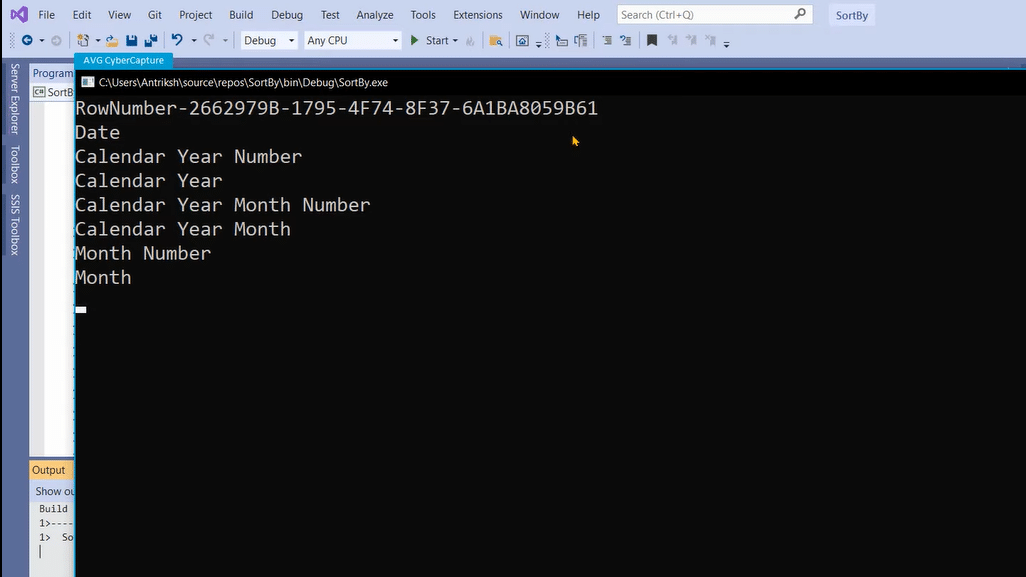
Now we can proceed further and write more code.
We are going to create a list of tuples that will contain three columns more. One of the columns will be the target column. The second column will be the column through which we want to sort the target column, and the third column will simply hold true or false, whether we want to hide the column through which we are actually sorting.
Let’s say we want to sort the Calendar Year column by the Calendar Year Number. The first column will contain the Calendar Year, the second column will be for the Calendar Year Number, and the third column will decide whether we want to hide the Calendar Year Number column after we have completed the sorting or not.
And for that, let’s go back to Visual Studio, where we are going to create a new variable. You can name it anything you want. In this example, I’ll call it colOperations. Next, we are going to write new, and then we are going to create a list and we’ll write the type of columns (string, string, and bool). After that, we create the tuples.
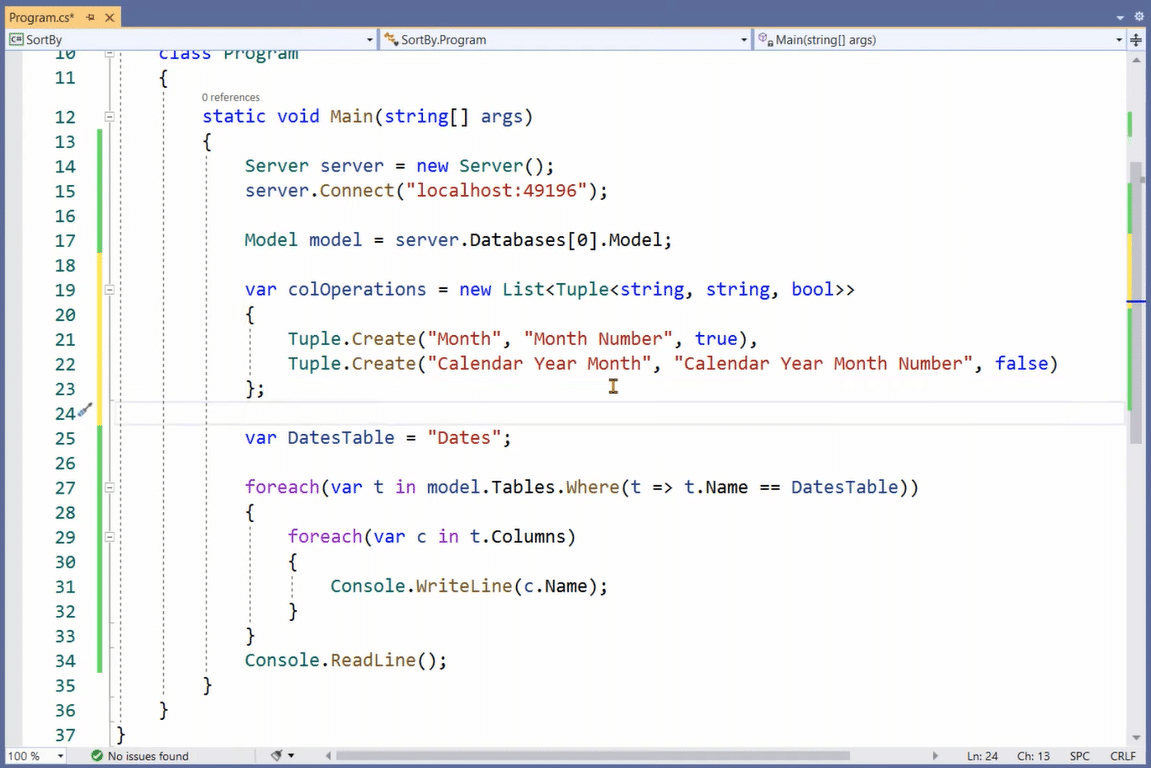
So basically, we are simply creating a list of three columns, and for three columns, we have provided two rows. Now inside our foreach loop, we are going to initiate a for loop. So basically, what we are saying is that declare a variable start with i in each iteration. If i is less than colOperations.Count then simply increment that.
Next, we are going to write an IF statement. The c.Name belongs to the name of the column that we are currently in. Then, we have the colOperations i. The i basically allows us to access one particular row. And when we write .Item1, we are able to access the first column, second column, or third column.
So first we are going to use the Item1 column. If that is true, we simply write c.SortByColumn should be equal to t.Columns. Remember that t is the table object. Then, we are accessing the columns from that particular table. We want the colOperations, the row that we are currently on the column operations, and the column is basically the Item2 object.
Finally, to hide that particular column through which we are applying the sort, we write one final line of code.
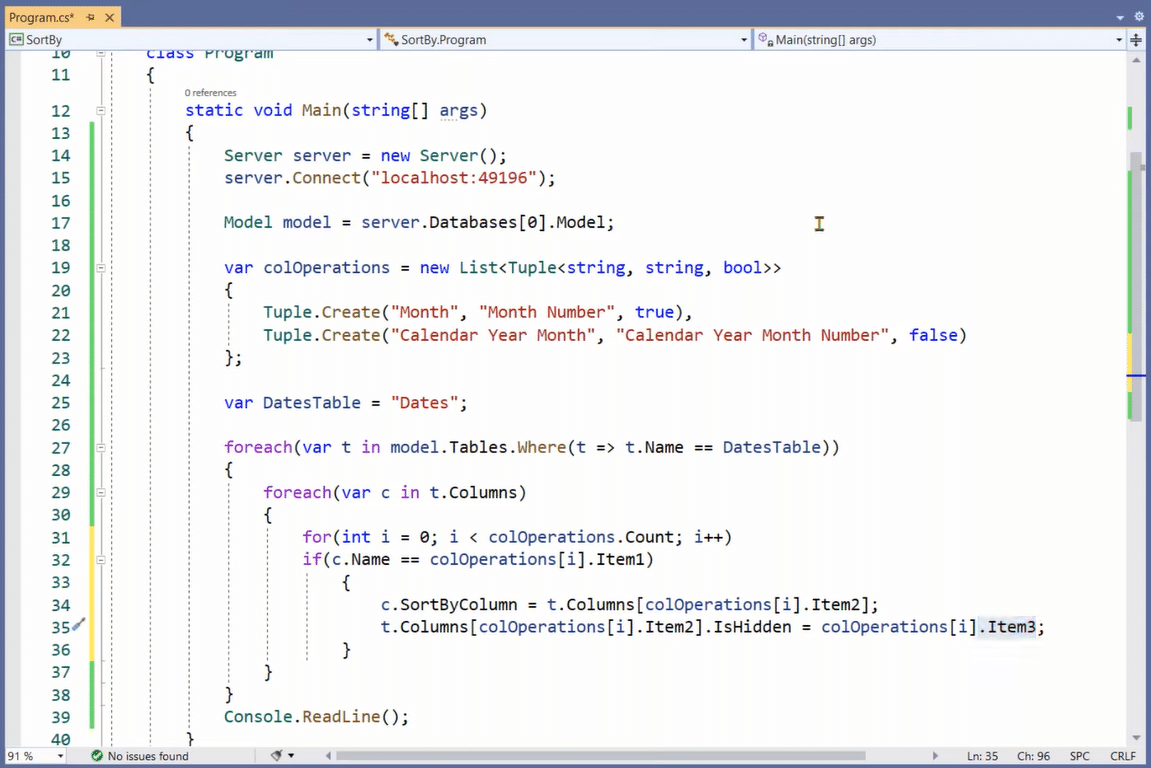
So now that we have written the main code that we are going to execute against our tabular model, we can simply copy the code from var colOperations and take it to Tabular Editor, and then we are going to execute the same code.
Sorting Columns In Power BI And SSAS Using Tabular Editor
We’re not going to use the server or the model object because behind the scene Tabular Editor will automatically know which Power BI model or the analysis services model it has to connect to. So, we don’t need to use those variables because that is already the job of the Tabular Editor to identify how it wants to connect to those models.
Back in Power BI, we are going to launch either Tabular Editor 3 or Tabular Editor 2. You can use whichever one you want. In this case, let’s go with Tabular Editor 3.
We go to the File tab, click on New C# code, and close the Properties option. Then, we can paste the code here. The only thing that we need to make sure of is that instead of using the model variable is to use the model object. So, let’s use the capital M and execute that code.
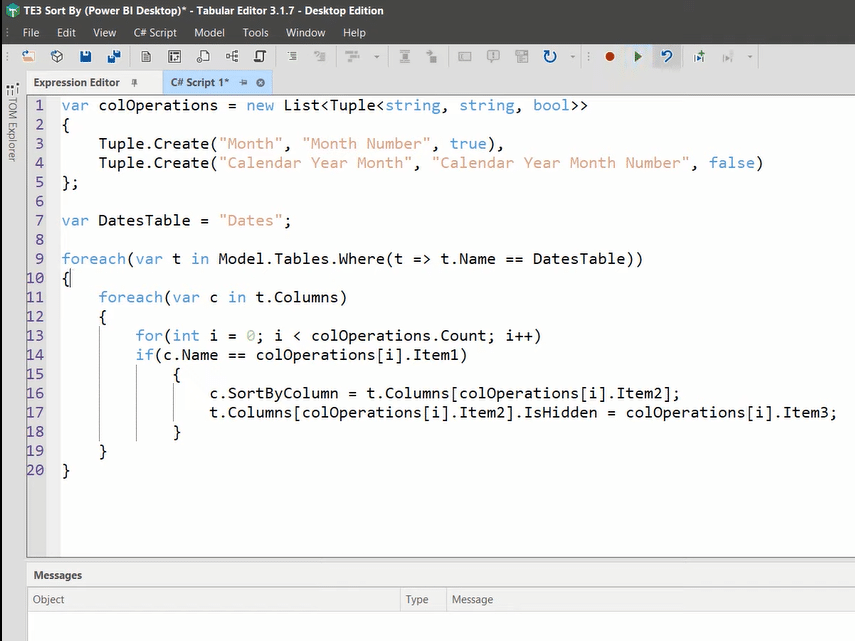
Now that the script has been executed successfully and it also says shows three model changes, we are going to commit the changes back to the data model. We’ll save whatever we have applied to those columns.
Back in Power BI, you can see that the Month Number is hidden. If I click on the Month column and go to the Column Tools, and to the Sort By Column, you can see that particular column has been sorted by the Month Number. The same goes with the Calendar Year Month Number.
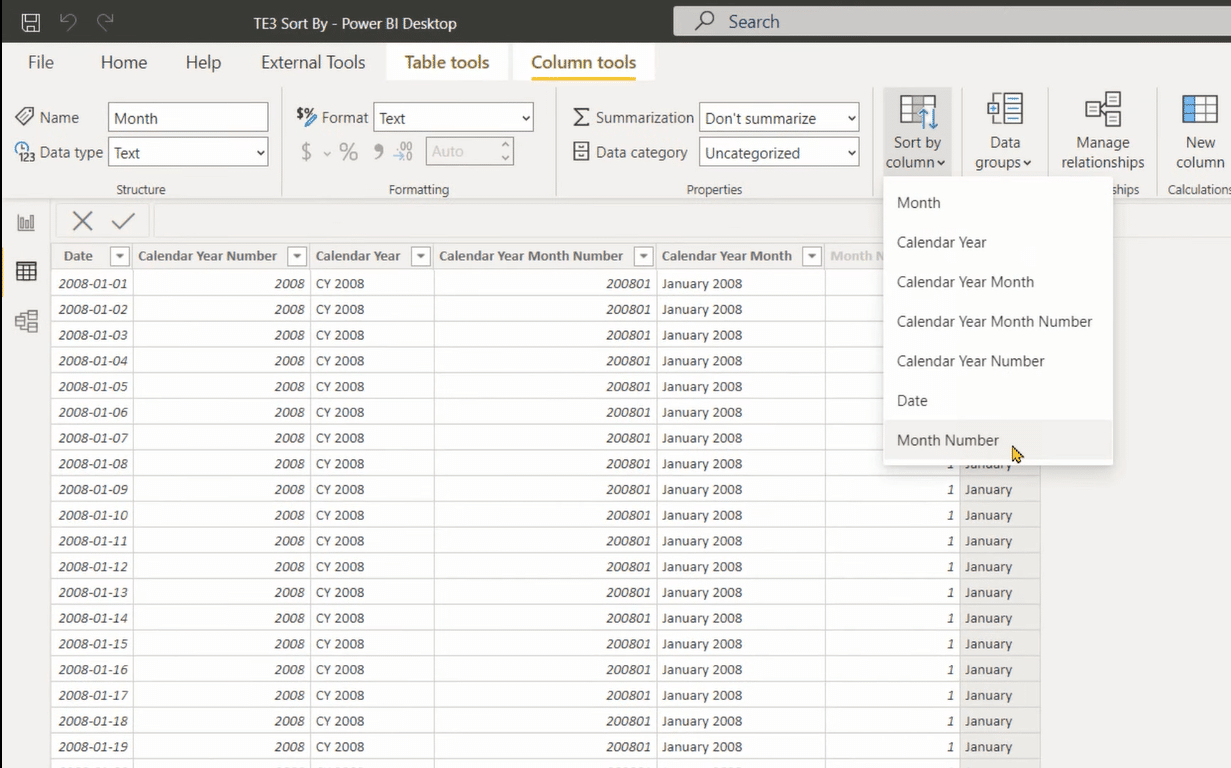
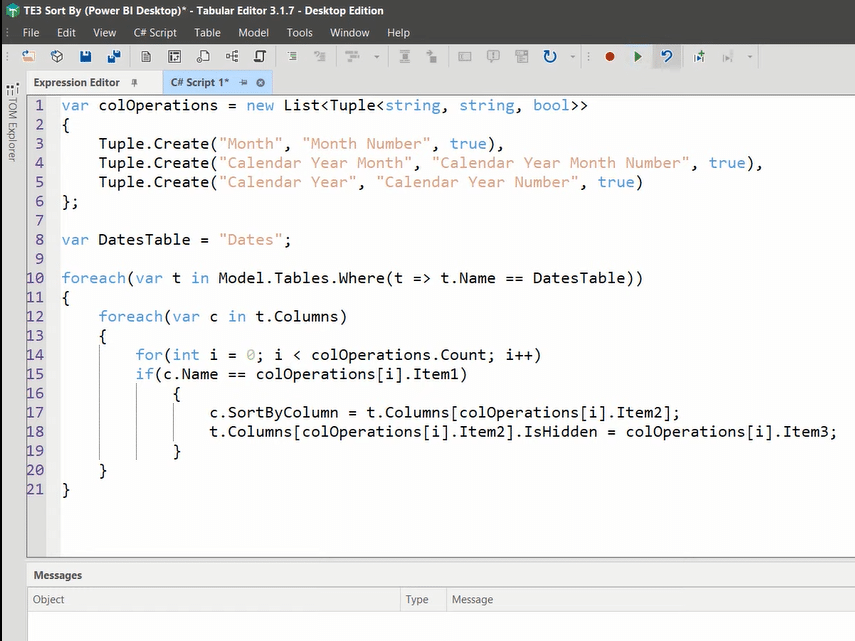
The Calendar Year is sorted by itself because we didn’t have that column inside that C# code. So, what we can do is launch back the Tabular Editor and create another tuple. And then, once again we execute that script.
***** Related Links *****
Tabular Editor Power BI: Version 3 Review & Tutorial
Power BI Tabular Editor 3: Automate With A Script
DAX Coding Inside Tabular Editor 3
Conclusion
That’s how easy it is to automate the process of sorting one column by another column in Power BI and SSAS. This was a very basic example of how you can do that operation inside the Dates table. But you can enrich this list by adding more columns and then check for another table.
That way, you can reduce the amount of time that you have to spend on sorting these columns for the same models that you’re going to create again and again.
I hope you’ve found this helpful. If you have any questions, just let me know in the comments section.
Enterprise DNA Experts


