In this tutorial, I’m going to show you how to create a Power Apps pop up form and how they can offer a more customized and interactive user experience. You can watch the full video of this tutorial at the bottom of this blog.

Form Power Apps pop ups are very powerful tools for you to provide a customized experience for your users and allow them to validate something that they’re about to do in an underlying database.

For example, if you go to your iPhone and try to delete an application, it will ask you if you are sure that you want to delete it. The reason for this is to create a very good UI that contains validation steps to ensure that you want to do the action you’re going to do.
We’re going to be doing the same thing within Power Apps. It’s a bit difficult to do in Power Apps natively because the way Power Apps works is that you have elements that go on a screen. You can’t have a screen superposed onto another screen. So, what we do is we use a grouping method to kind of mimic that. We will now go into Power Apps and show I’ll you how it’s done.
How To Create A Form Power Apps Pop Up
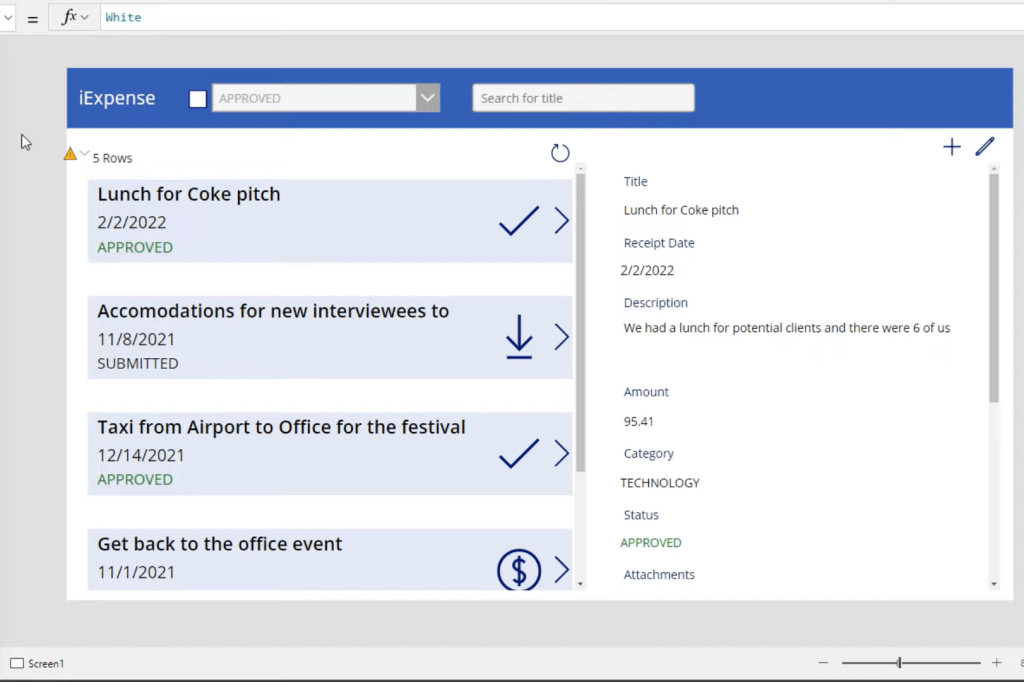
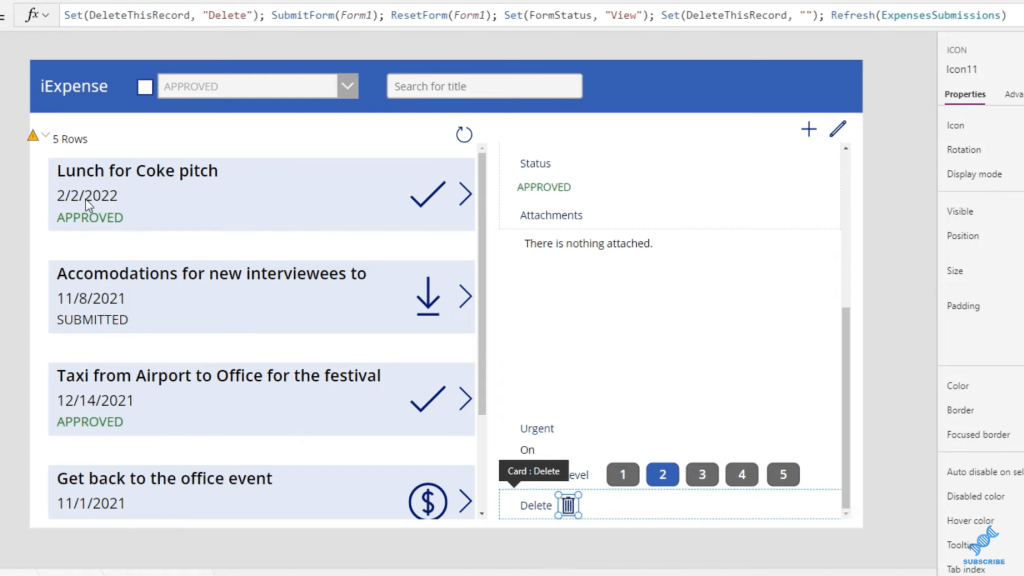
Let’s jump into the Power Apps Editor. In this example, I’m in the process of creating an expense reporting application for my business. On the left-hand side of the screen, I have a gallery of all my expenses. I can click an expense and get more information about that expense on the right-hand side.
We can see more information about that expense report, such as the description, the amount, the category, the status, and so on and so forth.
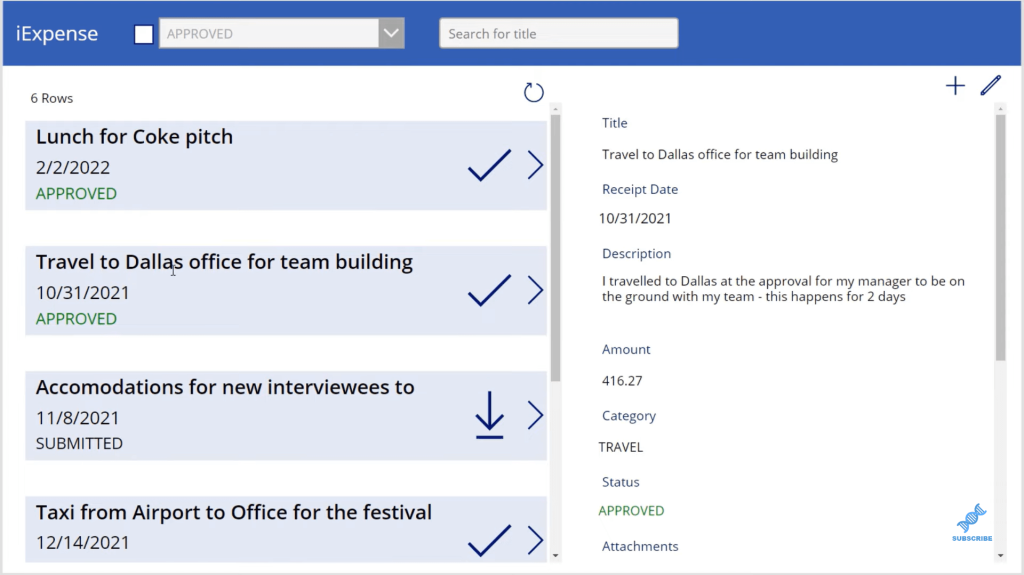
In addition to this, I can click Edit, and on the bottom, there’s a trash bin icon that enables me to delete this record as well.
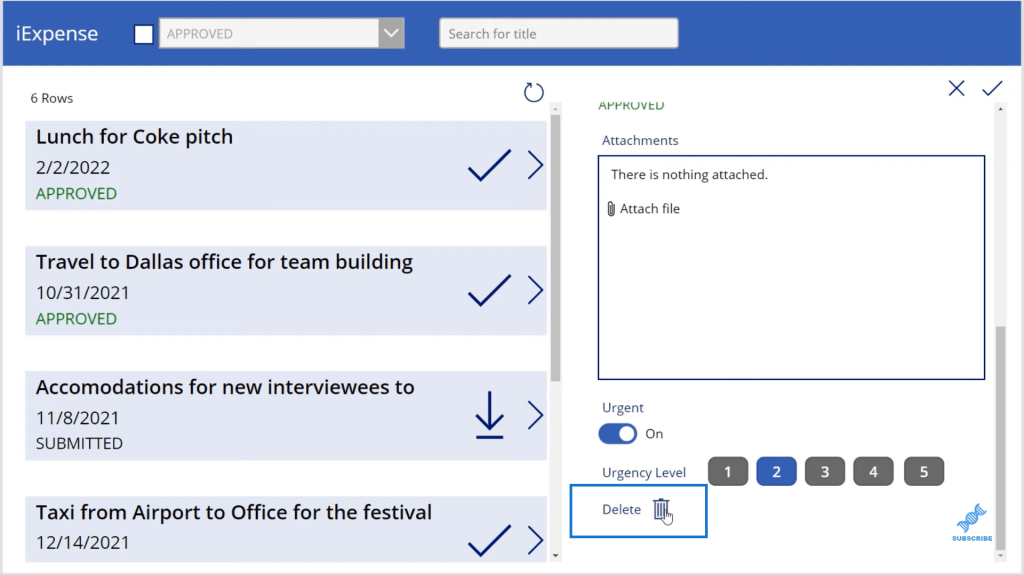
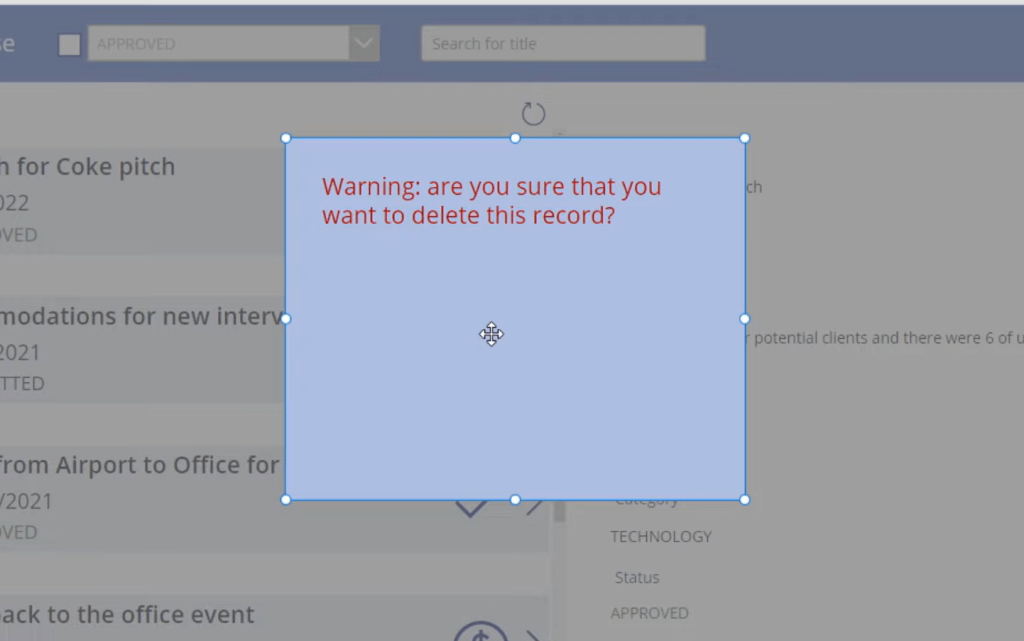
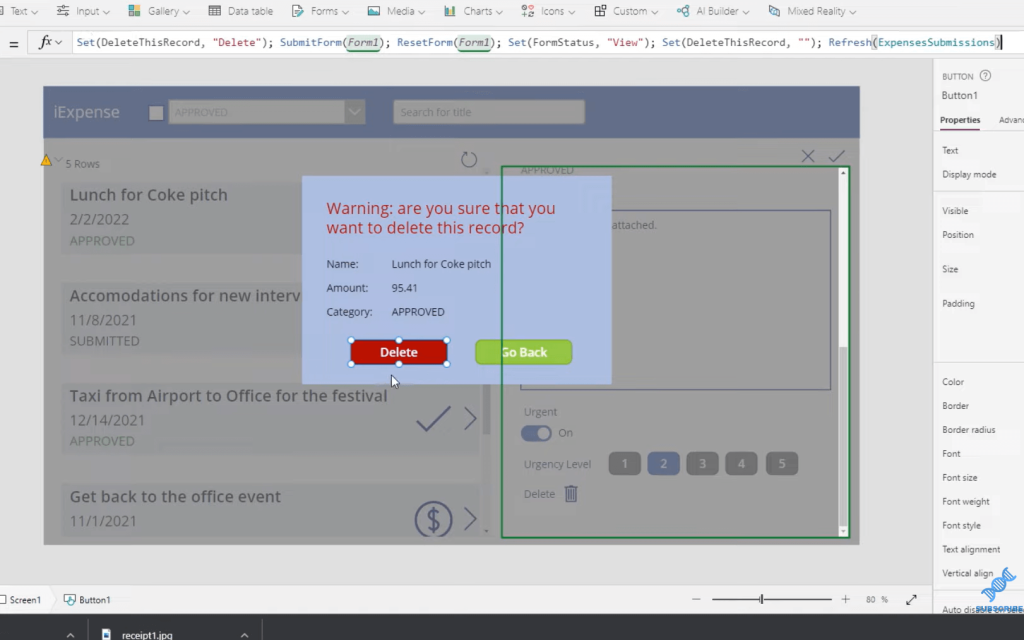
Now, I want to create a form pop up so that if a user goes in and deletes a record, there’s a message box that appears to confirm if the user actually wants to delete the record or not.

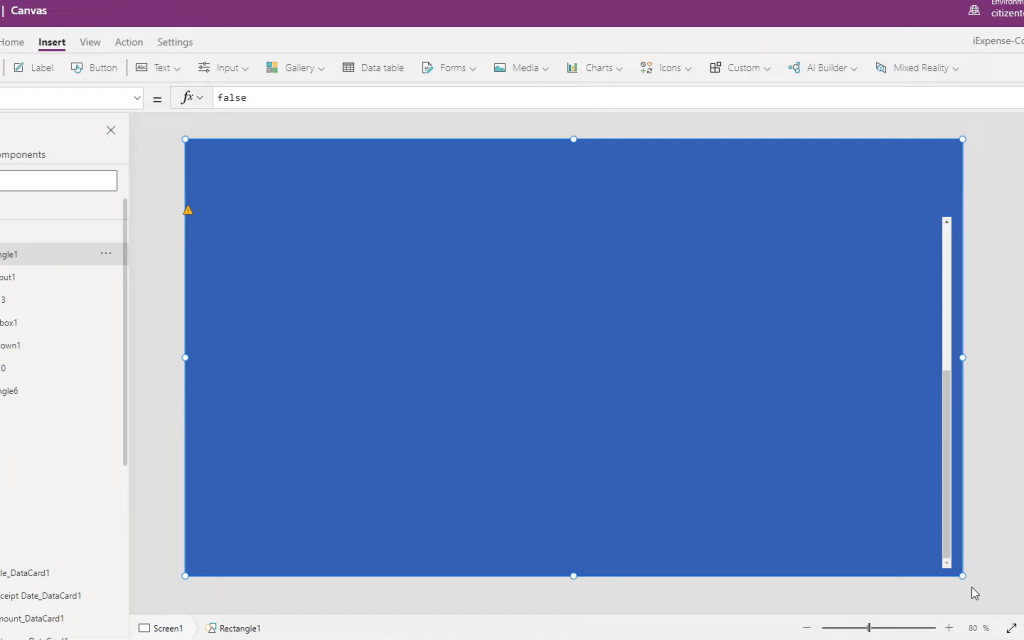
The first thing I’m going to do is add a rectangle that will cover the whole screen. It’ll look like the screen is a little bit faded just to mirror the appearance of a screen on top of one another.
So, I’ll go to Insert, then I’ll go over to Icons, and I’ll go all the way to the bottom to Rectangle. I’ll make sure that the rectangle covers the entire screen.
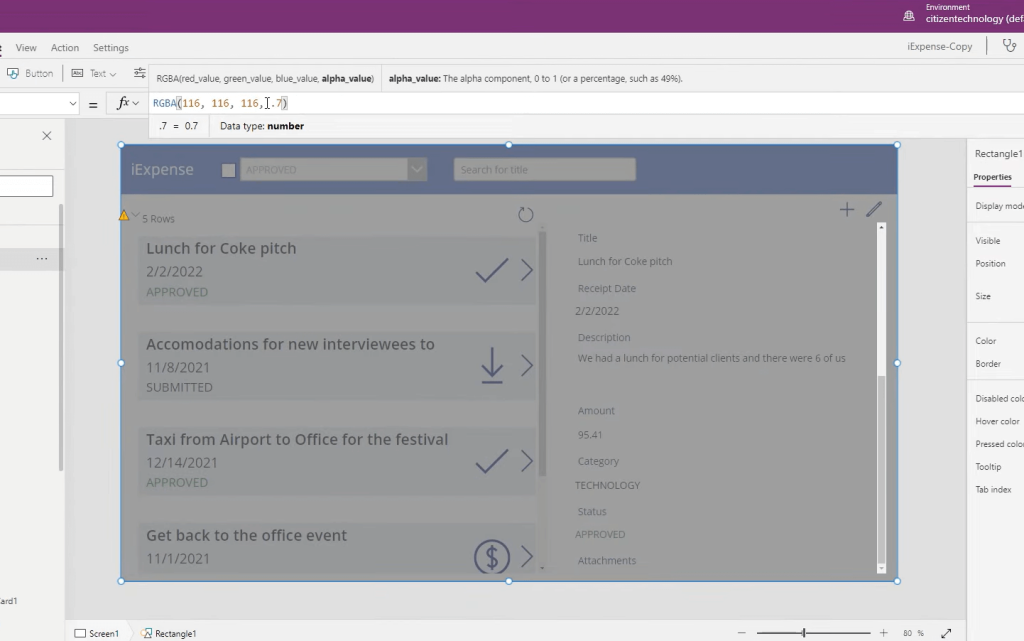
The next thing I’m going to do is change the color of this shape to dark gray. Then I’ll go to the Fill property of this rectangle. We have the red, the green, and the blue, but we also have the alpha value, which represents the opacity or the transparency. We’ll make the transparency 0.7, so it looks like it’s kind of faded.
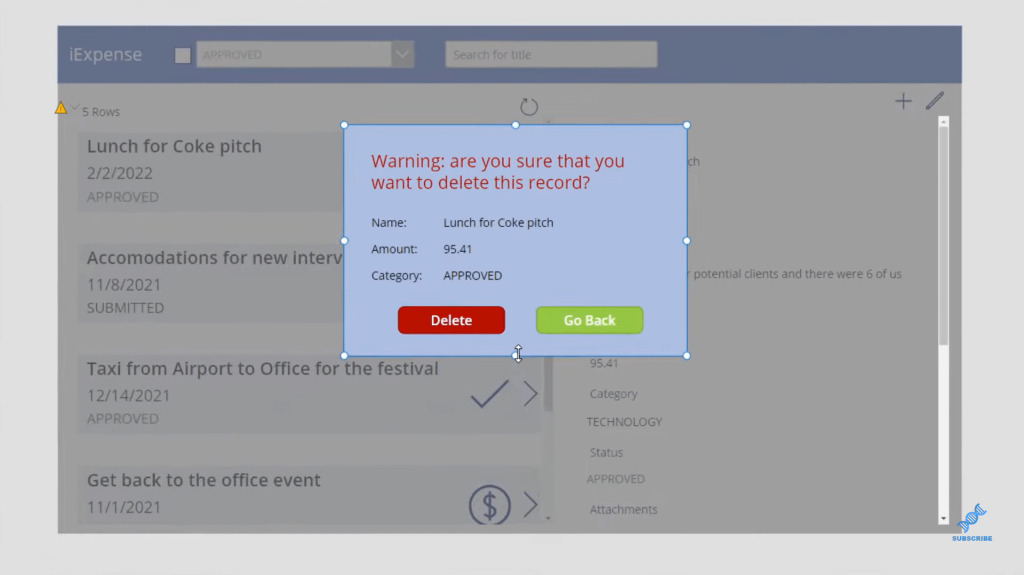
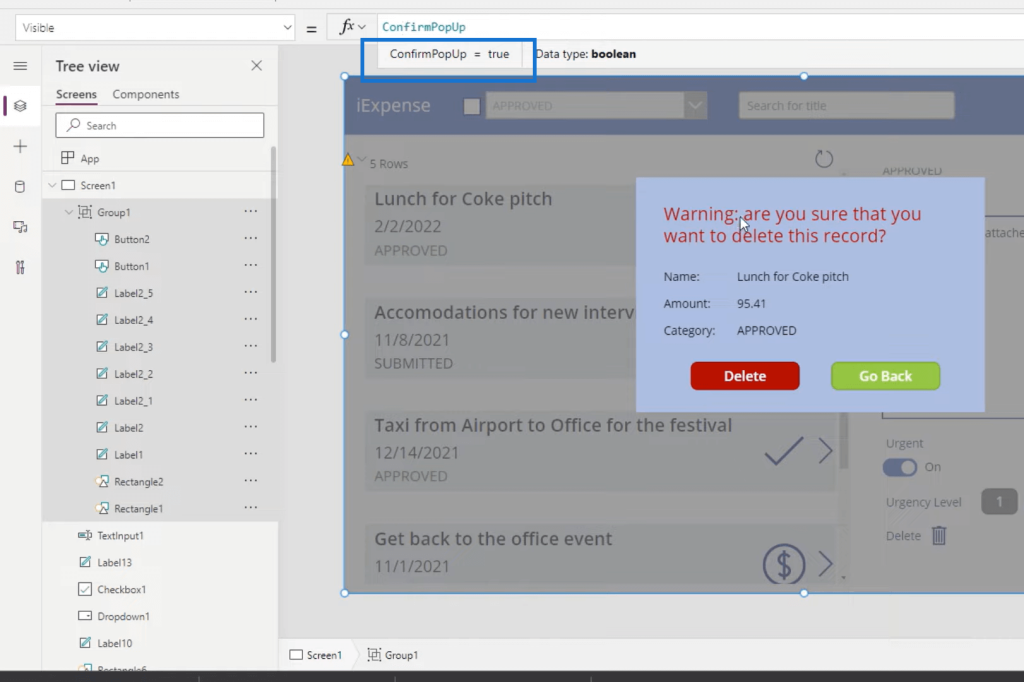
Next, we will add another rectangle, which is going to be our pop up box. Then, we’ll add in a label, which is a sort of warning for the user. We can change the colors and adjust the size of the font.
Now, we want to show the user the record that they’re actually going to be deleting. So, we want values, such as the name, the amount, and probably the category of the expense report that they’re about to delete.
To do that, let’s go back into our label and we will add the name, the amount, and the category. The record that we want to show is based on the record that has been selected in the underlying gallery. The underlying gallery here is called Gallery 1. So, the name of the item that’s been selected in gallery one is simply Gallery1.Selected.Title. The amount is going to be Gallery1.Selected.Amount, and for the category, it’s going to be Gallery1.Selected.Status.Value

We’ll then add in two buttons. One button will be basically Delete and the other one will be just Go Back. We’ll adjust the color and size as well.
Now, we need to make sure that when someone clicks the garbage or trash bin icon, it doesn’t delete the record, but instead, it shows this popup box. To achieve that, we will highlight all the things in our pop up box, right-click and select Group.
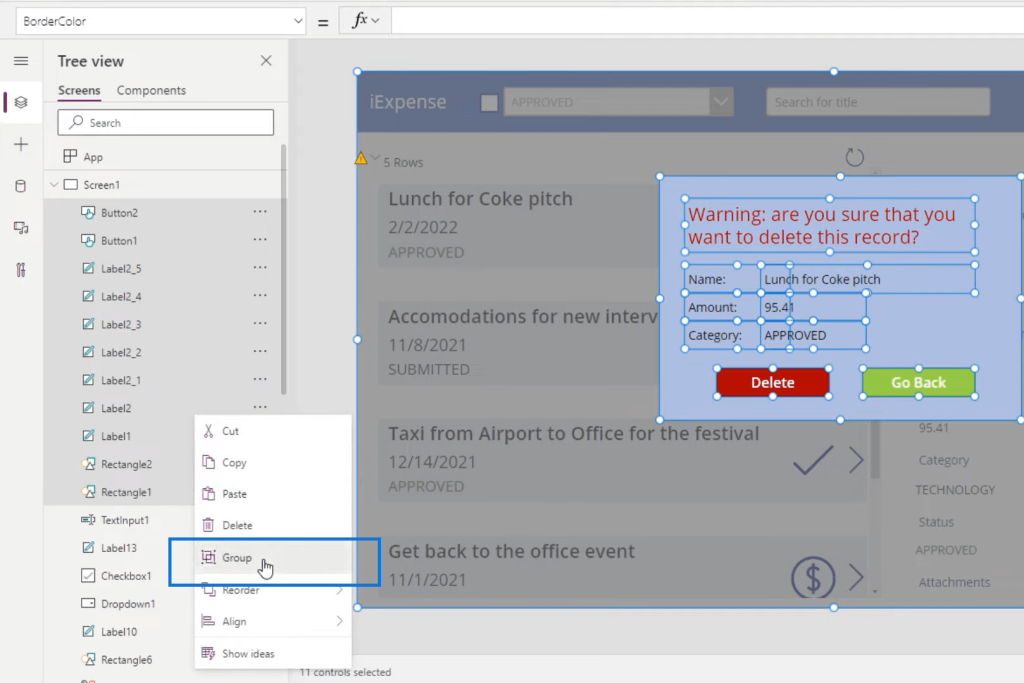
This is one of the great things about Power Apps. It allows us to group elements together. With that, it has created a group called Group1.
What’s nice about this is that if you modify the property of a group, for example, visibility, it will impact all the other properties. It’s very nice to have something like this that all fit together. It’s great to group them because we can control all the properties of those elements at once.
For example, we want to control the visibility of all these properties and make them “false” for now, it goes away.
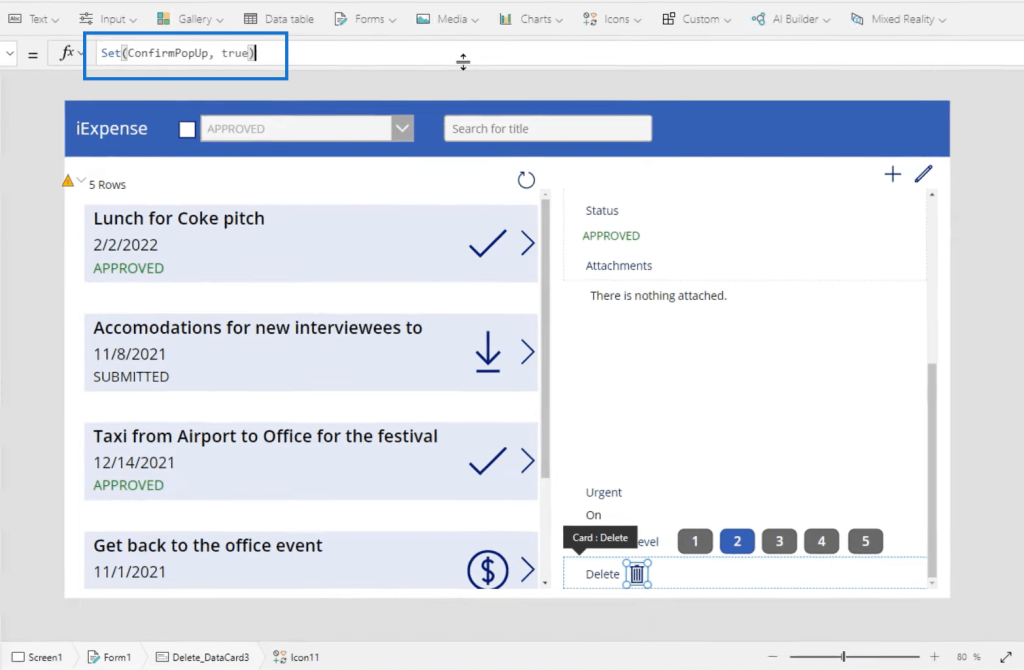
Now, let’s try to select the garbage icon, and as you can see when it’s selected, it does all of these functions, and these functions basically make sure that the record has been deleted. But we don’t want that. So, we’ll copy this for now and put it in an empty notepad, just so that it’s saved somewhere. This is the actual function that we’ve created to delete the record and we will simply just delete it.
And now, we will create a new variable that will control when the form actually pops up. Let’s call this variable the set function. Let’s name our variable, ConfirmPopUp, and we will set that to true.
We will then select the group and set the visibility property to that variable, which is ConfirmPopUp. Since it’s set to true, we see everything.
The next thing that we’re going to do is click Go Back, and we’re going to have an action associated with clicking that. When someone selects that, we want the visibility of Group1 to be false.

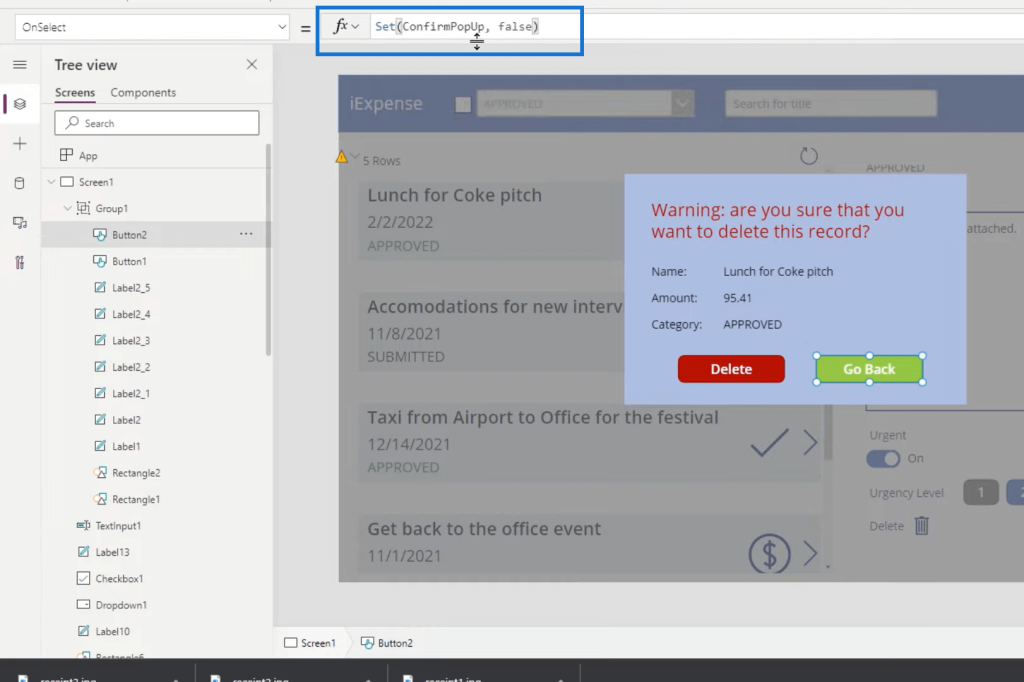
Next, we need to change the OnSelect action of the Delete button to execute the functions that we saved in the notepad.
The last thing we need to do is after someone’s clicked the Delete button, we also want to get rid of the popup. So, we will add another action and we will set the ConfirmPopUp variable to false. And that’s how you would use pop ups within Power Apps.
***** Related Links *****
Microsoft Power Apps: Grouping Elements Together
Power Apps Environments: Setting Up The App Elements Properly
Power Apps: Getting Started With This Revolutionary Tool
Conclusion
One reason for using Power Apps pop ups is to create a customized experience for your users. Another is to create some sort of validation for your users as well because it’s beneficial to your users.
It’s all about crafting a user interface for your users so that they don’t have to go to the underlying SharePoint list or database and get confused with editing and deleting certain things. They can do it from the safety of a UI that you’ve created for them so that they don’t mess anything up. Form pop ups are a powerful tool to accomplish that.
Let me know if you have any questions and leave comments in the comment section below.
All the best!
Henry