
In this tutorial, I will discuss four hidden pitfalls in Power BI that can wreck your data model and/or your report. I will show you not only how to avoid these problems when creating Power BI reports, but how to create a comprehensive template that effectively addresses all of them as well as speeds up your Power BI development. You can watch the full video of this tutorial at the bottom of this blog.

4 Horsemen Of Power BI Apocalypse In Creating Power BI Reports
Auto-detect Relationships
The first pitfall when creating Power BI reports is Auto-detect Relationships. This turns over the decision-making on your data modeling from your judgment and expertise to an automated process within power BI. I think that Microsoft should bring back Clippy from the 90s to at least give you a fair warning and allow you to approve whether you want them to do things to your data model or not.
This is an actual example from some work a friend of mine was doing for the Enterprise DNA data challenge 15. She put this Total Wins table into a newer data model and forgot to turn off the Auto-detect Relationships.
As a result, it built three relationships into this table of the wrong type in the wrong direction and added bi-directional relationships instead of unidirectional relationships. It created a lot of ambiguity within her model and undermined the accuracy of her DAX.
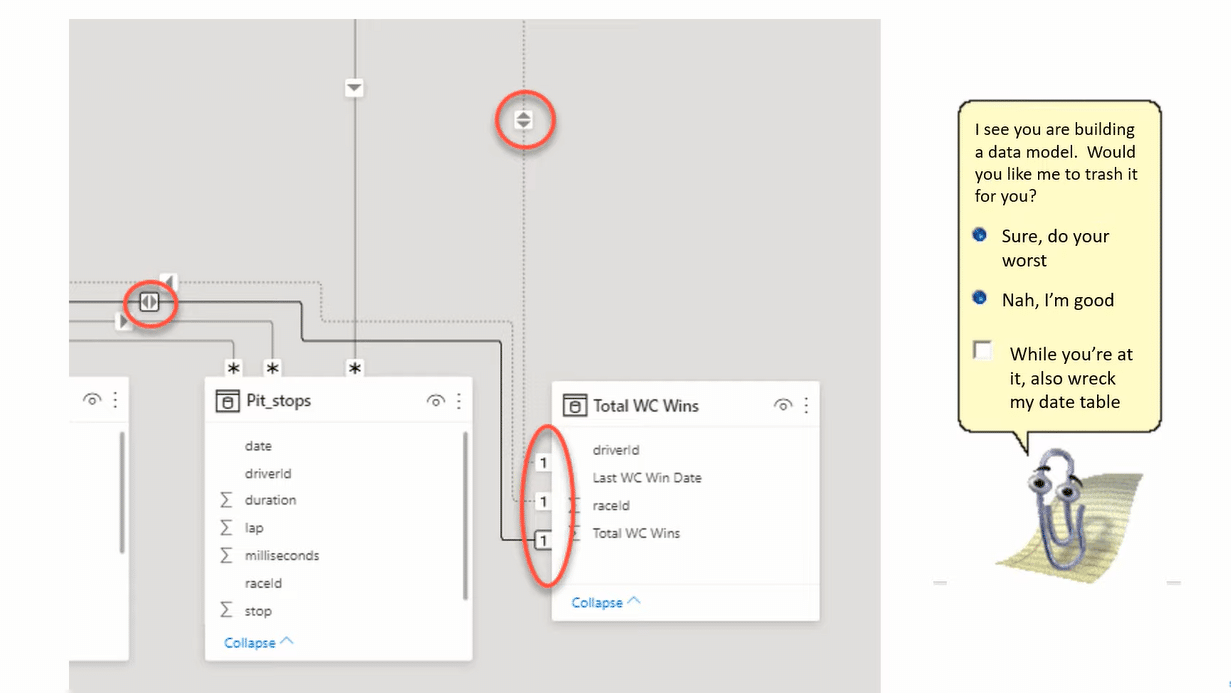
If this doesn’t tell you that you should turn it off, I’m not sure what will. Also, if you have Auto-detect Relationships on, and you’re putting a disconnected table in your model, for example, a harvest values for a slicer, but you don’t want it connected to your data model, it’s going to automatically connect those and basically render useless the disconnected element of that table that you were trying to achieve.
Auto Date/Time
The second thing I want to talk about is the Auto Date/Time. I think this is a feature that was intended to help beginners, who were not aware of the intricacies of dedicated Date tables.
This feature creates a single Date table on each of the dates and your data model on the one side of a one-to-many relationship. So, it can create, in some cases, five or six different Date tables within your model. It also means that it is created in a way that you have to deal with the dates in a strange hierarchical format. It not only clutters the model, but it makes working with them difficult.
So, let’s jump into Power BI. We’re going to create a template file, turn off all these features in the template, and then save that template with some other functionality. We can open that up every time we recreate a new report and have it ignore those four horsemen.

Now, if we go to Options and Settings, you’ll see in Global that there is no way to turn off that Auto-detect Relationships. The only way to turn it off is in the Data Load under Current File. So, if you don’t make a template, you’ve got to turn this off every single time. And if you don’t remember, it’s going to create some of those bad relationships.
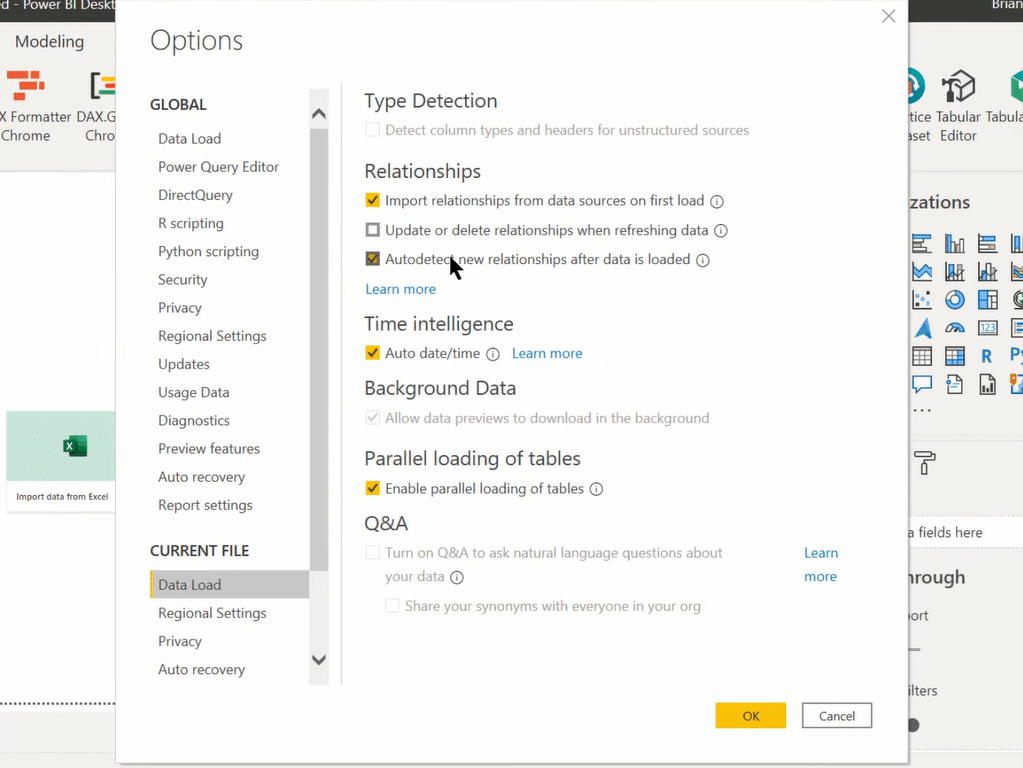
So turn that off as well as the Auto Date/Time. Moreover, make sure that Detect column types and headers for unstructured sources is turned off as well, which is something in Power Query that, particularly with CSV files, can cause problems because it only judges based on the first couple of hundred rows. Again, it makes some bad decisions that are going to potentially cause problems when you’re creating Power BI reports.
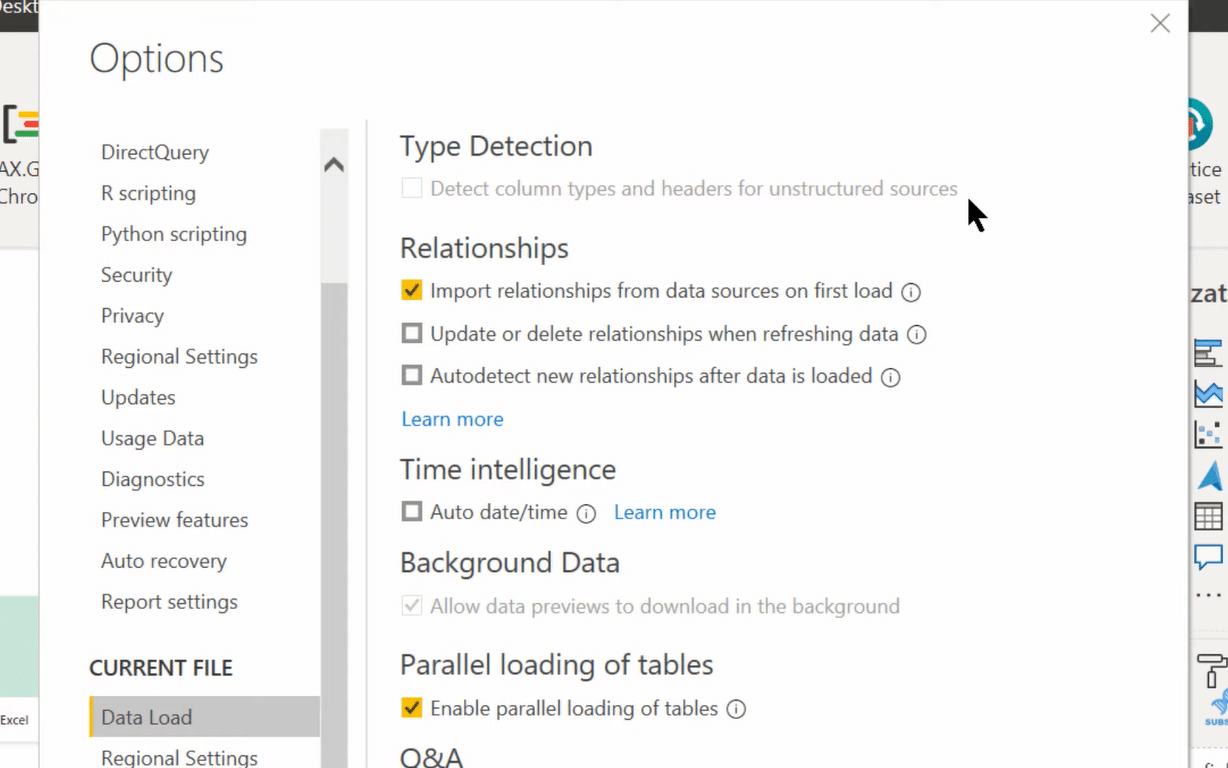
You can also turn off Auto Date/Time globally, which means we’ve defeated the first two horsemen right out of the gate.

Moving on, we’re going to put a Date table into our template. The Date table I use is Melissa’s incredible Extended Date table, which you can find in the Enterprise DNA forum.
Now we go into Power BI, go to Home, the New Source, and then Blank Query. Then, if we go into the Advanced Editor, we can paste the Extended Date table code.
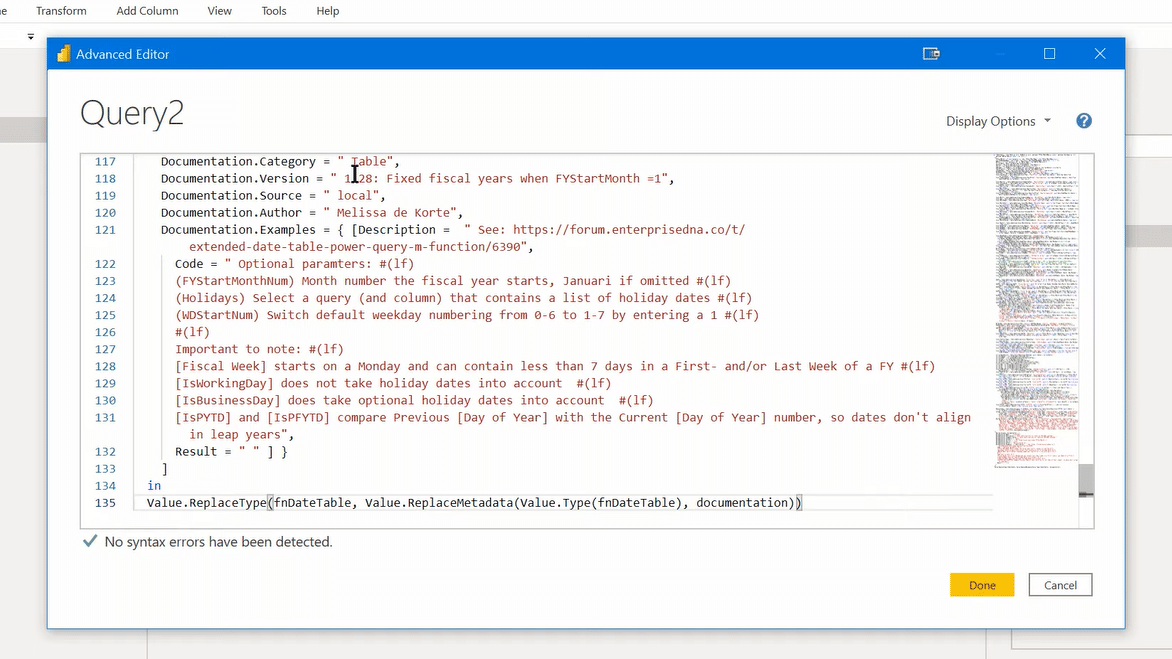
And at this point, we’ve got a decision to make. Since we are using a template, we don’t know what the fact table is going to look like. It’s going to be different for every report.
And so, if your fact tables tend to be a fairly constant duration, you could create a dynamic start and end date for your Date table. However, what I typically do in this situation is I just use a year that I know is not correct, but that I know is if I forget to go in and change things is going to give me really strange results. Then, it’s going to jog my memory and remind me to go in and match the dates of my Date table to my fact table.
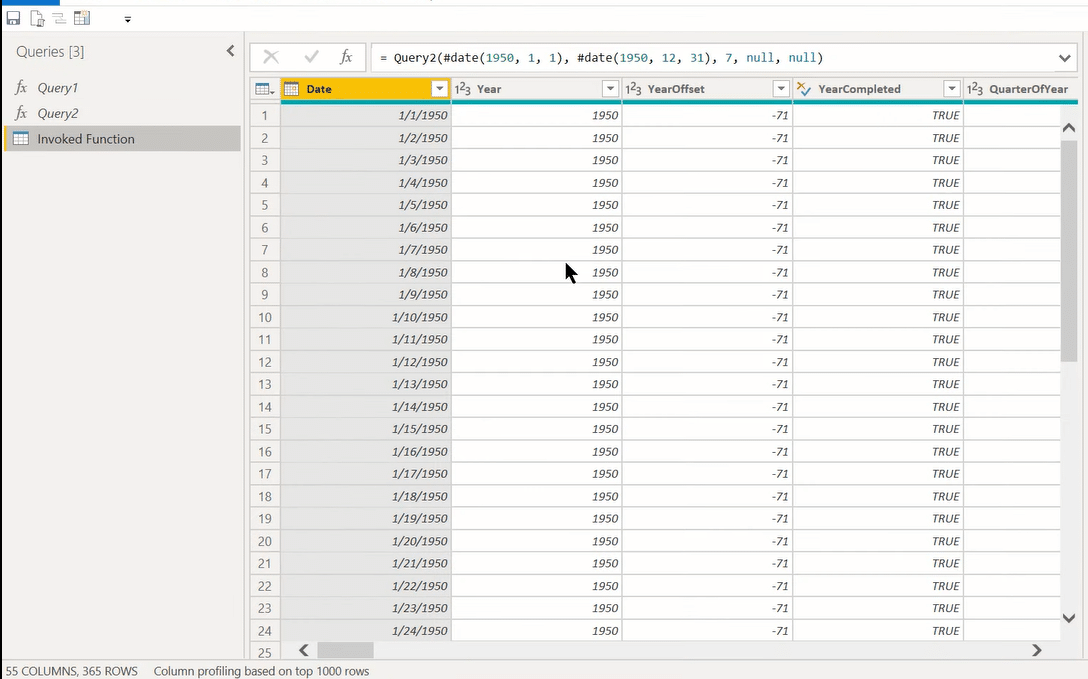
So in this example, I’m going to just put 1950 here. We always want to use a full year in our Date table, so I’ll put it until the end of 1950. The fiscal year, let’s say, starts July 1st.

We then hit Invoke, and it builds that Date table for us. Later when we know the duration shape of our fact tables, we’ll just go in here and change those dates. It’ll update the Date table to match those durations.
Marking Date Tables When Creating Power BI Reports
Now, I want to talk about Marking Date tables. This is one of the other horsemen we haven’t dealt with yet. In your Date table, you can do it either in the model view or in the table view. I typically do it in the table view.
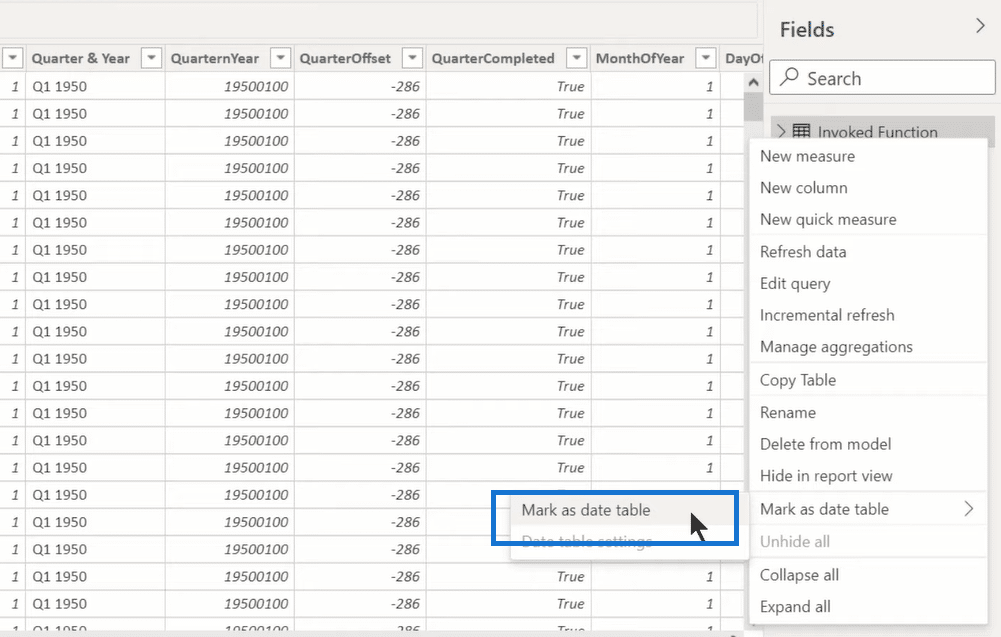
It’ll ask you for the field that you want to validate. In the extended Date table, that’s always going to be the Date field.
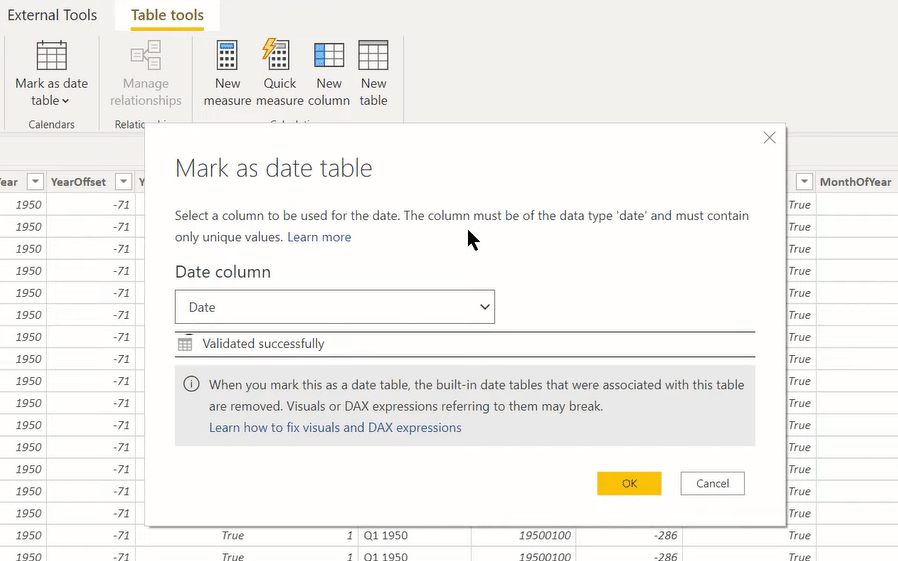
When you hit validate, it does six things in sequence. It confirms that the Date field contains unique values, that it contains no null values, that it contains contiguous date values, and that if it’s a Date/Time field (which in this case, it’s not, it’s a Date field). If it were a Date/Time field, it would confirm that it has the same timestamp for each of the entries of that date.
Moreover, it gets rid of the automatic date hierarchies that I talked about earlier. It also allows certain functions that expect a contiguous validated date under time intelligence functions to work properly. In some cases, those functions will not work properly without a properly marked Date table and a validated date field.
So, by marking your Date table, it does all those good things, and we do that in the template. Even when we change the duration of the start and end date, it’s still going to remain as a marked Date table.
Auto Summarization
The last thing we want to do is the Auto Summarization.

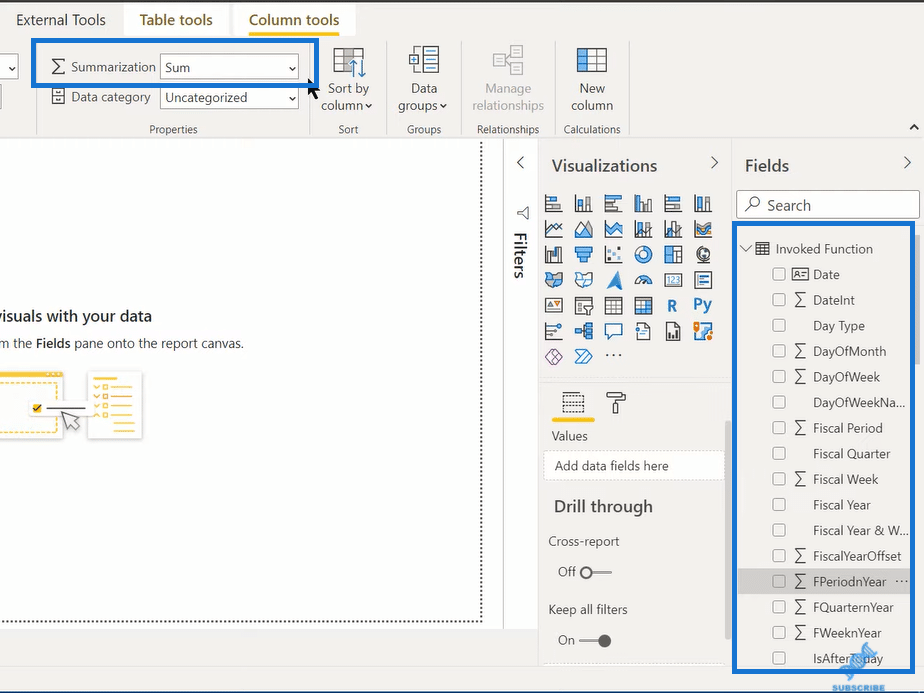
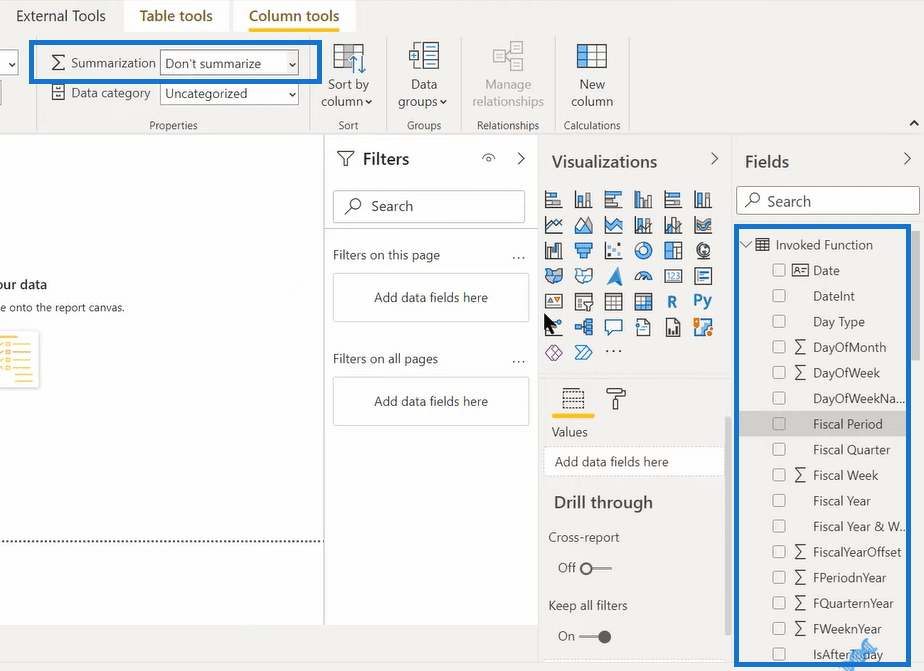
The last thing we want to do is the Auto Summarization. If we go to our field view, we’ll see the summation signs next to all our numeric fields. You’ll see under Column Tools that it puts a summation of Sum next to all of those. It assumes it knows what we want to do with these.
This gets to the issue of implicit versus explicit measures. Again, you don’t want to turn over this decision-making to Power BI that you want to create explicit measures, and you want to turn these Sum functions off. In native Power BI, there’s no way of turning all those off at the same time.
So then you have the laborious task of going through each one where it’s added that summarization to, and going to Column Tools, and then clicking down on Don’t summarize. When you do that, you’ll see it takes the summation sign away.
But, you’ll notice that this Date table has lots of these auto summarizations. You might wonder if there’s an easier way to do this. The answer is yes there is – you can use the Tabular Editor 3 (TE3).
We’re going to take advantage of the advanced scripting mode in TE3 to just turn all this off at once. To do that, we go to Macros and then click on Turn off Summarization for Entire Model. You’ll see that it’s just a relatively short C-sharp script.
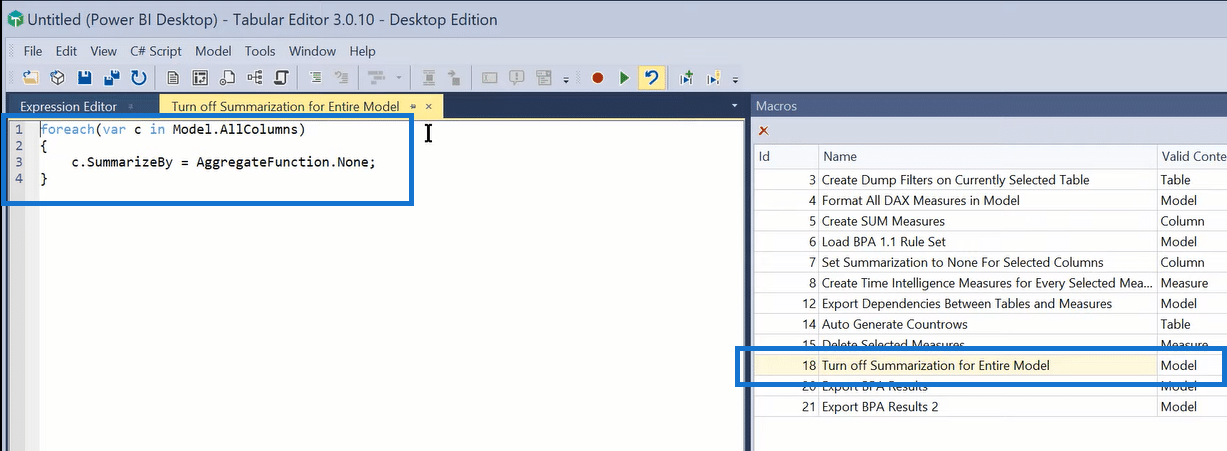
Then, we go back to the TOM Explorer, click on our data model, right-click on Macros, and then click Turn off Summarization for Entire Model. And that turned off the summarization for our entire Date table with just a couple of clicks. That’s just an awesome feature in TE3.

In addition to these four horsemen, there’s one more important thing that you need to do. You need to hide your key fields on the fact table side of the relationship. To do this, you have to go through them individually and hide each of those in native Power BI. But, you can also script that into TE3 and with just two clicks, everything is done correctly within your template.
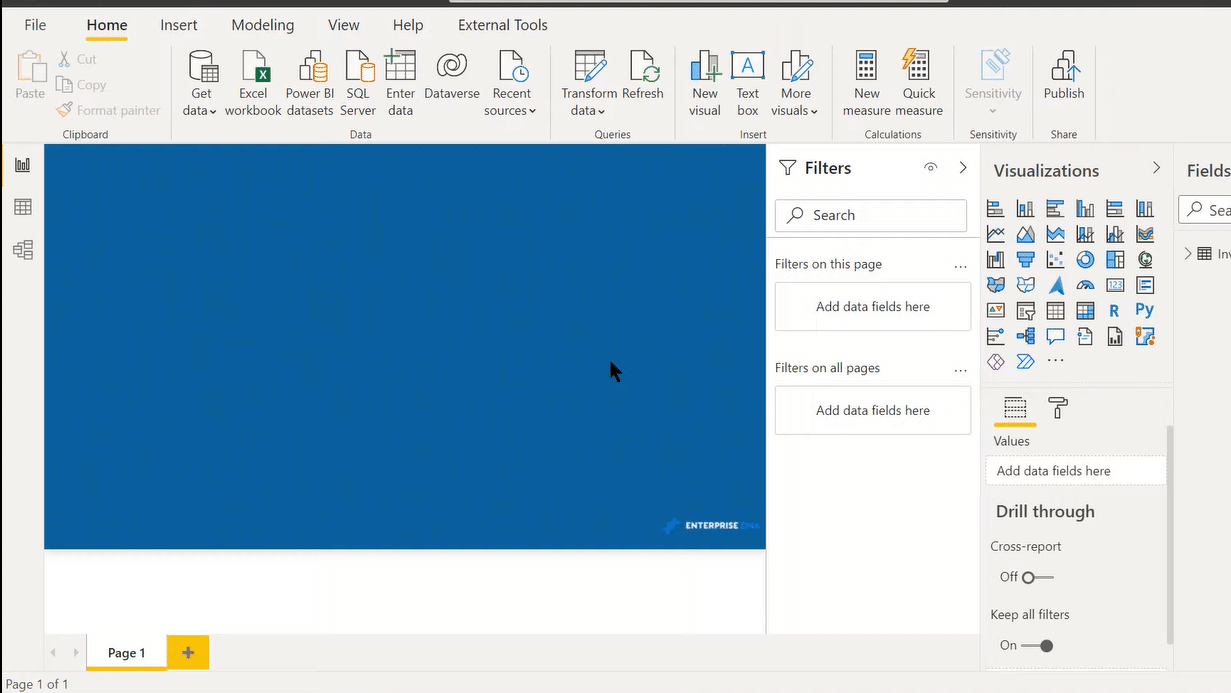
After knocking out those four horsemen, we make our lives easier from a development standpoint, in terms of themes and backgrounds. You can create something like this – a template with your company logo, the background color, etc. After this, you can then save it as a PBIT template, not as a PBX file. When you open this file, it will give you a nice starting place for your design with all those four horsemen turned off and “defeated”.
***** Related Links *****
Best Practices For Power BI Report Development
Power BI Best Practice On Reports & Visualizations
Data Modelling In Power BI: Tips & Best Practices
Conclusion
In this blog, I showed you the four hidden pitfalls in Power BI, how to avoid them, and more tips for fast and easy report development. Hopefully, this gives you some good food for thought and how you’d want to set up a similar template and avoid some of those major pitfalls when creating Power BI reports.
Cheers!
Brian


