In this tutorial, we’re going to talk about the Power Apps LookUp function and the Launch function to improve the end user experience.
The LookUp function is used to look for pieces of information across different data sources.
It’s very similar to Excel’s VLOOKUP and HLOOKUP, but more flexible and covers more ground like INDEX MATCH. It’s perfect if you’re working with multiple data sources in one app.
The Launch function allows users to launch a webpage or another app from within the app we created in Power Apps.
The Launch function is great if you want end-users to be able to call phone numbers saved in the app or launch apps like Google Maps.
Working With Two Data Sources
Let’s start off with the LookUp function. As we mentioned earlier, LookUp is perfect if we want to pull information from multiple sources.
In the example we’re using, our data is coming from two data sources, both of them saved in an Excel file in OneDrive. One data source is a table containing customer information, which is displayed in the Customer Details screen. The second data source contains information about the organization’s agents, which can be found on the Agent Screen.
The goal here is to combine the two data sets so that we can look for and display specific records.
For example, we might be interested to find out the phone number of the agent handling Brooks Tharpe. If we go to Customer Details, it shows us the name of the agent, Beto Yark.
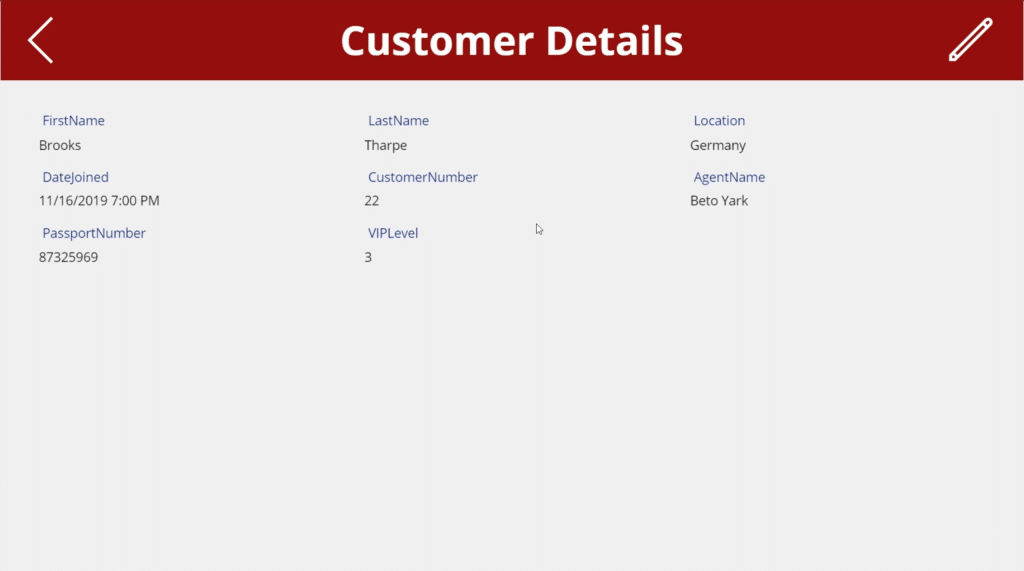
However, that screen doesn’t show us the agent’s phone number. Once we see the agent’s name in the Customer Detail screen, we’d have to jump to the Agent Screen to see what Beto Yark’s phone number is.
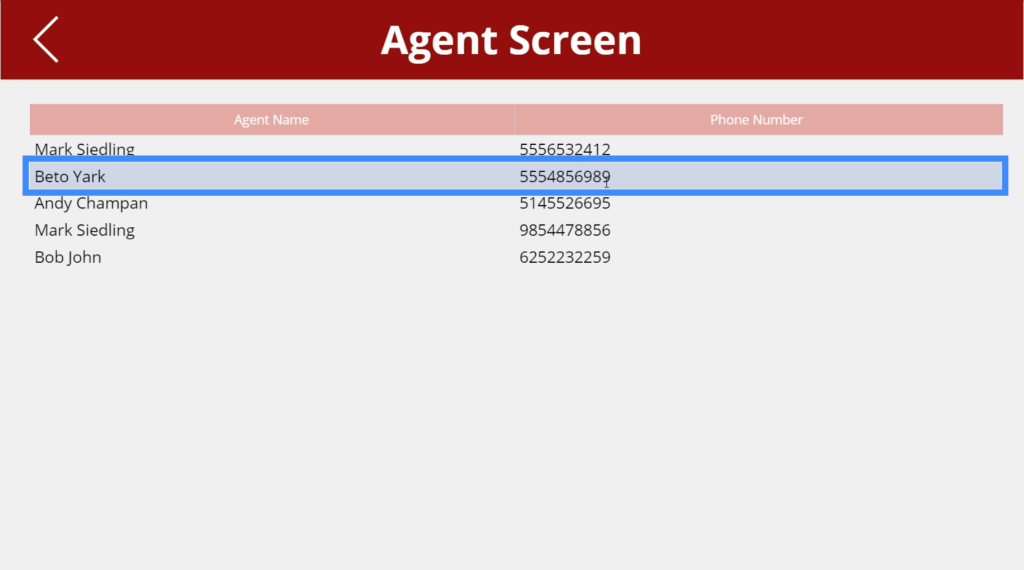
This impacts the end user’s convenience. Ideally, we’d want to have the agent’s contact information showing up in the Customer Details screen as well. This is where the Power Apps LookUp function comes in.
How The Power Apps LookUp Function Works
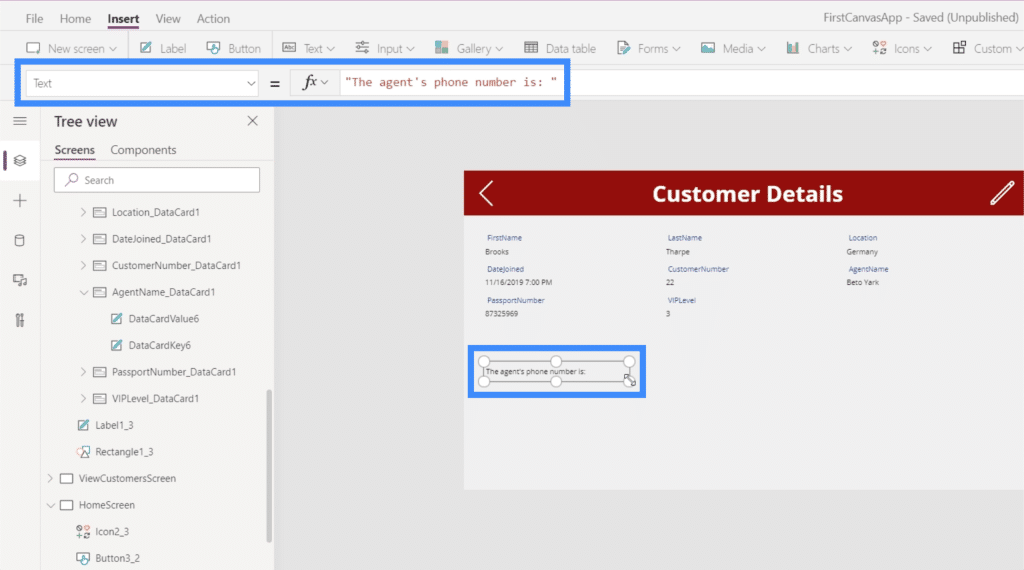
Let’s start by adding a label, which will display the text “The agent’s phone number is:”.
Then, we’ll add another label that will display the agent’s phone number.
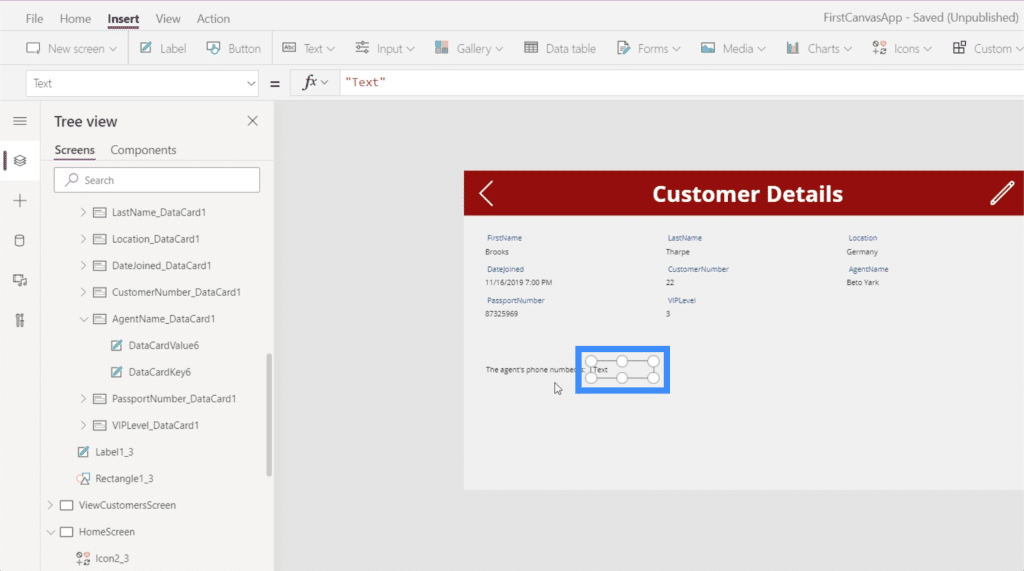
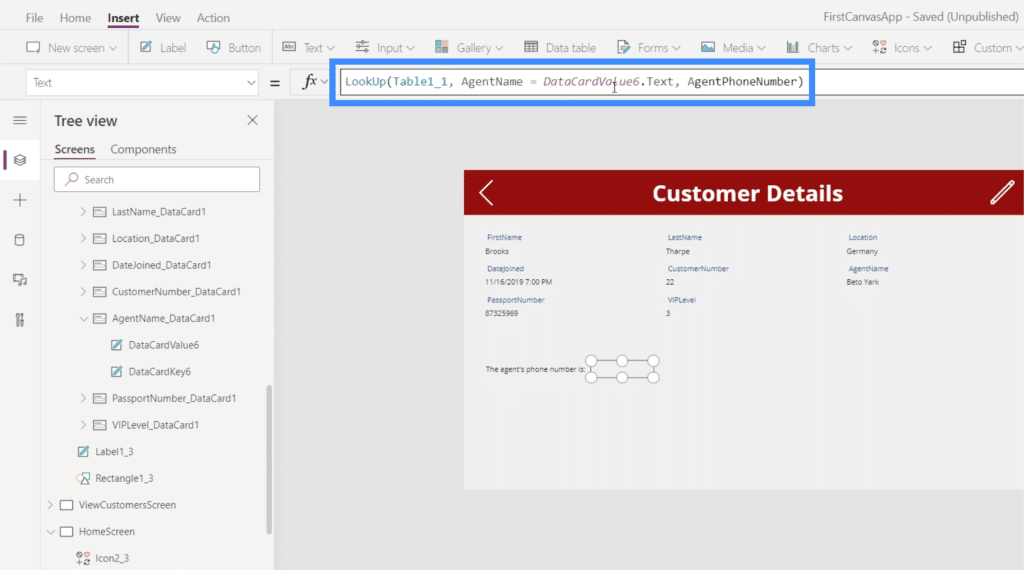
The goal here is for this label to display the phone number returned by the LookUp function. So we’ll choose Text from the property dropdown and start with the LookUp function in the formula bar.
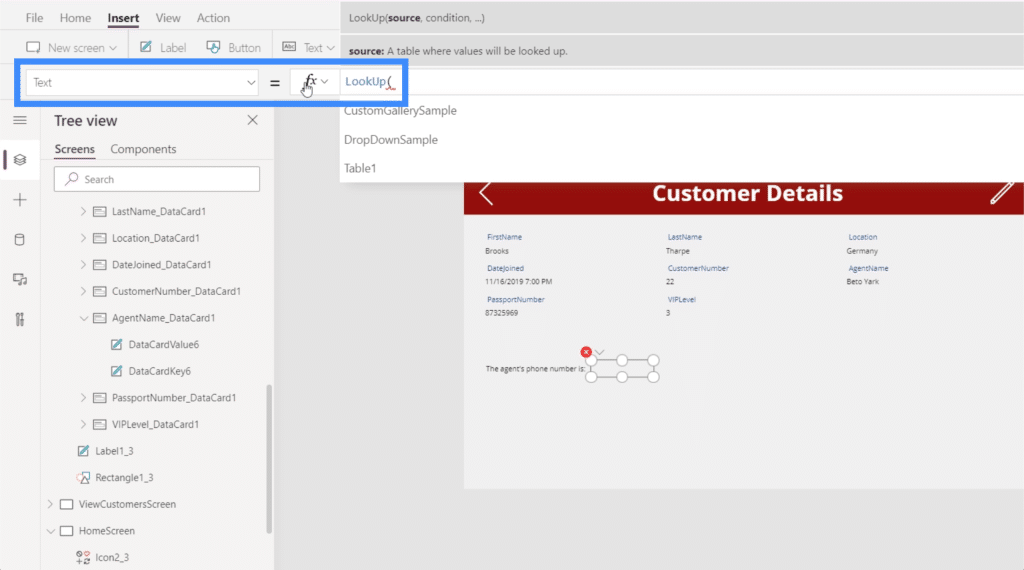
LookUp takes three arguments – a table, a conditional logic and a column.
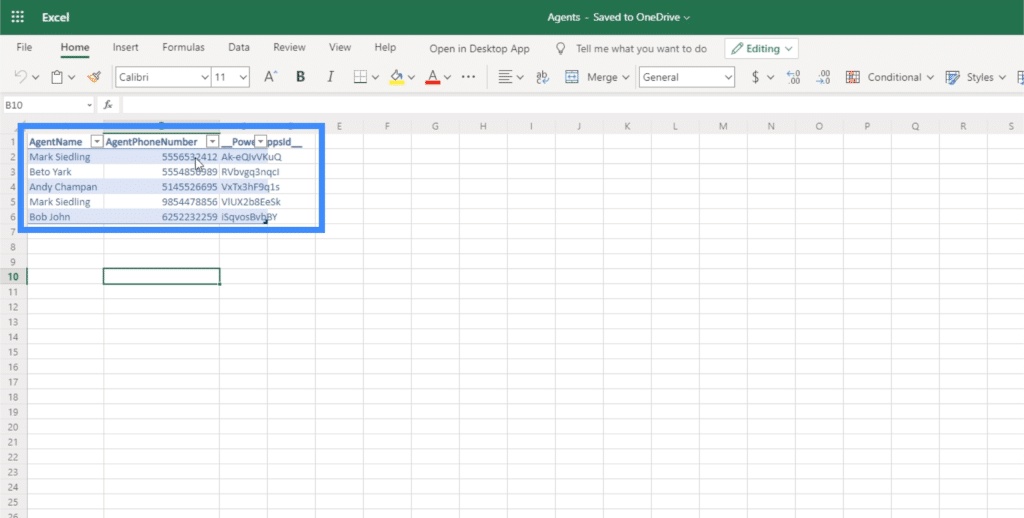
We’re going to use Table1_1, which contains the agent names and phone numbers.
We want this label to be dynamic because we have other agents on this list. We don’t want the formula to just search for Beto Yark all the time. So we’ll reference the column for AgentName equals DataCardValue6.Text.
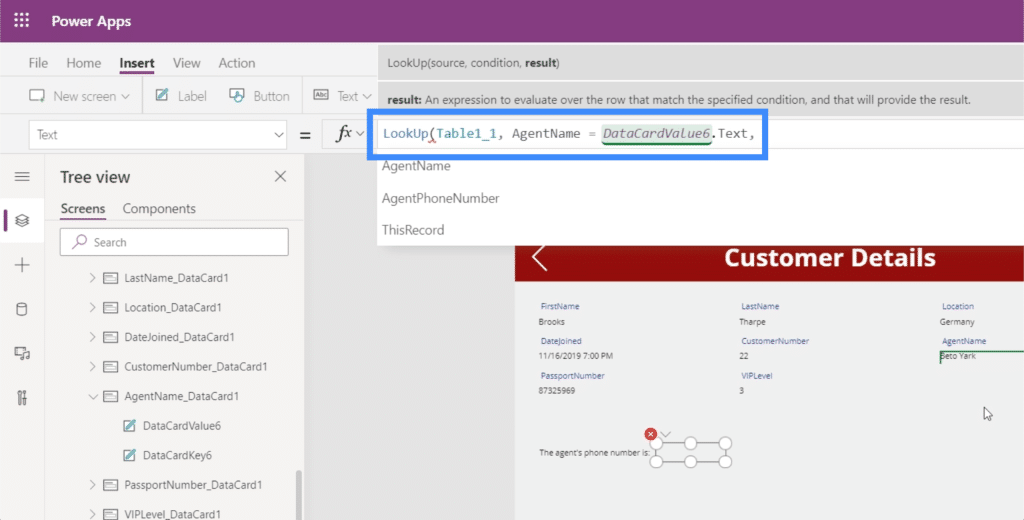
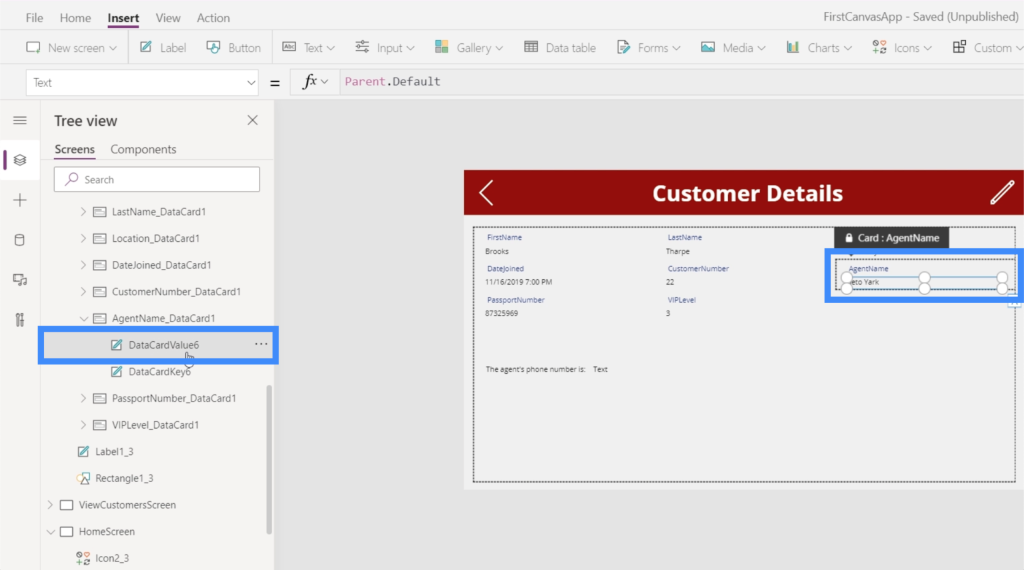
We’re using the text value for DataCardValue6 because this is the field where the agent’s name is. This means that this also changes depending on which record the user looks for.
Finally, we’re going to reference the actual piece of information we’re looking for. In this case, we want the phone number corresponding to the agent name.
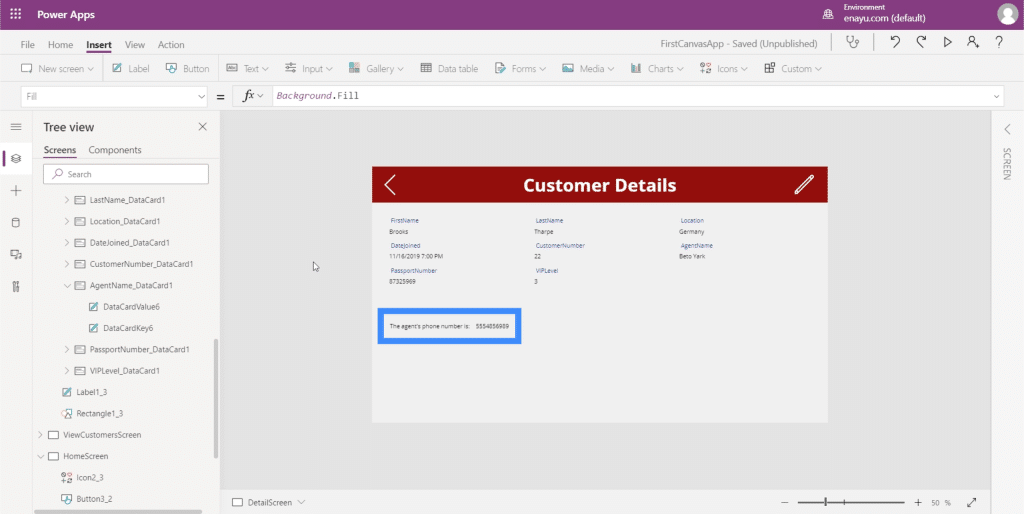
Now, the number for Beto Yark is showing up, which means that we’ve successfully referenced data from a table containing our agent information on a page that is originally linked to a different data source.
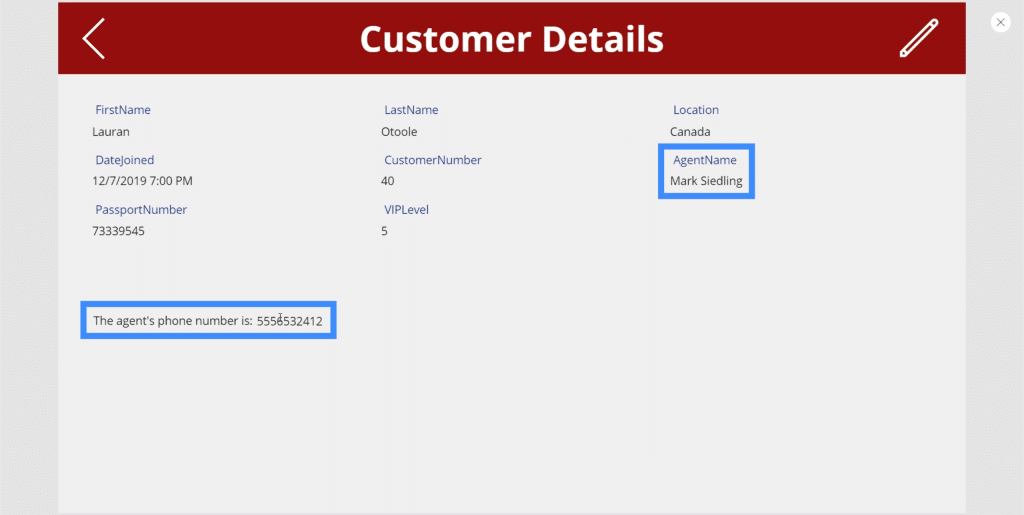
If we choose a different record, this time for the customer named Lauran Otoole, we see that the agent assigned is Mark Siedling. This means that the phone number showing below has also changed.
If we take a peek at the actual table in our data source, it does prove that the right number was showing up on our screen.
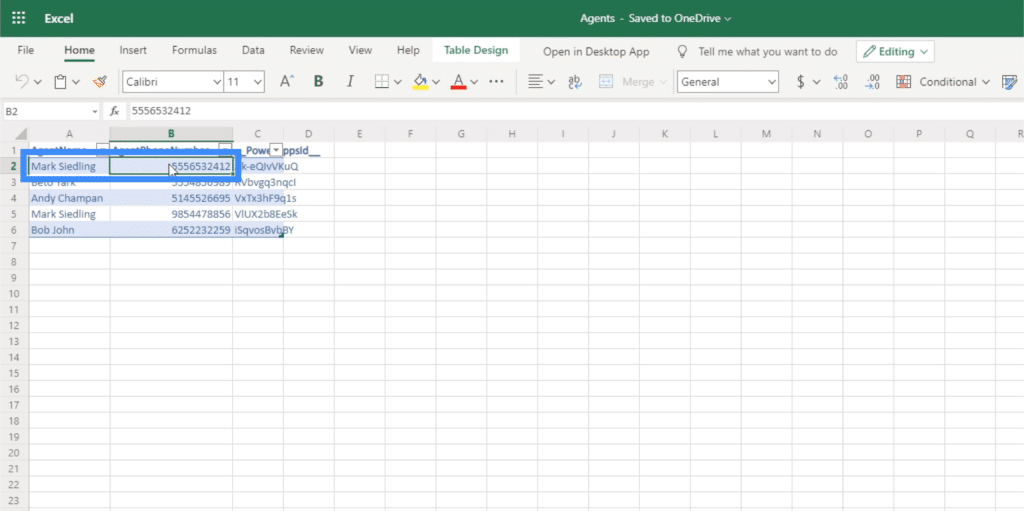
This means that the formula is working the way we want it to.
Adding Call Functionality
Now that we’ve explored the Power Apps LookUp function, let’s move to the Launch function. Although Launch can help open up a number of different apps, in this example, we’re going to focus on adding call functionality.
Let’s start by adding a button right beside the agent phone number. Let’s change the text to “Call Agent”.
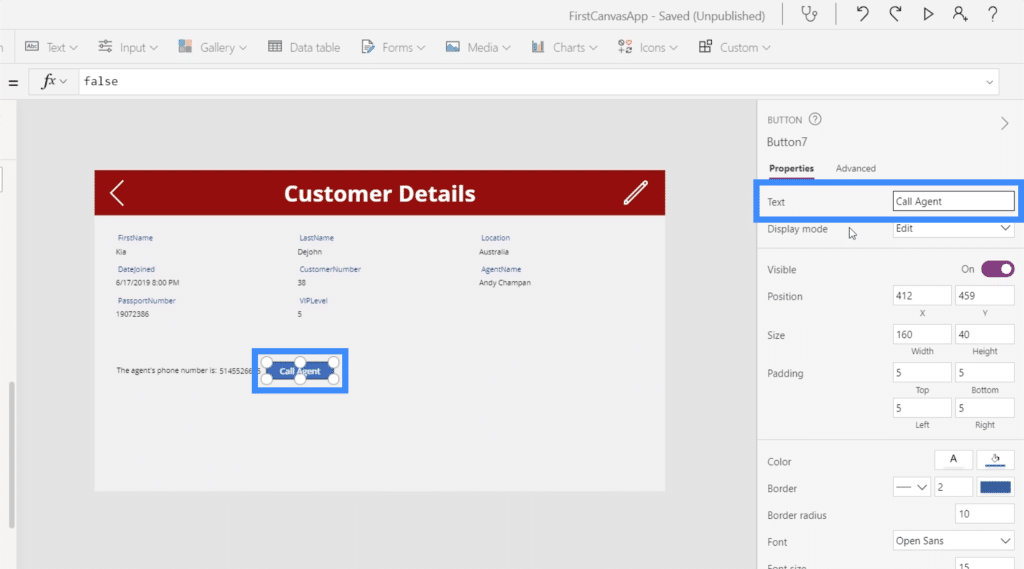
With the button highlighted, we’ll choose OnSelect on the property dropdown and use the Launch function.
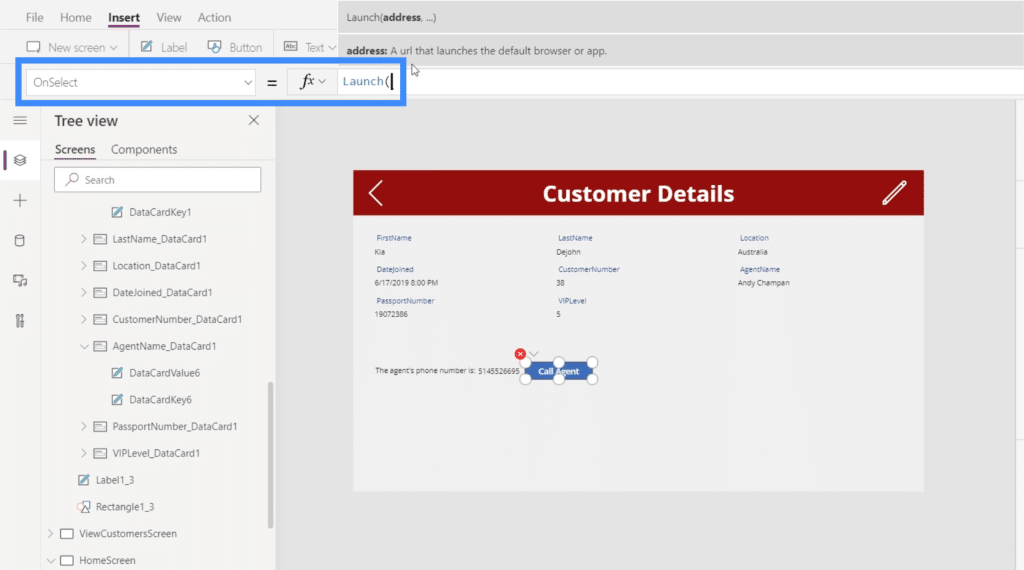
Since we’re adding call functionality, we’ll use “tel” to indicate that the data being referenced is a phone number. Then, we’ll follow it up with the actual phone number.
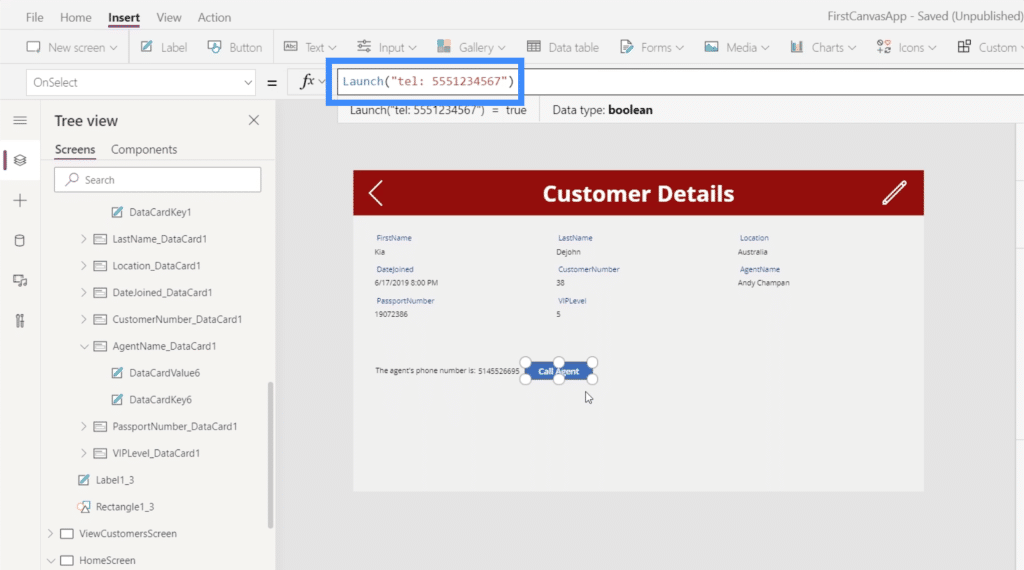
With that formula in place, what the Call Agent button will do is look for an app that will allow the user to call that phone number. If the user is on his mobile, the button will attempt to open the actual Phone app and dial that number. If you’re on your computer, it might attempt to launch Skype. If you’re on an iPad, then it can open Facetime.
Again, we want this button to be dynamic. We don’t want it to just dial the same number all the time. What we want is for the button to dial whatever number is showing up on the label beside it.
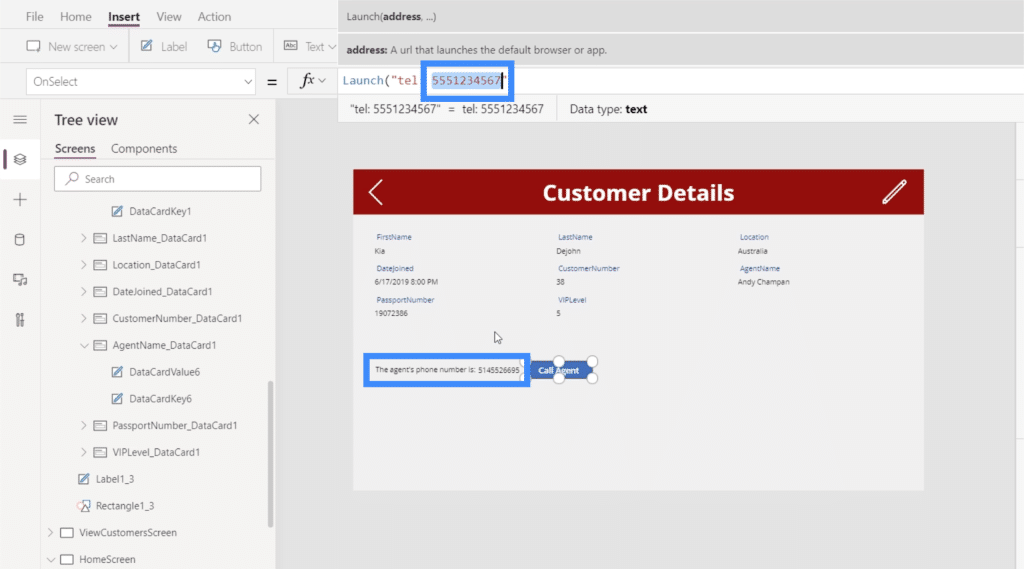
So we need to reference the text on Label8.
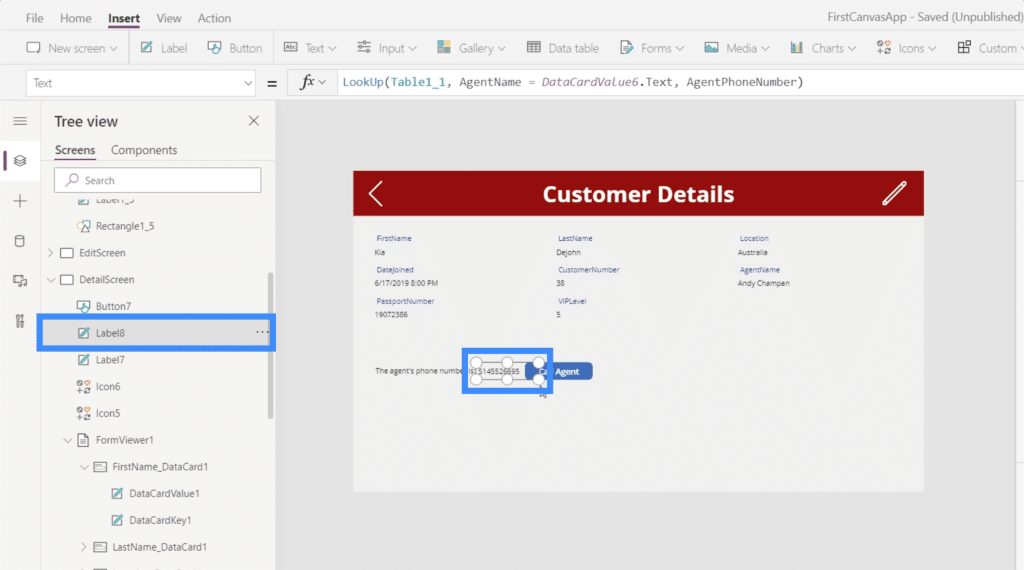
To do that, we’re going to need the Concatenate function. Concatenate links together a series of strings, in this case, the “tel:” and the text on the label.
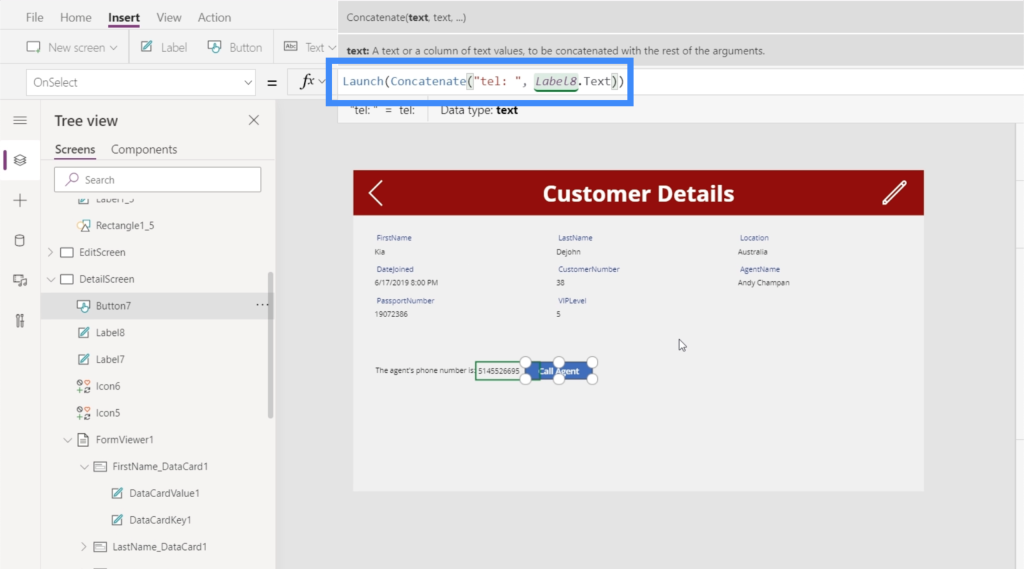
Now that we have that formula in place, let’s see what happens when we use the button. Pulling up the record for Kia Dejohn, it shows that the agent is Andy Chapman. Let’s click the Call Agent button.
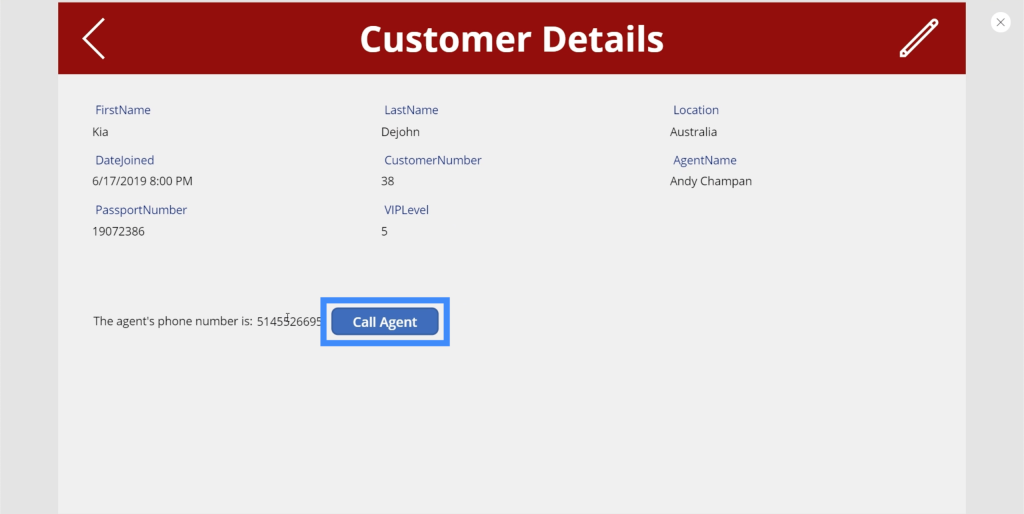
Because I’m on my computer, you can see that it’s trying to launch an app to call the number.
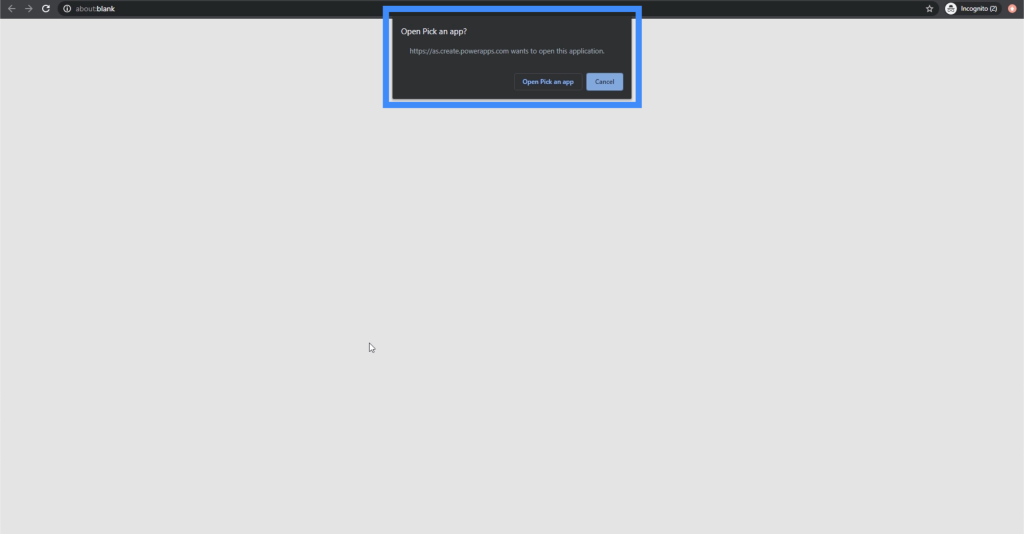
Again, the app to be launched will depend on the device you’re using. The bottom line is, it’s going to launch the app that will allow you to call the number on the screen.
***** Related Links *****
Power Apps Introduction: Definition, Features, Functions And Importance
Power Apps Environments: Setting Up The App Elements Properly
PowerApps Functions and Formulas | An Introduction
Conclusion
The Power Apps LookUp and Launch functions are just two of the many functions that can optimize the app you’re working on. The ability to see important information in one place and make a call directly from that page does make it faster for end-users to do what they need to do.
As we create more tutorials for Power Apps, we’ll be exploring other similar capabilities that will further make your app even more useful.
All the best,
Henry


