Inputs are very common in Microsoft Power Automate. In this tutorial, we’ll learn how to set up UI flow inputs for the actions that we need to record.
UI flow inputs are used to pass information from an external source or any supported connector to the recorded actions that we’re automating.
We’ll be using this sample UI flow that I previously created. This flow displays static text on a notepad.
Let’s say for example, we want to display “Hey, my name is”, then a user can enter any name and our flow would put that into a notepad file. This is what we’re going to do in the next steps.
Configuring The Sample UI flow
First, we need to get rid of the Run Untitled – Notepad script step because we want to record another UI flow or another UI recorder action. Just click the ellipsis and click Delete.
Then click Ok.
After that, let’s create a new action.
We’ll create a new variable by clicking Variable.
Click Initialize variable.
Set the name of the variable to bool, choose Boolean as its type, and set the value to true.
We’ll get rid of this later on. The reason why we’re setting this action up is because we want to be able to go back to the previous step in our UI flow process. Without setting an action, we won’t be able to go back to the previous steps. So, let’s click the Back button now.
Prior to this tutorial, I’ve set up a new input called Name. I’ve given it the default value of “Henry” and the description of “Please enter in your first name”. So before we start this flow, we need to enter a name.
Let’s click Next.
Then, we’ll get rid of the Initialize variable action that we previously created.
Click Ok.
After that, we’ll create a new UI flow recorder action. So, let’s click New Step.
Then click Recorder.
Click Record app.
After that, click Launch recorder.
Recording UI Flow Inputs
First, click Record.
Then let’s open up Notepad.
Let’s type “Hey, my name is” and instead of providing a fixed value, use the inputs from our Power Automate flow. Therefore, let’s click Inputs on the top menu bar. Then click the Name input.
By doing that, it’ll type in the default value that we’ve set to the Name input, which is “Henry”.
Lastly, click Done.

We have now created a flow with an input variable. Let’s then see it working in action.
Testing UI Flow Inputs
First, click the Next button.
We don’t have the outputs yet, so we don’t need to worry about this. Just click Next.
Then again, let’s first enter a name here. For example, let’s type “David Copperfield”. After that, click Test now.
Click Test.
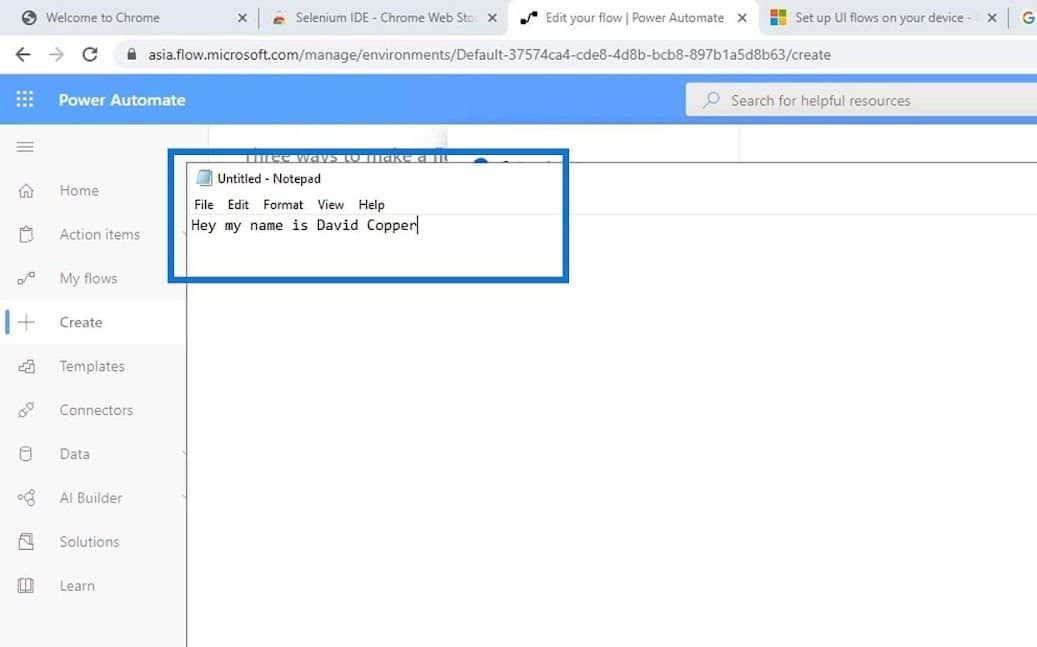
Make sure not to move your mouse during the whole process. As we can see, it opens up a new notepad file and it automatically types in “Hey my name is” along with the input value that we entered which is “David Copperfield”.

That means our UI flow successfully worked. If we go back to the Record and edit steps, we can actually see it in the code as well. Just click the Run Untitled – Notepad script step.
As we can see, it first launched Notepad.
It then replays keystrokes. This is when we typed “Hey, my name is”.
Lastly, it inserted a text input with the value of the Name variable that we previously configured.
***** Related Links *****
Power Automate Flow: Usage And Types Explained
Scheduled Workflows In Microsoft Power Automate
Power Automate UI Flow | An Introduction
Conclusion
Using inputs, we can customize our UI flow actions to make it whatever we want it to be. We don’t need to technically record our UI flows. We can just add action and choose whatever actions we might want such as Left click, Right click, or even Get text.
That’s how we can use UI flows with inputs. It’s just so much easier doing the record function first and then modifying the code if we need to.
All the best,
Henry


