Python is a widely used programming language with libraries and modules at your disposal. One challenge developers usually face is managing multiple versions of the language and their various dependencies.
Often, you would uninstall one version and install another one for a particular use case. However, there is a smarter way of switching versions in Python with Pyenv.
Pyenv is a Python version management tool. It is ideal for managing different Python installations. This tool allows you to work with multiple Python versions effortlessly. Pyenv provides many functionalities for users, including the ability to switch between versions, globally or per-project basis, compilation error diagnostic, and plugin support.
Once you start working on larger Python projects, you’ll need to work with multiple versions to achieve the results you want. Therefore, in this article, we’ll get you started with Pyevn. You will learn how to manage multiple Python versions, diagnose errors, and get help when needed.
Let’s get into it!

How to Install Pyenv
To begin using pyenv, you’ll first need to install it on your system.
The installation process differs slightly between Windows and Unix-based systems (Linux and macOS). In this section, we’ll break down the installation process for both types of systems.

1. Installing pyenv on Windows
For installing pyenv on Windows, pyenv-win is the recommended package.
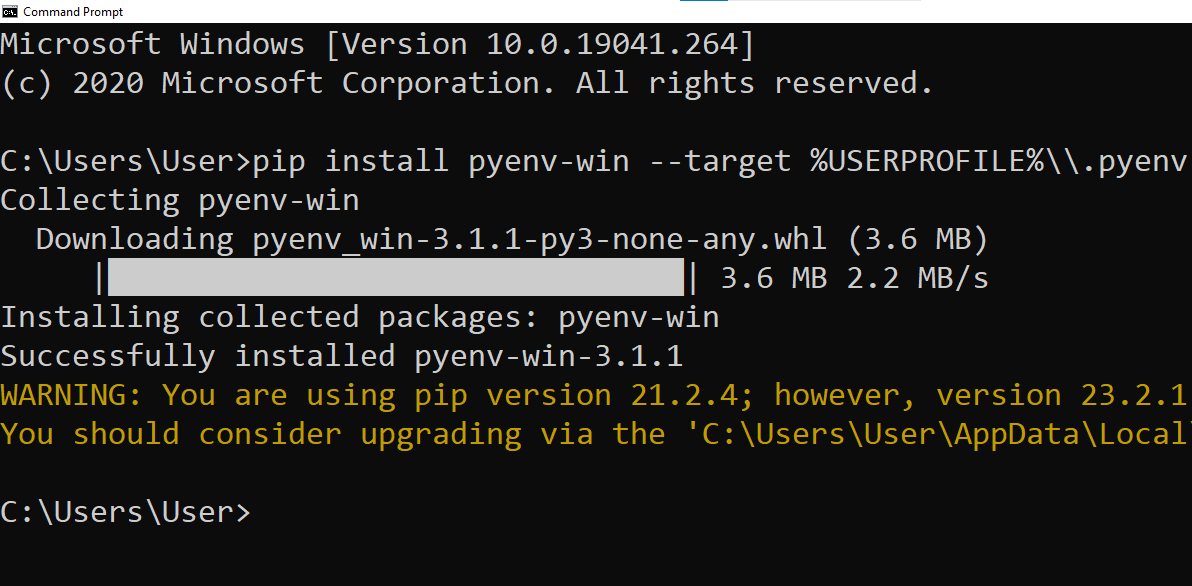
Open up Windows Command Prompt and run the following command:
pip install pyenv-win --target %USERPROFILE%\\.pyenvThis command will install pyenv on your windows operating system.

If you run into an error with the above Python command, use the following instead:
pip install pyenv-win --target %USERPROFILE%\\.pyenv --no-user --upgrade2. Installing pyenv on Mac and Linux
To install pyenv on Unix-based systems, ensure that you have Git installed, as it’s required for the installation process.
For macOS users, it’s also recommended to have Homebrew installed.
To make the installation process simpler, you can use pyenv-installer.
First, install the required build dependencies for your system by following the instructions found in the installation wiki.
After installing the build dependencies, proceed with the pyenv installation using the following command:
curl https://pyenv.run | bashThis will install pyenv along with its essential plugins.
Once the installation is complete, configure your shell environment by adding the following lines to your shell configuration file (e.g., .bashrc, .zshrc):
export PATH="$HOME/.pyenv/bin:$PATH"
eval "$(pyenv init -)"
eval "$(pyenv virtualenv-init -)"
Then, restart your shell or run source <your_shell_configuration_file> (e.g., source ~/.bashrc) to make the changes take effect.
Now that the latest pyenv version is installed on your system, you can start managing multiple Python versions seamlessly.
4 Main Features of Pyenv
In this section, we’ll look at the 4 main features of Pyevn. This knowledge will help you understand when to use this tool.

- Install multiple versions of Python: It allows you to have multiple versions installed on your system simultaneously, enabling you to choose the right version for each project or task.
- Easy switching between versions: With the help of simple commands, you can change the active system Python version within your project or globally across the entire system.
- Virtual environment support: Pyenv integrates with tools like virtualenv and pipenv to provide support for virtual environments, which helps isolate project dependencies and avoid potential conflicts.
- Automatic activation of versions and virtual environments: Pyenv can manage your project’s Python version and virtual environment and automatically activate the right version when required.
6 Important Pyenv Commands
We have listed some important pyenv commands in this section that will help you manage your Python environment effectively.

1. pyenv install
This command allows you to install Python versions on your system. For example, pyenv install 3.9.1 would install Python 3.9.1. You can also list all available Python versions with pyenv install –list.
2. pyenv uninstall
To remove a previously installed version of Python, use the uninstall command followed by the version you wish to remove: pyenv uninstall 3.9.1.
3. pyenv global
The global command is used to set the default system-wide Python version. For instance, pyenv global 3.9.1 would configure your system to use Python 3.9.1 by default.
4. pyenv local
You can use the local command to switch the Python version for a specific project or directory. In your project directory, run pyenv local 3.8.5 to set the Python version for that specific directory. Pyenv creates a .python-version file within the directory that stores the specified version.
5. pyenv shell
Temporarily override the current shell session’s Python version by running pyenv shell 3.8.5. This command is particularly useful for testing your code with multiple versions without affecting the global or project-specific settings.
6. pyenv update
Although Pyenv does not have a direct update command, you can update your Python version by installing the desired new version and switching to that version using either the global or local command.
How to Manage Python Versions With Pyenv
The core feature of Pyenv is its ability to change the active Python version for your project seamlessly.
This is achieved by modifying the PATH environment variable, which is used to determine the location of Python binaries.
When you switch between versions using pyenv commands like pyenv global or pyenv local, the tool takes care of updating the PATH for you.
To set a global Python version, you can use the pyenv global command followed by the desired version number.
This sets the default Python version for your entire system:
pyenv global 3.9.0You can also set a local Python version for a specific project directory by using the pyenv local command.
This will create or update a .python-version file in the project folder, which stores your preference for that project:
pyenv local 3.6.0How to Create a Virtual Environments With Pyenv
In managing Python projects, it’s important to use virtual environments.
Virtual environments allow you to maintain separate environments for different projects, isolating dependencies and avoiding conflicts. The pyenv tool simplifies this process by seamlessly managing versions and virtual environments.
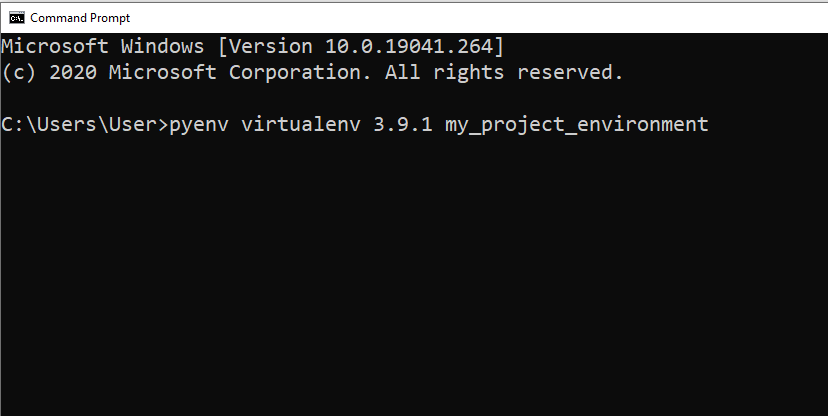
To create a virtual environment, make sure you have the desired Python version installed through pyenv. Then, execute the pyenv virtualenv command, followed by the Python version and a name for the virtual environment.
For instance:
pyenv virtualenv 3.9.1 my_project_environment
This command creates a virtual environment named “my_project_environment” using the Python 3.9.1 version.

To activate this virtual environment, you can use the pyenv local command followed by the virtual environment name:
pyenv local my_project_environment
Now, any Python packages and dependencies installed will be specific to this virtual environment, ensuring a clean separation between projects.
How to Manage Packages With Pyenv
When working with Python projects, you will rely on various packages to extend functionality or execute specific tasks.
Pyenv is a useful tool that simplifies the management of multiple Python interpreters, like CPython, and their respective packages.
A package manager is crucial when dealing with the installation and upgrading of Python packages. To effectively use Pyenv, it is important to have familiarity with crucial package management tools, such as pip and virtualenv.
pip is the standard package manager for Python and makes it easy to locate, download, and install Python packages.
To use pip with your chosen Python version in Pyenv, simply run it using the corresponding Python interpreter.
For instance, if you have Python 3.9.0 installed via Pyenv, you can use pip as follows:
pyenv exec python3.9 -m pip install package_name
It is best to use virtual environments if working on multiple projects.
By understanding how to work with packages, you gain the ability to tackle multiple projects with different versions and dependencies. This results in efficient and organized development workflows.
Final Thoughts
Pyenv is a game-changer when working on larger Python projects. This is because as you dive deeper into Python projects, you’ll find that different versions matter.
By learning pyenv, you’re equipping yourself with the flexibility to switch between these versions seamlessly. This tool ensures that you’re using the right version for the right task, preventing potential incompatibilities and issues down the road.
Moreover, pyenv adds immense value by keeping your development environment clean and organized. Think of it as giving your projects a solid foundation, ensuring stability and efficiency.
Check out our Python playlist below to learn more Python tips and tricks!
Frequently Asked Questions
In this section, you’ll find some frequently asked questions you may have when working with pyenv.

How to install pyenv?
To install pyenv, you can use the pyenv-installer script. First, make sure you have the necessary dependencies, such as build tools and libraries.
Then, run the following command:
curl https://pyenv.run | bash
After installation, add the appropriate lines to your shell configuration file to initialize pyenv on startup.
How does pyenv manage multiple Python versions?
pyenv is a powerful Python version manager that helps you manage and switch between different Python versions on your system. It does this by intercepting the Python calls and directing them to the appropriate Python version installed on your system. This process is transparent and allows you to maintain Python versions without conflicts.
How to switch Python versions using pyenv?
To switch Python versions using pyenv, first, ensure the desired version is installed using the following command:
pyenv install <python_version>
Then, use the pyenv global, pyenv local, or pyenv shell commands to set the current Python version for various scopes:
pyenv global <python_version>
pyenv local <python_version>
pyenv shell <python_version>
How to set a global or local Python version with pyenv?
You can set a global Python version by using the pyenv global command:
pyenv global <python_version>
To set a local Python version for a project, navigate to the project directory and run the following command:
pyenv local <python_version>
This will create a file named .python-version in the project directory containing the specified Python version.
How to install packages when using pyenv versions?
When using pyenv, you can install packages using pip, just like you would do with any other Python environment. Since each particular Python version managed by pyenv has its own set of packages, you can install packages specifically for a certain version without affecting others.
Consider using virtual environments in combination with pyenv to isolate project dependencies and make package management even more efficient.
How does pyenv compare with other Python environment management tools like pipenv and poetry?
While pyenv is focused solely on managing and switching between Python versions, tools like pipenv and poetry are aimed at managing dependencies and virtual environments for Python projects.
Pipenv and poetry are comprehensive solutions for managing both Python versions and package dependencies in a project, whereas pyenv is used for managing Python versions. You can use pyenv alongside pipenv or poetry for a complete Python environment management experience.


