
In this tutorial, we’ll take approvals to the next level. We’ll discuss the process of creating a Microsoft flow approval with multiple options, which can be of great help to certain business processes. For example, an organization might have an expense report system where if the request is worth a thousand dollars, it needs to undergo approval.
With a multi-option approval workflow, the user can then choose to approve or reject, or even escalate to CEO or to HR. They can have a variety of options for necessary actions.
This is a sample flow that uses a simple approval. The users were given the option to either approve or reject a tweet.

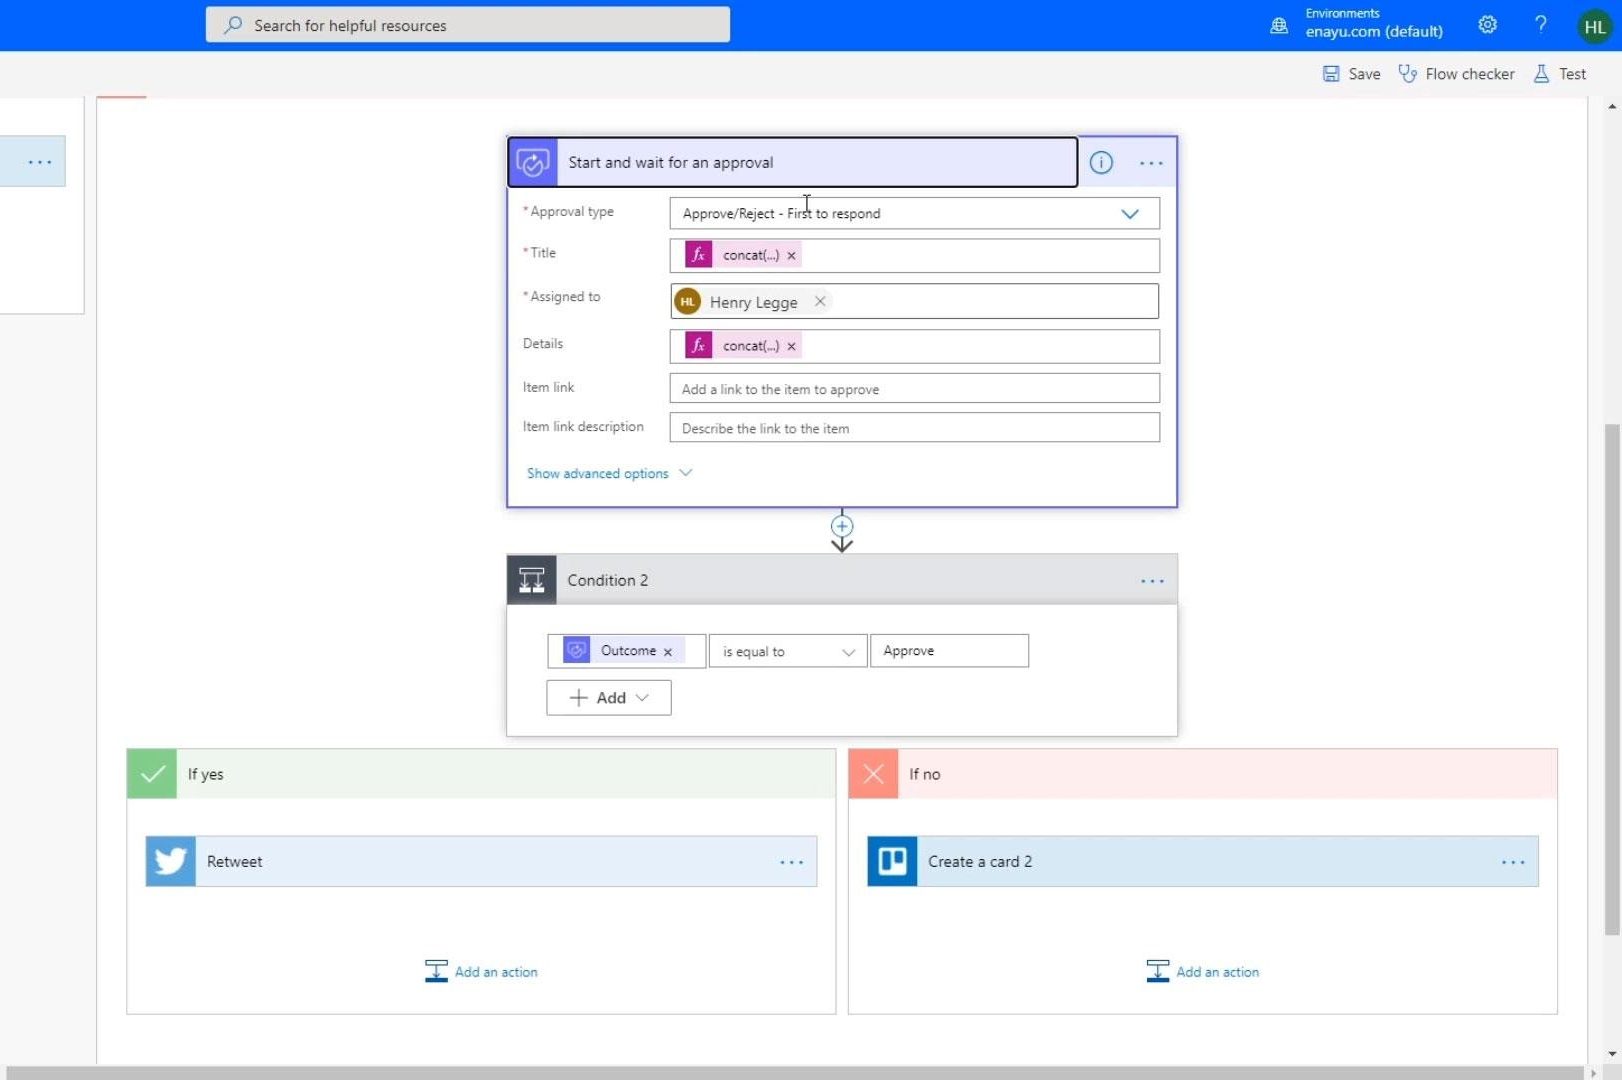
But for this tutorial, we’ll have an example where they can select from multiple options.
Creating The Options For A Microsoft Flow Approval
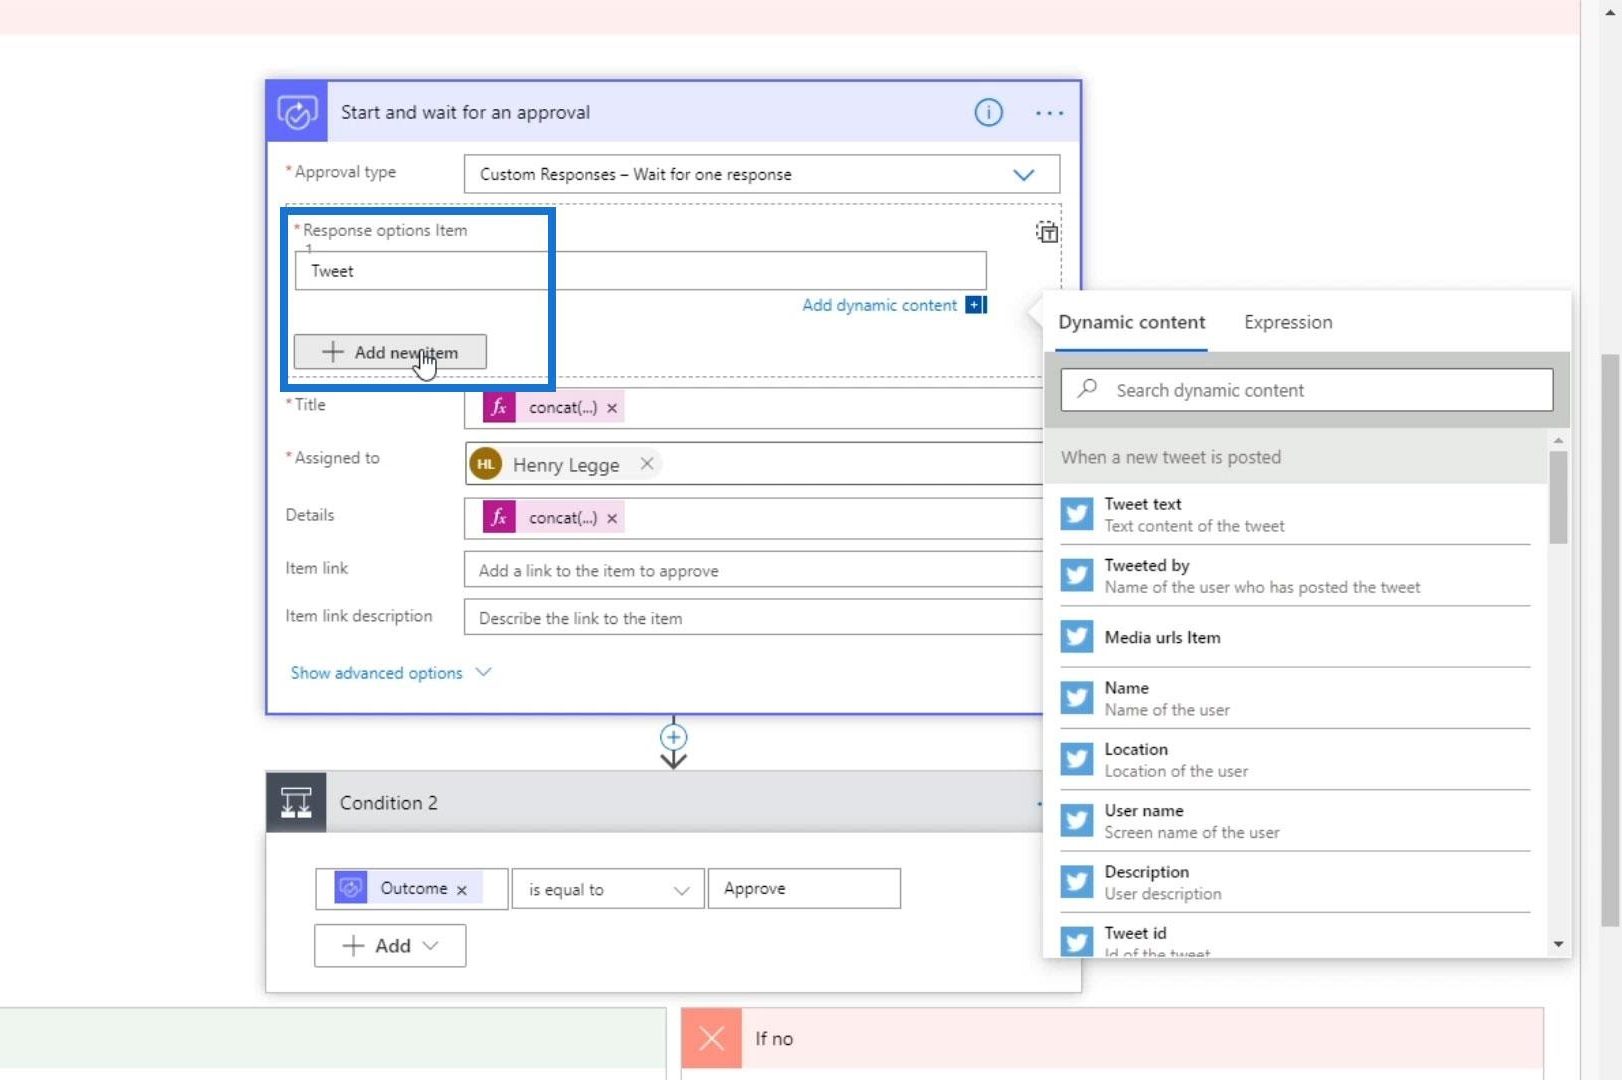
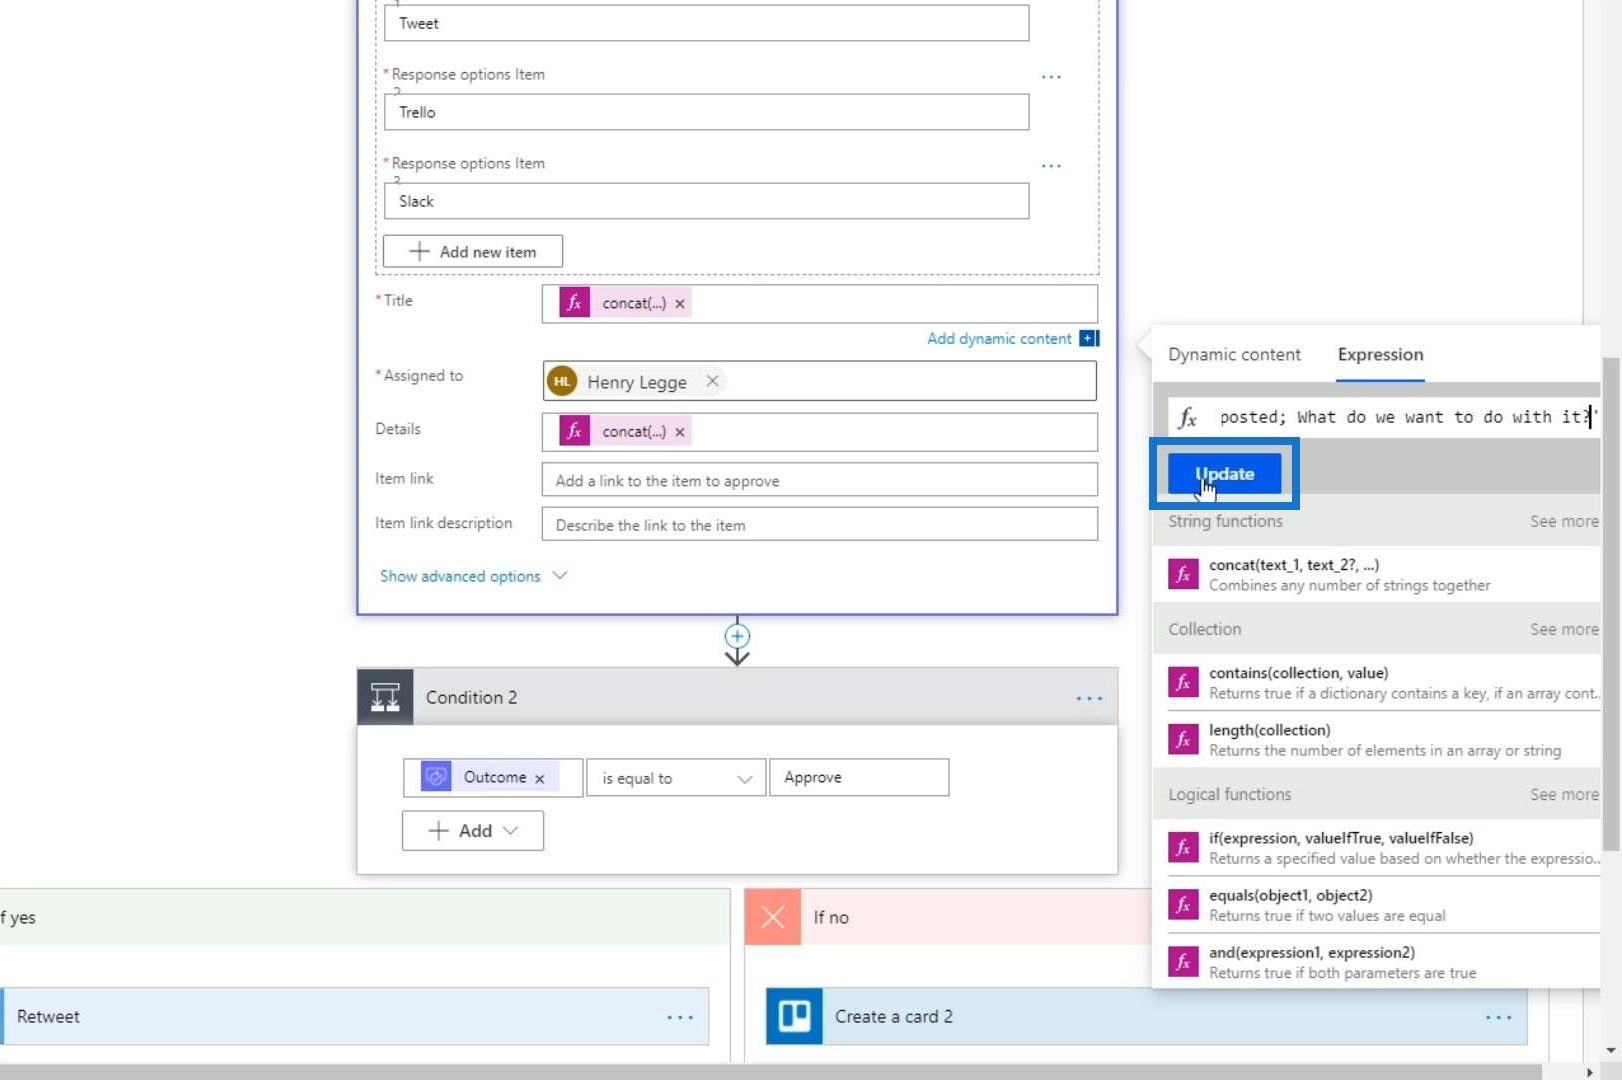
First, let’s set the Approval type to “Custom Responses – Wait for one response”.

One of the response option items will be “Tweet”. Then, click the “Add new item” button.
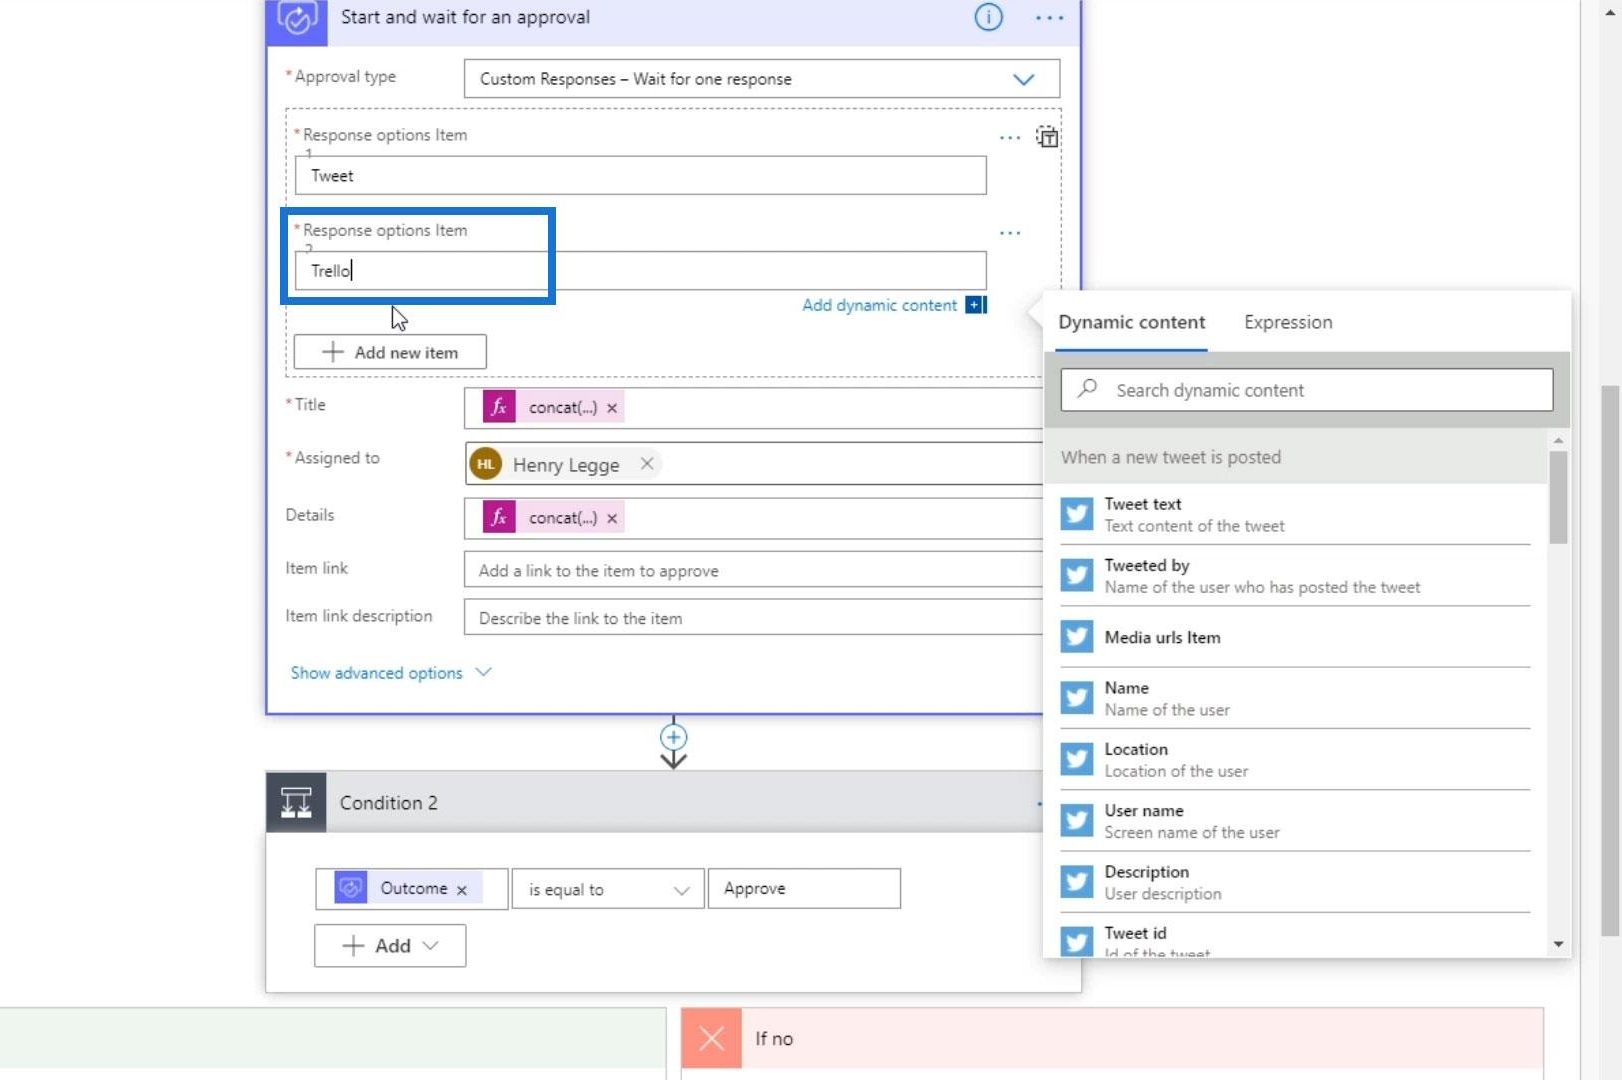
The next one is a Trello card, but we’ll just put in “Trello”.
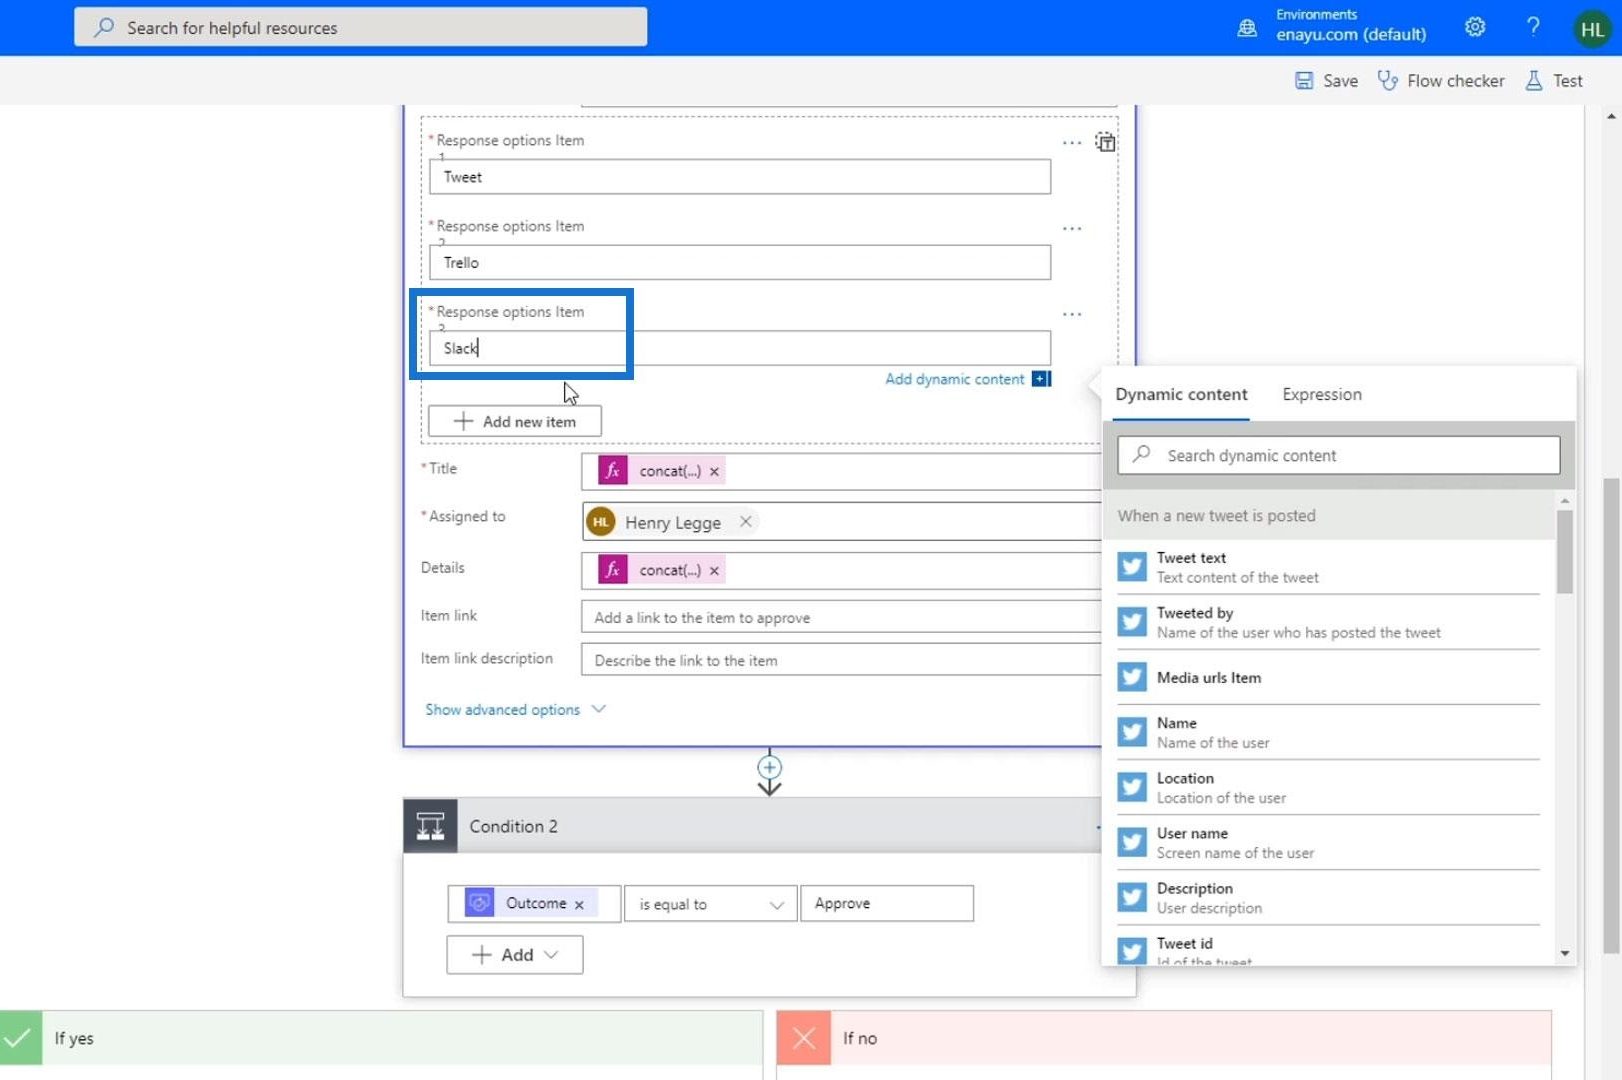
The last one is “Slack”.
Click the concat expression in the Title field and let’s change “New tweet has been posted” to “What do we want to do with it?”. Then click the Update button.

We’re now done modifying our approval action.
Modifying Options For The Flow Approval
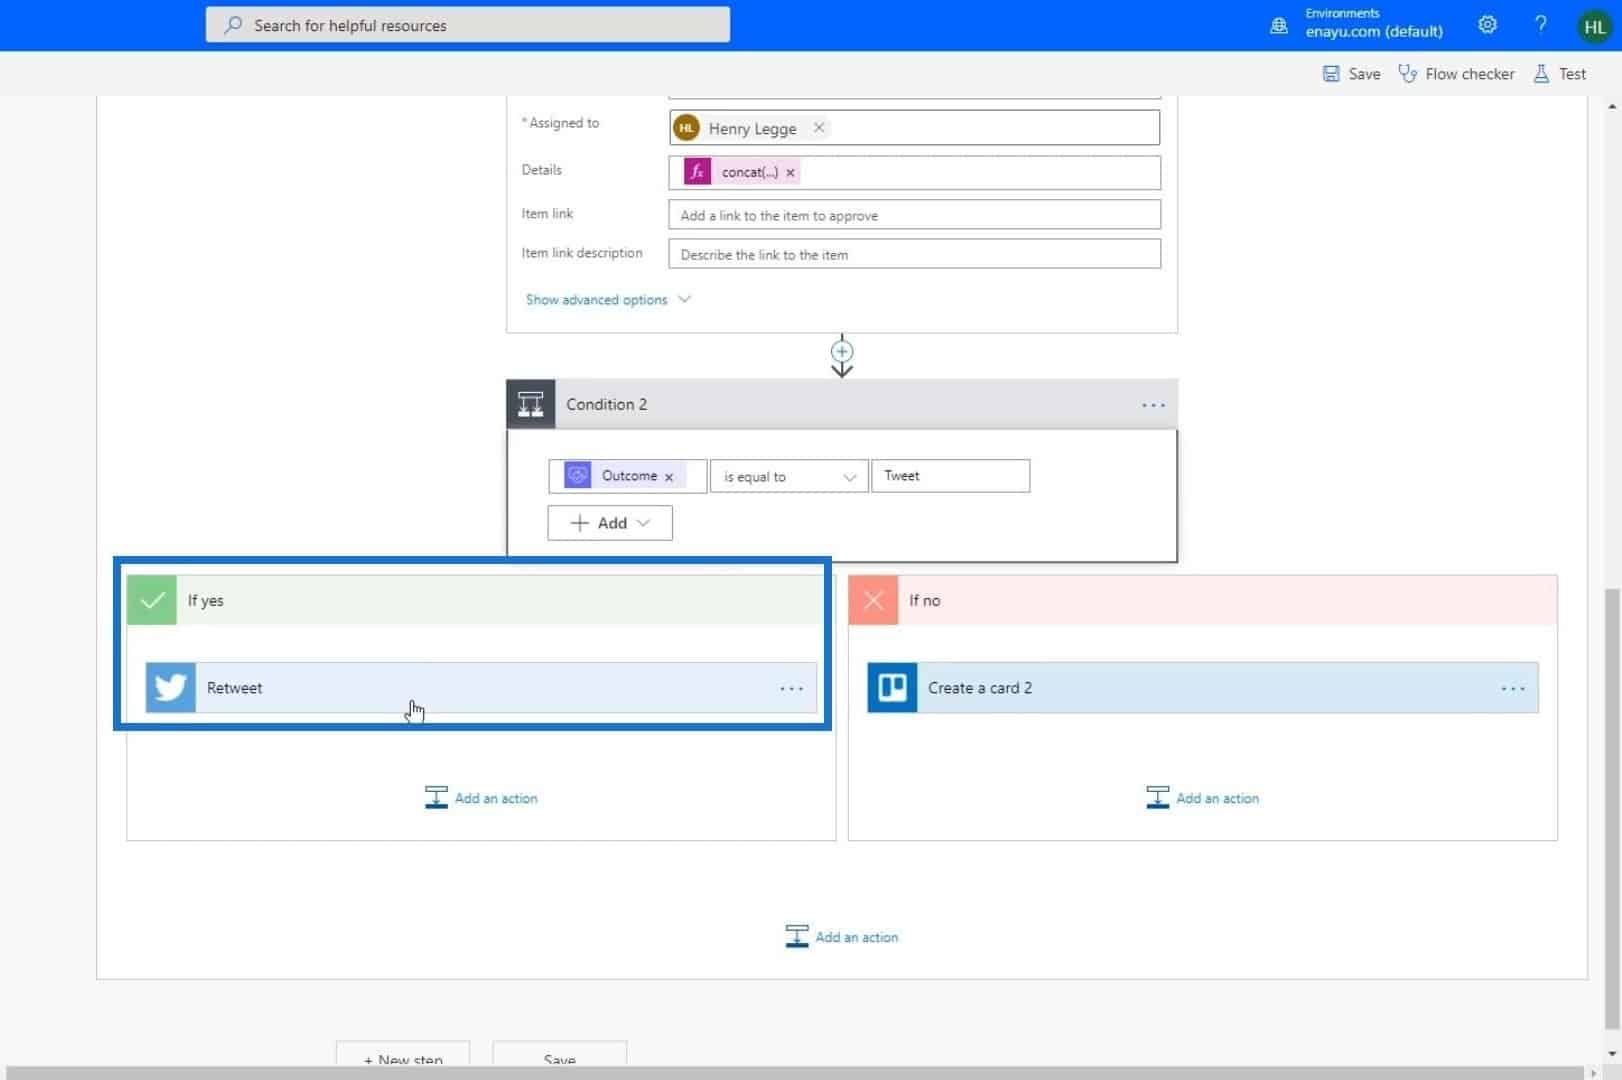
Let’s now modify the condition and change it to “Outcome is equal to Tweet”.
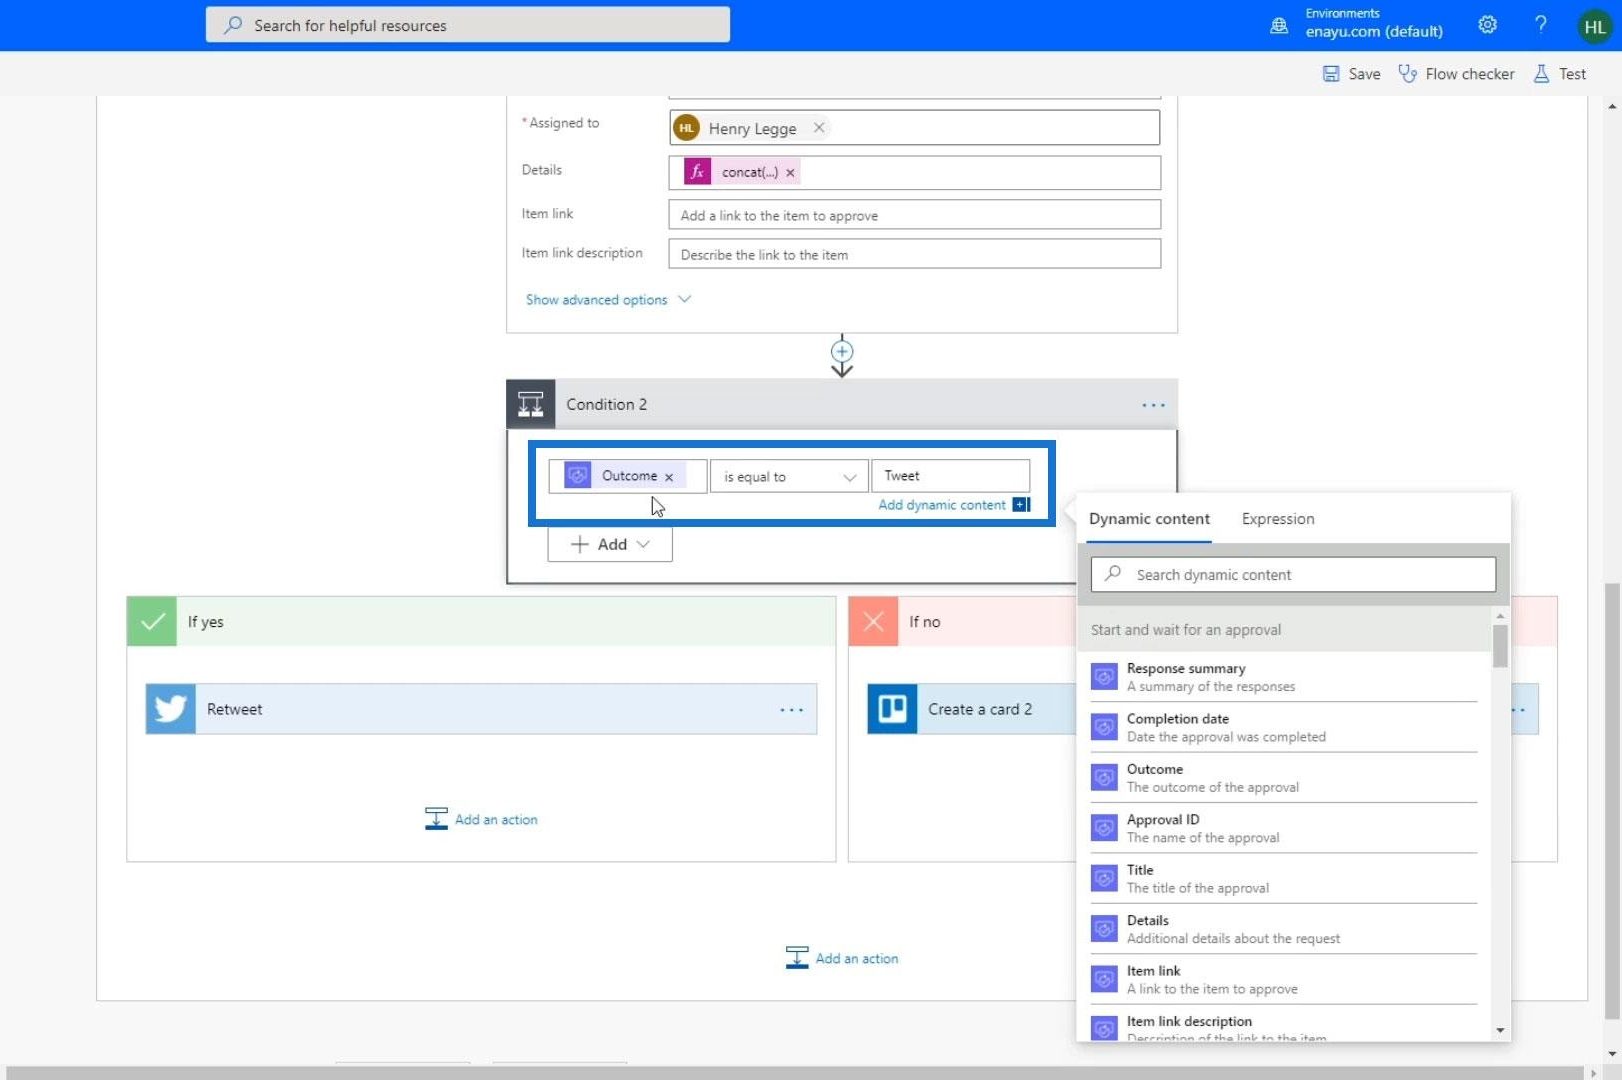
If the outcome is equal to the tweet, then it simply retweets it.
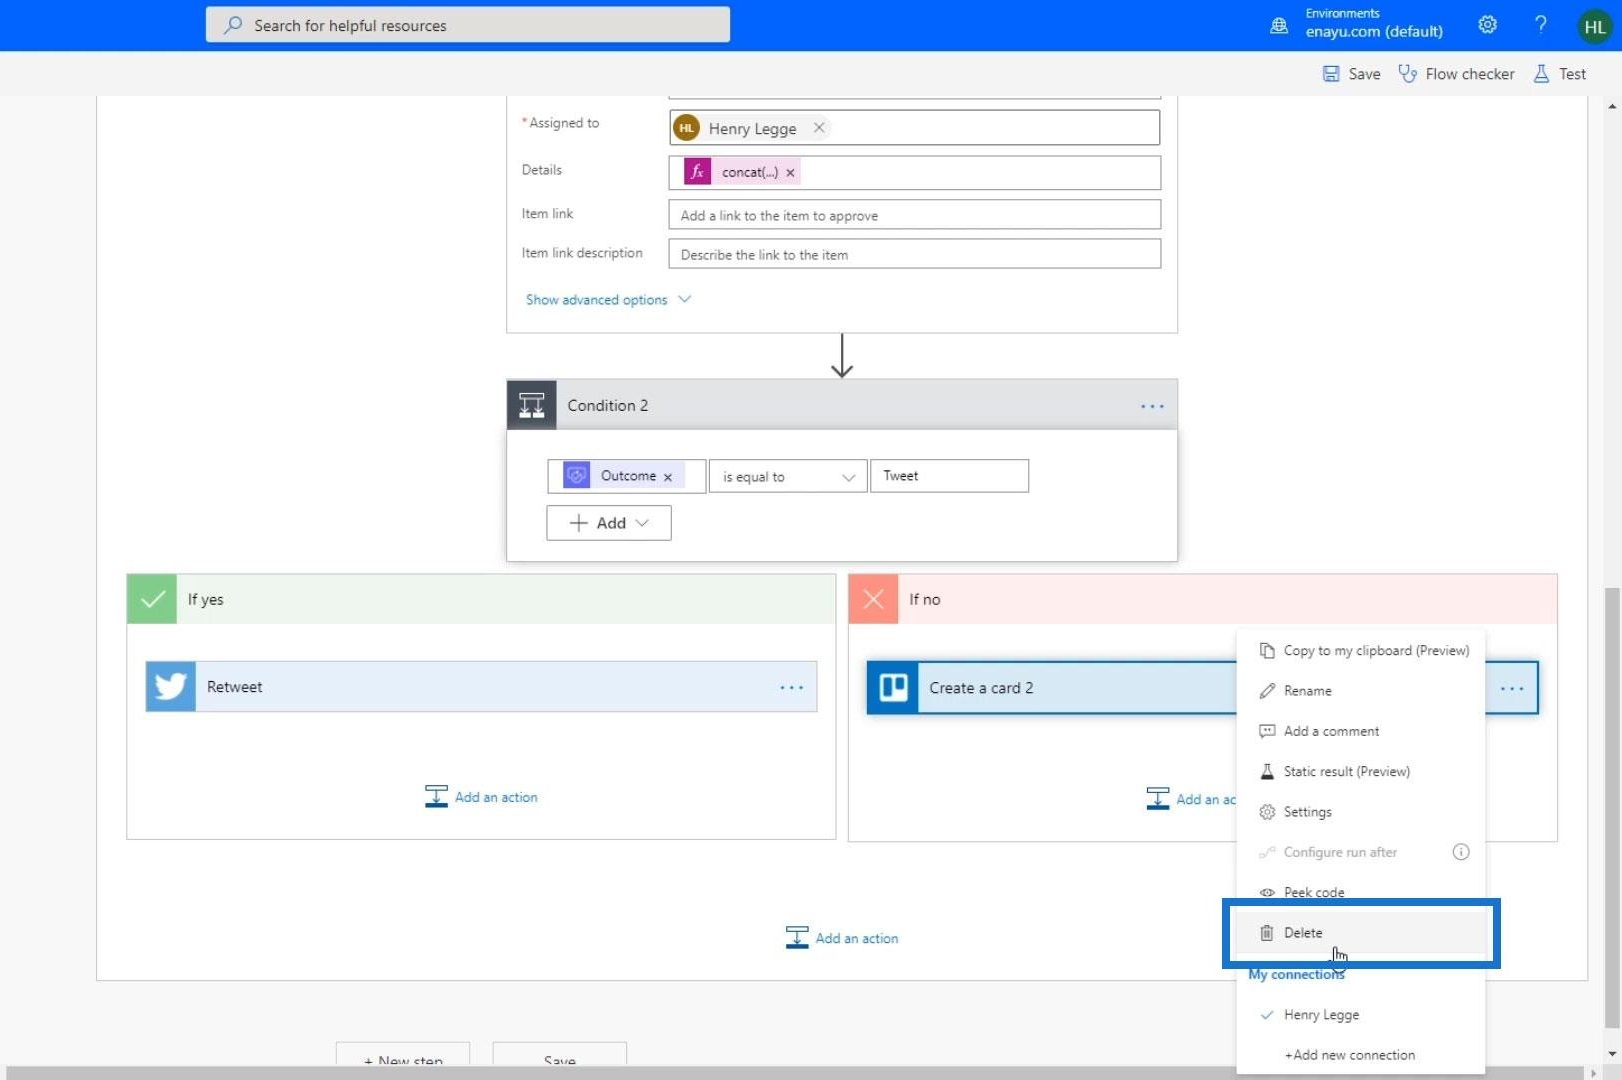
If not, we need to have another condition on top of that. So, let’s delete the current action within the “If no” path.
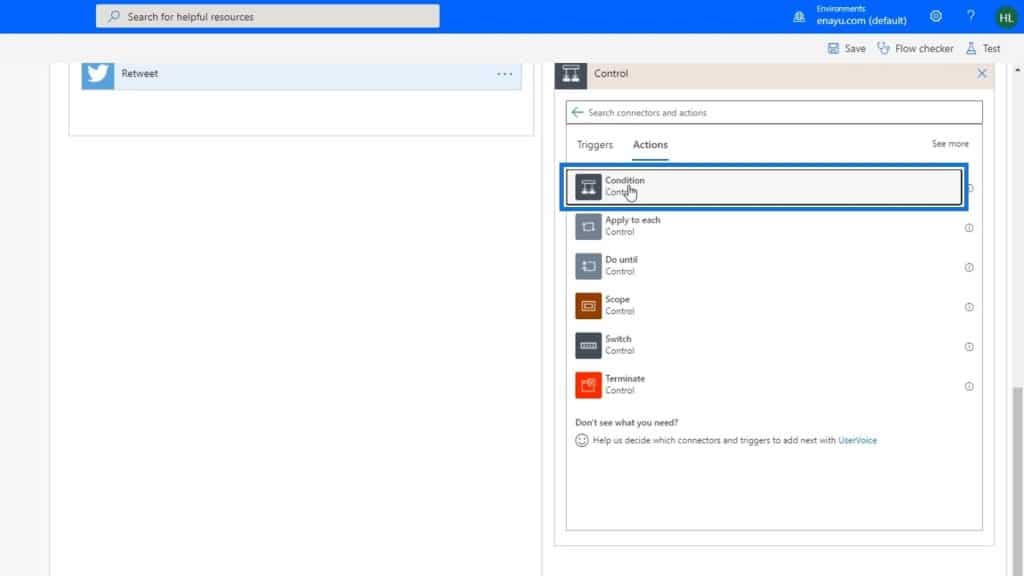
Then let’s add a Condition control.
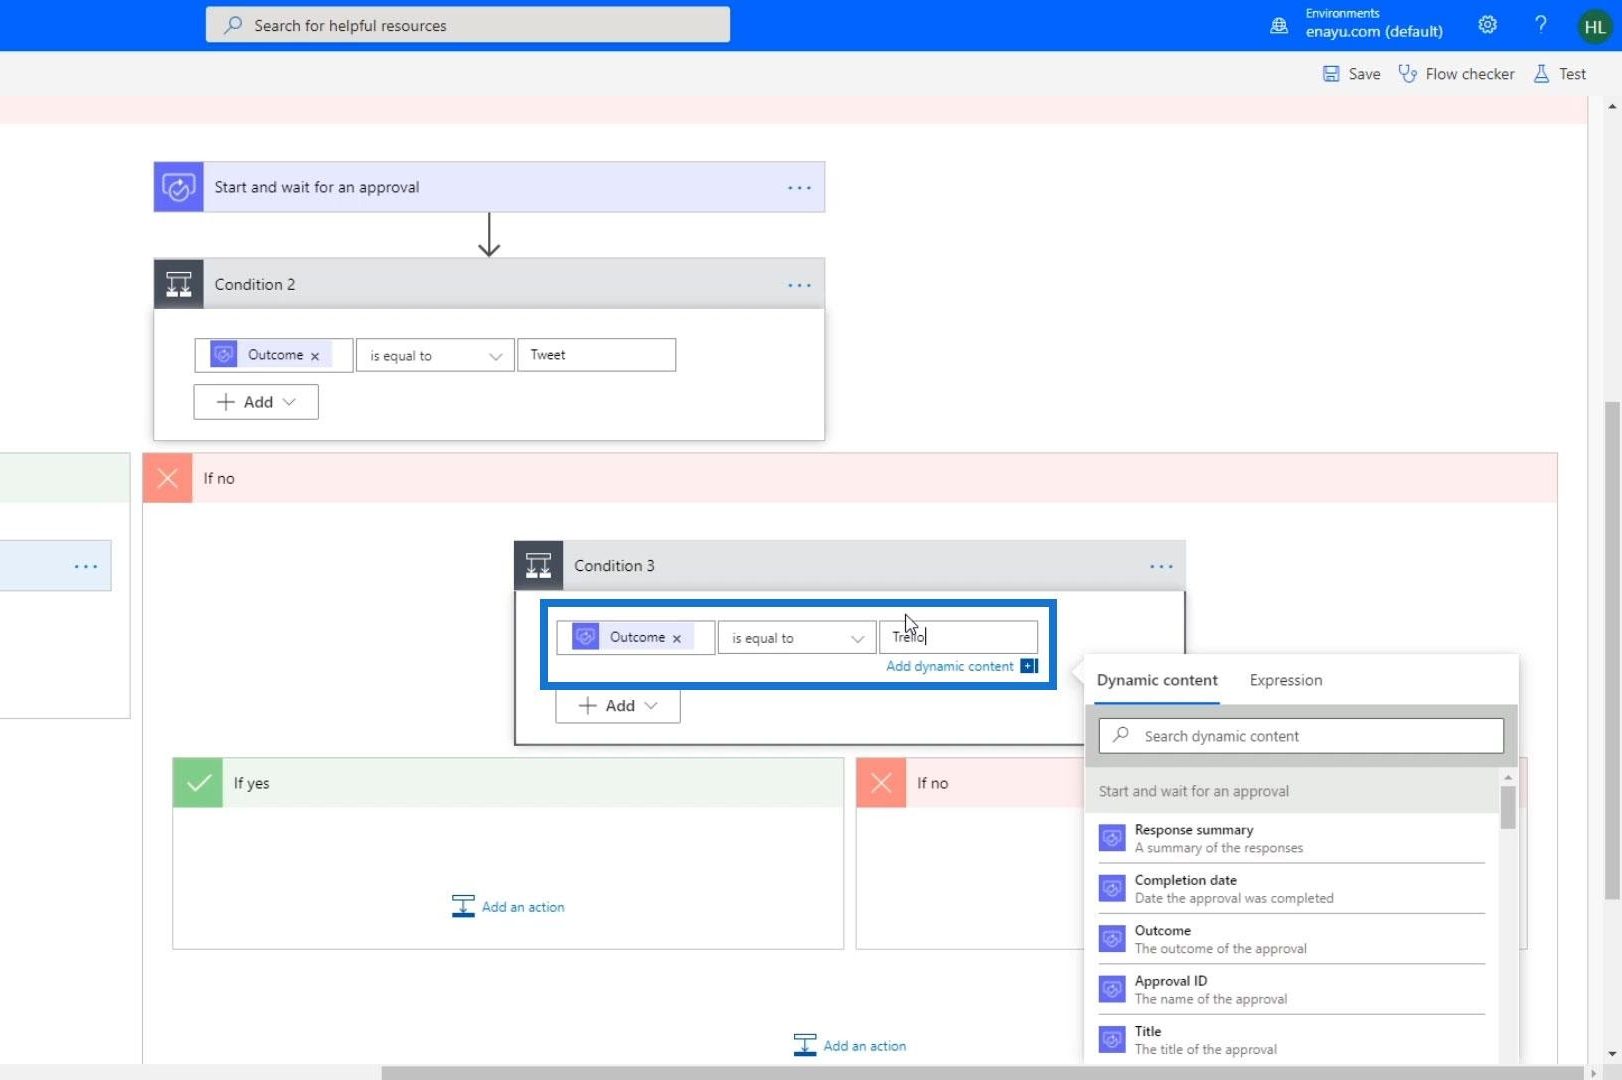
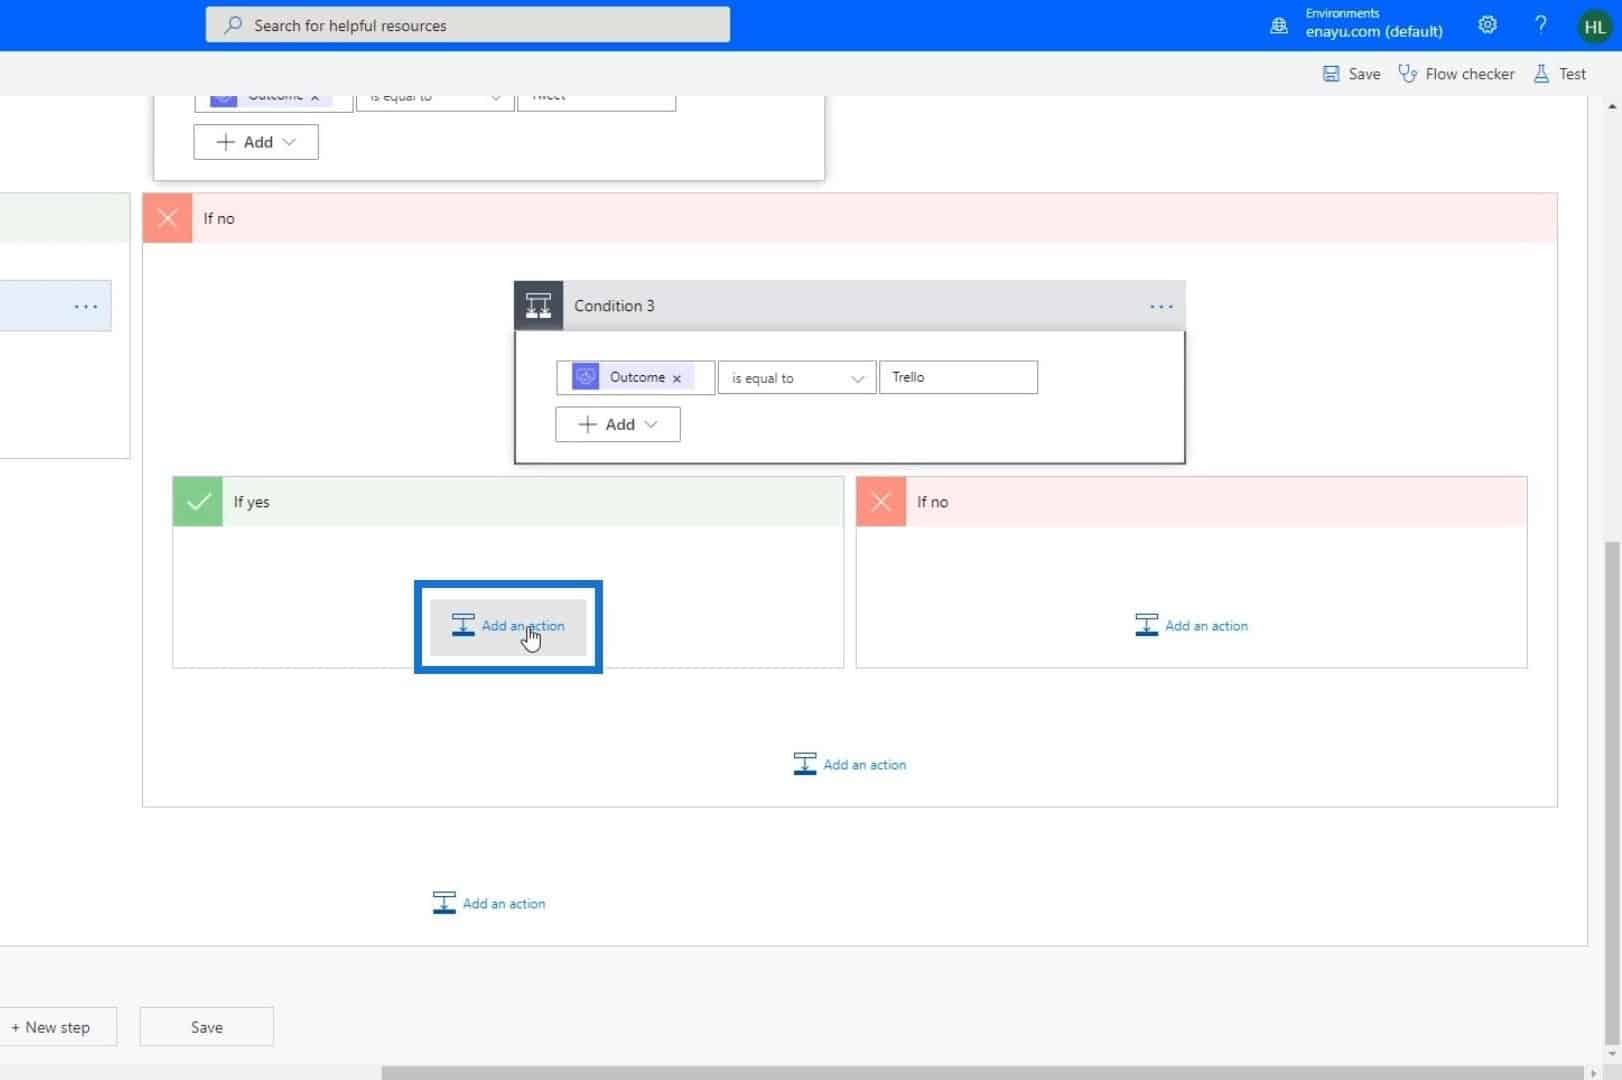
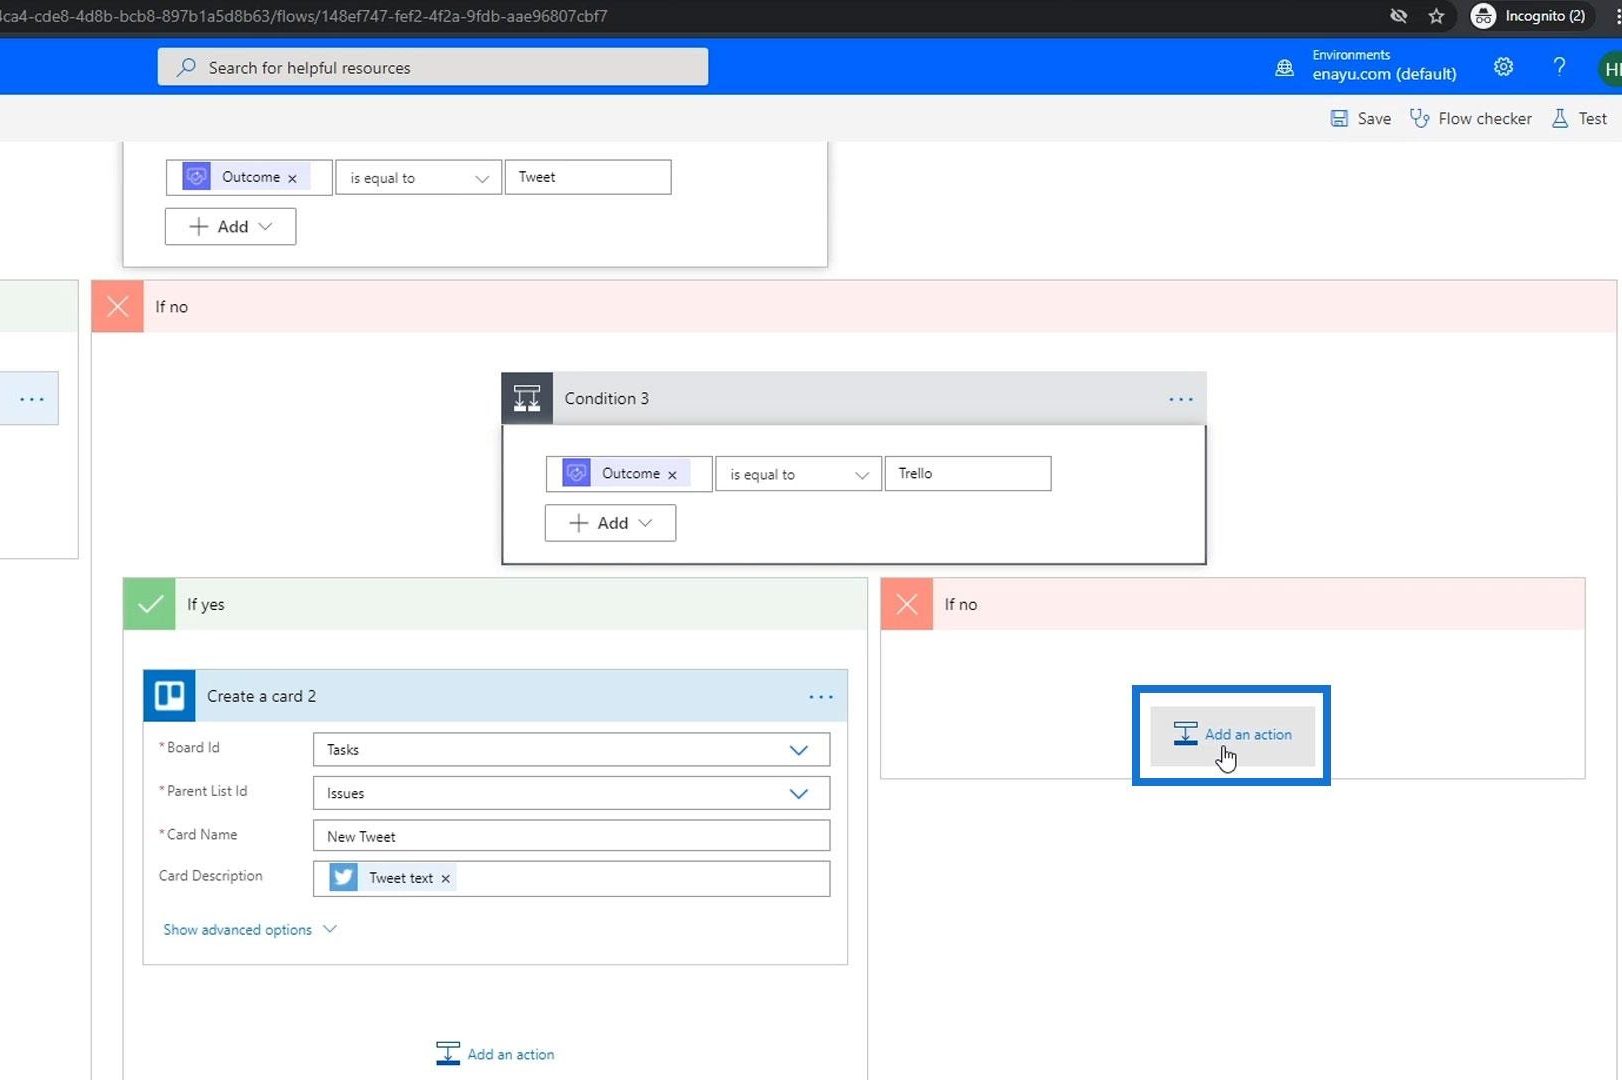
The condition is going to be if the “Outcome is equal to Trello”.
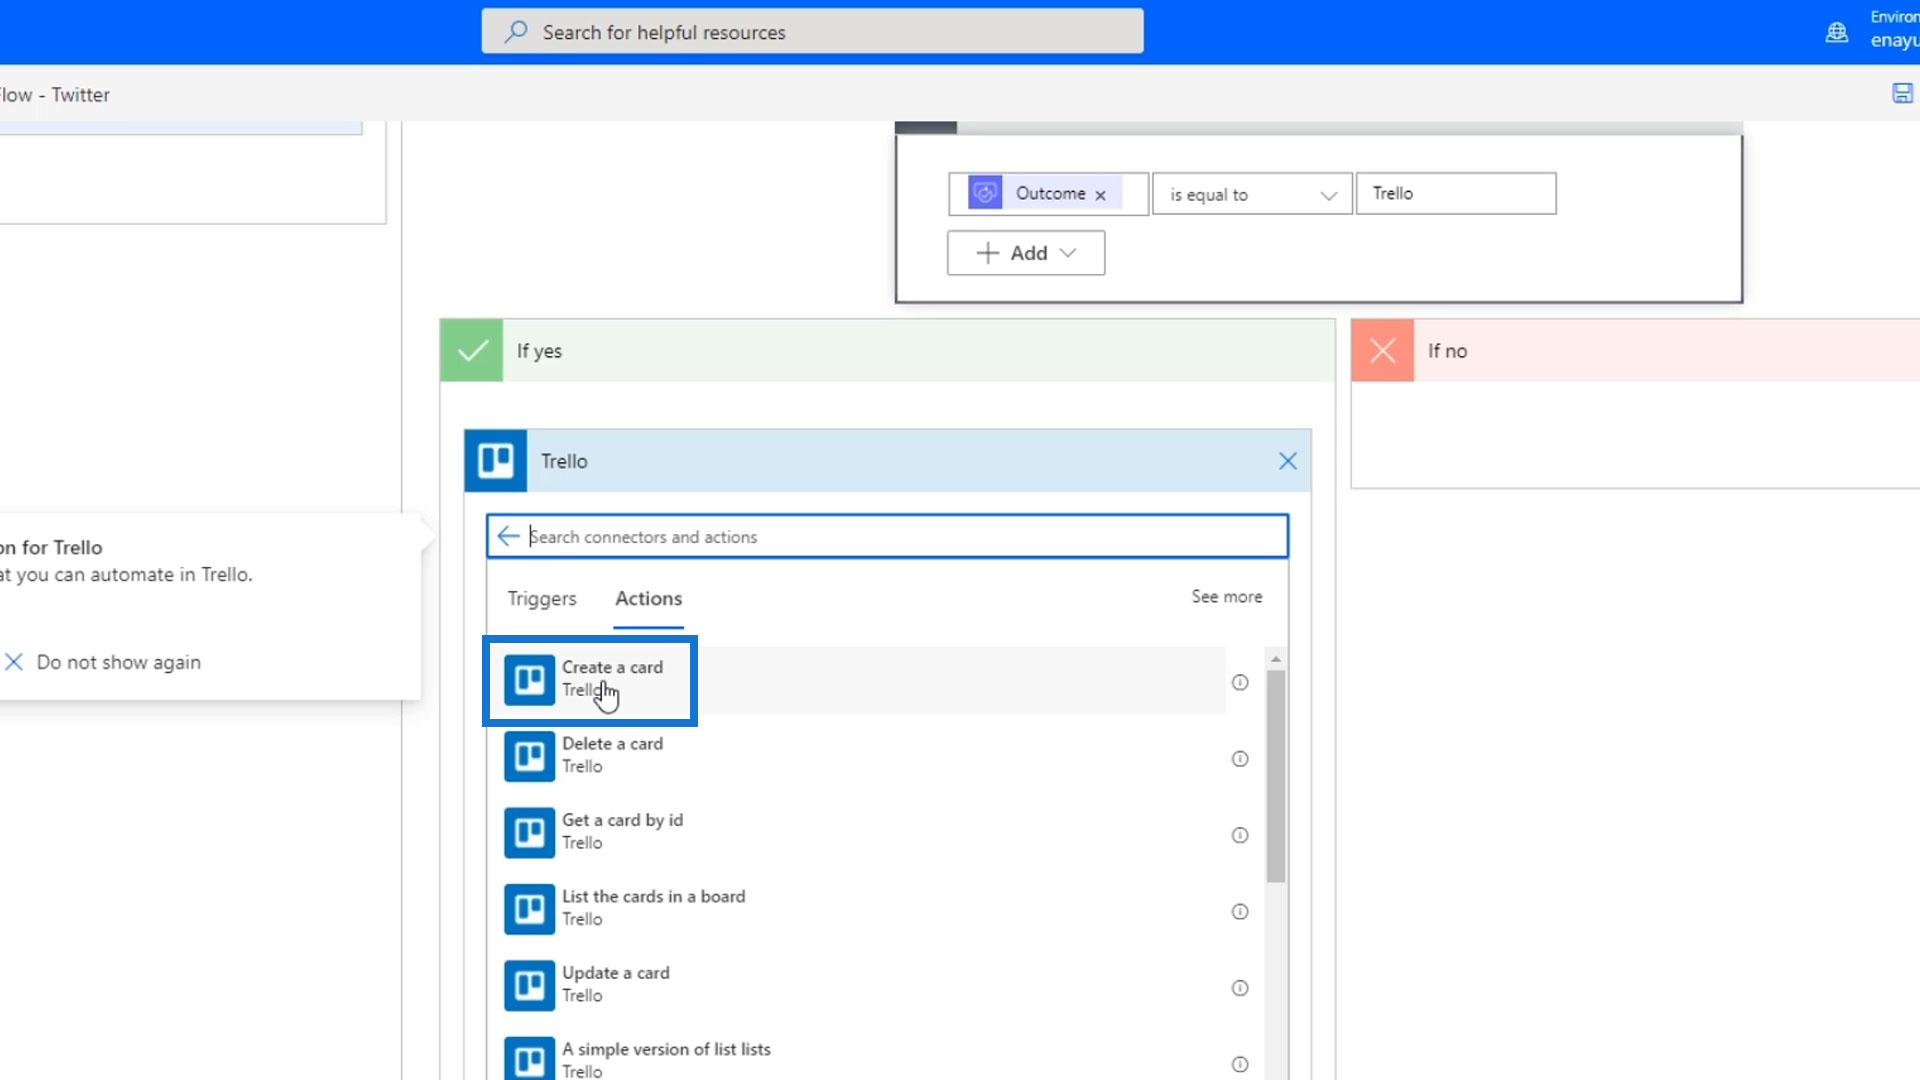
If the condition is true, then we have to create a Trello card. So, click the Add an action button within the “If yes” path.
Search and click the Trello connector.
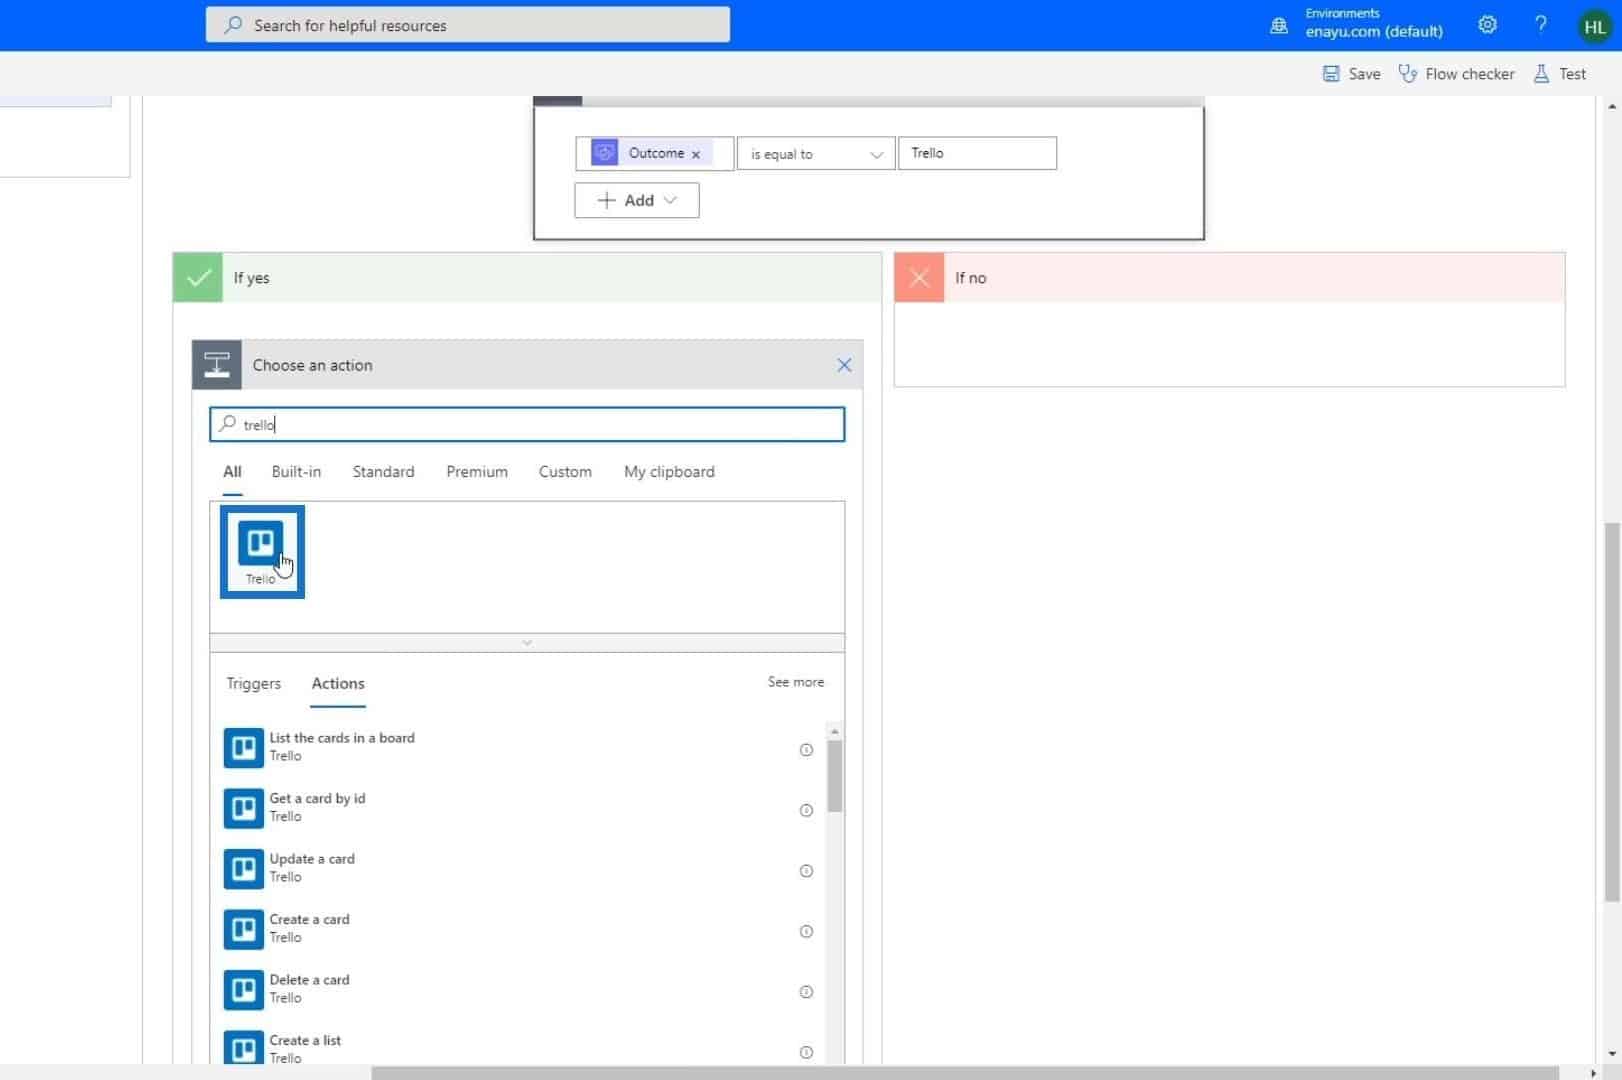
Choose “Create a card”.
Set “Tasks” to the Board Id field and “Issues” to the Parent List Id.
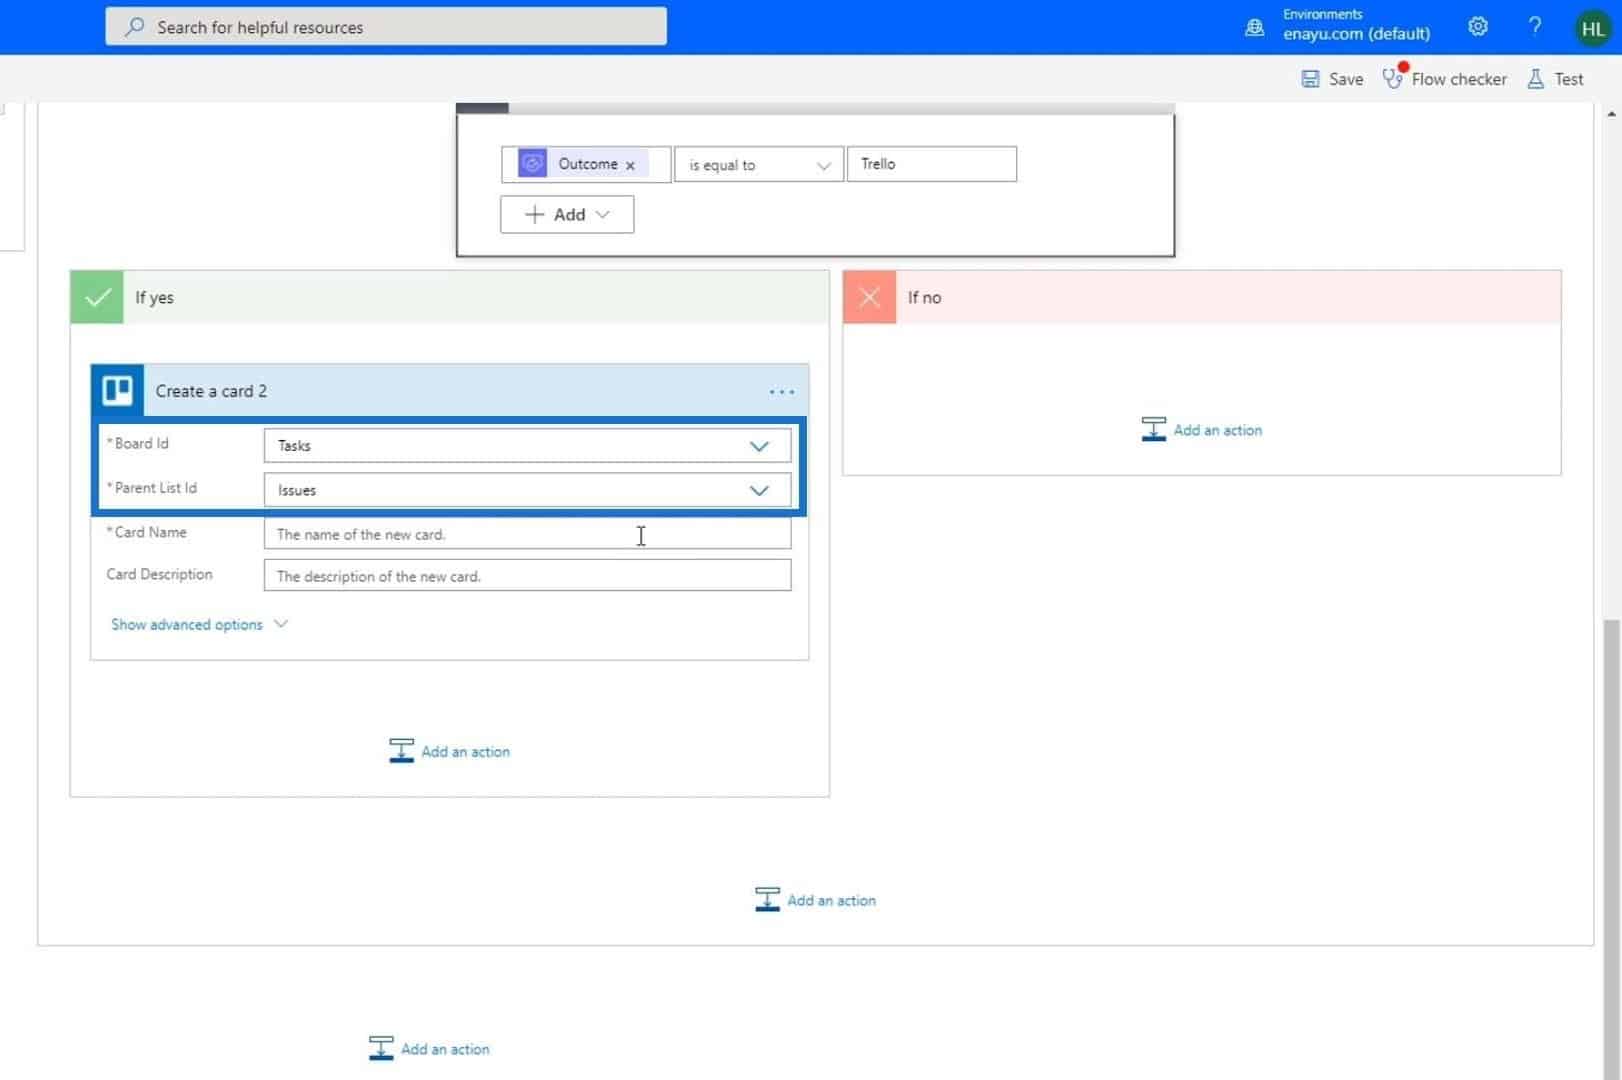
The name of the card can be “New Tweet”.
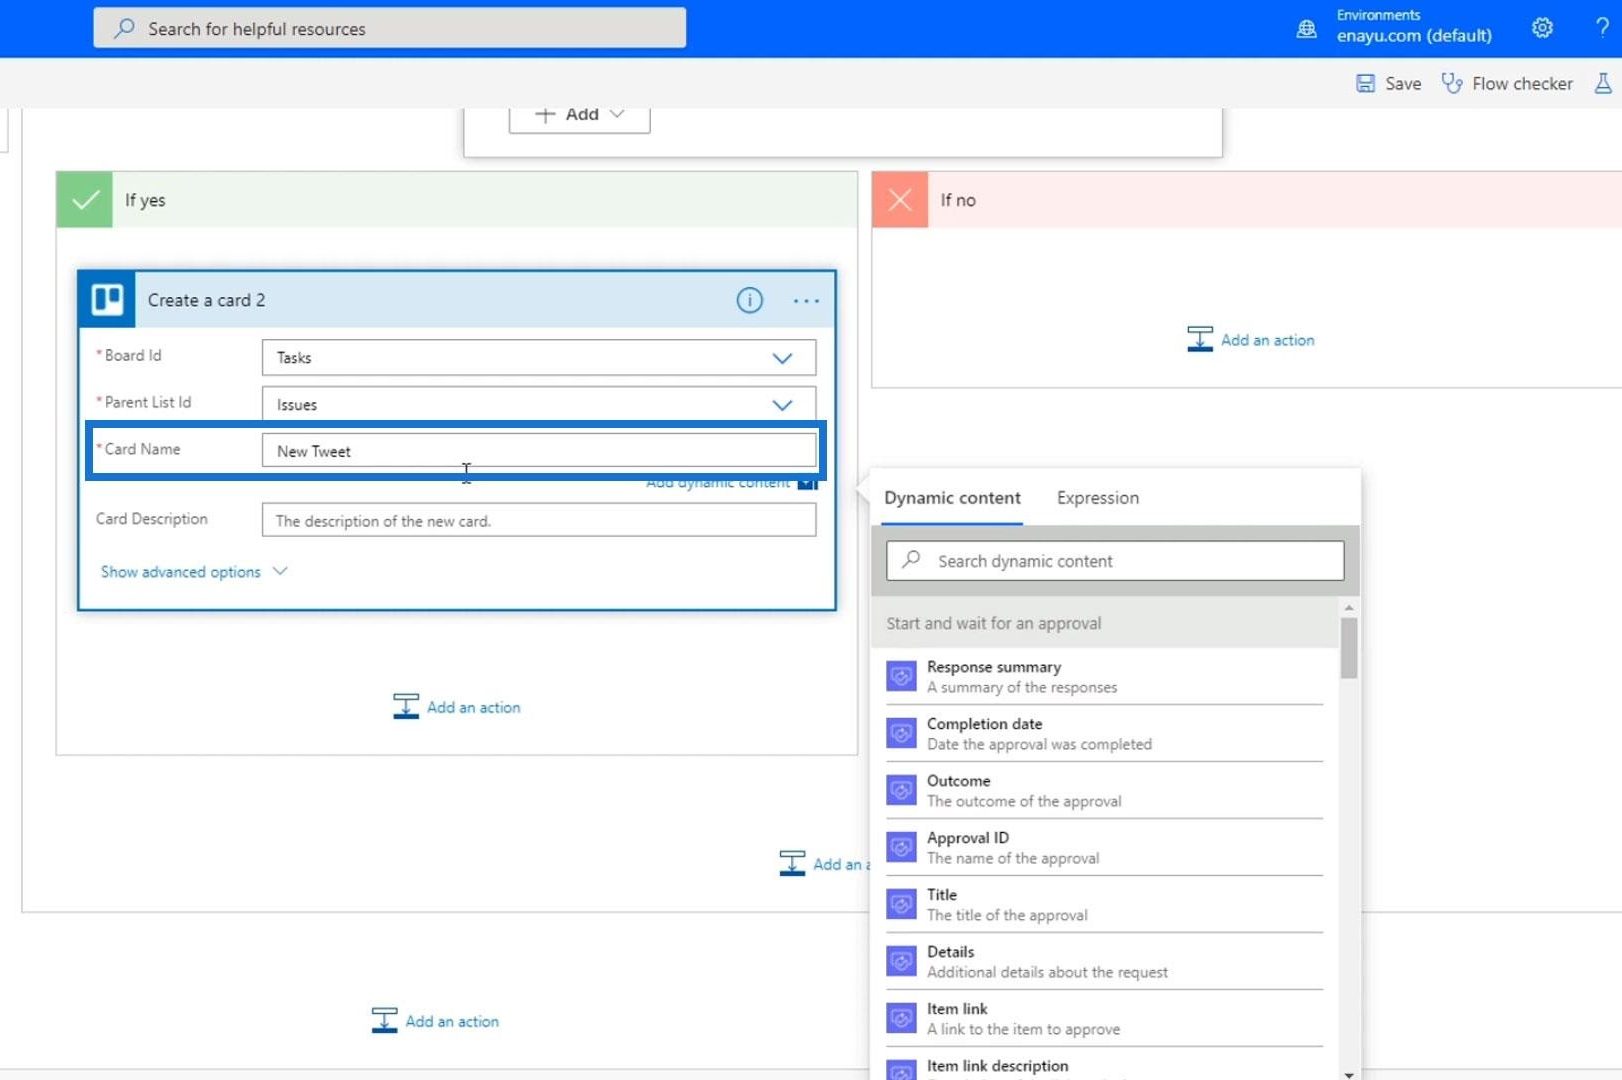
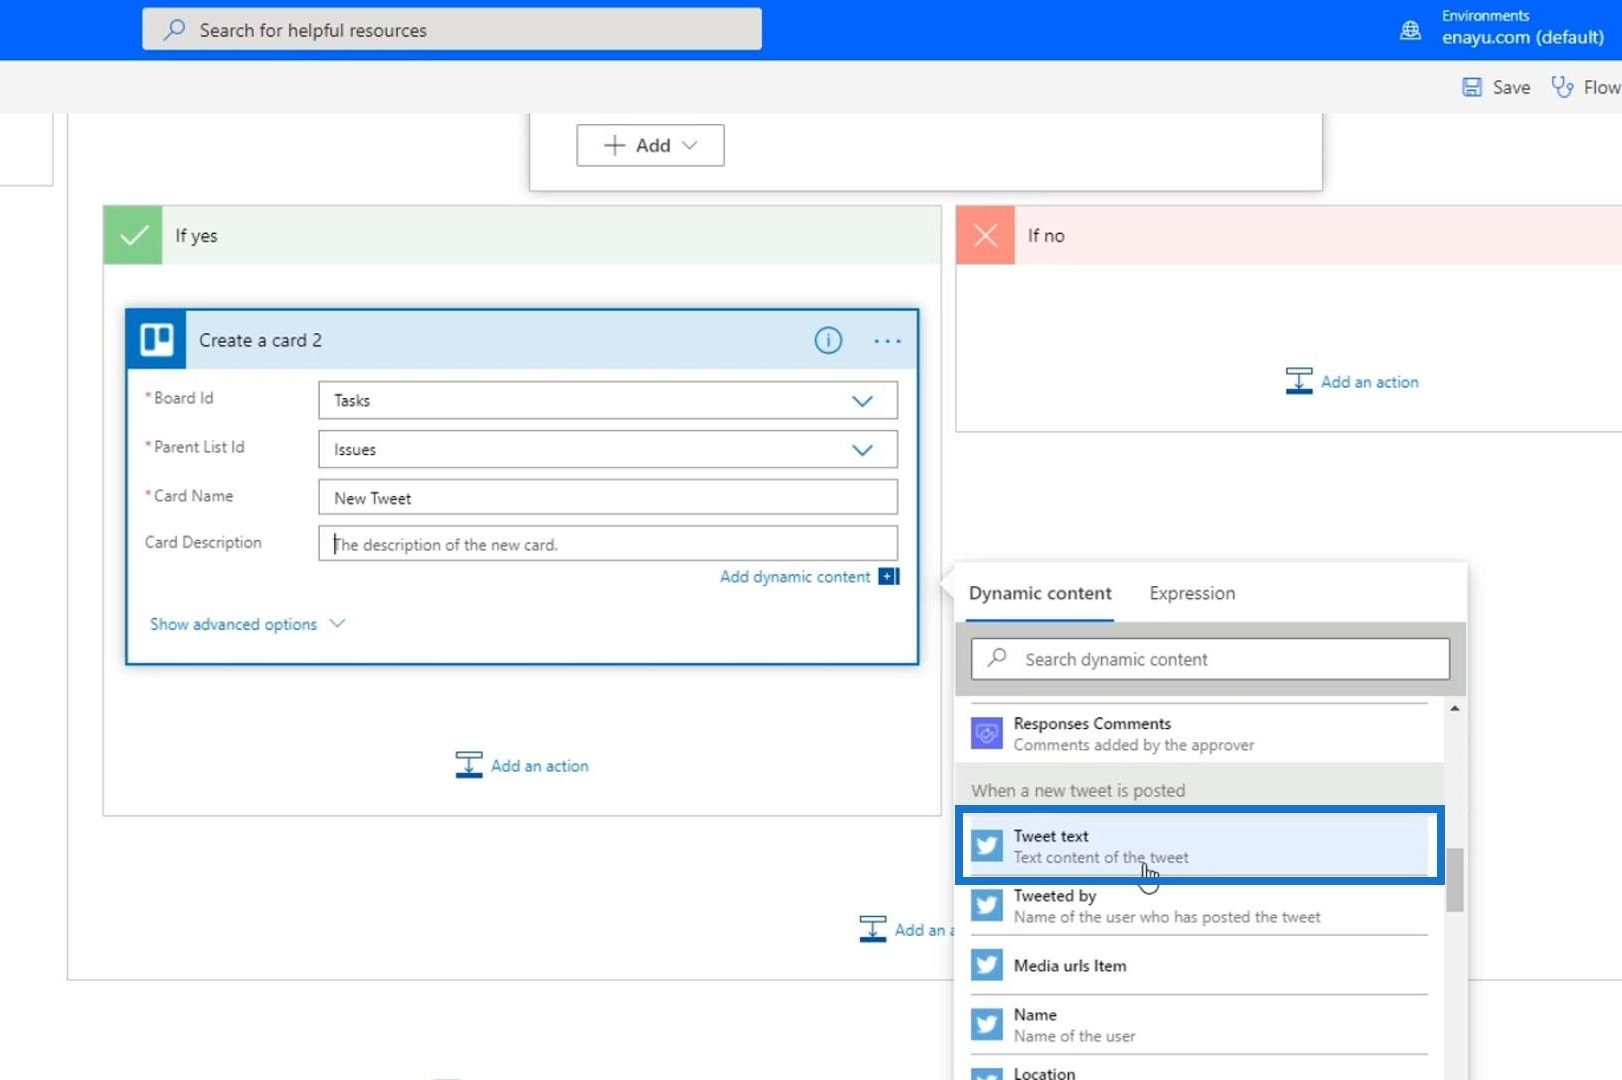
Then the Card Description should be the Tweet text.
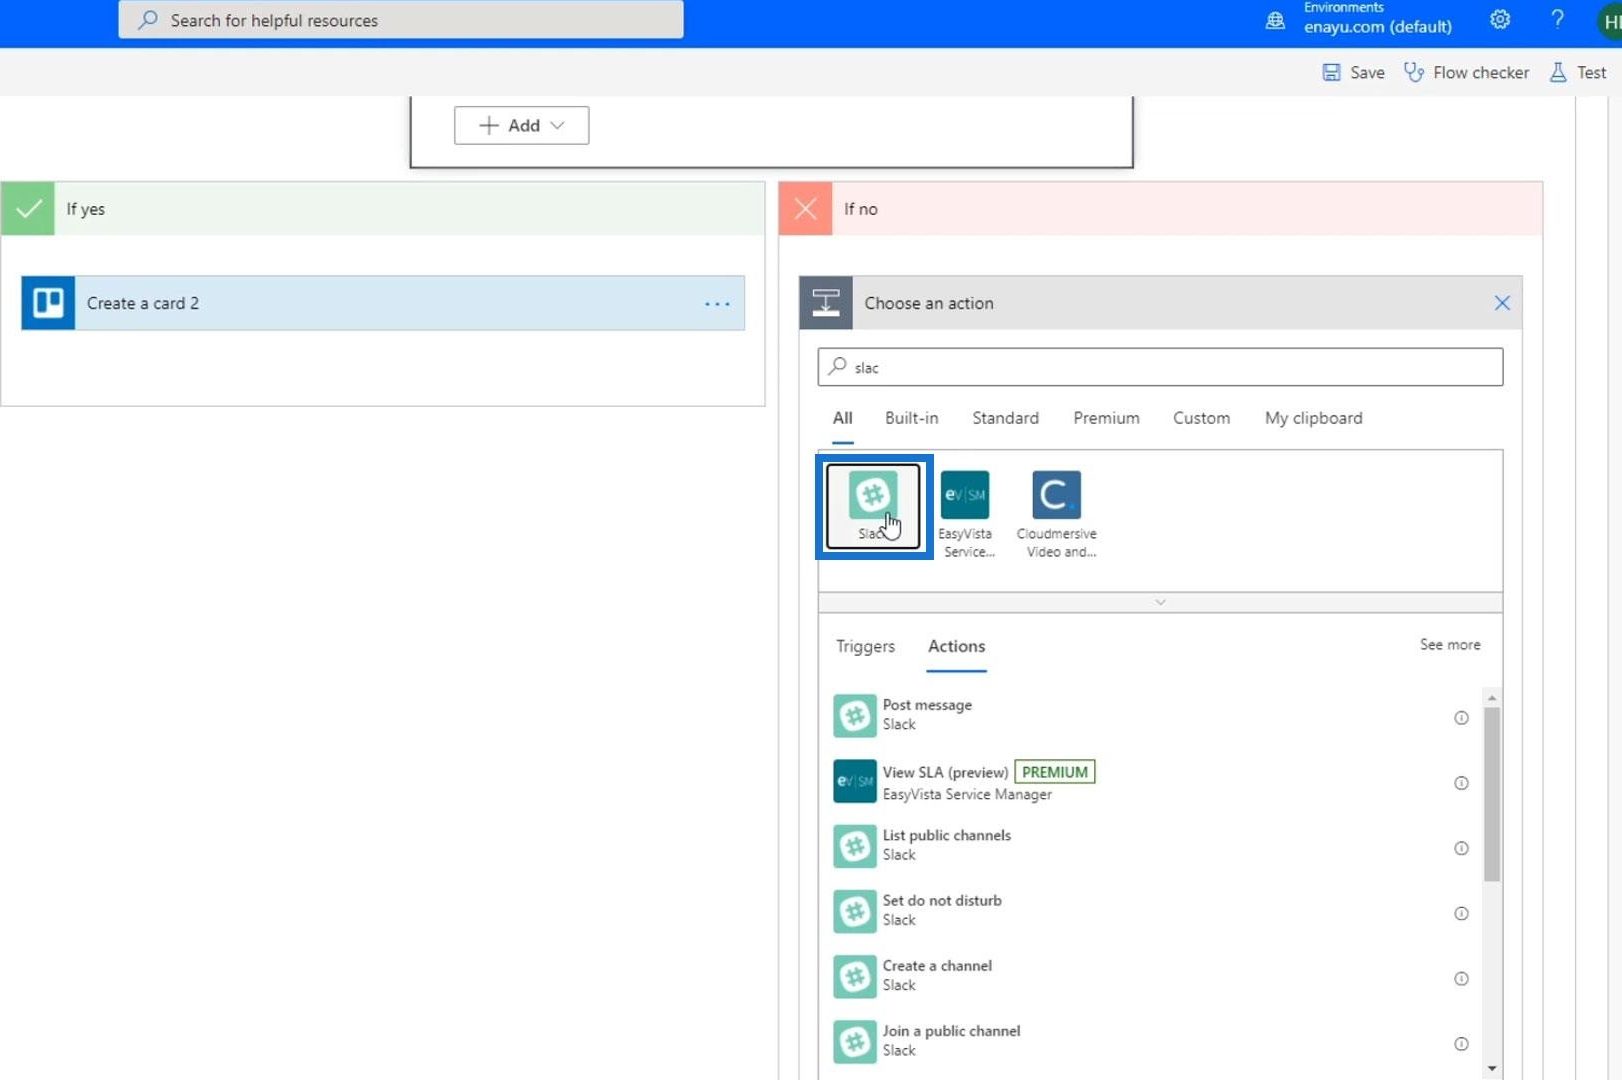
If the person doesn’t choose “Tweet” or “Trello”, then the last option they have is “Slack”. Click the Add an action button within the “If no” path of Condition 3.
Search and click the Slack connector.
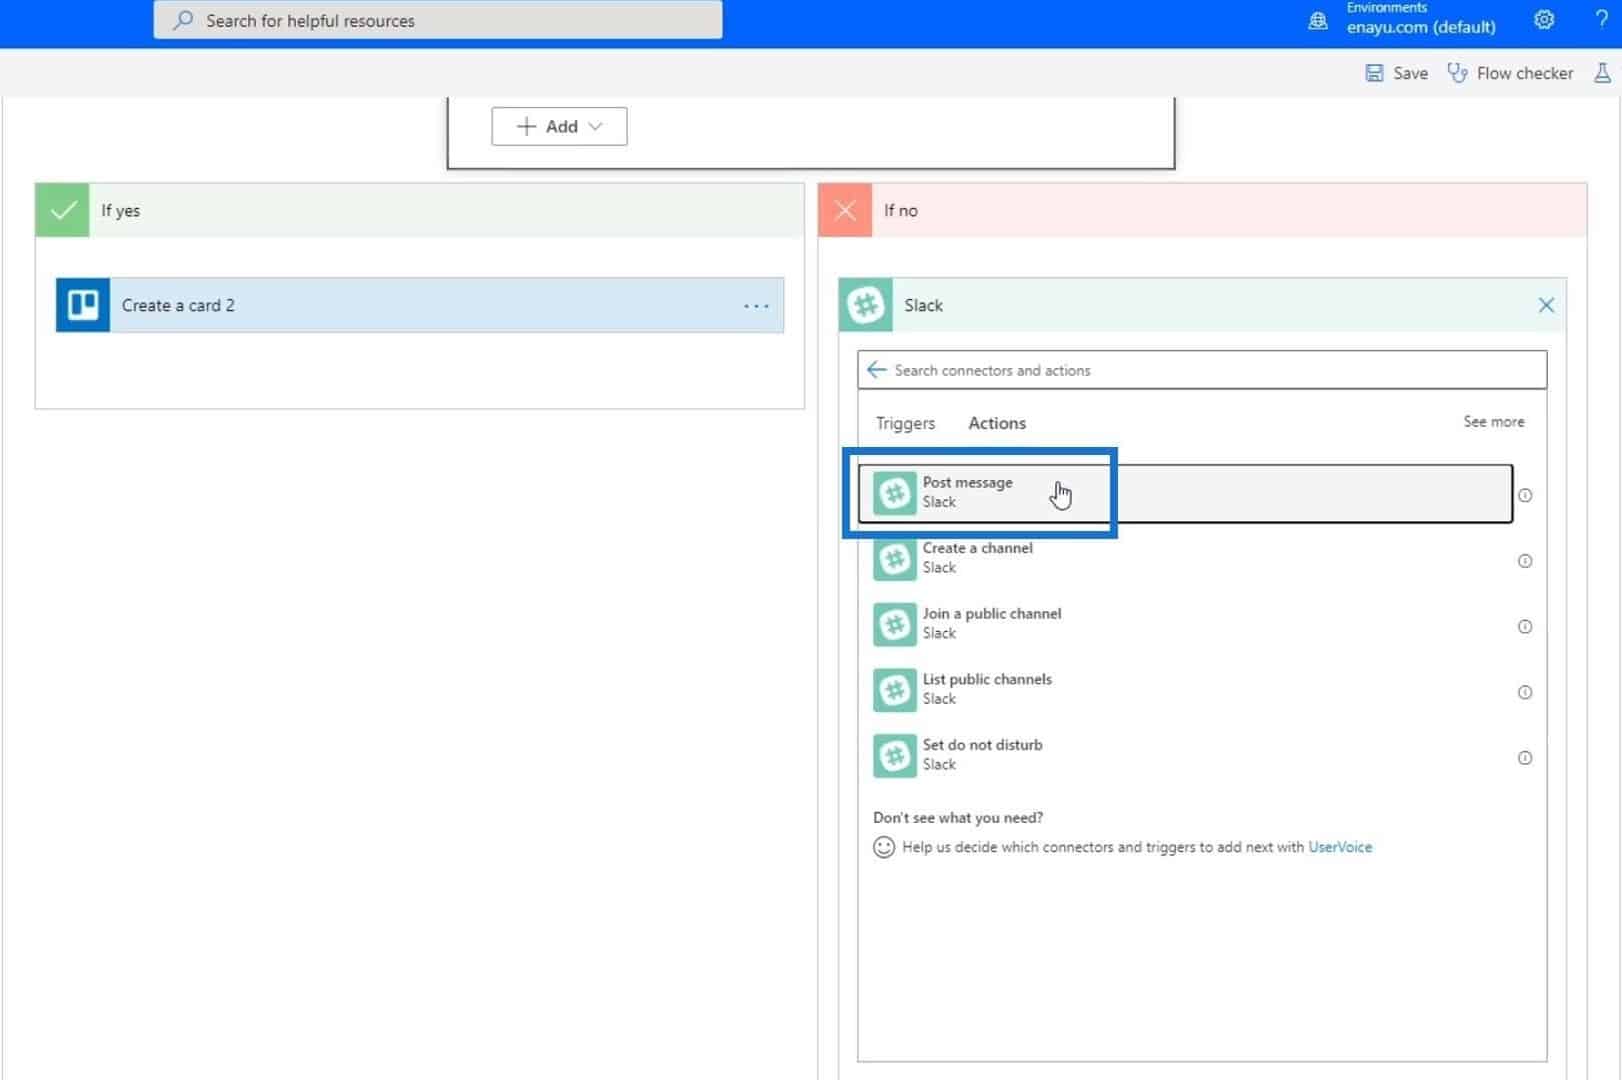
Then choose “Post message”.

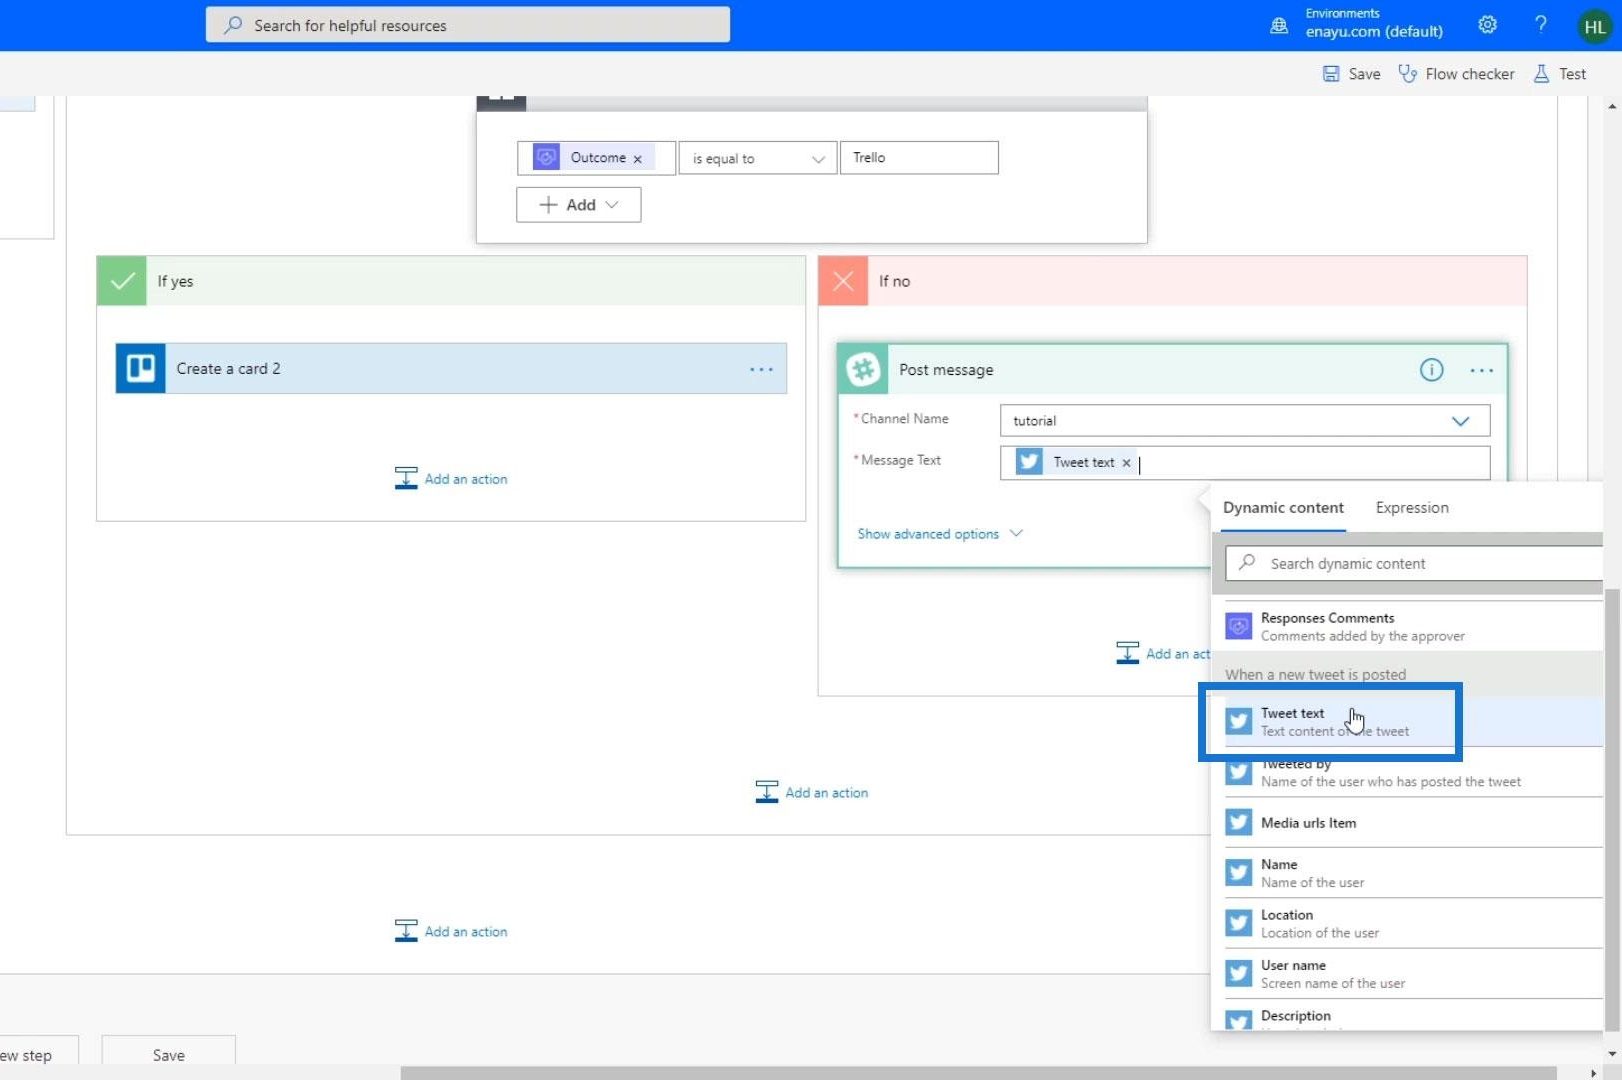
We’ll post it to the tutorial channel, and the body of the message should be the Tweet text.
Now we have set all the necessary details and settings.
Testing The Multi-Option Approval Workflow
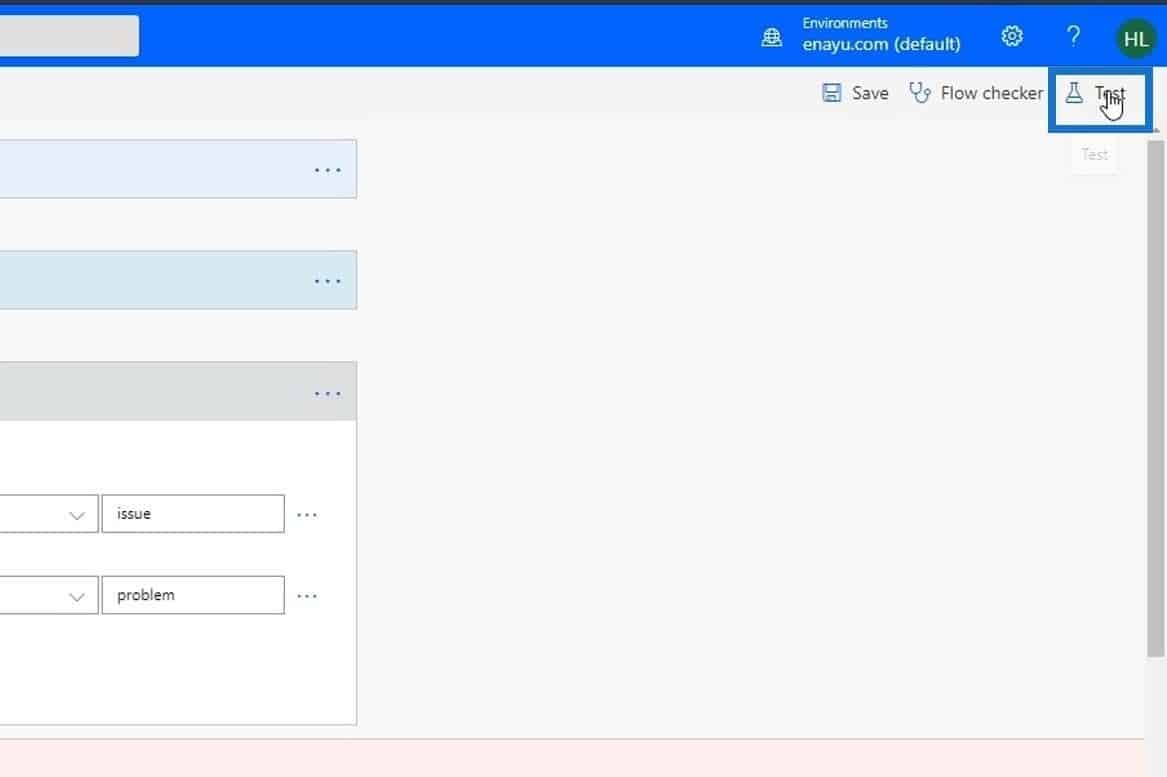
Let’s see if our flow works properly. Click Test.
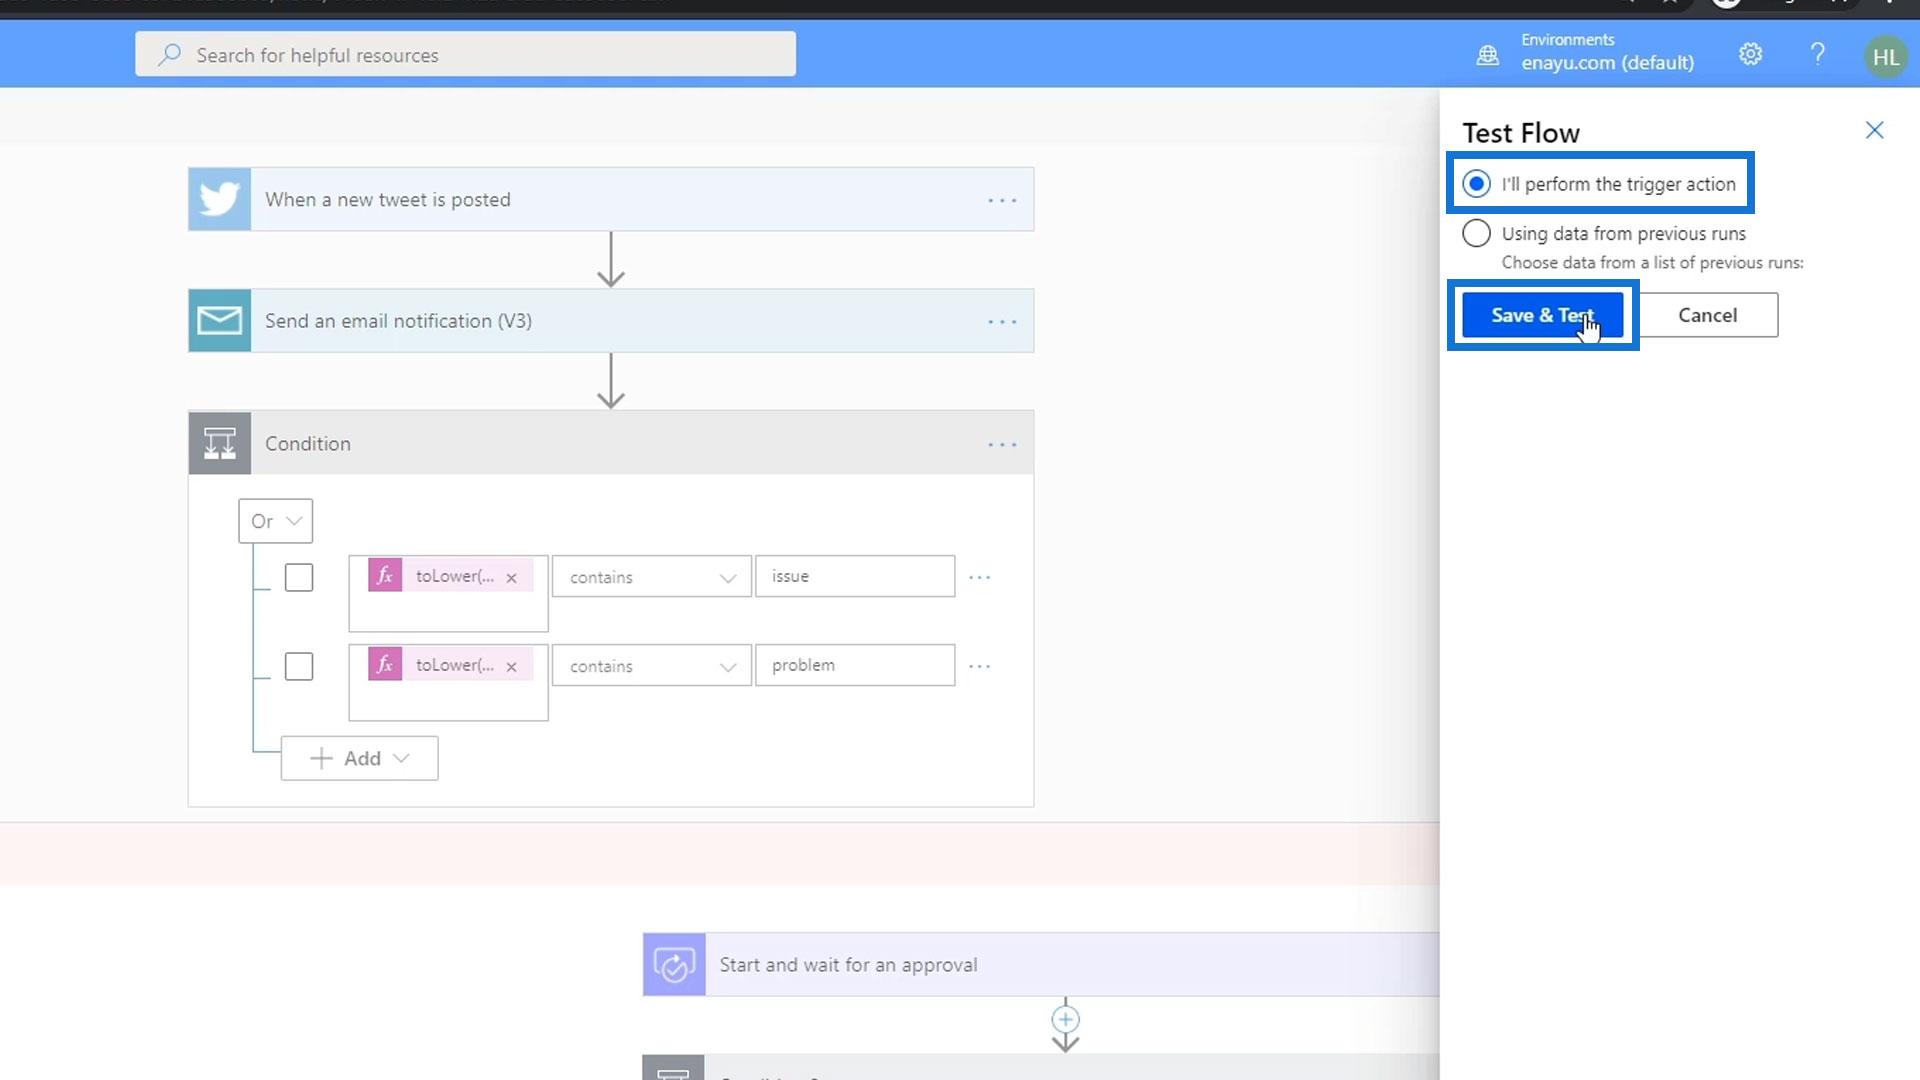
Then, select the “I’ll perform the trigger action” option and click the “Save & Test” button.
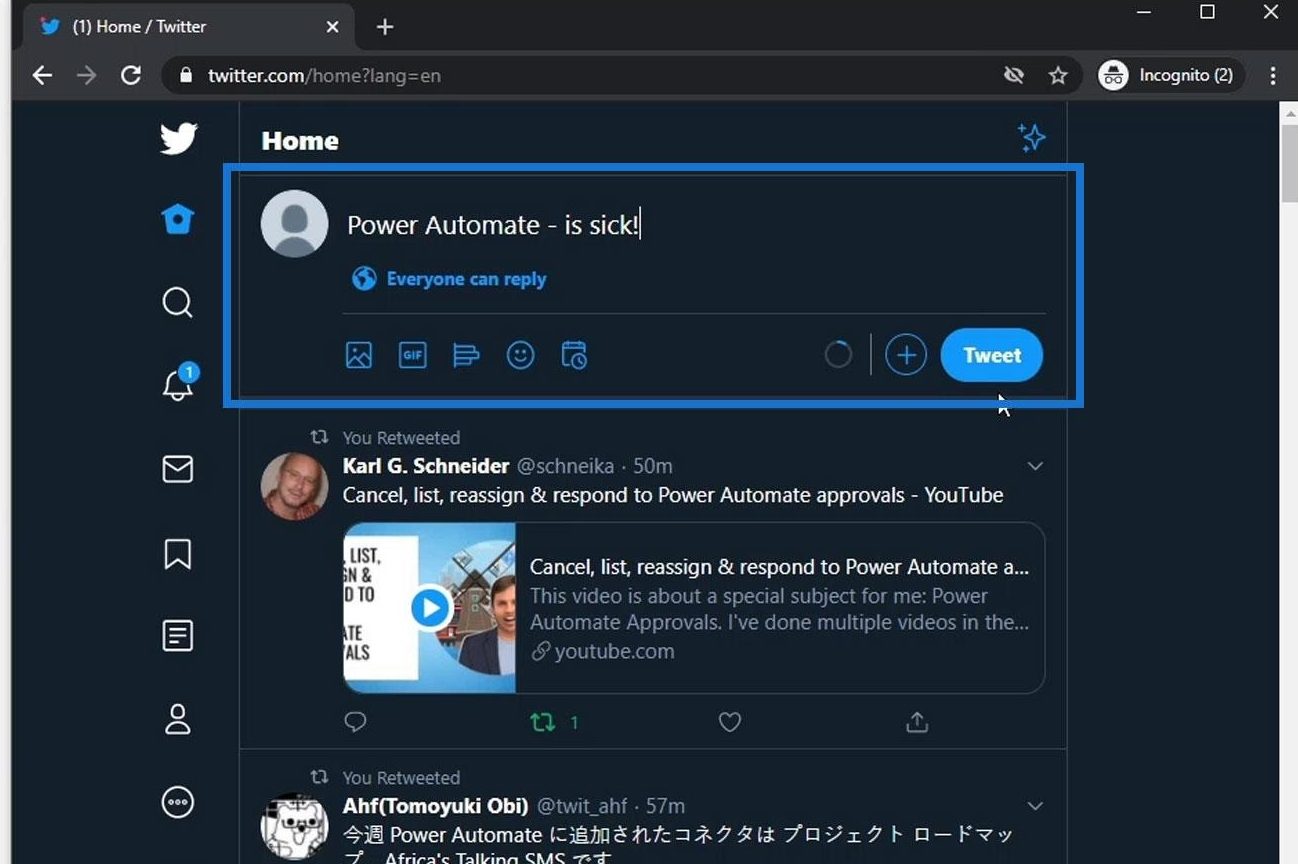
Let’s open Twitter and tweet “Power Automate – is sick!”.
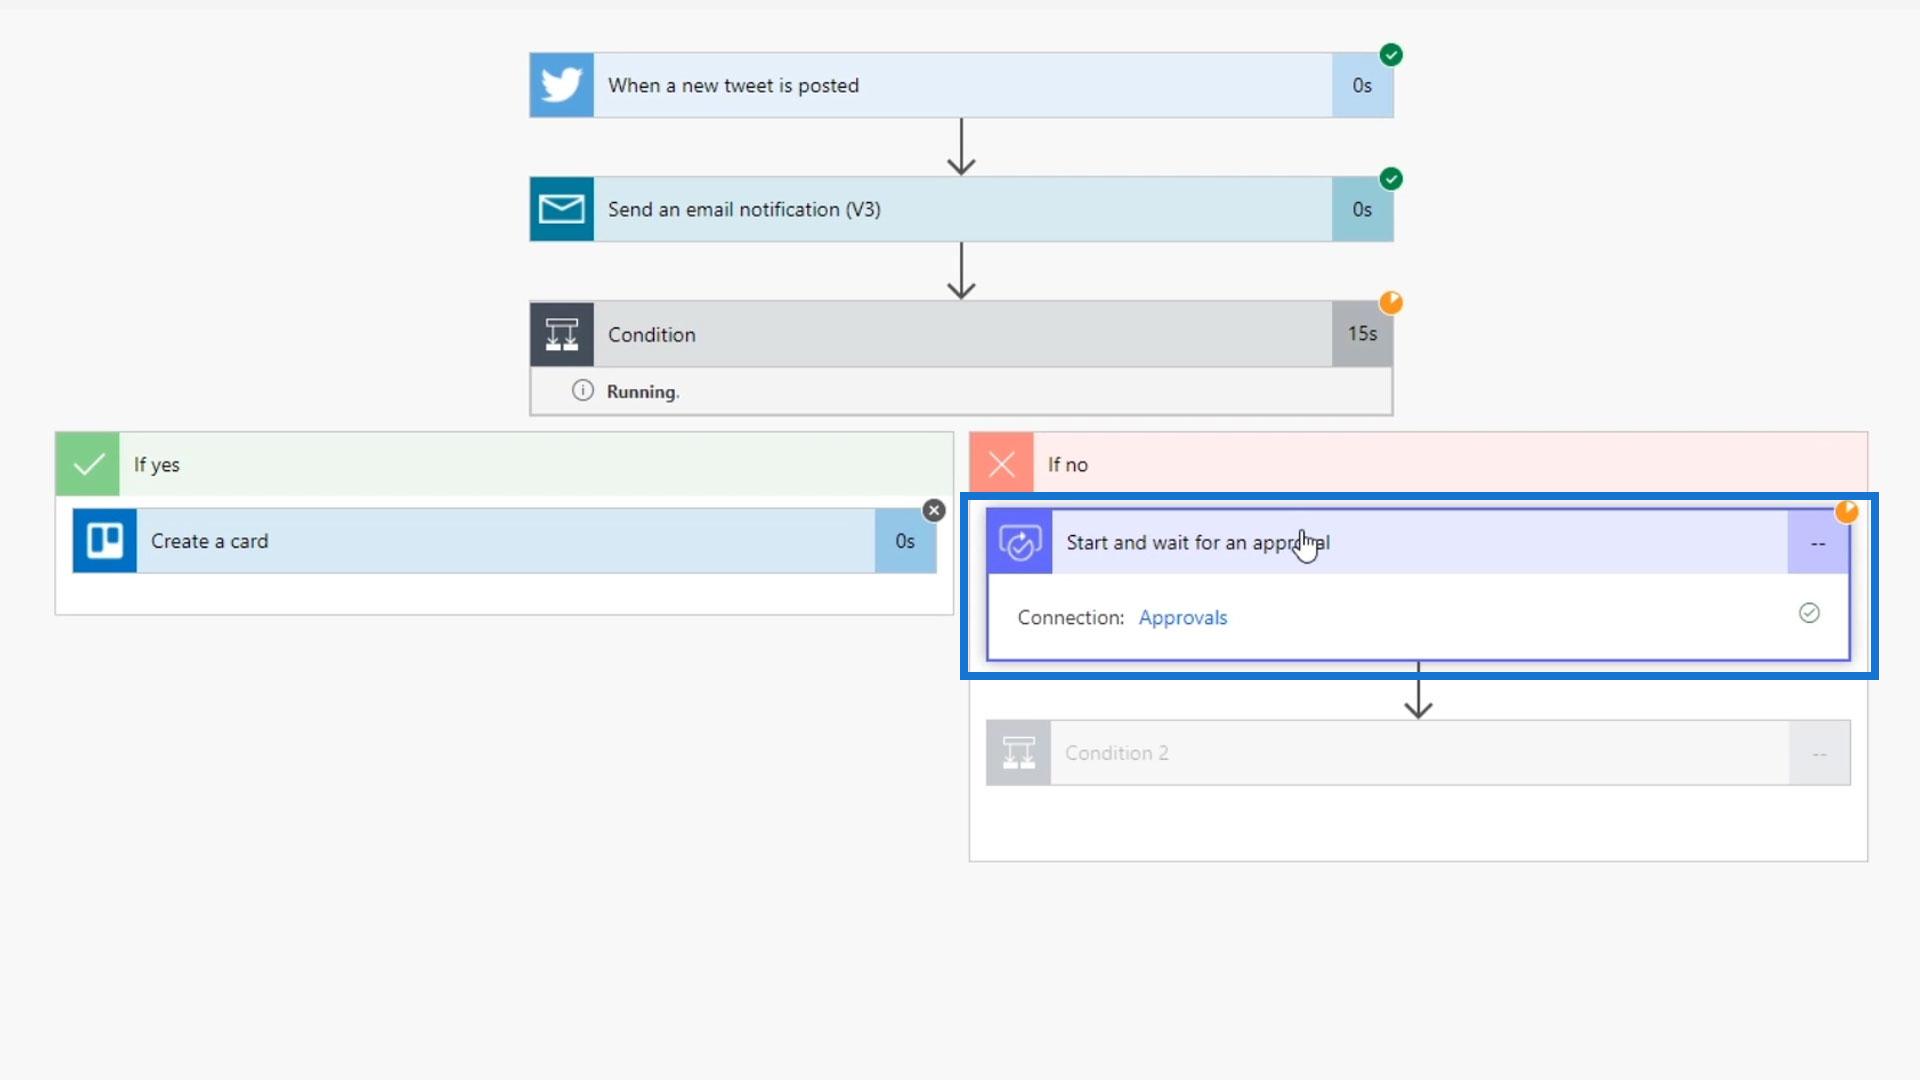
After our flow runs successfully, we’ll see that it’s now waiting for approval.
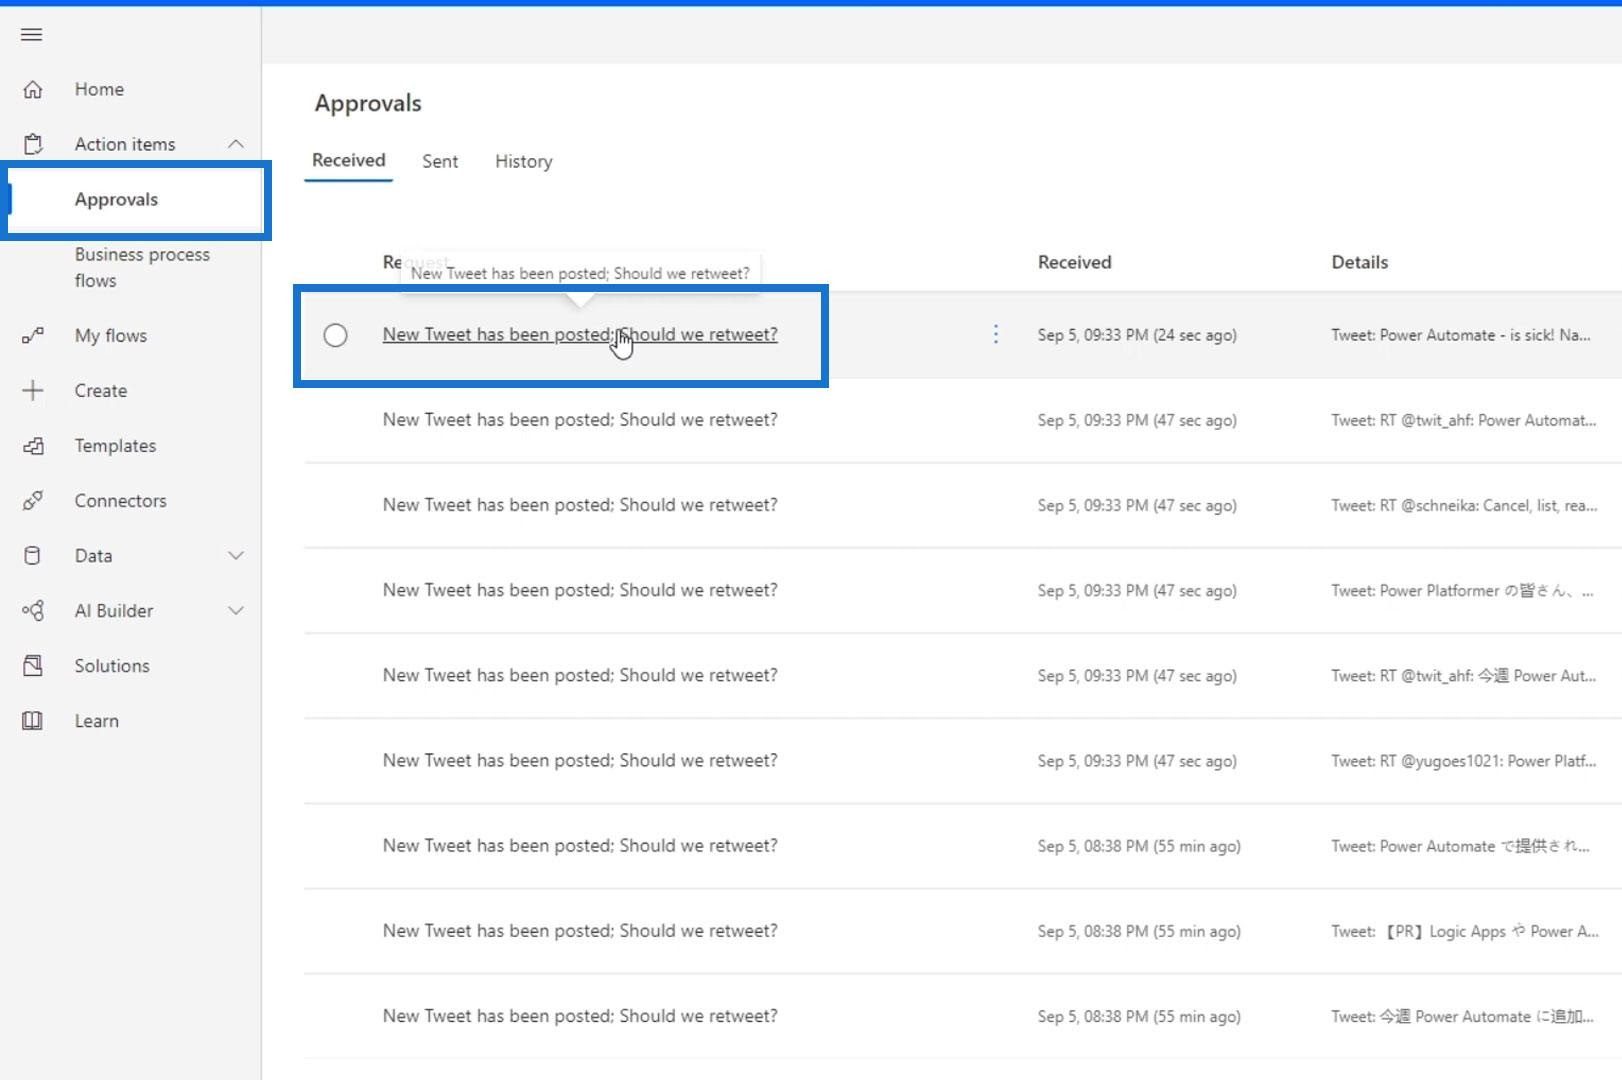
If we go to Approvals, we’ll be able to see all the approvals that we currently have. Let’s click the most recent tweet that we did.
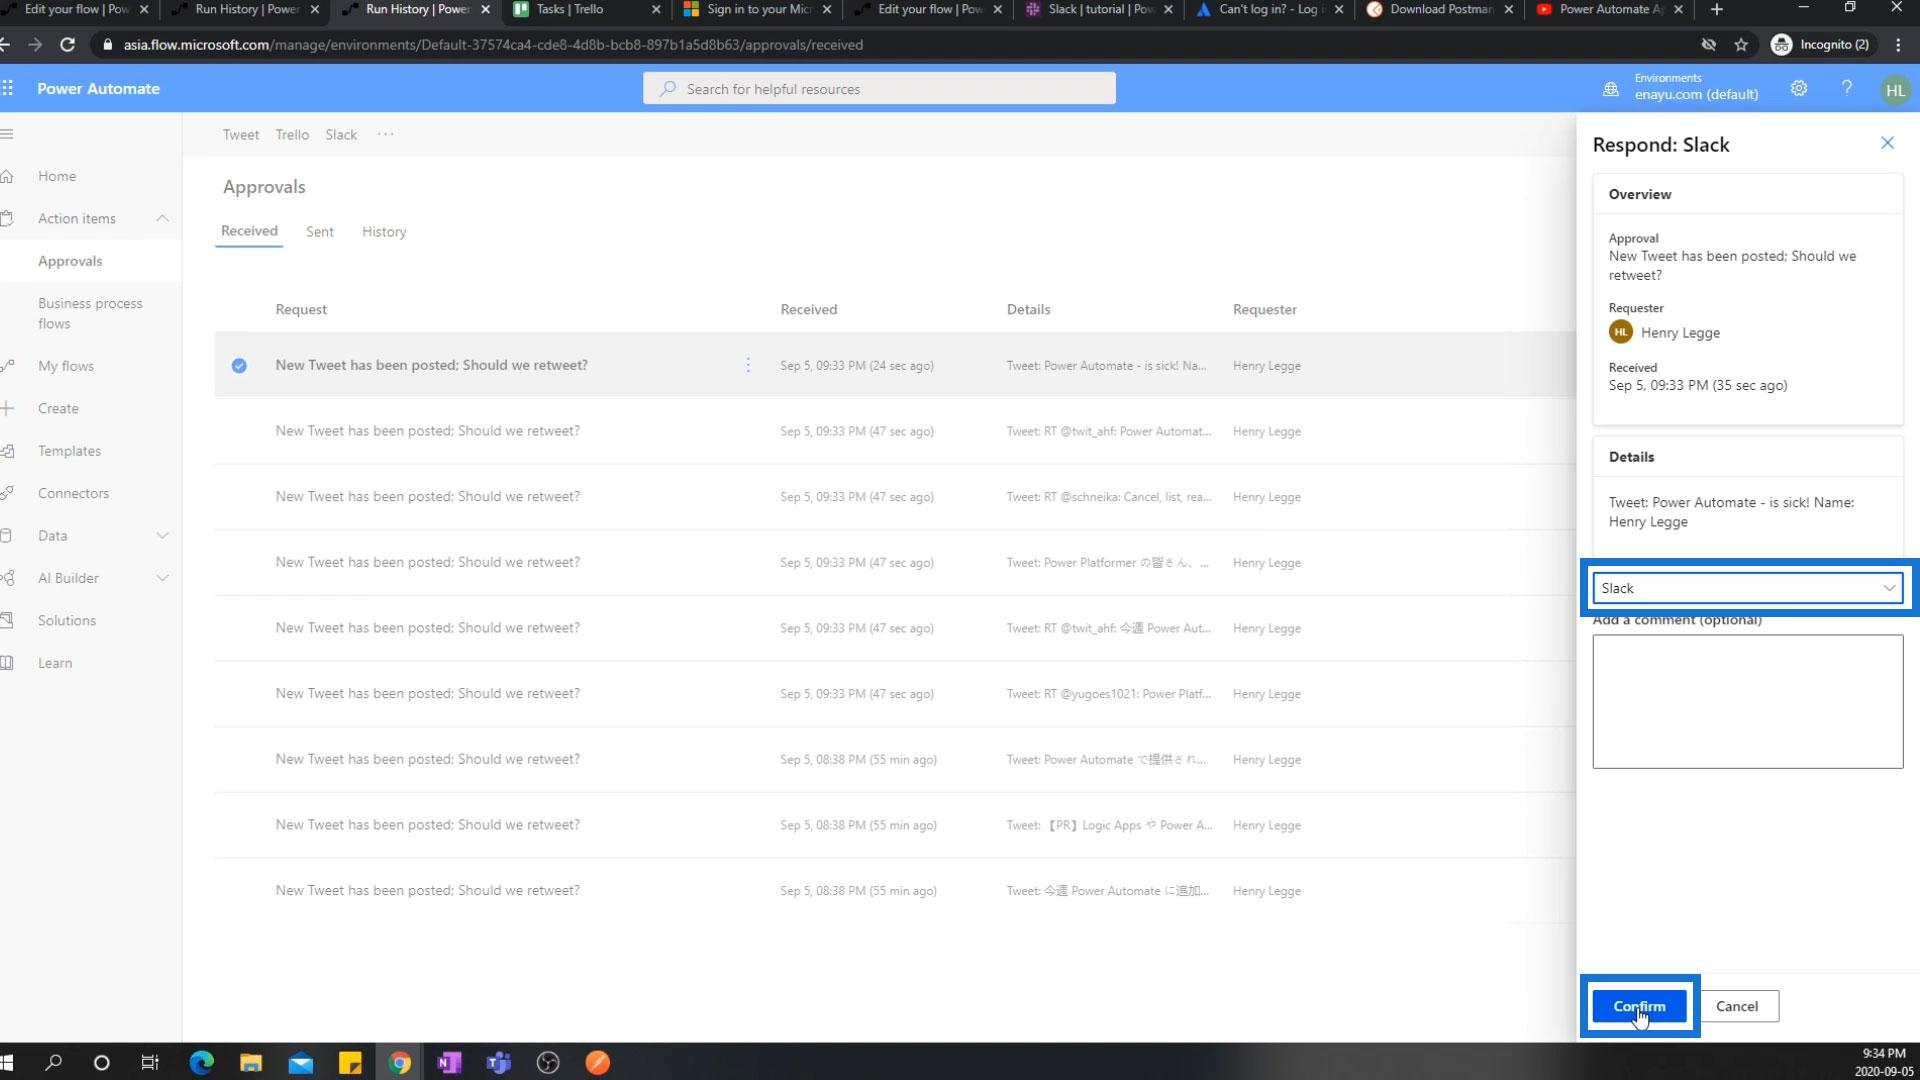
We’ll then see all the details regarding that tweet and we can choose a response. Let’s say we don’t want to retweet it, but we do want our organization to know about this tweet that has been posted. Therefore, let’s choose to send a message in Slack. Then click the Confirm button.
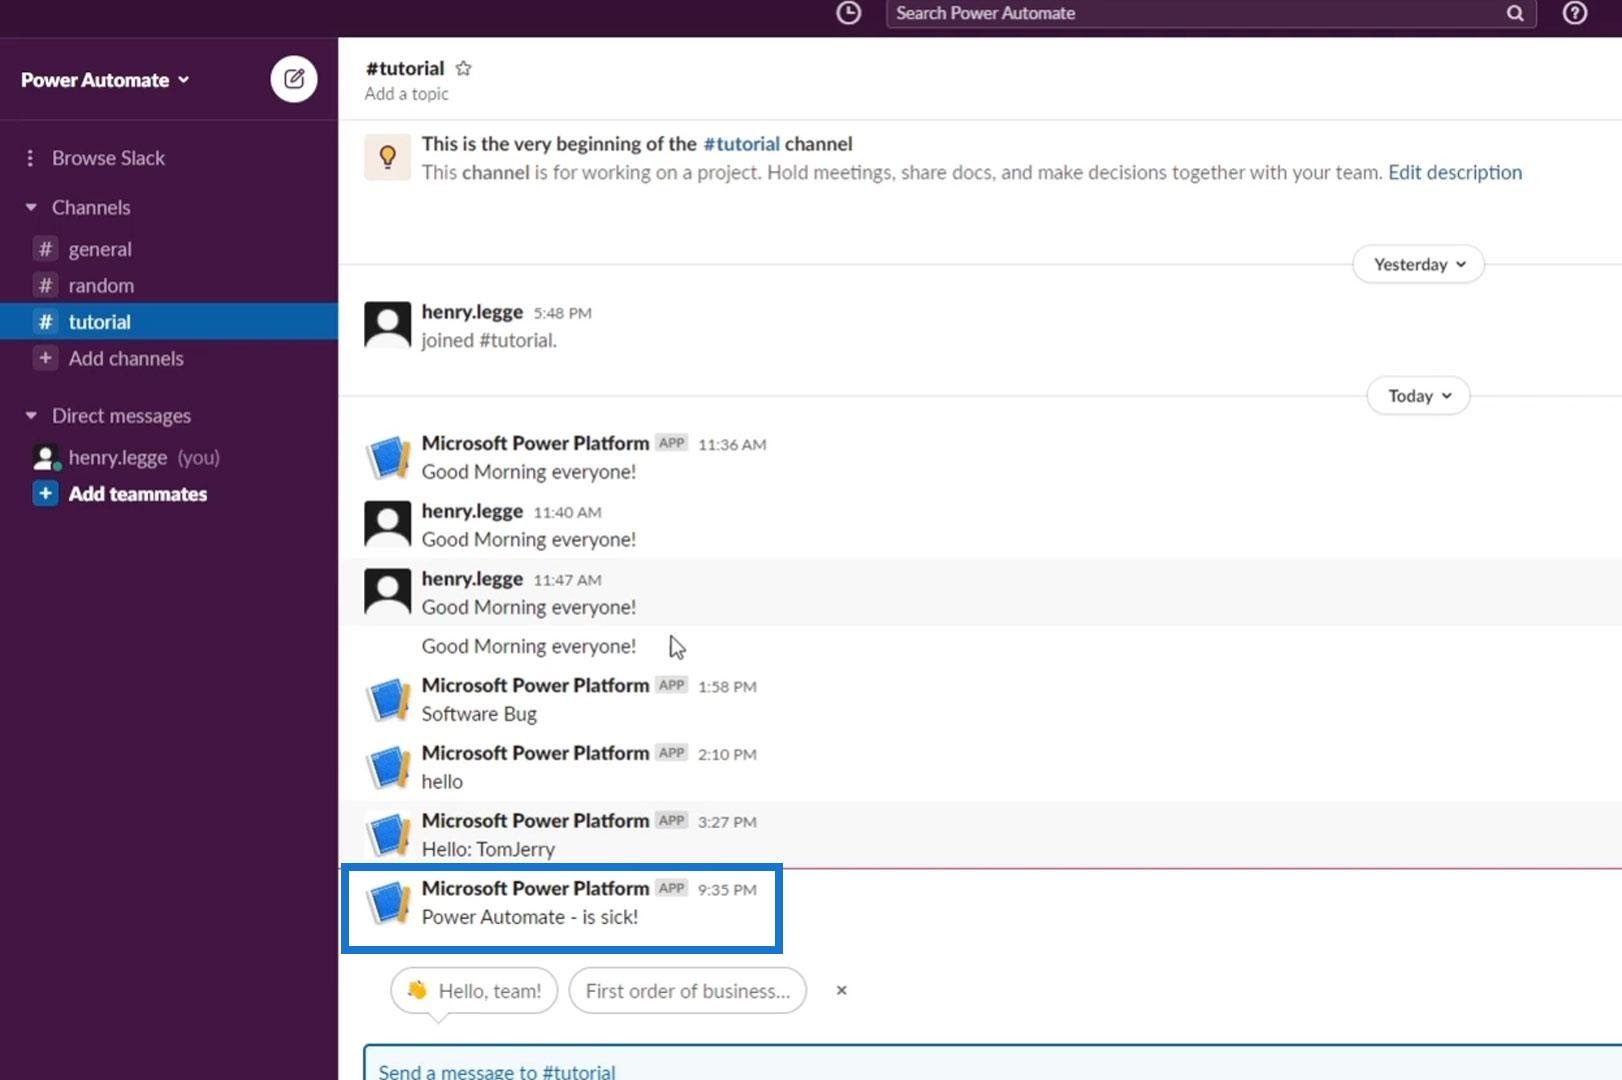
After the execution of the flow, let’s look at our Slack where we can see the newly-posted message.
***** Related Links *****
Power Automate Expressions – An Introduction
Automated Flow In Microsoft Power Automate
Microsoft Flows: Editing And Tracking In Power Automate
Conclusion
To recap, we’ve created an entire flow that’s automated but also includes a user intervention via Microsoft flow approval with multiple options to choose from. This creates lots of possibilities.
You can have a flow wherein someone doesn’t necessarily need to approve a certain input, but they can escalate it to someone else who approve it or not. Hopefully, this tutorial helped you make the most out of Microsoft flow approvals.
All the best,
Henry


