
When working with Microsoft Excel, you often want to define a specific area of your worksheet for printing. This ensures that only the relevant information is included in your printout.
When you learn how to set a print area in Excel, you will control which cells, rows, or columns will be printed. This is particularly useful when dealing with large or complex worksheets.
This article shows you how to:

· Set a print area in Excel
· Define multiple print areas
· Modify, clear, or ignore existing print areas
Understanding Print Area Basics
By default, Excel prints your entire worksheet. If you only need a portion of the data in your worksheet, aka a print area, unnecessary pages may be printed.
A print area in Excel defines one or more ranges of cells that you select for printing. By setting a print area, only the data you want to print will appear on the final printed sheet.
Suppose you have a large Excel sheet with data across many rows and columns. The entire sheet may print on multiple pages, but you may only want a small section of the data.

This is when a print area is the solution. It can greatly reduce paper waste.
Another scenario is when you want two distinct sections in a single worksheet to print on separate pages. The video below shows a worksheet with raw data on the left and analysis on the right.
A print area can split the printout onto separate pages.
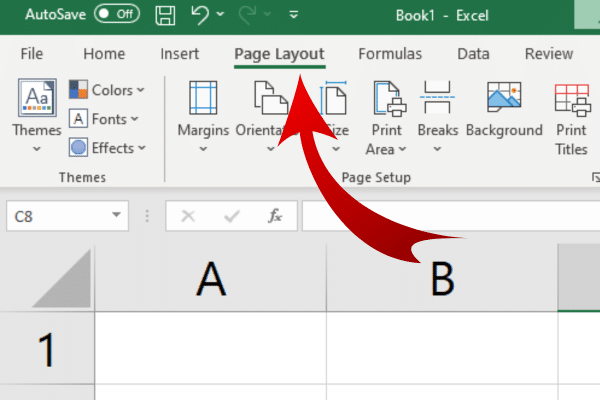
How to Use the Page Layout Tab
If you’re not a regular Excel user, it’s easy to forget where the most useful features are hiding!
When working with print areas, you will be using the Page Layout tab. This tab is in the top ribbon to the right of the Home tab.
How to Select Cells To Include In The Print Area
Before setting a print area, you need to select the cells you want to include.
To do this:
Click on the first cell in the range you want to select.
Hold down the left mouse button and drag the cursor to the last cell in the range.
Release the mouse button. The selected cells are now highlighted.
A single group of cells is often all that you want to print. However, there may be more than one grouping in the worksheet that you want to include in your printout.
If you want to select several groups of cells for printing, follow these steps:
Start by selecting one range as in the earlier instructions.
Hold down the Ctrl key and select the next range.
Repeat for as many groups of cells as you want to include.
Note that each group will print on its own page once you’ve set up the print area.
How To Set Print Area In Excel
Once you have selected the desired group or groups of cells, you now use the Excel tools.
Go to the Page Layout tab.
Expand the Print Area drop-down box in the Page Setup area
Select “Set Print Area.”
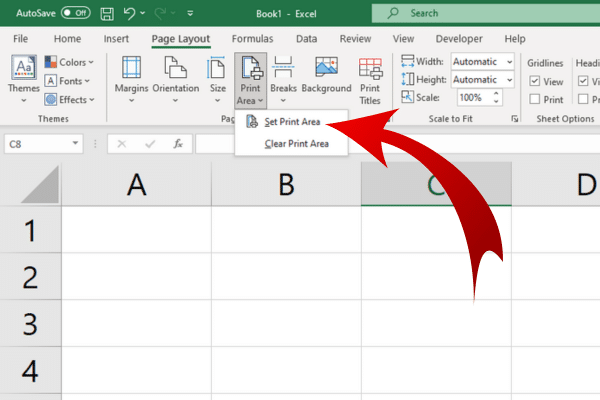
A designated print area will now appear on the worksheet, marked by dashed lines. Each faint gray line shows a boundary. The printed output will include only the print area on its own page.
This print area will usually remain in place even if you save and close the entire workbook. That means you don’t have to worry about losing the setup when reopening your document.
How to set multiple print areas
There is no special command to select multiple print areas. Instead, you select multiple ranges with the steps shown in the previous section.
Once you’ve selected the areas, follow the same steps in this section to print your selection. Each print area will appear on a separate page.

Reviewing a Print Area In Excel
Once you’ve set one or multiple print areas, it’s a good idea to review what the output will look like before printing it on paper.
Excel provides three tools that help reduce the possibility of formatting or layout issues. They will also show how the layout will appear across separate pages.
1. Page Layout View
The Page Layout View provides one way of checking that your data will be displayed accurately on the printout. Follow these steps:
Select the View tab on the Ribbon.
Click on the Page Layout button in the Workbook Views group.
Observe the cells and formatting in the Page Layout View.
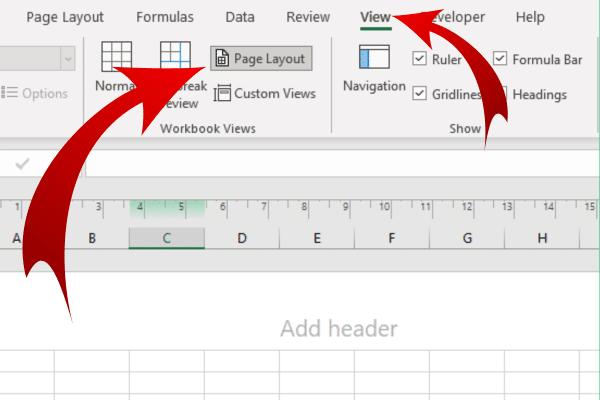
This view shows you all the print areas. It also provides a page break preview. You can adjust margins, headers, and footers directly in the view.
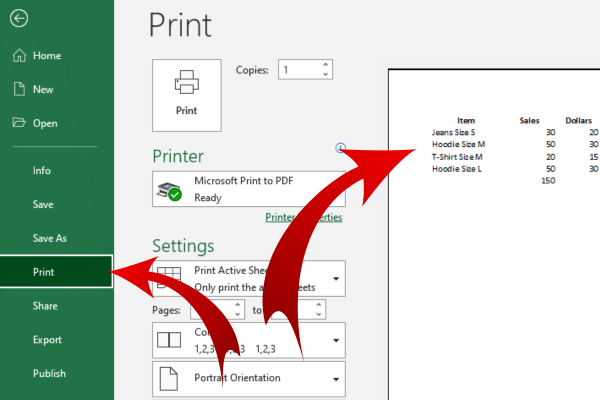
2. Print Preview
Another way to ensure your print area is set correctly and your data is displaying accurately is by using Print Preview. This tool allows you to view how the entire document will appear when printed.
To access Print Preview, follow these steps:
Click on the File tab on the Ribbon.
Select Print or press Ctrl+P on your keyboard.
Review the document displayed in the preview pane.
Within Print Preview, you can modify the print settings, such as print orientation, scale, and paper size if needed.
Once you’re satisfied with the preview, click on the Print button to quickly print your document.
Page Setup Dialog Box
You can modify the print area before printing your document by using the Page Setup Dialog Box. Follow these steps in your Excel worksheet:
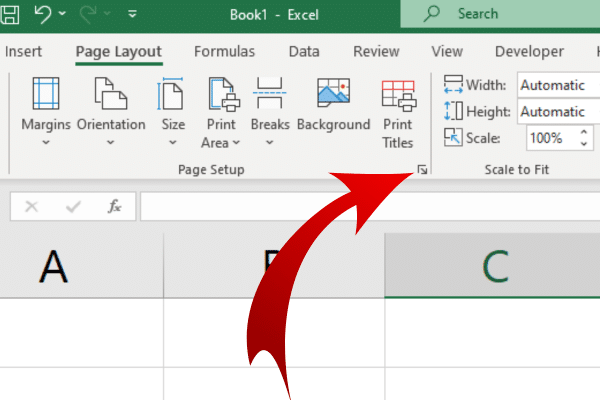
Go to the Page Layout tab.
In the “Page Setup” group, click the small arrow in the bottom-right corner.
It’s easy to miss the tiny arrow! This picture will help you out:
Each of these tools also has keyboard shortcuts for access.
Additional Excel Print Settings
You will often want to customize your printouts for clarity and appearance. In this section, we show three additional print settings to achieve what you need.
1. Print Titles
Print titles allow you to display specific rows or columns on every page of your printout.
To set print titles, follow these steps:
Select the Page Layout tab in Excel.
In the Page Setup group, click Print Titles.
Choose the rows or columns you want to appear across the entire spreadsheet.
2. Scaling Options
Scaling options let you adjust the size of the printed content to fit within the dimensions of your pages.
To set scaling options, do the following:
Click on the Page Layout tab.
In the Scale to Fit group, select the scaling option of your choice.
3. Gridlines and Headings
By default, Excel does not print gridlines and headings (row numbers and column letters) on the page. If you’d like to include them in your printout, follow these steps:
Go to the Page Layout tab in Excel.
In the Sheet Options group, check the Print box under Gridlines and/or Headings.
Manipulating Print Areas
After you’ve set a print area, you may want to remove it or change it in some way. Here is how to do so.
Clearing One Or Multiple Print Areas
To clear print area, follow these steps:
Select the worksheet where you want to clear the print area.
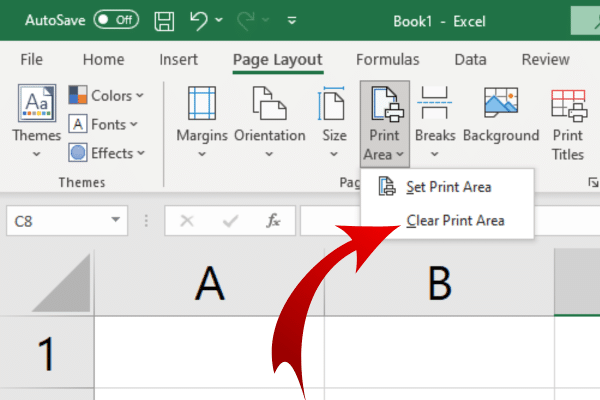
Go to the Page Layout tab.
In the Page Setup group, click on Print Area.
Choose Clear Print Area from the drop-down list.
After completing the steps above, all existing print areas will be cleared and the entire worksheet will be set to print by default.

Modifying An Existing Print Area
If you’d like to modify an existing print area, follow these steps:
Select the new range of cells that you want to set as the print area.
Go to the Page Layout tab.
In the Page Setup group, click on Print Area.
Choose Set Print Area from the drop-down list.
Note that setting a new area will replace the existing print area.
Ignore Print Area
If you want to print specific cells and ignore print area, follow these steps:
Select the range of cells
Choose “Print” from the left-hand menu
In the “Settings” section, click the drop-down menu under “Print Active Sheets”
Select “Print Selection.”
The Final Word
You have learned how to use Microsoft Excel’s print area feature to print single or multiple areas. You also know how to select the cell range you want and how to set the print area.
These skills will let you produce printouts that contain exactly the data you want, saving you time, and the planet!
Keen to dive into Excel and learn more, check out our Microsft Excel course to turn you into an Excel pro in no time!


