In this tutorial, you’ll learn how to install SQL server for Power BI. This includes a step-by-step demonstration on how to download and install the SQL server management tool and the Contoso database.
Installing SQL server comes with a variety of advantages. You won’t need to delete a part of your column. You’ll also have the means to easily go back to the original state without having to restart Power BI. Having a SQL server helps reduce development time.
Download SQL Server
To download SQL server, look for its download page using Google. Search for SQL server and click on the first link you see.

Then, download the Developer edition.

Click the downloaded file and the SQL server download window will appear. You’ll then be provided with three options: Basic, Custom, and Download Media.

Custom allows us to make any changes in the server name and install analysis services. But if you want to download and install SQL server on multiple systems without having to always use an internet connection, it’s recommended to choose Download Media. But for this demonstration, Custom will be chosen.
Next, choose the download path you want. Once done, click Install.

Install SQL Server
After the installation is done, a new pop-up window will appear. Click Installation found on the left pane and then select the New SQL Server stand-alone installation option.

When another window appears, click Next.

This will run and check for any update on the software.

Continue clicking on next until you reach the Installation Type setting. Choose Perform a new installation and then click Next.

Once you get to the Product Key setting, choose Developer in the free edition options. Then, click Next.

Read and then accept the License Terms.

The next step will allow you to choose options that you can include in the SQL server version you’re installing. In this case, you only need to include Database Engine Services, Analysis Services, and Client Tools Connectivity. Once done, click Next.

You now need to provide a name for the Instance ID. Since this demonstration will use the demo version, DemoDax is used.

Continue clicking on Next until you reach Database Engine Configuration. Under the Authentication Mode, choose Windows authentication mode. This option is the safest one to use. Then, click Add Current User so that you will be added as a SQL server administrator.

The next step will give you three options for the Server Mode. Choose Tabular Mode. Also, click Add Current User again to specify the administrator for this mode.

Continue clicking Next until you reach the Ready to Install setting. Check for any missing options or features. Once you’re done checking, click Install.

The installation takes some time to perform. Once it’s done, you’ll see a summary of the features you’ve downloaded along with SQL server. Now, click Close.

Install The SQL Server Client Tool
Once the SQL server has been installed, the next step is to download a client tool. A client tool will allow you to interact with the database.
Install the SQL server management studio by clicking the Install SQL Server Management Tools option.

You will then be redirected to a webpage where you can download SSMS.
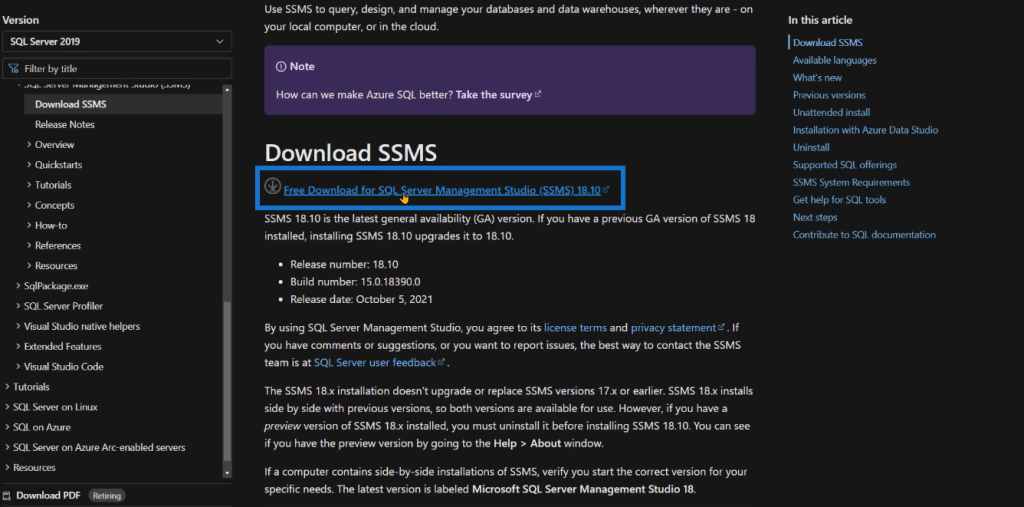
Once it has been downloaded, open the file and choose the Install option. You also have the option to choose a different installation path. But for this case, the default path is used.

Click Close once the SQL server management studio is successfully installed.

Now, launch the SQL server management studio. In the server name text box, define the server name you declared while installing SQL server. In this example, DemoDax was used.

If you click the Connect option, you’ll notice that you aren’t able to connect to the SQL server using the SQL server management studio. This is because you don’t currently have a database installed.

Install The Database For SQL Server
The database is used for loading data inside Power BI. To download the database, simply go to Google and search for SQL Server Contoso Retail Database. The database you’ll be using is provided by Microsoft.
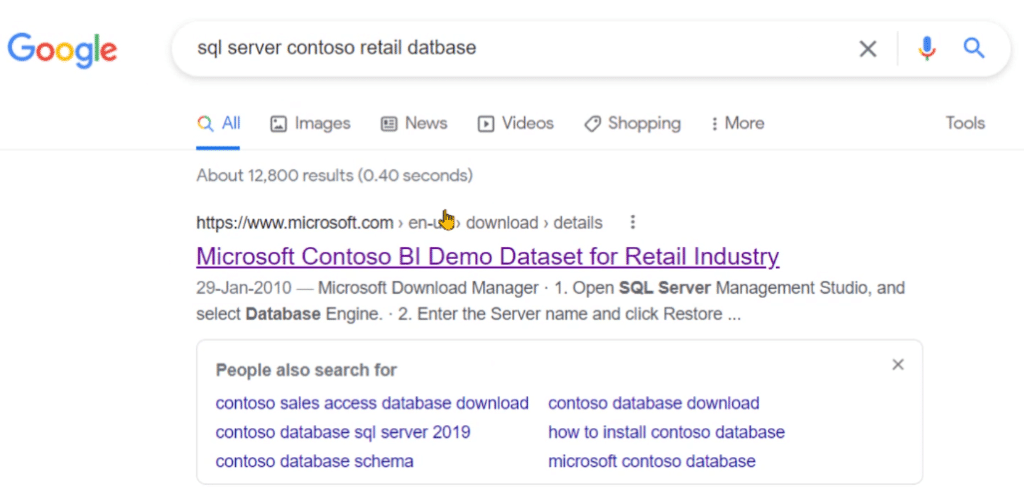
Once you’re redirected to the website, click Download.

Choose the first file with the filename ContosoBIdemoBAK.exe and click Next.
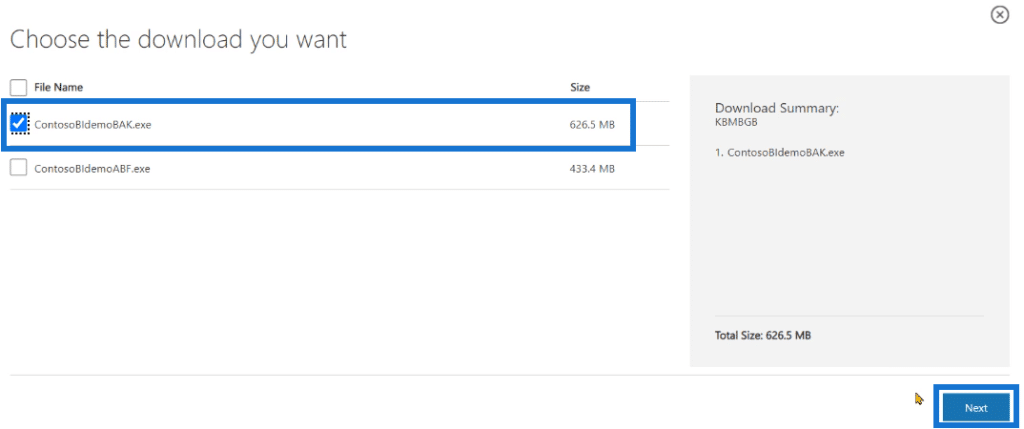
Once the file has been downloaded, you can now import the database in the SQL server management studio. Open the file and specify the path where you want to extract the file contents. Once done, click Okay and then Unzip.


When you go to the folder where you extracted the items, you’ll see a file with a .bak extension. This is what you’ll use for importing a database inside the SQL server management studio.
Now, open the SQL server. Right-click Database and choose Restore Database.

Choose Device and then click the ellipses (…).

Click Add and then copy the file path.

Exit SQL server and then open a new folder dialogue box and paste the path you copied.

Then, copy and paste the .bak file in this folder path.
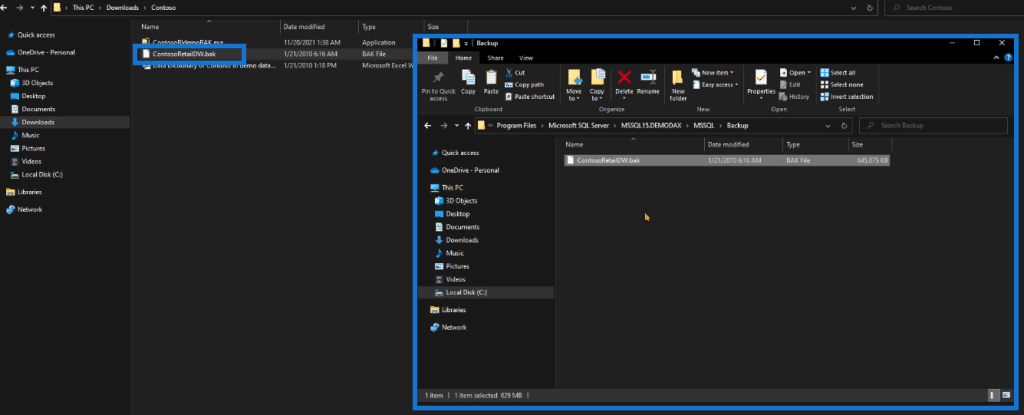
Go back to SQL server. Right-click on Database again and choose Restore Database. Choose the same options as before. You’ll notice that the .bak file has been added as an available database.

Once you click all the Okay options, the database will then be successfully installed in SQL server.

If you expand the database you restored and go to Tables, you can see that there are a lot of tables you can use in your data model.

Check And View Table Contents
You can execute a simple query to check the content of a given table. For this demonstration, use the code below:
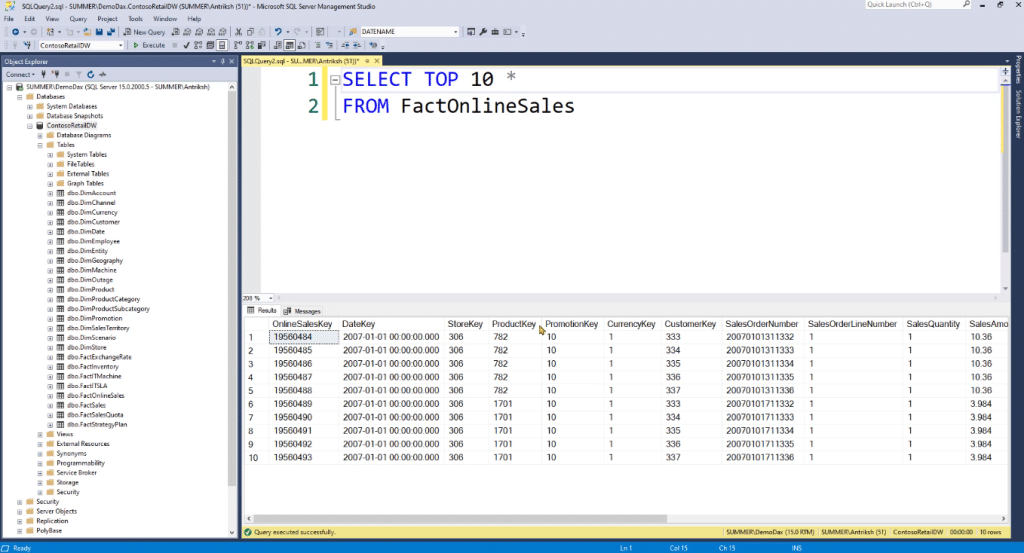
The data in the table is what you’ll be importing to Power BI. But before that, you need to create several views so that it’s easier to modify the content.
The code you see in this demonstration can be copied from the file available in the course module. Click Execute and you’ll then see that this creates several views in the data model.
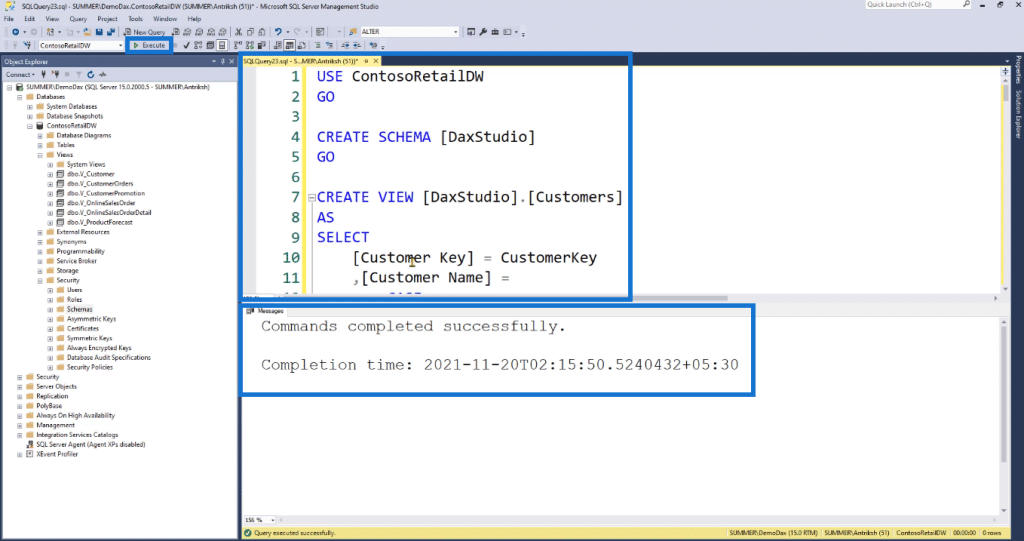
Right-click the Views option and choose Refresh.

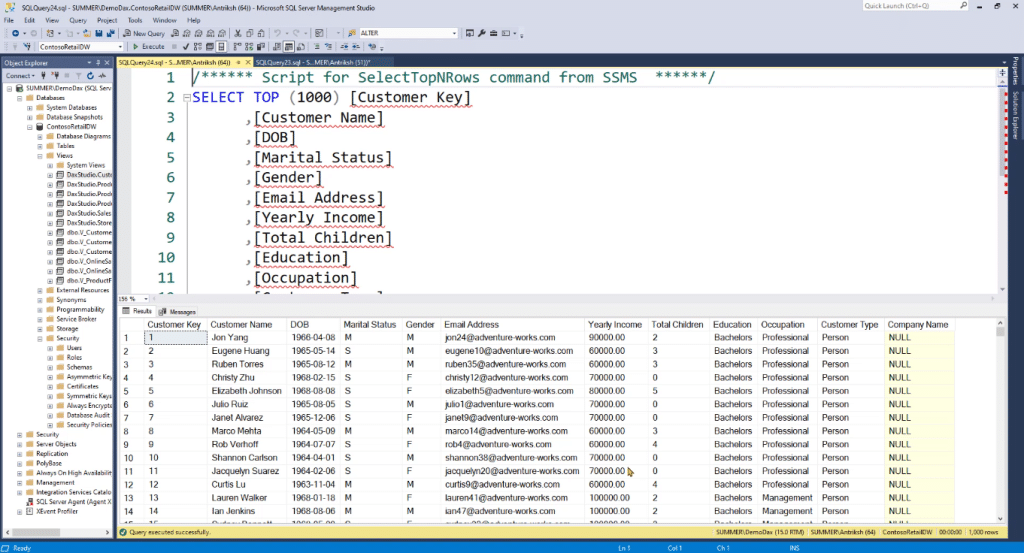
You’ll see that several views were created inside the View folder.

Right-click on any View and choose Select Top 100 Rows. You can then see the data contained inside that particular View option.
***** Related Links *****
xmSQL Aggregations In VertiPaq DAX Studio
Power BI And SSAS – Sorting Columns Using TE3 & C#
How To Install DAX Studio & Tabular Editor In Power BI
Conclusion
In summary, the tutorial provides you with a direct step-by-step demonstration on how to successfully install SQL server. Make sure to follow everything in order to avoid errors.
SQL is a valuable tool that complements Power BI. Though it’s not necessary to install it, it’s recommended. Later down the line, this will become a useful tool when modifying your Power BI data model.
Also, a simple demonstration was presented on how to change View options for tables. In succeeding tutorials, more features of the SQL Server will be discussed which will assist you in optimizing the development time when creating Power BI reports.
Enterprise DNA Experts


