
In this blog post, we’ll talk about the difference between Conditional and Custom Columns in Power BI. We’ll also show examples of when and how we can use them, including some of their alternatives.
Custom columns require a different formula language that we need to learn first. On the other hand, conditional columns are easy to create, require no formulas, and are powerful due to the extensive filtering options available.
Creating Custom Columns In Power BI
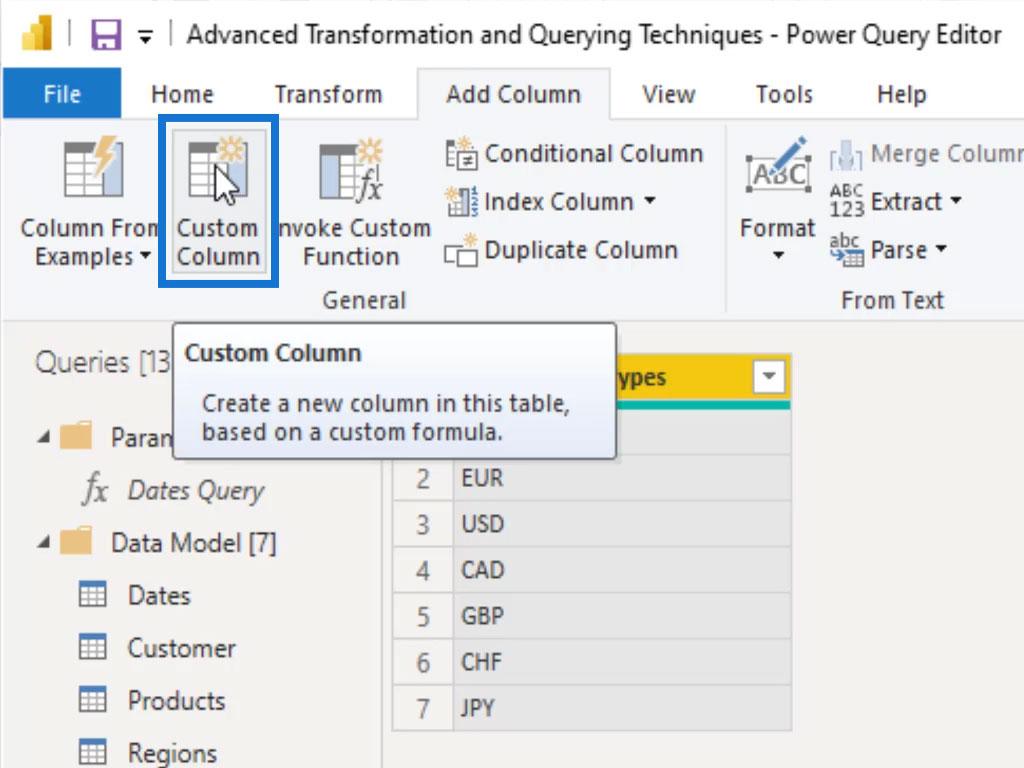
First, select any table where you want to add a custom column. For this example, we’re adding this custom column inside our Currencies table.

To create a custom column, click the Custom Column option which is located within the Add Column ribbon.
A popup box will appear where we can create a column by implementing some logic inside. For this example, we named our custom column as “Full Exchange Rate”.

Inside the Custom column formula, we typed “NZD/” &, then chose the Currency Types under the Available columns.
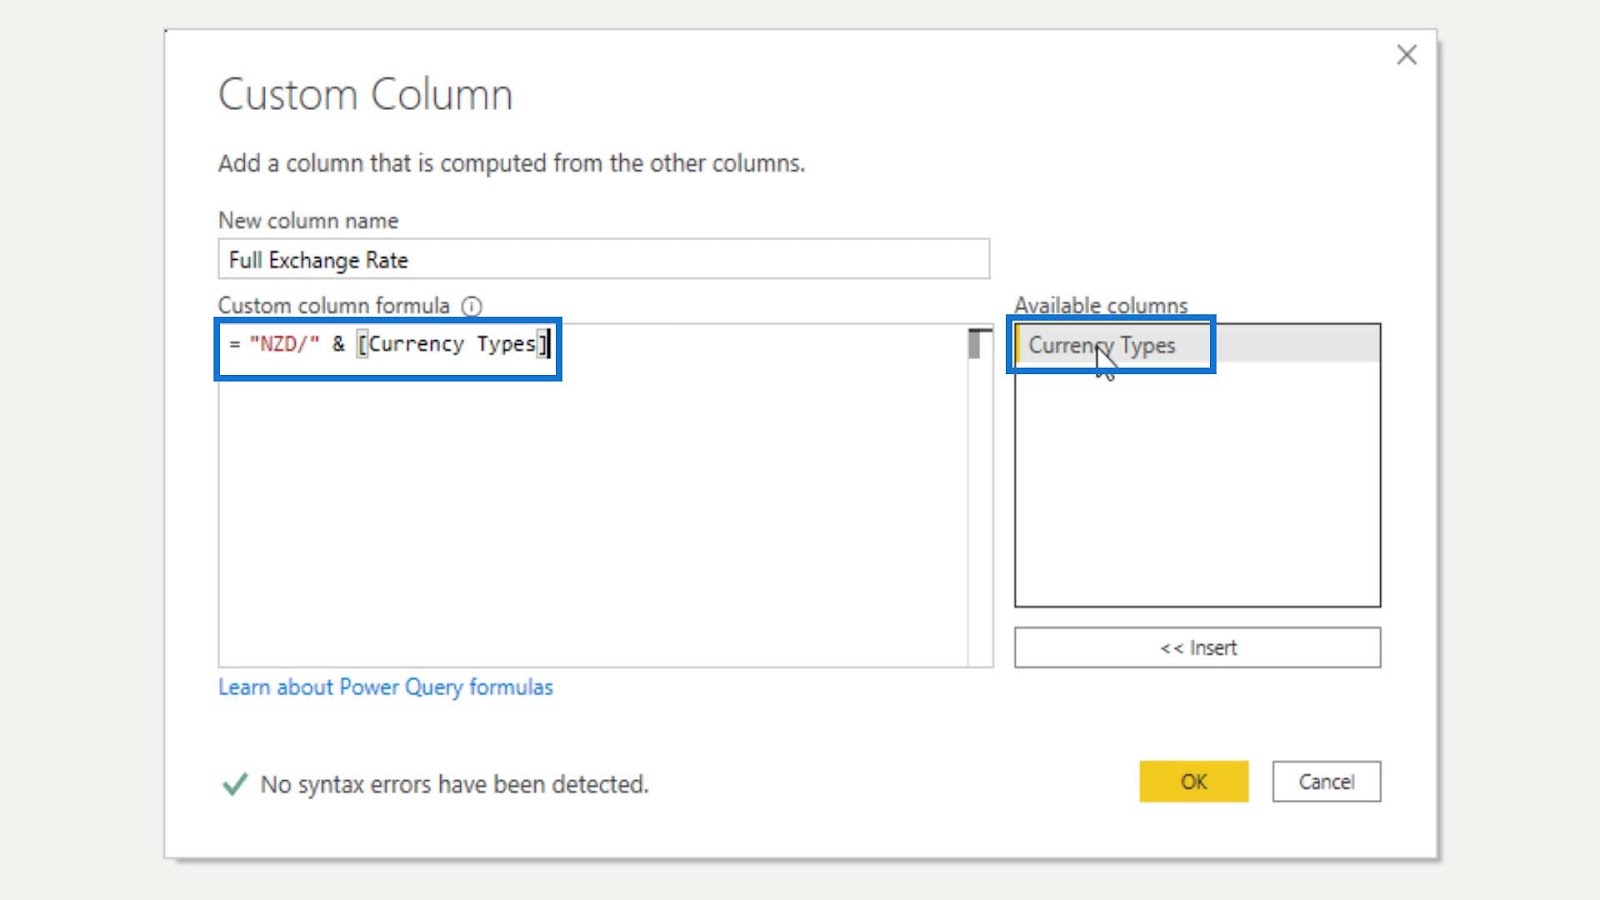
To apply this custom column, we need to click the OK button.

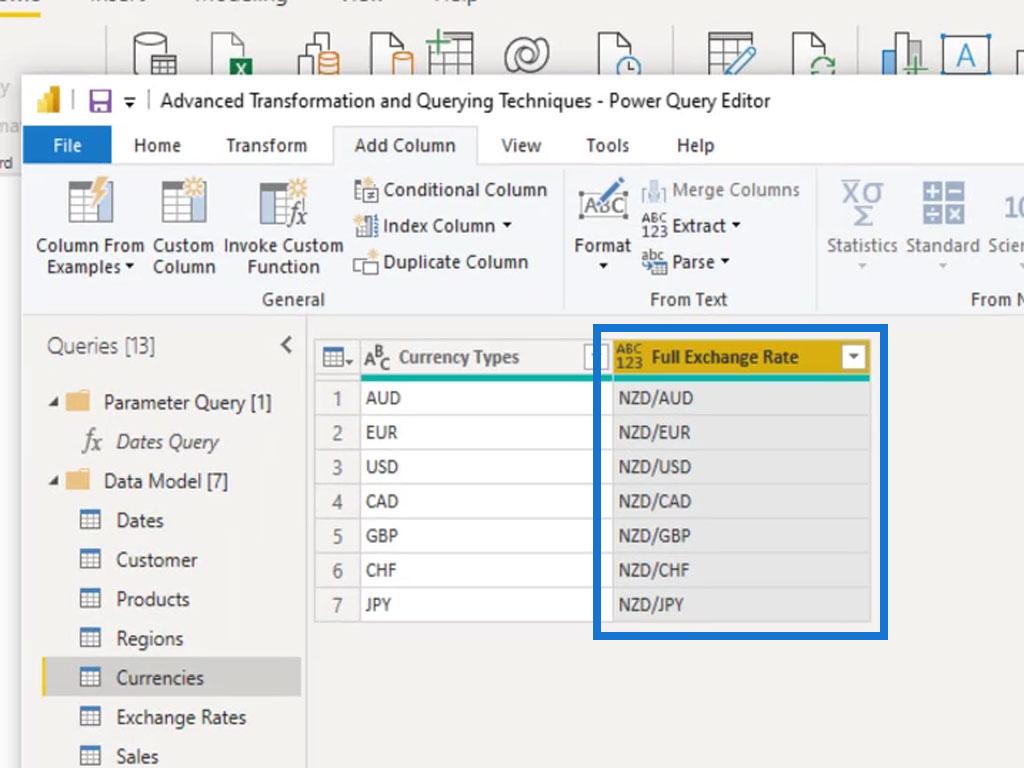
A new column (Full Exchange Rate) is now created on our Currencies table.
This is one way of creating a custom column. However, I personally don’t use this feature because it requires a different formula language that doesn’t relate to Excel, M language, or DAX. We need to learn this new formula language first before we could write these custom columns.
I want to recommend an easier way before using the Custom Column option. But there are still some rare occurrences where we might want to use it.

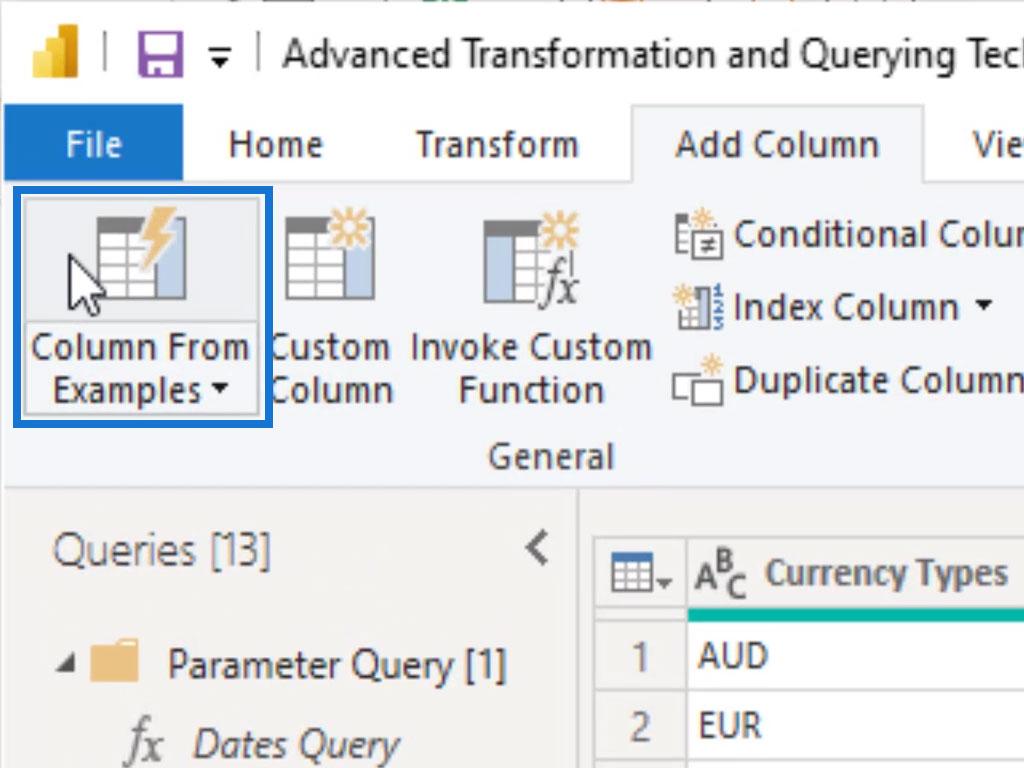
There are other ways that we can do to exactly get the result that we have created, which is easier than writing it with a formula. One of these is the Column From Examples where it will automatically add a new column. We can populate its contents from a current selection or provide an input based on a selected column.
Using Index Columns In Power BI
There are instances where we have to create an Index column on our table. These are usually used on databases to easily locate data without having to search each of their rows. For Power BI data, we can use it as a slicer.
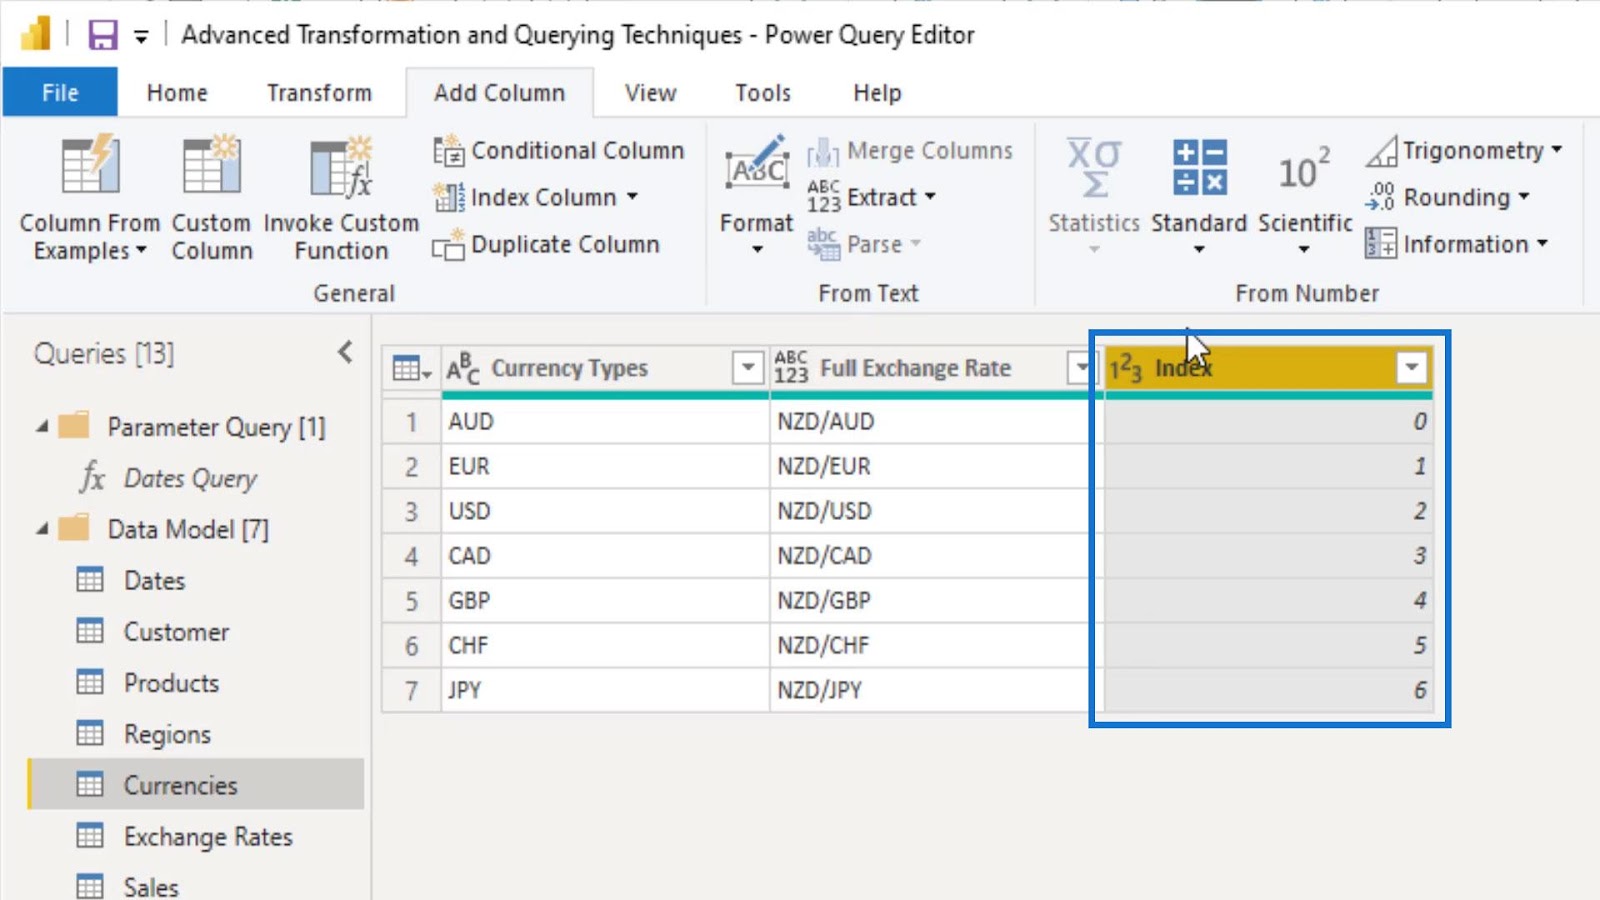
We can easily create an Index column by clicking the Index Column option under the Add column ribbon.

Directly clicking on it will provide us an Index column that starts with 0.
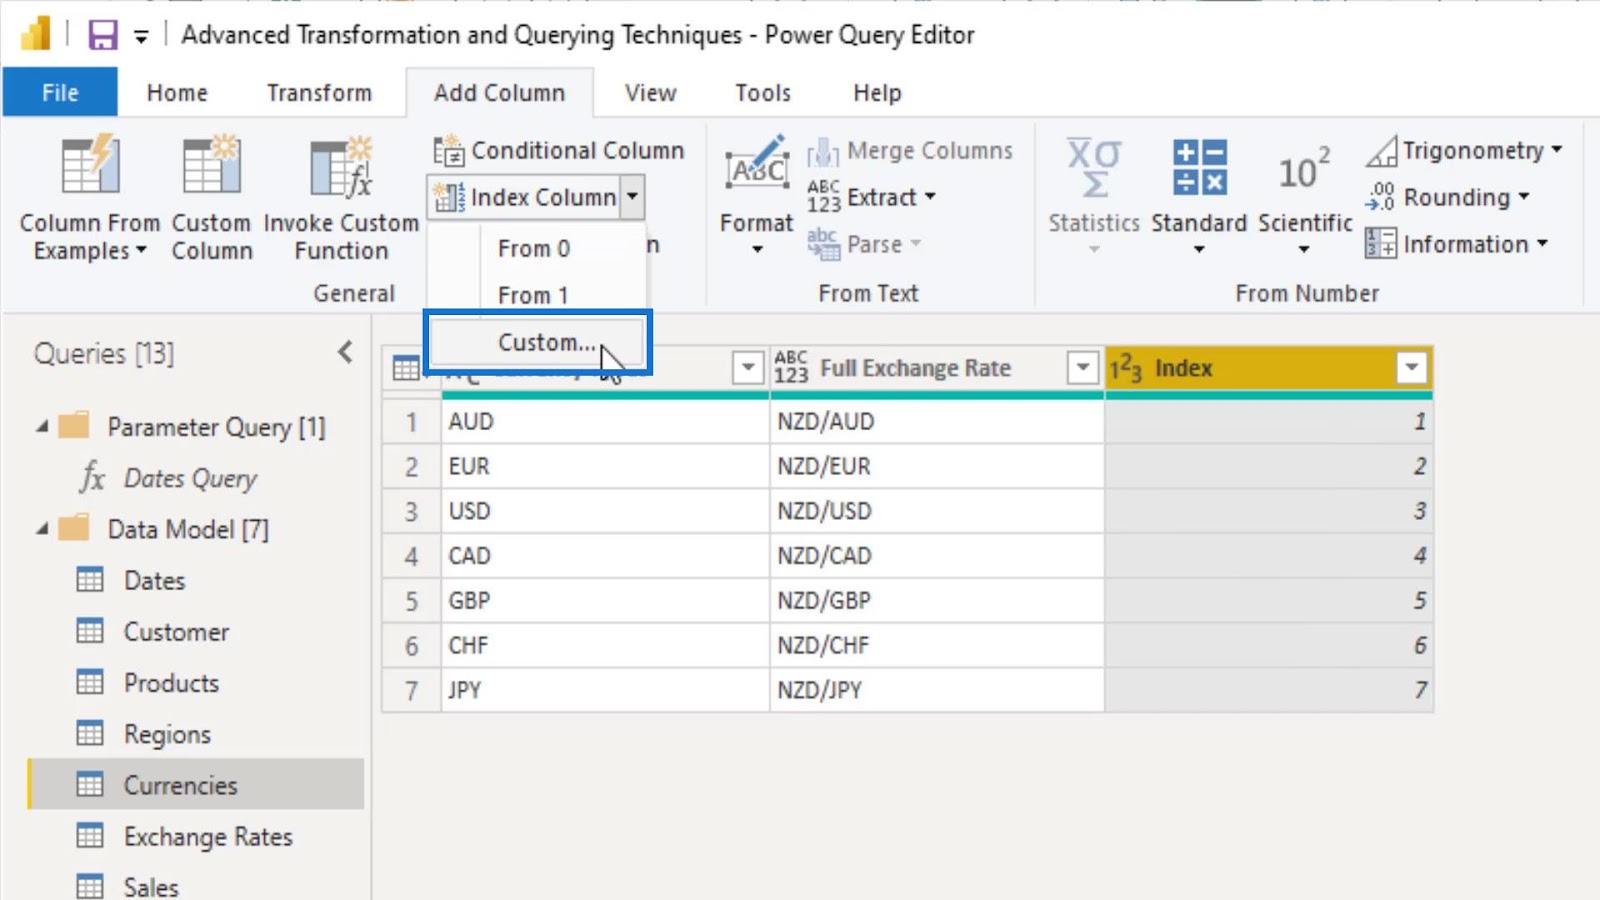
We can change that by clicking its dropdown arrow and selecting the From 1 option.

Instead of 0, our Index column will start from 1 by using that option.

We also have the Custom option if we want to start our index on another number instead of 0 or 1.
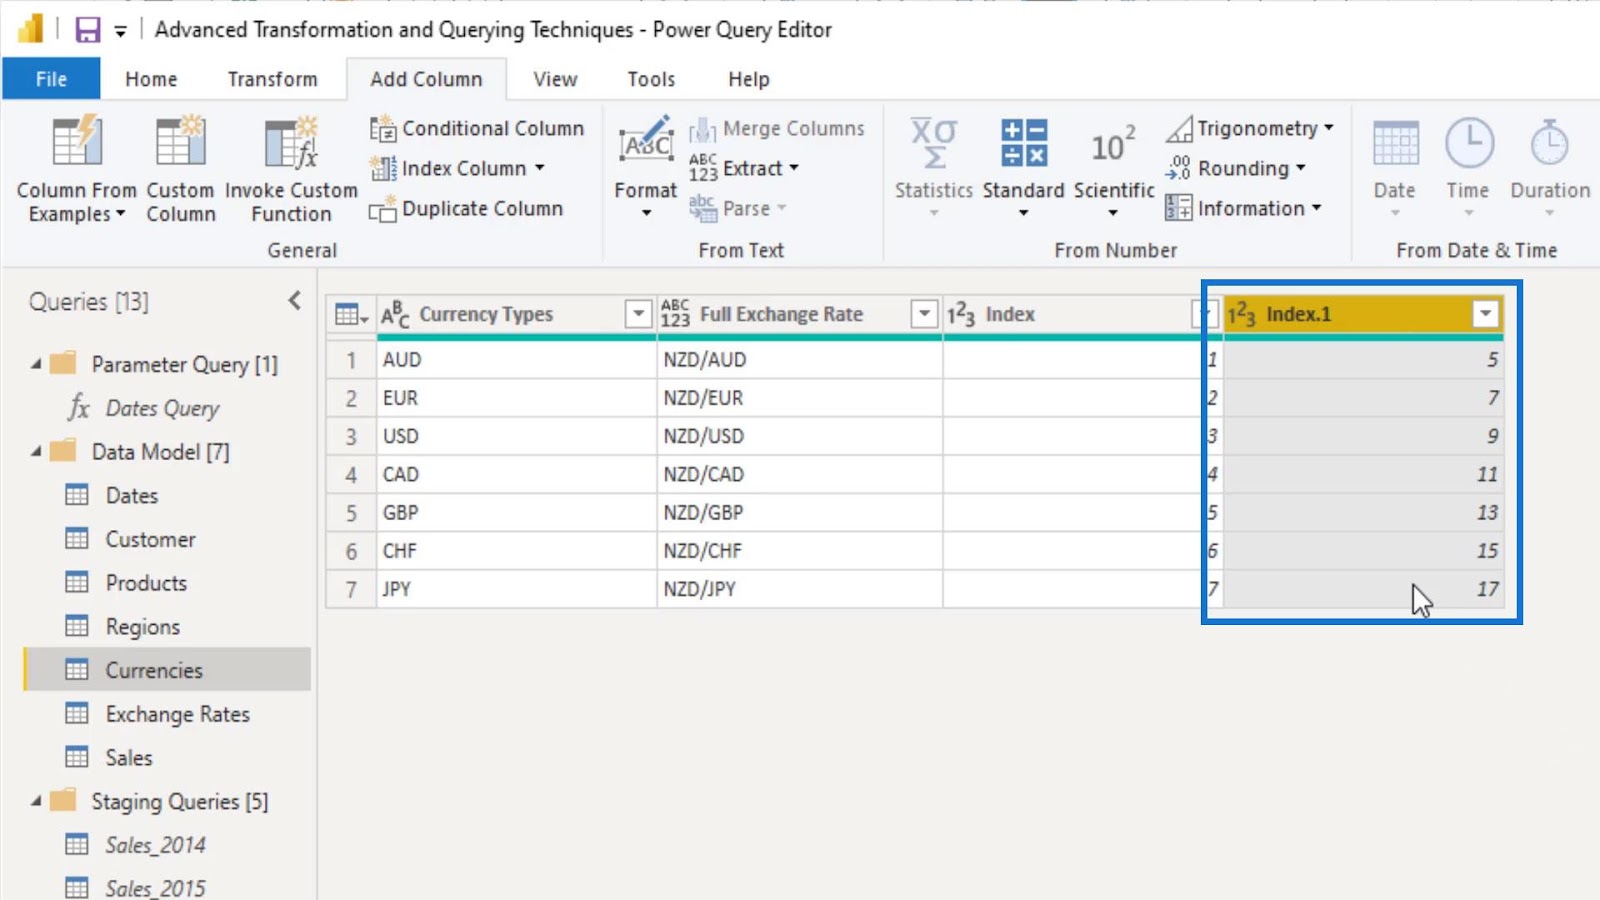
For example, we want to start our index number to 5. We just need to set that on the Starting Index field. We can also create a custom increment if we want to. For example, we want to increment by 2.

It will then provide another Index column that starts with 5 and increments by 2.
However, what if we wanted a custom Index column where the USD is number 1, euro is number 2, pound is number 3, and AUD is number 4? That’s where the Conditional Column option comes in.
Using Conditional Columns In Power BI
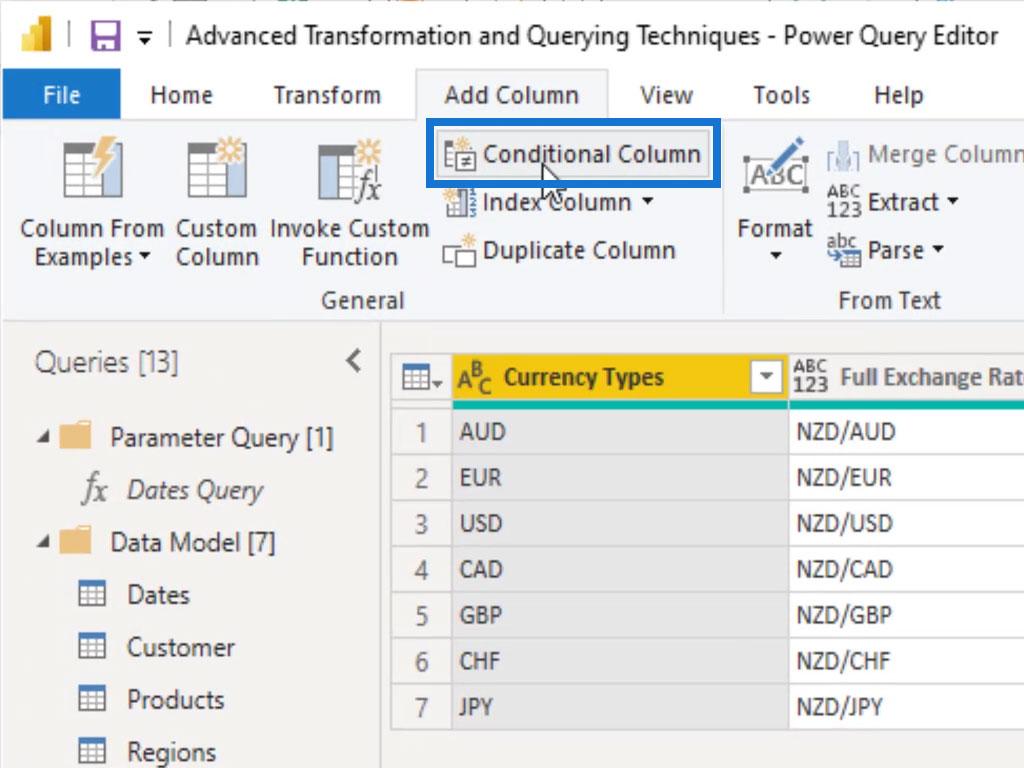
Using the Conditional Column is an interesting way to create columns. To use this, just click on this option located within the Add Column ribbon.
We can then create an If logic inside our tables. In this part, we’re creating a new column named as Ccy index and a condition that says If the Currency Types is equals to USD, we want the output to be 1.

We can then add the other rules or clauses that we want by clicking the Add Clause button.

Then add the other rules for the other currencies, and click the OK button to create this column.

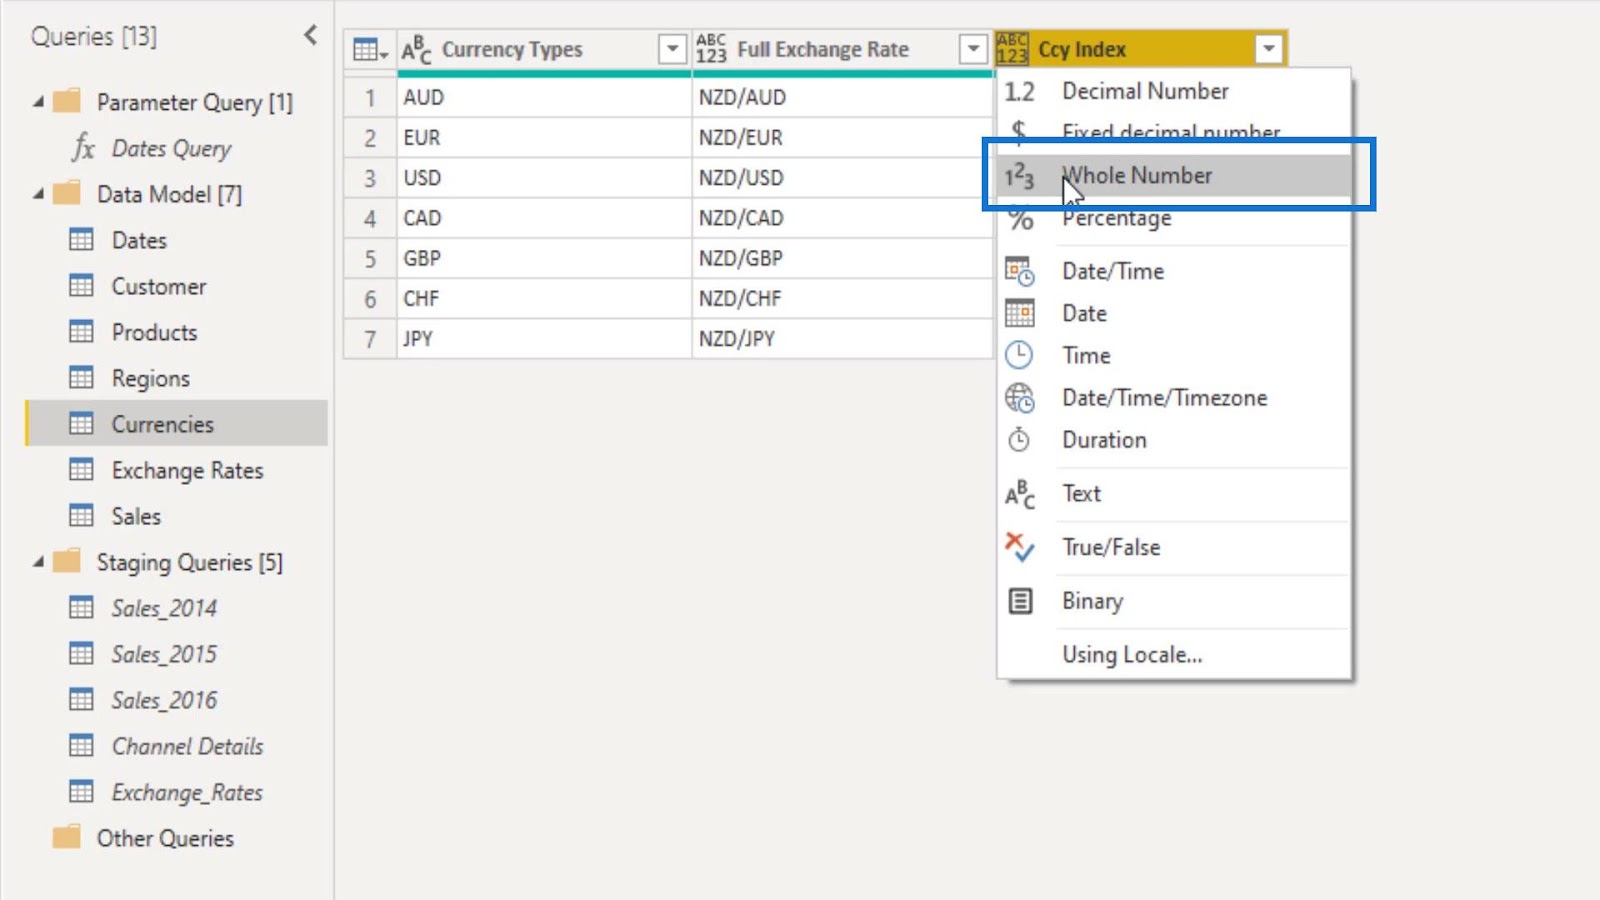
When creating columns that we’ll use on our model, we should always set their data type properly. We can change that by clicking the data type icon on their left side.


For this example, our custom Index column should have a Whole Number data type.
We now have a custom Index column where its index number depends on the currencies. By having this custom Index column, we can sort our Currency Types column based on it.

***** Related Links *****
M Code In Power Query Custom Columns | Power BI
How To Unpivot Columns In Power BI
Unpivot Multiple Columns Dynamically In Power BI
Conclusion
All in all, these are the different ways of creating custom columns in Power BI. The main point here is that we hardly ever use the Custom Column feature because it requires a different formula language that doesn’t relate to Excel, M language, or DAX.
We need to learn this new formula language first before we could write these custom columns. Therefore, using the Conditional Column to create a custom column would be better.
All the best,
Sam


