I’m going to show you a new approach in creating a date table in Power BI. You may watch the full video of this tutorial at the bottom of this blog.
I’ve done so many tutorials about creating date tables over the years, but the new method I’m using now is, by far, the most efficient way to do it. This is actually an approach created by Melissa, one of our Enterprise DNA experts. She does a lot of work around M codes, which is what I’m going to use for this approach.
Not only will this approach make the entire process faster, but it’s also going to yield better quality results.
Date Table M Code
The first thing I’m going to do is go into the Query Editor where I’ll create a new blank query.
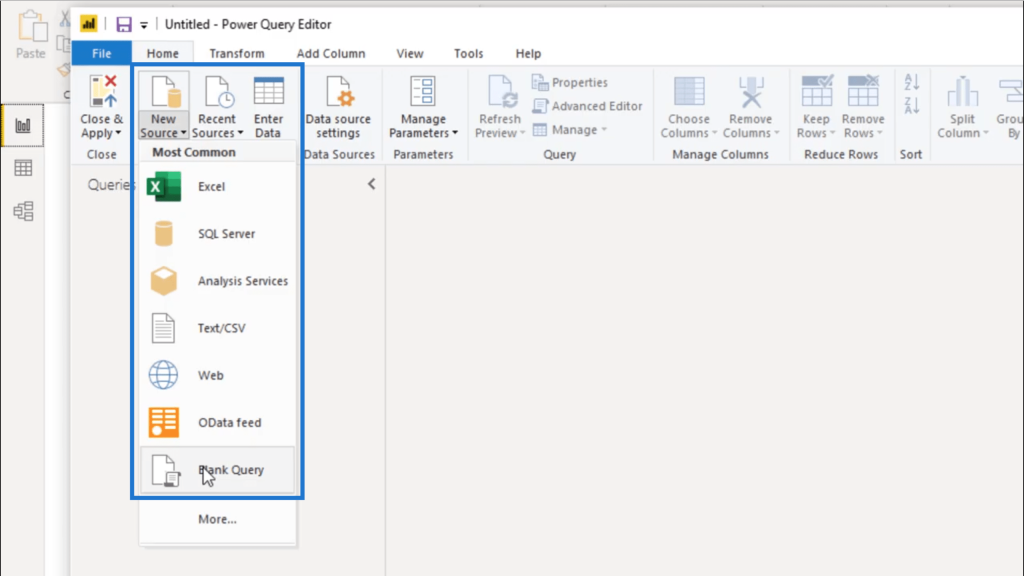
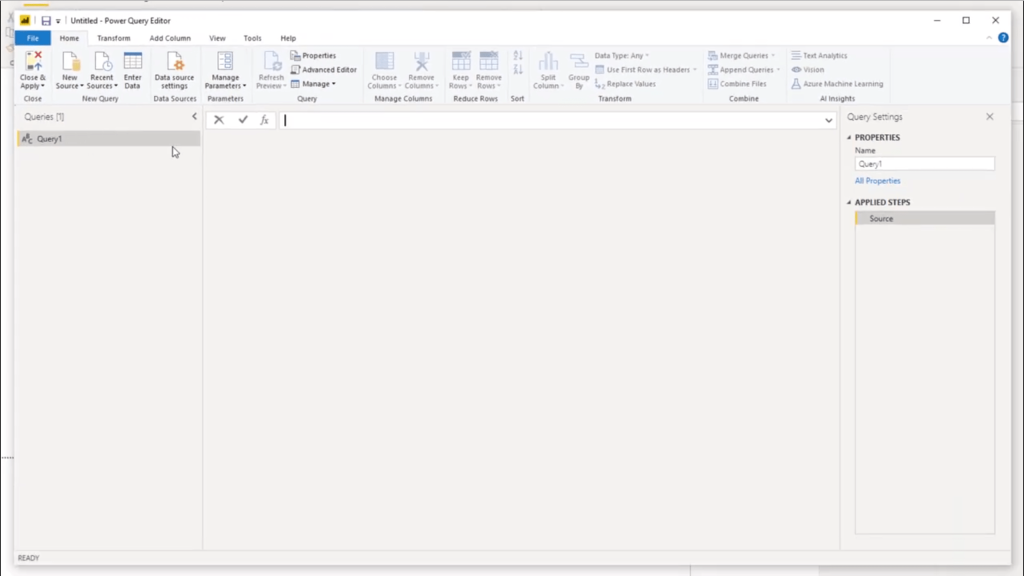
Once the blank query opens up, I’ll leave it as it is temporarily.
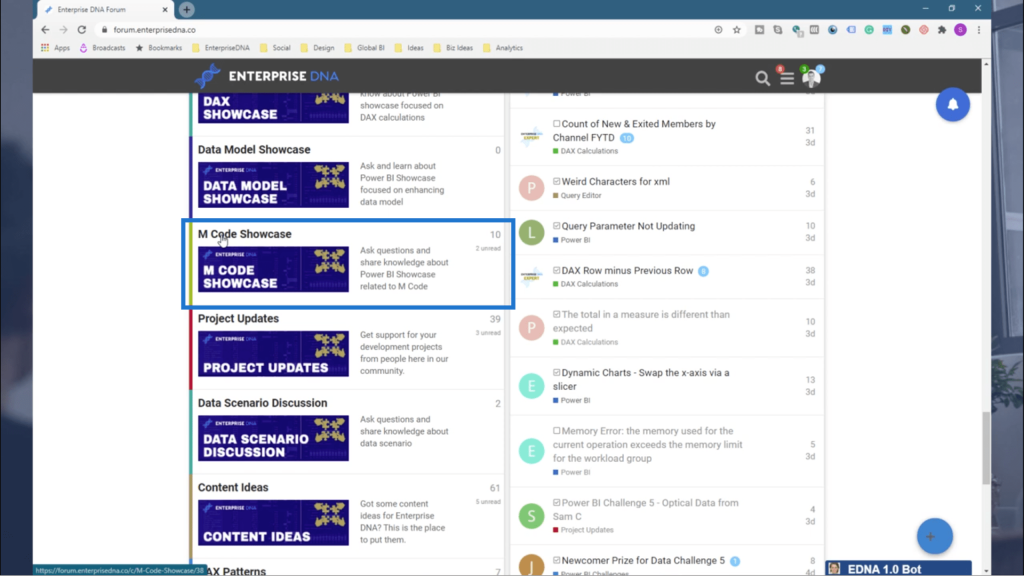
Now, I’m going to go to the Enterprise DNA Forum. Anybody can access the posts here.

If you scroll down, you’ll see that there’s an entire catalog of topics. What I need is inside the M Code Showcase. M codes are used inside the query editor.
The code that I need is inside the topic called Extended Date Table.
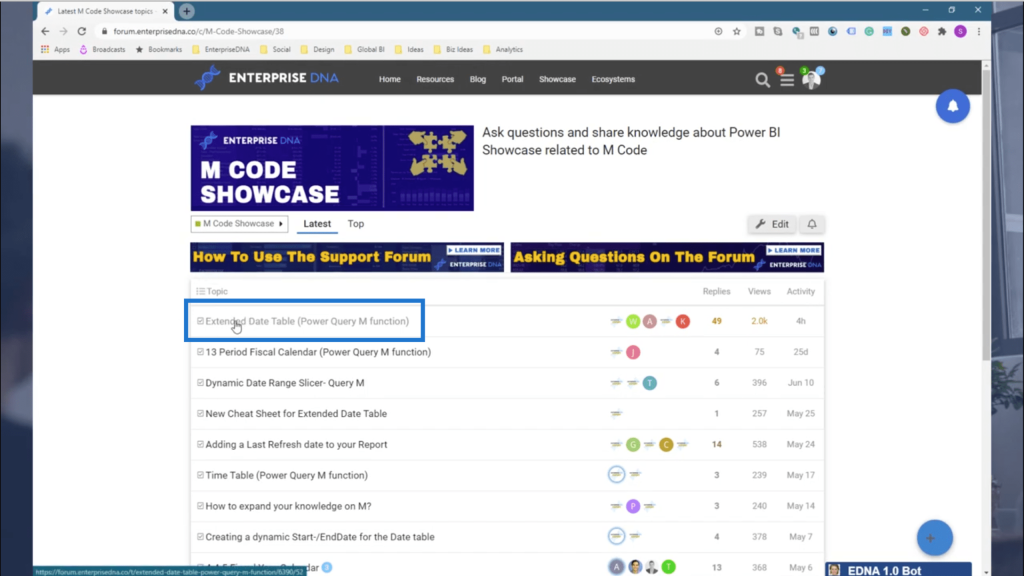
Once I click on it, I’ll scroll to the very top. This is where Melissa left the code that’s going to give me the most comprehensive date table I’ve seen so far.
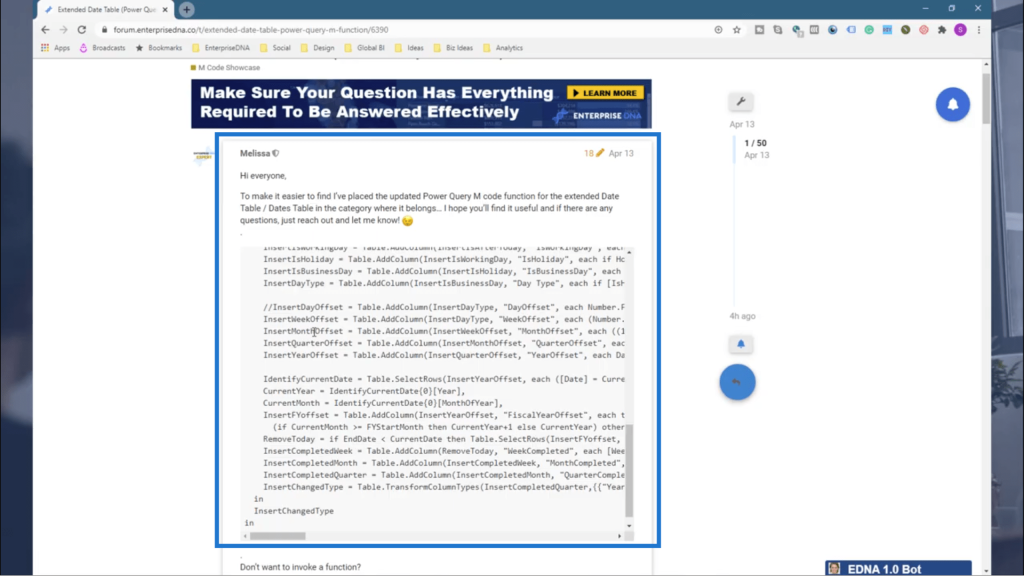
Again, I used to have a code of my own that I used for creating a date table in Power BI. But what Melissa did was study every nuanced use of a date table and came up with the code to generate all the details needed.
So I’m going to copy that entire code and jump back into Power BI. I’ll go straight into the Advanced Editor.
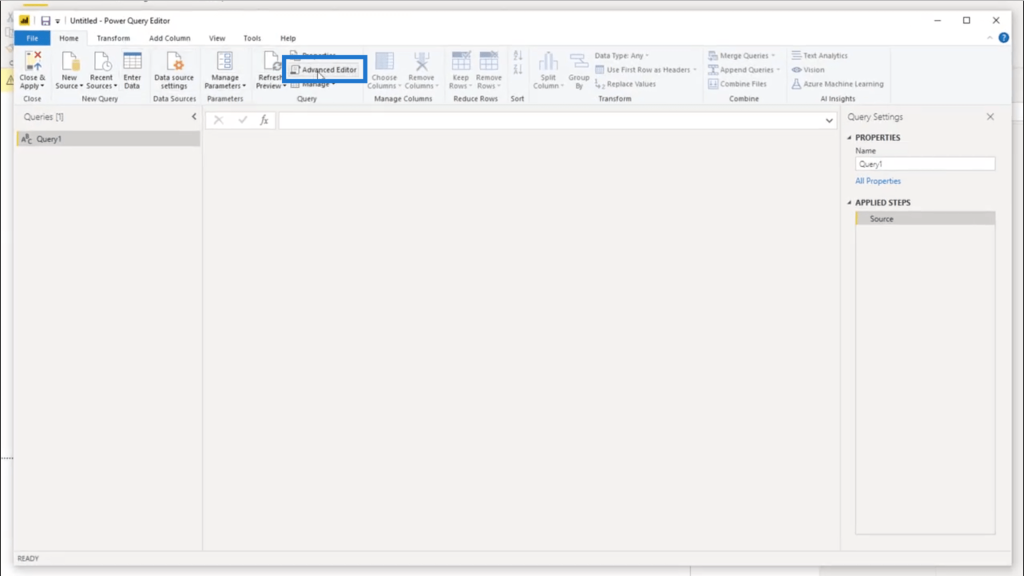
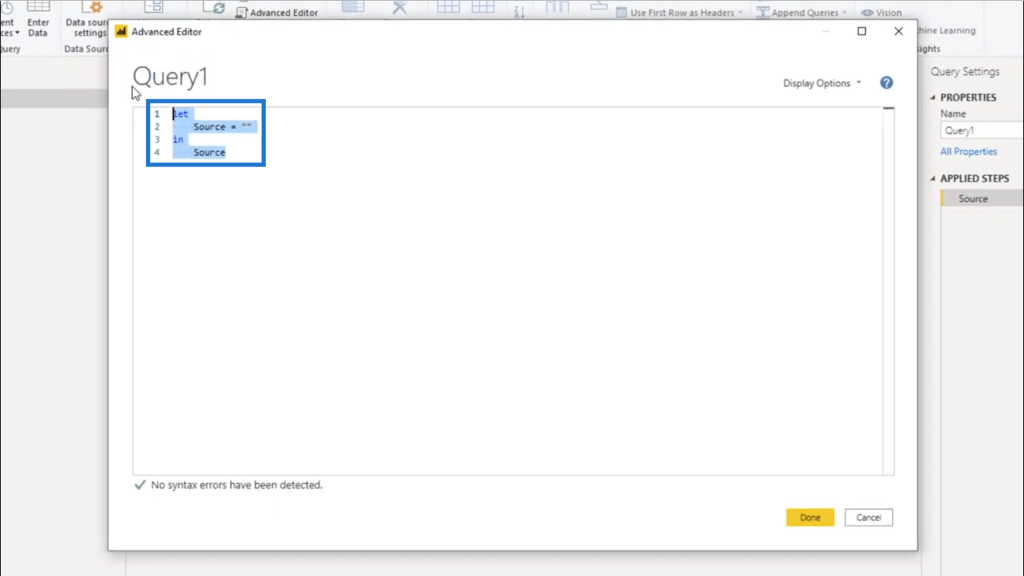
Then I’m going to highlight the default information in there and delete it all.
Now, I’m going to go paste the code I copied from the forum.
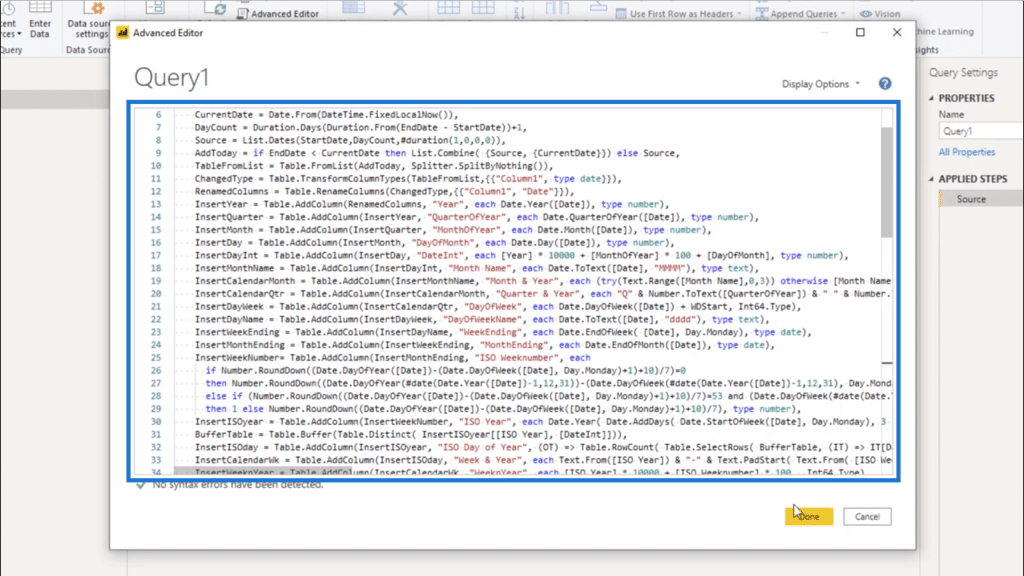
Then I’ll press on Done.
Adding Parameters
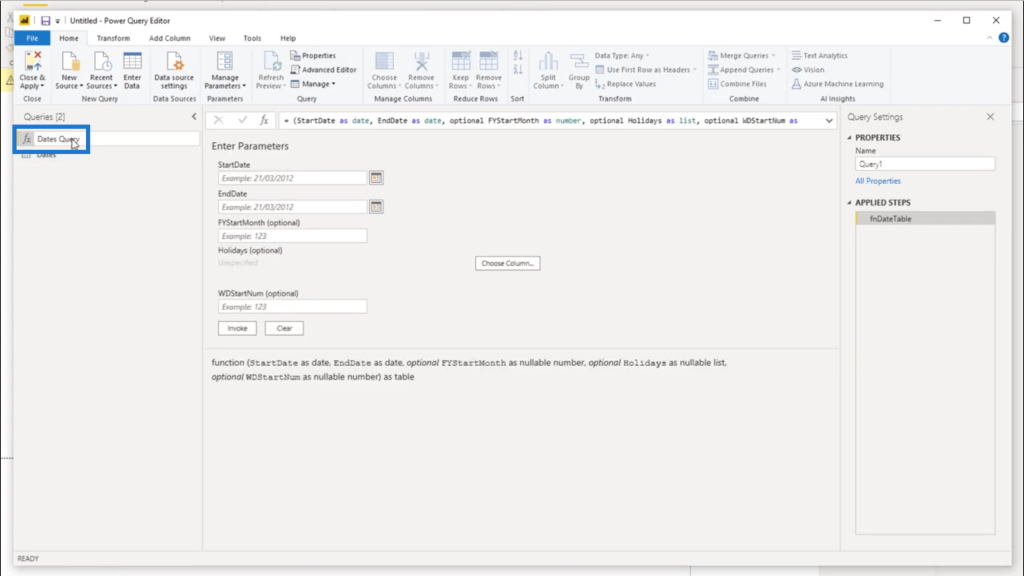
Once I click on Done in the Advanced Editor, I’ll be prompted to enter some parameters.
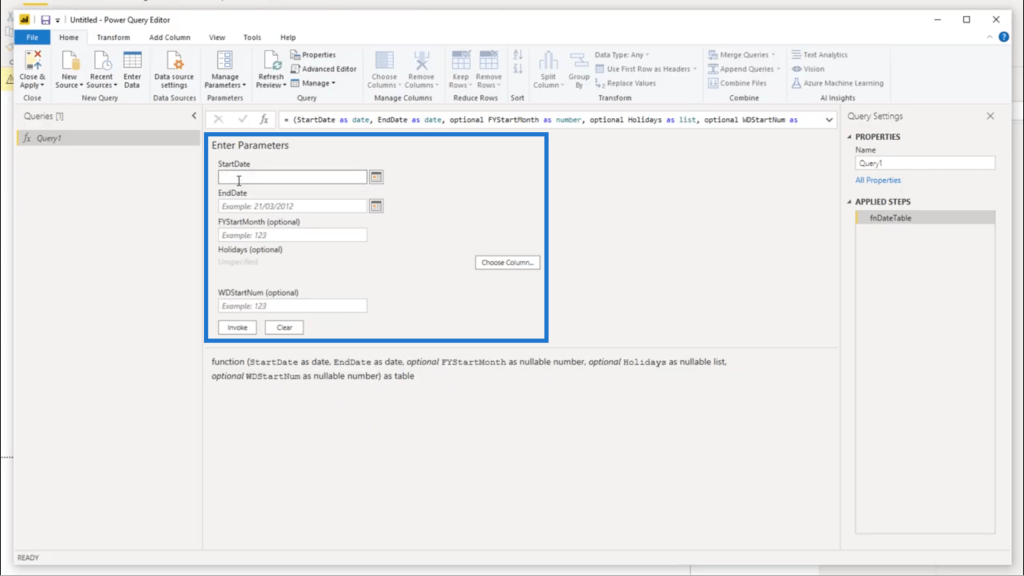
These parameters will dictate the data going into my date table.
I’ll use January 1, 2018 as my StartDate and December 31, 2022 for my EndDate.
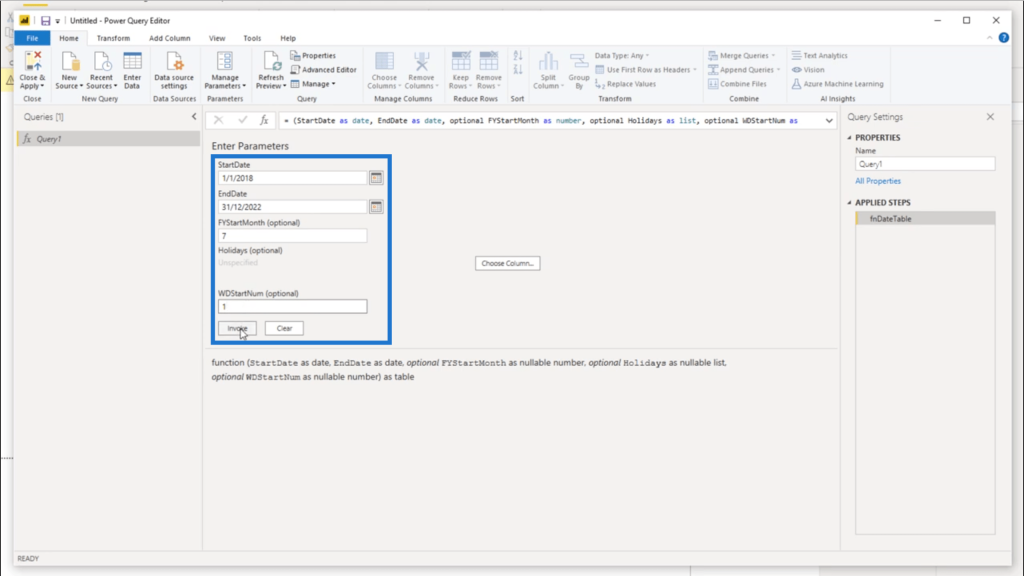
It also allows me to decide when my fiscal year will start. Assuming that my start month is July, I put 7 under FYStartMonth. I’m also going to use Monday as the start of my week, so I put 1 under WDStartNum.
There’s also an option to add holidays. All you need to do is import a custom list of holidays and you’re good to go. Melissa covers how to do that in another tutorial.
Once I click Invoke, I’ll have a comprehensive date table that covers every imaginable date combination or date metric.
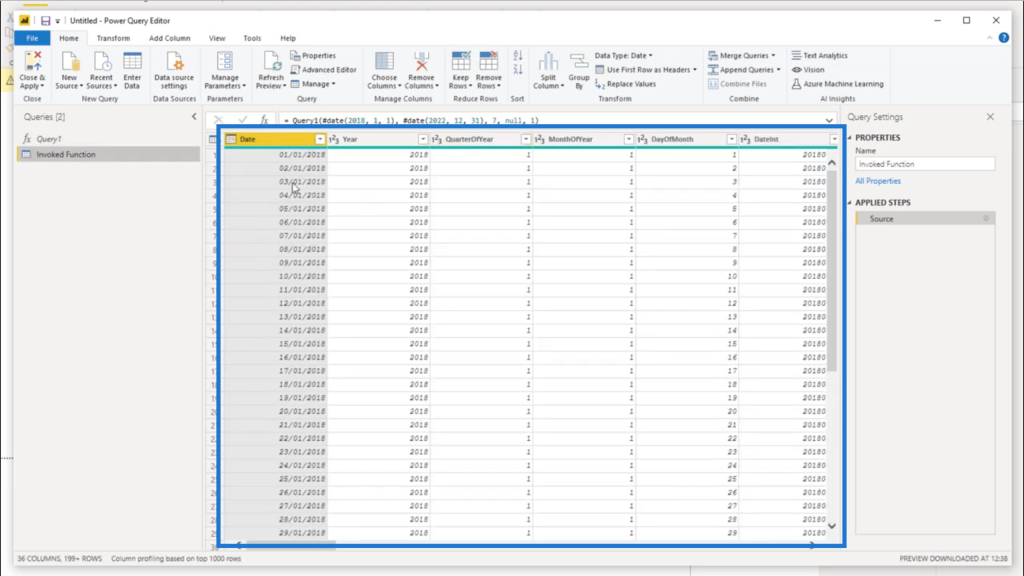
Considering the scope of this date table, working on time intelligence is much easier with this approach. It eliminates the need to input additional columns because this already covers everything.
One thing that makes Power BI reports intuitive is the way you name all the elements. So I’m just going to rename this table and call it Dates.
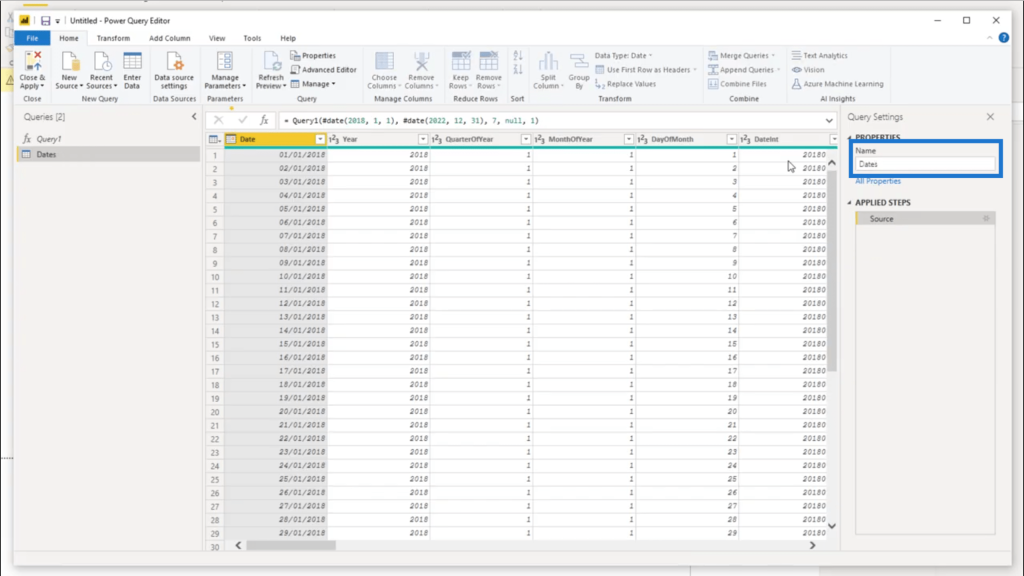
I’ll also change the query name to Dates Query.
Making Changes To The Date Table
What if I need a different set of dates in my date table? All you need to do is go to the formula bar and change what needs to be changed.
Let’s say I want to change the years 2018 and 2022.
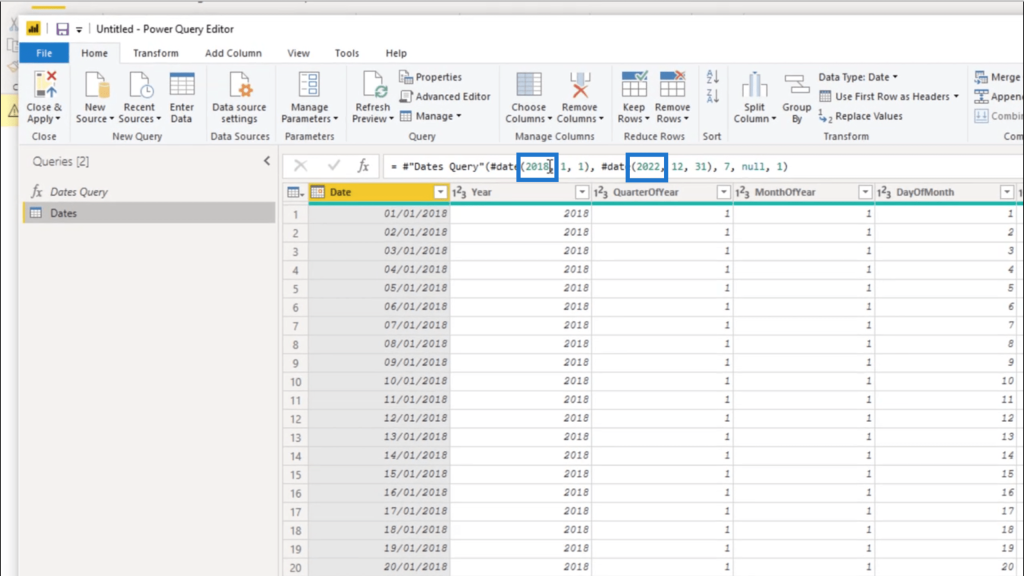
I’ll just change that directly within the formula. In this case, I changed 2018 into 2017, and 2022 into 2023.
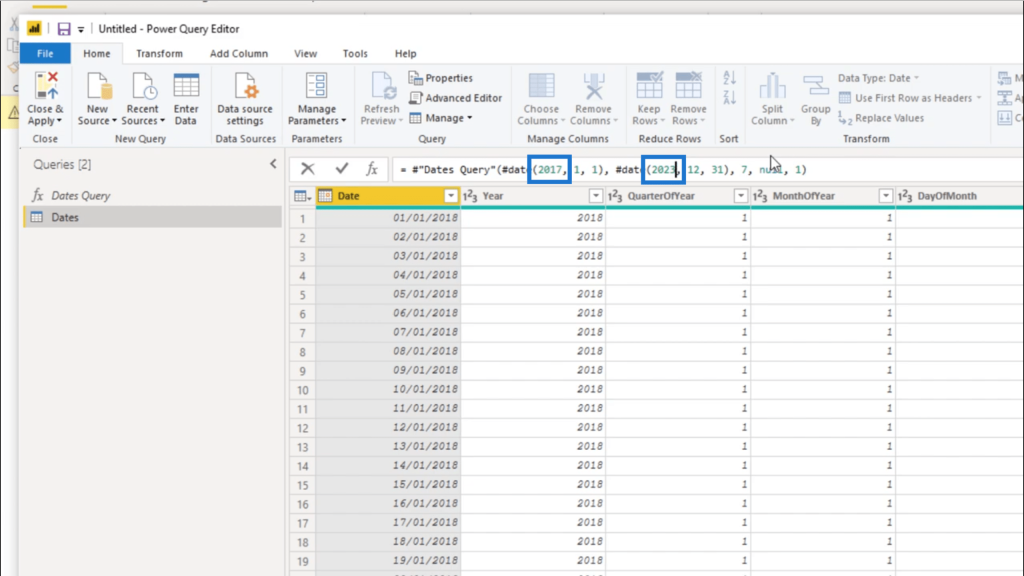
Once I’ve made all the changes, I just need to push Enter.
Just like that, my table now carries the dates that I put into the formula.
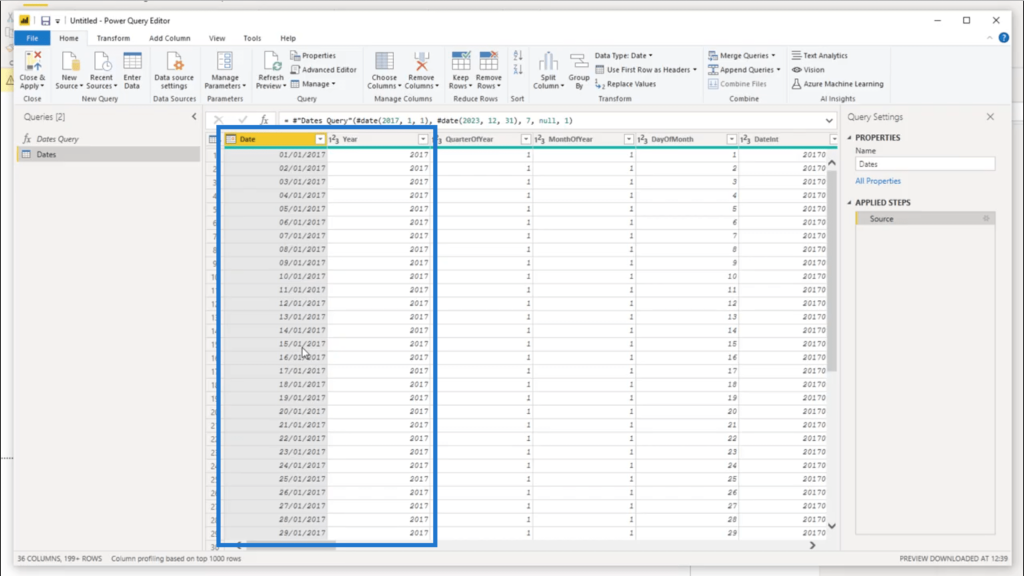
I’ll just click on Close & Apply to save those changes in the system.
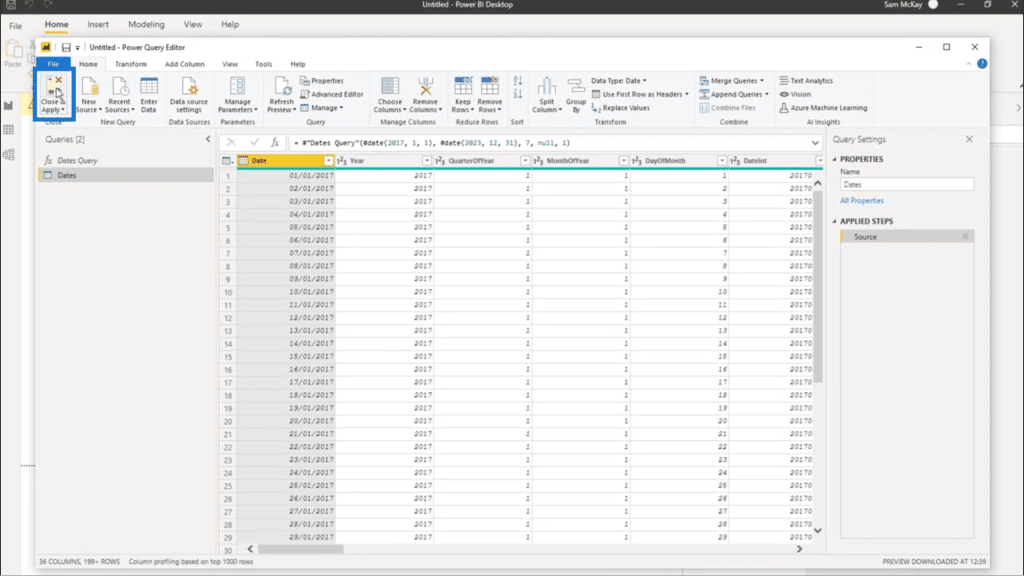
Seeing all the steps I applied here, creating a date table in Power BI now takes less than 30 seconds. It’s a mix of efficiency and quality, especially if you look at how much date information it carries.
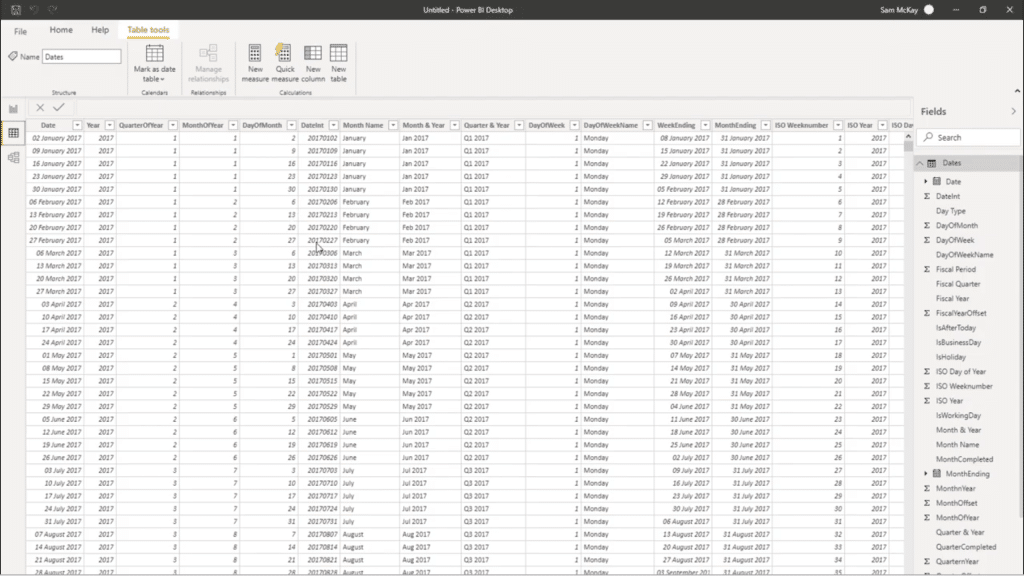
There will be times when you won’t really need all the information in this table. If this happens, just go back into the query editor and remove the columns you don’t need.
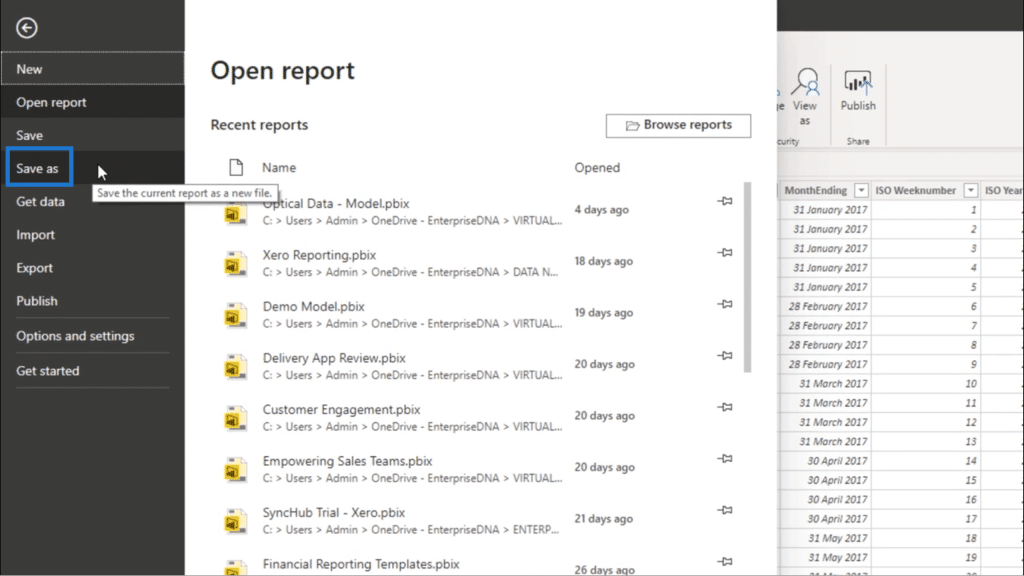
It’s also possible to make the process even faster. That’s by saving this table as a template.
Just go to file and click on Save As.
Then, save this as a PBIT file.
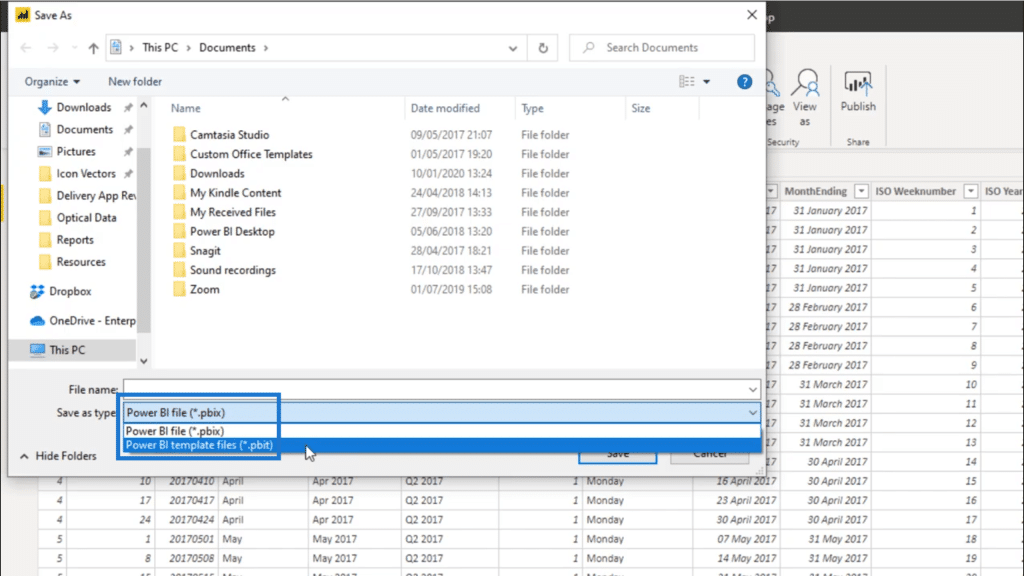
Now, you can use the template each time you need a date table. Instead of going through that entire process, you can automatically start with your date table each time.
***** Related Links *****
How To Work With Multiple Dates In Power BI
Showing Month to Date (MTD) To Current Date In Power BI Using DAX
Calculate Financial Year To Date (FYTD) Sales In Power BI Using DAX
Conclusion
Creating a date table in Power BI is now more efficient thanks to the M code that Melissa created. The great thing about this is that date tables are always essential in different types of work, especially if there’s a time element involved.
You can also look at other ways that this M code can be used. As I mentioned earlier, Melissa covered the part about adding holidays into the equation in a separate tutorial – this could be a good place to start!
All the best,
Sam


