
In this tutorial, we’ll be talking about the third type of variable called collections. Collections are helpful if you want to create variables on Power Apps that are more comprehensive than contextual and global variables.
We talked about contextual and global variables in a different tutorial.
Contextual variables are straightforward variables that can only be accessed through a single screen while global variables can be accessed across different screens. As for collection variables, they’re perfect for more advanced applications.

Let’s find out what’s different if we create variables on Power Apps using collection variables.
What Are Collection Variables?
Collections are more complicated than contextual and global variables.
Global and contextual variables can only store one item at a time, while collections have the ability to store different items at a single time.
Think of collection variables as being similar to data sources. They could hold different columns of information for different records, which is similar to how an Excel file works. If you look at an Excel file, each record counts as an item while each column counts as a field. This is how collections work as well.
How To Create Collection Variables
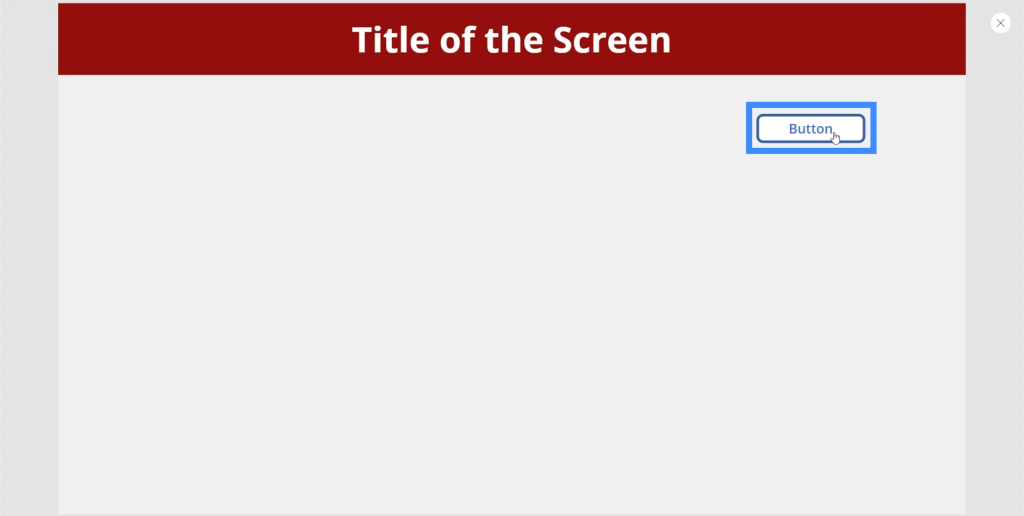
To create a collection variable, let’s start by adding a button. We can do this by clicking on the Button under the Insert ribbon.
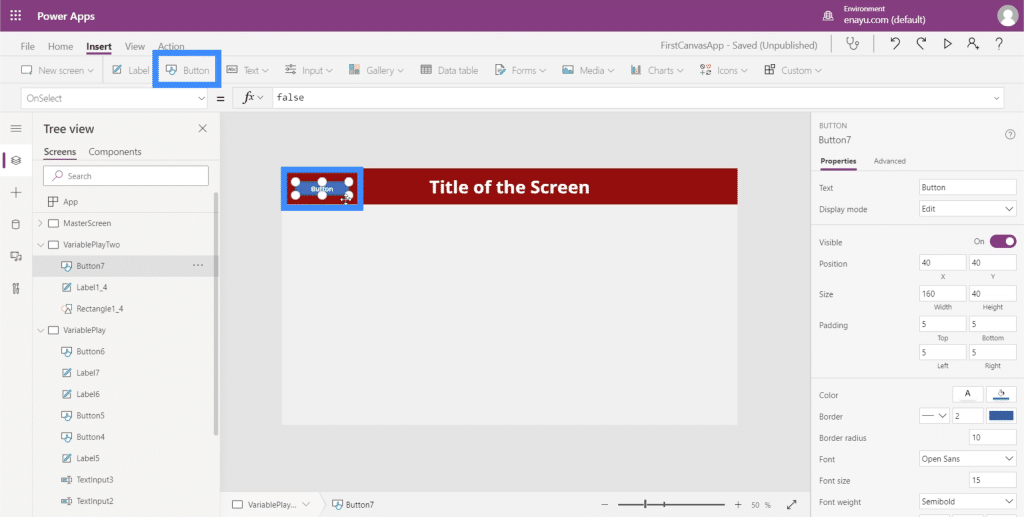
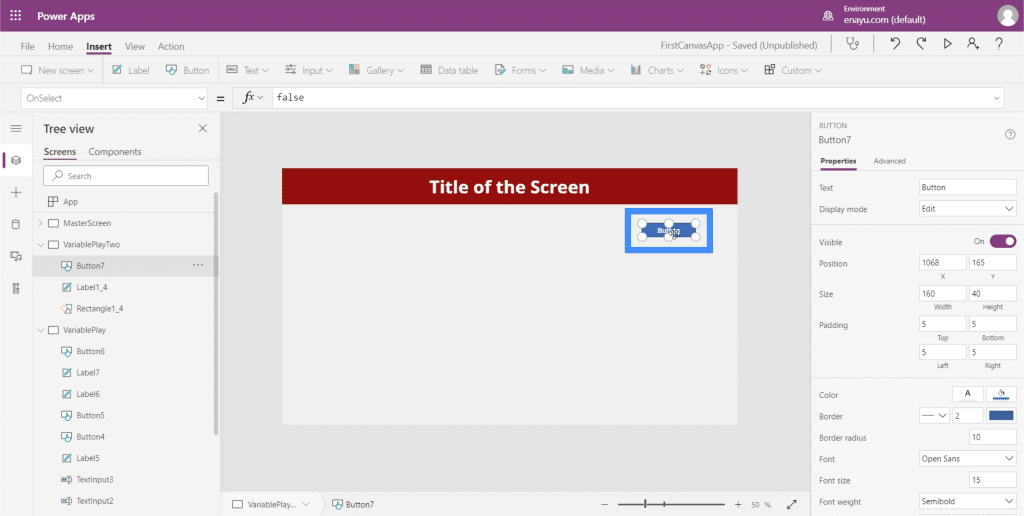
Like any other element on Power Apps, we can drag the button anywhere on the screen.
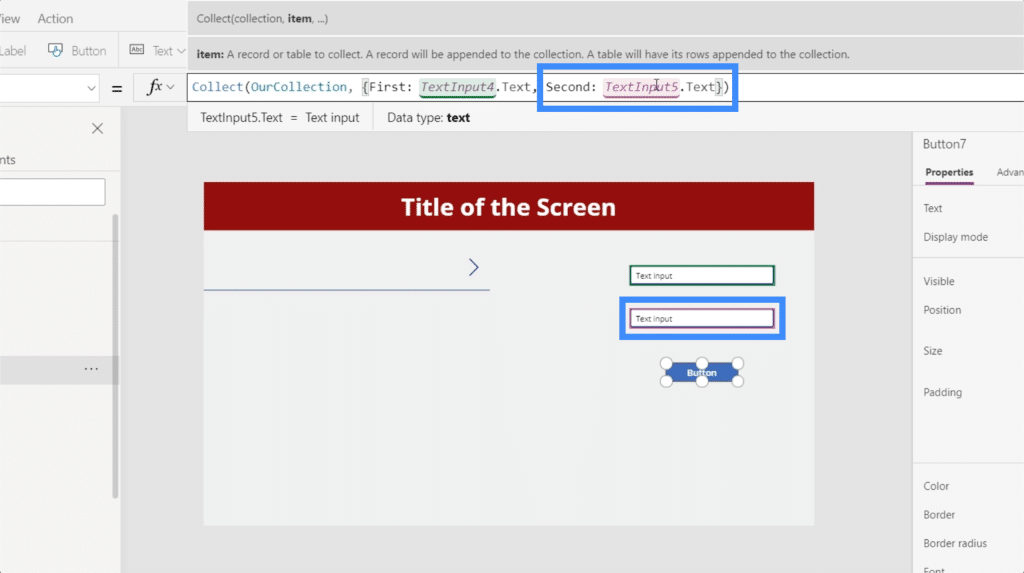
What we want to do here is to create variables when we click on the button. Since we want to create a collection variable, we’ll start off with the Collect function in the formula bar.

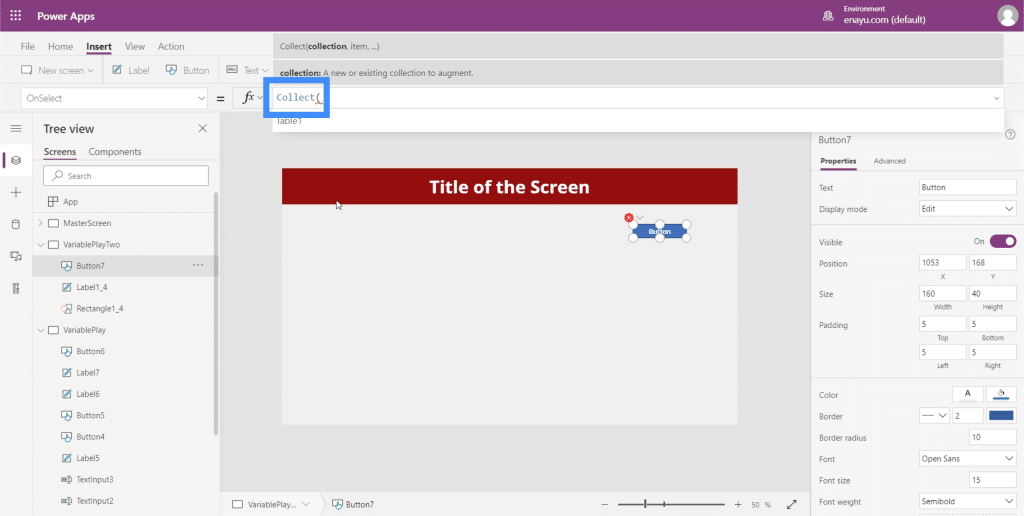
The Collect function takes the collection name, so let’s call it OurCollection.
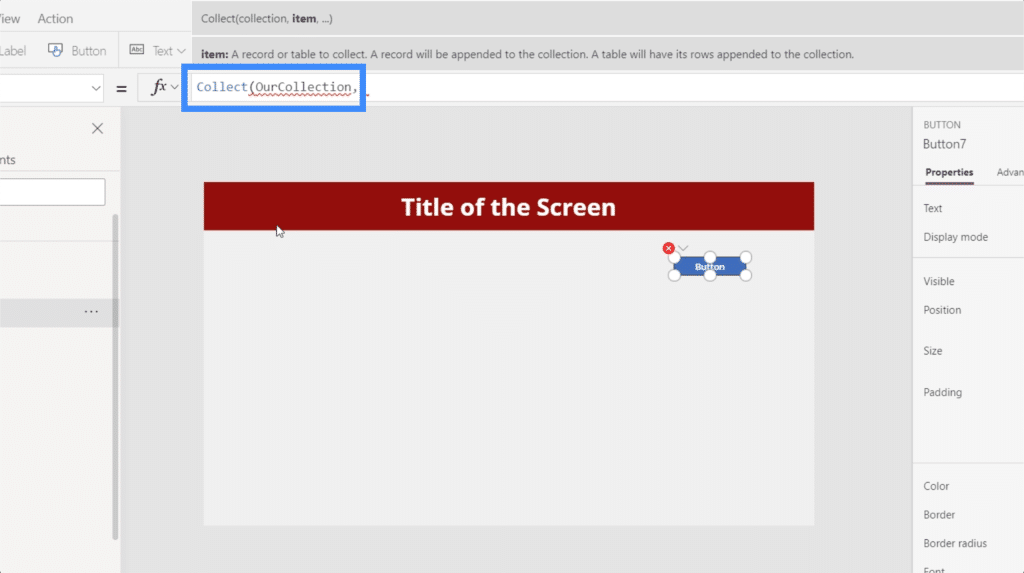
Then, it takes an item, which is basically a dictionary of different things. To reference the items we need, we’ll use curly braces, then we’ll define a column.
Let’s call the first column First then reference a record for Ben. Then, let’s add a second column called Second and reference the record Dover.

Let’s click Enter for that formula to kick in. This means that we’re setting up a new collection variable each time we click on the button.
Create Variables In A Gallery
Now, let’s see how collections are represented.
Collections are very useful for two things — data tables and galleries. For now, let’s work on using variables in a gallery. Just click the Gallery button under the Insert ribbon.
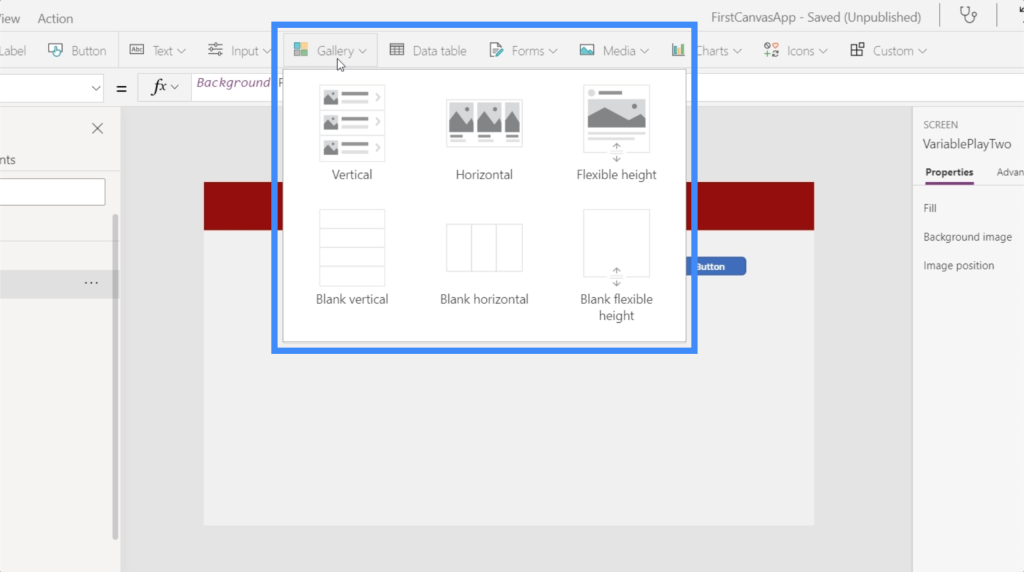
For this, let’s use a vertical gallery.
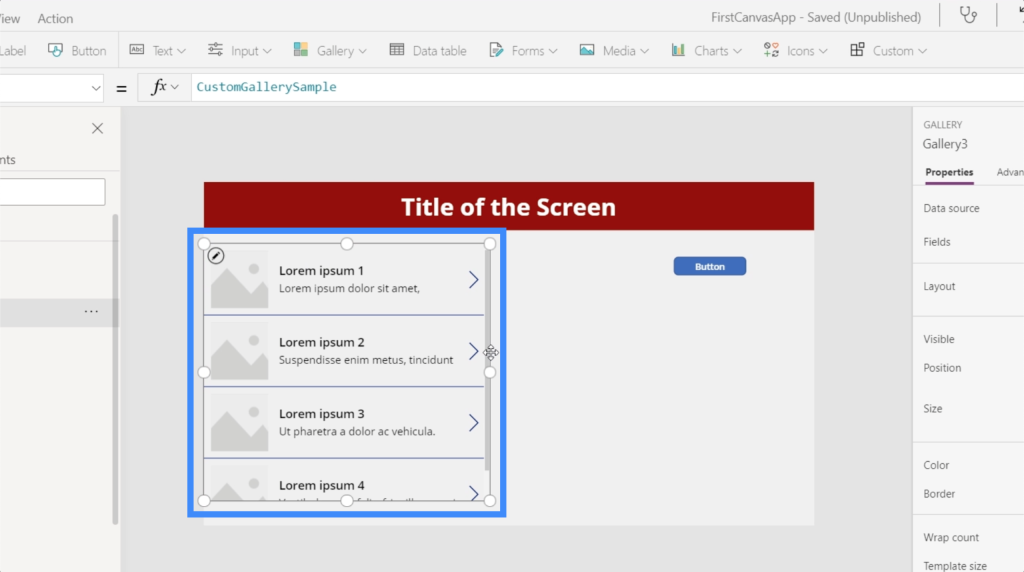
If you’ve seen our tutorial about galleries, you’ll remember that we need a data source where our gallery can get the data to display. So if we check on the galley’s data source, you can see that Table1 is included in the options. This is a table that we previously connected to this app when we first started working on it.
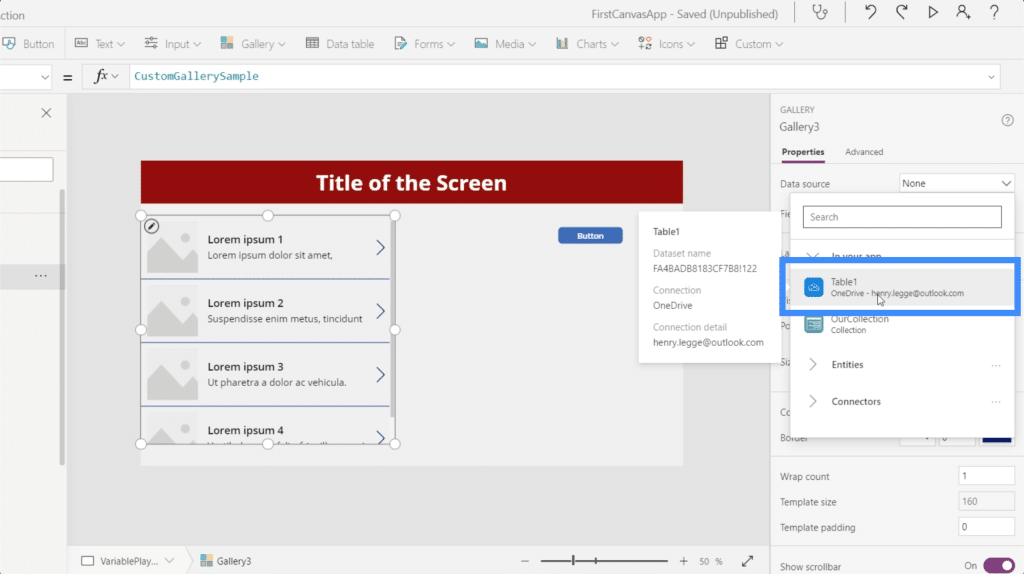
But we also mentioned earlier that collections work the same way as data sources. That’s why our collections is also showing up under data sources. This is the variable that we just created.
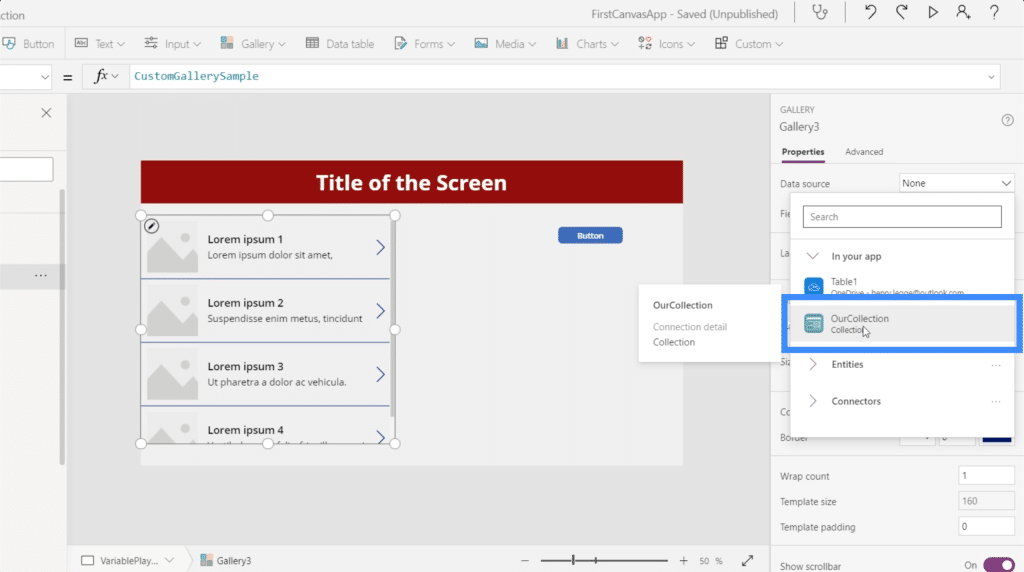
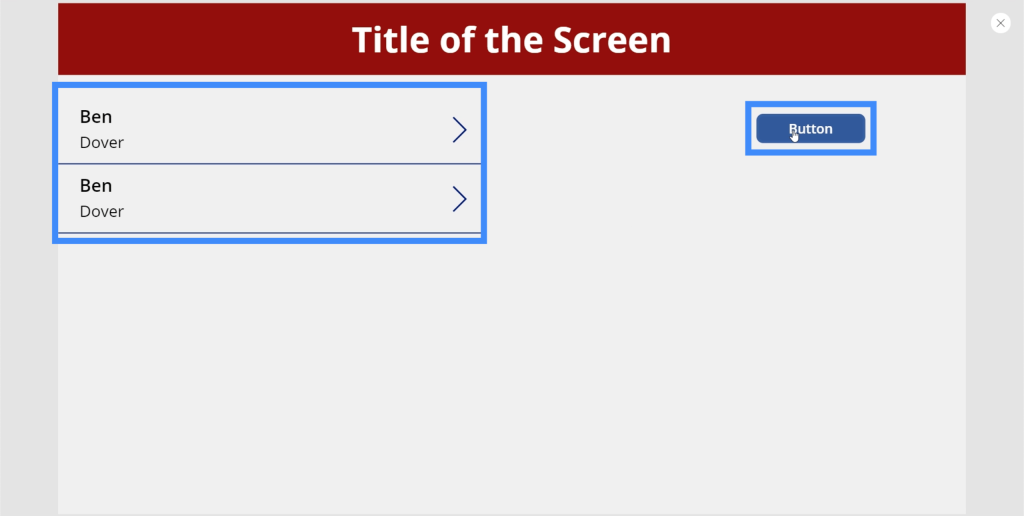
If we choose that, you’ll see that the gallery now displays the entry we created earlier for Ben Dover.

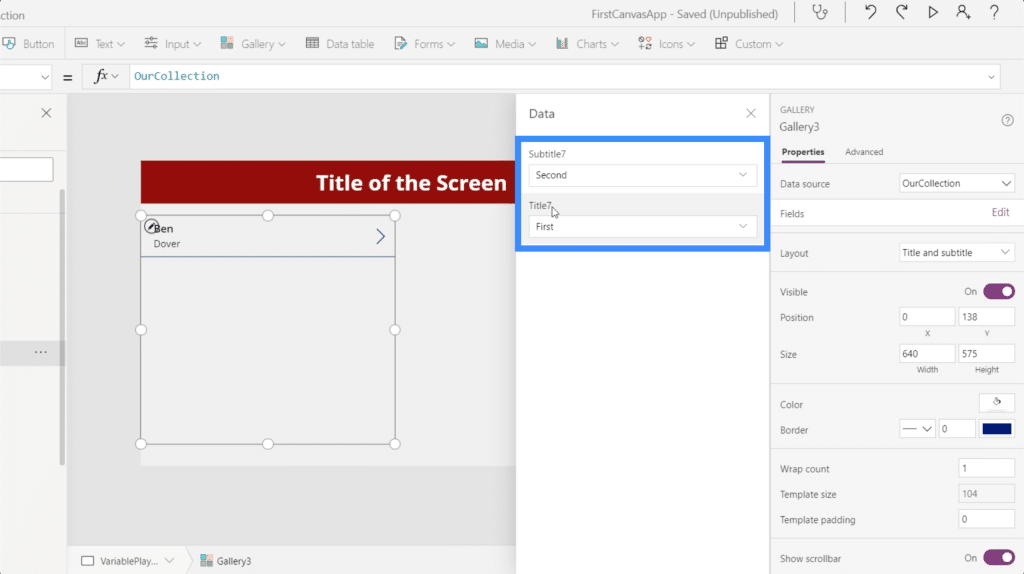
If we check on Fields under the Properties tab on the right pane, you’ll also see the columns we created — First and Second. The first is now showing up as the title while the Second is showing up as the subtitle.
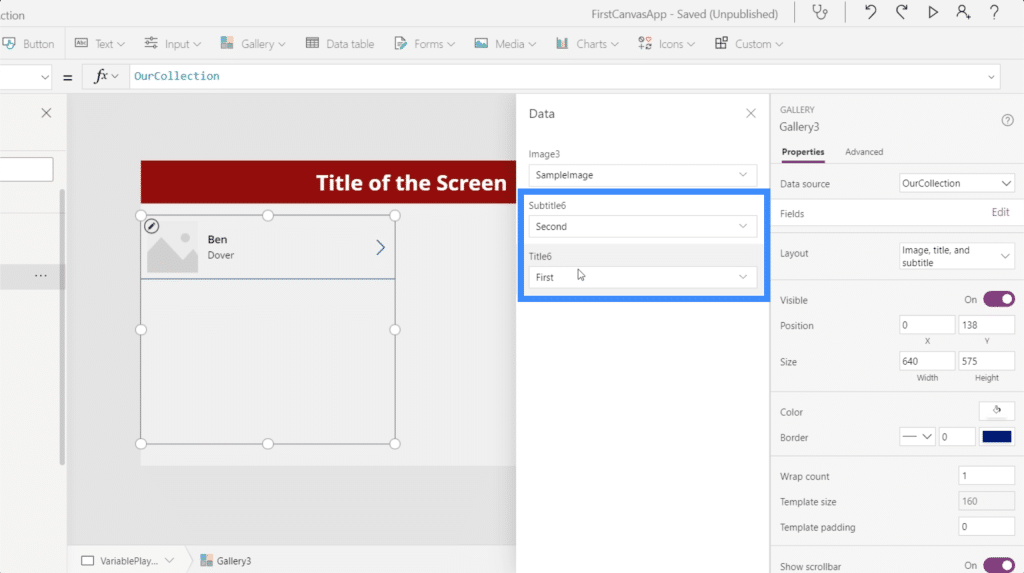
You’ll also notice that our gallery includes an image. Since we don’t have images to use at the moment, we can change the layout of the gallery so that it only contains a title and a subtitle.

Once we do that, we’ll only have two fields remaining.
Now, we’re adding the record for Ben Dover each time we click the button.
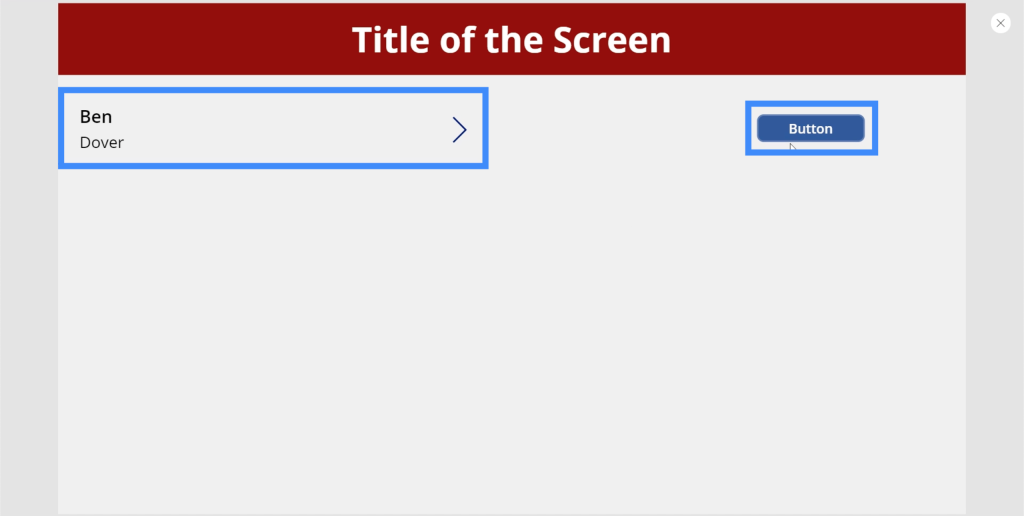
So if we click on the button a second time, we’re creating another collection variable, which adds another record for Ben Dover.

Making Collection Variables Dynamic
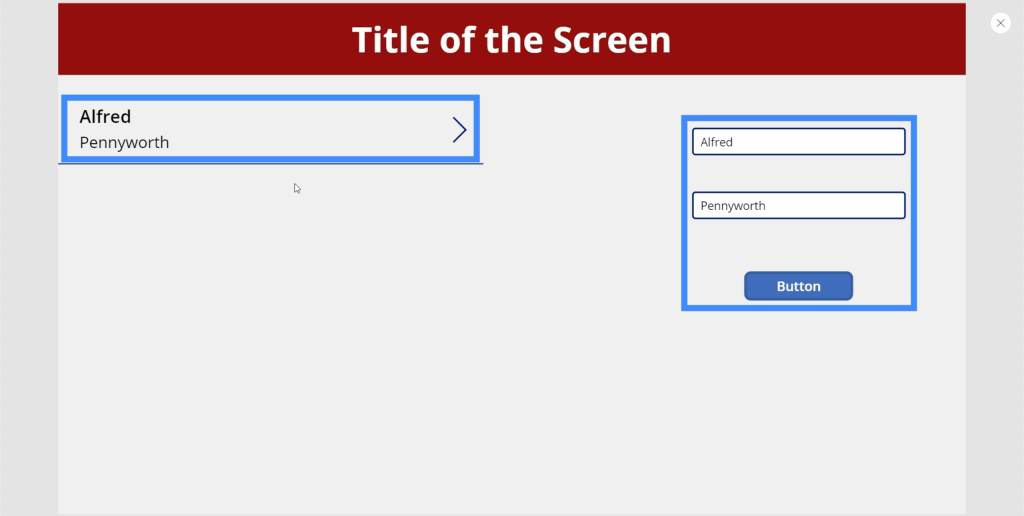
Right now, our button creates the same record over and over again. So let’s make our variable dynamic so that we can add other records as well. To do that, let’s add Text Inputs.
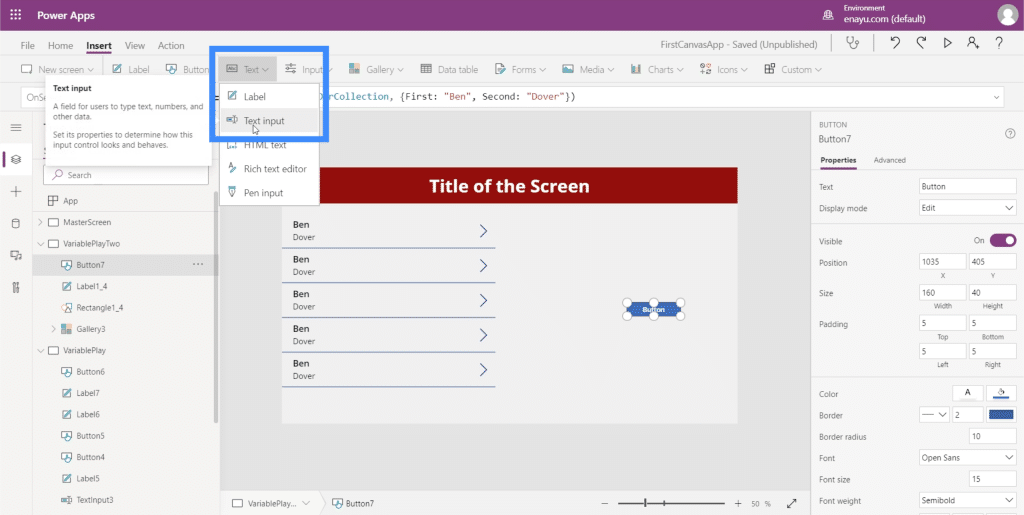
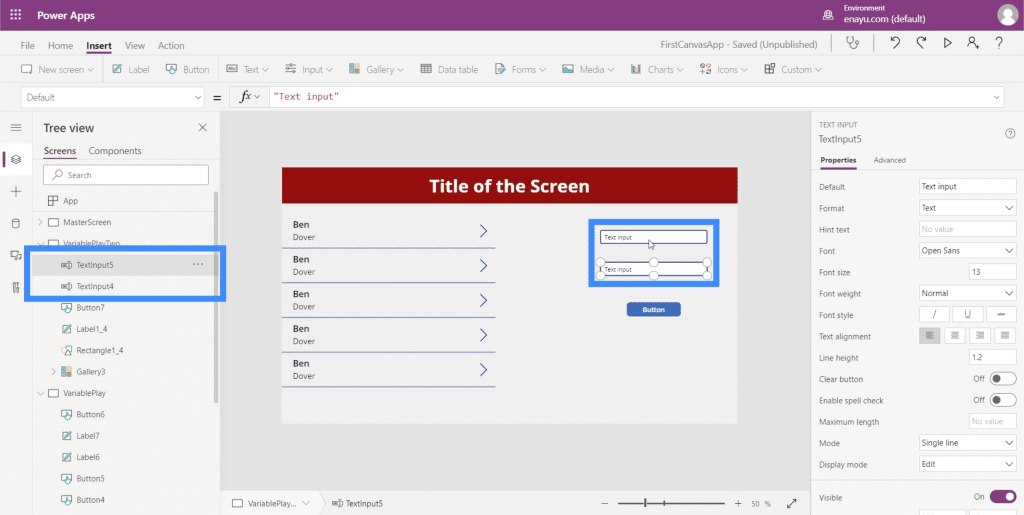
We’re going to need two text inputs for our variable. You’ll see that these two text boxes correspond to TextInput4 and TextInput5.
Going back to the formula bar, we’ll need to change Ben into TextInput4.Text. This means that it will take whatever we type into TextInput4.
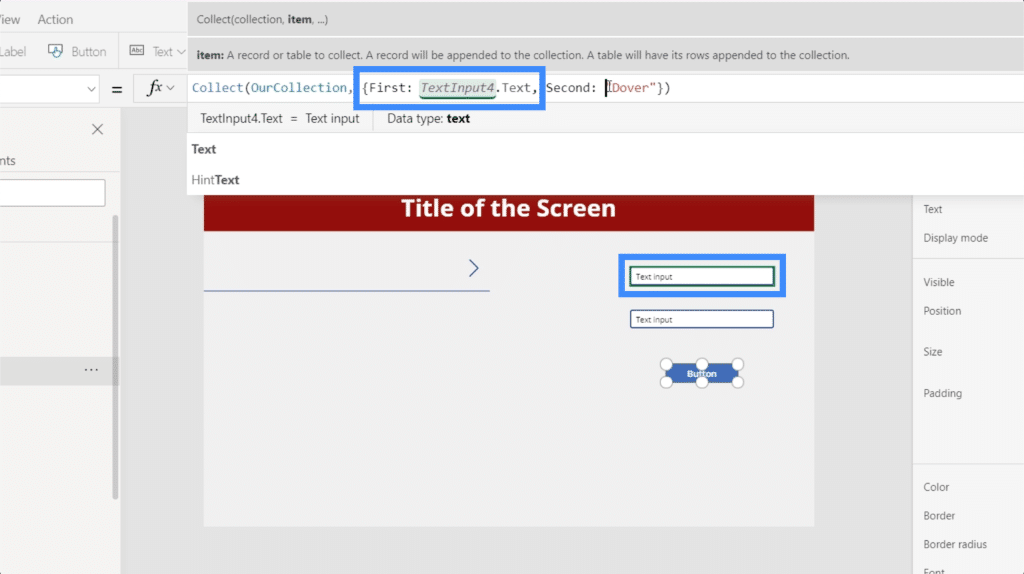
Then, let’s change the Second record as well and make it TextInput5.
Now, let’s see how it works. If we type in Alfred on the first text box, put Pennyworth on the second one, and click the button, it creates a new record for Alfred Pennyworth.
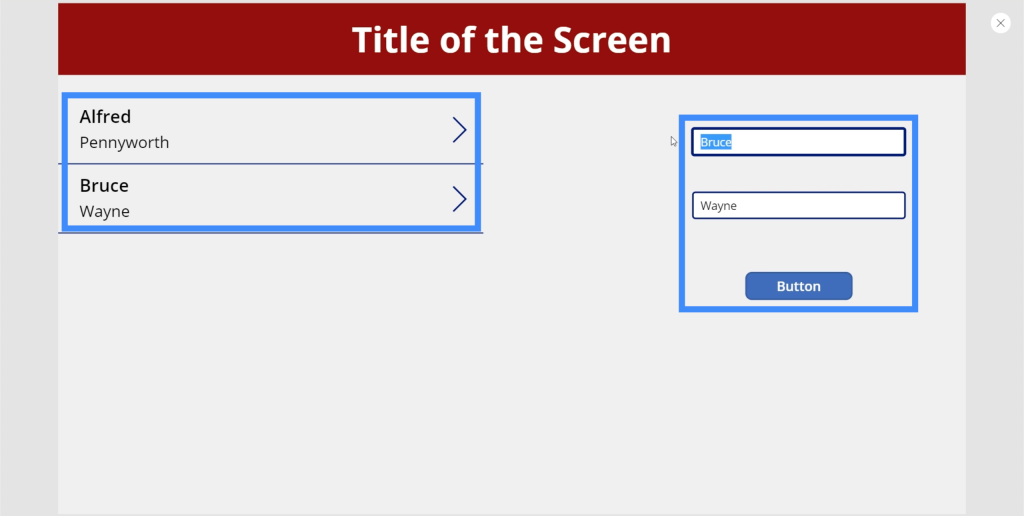
We can put another record by typing a different name into the text boxes again. This time, let’s put Bruce Wayne.
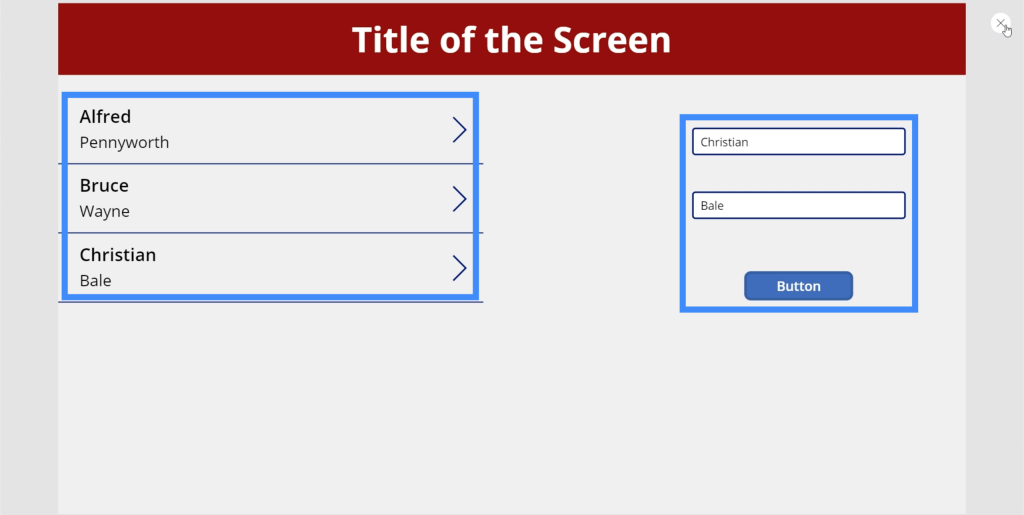
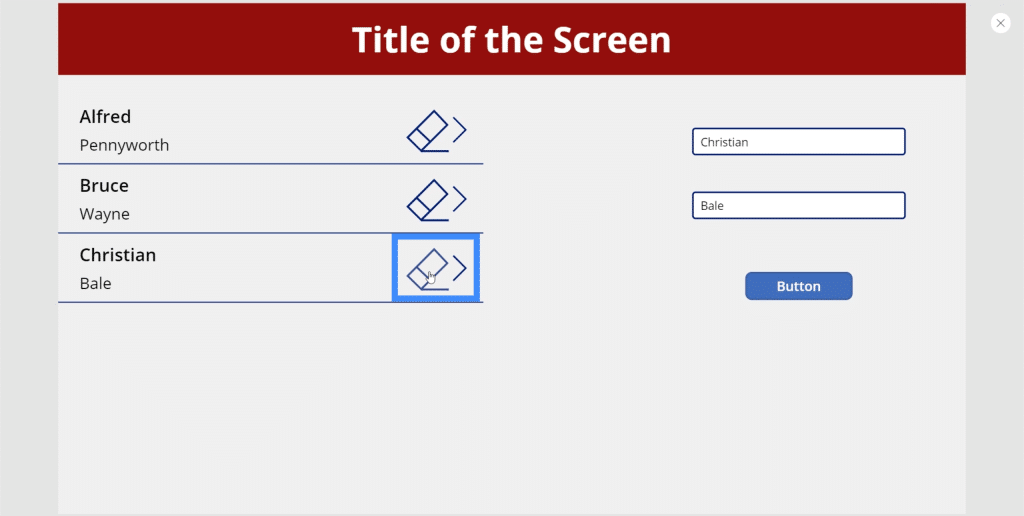
We can add as many records as we want here. Let’s add a third record for Christian Bale.
How To Remove Records From The Gallery
Now that we’ve successfully added items to our gallery, let’s see how we can remove items.
Let’s add the Erase icon in our gallery by clicking on the Icon dropdown under the Insert ribbon.
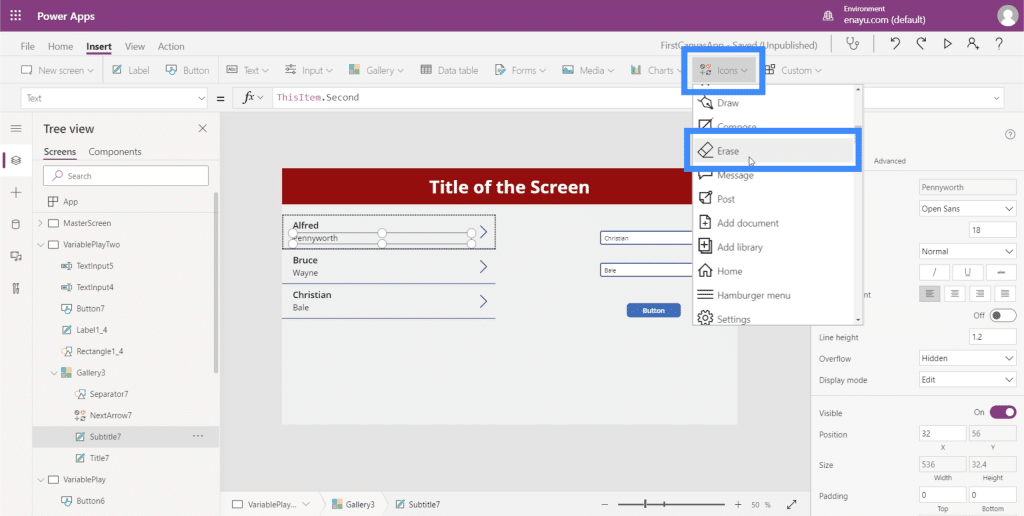
Let’s move it to the right side of each record.
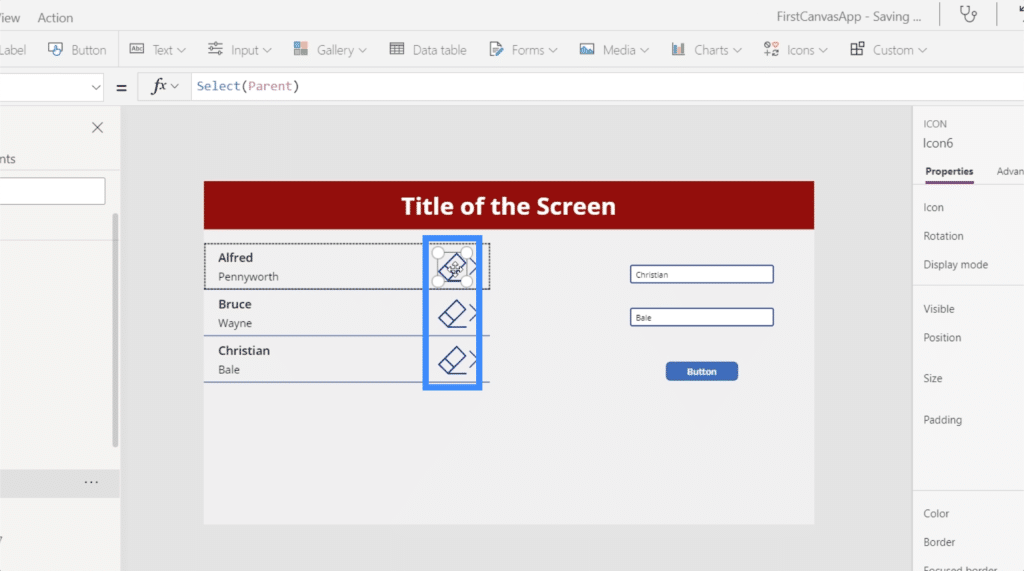
Then under OnSelect, let’s use the Remove function.

The Remove function takes two arguments. First, we need to specify the collection that we want to remove. In this case, there are two data sources showing up — our collection and Table1.
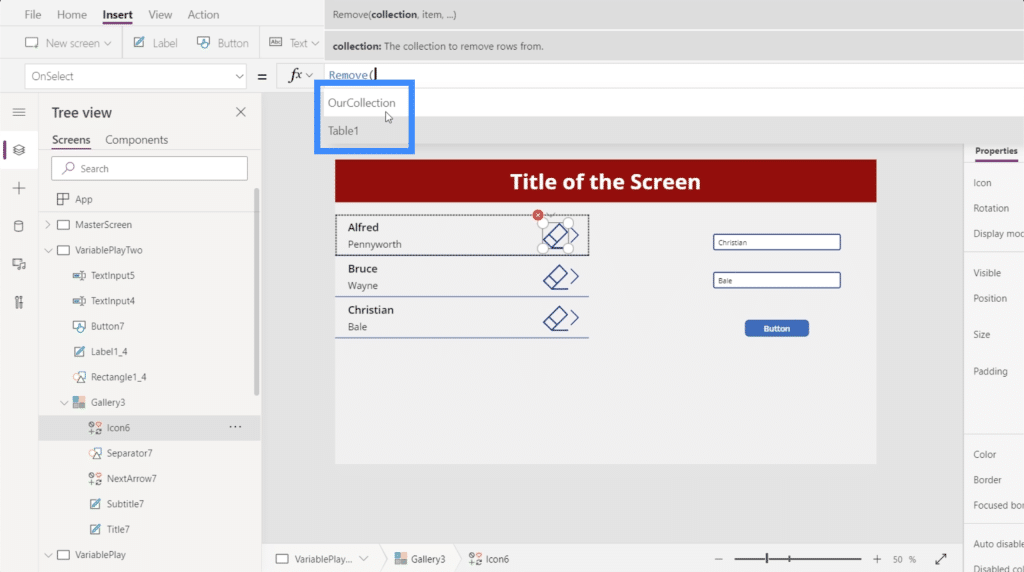
Since the record we want to remove is within OurCollection, we’ll choose that.
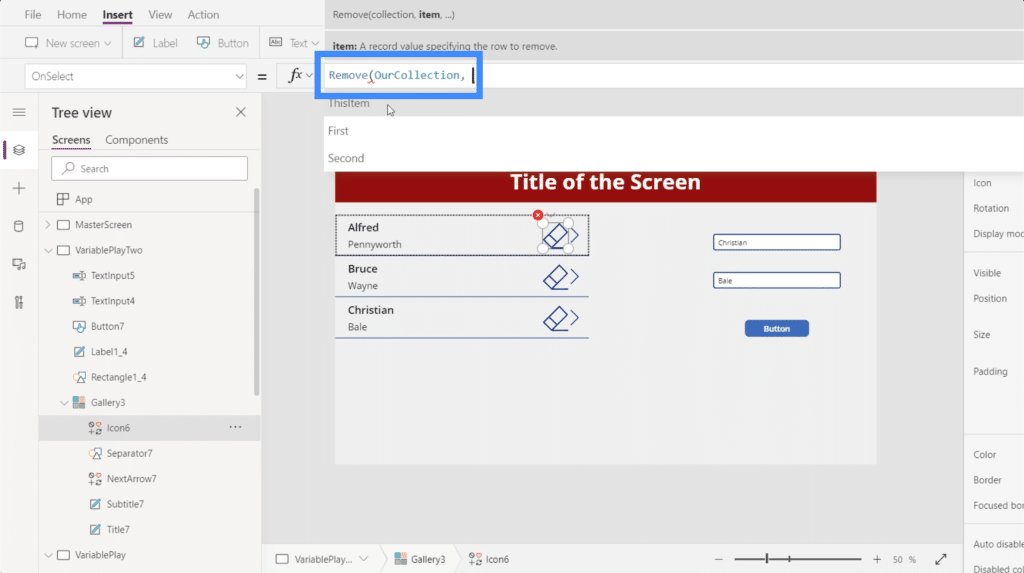
The second argument looks for the item we want to remove. Although this allows us to remove either the First or the Second fields, it also allows us to remove the entire record using this item.
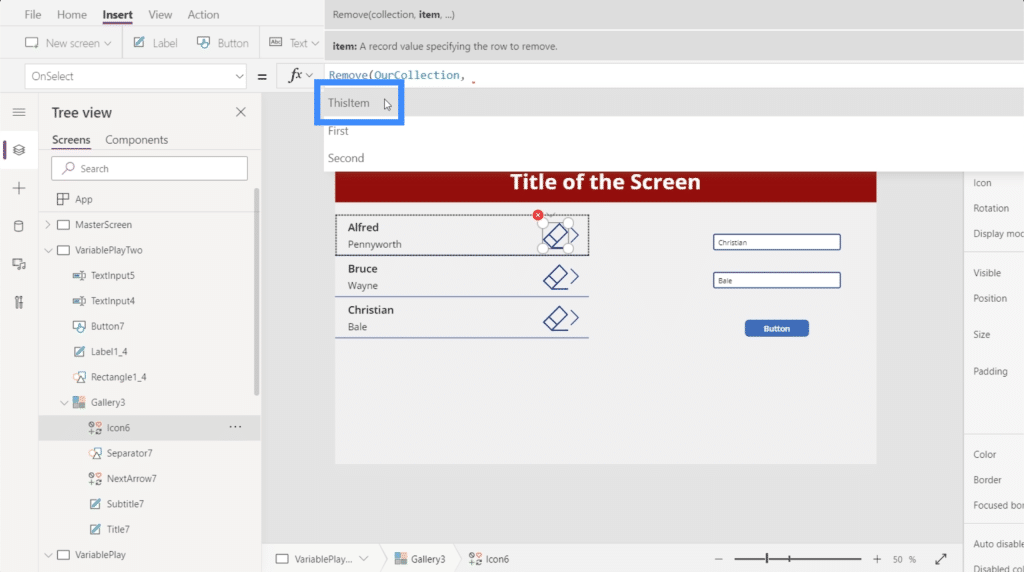
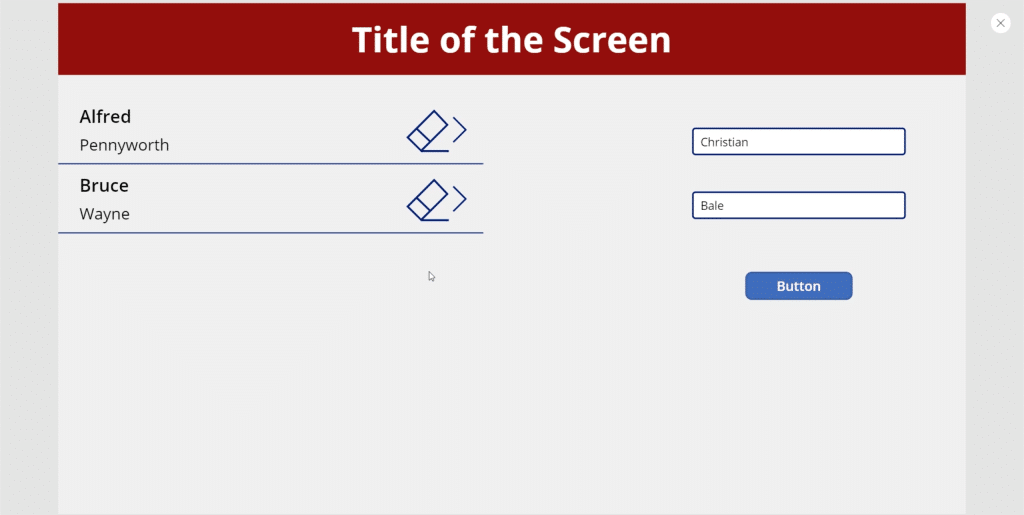
When we use ThisItem, Power Apps is intuitive enough to know which button corresponds to which item. In this case, if we want to remove Christian Bale, we just need to click on the icon beside it.
Once we do that, that specific record is removed while everything else stays in place.
***** Related Links *****
Power Apps Introduction: Definition, Features, Functions And Importance
Power Apps Environments: Setting Up The App Elements Properly
Power Apps Canvas: How To Create An App From Scratch
Conclusion
When you create variables in Power Apps, you add more ways for users to play around with the data provided. Especially when it comes to collection variables, we’ve seen that it creates more opportunities for users to interact with the app we’re creating.
This is just one way that collection variables can be helpful. As we dive deeper into Power Apps, you’ll definitely find more applications depending on the type of output you’re looking for.
All the best,

Henry


